Article Contents:
- First, narrow down your selection in the catalog
- Choose the sample format for the task you're checking
- Try the profile on the wall and step back to a normal viewing distance
- Check the relief under side and evening light
- Assess the profile's projection next to the door casing and furniture
- Assemble a straight joint before approving a long run
- For a complex section, make a corner mockup
- Apply the paint color on the same relief that will be used in the project
- The RAL or NCS code is supplemented with the gloss level and a sample
- Compare two color swatches under identical conditions
- The ceiling rose is evaluated together with the light fixture
- Applied decor is tried on within the entire wall composition
- Assemble a sample panel with clear labels
- Record what the client approved and what remains to be checked
- Transfer the approved item code to the drawings and the order
- Keep the reference sample and organize the studio library
- The catalog and exhibition stand are supplemented with project samples
- How to order stucco samples and proceed to purchase
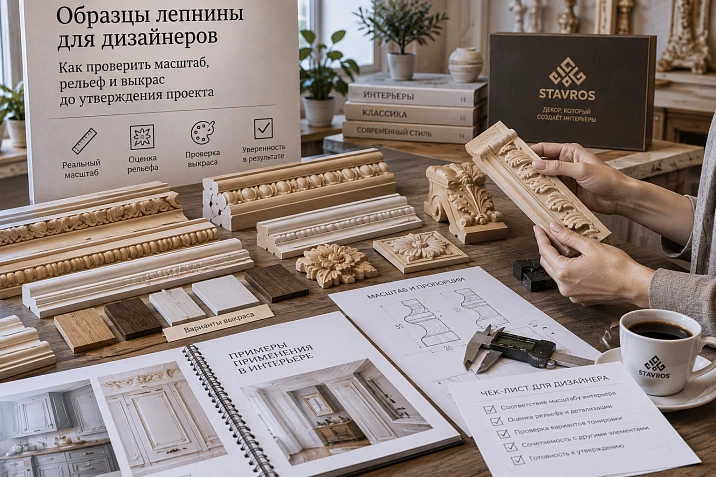
In the visualization, the molding forms a thin frame around the wall panel. On site, the same profile casts a wide shadow, approaches the casing and looks more prominent than the project intended. The article was chosen correctly, the dimensions were transferred without error — the conditions of perception changed: real light appeared, along with the actual surface and the usual viewing distance.
Plaster samples for designers help verify these conditions before purchasing the entire set. They connect the image with a specific product, installation method and finish. But for this, it is not enough to show the client a few white fragments on a table: each sample needs a specific purpose.
The working sequence begins with a short list of articles and ends with an approved reference. Between them — checking scale, lighting, junctions and color. The result of such coordination must be preserved in the drawings, specification and order, otherwise the useful test will remain only an impression from the meeting.
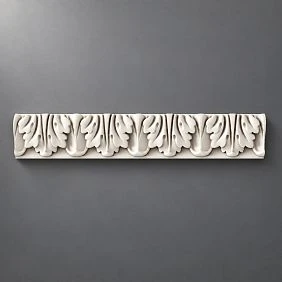
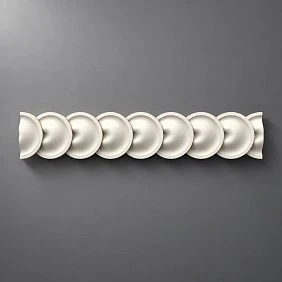
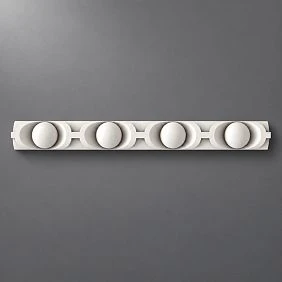
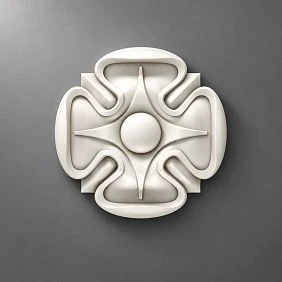
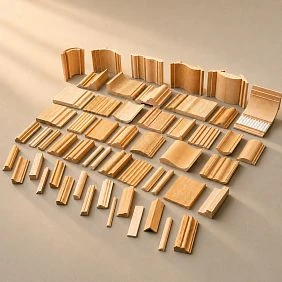
First, narrow down the selection in the catalog
Ordering samples of the entire collection for one room is usually unnecessary. First, determine the role of the plaster: a calm border of the wall field, an expressive cornice, an ornamental insert or a frame for a ceiling light fixture. Then select several products with a clear difference between them.
For example, for a living room you can compare two or three moldings and one or two cornices. This is not a mandatory set composition, but a way to limit the choice. One profile is checked as the most restrained, the second — as more voluminous, the third — as a variant with ornament. If the difference cannot be explained, physical samples will only transfer the uncertainty from the screen to the table.
During the preliminary review moldings from polyurethane save the article, dimensions and a link to the product page. For each candidate, write down one question: is the protrusion too large, is the pattern readable from the doorway, does the profile match the casing.
This is how a set of samples for the designer is formed, tied to the decisions of a specific project. If several rooms are planned, it is convenient to distribute the options by zone before ordering, so as not to accidentally compare bedroom decor with the accent design of a formal living room.




Choose the sample format for the task being verified
A material fragment, a cut of a specific profile, and an assembled corner each provide different information. A small piece with a smooth surface is suitable for a preliminary coating test, but it does not confirm the scale of another product. To choose a shape, you need exactly the cross-section specified in the project.
| Format | What can be checked | What it does not confirm |
|---|---|---|
| Material fragment with known preparation | Compatibility of the test finish, surface character | Shape and scale of another item |
| Cut of the selected molding | Cross-section, projection, local relief, and shadow | View of the entire frame and a long section of wall |
| Test joint or corner | Mating of parts and the result of seam treatment | All other room details |
| Full-size decorative element | Overall outline, proportions and detailing | Matching the surroundings without fitting it on site |
The length of the segment also matters. With a smooth profile, a short fragment shows the cross-section, while with an ornamental one it may not accommodate the full repeating motif. Before ordering, clarify which part of the pattern will be included in the sample.
В product samples section various materials and display formats are found. The name of the molding set alone does not mean that it contains the required polyurethane products. The composition, item codes and the possibility of obtaining additional material for a trial section are checked separately.
Our factory also produces:
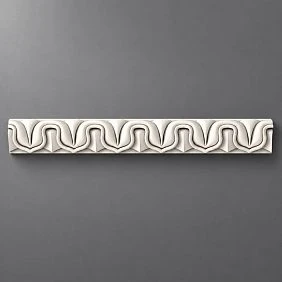
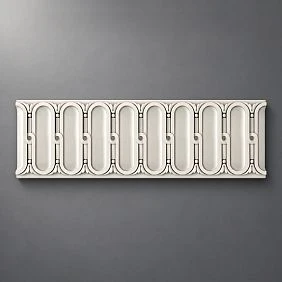
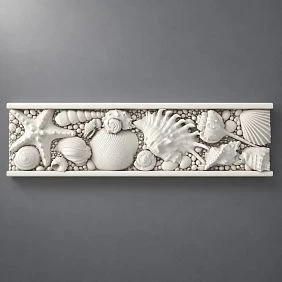
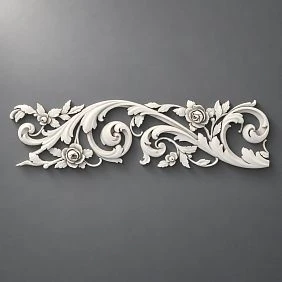
Try the profile on the wall and step back to your usual distance
On a work desk, the sample is close to the eyes, and its edges are well lit. On the wall, the situation changes: the profile becomes part of a large surface and enters into relationships with the door, baseboard and furniture. Therefore, it is useful for designers to evaluate molding samples in the intended installation area.
If the object is accessible, mark a full-size frame and place the profile in the required orientation. For temporary placement, choose a method suitable for the surface and the weight of the sample. If access is unavailable, use a wall mockup with the dimensions of the opening and main elements, maintaining a 1:1 scale.
Then look at the composition from familiar points: from the doorway, from the sofa, along the passage. The difference between a distance of about one meter and a view across the room is especially noticeable with small ornament. Up close it may look detailed; from a distance it can turn into a general band of light and shadow.
A short sample does not show the full extent of the frame. Therefore, the outline of the entire composition is marked out separately, and the actual profile is used to check its boundary. This technique allows you to evaluate both the size of the field and the character of the line, without passing off a small segment as a full wall mockup.
Get Consultation
Check the relief under side and evening lighting
Two profiles of similar width can be perceived differently due to the depth of the cross-section. With one, the shadow remains narrow; with the other, it becomes a noticeable band. In a frontally lit photograph, this difference may be subtle, but near a window with light grazing along the wall, it can be decisive.
The sample is examined under daylight and under the fixtures specified in the design. If the sconce or linear lighting has not yet been installed, a temporary source is placed taking into account the future direction and distance to the wall. An arbitrary flashlight held close to the relief shows its features, but does not reproduce the future lighting picture.
A specific question needs to be answered: does the shadow help read the composition or make it heavier than intended? It is especially important to check adjacent lines. With closely spaced frames, wide shadows can visually reduce the gap between them.
Photographs record the result, but the final impression is better obtained directly on site. The phone's automatic exposure changes the brightness of the wall, and image processing enhances or softens the contrast. For comparison shots, the same shooting conditions and sample positions are maintained. If the design lighting has not yet been reproduced, this item is left open until further verification.
Evaluate the profile's projection next to the casing and furniture
The width of the molding describes only part of its geometry. For junctions, the projection from the mounting plane is important, and for a cornice, also its position relative to the wall and ceiling. The maximum dimension in the product card cannot automatically be considered the depth of the relief or the distance to an adjacent element: the designations are verified against the drawing.
When selecting, of polyurethane moldings the sample is placed next to the casing, wall panel, switch, or built-in wardrobe. They check not only the beauty of the transition, but also access to the hardware, door opening, the position of removable covers, and other serviceable elements.
Suppose the profile visually fits between the casing and the wardrobe, but after installation the door passes right up against its projection. A flat outline will not show this. Here, real volume and a movement check are needed, not an additional assessment of the photograph.
If the wall material has not yet been applied, the future finish plane is taken into account. A sample placed against the rough base may end up at a different depth relative to the finished casing. All compared elements must correspond to the same state of the room — the one intended after completion of the work.
Assemble a straight joint before approving a long run
A single strip tells almost nothing about how the joint between two lengths will look. For a long run, a trial joint on a substrate prepared like the future wall is useful. It shows whether the profile matches, any step between the pieces, and the result of seam finishing.
The joint materials and the sequence of work are chosen according to the instructions for the specific finish. It is important to reproduce not only a dry fit but also the specified joint preparation for painting. The final assessment is made after the finishing is complete and the curing time specified by the manufacturer of the products used has elapsed.
For an ornamental profile, the continuation of the pattern is checked separately. Matching outer cross-sections do not guarantee that the motifs will meet at a successful point. Such a check may require more material than is included in a standard sample kit.
The trial joint is examined under the same side lighting that will be present on site. This test helps agree on the method of execution and the appearance, but it is not proof of how all joints will behave throughout service. The substrate, installation conditions, and adherence to the technology remain separate requirements. The reference sample is needed by the contractor as a concrete quality benchmark, not as a promise that any seams will become invisible.
Make a corner mock-up for a complex section
An inside corner, an outside projection, and a transition near a door portal each require separate checking. On a straight run, the ornament develops freely, but at a corner one has to decide where to break it and how to align the mating part. This task cannot be assessed from a single sample.
For the mock-up, choose a junction that actually occurs in the project. If the problem involves an outside corner, demonstrating an inside corner will be of little help. Preserve the actual angle of the substrate and the design orientation of the profile. Setting the cut depends on the geometry of the joint; the angle of the room cannot be assumed to be right without checking.
The cornice is installed on the mock-up relative to two planes — the wall and the ceiling. Laid flat on a table, it shows neither its future projection nor the position of its lower edge. It is the corner fragment that helps show how the profile will complete the room around the perimeter.
After fitting, assess the pattern, the seam, and the possibility of finishing the recesses. If the design requires a ready-made corner element, include it in the trial set. Record the decision in a photograph and a junction drawing: the contractor needs a way to reproduce it, not just a picture of a cornice they like.
Make a drawdown on the same relief texture that will be used in the project
A flat color card helps choose the direction of the palette, but it does not show the coating on raised areas and in recesses. For final approval, a real sample of the selected product is painted. Next to it, a section of wall or a separate panel with the specified wall finish is prepared.
First, the condition of the decor surface and the preparation requirements are clarified. A factory coating, if provided for a specific product, does not mean that any paints are compatible with it without testing. Primer, paint, and joint treatment materials are selected as a coordinated system, following the instructions of their manufacturers.
The sample reproduces the planned application method. A brush, roller, and spraying can leave a different surface character, so a beautiful demonstration drawdown must be achievable by the method accepted on site. On the relief, check whether fine details are preserved, whether there are unpainted recesses or accumulations of material at the edge.
The evaluation is carried out after the coating has dried according to the technology. The products used and the preparation are recorded on the sample card. The wording “white matte paint” is not enough for another contractor to reproduce the result: the specific material and the agreed sequence of work must be preserved.
The RAL or NCS code is supplemented with the gloss level and a sample
The color code provides a reference for selection, but it does not describe the entire finished surface. The same color at different gloss levels is perceived differently, especially on rounded raised areas. A light highlight can emphasize the profile even when the molding is painted to match the wall.
Therefore, the RAL or NCS designation is supplemented with the brand and name of the paint, the tinting data, and the selected gloss option. If the wall and decor are painted with different products, both coatings are compared side by side. A matching entry in the schedule does not replace such a comparison.
A specific result should be approved: for example, a calm frame that reads primarily through shadow, or a line noticeable due to color and highlights. The words “satin” or “matte” help describe the intention, but the final appearance is confirmed by a dried drawdown under the project lighting.
If the sample is approved in the studio, record which site conditions still need to be checked. The shade on the screen and a photograph are useful for discussion, but a physical reference preserves a surface that a digital image does not have. In a dispute about gloss, it will provide more information than resending the same color number.
Compare two color samples under identical conditions
If the client is undecided between molding in the wall color and a contrasting finish, two comparable options are prepared. Both use the same profile and the same background. Only the color scheme is changed, while all other parameters remain consistent.
When one option is shown on a wide cornice in daylight and the other on a small molding under a desk lamp, the comparison becomes meaningless. It is impossible to tell what influenced the choice: the shade, the size, the relief, or the lighting. The fewer such differences there are, the clearer the outcome of the meeting.
It is useful to place the options sequentially in the project area and view them from a single point. Nearby, keep samples of adjacent materials: wall covering, casing, furniture. A small white profile on a white table says almost nothing about how it will look next to a dark cabinet.
After making a selection, both designations are retained, but their statuses are separated. A rejected color sample should not remain among the approved ones without explanation. If both options are suitable, it is specified which room each applies to. Otherwise, the installer or order picker will receive two attractive samples and will have to decide on their own which one belongs to the current order.
Evaluate the ceiling medallion together with the light fixture
For a medallion, the diameter, depth, pattern of the central area, and its relationship to the ceiling mount of the light fixture are important. A standalone photo of the decor does not show which part of the ornament will be covered by the chandelier cup and how the composition will look from below.
When choosing ceiling rose made of polyurethane its outline is checked at full size relative to the light fixture and cornice. A paper template is useful for the overall proportion, while the actual element or a suitable mock-up is useful for assessing volume. A small fragment of the ornament does not confirm the impression of the entire medallion.
A universal ratio of decor diameter to chandelier diameter is of little help here. Light fixtures differ in silhouette: a compact central part with widely spreading arms is perceived differently from a solid round shade. Compare actual shapes, room height, and typical viewing points.
The central hole and mounting position are clarified based on the specific products and the project. The medallion is part of the decorative composition, while the light fixture mounting structure is planned separately. For color approval, the sample is placed in a ceiling orientation: the shade and shadows on a horizontal surface may be perceived differently than those of the same part on a vertical display stand.
The applied decor is tried on within the entire wall composition
The central applique, corner element, and vertical insert need their surroundings. On their own, they show the pattern, but they do not answer the question of how much free space will remain between the ornament and the frame. This gap affects the readability of the composition no less than the size of the part itself.
Suppose that in a conventional frame with an outer width of 500 mm, the profile takes up 30 mm on each side. The inner field will be 440 mm. If a 300 mm wide applique is placed at its center, 70 mm will remain to the inner edges. This is a calculation for a specific example, not a recommended spacing standard.
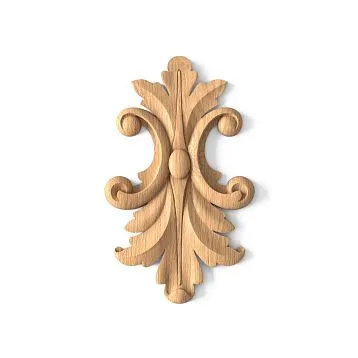
After calculation molded decoration made of polyurethane check it at 1:1 scale together with the molding. Take into account the outer scrolls and protruding leaves, not only the compact central part. Then look from a distance: does the free field remain, or does the small ornament merge with the frame border.
If the decor is repeated on several panels, it is advisable to lay out at least the adjacent module. A single element may look moderate, while a sequence of identical accents may look too dense. Interior decor samples here help you choose not only the product but also the frequency of its repetition.
Assemble a sample panel with clear labels
The project materials panel brings together the selected products and information about their use. It should answer the question of what exactly has been approved, where it will be installed, and how it is finished. A mood board solves a different task: it conveys the image of the interior, but does not replace the list of specific products.
A card is attached to each sample. For a small project, a simple table is sufficient if the records are unambiguously linked to the physical parts.
| Card field | What to record |
|---|---|
| Project and room | Project name, room, wall, or ceiling area |
| Position on the drawing | The designation by which the contractor will find the sample |
| Product | Manufacturer, full SKU, and size variant |
| Link and image | The clean product page URL and a photo of the selected part |
| Finishing | Preparation, specific finish, color, and gloss level |
| Inspection result | Decision made, remaining questions, and date |
The marking is also kept on the back of the sample itself. This is important if it is removed from a panel or handed over to the site: a separate part should not turn into "that narrow molding from the box."
If the sample has been cut down, note that its length is for demonstration only. Otherwise, the measured fragment may be mistakenly taken as the supplied product size. For a composite assembly, list all SKUs involved, including corner and connector elements.
Record what the client has approved and what still needs to be checked
A general impression of "I like this one" does not yet indicate whether the color, scale, and joining method have been agreed upon. In the meeting, it is useful to go through four points separately: the product's shape, the place of application, the finish, and the appearance of the sample joint. This makes it clear which decisions are ready to be transferred into the documentation.
| Status | What does it mean | Next action |
|---|---|---|
| Approved | Approved for use in the specified location with the recorded finish | Include in the current specification |
| Backup option | Possible alternative with agreed-upon conditions | Approve the replacement before use |
| Rejected | Not used in the current solution | Remove from the project's working set |
| Requires verification | There are still questions about the light, color, or joint | Perform the missing sample |
The status applies to a specific version of the solution. If the profile is approved in form but the color sample is not yet ready, this is recorded explicitly. Approval of a white sample cannot be carried over to any future finish.
After the meeting, the date, the approver, and the final record are saved together with photographs. Comments such as "make it less glossy" must lead to a new sample rather than remain a verbal instruction. The previous version is marked as replaced so that it does not accidentally return to purchasing.
Transfer the approved item code to the drawings and the order
Physical approval concludes with updating the project. If a wider molding is chosen instead of the original one, it is not only the line in the specification that changes. You need to check the field dimensions, offsets, junctions, and material quantity. An old model left in the visualization will create two different ideas about the same interior.
Files from the section of catalogs, drawings, and models are selected for the approved product. The availability of the required format and compliance of the geometry are checked for the specific item. The dimensions in the working drawing must describe the selected version, not a similar model from a previous project.
The link is maintained consistently: the item code on the sample matches the item code in the specification, and then in the order. Along with it, the approved finish and the room designation are transferred. Similarity of photographs is not grounds for automatic replacement.
The quantity is calculated based on the updated layout, taking into account supplied lengths, joints, and cutting. The length of the demonstration fragment is not relevant to this calculation. If a replacement is required due to the item being unavailable, return to the checks it affects: a different protrusion requires checking junctions, a different relief requires checking lighting and color sample.
Save the reference sample and organize the studio's library
An approved sample is needed before the project is completed: it is compared with the contractor's trial work, used when clarifying the finish and for additional orders. It is better to store it separately from the demonstration pieces used regularly, protecting the surface from dirt and damage.
In a sample library for designers, it is convenient to separate moldings, cornices, rosettes, and applied and wall decor. Within each group, item codes and links to product cards are kept. Painted fragments are separated from unpainted ones, and specific project reference samples from the general selection for initial meetings.
Before reusing an old sample, check that the product is still current and the condition of the coating. It confirms what was agreed earlier, but does not automatically indicate current product availability. A worn surface or an unlabeled new paint sample should not replace the saved reference sample either.
For a small studio, a register with photos, the sample's location, and a note of who took it to the site is sufficient. This is easier than searching for the right profile among boxes. Professional materials and options for collaboration can be found in the STAVROS section for designers and architects, linking the replenishment of the library to the studio's real tasks.
The catalog and exhibition stand complement project samples
A printed catalog is convenient for an initial review of the assortment and discussion of style. STAVROS offers the polyurethane decor catalog KATALOG-PUIt helps you find products, but the printed image does not show the actual profile projection or the result of the design paint finish.
For a studio that regularly showcases stucco moldings to clients, themed exhibition stands are worth considering. The catalog includes the following items:
| Stand theme | Product code and card |
|---|---|
| "Versailles" | SVPU-005 |
| "Japandi" | SVPU-006 |
| «Summer Garden» | SVPU-007 |
| "Neoclassic Light" | SVPU-008 |
The stand is chosen based on its content and placement. Before purchasing, its dimensions, contents, and installation method are confirmed. A large exhibition structure and a portable set of materials for an interior designer serve different purposes, so one format should not automatically be used instead of the other.
Demonstrating the collection helps discuss combinations, but a specific wall still requires the selected product codes and the corresponding paint finish. The stand's product code designates a display item; it does not replace the list of products that will ultimately go into the interior. The project specification is compiled separately, even if the client liked the entire displayed composition.
How to order stucco molding samples and proceed to purchase
To order stucco molding samples for designers in a way that benefits the project, prepare a short list of products and questions about them. Specify what needs to be checked: cross-section, ornament repeat, corner, butt joint, or painting. The required format and quantity of material depend on this.
If the required product code is not in the selected demonstration set, ask whether it can be obtained separately and what delivery format is available. For a trial joint, two matching fragments are arranged in advance; for comparing paint finishes, material for both options is needed. Purchase terms and set contents are confirmed before ordering, without assuming that any sample is automatically included in the set.
After approval, you can You can buy ready-made stucco matching the Baroque style. Calculate the quantity: linear meters of cornices and moldings, number of rosettes, pilasters, consoles, corner elements. Add a ten to fifteen percent allowance for trimming. according to the updated specification. The order must match in article numbers, dimensional versions, and quantities; finish requirements are retained in the documentation for its contractor. Availability and lead times are clarified for the actual order composition.
An approved sample or an agreed set of reference pieces is handed over to the site together with the working drawings. Then the moulding chosen at the meeting remains a specific product with a clear surface, colour, and application area — from the first fitting to the acceptance of the finished interior.