


Article Contents:
- What to buy for finishing slopes: a complete set
- Wooden elements for slopes
- Polyurethane elements for framing an opening
- Consumables
- How slopes differ from 'window decor': a change in perspective
- Anatomy of an opening: what exactly needs to be finished
- Why plastic corner guards are not the answer
- Where to use wood when finishing slopes
- Wooden trim: the main element
- Molding for side strips and horizontal lines
- Wood trim: invisible but essential
- Batten strips: a detail of professional installation
- Where wood is irreplaceable
- Where to use polyurethane in the window slope framing system
- Moldings around the opening: decorative frame on the wall
- Polyurethane molding: lightweight profiles for wall lines
- Overlays and decor for moldings
- Wall decor: architectural extension
- Connecting polyurethane with baseboard and cornice
- Ready-made kits for different tasks
- Window slope: basic classic kit
- Doorway: kit with active decor
- Classic opening: vertical accent
- White interior: everything paintable in a single tone
- Interior with natural wood: texture as the main argument
- How to buy correctly: what to take at once
- Mistakes when choosing architraves and moldings
- Installation technology: briefly about the main
- Slopes in different classic styles: proportions and details
- Strict neoclassicism
- French Classics
- English classic style
- Scandinavian interpretation of classics
- About the Company STAVROS
- FAQ: Answers to Popular Questions
- How to design window slopes in a classic interior?
- What is better for slopes: wood or polyurethane?
- Can polyurethane molding be used around a window or door?
- What to buy for finishing slopes?
- How to avoid making the opening too heavy?
- Is surface preparation needed before installation?
- How to choose the width of the molding frame to match the opening size?

After installing a new window or door, a special feeling of incompleteness appears in the room. The window is in place, the slopes are puttied, but an unsightly joint gapes between the frame and the wall, and the entire opening looks as if it was simply cut into the wall — rough, without respect for the interior. This is where work with trims, moldings, and profiles begins. This is where wood and polyurethane cease to be building materials and become tools of architectural thinking.
The topic of this article is not "decoration around the window" in an abstract sense. It discusses something specific: how to technically close slopes correctly, how to frame an opening beautifully, what to buy for a complete set, and what mistakes to avoid. A buyer looking for information about wooden architraves and polyurethane moldings has typically already encountered a real task after renovation — and needs a precise, practical answer.


What to buy for finishing slopes: a complete set
First of all — a list. Slopes in a classic interior require a comprehensive approach, and trying to get by with just one architrave without coordinated accompanying elements yields a mediocre result. Here is what you need to buy.


Wooden elements for slopes
Wooden casing — the main visible framing element. It covers the joint between the door or window frame and the wall surface, forms the "frame" of the opening, and sets its entire visual tone. In a classic interior, an architrave made of solid beech or oak is not just a functional strip, but a full-fledged decorative detail with profile, relief, and character.
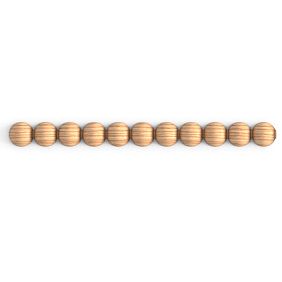
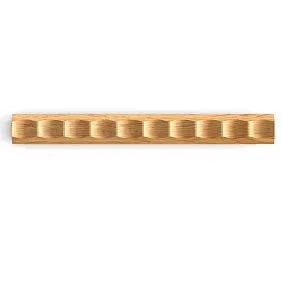
Pogonazh iz massiva — for side strips, horizontal lintels, decorative framing of the slope plane from the inside. Molded products made of oak and beech form the framing structure: they create corner transitions, cover the side edges of the slope, and establish a horizontal rhythm on the plane around the opening.
wooden floor — flat or profiled strips of solid wood for covering joints. Where the architrave meets the slope, where the slope meets wallpaper or drywall — everywhere a layout is needed: it hides technological gaps, prevents the joint from opening over time, and maintains a neat appearance of the opening for years to come.
A wooden cover strip is a narrow molded strip installed at the junction of the slope to the frame. Without the cover strip, the joint remains open, allowing dust and moisture to enter; with it, the entire structure looks monolithic. Wooden decoration — overlay elements made of solid wood that additionally decorate the corners, vertical posts, and horizontal lintels of the architrave.
Our factory also produces:


Polyurethane elements for framing the opening
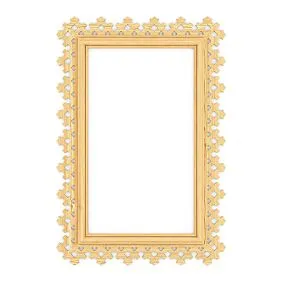
Moldings made of polyurethane — for decorative framing of the wall around the opening, horizontal lines above the slope, and the baseboard line at the bottom. Polyurethane molding is mounted on the wall, not in the area of direct mechanical contact — this is the optimal separation of functions between wood and polyurethane.
Polyurethane trim — lightweight profiles for painting for horizontal and vertical lines around the opening on walls. Polyurethane trim is ideal for creating a decorative field around the window: it is not a load-bearing part, but an artistic tool that shapes the architectural logic of the space.
Polyurethane appliqués — corner decorative elements for molding joints, rosettes in the upper corners of the frame around the opening, lightweight relief inserts. Decor for Molding — specialized elements: brackets, corner overlays with ornamentation, inserts at profile intersection points.
Polyurethane moldings и Polyurethane wall decor complete the picture: they frame the wall surface near the opening, creating a molding frame — that very 'picture frame' that includes the window or door in the architectural paneling of the wall.
Get Consultation
Consumables
Liquid nails or special polyurethane adhesive — for mounting all profiles and overlays. Read more about choosing the composition: what to glue polyurethane molding with — the article explains why one glue works and another leads to delamination after six months. Finishing nails and screw anchors — for wooden parts. Acrylic sealant — for sealing all joints after installation and before final painting. Acrylic primer, enamel, or oil — final coating depending on the interior style. Reserve for all profiles — at least 10%, optimally 15%.
How slopes differ from 'decoration around the window': a change in perspective
Most articles on the internet about classic window design write about curtains, blinds, windowsills, wall color, and furniture arrangement. Slopes are at best one line there. But it is the slopes that determine the quality of perception of the opening from two to three meters — and this is the main viewing distance in a living space.
Anatomy of the opening: what exactly needs to be designed
Proper design of door and window slopes requires working with several zones simultaneously:
-
The edge of the wall — the slope plane from the frame to the wall surface. A wooden layout, trim strip, or architrave is installed here.
-
The joint of the slope with wallpaper or plaster is the most vulnerable spot. It is here that cracks, delamination, and gaps appear over time. The architrave or layout rigidly fixes this joint.
-
The junction with the frame — the transition from the slope plane to the window or door frame. It is covered with an architrave or a wooden casing with a corresponding profile.
-
Side verticals — visible strips on the sides of the opening. In the classic style, a wooden casing with relief forms the vertical posts of the "frame."
-
The upper lintel — a horizontal element above the opening. In a classic interior, this is the most decorative part of the framing, which can be designed with a wooden casing or supplemented with a polyurethane molding above it.
-
Transition to the baseboard — the lower zone of the doorway where the casing meets the floor baseboard. Precise cutting and matching profiles are important here.
Why plastic corner pieces are not the answer
Where to use wood when designing slopes
Where to use wood when designing slopes
Wood is a material of strength, tactile value, and long-term stability. In the slope framing system, wood occupies strictly defined positions.
Wooden architrave: the main element
Wooden casings made of beech and oak are profiled strips with a relief cross-section, mounted around the frame on three or four sides. The architrave profile can be simple (a straight strip with a chamfer), semi-classical (with one or two curves), or richly profiled (with moldings, scotias, and straight shelves — in the spirit of academic order decor).
The width of the architrave is chosen based on the wall thickness and the depth of the slope. For a typical apartment wall 300–400 mm thick, an architrave 70–90 mm wide works optimally. For thin partitions 120–150 mm, an architrave of 50–60 mm is sufficient. It is important that the architrave covers the entire visible edge of the slope — from the frame to the finished wall surface — with a slight overlap on both sides.
An oak architrave is a choice for interiors with natural wood texture: under oil, tinting, or wax coating. A beech architrave is for interiors intended for enamel painting: the surface of beech is dense, non-porous, the paint lays in an even layer without revealing the wood grain.
Molding for side strips and horizontal lines
Pogonazh iz massiva in the slope area is used for several functions. First, these are flat or profiled strips covering the side plane of the slope from the inside: they form a smooth, painted or oiled surface instead of bare concrete or plaster. Second, these are molding profiles for horizontal lintels inside the slope — where it is necessary to divide the slope space into zones (window sill at the bottom, side planes, top plane). Third, these are belt strips on the wall next to the opening — to create a horizontal rhythm.
When choosing molding, it is important to coordinate its cross-section with the architrave profile. If the architrave has a pronounced relief, it is better to take the molding for the slope plane flatter — so as not to create "competition" of profiles in a small area.
Wooden layout: inconspicuous but mandatory
wooden floor are flat thin strips (5–10 mm thick) with a width of 10 to 40 mm, which cover the joints. In the slope framing system, the layout is used in several places:
-
At the junction of the casing and the slope strip (if they are from different profiles)
-
At the junction of the slope strip and wallpaper or plaster
-
At the horizontal transition from the slope to the windowsill
-
At the junction of the vertical casing and the floor plinth
A layout is a detail that is almost invisible, but without which the result looks unfinished. Joints without a layout are the first thing that reveals unprofessional work.
Batten strips: a detail of professional installation
A wooden batten strip is a thin narrow plank (10–25 mm) that covers the gap between the frame and the slope plane. This detail solves three tasks at once: technically it hides the mounting gap with foam, decoratively it creates a clear junction line, and physically it fixes the edge of the slope strip to the frame, preventing it from peeling off. The batten strip is installed after the main slope strips — last.
Where wood is irreplaceable
Wooden elements should be placed in all areas of mechanical contact. A door casing is a place that is passed by hundreds of times a day, touched by hand, when carrying furniture, or opening the door. Here, strength and the ability to withstand point impacts are needed. That is why a wooden casing made of solid wood is the right choice for door openings, not a polyurethane analogue, which quickly gets dents under such conditions.
Where to use polyurethane in the slope framing system
Polyurethane in the slope decor system is not a competitor to wood, but its logical continuation on the wall. All decorative elements that are outside the zone of direct mechanical contact are ideally made from polyurethane.
Moldings around the opening: a decorative frame on the wall
Moldings made of polyurethane — this is what turns a framed slope into an architectural object. The molding frame is mounted on the wall around the casing, indented from it by 30–60 mm, and creates a "second contour" of framing — wider, decorative, without a load-bearing function. It is this frame that gives the opening the appearance of a palace portal or a classic niche. For installing molding frames, it is important to understand the technique of corner cuts and joints: a detailed instruction with an analysis of all typical situations is in the article about installing polyurethane moldings.
Polyurethane linear profiles: lightweight profiles for wall lines
Polyurethane trim — profiles for horizontal and vertical lines on walls near the opening. This is a horizontal belt at the height of the window impost, continuing from the slope across the entire width of the wall; vertical pilaster lines next to the side slopes; a cornice line above the opening, transitioning into a ceiling molding. Polyurethane linear profiles are mounted with glue, easily painted in any color, and do not require complex surface preparation.
Overlays and decor for moldings
Polyurethane appliqués — corner decorative elements for joints of molding frames. In the corners of a rectangular frame around the opening, overlays with ornament are placed — rosettes with acanthus leaf, geometric diamond-shaped inserts, sculptural corner brackets. Decor for Molding also includes keystones — an element that is installed in the center of the horizontal molding above the opening and is a standard technique of classical architecture.
Wall decor: architectural continuation
Polyurethane wall decor — profiles, frames, pilaster overlays for decorating the piers next to the opening. When the wall between two windows or between a window and a door is decorated with molding cells, the entire interior gains structure: walls transform from flat painted surfaces into architecturally organized planes.
Polyurethane bond with baseboard and cornice
One of the main advantages of polyurethane decor in the slope area is its ability to organically integrate into the overall horizontal system of the room. The baseboard, waist molding, cornice profile under the ceiling — all these lines create the architectural rhythm of the room. The molding framing of a window or door should engage in a dialogue with these lines: the upper molding above the opening aligns in height with the horizontal belt on the wall, the lower one matches the height of the baseboard. Then the opening is perceived not as a "hole in the wall," but as a planned architectural element.
Ready-made kits for different tasks
Different interiors require different solutions. Here are five practical kit options — from minimalist to rich.
Window slope: basic classic kit
Wooden casings on three or four sides of the window frame. Wooden trim at the joints of the slope and wall. Wooden nashchelnik at the junction with the frame. Polyurethane molding — a decorative frame on the wall, surrounding the casing with a 40 mm offset. Polyurethane corner pads at the corners of the frame. Acrylic sealant for all joints. Primer and enamel — a single color for the entire system.
Doorway: kit with active decor
Wooden casing made of oak with a relief profile — on three sides of the frame. Wooden nashchelnik — at the junction with the frame. Pogonazh iz massiva — for decorating the slope plane inside the opening. Polyurethane molding frame on the wall with a keystone above the opening. Baseboard at the base of the casing with precise joining. Polyurethane moldings — additional decorative belt above the doorway.
Classic opening: vertical accent
Wooden vertical architraves with pilaster relief. The upper polyurethane molding with ornament is a horizontal lintel extending 20–30 mm beyond the width of the vertical architraves on each side. Corner overlays at the vertical-horizontal joint. Polyurethane baseboard at the base. This is a classic portico scheme: two "columns" — vertical architraves, "beam" — upper molding. Architecturally precise, visually strong.
White interior: everything painted in a single tone
Polyurethane profiles molding for the frame around the opening. Polyurethane trim — for horizontal lines on the wall. Wooden trim in the same enamel tone for the slope plane. Wooden architraves — painted with the same white or cream enamel. Result: an absolutely uniform surface where the material is guessed only by tactile sensation, not by color. This technique is characteristic of French neoclassicism and Scandinavian interpretation of classics.
Interior with natural wood: texture as the main argument
Oak architraves with oil and tinting — visible wood texture. Wooden layout of the same tone. Polyurethane wall decor — calm, geometric, without floral ornaments, painted in a neutral tone close to the wall color. Here polyurethane "takes a back seat," and wood becomes the main material. This balance is characteristic of English club style, "hunting" interior, or Scandinavian neoclassicism with warm wooden accents.
How to buy correctly: what to take at one time
One of the most practical questions is how not to forget anything on the first order. Below is a complete list to check before completing the purchase.
Wooden elements:
-
Wooden architraves — including all openings with a 10% reserve
-
Solid wood trim — for slope planes and horizontal lines
-
Wooden layout — for all joints
-
Overlays — for each junction with the frame
-
Wooden decor — overlay elements for corners and posts
Polyurethane elements: -
Polyurethane moldings — for frames around openings
-
Polyurethane trim — for wall lines
-
Polyurethane overlays — corner elements of frames
-
Decor for moldings — keystones, brackets, rosettes
-
Polyurethane stucco — additional wall decor
Consumables: -
Liquid nails / polyurethane glue
-
Finish nails and self-tapping dowels for wood
-
Acrylic sealant
-
Acrylic primer
-
Enamel or oil — finish coating
-
Profile reserve of 10–15% of the calculated length
Mistakes when choosing architraves and moldings
Experience is the sum of mistakes that are better not to make yourself. Below are typical miscalculations that occur most often.
Buying an architrave without measuring the width of the slope. This is a basic but very common mistake. The width of the visible slope — the distance from the edge of the frame to the wall surface — determines the minimum width of the architrave. If the slope is 80 mm and the architrave is 60 mm, it won't cover the edge. Measure the slope at several points: in old houses it is often uneven.
Not accounting for the wall thickness when choosing a platband. The platband is selected based on the depth of the gap between the frame and the slope panel. If the gap is 8 mm, a 6 mm platband will not cover it completely. Choose one with a width margin.
Forgetting about the top lintel. Some buyers only buy architraves for the side verticals, forgetting about the top horizontal element. Without it, the opening looks "open" at the top. The top lintel is a mandatory part of the system.
Not buying platbands for junctions. Without a platband, the joint between the frame and the slope is a visible gap or, at best, a strip of sealant. This is not professional and not beautiful.
Using too wide molding in a small opening. The molding frame should be proportional to the opening. For a window 100 cm wide, molding 60–70 mm high is the maximum. A wider profile visually "eats up" the wall around the window and makes the space feel cramped.
Not connecting the casing with the baseboard. The vertical casing of a doorway meets the horizontal baseboard at the floor. If the profiles are not coordinated in relief and height, the joint will look ugly. Either use a baseboard of the same height as the width of the vertical casing, or install a transition piece in the corner.
Mixing different profiles without a unified scheme. A wooden casing with baroque relief and a geometric polyurethane molding is a conflict, not a combination. The style of all profiles in the area of one opening must be coordinated.
Not accounting for cutting waste. All profiles cut at a 45° angle at frame joints require extra material. Each joint consumes a few extra centimeters. In total — 10–15% above the calculated length.
Forgetting sealant for the final seam. All joints after installation and before painting must be filled with acrylic sealant. It prevents the seam from opening due to temperature deformations and creates a monolithic surface appearance.
Installation technology: the essentials in brief
A detailed breakdown of installation is in a specialized article about installing polyurethane moldings, which explains the technique of miter cuts, joint sealing, and final painting in detail. Here are the key principles.
Wooden casings are installed with finishing nails after preliminary marking and level checking. Start with the top horizontal plank, then the side verticals with a 45° miter cut or butt joint. Install the architraves last, after fixing all slope planks. Polyurethane moldings are installed with glue (liquid nails or special acrylic glue). All joints and connections are coated with acrylic sealant after installation, before priming. Priming is mandatory for both materials: acrylic in two coats. Final coating: wood — enamel or oil, polyurethane — only enamel.
An important nuance: if wood is coated with oil and polyurethane profiles are painted with enamel, the colors must be coordinated in tone in advance — "oiled oak" and white enamel create a beautiful contrast, "oiled oak" and gray enamel create a complex duo requiring design precision.
Slopes in different classic styles: proportions and details
Strict neoclassicism
Beech trim 70 mm wide, white enamel, without complex relief — maximum one or two profile curves. Molding frame on the wall — simple rectangular profile without ornament. Corner overlays — geometric, square. No floral motifs. Color — white or light gray. This is an option for those who value clarity and order.
French Classicism
Beech trim with rich profile — several pulls, fillets, shelves. Molding frame on the wall with ornamental corner rosettes. Keystone above the opening made of decoration for moldings. Color — ivory or soft cream. This is an interior that loves details and is not afraid of relief.
English classic style
Oak trim under oil — dark, with pronounced texture. Polyurethane moldings on the wall — painted in cream or white, creating contrast with dark wood. Wooden decoration — strict, geometric, without floral overlays. Baseboard — high, profiled. This is an interior with character and respect for the material.
Scandinavian interpretation of classics
Light beech, coated with matte white oil. Minimal trim relief. Polyurethane moldings — thin, flat, without ornament. Color — white. Maximum conciseness while maintaining classic structure: verticals, horizontal top, frame on the wall. No overload of details.
About the company STAVROS
At the end of this article — a word about those who produce everything described above. STAVROS — a production that began its journey in St. Petersburg in 2002: two artists opened a workshop of carved wood products, and a year later their works appeared in the interiors of the Konstantinovsky Palace. The Hermitage, Alexander Palace, Sheremetyev Mansion, Trinity-Izmailovsky Cathedral — these objects formed the quality standard that STAVROS maintains in every product — from cornice profile to wooden trim.
Today STAVROS is an in-house production with 3D milling, hand sanding, and a wide range of solid oak and beech products, as well as a full assortment of polyurethane moldings for interiors. Showrooms in St. Petersburg and Moscow, delivery throughout Russia, working with retail customers, designers, and furniture manufacturers. All links in this article lead to the real STAVROS catalog with current items and warehouse stock.
FAQ: Answers to popular questions
How to finish window slopes in a classic interior?
The best solution is a combination of wooden architraves for framing the box and polyurethane moldings for a decorative frame on the wall around the opening. wooden casing provides strength and a neat technical edge, Moldings made of polyurethane — architectural depth of framing. Layout, platbands, and sealant cover all joints and junctions.
What is better for slopes: wood or polyurethane?
Wood is for architraves, platbands, layout, and all areas subject to mechanical contact. Polyurethane is for molding frames on the wall, decorative lines, baseboards, and lightweight overlay elements without load. The two materials do not compete but complement each other: each takes its functional place.
Can polyurethane moldings be used around a window or door?
Yes. Polyurethane moldings in the form of molding frames, cornice lines, and decorative overlays works perfectly in the window or door opening area — provided it is placed on the wall, not in the zone of direct mechanical contact (not on the box itself, not in areas of constant impact).
What to buy for finishing slopes?
Wooden casings create a frame around the opening, visually highlighting it from the wall plane. A classic casing has a profiled section that corresponds to the profiles of baseboards and moldings., Pogonazh iz massiva, wooden floor, platbands, Moldings made of polyurethane, Polyurethane appliqués, glue or liquid nails, fasteners, acrylic sealant, primer, finish coating. Allow 10–15% extra for all profile items.
How to avoid making the opening too heavy?
Choose one main element and make it the accent. Either an expressive wooden platband with rich relief — then the polyurethane frame on the wall should be laconic. Or an active polyurethane frame with ornamental corner overlays — then choose a wooden platband with a simple profile. The main thing is not to activate both elements to the maximum at the same time: in a small opening, this creates overload.
Is surface preparation necessary before installation?
The wall in the installation area must be level, dry, and dust-free. Polyurethane profiles are mounted with glue — the surface must be primed. Wooden parts are fastened mechanically, but the surface must also be level for them — otherwise, the plank will bend when fastened. After installation, all joints are sealed with sealant, the surfaces are primed, then the finish coating is applied.
How to choose the width of the molding frame for the opening size?
The frame should be proportional to the opening and set back from the platband by 30–60 mm. For a standard window 90–120 cm wide, the frame is set back by 40 mm, the molding profile height is 30–50 mm. For a wide opening 150–200 cm — setback 50–70 mm, profile height 50–70 mm. The key rule: the molding frame should not occupy more than a third of the width of the wall section next to the opening.


