Article Contents:
- Why a fresco without a frame is an unfinished solution
- Where to use a fresco with stucco decor
- Living room: wall behind the sofa and dining area
- Bedroom: headboard and panel behind the bed
- Hall and main entrance: fresco as a statement
- Study: painting as a background for work and reflection
- Children's room: a fairy tale scene in the right frame
- Basic schemes for framing a fresco with moldings
- Scheme 1. Fresco in a large frame: classic panel
- Scheme 2. Fresco between moldings: horizontal and vertical bands
- Scheme 3. Panel with decorative overlays
- Scheme 4. Symmetrical composition: two panels on the sides
- Scheme 5. Fresco in an arched frame
- Scheme 6. Fresco as part of a panel system
- How to choose moldings for framing a fresco
- Profile width depends on the scale of the panel
- Cross-section shape depends on the style of the fresco
- Color of the molding relative to the fresco
- Styles and types of frescoes: how to choose moldings
- Neoclassicism: monumental panel in a classic frame
- Modern classic: fresco as an elegant accent
- Japandi: painting without a frame or with a very thin profile
- Versailles Light: rich framing for expressive painting
- How to combine fresco with baseboard, cornice and doors
- Baseboard as the foundation of the system
- Cornice as the finishing touch
- Doorways and fresco
- Furniture and alignment to the axis
- Technical nuances of installing moldings around a fresco
- What is important to do before installation
- Sequence: frame first or fresco first
- Fresco lighting: molding as a frame for light
- Mistakes when framing a fresco with moldings
- What to buy for framing a fresco
- Answers to popular questions
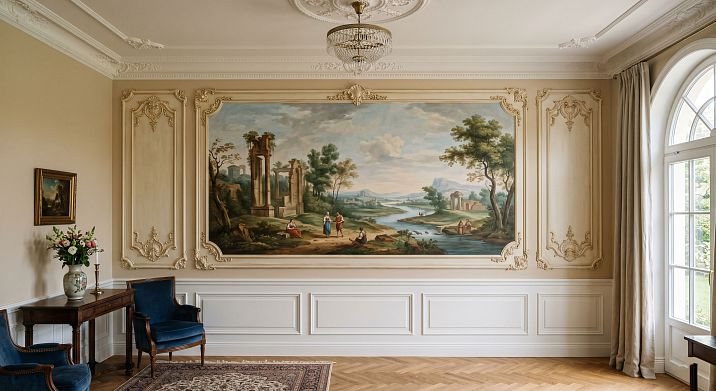
Imagine: the artist has finished the work. On the wall is a painting you ordered for months: a forest landscape, abstract waves, a botanical drawing, or a classic ornament. The painting is beautiful. The artist is a master of their craft. But something is wrong. The wall with the fresco looks... unfinished. The image is simply applied to the wall — without a border, without a frame, without context. It starts where the wall starts and ends where the plaster ends.
It is at this moment thatSculptural wall decoration. Polyurethane moldings, frames, overlays, and decorative bands turn the fresco from a "drawing on the wall" into a full-fledged architectural panel — with clear boundaries, architectural framing, and the feel of an artwork in the interior.
This article is about how exactly the combination of fresco andof polyurethane moldings: schemes, proportions, styles, mistakes and practical solutions for the living room, bedroom, hall, study and dining area.





Why a fresco without a frame is an unfinished solution
Ask yourself a simple question: why do paintings in galleries hang in frames? Not only because the frame is "beautiful." The frame performs an architectural function: it separates the artwork from the surrounding space, creates a boundary between the "image" and the "wall," sets the scale, and focuses the gaze.
A fresco or wall painting is the same artwork. Only without a frame. And that is why, no matter how beautiful the painting itself is, without framing it is perceived differently: as a finish, as a decorative coating, but not as an artistic statement.
Moldings around the fresco solve this problem. They create a boundary — clear, architectural, three-dimensional. The image gets a frame, and with it — status. A fresco in a frame made of polyurethane moldings is no longer just a "painted wall." It is a panel. It is the central element of the interior.
The second argument is practical. The painting rarely occupies the entire wall from floor to ceiling. More often — some part of it. And then the question arises: where does the fresco end and where does the plain wall begin? If there is no clear boundary — the transition looks random. A molding frame gives this boundary clarity and logic.
The third argument is stylistic. Properly selectedDecorative Wall Moldings enhance the character of the painting. A classic profile with decor — for a fresco in Baroque or Neoclassical style. A smooth, laconic profile — for modern abstraction or botanical painting. The molding does not just frame — it sets the tone.




Where to use a fresco with stucco decor
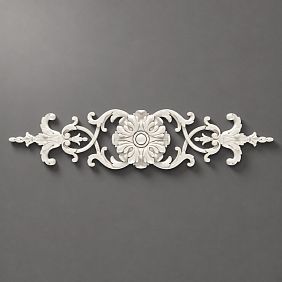
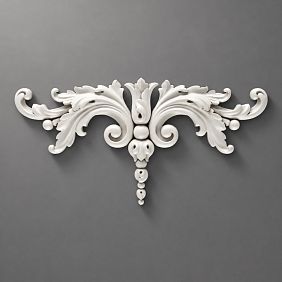
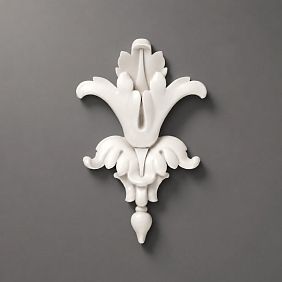
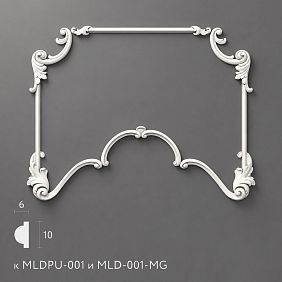
Our factory also produces:


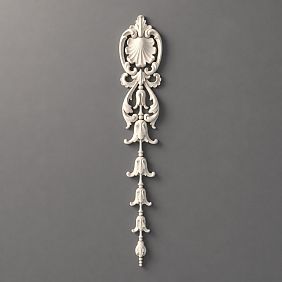
Living room: wall behind the sofa and dining area
The living room is the most popular place for a fresco with molding framing. The wall behind the sofa is the main accent surface of the room, which has long held a special place in interior design.
A large painted panel in a frame made of polyurethane wall decor behind the sofa is an impressive and logical solution. The frame fixes the boundaries of the fresco, ties it to the axis of the sofa, and creates a complete composition. Frame width: the width of the sofa plus 20–30 cm on each side. Height: from 30 cm from the floor to 30–50 cm from the ceiling (or to the molding belt).
The dining area is another focal point. A painting on the wall behind the dining table in a molding frame turns lunch or dinner into an event. A landscape, floral motif, abstract painting — any subject works if it is properly framed.Accent wall made of polyurethane — about the principles of creating an accent zone with molding framing in the living room and dining area.
Get Consultation
Bedroom: headboard and panel behind the bed
A fresco behind the bed is one of the most expressive techniques in the bedroom. Especially when it is framed with moldings: the image gets clear boundaries, and the headboard area becomes an architectural accent.
Important proportion: the width of the frame with the fresco in the bedroom is strictly the width of the bed or slightly wider (15–25 cm on each side). Height — from the pillow level to the ceiling (or to the molding cornice belt). This creates the feeling of a "niche" — depth behind the bed that physically does not exist, but is created by the combination of the fresco and the frame.
Sculptural wall decoration in the bedroom with a fresco: medium width profile (28–45 mm), calm classic or modern cross-section pattern. In the color of the wall — if the fresco is bright. White — if the fresco is in pastel tones.Stucco molding set for the bedroom— about the systematic selection of profiles for a sleeping area with accent painting.
Hall and main entrance: a fresco as a statement
The hall of a private house or the main corridor is a space where a fresco with a molding frame works with maximum impact. This is the first thing a guest sees when entering the house. This is the zone of first impression.
A monumental panel in a classic frame made ofpolyurethane moldingson the end wall of the hall is an architectural gesture. It sets the scale, style, and character of the entire house. For the hall, more expressive profiles are appropriate: 40–60 mm, a classic cross-section pattern,Decor for Moldingin the corners of the frame,PU overlaysin the center of the top crossbar.
For a modern hall — a minimalist profile of 30–40 mm without ornament, a frame in the color of the wall or slightly more contrasting.
Study: painting as a background for work and reflection
In a study, a fresco with a molding frame is not just decor, it is an environment. A landscape, a map, an abstract painting, or a botanical drawing behind the desk sets the atmosphere and character of the space.
Frame in the office: strict, without unnecessary decor. Profile 25–40 mm, smooth or with minimal relief. If the office is decorated in a modern classic style, a profile with a clear rectangular cross-section and corner inserts is possible.Wall decor in the office made of polyurethane — about the principles of designing a workspace with an accent wall.
Children's room: a fairy-tale story in the right frame
Painting in a children's room is already a tradition. Clouds, forest, fairy-tale characters, stars. But without a frame, this painting often turns into a shapeless spot.stucco decor for a children's room with a fresco — thin profile 14–22 mm, simple rectangular frame, matching the wall color or white. The painting gets a border, becomes a "window" into a fairy tale.
Important: in a children's room, the frame should be light. Not a heavy classic profile — but thin, smooth, delicate.
Basic schemes for framing a fresco with moldings
Scheme 1. Fresco in a large frame: classic panel
The most convincing and simplest scheme. The painting occupies a rectangular area bounded by a molding frame around the perimeter. The frame is single, large, proportionate to the fresco.
Technology: first, a frame of moldings is marked and mounted. Then — inside the frame — the painting is applied. Or vice versa: first the painting, then the frame is mounted along its edges. The first option is technically neater: the artist works within set boundaries.
Proportions: the distance from the edge of the frame to the edge of the painting is 3–8 cm (this is the "mat" — the space between the image and the molding). An important nuance: too small a distance makes the frame feel cramped, too large makes it loose. 4–6 cm is optimal for most formats.
Profile for this scheme: 30–55 mm. The larger the panel, the more expressive the profile can be.Ready-made molding frames for the wall — about framing systems with different frame formats.
Scheme 2. Fresco between moldings: horizontal and vertical belts
A more complex scheme: the painting occupies an area bounded at the top by a cornice belt, at the bottom by a molding belt at a height of 100–120 cm, and on the sides by vertical profiles. This is not a rectangular frame, but an architectural system into which the painting is integrated.
This technique works well in a living room or hall with high ceilings: horizontal belts divide the wall into zones, and the painting occupies one of them — the middle or upper one.symmetric polyurethane wall decor — about the principles of horizontal and vertical wall division using molding systems.
Scheme 3. Panel with decorative overlays
A classic scheme for a neoclassical or baroque interior. A frame of moldings — with cornerdecorative elements for moldings at the corners andPU overlay in the center of the top crossbar. This is a "ceremonial frame" — with character, with history, with architectural grandeur.
For this scheme, the balance between the decorativeness of the frame and the character of the painting is important. If the fresco is lush, the frame can be more restrained. If the fresco is delicate, the frame can be richer.
Example: a light botanical painting (thin branches, leaves, flowers) in a frame with expressive corner inserts and a classic overlay — a beautiful contrast between the delicate image and the architectural framing.
Scheme 4. Symmetrical composition: two panels on the sides
Two identical panels on one wall — with a painting in each — create a symmetrical architectural system. Between the panels is a free wall zone. On the sides of the panels are equal-sized indents.
This scheme works where the wall is wide and the painting does not occupy it entirely. For example: a 4 m wall, two 1.2 m panels with painting, separated by a 0.8 m zone — symmetry, rhythm, architecture.Polyurethane wall decor in this scheme, the frames are of the same profile, the same size, the same color.
Scheme 5. Fresco in an arched frame
For classical and neoclassical interiors — an arched frame. The top crossbar of the molding frame is made in the form of a semi-arch. This requires precise bending of the profile (polyurethane allows bending with steam or a special tool) or a composite arch from individual elements.
An arched frame with a fresco is solemn, beautiful, and architecturally strong. It works especially well in a hall, bedroom, and living room with high ceilings.Polyurethane Items — a complete catalog, including profiles and elements for arched systems.
Scheme 6. Fresco as part of a panel system
The painting occupies the central wall panel, framed by moldings that are part of the overall system: baseboard — vertical profiles — horizontal belt — central panel — cornice. This is a full architectural wall where the fresco is one element, not an isolated object.
Such a scheme requires thoughtful design: all system elements must be calculated in advance — before the painting is applied.how to combine stucco decor with baseboards and cornices — about horizontal lines as the basis of a systemic molding wall with a fresco.
How to choose moldings for framing a fresco
Choosing a profile is a key issue. The wrong molding can either "overwhelm" the fresco or "get lost" against its background. A few practical rules.
The width of the profile depends on the scale of the panel
Small fresco (up to 1 × 1 m) — profile 18–28 mm. Medium (1 × 1.5 m — 1.5 × 2 m) — 28–45 mm. Large panel (more than 2 m on the long side) — 40–60 mm and above. The rule is simple: the frame should be proportionate to the image. A thin profile on a monumental panel gets lost. A massive profile around a delicate painting overwhelms it.
The cross-section shape depends on the fresco style.
Classical fresco with figures, ornament, landscape in a traditional manner — a classic profile with a clear relief, possibly with corner inserts.Neoclassical Stucco Decor— system profiles specifically for classical and neoclassical interiors with fresco.
Modern abstraction, botanical painting, geometric pattern — a smooth, minimalist profile without ornament.Neoclassic Light style moldingsor the Japandi collection — delicate profiles for modern paintings.Moldings and decor in the Japandi style— minimalist systems for modern interiors with artistic painting.
Molding color relative to the fresco
This is one of the most important decisions. Several scenarios:
Molding in the color of the wall around the fresco. The frame is delicate, almost invisible. The emphasis is on the painting. Works well with bright, saturated frescoes that do not need additional highlighting.
White molding. A classic option that works with most color schemes. A white frame on a gray, blue, green wall — it's neat and convincing.
Molding in the color of the fresco background. If the fresco is painted on a warm ochre background, the molding is the same shade. A smooth transition is created, the frame becomes an extension of the image.
Contrast molding. A dark profile on a light wall around a light fresco is a strong, graphic technique. Used in spacious rooms with a confident design concept.stucco decor in the color of the wall or contrasting— about two approaches to the color of moldings in the context of an accent wall with painting.
Styles and types of frescoes: how to choose moldings
Neoclassicism: a monumental panel in a classic frame
A fresco in a neoclassical style — a mythological subject, an architectural motif, an ornamental frieze — requires an appropriate framing.Neoclassical Stucco Decoroffers profiles with a clear classic character: rectangular cross-section, possibly a small shelf, corner inserts with geometric or floral motifs.
For a formal hall or living room with high ceilings — a double frame: the outer one wider, the inner one narrower. A small gap (20–30 mm) between the frames. This creates a sense of depth and gives the panel monumentality.
Modern classic: fresco as an elegant accent
In a modern classic interior, a fresco is not a dominant element but an elegant detail. A delicate botanical pattern, abstract painting in calm tones, or a graphic motif. Frame: a 25–35 mm profile with a clear rectangular cross-section, without corner inserts or with minimalist geometric inserts.
Japandi: painting without a frame or with a very thin profile
The philosophy of Japandi implies maximum minimalism. A fresco in this style — bamboo branches, a mountain ridge, minimalist abstraction. Frame: profile 12–18 mm, strictly matching the wall color. Or — without a frame at all, but with horizontal molding strips above and below the painting area.Attic in Japandi style— a collection of delicate profiles, ideal for Japanese-Scandinavian aesthetics.
Versailles Light: rich framing for expressive painting
If the fresco is formal, lush, with ornament and three-dimensional motifs, and the interior matches — more decorative moldings and overlays are appropriate.Versailles Light stucco decor— a collection with more expressive profiles for formal interiors. Corner inserts with floral motifs, overlays above the center of the frame, possibly a cornice with an ornamental strip.
How to combine a fresco with baseboard, cornice, and doors
Baseboard as the foundation of the system
If the fresco starts from the floor (or close to it), the baseboard becomes the lower horizontal line of the entire composition. It should match the style of the molding frame: the same or similar profile. The baseboard is the foundation from which the entire decorative vertical starts.how to combine stucco decor with baseboards and cornices— about the systemic logic of horizontal lines in the interior.
If the fresco starts higher (e.g., from a belt molding at a height of 90–100 cm), the baseboard and lower zone are designed separately — most often with simple vertical frames or a contrasting wall shade.
Cornice as a completion
The cornice above the fresco zone is the top point of the entire architectural system. It creates a sense of completeness: the panel does not break off at the ceiling but is logically "built into" the wall architecture. The cornice should match the style of the molding frame.
For small rooms — a cornice of 45–65 mm. For spacious formal spaces — 80–120 mm.Moldings made of polyurethane — full catalog of profiles, including cornices of different scales.
Doorways and the fresco
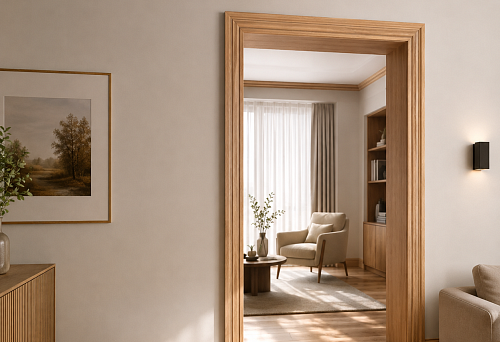
If the fresco is located near a doorway, the molding frame of the fresco should echo the door casings: the same profile or a similar style. If the casings are classic, the fresco frame should be in the same vein. If the casings are modern and minimalist, the frame should be accordingly.
Mistake: a classic ornate frame for the fresco and modern smooth casings nearby — this is a stylistic conflict that is immediately noticeable.
Furniture and axis alignment
The fresco frame should be aligned with the axis of the furniture located below or in front of it. The central axis of the frame should coincide with the central axis of the sofa, bed, dining table, or console. This is a mandatory rule: without alignment to the furniture axis, the frame looks randomly placed.
Technical nuances of installing moldings around a fresco
What is important to do before installation
First — marking. Horizontal and vertical frame lines are applied with a laser level. This is critically important: molding laid "by eye" causes a skew that is visible along the entire length of the profile.
Then — checking the corners. The standard internal corner of the frame is 45°. But in old houses, wall corners may be inaccurate and walls uneven. Polyurethane compensates for minor unevenness (up to 3–4 mm) due to glue, but more serious deviations require leveling.
Then — fixing the points for backlighting and sconces. If fresco lighting is planned, the mounting points for fixtures are determined before installing the moldings. Sconces along the frame axes, hidden lighting along the top crossbar — all this requires preliminary planning.
installing polyurethane molding — complete installation instructions, including work with non-standard angles, hidden joints, and final painting.
Sequence: frame first or fresco first
This is a question that is asked constantly, and the answer depends on the situation.
Frame first, then painting. This is a professional approach. The artist works within set boundaries — and the image fits perfectly into the frame. The only condition: the frame must be primed and painted before the painting begins. The moldings are protected with painter's tape during the artist's work.
Painting first, then frame. If the fresco is already applied, the moldings are installed along the edges of the finished image. The main thing is careful installation without damaging the painting. The glue is applied pointwise, without going beyond the edges.installation of polyurethane molding — a detailed practical guide.
Fresco lighting: molding as a frame for light
Hidden lighting of the fresco along the top or side crossbars of the frame is a powerful technique. An LED strip hidden behind the molding provides soft directional light that emphasizes the texture of the painting and makes it more voluminous.
For this, the molding of the top crossbar must have sufficient profile depth (20–25 mm) to hide the LED strip. Alternatively, a special subframe structure is used.
Mistakes when framing a fresco with moldings
Frame too small. A frame that is tighter than the painting is like tight clothing on a large body. The image 'bulges' out of the frame, the border looks random. Rule: the frame is always slightly larger than the image (with an indent of at least 4 cm on each side).
Molding too small for a large panel. A 12 mm profile around a monumental fresco of 3 × 2 m is an invisible thread around a canvas. The frame must be proportionate to the image.
Lush stucco around an active fresco. A bright, rich, multi-detailed painting plus a heavy ornamental molding is a clash of two active elements. One of them must be dominant. Either an expressive fresco in a delicate frame, or a restrained painting in a rich setting.
No alignment with the furniture axis. A frame shifted relative to the sofa or bed looks like a design mistake. The axis of the frame is strictly aligned with the axis of the main piece of furniture.
Lack of gaps between the molding and the painting. A molding mounted flush to the edge of the image without an indent is not a frame, it's a border. An indent of 4–6 cm is a mandatory 'breathing space' between the image and the frame.
Different styles of frame and trim. A classic frame on the fresco and modern trims next to it create a style conflict. All profiles on one wall should be in the same style key.
The vertical axis of the sconces is not considered. Sconces installed asymmetrically relative to the frame or fresco are a common mistake. Sconces are always mounted symmetrically: along the axis of the frame or at specific nodes of the composition.
Poor surface preparation. The fresco is applied to a prepared, smooth surface. Moldings are mounted on the same wall. If the wall is uneven — first putty, then painting, then moldings.
What to buy for framing a fresco
Practical list of STAVROS elements for working with a fresco:
-
Moldings made of polyurethane — linear profiles of various widths (from 18 to 60 mm) for frames around the fresco, belts, and wall division systems.
-
Polyurethane wall decor — ready-made systems for accent walls with painting.
-
Decor for Molding — corner inserts for classic frames around the fresco.
-
PU overlays — central accent elements above the fresco, in the top crossbar of the frame.
-
Ready-made molded decor kits — system sets for framing panels.
-
Polyurethane Items— baseboards, cornices, and architraves to create a unified system together with the fresco frame.
By collections depending on the interior style:
-
Classic and neoclassical fresco —Neoclassic Collection
-
Light, modern painting —Neoclassic Light collection
-
Minimalist painting, Japandi —Japandi collection
-
Grand interior with rich painting —Versailles Light collection
Answers to Popular Questions
Can moldings be installed over a finished fresco?
Yes — with careful installation. Glue is applied pointwise to the back side of the molding. If the painting is done with high-quality paints and well-fixed with varnish, moldings are installed along its perimeter without damage. It is recommended to use a thin glue without excess that does not extend beyond the edges of the profile.
How to make a double frame around a fresco?
Two frames with a gap between them is a classic technique for grand interiors. The outer frame is wider (40–55 mm), the inner one is narrower (20–28 mm). The distance between the frames is 25–40 mm. The outer frame is installed first, the inner one strictly parallel with a fixed gap.
Is it necessary to varnish the fresco before installing moldings?
It is advisable. Varnish protects the painting from accidental contamination during installation and also creates an even finish. Matte varnish is for delicate paintings. Glossy varnish is for richer, more formal ones.
What glue should be used for installing moldings near a fresco?
Construction adhesive like liquid nails or specialized polyurethane glue. On painted walls, priming is mandatory before installation.installing polyurethane molding — with a detailed description of working with glue and surface preparation.
How to design a fresco that covers an entire wall from floor to ceiling?
In this case, moldings are installed not around the fresco, but as architectural bands along the wall perimeter: baseboard, cornice, vertical profiles at the corners. They frame not the image, but the entire wall as a whole — turning it into an architectural panel.
Is fresco lighting necessary?
Lighting significantly enhances the effect. Hidden lighting behind the top crossbar of the frame, sconces on the sides of the frame, or directional lights from above — all these options add volume to the painting and make it visible under different lighting conditions.Accent wall made of polyurethane — about the principles of working with light in the accent wall area.
Can you make a frame from moldings for a fresco yourself?
Yes — this is an accessible DIY project. You need: molding of the desired profile, a miter box or miter saw for 45° cuts, construction adhesive, a laser level. With careful marking and clean corner joints, the result is professional.installation of polyurethane molding — a step-by-step guide for self-installation.