Article Contents:
- How a designer can work with stucco as interior architecture
- Which types of stucco to include in a design project
- Moldings
- Ceiling Cornices
- Ceiling Rosettes
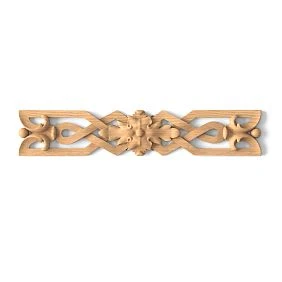
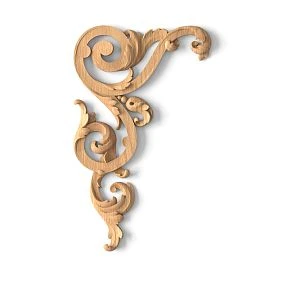
- Inlays and Decorative Elements
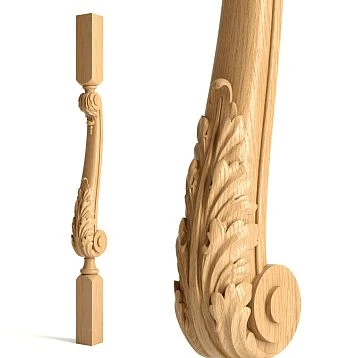
- Pilasters, columns and capitals
- Small room
- High ceilings
- Large public space
- Symmetry
- Asymmetry
- In the color of the wall
- Contrasting stucco
- Half a tone lighter or darker
- Accent trim
- Wall molding
- Ceiling stucco molding
- Ceiling rosette
- Unified wall and ceiling system
- Classic
- Neoclassicism
- Art Deco
- Modern Interior
- Eclecticism
- Moldings and Cornices
- Cutting map
- Ceiling Cornices
- Ceiling Rosettes
- Technological allowance
- Small bedroom
- Spacious living room
- Long corridor
- Wall with a fireplace
- Public space
- What to do when replacing an SKU
- How to place a repeat order
- When a specification can be considered final
- How is molding for designers different from ordinary decor choices?
- Which type of molding is best for a modern apartment?
- Should the same decor be used in all rooms?
- How to tell if a socket fits the chandelier?
- Can molding be used on just one accent wall?
- How can I tell if there is too much molding?
- Do I have to order samples?
- Why do I need 3D models if there are photos?
- Why does a designer need DWG files of molding?
- How do I calculate moldings in a framed composition?
- How to calculate decorative overlays?
- Can I use the same molding on the wall and ceiling?
- Can molding be painted a dark color?
- When is complex ornamental molding needed?
- How can I avoid a discrepancy between the visualization and the construction?
- When can the main order be placed?

In a professional project, plaster moulding does not begin with the question "which applique is more beautiful." A designer needs to connect the architecture of the space, the scale of the decor, door and furniture axes, the ceiling, light, the rhythm of the walls, the actual dimensions of the products, and subsequent installation. Only after that does an individual moulding, cornice, ceiling rose, or applique become a design solution.
That is why plaster moulding for designers is not selecting a few decorative details from pictures, but a full workflow:
interior concept → selection of elements → composition → scale check → samples → 3D/DWG → visualization → calculation → specification → purchase.
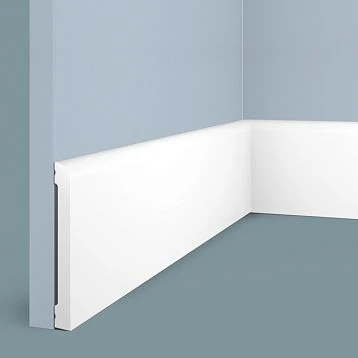
In the first third of the project, it is useful for the designer to work not with the abstract notion of "plaster decor," but with specific categories. For example, Polyurethane moldings includes wall and ceiling elements, mouldings, cornices, ceiling roses, and appliques that can be linked into a single system.
The main principle: do not force the architecture to adapt to already chosen decor. First the composition is formed, then products of the required scale are selected for it, and only after checking the actual profile and technical materials are item codes allowed into the final specification.

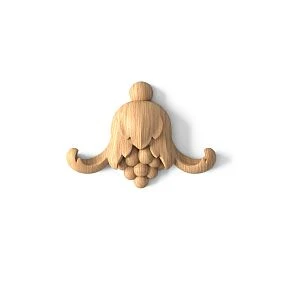
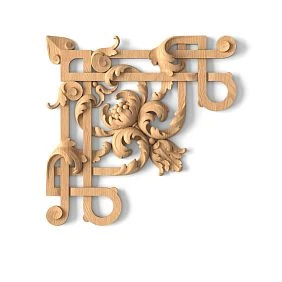
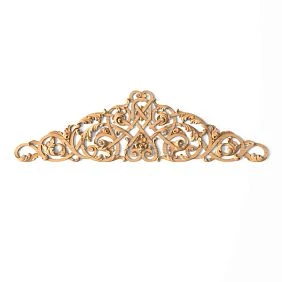

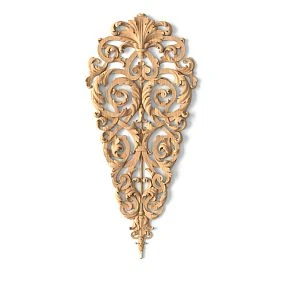
How a designer should work with plaster moulding as interior architecture
Plaster moulding is a system of lines, reliefs, and accents. It must work together with the space, not exist on top of it.
Connection with doorways
The door creates a strong vertical axis. A wall frame can:
-
continue this axis;
-
symmetrically support it;
-
form a portal;
-
step back to a deliberately noticeable distance.
A bad option is when the molding almost touches the casing and forms an accidental narrow gap. Such a gap looks like a marking error.
Before approving the layout, you need to see the exact width of the casing and the final size of the opening.
Connection with the ceiling
The ceiling cornice, ceiling rose, and wall frames should be perceived as part of one space.
If thin geometric paneling is used on the walls while the ceiling receives an excessively massive ornament, the systems begin to compete.
The reverse situation is an expressive classical interior where the ceiling remains completely bare, even though the walls are rich with stucco decor. Sometimes this is justified, but the decision must be deliberate.
Relationship with furniture
A composition cannot be designed on a blank wall if the placement of large furniture is already known.
The following must be marked on the elevation:
-
sofa;
-
bed;
-
console;
-
a dresser;
-
wardrobe;
-
desk;
-
TV;
-
paintings or mirrors.
After this, it becomes clear which frames will be open and which will be almost completely hidden.
Relationship with lighting fixtures
Wall sconces and pendants also set axes.
If a sconce is placed inside a frame, its position must be tied to the center or deliberately offset. If a lighting fixture crosses the profile, this must be a design decision, not the result of late electrical work.
Connection with wall panels
Stucco can:
-
continue the panel grid;
-
form the upper part of the wall;
-
separate the panel from the painted area;
-
act as a transition between materials.
But if the wall panel already has an active relief, additional molding can make the composition too complex.
Connection with the baseboard
The lower border of the frame should take into account the height of the baseboard.
You cannot design the molding as if the wall starts from the floor. In a real room, the lower line is perceived together with the baseboard and furniture.
Central axes of the room
In formal spaces, the stucco composition is often built around:
-
the fireplace;
-
the chandelier;
-
door portal;
-
console;
-
the central window;
-
the axis of the bed.
If the decor ignores these lines, the room looks less cohesive.




What types of stucco to include in the design project
A professional specification should separate product types by function. The wording “stucco decor — set” is too vague for working documentation.
Our factory also produces:

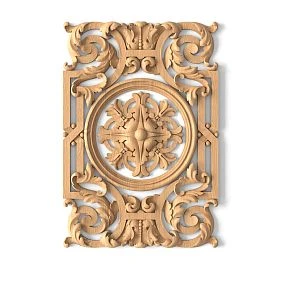


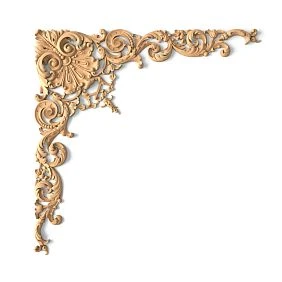

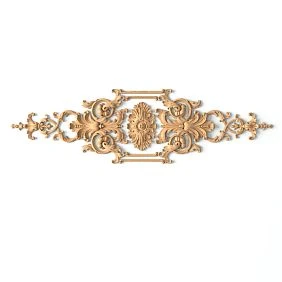
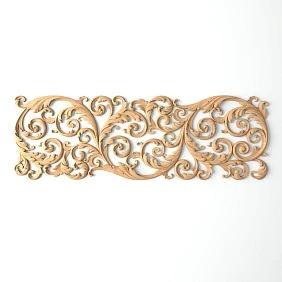
Moldings
Moldings form:
-
frames;
-
panels;
-
horizontal division;
-
vertical margins;
-
frames;
-
transitions between zones.
They are especially convenient for frame systems Moldings made of polyurethane, because a specific profile can be assigned to one article number and repeated in different rooms.
Get Consultation
Ceiling cornices
A cornice connects the wall and the ceiling. It can:
-
finish the wall;
-
hide the transition;
-
support classical architecture;
-
work with ceiling frames;
-
be used as part of a lighting composition, if provided for by a specific solution.
Its scale should be coordinated with the ceiling height and wall decor.
Ceiling medallions
The ceiling rose forms the center of the ceiling composition and is often aligned with the chandelier.
It should be coordinated:
-
with the size of the room;
-
with the diameter of the light fixture;
-
with the ceiling height;
-
with the cornice;
-
with other ceiling elements.
For design work, it is useful to consider Polyurethane ceiling rosettes as a separate specification group, rather than as an “addition to the chandelier.”
Inlays and Decorative Elements
Overlays work as:
-
center of the frame;
-
corner element;
-
accent above the door;
-
vertical decor;
-
part of a complex composition.
Orientation and installation axis are especially important for them.
Pilasters, columns and capitals
In more architectural projects, stucco becomes part of a three-dimensional system.
Here it is no longer enough to choose a beautiful capital. You need to check:
-
total height;
-
wall width;
-
base;
-
vertical module;
-
joint with the ceiling;
-
the relationship to doors;
-
actual dimensions of all parts.
Stucco decor as a unified system
When a designer uses several categories at once, it is useful to define their hierarchy in advance.
For example:
main molding → ceiling cornice → rosette → secondary appliqués.
Then it is clear in the project which element defines the architecture and which ones support it.
How to choose the scale of stucco for a room
The size of an item in a product card and its actual scale in a room are two different things.
A designer must consider not only the millimeters of the profile but also the distance from which it will be seen.
Ceiling height
With a high ceiling, fine relief can get lost.
But this does not mean that a high ceiling always requires large stucco. If the room is narrow or the style is minimalist, a massive profile may turn out to be excessive.
Wall length
The longer the wall, the larger the logic of the composition should be.
On a five- or six-meter plane, many small frames often create fragmentation. One or two large systems can look calmer.
Viewing distance
In a narrow hallway, decor is perceived from a close distance. In a living room — from several points, sometimes from 5–7 meters.
A profile that looks expressive on a sample in your hand may disappear on a distant wall.
Furniture size
A large sofa, a tall wardrobe, or a massive bed require a different scale of decorative grid than a light console.
The frame should either interact with the furniture or form an independent architecture.
Door width
A wide portal creates a strong mass. A too-thin profile next to it may look weak.
At the same time, it is not at all necessary to repeat the width of the door casing. Visual balance is what matters.
Relief Depth
A deep relief creates active light and shadow. With side lighting, the effect is enhanced.
Therefore, the profile size cannot be judged only by the frontal photo in the catalog.
Small room
In a compact room, the following usually work better:
-
concise profiles;
-
a limited number of frames;
-
calm ornament;
-
painting in the wall color.
The main danger is turning the wall into a dense grid.
High ceilings
In a space with a high ceiling, you can use more expressive molding, but it is better to first check:
-
distance to the viewer;
-
large furniture;
-
cornice;
-
ceiling composition.
Large public space
In a lobby, restaurant, or representative area, the decor should be readable from a distance.
Especially important there are:
-
overall silhouette;
-
rhythm;
-
major axis;
-
repetition of elements.
Small details become secondary.
How to assemble a stucco composition on the wall
A wall composition begins not with choosing the applique or the number of frames. First, you need to build the architectural grid of the wall.
Step 1. Create a layout drawing
The layout must include:
-
clean dimensions;
-
doors;
-
windows;
-
baseboard;
-
cornice;
-
switches;
-
sockets;
-
built-in furniture;
-
large items;
-
sconces and other light fixtures.
If the layout drawing is made before the final finishing, you need to understand which dimensions will still change.
Step 2. Mark the doorways
Doors create strong verticals. If the frame almost coincides with the door casing, you need either to connect them with an axis or to create a noticeable offset.
A random few centimeters between two active profiles usually looks worse than a deliberate abutment or a full pause.
Step 3. Place the furniture
A frame behind a sofa can work as a backdrop. A frame behind a tall wardrobe will simply disappear.
That is why furniture in the elevation is needed even at an early stage.
If a model has not been chosen yet, use a dimensional block with realistic dimensions.
Step 4. Determine the compositional axes
The axes can pass through:
-
center of the wall;
-
center of the bed;
-
the center of the fireplace;
-
TV;
-
the chandelier;
-
console;
-
doorway.
After that, the designer understands where symmetry is needed and where asymmetry is justified.
Step 5. Determine the frame zones
There is no need to automatically divide the wall into three or five equal parts.
The quantity depends on:
-
width;
-
furniture;
-
doors;
-
the chosen style;
-
the scale of the profile.
One large frame is sometimes stronger than five small ones.
Step 6. Choose the molding
Only after the geometry appears does it become clear how wide and prominent the profile should be.
If the frames are small, a large ornamental molding may take up too much of the field.
If the wall is large, a thin profile may get lost.
Step 7. Add corner and center elements
Additional decor should be subordinate to the main system.
The central overlay is tied to the axis, the corner element to a specific frame, and the mirrored pair to the orientation.
Step 8. Check the composition at scale
At this stage, the following are useful:
-
visualization;
-
printing the layout;
-
a 1:1 scale fragment;
-
A physical sample.
Step 9. Transfer the solution to the working documentation
After approval, the following remain in the drawing:
-
frame dimensions;
-
indents;
-
profile;
-
article number;
-
installation zones;
-
corner elements;
-
finish.
This is how a "beautiful picture" becomes a reproducible solution.
Symmetry
A symmetrical composition works well on formal walls and around central objects.
But the center can be wider than the side margins. Symmetry does not mean identical rectangles.
Asymmetry
Asymmetry is needed if the architecture of the room is already asymmetrical.
For example, the door is offset to one edge, and the furniture occupies the opposite part of the wall.
In such a case, an attempt to forcibly create mirroring often looks artificial.
Stucco molding for painting: how to work with color
Color changes the perception of relief no less than its geometry. Therefore, the designer must determine the finish simultaneously with the composition.
For a separate technical elaboration, it is useful to use the material Molding for painting, and in the project, choose one of the scenarios in advance.
Matching the wall color
This is one of the calmest options.
The line is read through light and shadow, not through contrast.
Suitable for:
-
neoclassicism;
-
calm modern interiors;
-
bedrooms;
-
monochrome living room;
-
a complex wall composition where no additional color noise is needed.
Contrasting molding
Contrast makes the decor graphic.
For example, a light profile on a darker wall or vice versa.
This technique emphasizes all layout inaccuracies more strongly because the boundaries become more noticeable.
Therefore, the geometry must be especially clean.
Half a tone lighter or darker
This is an intermediate scenario.
It allows you to highlight the relief without turning it into a rigid frame.
Suitable for interiors where you want extra depth without contrast.
Accent finish
Metallic, patinated, or complex decorative finishes are acceptable where they support the concept.
But such a finish turns the molding into an active object. Then the rest of the wall should be calmer.
Test paint sample
The color on a small fan and the same color on a relief element look different.
Shadow, protrusions, and recesses create different values of the same shade.
Therefore, for a responsible project it is useful to:
-
receive a sample;
-
paint it in the chosen color;
-
view in daylight;
-
check under evening lighting;
-
only after that approve the finish.
Polyurethane stucco in a professional project
Polyurethane stucco is convenient for the designer because it allows working not with abstract relief, but with serial products and article numbers.
This is especially important for large projects, where one element is repeated dozens of times.
Light Weight
For the designer, this means more freedom in wall and ceiling compositions.
But the lightness of the material does not eliminate the need to:
-
prepare the base;
-
select the mounting system;
-
think through the angles;
-
determine the order of painting.
Detailed relief
The ornament can be used as a standalone accent.
At the same time, the more complex the pattern, the more carefully you need to approach the joints and scale.
Painting option
Polyurethane decor can be integrated into the project's color system.
This allows the same geometry to work:
-
in the color of the wall;
-
in white;
-
contrastingly;
-
in complex decorative finishing.
Repeatability of elements
For a project interior, it is important that identical overlays and moldings are repeated as a system.
If there are ten identical decorative elements on a wall, a small positioning error becomes more noticeable precisely because of the repetition.
System composition
Instead of buying individual beautiful pieces, the designer can assemble:
-
molding;
-
overlay;
-
the rosette;
-
cornice;
-
ceiling decor.
The main thing is not to use everything at once without hierarchy.
Catalog as a project library
Professional work begins when each selected element gets:
-
article number;
-
size;
-
the purpose;
-
a place in the composition.
This is exactly what allows moving from a moodboard to a working specification.
Wall, ceiling, or integrated system
Dividing by zones helps avoid mixing different decor functions.
Wall molding
Polyurethane wall decor may be included in:
-
frame systems;
-
accent panels;
-
vertical compositions;
-
doorway decoration;
-
central decorative fields.
Wall moulding is especially sensitive to furniture: almost any large item covers part of the wall.
Ceiling moulding
Ceiling molding works on a different level.
It interacts with:
-
the cornice;
-
with light;
-
the chandelier;
-
coffered grid;
-
ceiling geometry;
-
the central axis of the room.
The higher the ceiling, the more important it is to evaluate the composition from below, not just on the plan.
Ceiling rose outlet
The ceiling rose is most often tied to the light fixture, but it does not have to match it in diameter.
Visual balance is more important.
If the chandelier is large and bold, an overly complex ceiling rose may compete with it.
If the light fixture is minimalist, a decorative ceiling rose can become an independent architectural focal point.
A unified system of wall and ceiling
In a strong interior, the wall and ceiling do not look like two independent decorations.
For example:
-
moldings create a vertical rhythm;
-
the cornice completes it;
-
the rosette supports the central axis;
-
the ceiling composition repeats the proportions of the lower fields.
This is how stucco works as a unified architectural language.
How to choose stucco to match the project style
Style should not turn into a catalog of historical features. For a designer, it is more important to understand how a specific profile supports the overall architecture.
Classic
A classic interior allows:
-
elaborate ornament;
-
symmetry;
-
deeper relief;
-
multi-level compositions;
-
ceiling rosettes;
-
cornices;
-
pilasters.
But even here, the number of details should be related to the scale of the room.
In a small room, an attempt to reproduce a palace system in full often makes the interior heavier.
Neoclassicism
Neoclassicism allows you to preserve architectural logic and reduce decorative density.
These work well:
-
calm moldings;
-
large frames;
-
painting in the color of the wall;
-
a limited number of overlays;
-
concise ceiling solutions.
Proportions and intervals are especially important here.
Art Deco style is renowned for its love of ornamentation, symmetry, and refined details. The molded decoration NPU-422 can become an excellent complement to geometric motifs and contrasting color combinations characteristic of this style. Try highlighting it with metallic paint or patina — and you’ll get an eye-catching detail that’s hard to look away from.
In Art Deco, stucco molding can work through:
-
geometry;
-
a repeating rhythm;
-
vertical lines;
-
contrast;
-
accent elements.
Ornament doesn't have to be historical. Sometimes a strict profile and a precise grid are enough.
Modern interior
Modern molding is often almost devoid of ornament.
It can work as:
-
a fine architectural line;
-
a frame;
-
a frame in the wall color;
-
a zoning element;
-
a continuation of the joinery.
The main mistake is adding a classic profile just because the word "molding" is associated with historical style.
Eclecticism
Eclecticism allows the use of historical decor in modern architecture.
But here hierarchy is especially important.
If the room already has:
-
bold furniture;
-
active stone;
-
complex light;
-
expressive art,
stucco molding should either support one of these layers or be as calm as possible.
Why the collection does not replace design
A ready-made collection helps bring elements together in a unified language, but the designer must still determine:
-
scale;
-
quantity;
-
place;
-
axes;
-
color;
-
the method of repetition.
Even a good collection does not guarantee a good composition if it is mechanically distributed across the walls.
Plaster moldings samples: what a designer should check in person
A physical sample is needed not to look once again at a shape already seen in the catalog. Its function is to check what is poorly perceived on a screen.
Scale of the relief
In a photograph, the product is usually shown up close.
In a real interior, it is perceived from a distance.
The sample helps to understand:
-
whether the ornament is too small;
-
whether the protrusion is too large;
-
how noticeable the line is;
-
how the profile interacts with the wall.
Surface quality
Before painting, the surface must be clear to the contractor and the designer.
If the project involves a complex finish, a sample makes it possible to check the result in advance.
Depth of the ornament
A deep relief creates a strong shadow. With side lighting, it becomes even more pronounced.
If the wall receives a lot of natural light from the side, it is better to place the sample in exactly such an area.
Thickness and profile
Millimeters in a catalog are an abstract figure until the designer sees the actual cross-section next to a casing, panel, or baseboard.
Base color white
Even if the product will be painted, the base shade is important for a test paint and for perception before the finish.
Junction
Two samples can be joined and checked:
-
the joint line;
-
the pattern alignment;
-
edge quality;
-
the behavior after painting.
Paint sample
Workflow:
catalog → sample → paint sample → approval → article number → specification.
If a project is based on painting in the wall color, it is the paint sample that shows the real interaction of texture and color.
Side lighting
A profile that appears calm under frontal lighting can become very active under side light.
Therefore, the sample should be checked not only on a desk in the office.
3D models of stucco moldings for project visualization
For a professional project, the 3D model links a specific product code to a real scene.
On STAVROS pages, drawings and 3D models are available for individual polyurethane products, and in the project system it is useful to record 3D models of stucco together with the selected product codes.
Why use a real model
It allows you to see:
-
a protrusion;
-
depth;
-
relief;
-
shadow;
-
scale;
-
repetition of the ornament.
If a conventional strip is used in the visualization instead of the real profile, the client may approve a completely different visual effect.
The product code must match the visualization
Workflow:
selected product code → 3D → visualization → approval → the same product code in the working documentation.
If the model changes after approval, you need to update:
-
visualization;
-
the unfolded view;
-
specification.
Light check
3D is especially useful for relief decor.
You can see in advance how the ornament works:
-
in daylight;
-
with a wall light;
-
with overhead lighting;
-
with linear lighting.
Furniture check
The scene shows whether the sofa or wardrobe overlaps the stucco composition.
This helps catch a mistake before installation.
Limitation of 3D
A model does not replace a sample.
It shows the form, but does not fully convey:
-
texture;
-
actual shade;
-
surface quality;
-
the visual feel of the material.
That is why digital and physical verification complement each other.
DWG Stucco Moldings: Why a Designer Needs a Working Drawing of the Product
Working documentation must be based on precise geometry.
For this, a designer will find useful DWG of stucco moldings and other technical files.
Product profile
DWG helps to see the actual cross-section.
This is important for:
-
the junction with the architrave;
-
transition to the cornice;
-
connections to the panel;
-
construction of a complex assembly.
Dimensions
In a working drawing, you cannot draw molding of an "approximate width."
The actual size affects:
-
a frame;
-
intervals;
-
angles;
-
distance to furniture.
Scale
If the profile is inserted into CAD at actual scale, the designer will notice more quickly that it is too large or too small.
Working layout
The layout records:
-
lengths;
-
axes;
-
markings;
-
indents;
-
article numbers;
-
Decorative elements.
Details
Individual assemblies are especially useful for:
-
inner corner;
-
external corner;
-
door portal;
-
intersections of two profiles;
-
transition to the ceiling;
-
complex decorative center.
Handover to builders
The contractor must understand the solution without viewing the render.
The render shows the intent.
The DWG shows exactly what to do.
Do not overload the sheet
It is not necessary to show a detailed profile on every frame.
It is enough:
-
product code;
-
legends;
-
typical detail;
-
SKUs;
-
non-standard areas.
This way the drawing remains readable.
How to translate a stucco visualization into a working specification
An approved image is not yet ready for purchasing.
In the specification, each item must become unambiguous.
| Field | What to specify |
|---|---|
| Manufacturer | STAVROS |
| Article number | specific SKU |
| View | molding / cornice / rosette / overlay |
| Size | actual |
| Material | Polyurethane |
| Room | Room Name |
| Zone | wall / ceiling |
| Quantity | pcs. or linear m |
| Finish | color / coating system |
| Note | corners, junctions, installation |
Manufacturer
If the project is approved for a specific product range, this must be indicated.
Otherwise, the order assembler may replace an element with a similar-looking one but with different dimensions.
Article number
This is a key line.
The words "classic molding 50 mm" are insufficient.
Type
The category helps you quickly understand the calculation method.
Molding is counted by length, the overlay by pieces, and the rosette as a separate item.
Size
The size is fixed from the card of the specific product.
No need to manually rewrite parameters from memory.
Room and zone
Even a single SKU is better broken down by room.
For example:
LIVING / WALL-A
BEDROOM / WALL-C
This makes it easier to distribute material on site.
Quantity
For linear elements, you need the calculated linear meters and the number of product parts.
For piece decor — the number of items.
Coating
It is necessary to specify:
-
color;
-
system;
-
where painting is performed;
-
is a test paint-out needed.
Note
Here you can include:
-
mirrored orientation;
-
non-standard angle;
-
flexible section;
-
special joint.
The specification must allow another specialist to order the set without verbal explanation from the project author.
How to calculate the amount of moulding for a project
The calculation depends on the type of product. Linear elements and piece decor cannot be calculated with the same formula.
Moldings and Cornices
For frames and long lines, the basic principle is:
the sum of the lengths of all sections + technological allowance.
For a rectangular frame:
2 × width + 2 × height.
Example.
Frame 1.2 × 1.8 m:
2 × 1.2 + 2 × 1.8 = 6.0 m.
If there are four such frames:
6.0 × 4 = 24 m.
This is pure geometry without accounting for cutting.
Why 24 m does not mean you need to buy exactly 24 m
The profile is supplied in specific commercial lengths.
If the segments do not lay out conveniently, the arithmetic minimum does not match the actual purchase.
For example, if long verticals are needed at almost the full length of one piece, short offcuts after cutting cannot always be used on an adjacent frame.
Cutting map
For a complex composition, the designer or kit planner can make a table:
| Detail | Length | Quantity | Note |
|---|---|---|---|
| V-A | 1.80 m | 8 | Frame verticals |
| H-A | 1.20 m | 8 | horizontals |
| V-B | 1.40 m | 4 | side zone |
| H-B | 0.65 m | 4 | side zone |
After that, the pieces are sorted by product lengths.
This makes it visible:
-
where usable offcuts remain;
-
where an additional element is needed;
-
which long sections cannot be assembled from short pieces.
Corners
The more corners there are, the higher the risk of waste.
On a single long straight line, the number of cuts is minimal.
In a system of twenty small frames, the number of cuts increases sharply.
Therefore, the same total linear meterage may require a different reserve.
Ornament
If the profile has a repeating pattern, a short offcut may be unusable due to a mismatch in the repeat.
This is a separate reason not to treat the reserve as a single fixed percentage.
Get Consultation
Ceiling cornices
The cornice is calculated along the perimeter of specific zones.
If the room has:
-
niches;
-
protrusions;
-
columns;
-
complex angles,
the perimeter must be divided into sections.
Ceiling medallions
Sockets are counted individually.
But the designer additionally checks:
-
the number of light fixtures;
-
axis;
-
the size of the composition;
-
repetition in adjacent rooms.
Overlays
Individual decor items are easier to count by modules.
For example:
4 frames × 1 central overlay = 4 pcs.
If each frame has four corner elements:
4 frames × 4 corners = 16 pcs.
If the corners have left and right orientation, the quantity is divided by SKU.
Technological allowance
It is not possible to automatically assign a single percentage for all projects.
The reserve is usually higher if:
-
many corners;
-
the profile is complex;
-
the ornament requires alignment;
-
installers are working with the system for the first time;
-
there are long critical sections;
-
repeat ordering is undesirable.
Below — if the geometry is simple and the remnants redistribute well.
The correct stock appears after the cutting plan.
What to include in the order besides the molding itself
Professional specification does not end at the product SKU of the decor.
Mounting adhesive
The project needs to define the installation principle itself.
For the contractor, it is useful to specify a separate material for installation of polyurethane molding, and leave the required items and notes in the specification.
Jointing compound
If a long line is assembled from several parts, the butt joint must be taken into account in advance.
This is especially important for:
-
cornices;
-
long moldings;
-
ornamental profile.
Decorative corners
Ready-made corners are counted separately.
They cannot be counted as part of the linear meterage.
Central elements
Each central element is a separate SKU and a separate quantity.
Materials for finishing
If the entire composition is being painted, the designer must provide the contractor with information about the finish.
It is not necessary to include every can of paint in the decorative schedule, but the coating system must be specified.
Samples
For a responsible project, samples also become part of the process.
Their function is not to increase the number of items, but to reduce the risk of an incorrect main order.
Project matrix: how to link an element, a room, and documentation
In a large project, the problem is rarely that the designer cannot choose a beautiful detail. It is harder to maintain the connection between the visual idea, the actual product code, and the documentation when there are many rooms.
A simple matrix is useful for this.
| Code | Room | Element | Article | File | Quantity | Finish |
|---|---|---|---|---|---|---|
| D-01 | Living room | Molding | ___ | 3D + DWG | ___ m | Wall color |
| D-02 | Living room | Rosette | ___ | 3D + DWG | 1 pc. | White |
| D-03 | Hall | Overlay | ___ | 3D | 4 pcs. | Wall color |
| D-04 | Bedroom | Cornice | ___ | DWG | ___ m | White |
Such a table helps the specifier immediately see what belongs to a specific zone, and the designer — pr
Polyurethane ceiling molding: how to avoid a separate “decoration on the ceiling”
Polyurethane ceiling molding should continue the architectural logic of the room.
If there is a central axis on the wall, the ceiling composition can support it.
If a chandelier is offset because of furniture, it is not always necessary to return the ceiling outlet to the geometric center of the room. In an interior, the compositional center matters more than the abstract middle of the plan.
The query “ceiling medallion molding” in practice requires checking:
-
position of the lamp;
-
the diameter of the decorative zone;
-
ceiling height;
-
room scale;
-
the junction with other ceiling elements.
It is precisely these checks that distinguish professional selection from buying a separate decoration.
How to buy molding for a design project
The phrase “buy molding” describes the already transactional stage, but for a professional it comes after project verification. Molding for a design project must first be tied to specific item codes, dimensions, and application zones.
The commercial stage begins only after the design solution is sufficiently defined.
If you need You can buy ready-made stucco matching the Baroque style. Calculate the quantity: linear meters of cornices and moldings, number of rosettes, pilasters, consoles, corner elements. Add a ten to fifteen percent allowance for trimming. for the project, the professional sequence looks like this:
concept → catalog → item codes → samples → 3D/DWG → calculation → specification → order.
1. Choose an architectural system
The designer must understand:
-
where the walls are;
-
where the ceiling is;
-
what the frames are;
-
what the cornice is;
-
whether an outlet is needed;
-
whether there are additional overlays.
2. Narrow the catalog down to a few candidates
There is no need to coordinate twenty profiles.
It's better to choose 2–4 options that fit by:
-
style;
-
scale;
-
geometry;
-
task.
3. Check samples
The key profile should be viewed at real scale.
4. Lock in the product codes
Once approved, phrases like "roughly this profile" disappear from the project.
5. Check digital materials
3D and DWG connect the visualization and the working drawing.
6. Calculate the quantity
The calculation must be based on the actual layout and parts map.
7. Add installation and decorative elements
The order should include not only the main profiles.
8. Check current terms
Before ordering, check:
-
availability;
-
current price;
-
production time, if the item is made to order;
-
delivery;
-
completeness of the package.
9. Break down by room
For a large project, it is convenient to create a sub-list:
LIVING
BEDROOM
HALL
DINING
This simplifies the distribution of material on site.
10. Save the final revision
After ordering, you cannot continue changing the profile in the visualization without updating the specification.
A project must have one current version.
Five design scenarios: how the choice of molding changes
The same selection system works differently depending on the room.
Small bedroom
Initial conditions:
-
one main wall behind the bed;
-
two cabinets;
-
wall sconce;
-
average ceiling height;
-
limited viewing distance.
The main risk is a frame grid that is too small.
If the headboard covers half the wall, designing five frames behind it is pointless.
It is more rational to compare:
-
one large panel around the headboard;
-
three vertical fields;
-
a composition only above the furniture.
It is better to evaluate the profile from a real distance of 1.5–2 m.
Spacious living room
Here the opposite problem arises: small decor gets lost.
A large wall requires:
-
large axes;
-
longer lines;
-
a clear connection with the doors;
-
checks from the far point.
If the living room has a fireplace, TV, or large console, they become the main reference points.
Long corridor
In a hallway, frequent frames can create a "train car" effect.
It's better to consider:
-
a repeating large module;
-
one horizontal line;
-
decor on only one wall;
-
alignment with doorways.
Wall with a fireplace
The fireplace is already the architectural center.
The molding should support it.
Possible schemes:
-
central frame;
-
two side ones;
-
single portal;
-
rosette or overlay above the fireplace;
-
ceiling axis through the chandelier.
If the TV is located above the fireplace, its actual dimensions and mounting must be taken into account.
Public space
In a restaurant, lobby, or waiting area, the decor should be readable from a distance.
There the priority changes:
-
fewer small details;
-
more pronounced rhythm;
-
clearer repetition;
-
higher requirements for installation repeatability.
This is especially important if one composition is repeated on several walls.
How to coordinate stucco with the client
The designer sees the system, the client sees an emotional image.
Therefore, the presentation must translate the technical solution into a clear visual language.
Do not show only a single element
A card of the overlay does not explain how it will look on the wall.
It is better to show:
-
overall visualization;
-
close-up fragment;
-
a physical sample;
-
finish option.
Compare options on the same wall
If the client is choosing between a calm and a bold profile, show both versions in the same scene.
This makes it easier to assess the difference in scale.
Record the approved product code
After approval, immediately write down:
-
article number;
-
size;
-
color;
-
place of application.
Otherwise, the phrase “we chose the second option” will mean nothing a month later.
Approve the color separately
Form and color are two different solutions.
The same profile in white and in the wall color can be perceived completely differently.
Do not promise that the render will match real light
Visualization is useful, but the real relief must be confirmed with a sample.
Especially with complex side lighting.
How to hand over a stucco project to a contractor
The installer should not have to reconstruct the architectural idea from a render.
They need clear documentation.
Minimum set:
-
elevation drawing;
-
sizes;
-
axes;
-
indents;
-
profile codes;
-
article numbers;
-
ceiling elements;
-
details;
-
finish;
-
installation notes.
Wall numbering
convenient to use:
ROOM-01 / WALL-A
ROOM-01 / WALL-B
ROOM-02 / WALL-A
In the specification, the quantity is tied to the same codes.
Profile numbering
For example:
MLD-P01
CORNICE-C01
ROSETTE-R01
DECOR-D01
The full SKU is displayed in the legend.
Project revision
If the SKU changes, update:
-
visualization;
-
DWG;
-
specification;
-
procurement list.
An outdated version on site is more dangerous than a small arithmetic error.
Control dimensions
There is no need to dimension every line.
It is enough to provide:
-
overall dimensions;
-
frame size;
-
typical offsets;
-
axes;
-
non-standard sections.
Common mistakes in projects with stucco molding
Mistake 1. Choosing decor before architecture
Why it happens: it is easier to open a catalog than to build an elevation.
Consequence: the profile has to be adjusted to the already accepted geometry.
How to prevent it: first build the wall, then select the product codes.
Mistake 2. Designing on an empty wall
Why it happens: the furniture has not yet been approved.
Consequence: half of the frame is hidden by the sofa or wardrobe.
How to prevent it: use at least the overall dimensions of the furniture.
Mistake 3. Ignoring door casings
Why it happens: doors are handled by another section of the project.
Consequence: a random narrow gap appears between the profiles.
How to prevent it: include doors in the working elevation.
Mistake 4. Approving an ornament based on a large photo
Why it happens: it looks striking on the product card.
Consequence: in the room, the pattern turns out to be too small or too busy.
How to prevent: a sample and a visualization at real scale.
Mistake 5. Counting only the total square footage
Why it happens: you want to get the quantity quickly.
Consequence: the length is formally sufficient, but the cutting plan doesn't come together.
How to prevent: count the actual segments.
Mistake 6. Not separating left and right decor
Why it happens: the pair is perceived as a single item.
Consequence: the wrong number of orientations arrives at the site.
How to prevent it: separate SKUs.
Mistake 7. Changing the profile without updating the 3D and DWG
Why it happens: a new SKU that is “almost the same.”
Consequence: the contractor, the procurement specialist, and the designer are working from different versions.
How to prevent it: route any change through a revision.
Mistake 8. Leaving adhesive and installation to the last day
Why it happens: it is considered the contractor’s task.
Consequence: the decor system is approved, but the fastening technology is not.
How to prevent it: determine the installation principle before purchasing.
Mistake 9. Overloading the composition
Why it happens: you want to use as many beautiful details as possible.
Consequence: moldings, overlays, rosettes, and furniture compete with one another.
How to prevent it: establish a hierarchy.
When moldings are not needed
Professional work includes the ability to forgo a solution.
The wall is already complex
If there is:
-
active stone;
-
panel;
-
complex texture;
-
large-scale art;
-
built-in joinery,
an additional molding layer may be superfluous.
The space is very small and fragmented
Many openings and short wall sections leave little clean surface.
Instead of frames, you can use a single accent element.
The client wants clean minimalism
There's no need to add stucco just for the sake of a trend.
An empty wall is sometimes more precise than a concept.
No budget for quality installation
A complex stucco system requires careful marking, joints, and painting.
If the execution is going to be weak, it's better to simplify the project.
Stucco is hidden by furniture
There's no point in buying and installing something that won't be visible.
The exception is cases where the continuity of the system is important structurally or compositionally.
How to estimate a stucco budget before final configuration
A designer doesn't always need an exact estimate at an early stage, but needs to understand the cost structure of the solution.
The price of an individual element does not equal the price of the finished composition.
The budget includes:
-
main profiles;
-
cornices;
-
sockets;
-
overlays;
-
corner elements;
-
technological reserve;
-
mounting materials;
-
preparation;
-
the coloring;
-
installation;
-
possible additional order.
Why two similar walls cost differently
Let's imagine two walls of the same area.
The first has:
-
two large frames;
-
simple smooth profile;
-
minimum corners.
Second:
-
eight small frames;
-
ornament;
-
central overlays;
-
complex cuts.
The total square footage may be similar, but the labor intensity, waste, and number of piece elements differ.
Therefore, it is better to estimate the budget based on the structure of the composition.
How to reduce cost without destroying the concept
If the project exceeds the budget, it is useful to optimize the architecture rather than randomly changing the product codes.
Options:
-
reduce the number of frames;
-
use one type of profile instead of two;
-
keep decorative overlays only on the accent wall;
-
eliminate unnecessary corner elements;
-
unify the cornice between rooms;
-
move complex decor into one key zone.
This way the visual idea is preserved, and the specification becomes simpler.
Designer's checklist before including stucco in the project
Before releasing the documentation, it is useful to run a final check.
Architecture
-
there is a clear axis;
-
the decor is connected to the doors;
-
furniture is applied;
-
the ceiling and walls are coordinated;
-
no random gaps.
Scale
-
the profile has been checked at actual size;
-
the texture will not be lost;
-
the decor does not overwhelm a small room;
-
large elements are legible from the required distance.
Sample
-
the surface has been checked;
-
a test patch has been applied, if needed;
-
the light and shadow have been assessed on site or under similar conditions;
-
the joint is clear.
Digital materials
-
the correct SKU is in the 3D;
-
DWG matches the selected product;
-
worksheet updated;
-
old revisions are not used.
Specification
-
manufacturer specified;
-
item code specified;
-
dimensions are verified;
-
the quantity is calculated;
-
stock justified;
-
individual pieces counted separately;
-
finish specified.
Installation
-
base is clear;
-
mounting system provided;
-
corners and joints are shown;
-
complex assemblies are listed separately;
-
the painting sequence is known.
Purchase
-
the main profile is approved;
-
additional elements are coordinated;
-
current prices are verified;
-
availability is verified;
-
delivery is taken into account.
If one of the blocks remains undefined, the decision is not yet ready for the final order.
What to pass to the specifier along with the specification
Even a well-assembled schedule may require a dozen clarifications if the specifier cannot see the context. Therefore, it is useful to attach a short procurement package to the final specification.
It includes:
-
current project revision;
-
PDF layouts;
-
room and wall codes;
-
SKU table;
-
quantity by zones;
-
marked flexible and non-standard areas;
-
list of one-off decor;
-
finish information;
-
links to technical files;
-
contact of the responsible designer.
The procurement specialist does not need to decide again which profile is suitable. Their task is to purchase what has already been approved by the project and to notice in time any discrepancy between the documents and the available item.
If the supplier reports that the SKU is temporarily unavailable, it cannot be automatically replaced with a visually similar one. First, the designer checks the new geometry in the project. Even a small change in profile width can alter the frame intervals and door joints.
What to do when replacing an item code
Work sequence:
proposed replacement → dimension check → 3D update → elevation check → new sample if necessary → new specification revision.
After that, the procurement specialist receives the already updated schedule.
This way, a "temporary" part does not appear in the project and then remain on site forever.
How to place a repeat order
For a project with multiple phases, it is useful to save not only the name but also the SKU, batch, and application area.
If an additional profile is needed a month later, the order is created using the same SKU, not with the wording "that molding from the living room."
This is especially important if the project runs for a long time and involves several procurement specialists or contractors.
When can a specification be considered complete
Not when the table is filled in, but when any project participant can use it to answer unambiguously:
-
what to buy;
-
how many;
-
where to take it;
-
what finish to apply;
-
which file to open;
-
which element joins with what.
If a call to the project author is still needed to answer, the documentation is not complete.
FAQ
How is moulding for designers different from the usual choice of decor?
A designer works not with a single beautiful detail, but with a system. The product needs to be linked to the architecture, scale, 3D, working drawings, specification, calculation, and installation.
Which type of stucco molding is best for a modern apartment?
There is no universal answer. For a modern interior, more laconic profiles, large calm frames, and painting in the color of the wall often work better. But the decision depends on the scale, furniture, and architecture of the specific space.
Should the same decor be used in all rooms?
Not necessarily. It is more cohesive to use one stylistic family and adapt the scale. In a large living room, the profile can be more active; in a small bedroom, calmer.
How can you tell if a ceiling rose matches a chandelier?
You don't compare only the diameter. You need to consider the scale of the ceiling, the size of the light fixture, the height of the room, and the overall composition. The ceiling rose can be larger or smaller than the chandelier if the visual balance remains convincing.
Can stucco molding be used on only one accent wall?
Yes. This is especially logical in a modern interior, where a uniform decorative layer throughout the entire space is not needed. An accent wall can work around the bed, fireplace, console, or TV area.
How can you tell if there is too much stucco molding?
If the decor starts to compete with the furniture, light, art, and textures, the composition should be simplified. It is useful to temporarily turn off one decorative layer in the visualization and compare the versions.
Do I always need to order samples?
Not always. For a simple, familiar profile in a small project, precise technical data may be sufficient. A sample is especially useful for large relief, non-standard color, a large batch, or approval with the client.
Why are 3D models needed if there are photographs?
A photograph shows the product on its own. A 3D model allows you to check the real scale, shadow, intersection with furniture, doors, and light in a specific interior.
Why does a designer need DWG of stucco moldings?
To use the exact profile in working documentation, build details, control dimensions, and hand over the solution to the contractor without approximate lines.
How do you calculate moldings in a framed composition?
First calculate the perimeter of each frame, then sum all sections, check the product lengths, and make a cutting plan. After that, add a technological allowance.
How are decorative overlays calculated?
Individually by each SKU. It is better to count left and right elements separately.
Can one molding be used on the wall and ceiling?
Technically, this depends on the specific profile and project. Visually, a solution is possible if the geometry works in both zones. But more often, wall and ceiling elements perform different functions and are selected separately.
Can moulding be painted a dark color?
Yes, if the project provides for it. A dark color enhances shadow and makes the relief more noticeable. Therefore, it is better to make a sample first.
When is complex ornamental moulding needed?
When the architecture supports it: high ceilings, large walls, a classic or eclectic interior, a pronounced central composition. In a small neutral space, complex ornament may be excessive.
How to avoid discrepancies between the visualization and the construction site?
Use the same article number in 3D, DWG, and the specification. Whenever anything is replaced, update all documents and issue a new revision.
When can the main order be placed?
When the profile, finish, layout, quantity, reserve, decorative elements, and installation logic have been approved. Placing an order before this stage increases the risk of additional orders and replacements.
Summary: moulding for designers is a project system, not a set of decorations
A professional result emerges when the decor goes through the entire journey without losing information:
concept → architectural grid → scale → specific products → sample → 3D → DWG → calculation → specification → procurement → installation.
If a designer picks only a beautiful detail, they then have to adjust the project to fit the product. If the architecture is built first, moulding becomes a tool: it sets the axes, forms the rhythm, connects walls and ceiling, and supports furniture and lighting.
What matters for a project is not the number of decorative elements, but the quality of the connections between them.
The moulding must match the frame.
The frame — to the wall.
The wall — to the furniture.
The cornice — to the ceiling.
The ceiling rose — to the lighting composition.
The product code — to the visualisation and the working drawing.
Quantity — to the actual cutting map.
Installation — to the specific substrate.
Once these connections are established, buying moulding for a project becomes the final technical stage rather than a new search phase.
You can start your professional selection with the catalog STAVROS, but a strong design project is built not from an assortment as a list, but from the specific needs of the space.
This is how moulding for designers stops being just a professional search query and becomes a clear workflow: select, verify, visualize, document, calculate, and only then order.