Article Contents:
- What exactly the buyer gets under the article number MLDPU-001
- Table of characteristics MLDPU-001
- Comparison table: structural glazing bead vs. decorative molding
- Thin frame on a furniture facade
- Inner contour inside a wider frame
- Decorating dresser drawers
- Decorative framing of a panel
- Small wall frames
- Separation of painted wall sections
- Outline of a decorative panel
- Door leaf design
- Connection with compatible overlays NPU-438.1L/R
- Repeating contour on a series of furniture facades
- Example 1: one small facade 450 × 650 mm with a frame
- Example 2: a set of six facades for a kitchen unit
- Table of 'what to buy together'
- When the MLDPU-001 molding is the right choice
- When it is worth considering another option
- Route 1: assemble the molding, prepare the joints, and paint together with the facade
- Route 2: paint the molding separately and install it after the final facade finish
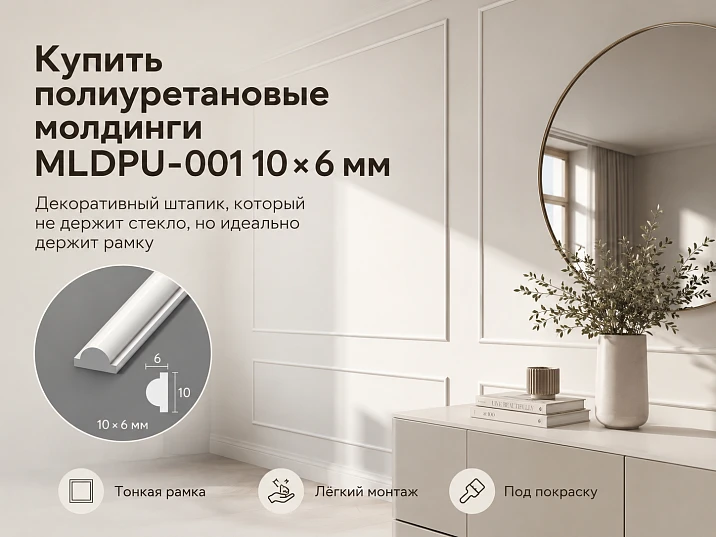
Buyers searching for "decorative glazing bead" often fall into the same trap. The word "glazing bead" in most people's minds is firmly associated with a wooden strip that presses glass into a window frame or facade. That is why, seeing the MLDPU-001 article with the label "polyurethane glazing bead," some buyers leave the site convinced: this is just a part for inserting glass, I don't need it. Others order it, wait for delivery, and only then realize they bought a thin decorative profile that does not mechanically secure the insert.
Both options are a loss. In the first case, the person does not get the needed decor. In the second, they are disappointed in the product, although the profile itself is completely high-quality and irreplaceable in its place.
This article is written for one purpose: so that the buyer understands what exactly MLDPU-001 is before adding it to the cart. The polyurethane molding 10 × 6 × 2600 mm is a thin decorative line for furniture facades, frames, drawers, wall panels, and panels. It does not hold glass, is not a structural element, and does not replace wooden glazing beads. But it creates a neat contour, hides joints, imitates a classic frame, and is easily painted together with the base.
If your task is to decorate a facade rather than secure an insert — read on. Everything is covered here: from the actual profile scale to calculating the number of strips, from installation errors to properly selecting paired overlays.
What exactly the buyer receives under the article number MLDPU-001
First of all — specifics. Not general words about a "decorative element," but a clear translation of characteristics into practice.




MLDPU-001 characteristics table
| Parameter | Value |
|---|---|
| Article number | MLDPU-001 |
| Product type | Decorative polyurethane molding |
| Visible width | 10 мм |
| Projection above the surface | 6 мм |
| Plank length | 2600 мм |
| Material | Polyurethane |
| Finishing | For painting |
| Purpose | Decorative finishing of facades, frames, panels, joints |
| Function | Decorative, not structural |
| Compatible overlays | NPU-438.1L/R (left and right) |
| Mounting | Adhesive (mounting compound for polyurethane) |
| Product card | buy molding MLDPU-001 |
Now — what lies behind these numbers in practice.
10 mm — the width of the visible line. This is a very compact profile. It does not form a wide plane, does not create a heavy shadow, and does not overload a small surface. Visually, it works as a thin frame — it emphasizes the contour and sets the rhythm of the frame, but does not compete with the facade itself. For small kitchen cabinet doors or a dresser drawer, this is often the optimal width. For a large full-height wardrobe, 10 mm may already be insufficiently noticeable — the profile will get "lost" on a large plane.
6 mm — the protrusion above the surface. This is the relief that forms a shadow under side lighting. Six millimeters is not a flat sticker or a paper imitation. With proper light, such a profile reads clearly and gives a lively volume. This is why MLDPU-001 molding works well in interiors where light falls along the surface of a wall or facade: in niches, in kitchens with backlighting, in hallways with spot lighting.
2600 mm — the length of one strip. This is one long rail, not a set of short pieces. When calculating the quantity, it should be taken into account that from one strip it is not always possible to cut all the necessary parts with minimal waste. The cutting order affects the total number of strips to be ordered — more on this in the calculation section.
Polyurethane — a material for further painting. It is not supplied in a tinted form. The buyer receives a profile ready for priming and subsequent painting with any compatible compound. This allows you to exactly match the color of the facade — whether it is white enamel, light gray matte paint, or a complex tinted shade. The material is stable, is not afraid of humidity typical for a residential interior, and holds paint well with proper surface preparation.
Compact cross-section. It is the size of 10 × 6 mm that determines the area of application: small surfaces, internal contours of frames, drawers, small doors, decorative panels, wall frames. For monumental full-height facades or heavy classic frames with several levels of profiles, wider moldings are needed.
Our factory also produces:
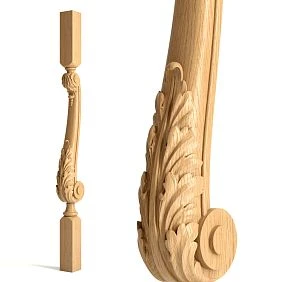
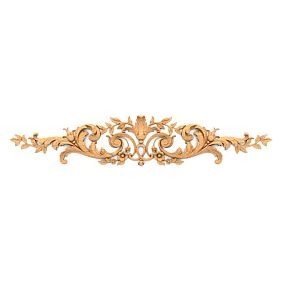
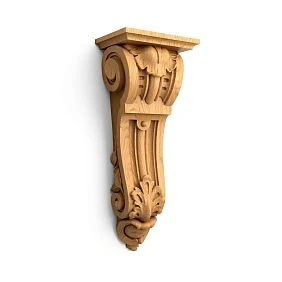
Why the word "shtapik" is confusing
This is not a matter of terminology for its own sake. It is a practical reason for mistaken purchases and disappointments.
In construction and carpentry, the word "glazing bead" refers to a narrow wooden strip that mechanically holds glass, a mirror, or another insert in a frame. It presses the glass against the groove, is fastened with nails or screws, absorbs force, and ensures fixation. Without it, the glass does not stay in place.
In a decorative context, "glazing bead" has long become a household term for any thin profile resembling a strip. Hence the confusion: a polyurethane decorative glazing bead resembles a construction one externally, but does not carry a structural function. It is attached with adhesive, creates a decorative line, and does not bear the load from the insert.
Get Consultation
Comparison table: structural glazing bead versus decorative molding
| Sign | Structural wooden glazing bead | Decorative molding MLDPU-001 |
|---|---|---|
| Purpose | Holding glass / insert in the frame | Decorative surface finishing |
| Material | Wood (solid, laminated) | Polyurethane |
| Mounting | Nails, screws, groove fitting | Glue |
| Perceives load | Yes — holds the glass | No — decorative only |
| Can one be replaced with the other | No | No |
| Finishing | More often under varnish or open texture | For painting |
| Profile Width | Varies structurally | 10 mm visible zone |
| Length | By frame size | 2600 mm per strip |
| Where to buy for painting | In STAVROS wooden products | Molding MLDPU-001 |
The main conclusion is simple: if the task is to secure glass or a mirror, a wooden structural part with a groove fit is needed. If the task is to create a decorative line on the surface of a facade or wall, MLDPU-001 is suitable.
Where to correctly apply molding MLDPU-001
The profile reveals itself precisely where a neat thin contour without extra volume is needed. Here are real scenarios where MLDPU-001 delivers results.
Thin frame on a furniture facade
The most common scenario. Four strips, mitered at 45 degrees, form a rectangular contour on a flat facade. The frame does not sink in—it protrudes 6 mm above the surface, creating a shadow and being readable from a distance. The line width of 10 mm allows the profile to be used even on small doors—for example, on a facade 500–600 mm high, where a wider molding would already "weigh down" the proportions.
Inner contour within a wider frame
On classic facades, double framing is often used: a wide molding on the outside, a thin one on the inside. MLDPU-001 works organically as an inner line that adds a second layer of detailing. It does not compete with the outer profile but emphasizes it.
Decorating dresser drawers
Drawers are a separate story. The drawer front is usually smaller than the cabinet door, its proportions are horizontal, and a large molding quickly becomes disproportionate. The 10 × 6 mm profile hits the right scale exactly: it sets a frame, does not overload the horizontal plane, and maintains lightness.
Decorative framing of a panel
If the front already has an insert — a veneered panel, decorative film, or MDF insert — the MLDPU-001 molding creates a neat frame around it. The joint between the base and the insert is covered, the outline is defined, and the front gains a finished look.
Small wall frames
The molding can be used not only in furniture. A thin frame on the wall — for photographs, small-format mirrors, decorative panels, or simply geometric accents in the interior — is another fully viable scenario. Here, adhesive mounting handles the task completely.
Dividing painted wall sections
A horizontal or vertical molding line on the wall separates two colors or two textured areas. Instead of painter's tape and an uneven boundary, you get a clear relief joint that, even upon close inspection, looks like an architectural element rather than a seam.
Outlining a decorative panel
Wall panels — PVC, MDF, veneered sheets — often require perimeter framing. The MLDPU-001 molding covers the panel edge and creates a transition between the panel and the main wall. With uniform painting, the seam is nearly invisible.
Door leaf decoration
A flat door leaf for painting is a good base for decor. Several MLDPU-001 strips, glued in the form of one or more frames, turn an empty plane into a classic door with a paneled structure. This is significantly cheaper than ordering a milled door and gives a similar visual result when painted.
Connection with compatible overlays NPU-438.1L/R
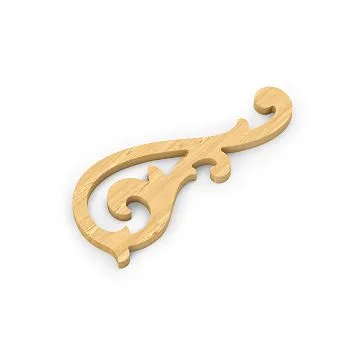
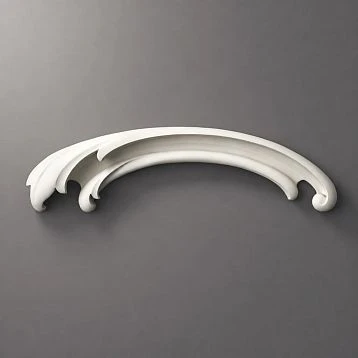
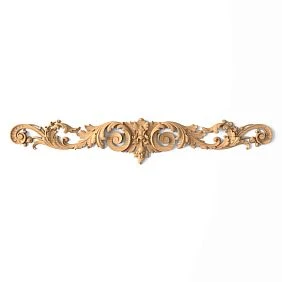
For MLDPU-001, compatibility with paired decorative overlays NPU-438.1L/R is confirmed. These are ready-made corner elements designed precisely for the 10 × 6 mm profile. They allow you to finish the ends of the molding with a decorative ending instead of a straight cut or closed frame. More about compatible elements is in the section below.
Repeating contour on a series of furniture fronts
When you need to design several identical doors — a kitchen set, a built-in wardrobe, a line of drawers — MLDPU-001 molding gives a unified rhythm across the entire furniture wall. The same profile, the same frame proportions, a single color — and disparate fronts turn into a coherent composition.
Where MLDPU-001 cannot be used or is impractical
An honest expert block is more important than beautiful promises. There are situations where MLDPU-001 either won't handle the task or is simply inappropriate.
As the only fastener for glass or mirror. The molding is held by glue and does not bear the load from a heavy insert. Glass or mirror must be fastened structurally — into a groove or on a special holder. The molding can decoratively cover the edge of the glass, but it is not a fixing element.
As a load-bearing frame. The thin 10 mm profile does not form a rigid structure. If the frame must hold something or serve as a skeleton, wooden parts or profiles of larger cross-section are needed.
Instead of a structural layout. If the task is to structurally divide the front, create a recess, or insert different materials, the molding does not replace the layout. These are different products with different functions.
On movable joints and deformable seams. Adhesive mounting holds well on rigid and stable surfaces. On joints that move (for example, between parts assembled without sufficient fastening), the molding may peel off. Before installation, it is important to ensure the surface is stable.
On overly large facades as the only expressive profile. A plane of 800 × 2200 mm with a frame made of a 10 mm wide profile is almost an invisible line. On large surfaces, wider profiles or several levels of framing are needed. In the catalog polyurethane moldings you can choose profiles with greater width for the specific scale of the facade.
Over weak paint or peeling film. Adhesive works correctly only on a clean, durable, and dry surface. If the surface is flaking, has grease contamination, or a film with bubbles, the molding will not adhere reliably. First, the surface is prepared, then the profile is glued.
Near a handle without checking for a free grip. If the frame comes too close to the handle installation point, fingers will press against the molding when opening the door. This is uncomfortable and leads to gradual detachment. Before marking the frame, you should "try on" the handle and check the grip area.
How 10 mm looks in reality: checking the scale before ordering
The photo on the screen lies. A profile that looks like a clear decorative line in a render may turn out to be less noticeable in reality—or, conversely, unexpectedly massive. Before placing an order, it is worth doing a simple check.
Take a strip of thick paper or cardboard exactly 10 mm wide and about 30–40 cm long. This is the visible area of the profile. Apply it to the facade—to a real door or a sheet of MDF of the required size. Step back to a working distance: one to one and a half meters for a kitchen, two meters for a wardrobe in the bedroom.
Now add a mental protrusion of 6 mm—this is easy to imagine by stacking six sheets of standard paper. This is exactly the relief that will be above the facade plane.
Check the profile under side light: turn on a spot light from the side or bring a phone with a flashlight at an angle. This creates the shadow that the molding casts in the interior. A 6 mm relief reads clearly under good side light even on a white facade.
If the frame seems too thin for the selected facade, consider a wider profile from the section polyurethane moldings. If 10 mm looks organic and doesn't get lost — MLDPU-001 is suitable.
After the "trial fitting," evaluate the profile after the intended painting: a molding painted in the facade color visually blends with it and appears thinner. A molding in a contrasting color, on the contrary, reads bolder and more noticeable. If you plan a contrast — take this into account when choosing the width.
How to calculate the number of 2600 mm strips: don't just divide the total length
The most common calculation mistake is to add up all the frame meters, divide by 2.6, and add one strip "just in case." The result is most often incorrect.
A correct calculation takes several factors into account at once.
The lengths of each side of the frame, not just the total perimeter. A frame on a 400 × 700 mm facade has a perimeter of 2200 mm. But it has four sides: two of 400 mm and two of 700 mm. From one 2600 mm strip, you can cut one 700 mm side and one 400 mm side with leftover. The second 700 mm takes another strip. Total: for the frame you need not 0.85 strips (2200/2600), but at least 2–3 strips depending on the cutting order.
Cutting the corners. The standard frame angle is 45 degrees. Each cut loses a triangular piece of material. The wider the profile, the greater the losses. For a 10 × 6 mm molding, the losses per cut are relatively small, but in serial work they add up to whole strips.
Cut width. The tool removes a few tenths of a millimeter per cut. With a large number of cuts, the losses add up.
Test joints. The first cut rarely comes out perfect. Especially if you're working with this profile for the first time. Allow 1–2 "practice" cuts for each type of cut.
The impossibility of joining the visible side from short remnants. For example, if a frame side of 600 mm length is needed, it cannot be made from two 300 mm pieces — the seam will be visible after painting. Remnants shorter than the required part go to waste.
Distribution of long and short parts across whole planks. A correct cutting map allows fitting several parts into one plank without large losses. An incorrect one leads to several planks being insufficient.
Example 1: one small facade 450 × 650 mm with a frame
The frame is offset inward by 40 mm from each edge. The internal frame size: 370 × 570 mm.
Required parts:
- 2 sides of 570 mm (with a 45° cut, the actual length considering the cut is about 590 mm)
- 2 sides of 370 mm (with the cut — about 385 mm)
From one 2600 mm plank:
- Plank 1: 590 + 590 = 1180 mm, remainder 1420 mm (enough for 385 + 385 = 770, remainder 650 mm — goes to waste or reserve).
- Total: 1 plank for the entire facade with a good margin for test cuts.
Recommendation: 2 strips per facade — one working, one safety. This is a reasonable minimum for a single job.
Example 2: a set of six facades for a kitchen cabinet unit
Suppose four facades are 450 × 650 mm and two facades are 450 × 900 mm.
For small facades: 1 strip per each = 4 strips. For large ones (900 mm side with cut ≈ 925 mm):
- One strip provides two sides of 925 mm (total 1850 mm, remainder 750 mm — enough for two short sides of 450 mm).
- Total 2 strips for both large facades (all four long sides), plus 2 more strips for all short sides and spare.
Total: 4 + 4 = 8 working strips + at least 2 safety strips = 10 strips for a smooth series without shortage.
The more often the same size is repeated, the easier it is to optimize cutting. For serial work, always make a cutting plan before ordering — this saves both money and waiting time for re-delivery.
How to combine MLDPU-001 with decorative overlays NPU-438.1L/R
A closed rectangular frame is a standard solution. But sometimes the frame is not closed, leaving it open on one or two sides, adding decorative ends to the molding ends. That is exactly what compatible overlays are for.
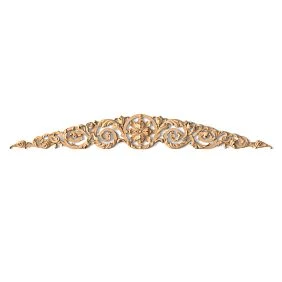
Compatibility with MLDPU-001 has been confirmed paired decorative caps for moldings series NPU-438.1L/R — these are left and right caps designed specifically for a profile with a 10 × 6 mm cross-section.
The application scheme is simple: left element NPU-438.1L — molding strip MLDPU-001 — right element NPU-438.1R. The caps finish the ends of the molding, turning an open profile into a complete decorative line with a neat ending.
Several important rules when working with caps.
Do not choose caps based only on similar width. If the cap profile is designed for a molding 12 or 8 mm wide, it will not fit evenly on MLDPU-001. The joint will be visible, and the relief will not match. Check compatibility by the molding's article number, not "by eye" from photos.
How to check relief matching. A correct cap should continue the curvature of the molding profile without steps or gaps. If there is a gap or protrusion between the cap and the strip end, it is an incompatible element.
How not to confuse left and right sides. The letters L and R in the article number stand for Left and Right. With standard facade orientation, the L cap is placed on the left side, and R on the right. If the facade is rotated or installed non-standardly, the sides may swap. Check orientation before installation, not after.
When a decorative ending is better than a closed frame. An open frame with caps looks organic in situations where the molding runs horizontally across the entire width of the facade without forming a full contour. Or when you need to decoratively finish the top or bottom edge of the facade without side strips. This creates a more modern, restrained effect — without a classic frame structure.
All compatible elements for MLDPU-001 are convenient to view in the filter Decoration for molding MLDPU-001 — only those overlays and elements that are designed specifically for this profile have already been selected.
What to buy together with the MLDPU-001 molding
Molding is not a standalone final product, but a component of a set. The result directly depends on what is purchased together with it.
Table "What to buy together"
| What to add | Why this is needed | What to pay attention to |
|---|---|---|
| Decoration for molding MLDPU-001 — overlays NPU-438.1L/R | Decorative endings for open frames and open ends | Check compatibility with the 10 × 6 mm profile, do not confuse L and R |
| Mounting and finishing materials | Adhesive for attaching polyurethane to MDF, facade, or wall | Clarify the compatibility of the composition with the base material |
| Primer for polyurethane | Surface preparation before painting | Polyurethane requires proper primer for paint adhesion |
| Paint for painting | Finish color of decor | Compatibility with material and primer; water-dispersion or alkyd |
| Putty for joints | Filling corners and gaps before painting | Flexible acrylic or special for decor |
| Painter's tape | Protection of adjacent surfaces during painting | Tape with clear adhesion, leaving no residue |
Each of these elements directly affects the result. A molding glued with an unsuitable compound will peel off at the first effort. A profile not primed before painting will hold color poorly and turn yellow. Joints in corners, not puttied before finishing, will be visible as dark lines.
Before placing an order, it's better to gather the entire set at once so that installation isn't interrupted by searching for missing materials.
Who MLDPU-001 suits, and who should choose a different profile
When MLDPU-001 molding is the right choice
The profile works well for those solving specific decorative tasks.
It suits when a thin, unobtrusive frame is needed on a small or medium facade. For furniture in a modern style, where decor is minimal and precise. For kitchen facades 400–800 mm high, where a wide molding would overload proportions. For dressers and drawers, where horizontal facades require a light accent without heaviness.
This is a choice for craftsmen who make furniture for painting: a single color hides the joint between the molding and the facade, and the result looks like a monolithic piece with relief, not like a glued-on strip.
It suits those who want to transform flat door panels or panels into classic ones—without replacing the entire panel.
It fits organically in interiors with a calm, restrained presentation: Provence, neoclassicism, modern classic, minimalism with accent details.
When to consider another option
If facades are large—height from 900 mm and above—a 10 mm profile on the frame will be barely noticeable. Here, a wider molding is needed. In the catalog polyurethane moldings You can choose profiles with a greater width.
If you need a powerful, voluminous classic frame with several levels of profiles, a thin 10-millimeter molding will look lightweight. Such a facade requires profiles with a width of 20–30 mm and a complex relief.
If the task is to fix glass or a mirror, MLDPU-001 is not suitable. It is a decorative element, not a structural one. You need wooden parts with proper geometry for the glass.
If the interior is loft, industrial, or functional minimalism without extra details, molding on the facade may look inappropriate in principle.
Practical selection: what facade, such a frame
A small kitchen facade 400 × 600 mm. MLDPU-001 is the optimal choice. The frame is shifted inward by 35–40 mm, four parts are cut at 45°, total consumption is 1 plank with a good remainder. With white painting of the facade, the molding gives a thin contour and a light shadow.
A medium wardrobe facade 600 × 1200 mm. A 10 mm profile is possible, but it is better to check the scale in real life before ordering. A frame around the perimeter with a 50 mm indent leaves enough space for the visual work of the profile. If after checking it seems that the line is lost, consider a wider molding.
A horizontal drawer facade 500 × 150 mm. This is where the narrow profile works best. Drawers with a 10 mm frame look neat and proportionate. A wide molding on such a facade will literally fill the entire height.
A wall frame for decor 300 × 400 mm. One of the neatest scenarios. Four planks cut at 45°, contrasting or tinting paint, and an empty wall gets light geometry. Consumption is less than one plank.
A door leaf 800 × 2000 mm. Several MLDPU-001 frames make a flat door "classic". Recommended scheme: one large frame at the top, one at the bottom, separated by a horizontal plank in the middle. Consumption is 3–5 planks depending on the number of frames and the cutting order.
How not to confuse MLDPU-001 with similar products
On the website and in sales, there are several categories of products that are easy to confuse at a quick glance.
Molding vs. glazing bead. A glazing bead is a wooden part for separating glass or decorative inserts. It is thinner, narrower, and often has a special groove. Polyurethane molding has no groove and does not structurally divide the surface.
Molding vs. baseboard. A baseboard is always a horizontal element along the perimeter of the floor or ceiling. Molding is a decorative profile of arbitrary placement: it can run horizontally, vertically, diagonally, or as a frame contour.
Molding vs. cornice. A cornice is formed from several profiles or has a complex cross-section for a ceiling transition. Molding MLDPU-001 is a simple single profile without a complex composite cross-section.
MLDPU-001 vs. wider moldings in the series. The main selection criterion is the width and proportions of the facade. MLDPU-001 is the thinnest profile for tasks requiring a delicate line. Wider profiles provide a heavier, classic pattern.
Polyurethane vs. wood for painting. Polyurethane is more stable under variable humidity, does not warp, and does not crack along the grain. Wood provides a natural texture but requires careful preparation before painting and is more sensitive to operating conditions. For full painting without exposed texture, polyurethane molding performs no worse than wood, and installation is simpler.
Painting the molding: together with the facade or separately
This is a fundamental choice that affects joint quality, repairability, and labor intensity.
Route 1: assemble the molding, prepare the joints, and paint together with the facade
The molding is glued to the facade before painting. Corners are puttied with a flexible acrylic compound, and excess is removed. After drying, the entire assembly — facade plus molding — is primed and painted with a single coat.
Pros: maximum color uniformity, no visible glue line, the joint between the molding and the facade is completely hidden under the paint. The result looks like a single piece with relief.
Cons: if the molding peels off after a year or gets damaged, repair will require repainting the entire facade. The color with spot touch-up will almost certainly not match.
Route 2: paint the molding separately and install it after the final facade finish
The facade is painted and dries completely. The molding is painted separately in the same color. After both parts are fully dry, the molding is glued onto the finished facade.
Pros: if the molding is damaged, it can be removed and replaced with a new one without repainting the facade. Repairability is significantly higher.
Cons: even with the same paint color, different batches and different application conditions produce barely perceptible tone differences. The glue line between the molding and the facade may be visible, especially with contrasting or saturated colors.
Recommendation. For serial furniture and commercial projects where repairability is important, the second route is better. For one-off pieces with custom painting, where a monolithic look without visible joints is needed, the first one is better.
Typical mistakes when choosing and buying MLDPU-001
Buying it as a glazing bead to hold glass. Already discussed above, but it's worth repeating: polyurethane molding does not hold glass. If fixation is needed, that's a different product.
Count only the total footage, not accounting for cutting. Divide the total perimeter of all frames by 2.6 — this is an underestimated calculation. The actual consumption is always higher due to the order of parts, cuts, and test cuts.
Do not check the 10 mm scale on the actual facade. The on-screen image is not a 1:1 scale. A simple check with a paper strip takes three minutes and saves you from mistakes.
Place the frame too close to the edge of the facade. The minimum offset is about 30–40 mm. Less than that — the frame visually "gets eaten" by the edge, looks unstable, and leaves a risk of chipping during installation.
Do not leave space for the handle. A frame passing through the grip area makes the door inconvenient to use and leads to gradual detachment of the profile.
Order overlays of an incompatible profile. Overlays are selected strictly by the molding article number. Elements that are similar in shape but designed for a different width will not provide a smooth joint.
Paint the molding and facade with mismatched compounds. If the facade is coated with alkyd enamel and the molding with water-dispersion paint, the difference in gloss will be noticeable in thin light. The finishing compound must be coordinated in advance.
Make a short joint in the center of the visible side of the frame. If the required length of the part is greater than the available remainder, and there is no new piece — do not assemble the required side from two pieces. The seam in the center of the visible part will be noticeable after painting. It is better to order a new strip.
Choose glue without checking the base. MDF, plywood, drywall, tile, enameled metal — each base requires its own compound. For polyurethane, a proven mounting adhesive compatible with the specific base is recommended. Universal "all-purpose" compounds often provide insufficient adhesion precisely on smooth painted surfaces.
Do not save the article number and frame diagram. In a year, when a new door or repair is needed, searching for a "similar profile" from memory leads to the wrong choice. Save the article number MLDPU-001, frame dimensions, and overlay placement. This takes a minute but saves hours on reordering.
Selection for different customer tasks
Different customers come to molding with different needs. Here's how MLDPU-001 fits into each of them.
A craftsman assembling furniture for painting. Polyurethane molding is the optimal choice: the material is stable, easy to cut, and paints well with proper priming. MLDPU-001 provides a thin line that doesn't weigh down the facade and works in any style.
A kitchen owner who wants to update facades without replacement. Glued molding + repainting facades is one of the most affordable ways to radically change the look of a kitchen. MLDPU-001 works great on 400–600 mm facades.
An interior designer selecting details for a project. The 10 × 6 mm profile is a delicate accent that doesn't compete with furniture or overload the space. It pairs well with classic, neoclassical, and restrained modern interiors.
A builder decorating wall panels. The molding easily adheres to MDF panels, drywall, and smooth plaster. When painted in the wall color, it creates architectural lines without complex finishing.
A furniture manufacturer looking for serial decor. Compact size, uniform length of 2600 mm, stable profile — this is convenient for serial cutting. The cutting plan is prepared in advance, waste is minimized, and the result is predictable.
How to buy MLDPU-001 molding on the STAVROS website
Purchasing shouldn't be complicated, but a few steps are worth following in sequence.
Step 1. Open the product page and check the profile. Go to the product page to buy molding MLDPU-001. Make sure you're looking at the 10 × 6 × 2600 mm profile. Check current availability.
Step 2. Check the scale of 10 mm in reality. Before placing an order, do a physical fitting with a paper strip as described above. This takes three minutes but eliminates disappointment upon receipt.
Step 3. Create a cutting map and calculate the number of planks. Don't just divide the total length. Break it down by parts: how many of each length, in what order they fit into a 2600 mm plank. Add a margin for test cuts and inevitable losses.
Step 4. Select compatible decor if needed. If the frame will be open-ended or decorative endings are required, open the section Decoration for molding MLDPU-001 and choose suitable overlays NPU-438.1L/R considering the orientation.
Step 5. Gather mounting and finishing materials. In the section Mounting and finishing materials find adhesive, primer, and, if needed, putty for joints. Choose the composition based on the base material — MDF, chipboard, drywall, or other material.
Step 6. Clarify delivery and payment terms. Current terms are on the page payment and delivery terms. Check before placing an order, especially if ordering multiple items at once.
If you have questions about compatibility, calculation, or configuration, STAVROS managers can help select the necessary elements. It's better to clarify in advance than to discover a mismatch after receiving the order.
FAQ: questions buyers ask about MLDPU-001
1. How does decorative glazing bead differ from window glazing bead?
Structural window glazing bead holds the glass mechanically — it is inserted into the groove and presses the glass against the frame. Decorative molding MLDPU-001 is attached with adhesive and does not bear the load from the insert. It creates a thin relief line rather than fixing the glass. These are fundamentally different products with different functions, despite the everyday coincidence of names.
2. Can polyurethane molding be used to secure glass?
No. Polyurethane molding is not a structural element. If you need to hold glass or a mirror, use a wooden glazing bead with groove seating or special holders. MLDPU-001 can be used as a decorative element over already secured glass — it will cover the edge and create a finish, but it will not hold the insert by itself.
3. How to check if the 10 mm width suits my facade?
Cut a strip of paper 10 mm wide and apply it to the actual facade. Step back to a working distance. If the line looks organic — the profile fits. If it gets lost — consider a wider molding. Perform the check under the lighting in which the facade will be used.
4. How many MLDPU-001 strips are needed for one facade?
It depends on the facade size and frame. For small facades (400–600 mm in height), 1–2 strips are usually enough. For a series of facades, create a cutting map: lay out parts across strips considering lengths and cuts. Add at least 1 spare strip for complex or non-standard work.
5. Can the molding be cut with a regular hacksaw?
Polyurethane cuts well. For straight cuts, a fine-tooth wood hacksaw is suitable. For a 45° miter cut, it is better to use a miter box or a miter saw — this ensures angle accuracy, which directly affects the quality of the joint at frame corners.
6. What adhesive should be used to glue molding to an MDF facade?
Use a mounting adhesive compatible with polyurethane and MDF. Before applying the adhesive, ensure the surface is clean, dry, and degreased. If the facade is painted, additionally check the adhesive's compatibility with the paint type — some acrylic coatings provide weak adhesion for mounting compounds. Specific compounds are in the section Mounting and finishing materials.
7. How to paint molding together with the facade so that the joint is not visible?
Glue the molding, let the adhesive set. Fill corners and gaps with acrylic putty, level it out. After drying, sand with fine-grit sandpaper. Prime the entire assembly. Apply the finish paint — two thin coats are better than one thick one. With proper preparation, the joint between the molding and the facade will be nearly invisible.
8. How to connect molding with NPU-438.1L/R overlays?
First, determine the orientation: the left overlay is placed on the left side of the strip, the right one on the right. The end of the molding is cut at 90° (straight cut). The overlay fits to the end, align the reliefs. With proper profile compatibility, the transition should be smooth without steps. Glue the overlay with the same mounting compound. More about choosing overlays — in the material about paired decorative overlays for moldings.
9. How to calculate molding for a series of six identical doors?
Create a cutting plan for one door, then multiply by six — but not by length, but by the actual number of strips considering the order of parts. Add 2 safety strips per series. This will protect against shortages in case of unsuccessful cuts.
10. Why should molding be primed before painting?
Polyurethane is a smooth material with low adhesion without preparation. Without primer, paint adheres poorly, scratches quickly, and may peel. Primer creates an adhesion layer between polyurethane and the finish paint. This is a standard step that cannot be skipped.
11. Can MLDPU-001 be used in a bathroom?
Polyurethane is resistant to humidity. However, if it involves constant direct contact with water or areas with high vapor load (directly above a shower), it is important to ensure reliable adhesive bonding to the base and paint resistance to moisture. In dry bathroom zones, hallways, or kitchens, the molding works without restrictions when properly finished.
12. How to store leftover MLDPU-001 strips until next use?
Horizontally, in a dry place protected from direct sunlight. Polyurethane may yellow under prolonged UV exposure. Horizontal storage prevents deformation from its own weight.
Summary: a thin profile that requires precise application
MLDPU-001 is not a universal construction glazing bead or a structural part for fixing glass. It is a neat decorative polyurethane profile with a cross-section of 10 × 6 mm and a length of 2600 mm per strip. It creates a thin relief line that turns a flat facade into a framed one, covers joints, sets the rhythm of a series of furniture doors, and works well on walls, doors, and decorative panels.
Understanding the profile's function is already half of making the right choice. The rest is accurate calculation of the number of strips, checking the scale in reality, proper selection of mounting compound and finish, and, if necessary, compatible NPU-438.1L/R overlays.
It is better to assemble the order as a kit: molding, adhesive, primer, and, if necessary, decorative ends. This saves time and eliminates forced pauses in work due to missing materials.
If you want to see the profile and check availability, go to the product page to buy molding MLDPU-001The same section also lists current specifications and compatible elements. If the task involves choosing between several profiles by width, the section polyurethane moldings will provide a complete overview of the STAVROS assortment for comparing options.