Article Contents:
- Polyurethane bracket: price and selection
- What determines the price of a polyurethane bracket
- Size: the main pricing factor
- Relief depth and shape complexity
- Purpose: facade or interior
- Coating and preparation for painting
- Number of items in the order
- Combining with Other Decorative Elements
- Where polyurethane brackets are used
- On the facade
- In interior
- Part of stucco decoration
- Facade or decorative bracket: which to choose
- Bracket for cornice: a special scenario
- Bracket for fireplace area
- Polyurethane bracket in a neoclassical interior
- Polyurethane bracket and painting: how it works
- How to choose a bracket before ordering: a checklist
- Mistakes when choosing brackets: case analysis
- Bracket and facade decor system: how they work together
- Bracket installation: the essentials in brief
- FAQ: direct answers to the main questions
- FAQ: direct answers to key questions


Polyurethane bracket: price and selection
Architecture knows how to hide its heroes. The cornice is in plain sight. The molding is in plain sight. Even the ceiling rosette gathers admiration. But the bracket stands in the shadows — literally and figuratively. It supports the cornice from below, holds up a shelf, completes a portal, frames a window opening. And it remains unnoticed — until it is absent.
The absence of a bracket is immediately felt: the cornice hangs in the air without support, the facade looks unfinished, the interior zone loses its architectural logic. One correctly selected Polyurethane bracket solves this task — quickly, precisely, without unnecessary costs.
Polyurethane bracket: price, types, purpose, selection for a specific facade or interior — all in one article. No fluff, no general phrases, with numbers and specific recommendations.


What determines the price of a polyurethane bracket
Size: the main pricing factor
Our factory also produces:


Size: the main pricing factor
Polyurethane brackets are cast products. Larger size means more material, longer production cycle, and higher weight. A small bracket 100×80 mm for interior use and a monumental facade bracket 400×300 mm are different categories with different prices. There are no exceptions here.
Practical conclusion: if the budget is limited, do not try to save by reducing the number of brackets. It is better to choose a smaller size that fits organically in the desired area than to install one large bracket where three medium ones are needed.
Get Consultation
Depth of relief and complexity of shape
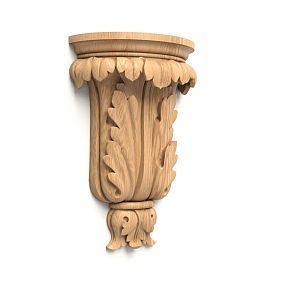
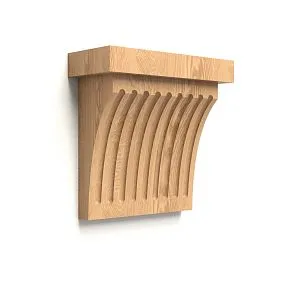
A smooth bracket with minimal ornamentation is cheaper than a bracket with three-level relief, acanthus leaves, and baroque detailing. This is not a question of polyurethane quality—it is a question of mold manufacturing labor intensity and casting complexity.
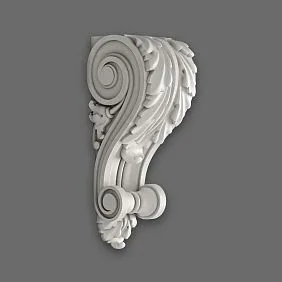
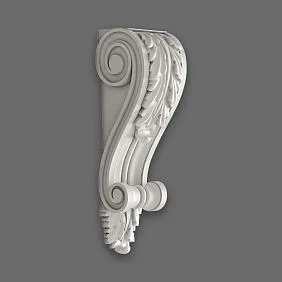
A simple geometric profile has one price. A bracket with an S-shaped volute scroll, deep floral ornament, and detailed base has another. For a classic facade and interior, this difference is justified: complex relief creates a play of light and shadow that makes the decor come alive.
Purpose: facade or interior
Facade polyurethane bracket requires higher material density—it operates under conditions of variable humidity, ultraviolet radiation, and temperature fluctuations from −30°C to +50°C. The standard for facade polyurethane is a density of at least 500 g/l with a closed-cell structure.
An interior bracket can be made from polyurethane of slightly lower density—this is reflected in the price. For indoor use, this is acceptable: stable microclimate, protection from precipitation, and no direct ultraviolet exposure.
It is important not to confuse these categories. Using an interior polyurethane bracket on an open facade is a mistake that will become apparent after the first winter.
Coating and preparation for painting
Bracket without coating — base price. Bracket with factory primer for painting — slightly more expensive, but much more convenient during installation. Ready-made finish painting in a specific RAL — even more expensive.
Most buyers purchase polyurethane brackets without coating and paint them on-site, coordinating with the overall color scheme of the facade or interior. This is a common practice: polyurethane accepts any paints — acrylic, alkyd, latex — provided it is primed beforehand.
Number of items in the order
Wholesale purchases typically come with a discount. For a project with dozens of brackets on one facade or for serial furniture production, the total price for a set will be lower than the sum of individual purchases.
For those who are putting together a complete system of facade or interior decor — Moldings for walls, decorative elements, Polyurethane trim plus brackets — this is already a comprehensive order, where the price of each item is more favorable.
Combination with other decorative elements
A bracket bought separately is one thing. A bracket as part of a decorative system is another. When Polyurethane brackets ordered together with cornices, moldings, and overlays from a single collection — this is a complete order, in which the supplier can offer more flexible terms.
In practice, this means the following: before purchasing a bracket, it is wise to first determine the full composition of decor for the area — cornice, molding, decorative elements — and buy everything together, rather than item by item.
Where polyurethane brackets are used
On the facade
Polyurethane facade brackets are a working tool of classical architecture. Historically, a bracket (from German Kragstein — protruding stone) performed a structural function: it was a stone projection supporting a cornice. In modern architecture, the structural function has shifted to load-bearing structures, but the decorative function remains and has acquired new meaning.
A polyurethane facade bracket is used in the following areas:
Support for interfloor cornices. A cornice separating the first and second floors of a classical facade receives rhythmic support from below — brackets are placed at equal intervals, creating a modular ornament. The spacing is typically a multiple of the window span width: one bracket in the center of the window or two brackets at the edges.
Design of the crowning cornice. The top cornice of the facade is the largest and most decoratively rich. Facade brackets here are often large, with intricate relief, becoming visual accents visible from afar.
Design of window openings. Above each window or on the sides of a window pediment, brackets create the effect of "support" for the archivolt or straight lintel block. This is an architectural imitation of a load-bearing function — and a very convincing one.
Entrance groups and portals. Above entrance doors, under the canopy, on the sides of the portal — brackets complete the decorative program of the main facade element.
Balconies and bay windows. A balcony slab or bay window projection needs decorative "support" — a row of brackets along the lower plane creates this effect.
All of this works within the framework of classical, neoclassical, and historicist architecture. For modern minimalism, the bracket as an element is inorganic — there are different rules of the game.
in the interior
A decorative polyurethane bracket in the interior is a more subtle matter. Here it does not imitate a load-bearing function — it creates an architectural accent where needed.
Fireplace zones. The shelf above the fireplace (mantel shelf or mantel) is often supported by decorative brackets on the sides. This provides both visual support and a transition from the portal to the shelf. For a classic fireplace, a bracket with an acanthus leaf or volute. For a more restrained one, a geometric profile.
Door and archway portals. An arch or rectangular portal with columns or pilasters on the sides naturally ends with an entablature — and brackets at the bottom of this entablature create the necessary architectural weight.
Decorative beams. In interiors with decorative wooden or polyurethane beams, brackets imitate the support points of these beams on the wall. The effect is convincing, installation is simple.
Wall shelves in a classic interior. An open shelf for books, vases, or decorative items in a classic or neoclassical interior looks organic only when supported by decorative brackets. A smooth metal bracket here is a foreign element.
Fireplace zones and column groups. When designing an area with columns or pilasters, brackets are installed at the transition points of the entablature — above the capital and along the lower edge of the architrave. This is a complex scenario requiring an understanding of the order system.
For interiors with a full set of polyurethane decor — Moldings, decorative elements, rosettes, Trim — brackets become part of a unified decorative program. One material, one processing style, the same reaction to painting. This is important for consistency of the result.
As part of stucco decor
Bracket stucco made of polyurethane — this is a formulation that accurately describes the nature of the product. A polyurethane bracket is part of stucco decor, it belongs to the same family of products as cornices, moldings, rosettes, overlays.
All Polyurethane moldings works as a system: the cornice sets the horizontal line, the molding divides the wall, the rosette places a point on the ceiling, the bracket creates rhythmic support along the lower plane of the cornice. Removing the bracket from this system means breaking the rhythm. Leaving only brackets without a cornice means creating a decorative orphan element that has no clear reference.
The correct approach: first, the entire decorative program of the zone is designed (wall, ceiling transition, cornice, moldings, brackets, molding decorative elements), then each element is selected from the catalog taking into account the consistency of styles and proportions.
Facade or decorative bracket: which to choose
A direct question — a direct answer. The table below summarizes the key differences:
| Bracket type | When to use | Comment |
|---|---|---|
| Facade bracket | For exterior decor | Important: size, polyurethane density, and coating for painting |
| Decorative bracket | For interior, fireplace zones, portals | Selected to match the room's style and ornamental program |
| Bracket for cornice | For interfloor and crowning cornices | Works on classical and neoclassical facades |
| Bracket for portal | For doorways, arched openings, fireplaces | Enhances the architectural accent of the entrance area |
| Bracket for painting | For custom finishing | Adapts to any facade or wall color |
There is an important nuance: the boundary between "facade" and "decorative" brackets in the catalog is not always rigid. Many models from the STAVROS catalog work both outdoors and indoors — provided the correct coating is applied. The determining factor is the density of the polyurethane and the protective coating used, not the shape of the product.
If the bracket will be placed on a facade in a climate zone with severe frosts, check the operating temperature range with the manufacturer. Polyurethane with a density of 500+ g/l withstands down to -40°C without deformation. Lighter polyurethane may develop microcracks during sharp temperature changes.
Bracket under the cornice: a special scenario
A cornice is a horizontal protruding element. Along its lower plane, brackets create rhythmic support. This is one of the most common application scenarios.
How to properly select a bracket for a cornice:
Proportion. The height of the bracket should be 0.6–0.8 of the cornice height. A bracket that is too small under a large cornice is a decorative conflict. A bracket comparable in height to the cornice or exceeding it is another conflict.
Protrusion depth. The bracket should extend forward approximately as much as the lower plane of the cornice. A deep cornice requires a bracket with a corresponding protrusion depth.
Rhythm. The spacing between brackets is a design decision tied to the modular grid of the facade. Typically: one bracket per window axis (centered), or two brackets at the edges of each window opening. Asymmetric rhythm without logical connection to windows is a mistake.
Style coordination. A bracket with a volute and acanthus under a strict profile cornice is a mismatch. A geometric cantilever bracket under a Baroque cornice with rich ornamentation is another mismatch. Styles must match.
Full range polyurethane brackets The STAVROS catalog is structured by size and style, allowing you to select the required size for a specific cornice without lengthy searches.
Bracket for the fireplace area
A separate and very telling story is the fireplace bracket. The fireplace portal is the architectural frame of the fireplace: pilasters or columns on the sides, an entablature with a shelf on top. It is a complete miniature order system within the interior.
Brackets in the fireplace area are installed:
-
Under the fireplace shelf — as visual support;
-
At the junction of the pilaster and entablature — as the completion of the capital;
-
On the sides of the mirror above the fireplace shelf — as side accents.
The fireplace area often becomes the central decorative focus of the living room or study. Here, you cannot make a mistake in choosing a bracket. Rule: everything that works on the fireplace must be coordinated into a single ensemble.
For those who are building a complete decorative program for the fireplace area — decorative polyurethane elements и Elements for moldings the STAVROS catalog allows you to select the entire set in a single style key.
Polyurethane bracket in a neoclassical interior
Neoclassicism is one of the most actively developing styles in modern interior design. It is not heavy imperial baroque or cold academicism — it is a light, airy interpretation of classical forms with modern materials and proportions.
A decorative polyurethane bracket in a neoclassical interior is an appropriate and often indispensable element. It appears:
-
In the transition zone from wall to ceiling — under the profile cornice;
-
In illuminated niches — as a side decorative accent;
-
In library areas — under hanging shelves;
-
In hallways with column groups — as a connecting element of the entablature.
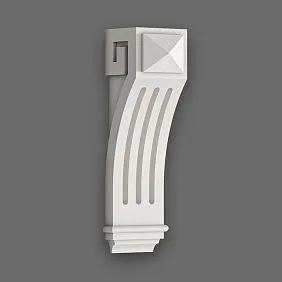
For neoclassicism, the right bracket is moderate relief, clean lines, without the excessive decorativeness of baroque. A volute curl without acanthus leaves, a geometric console profile, a restrained S-shaped curve — these are the forms that are organic in a neoclassical space.
Full range polyurethane products STAVROS covers both poles — restrained neoclassicism and rich baroque — which makes it possible to select an element for a project of any stylistic register.
Polyurethane bracket and painting: how it works
One of the most common practical questions. A polyurethane bracket for painting is not a difficult task if you follow a few simple rules.
Step 1: Degreasing. Before priming, the polyurethane surface must be degreased with a solvent (white spirit, 646) — to remove any residue of the mold release agent used during casting.
Step 2: Priming. Apply 1–2 coats of acrylic primer. The primer fills micro-pores on the surface and ensures adhesion of the topcoat. Without primer, the paint may peel.
Step 3: Topcoat. Use acrylic or alkyd paint. For exterior use — exterior acrylic paint with UV protection. For interior — any interior paint in the chosen RAL color.
Step 4: Varnish (if necessary). For interior brackets in high-humidity areas (bathroom, kitchen) — apply a final coat of acrylic varnish for extra protection.
Important: if the brackets are purchased for the facade and will be exposed to direct sunlight for years — choose only facade paints with UV stabilizers. Interior paint on the facade will fade within one season.
Color? Classic — white (RAL 9010 or 9016). For a light beige facade — warm white or ivory. For a colored facade — a matching or contrasting color, according to the project's design code. A decorative bracket indoors can be painted the same color as the wall (to blend in) or an accent color (to stand out as an independent decorative element).
How to choose a bracket before ordering: a checklist
A ready-made tool — read it once and use it every time you make a choice:
-
Determine the installation location. Facade or interior? Under a cornice, near a portal, in a fireplace area, under a shelf, or at a beam?
-
Measure the area. Height from the bottom plane of the cornice to the surface (for under-cornice brackets). Width of the opening or portal (for marking symmetry). Depth of the cornice or shelf overhang.
-
Select the format. Facade or interior. Large accent or small rhythmic.
-
Match with the cornice. Style, relief, proportions must align. For selection, refer to Polyurethane moldings and cornices in the same catalog.
-
Check the projection depth. A bracket with insufficient projection depth under a cornice with a large overhang looks "sunken" and loses its purpose.
-
Choose the relief style. Baroque ornament, classic volute, geometric console, restrained neoclassicism — choose according to the style of the space.
-
Clarify the painting possibility. All polyurethane brackets from the STAVROS catalog can be painted. Only clarify: whether primer from the supplier is needed or you prime yourself.
-
Calculate the quantity. Step × length of zone = quantity. Add 5–10% reserve for cutting and installation adjustments.
-
Check the symmetry. Brackets must be symmetrically aligned with architectural axes — window, door, column. Chaotic placement disrupts the rhythm.
-
Consider the entire decor set. Brackets + cornice + moldings + Decorative Inserts + Trim — this is a system. Purchase as a set.
Ошибки при выборе кронштейнов: разбор по делам
Не теория — практика. Вот что случается, когда выбор сделан без должного внимания.
Покупают без замера. «Мне нужен кронштейн под карниз» — без размеров карниза, без высоты зоны, без понимания глубины выступа. Результат: кронштейн приходит, оказывается либо слишком мелким, либо слишком крупным.
Не учитывают глубину выступа. Карниз с выступом 150 мм и кронштейн с выступом 60 мм — визуально кронштейн «тонет» под карнизом. Глубина выступа кронштейна должна быть соразмерна глубине карниза.
Смешивают стили лепнины. Кронштейн в стиле барокко с пышным акантом + карниз в стиле ампир с геометрическим меандром = декоративный конфликт, который бросается в глаза каждому, у кого есть базовое понимание ордерной системы. Стили должны совпадать.
Не согласуют с карнизом и молдингами. Кронштейн, купленный от одного поставщика, карниз — от другого, молдинг — от третьего. У каждого свои пропорции, свои профили, своя стилевая «акцентность». На стене или фасаде это несоответствие видно.
Берут слишком мелкий элемент для крупного фасада. Маленький кронштейн под большим карнизом большого дома — декоративная несоразмерность, похожая на бант на взрослом мужчине. Масштаб кронштейна должен соответствовать масштабу здания.
Не продумывают окраску. Купили, поставили в белом заводском цвете на серый фасад. Или поставили без финишной окраски вообще. Полиуретан без защитного покрытия на улице — это снижение срока службы в разы.
Считают цену за штуку, не за систему. «Вот здесь кронштейн на 200 рублей дешевле». Но этот кронштейн другого профиля, другого стиля, другого производителя — и в итоге весь декор не складывается в ансамбль. Экономия в 200 рублей оборачивается переделкой всей зоны.
Bracket and facade decor system: how they work together
A classic facade is not a set of individual details. It is a system of interconnected architectural elements, each supporting the meaning of the other.
The complete composition of the decorative program of a classic facade:
-
Base cornice — horizontal division above the base;
-
Interfloor cornice with brackets — visual division of floors;
-
Window architraves with keystones and sandriks;
-
Pilasters or semi-columns with capitals — vertical accents;
-
Crowning cornice with brackets — final horizontal completion;
-
Pediment above the central risalit — if present;
-
Polyurethane trim — profile rods, borders, strips;
-
Decorative Inserts — medallions, locks, corner overlays;
-
Moldings — horizontal profile rods.
Brackets in this system are a rhythmic element that appears in two or three horizontal zones of the facade. Their size, style, and relief must be coordinated along the entire vertical. The brackets of the crowning cornice can be larger and richer than the brackets of the interfloor cornice — there is architectural logic in this: the higher, the more solemn.
This entire set of elements is present in the assortment polyurethane products from STAVROS — the manufacturer provides the ability to assemble a complete decorative system from a single source.
Bracket installation: the main points briefly
Installing a polyurethane bracket is a simple operation. Main steps:
Marking. Mark the axis of the cornice or shelf on the wall. Mark the bracket positions along the marking with the required spacing. Check symmetry relative to window and door axes.
Surface preparation. The wall or facade must be clean, free of dust and grease stains. Old paint that may peel off should be removed or primed with a binder.
Applying glue. Acrylic glue (liquid nails or mounting acrylic) is applied to the back surface of the bracket. For heavy large brackets — an additional dowel through a through hole in the lower part.
Pressing and fixing. The bracket is pressed against the wall and held until the glue initially sets. For large heavy products — temporary fixation with masking tape or wedges.
Finishing. The joints between the bracket and the wall are filled with acrylic sealant, and after drying, they are painted.
For facade installation, stainless steel or galvanized fasteners are mandatory. Black metal causes rust, which seeps through the polyurethane and leaves unsightly streaks on the wall.
Where to order polyurethane brackets
STAVROS manufactures Polyurethane brackets with prices ranging from 1,370 to 17,310 rubles per piece depending on the model. The assortment includes more than ten models of different sizes and styles, from small interior to large facade ones. Full catalog polyurethane decor allows you to assemble a complete decorative system from a single source: moldings, cornices, brackets, Decorative Inserts, Elements for moldings, Trim.
Delivery across Russia and the CIS, showrooms in Moscow and St. Petersburg — for those who want to assess the size and relief of products before ordering. Individual consultations on selection and quantity calculation — upon request.
FAQ: direct answers to the main questions
What determines the price of a polyurethane bracket?
Size, shape, depth of relief, purpose (facade or interior), coating, and quantity of items in the order. The price range in the STAVROS catalog is from 1,370 to 17,310 rubles per piece.
Where are facade polyurethane brackets used?
Under interfloor and crowning cornices, above window openings, in entrance groups and portals, under balcony slabs. Everywhere where decorative "support" of a horizontal protruding element is needed.
How is a decorative bracket different from a facade bracket?
A facade bracket is designed for external conditions: dense polyurethane, protective coating, stainless steel fasteners. A decorative one is more often used in interiors: fireplace areas, portals, beams, shelves. The shape and relief can be identical — the difference is in the material and coating.
Can polyurethane brackets be painted?
Yes. Degrease — prime with acrylic primer — apply finish paint. For the facade — facade paint with UV protection. For the interior — any. Color — as chosen.
How to choose the bracket size?
The height of the bracket is 0.6–0.8 of the cornice height. The depth of the projection is proportional to the cornice overhang. The spacing is tied to the modular grid of the facade or the width of the interior zone. Symmetry is mandatory.
What to combine the bracket with in a decorative system?
With cornices, moldings, linear profiles, and decorative overlays from the same range. The entire set is from one source, in the same stylistic key. This is how a cohesive architectural decor is formed, not a set of random details.