Article Contents:
- Procurement card instead of catalog: how a professional workshop works
- What is included in a classic furniture set: full list
- Procurement starts with the type of furniture
- Wooden elements: where wood is indispensable
- Furniture handles: daily contact requires material
- Furniture legs: they determine height and character
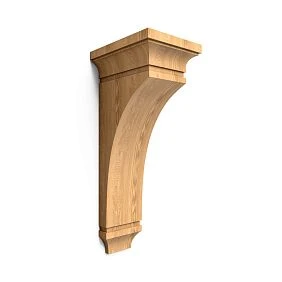
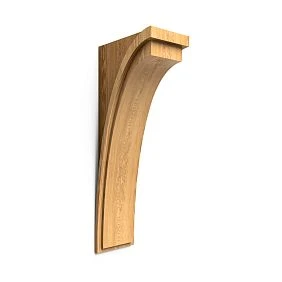
- Decorative brackets
- Wooden decor and carved overlays for facades
- Wooden moldings for facades: frame system made of solid wood
- Solid wood moldings: glazing bead, layout, batten
- Polyurethane elements: where relief matters more than strength
- Polyurethane moldings for facades: frames for painting
- Polyurethane overlays: decorative accents without the weight of wood
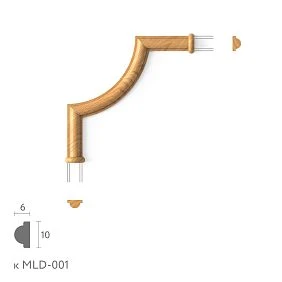
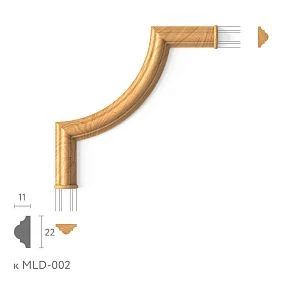
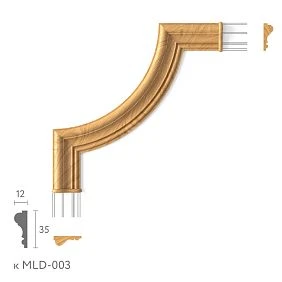
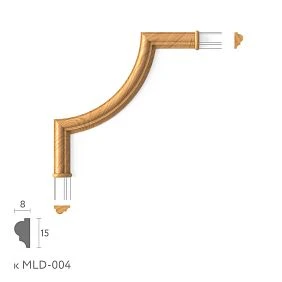
- Molding decor: clean corners of facade frames
- Furniture cornice part: upper polyurethane band
- Kits for specific products
- Kit for a classic wardrobe
- Kit for a classic chest of drawers
- Kit for a sideboard
- Classic kitchen facade kit
- Console kit
- Built-in wardrobe kit
- How to create a purchase map: a practical checklist
- Step 1 — Product type and number of facades
- Step 2 — Style and finish
- Step 3 — Choosing handles
- Step 4 — Choosing legs
- Step 5 — Moldings: facade layout
- Step 6 — Overlays
- Step 7 — Cornice and upper belt
- Step 8 — Mounting materials
- Separation of wood and polyurethane: zone table
- Errors in configuring classic furniture
- Buy handles after marking the facades
- Choose moldings without door dimensions
- Forget the allowance for trimming moldings
- Mix wood and polyurethane without a single final paint
- Place polyurethane decor in the active grip zone
- Not consider the facade thickness when choosing a molding
- Not ordering fasteners in advance
- Choosing decor without a unified style concept
- Coatings: when wood and polyurethane must match
- Complete order checklist for a furniture workshop
- STAVROS: partner of a furniture workshop
- Frequently Asked Questions

Procurement card instead of a catalog: how a professional workshop works
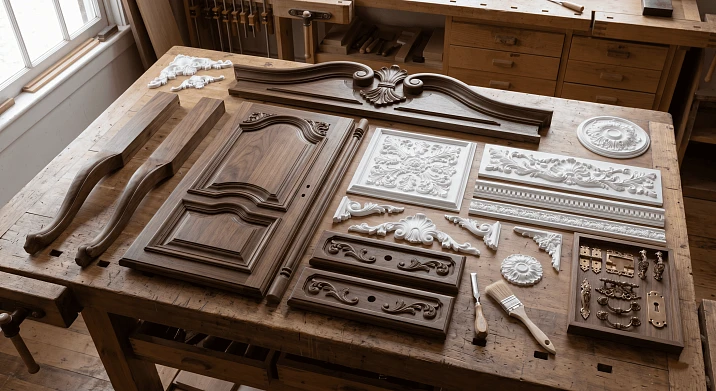
A workshop that makes custom classic furniture faces the same problem: the fronts are ready, the body is assembled — and then it turns out that the handles haven't been ordered yet, the moldings were chosen hastily, and the decorative overlays arrived with the wrong profile. The project stalls.
This is not a production problem. It's a procurement problem. Classic furniture is not a monolithic product that comes entirely from one material. It's a system: wooden load-bearing and tactile parts, polyurethane decorative elements, fasteners, glue, finishing materials. All of them must be selected and ordered before production begins — not after.
This article is a procurement card for a furniture workshop and a designer who assembles a classic-style furniture order. Here's what to buy, in what order to think about the selection, how to separate wood and polyurethane by application zones, and how not to stop the project midway.




What's included in a classic furniture set: a complete list
Let's start from the end — with what should be in the basket before production begins.
Wooden elements:
-
wooden furniture handles — for all doors and drawers;
-
Furniture Legs and Supports — for products with legs;
-
Decorative brackets — for consoles, shelves, side supports;
-
Wooden decor and overlays — carved facade elements;
-
Wood moldings for furniture — frame profiles for facades;
-
Pogonazh iz massiva — glazing bead, layout, architraves, transition profiles.
Polyurethane elements:
-
Moldings made of polyurethane — facade frames for painting;
-
Polyurethane appliqués — decorative facade accents;
-
Decor for Molding — corner inserts;
-
Polyurethane moldings — cornice parts, upper belt;
-
Polyurethane wall decor — elements of furniture side panels.
Installation and finishing materials:
-
Fasteners for wooden elements — screws, handle backplates, leg ties;
-
Polyurethane mounting adhesive — adhesive selection;
-
Acrylic sealant — for finishing joints;
-
Primer — for painting polyurethane elements;
-
Paint — water-based or enamel, matching the facade;
-
Varnish or oil — for wooden elements with an open texture;
-
Spare profile and trims — 10–15%.
The main setup for a workshop: furniture components are not something you pick up at the end. They are what determine the design and production technology from the very beginning. Handles dictate the layout of facades. Legs determine the height of the product. Moldings set the rhythm of the facade plane. All of this must be known before the first board is taken.
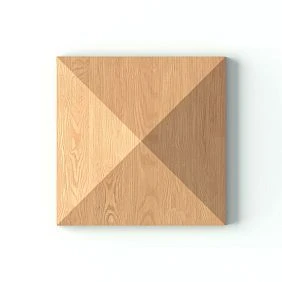
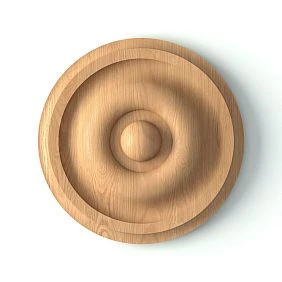
Our factory also produces:
Procurement starts with the type of furniture
Before diving into specific details — you need to determine what exactly is being produced. Because furniture components they differ not only in type but also in purpose.
| Furniture type | Priority elements |
|---|---|
| Cabinet | Handles, facade moldings, top cornice, overlays |
| Commode | Legs, handles, central overlays, facade frames |
| Buffet | Cornice, glazing bead, handles, overlays, side moldings |
| Display case | Glazing bead, handles, millwork, overlays |
| Console | Supports, brackets, decorative overlays |
| Kitchen fronts | Handles, moldings, overlays, fasteners, primer, paint |
| Desk | Legs, drawer handles, decorative overlays |
| Cabinet | Legs, handles, overlays, moldings |
| Built-in wardrobe | Moldings, cornice, millwork, architraves, handles |
This is not a rigid scheme — it's a navigator. Start with the furniture type, identify priority categories, then detail each of them.
Get Consultation
Wooden elements: where wood is indispensable
Furniture handles: daily contact requires the right material
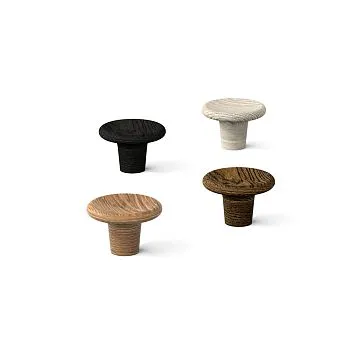
wooden furniture handles — is a part touched hundreds of times a day. It must be pleasant to the touch, withstand constant mechanical stress, and maintain its geometry for many years. Wooden handles made of solid beech meet all three requirements.
The STAVROS range includes 32 models of wooden furniture handles. These are surface-mounted handles made using 3D milling. Four finish options: white, black, brown, clear lacquer. Each model is a separate milled profile, from strict rectangular to classic shaped.
Production logic: handles are selected before marking the facade. Why? Because the diameter of the mounting hole and the distance between fastening holes depend on the specific handle model. If the handle is ordered after the facade has been drilled, you may get a mismatch that cannot be fixed.
Parameters for choosing a handle for classic furniture:
-
Handle length — for doors 60 × 60 cm and above, a handle length of 100–160 mm is recommended; for drawers — 80–120 mm;
-
Profile height — for furniture with rich decor, deep molding relief — a handle with a pronounced shaped profile; for restrained neoclassicism — rectangular or minimalist;
-
Finish — white or cream lacquer for furniture to be painted; brown or clear — for furniture in natural or tinted wood.
Furniture legs: they determine height and character
wooden furniture legs This is not a technical support. It is the first part a person sees when entering a room: because the eye first slides down — to the floor, to the legs, to the base. The right leg makes a sofa "French", a chest "antique", and a cabinet "classic."
STAVROS legs are turned solid wood pieces with classic profiles: cabriole (curved with a knee), cone (strict straight taper), stem (with a waist), square elongated (for strict neoclassicism). Height — from 50 to 200 mm. Finish — white, black, brown, clear lacquer.
Production logic: legs are selected before the body calculation. The leg height is included in the total product height. If the leg is chosen after, the body may end up too high or too low.
An important nuance: leg attachment is a tenon or threaded stud. For tenon attachment, a seating socket must be provided in the lower support plate of the body. For threaded attachment, a threaded insert is needed. Both options require preparation at the body production stage.
Decorative brackets
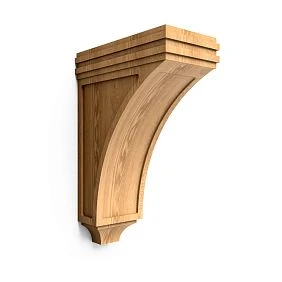
Decorative brackets from solid wood Used in classic furniture where visual support for horizontal elements is needed: console shelves, side protruding parts of sideboards, wall-mounted shelves above the work area. A bracket is an element that both supports and decorates.
In furniture application, the bracket is mounted on the body (side wall or vertical frame element) using self-tapping screws from the inside. The decorative carved surface of the bracket faces outward. For heavy loads — additional wall mounting.
Wooden decor and carved overlays for facades
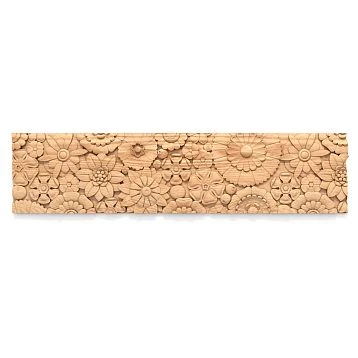
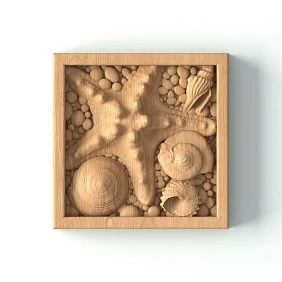
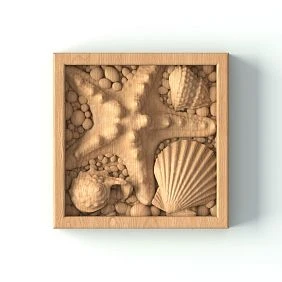
Wooden overlays and decor for furniture Carved three-dimensional elements for facade surfaces: medallions, cartouches, corner rosettes, frieze overlays. They are mounted on the facade surface and create a pronounced three-dimensional relief.
On kitchen facades, cabinet doors, chest facades, wooden overlays are placed in areas not subject to frequent mechanical contact (not where you grab with your hand). A central medallion on the door facade is the correct position for a wooden overlay. The area around the handle — no.
Wooden moldings for facades: solid wood frame system
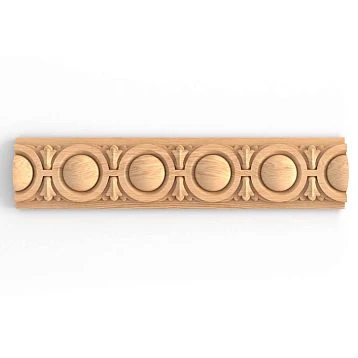
Wood moldings for furniture — linear profiles for forming a frame structure of the facade. This is a classic way to design furniture facades in the style of an "English" or "French" cabinet: the facade is divided into rectangular fields by moldings.
Wooden moldings are mounted with glue and finishing nails. They withstand load, accept varnish, oil, or paint. For furniture in natural wood or with a transparent finish — only wooden moldings. For furniture to be painted — a choice between wood and polyurethane.
Solid wood linear profiles: glazing bead, insert, cover strip
Pogonazh iz massiva in furniture production — these are glazing bead (for fixing glass in display cases and glazed doors), insert (for covering gaps and decorative perimeters), cover strip (for closing gaps between the cabinet and the wall), and flat strips for horizontal dividers.
Glazing bead is one of the "smallest" items in the kit that is most often forgotten to order. A sideboard with glazed doors without a glazing bead is an unfinished product. The glazing bead is needed before glass installation, so it must be available at the time of assembly.
Polyurethane elements: where relief is more important than strength
Polyurethane moldings for facades: frames for painting
Moldings made of polyurethane on furniture facades — this is an alternative to wooden moldings where the furniture will be fully painted. Polyurethane does not require as thorough pre-sanding for painting as wood — it already has a smooth surface, accepts primer and paint without additional surface treatment.
Polyurethane molding is mounted with assembly adhesive. This method is faster than nailing — there is no need to sink heads, putty, and sand. After gluing — sealant along the perimeter of the molding, primer, paint.
Important note: Moldings made of polyurethane should not be placed in areas of frequent hand grip or mechanical impact. On the cabinet facade — outside the handle area. On the door — along the perimeter, not around the opening mechanism.
Polyurethane overlays: decorative accents without the weight of wood
Polyurethane appliqués — decorative molding in the form of individual three-dimensional elements: medallions, cartouches, rosettes. On furniture facades, they are used where a visual accent is needed without significantly increasing the weight of the product.
A polyurethane overlay after painting is visually indistinguishable from plaster or wood carving. At the same time, it does not weigh down the hinged door and does not create difficulties with the load on the hinges. For standard furniture on hinges with a load capacity of 20–30 kg, this is a fundamental advantage.
On the side panels of the cabinet, on the wall between the doors, on the back wall of the display case — these are areas where polyurethane overlays work without any restrictions: no load, minimal contact.
Decor for moldings: clean corners of frame facades
Decor for Molding — corner and central decorative inserts — solves the problem that every workshop faces when working with frame facades. The corner of a molding cut at 45° requires precision of the miter box and precision of the cut. The slightest deviation — and there is a gap or step in the corner.
Corner insert made of decoration for moldings is mounted in the corner first, and straight pieces of molding adjoin it with their ends. No angle cutting, no problems with corner joints. The corner is always clean. The facade is professional.
For a workshop that produces furniture serially or semi-serially, molding decor saves time and eliminates defects during the assembly stage of facades.
Furniture cornice part: upper belt made of polyurethane
The upper cornice of a cabinet or sideboard — a horizontal profile that finishes the furniture from above — is traditionally made of wooden MDF or solid wood. But for furniture intended for painting, a cornice made of moldings from polyurethane — is faster and more precise.
A polyurethane cornice with a classic profile is mounted with glue to the upper horizontal plane of the body. After painting, it is indistinguishable from a wooden one. Plus: precise geometry without the need for milling the profile on woodworking equipment.
Kits for specific products
Kit for a classic cabinet
A classic cabinet with facades for painting is one of the most common orders for a furniture workshop.
Wooden elements:
-
Furniture Handles — 1 per door + 1 per drawer;
-
Wooden decoration — 1 central overlay per door.
Polyurethane elements:
-
Moldings made of polyurethane — facade frames;
-
Decor for Molding — 4 corner inserts for the frame;
-
Polyurethane moldings — upper cornice.
Mounting materials:
-
PU assembly adhesive, sealant, primer, paint, 10% profile allowance.
Classic dresser kit
Dresser — a piece of furniture on legs, with several drawers, with decorative relief on the facades.
Wooden elements:
-
Furniture legs — 4 pieces, cabriole or cone profile;
-
Wooden handles — according to the number of drawers;
-
Wooden decoration — central overlays on drawer fronts.
Polyurethane elements:
-
Moldings made of polyurethane — frame profiles around the perimeter of each facade;
-
Decor for Molding — corner inserts;
-
Polyurethane appliqués — accents on side panels.
Mounting materials:
-
Fasteners for legs, PU glue, sealant, primer, paint, allowance.
Sideboard kit
A sideboard is a complex piece: a lower cabinet section and an upper display section. Different zones have different decor requirements.
Wooden elements:
-
Wooden handles — for all doors and drawers;
-
glazing bead from molding — for fixing glass in the upper doors;
-
Moldings for furniture — on the lower part in natural wood (if the sideboard is not for painting);
-
Wooden decor — accents on the lower facades.
Polyurethane elements:
-
Polyurethane moldings — upper cornice of the sideboard;
-
Moldings made of polyurethane — frames of the upper display section;
-
Decor for Molding — corner inserts of the frames.
Kit for kitchen facades in classic style
Kitchen facades for painting are a mass-market product where speed and reproducibility of parts are critical.
Wooden elements:
-
Furniture Handles — standard model for the entire kitchen;
-
Wooden Inlays — only if the facade features accent decor.
Polyurethane elements:
-
Moldings made of polyurethane — facade frames (one model for all facades);
-
Decor for Molding — corner inserts.
Mounting materials:
-
Assembly adhesive, sealant, primer, paint — batch for the entire kitchen project.
For the kitchen, a uniform handle type across all facades is important. Mixing two handle models in one kitchen is a gross mistake that catches the eye even of an untrained person.
Console kit
Console — a wall-mounted table without a back wall, usually on brackets or turned legs.
Wooden elements:
-
furniture supports and legs — 2–4 pieces, classic turned profile;
-
Decorative brackets — if the console is wall-mounted;
-
Wooden decoration — overlay elements on the front plane.
Polyurethane elements:
-
Moldings made of polyurethane — frame decor of the front plane;
-
Polyurethane appliqués — accent in the center of the front.
Built-in wardrobe kit
Built-in furniture is a special category. There are no legs, no console brackets. Here, moldings, cornices, and trim for joints are important.
Wooden elements:
-
Wooden handles — for all doors;
-
Pogonazh iz massiva — cover strips for wall joints.
Polyurethane elements:
-
Polyurethane moldings — top cornice;
-
Moldings made of polyurethane — facade frames;
-
Polyurethane trim — transition profiles and baseboard line.
How to create a purchase map: a practical checklist
A workshop or designer working with classic furniture saves up to 30% of time on purchasing by using a standard order map. Here's how it's built.
Step 1 — Product type and number of fronts
Write down: what type of furniture, how many doors, how many drawers, what side panels. This is the basis for calculating the number of handles, moldings, and overlays.
Step 2 — Style and Finish
Furniture for painting or with open wood? If for painting — polyurethane moldings; wooden handles in the desired coating color; legs to match. If open wood — wooden moldings, legs and handles for varnish or oil.
Step 3 — Choosing Handles
This is the first decision on components. Select a model, check the distance between holes, specify the coating. Record it in the order card. Mark the facades for fasteners — only after this decision.
Step 4 — Choosing Legs
Determine the profile type and height. Recalculate the total height of the product with the leg. Specify the attachment method (tenon or thread) and provide a mounting spot in the body.
Step 5 — Moldings: Facade Layout
Draw the facade with molding frames. Calculate the linear footage of each frame. Multiply by the number of facades. Add 15% reserve. Calculate corner inserts: 4 per frame.
Step 6 — Overlays
Determine the positions of decorative overlays: one accent on the facade or a pair of symmetrical corner ones. Specify whether wooden or polyurethane overlays — depending on the area (load vs decor).
Step 7 — Cornice and top belt
Cornice type, profile width, perimeter length of the top horizontal + 15% allowance.
Step 8 — Installation materials
Construction adhesive, sealant, primer, paint, fasteners for legs, finishing nails for wooden moldings, painter's tape.
Wood vs. polyurethane separation: zone table
A fundamental question for any workshop: where wood, where polyurethane?
| Furniture zone | Recommended material | Reason |
|---|---|---|
| Handles | Wood | Daily contact, load |
| Legs | Wood | Bear weight, contact with floor |
| Brackets | Wood | Bear load |
| Glazing bead | Wood | Glass fixation, load |
| Cover strip | Wood | Load, constant contact |
| Facade moldings (painting) | Polyurethane | Quick installation, precise geometry |
| Decorative facade overlays | Polyurethane or wood | PU — if no contact; wood — if contact |
| Top cornice (painting) | Polyurethane | Does not bear load, for painting |
| Corner frame inserts | Polyurethane | Decorative only |
| Side panels | Polyurethane | Decor without weight |
| Carved accents (central) | Wood | Depth of relief, value of texture |
Mistakes when assembling classic furniture
Buy handles after marking the facades
The most expensive mistake. Facades are drilled for a standard center distance of 96 mm, but the chosen handle has a center distance of 128 mm. Result: redoing the facades. Handles are the first decision when assembling. Always.
Choose moldings without door sizes
The molding frame on the facade should be indented 10–15 mm from the edge of the facade and have correct proportions of the inner field. Without measuring the doors, you can buy moldings that are too wide, leaving no margin, or too narrow, which will be lost on a large facade.
Forget the allowance for trimming moldings
A frame of 4 pieces of molding requires cutting 4 ends. Plus possible installation errors. 10–15% margin is mandatory. Without a margin, there is a risk of stopping installation in the middle of a batch of facades.
Mix wood and polyurethane without a single finish coat
Wooden molding and polyurethane overlay next to each other — when painted, they will give different surfaces if not leveled with primer. Wood fibers will show through the paint, polyurethane will not. A uniform finish is only possible with proper surface preparation.
Place polyurethane decor in a high-touch area
Polyurethane is not designed for constant mechanical contact and impacts from nails, rings, objects. Handles, bottom edges of doors, visible corners — only wood or metal. Polyurethane — only in purely decorative areas.
Not accounting for the facade thickness when choosing molding
A molding with a 15 mm overhang on a 16 mm MDF facade is double the thickness at the facade edge. Hinges must bear this load. Too deep a molding relief overloads the hinges and creates a risk of facade deformation.
Not ordering fasteners in advance
Legs — for a specific type of attachment. Brackets — for a specific screw diameter. Glazing bead — for the glass thickness. Each item requires its own fastener, which must be available at the time of installation.
Choosing decor without a unified style concept
Baroque handles with lush relief + minimalist geometric legs + classic Ionic moldings — this is not a wealth of choice, it is a stylistic conflict. All decor of a furniture piece must belong to one stylistic family.
Coatings: when wood and polyurethane must match
When the furniture is fully painted, wooden and polyurethane elements should give the same finish under the paint. This is achieved by proper preparation:
-
Wooden elements — sanding, 1–2 coats of acrylic primer, paint;
-
Polyurethane elements — degreasing, 1 coat of primer, paint.
Without primer on polyurethane, paint adheres poorly. Without sanding wooden elements, the fiber texture shows through the paint.
If the furniture is made of natural wood, polyurethane elements must be painted to match the wood tone or the furniture's color. This requires either tinting the polyurethane with special compounds or using acrylic paint in the desired shade.
Complete order checklist for a furniture workshop
Wooden elements — items to check:
-
Wooden handles — model, length, center distance, coating;
-
Furniture legs — profile, height, mounting method, coating;
-
Brackets — size, offset, mounting method;
-
Wooden decoration — positions, size, coating;
-
Moldings for furniture — profile, width, linear footage + 15%;
-
Pogonazh iz massiva — glazing bead, cover strips, layout.
Polyurethane elements — positions to check:
-
Moldings made of polyurethane — profile, width, linear footage + 15%;
-
Decor for Molding — 4 per frame × number of frames;
-
Polyurethane appliqués — positions, model;
-
Polyurethane moldings — cornice, length + 15%.
Mounting materials — positions to check:
-
PU mounting adhesive — volume for project + reserve;
-
Acrylic sealant — quantity;
-
Primer — for polyurethane surfaces;
-
Paint — volume for project + 10%;
-
Varnish/oil — for wooden elements with open texture;
-
Fasteners — by type of legs and brackets;
-
Finish nails — for wooden moldings;
-
Painter's tape.
STAVROS: partner of a furniture workshop
A workshop that works with classic furniture in series or to order needs a supplier with a wide range of wooden and polyurethane elements, a stable warehouse, and the ability to order from one piece to large batches.
STAVROS is exactly such a partner. Manufacturing in St. Petersburg since 2002. The company's history began with the restoration of historical sites — the Konstantinovsky Palace, the Alexander Palace, the Hermitage. This school of precision and respect for proportions underlies every product.
STAVROS produces:
-
Wooden furniture handles — 32 models, 4 finishes;
-
Furniture Legs and Supports — classic turned profiles;
-
Decorative brackets from solid wood;
-
Moldings for furniture from solid wood;
-
polyurethane molding — cornices, baseboards, friezes.
The entire range is in a single catalog furniture components on the website stavros.ru. Showrooms in Saint Petersburg and Moscow. Delivery across all of Russia. Order from one piece. In-stock items — from 3 working days. Custom order — 5–10 working days.
Frequently asked questions
What to buy for making classic furniture?
The kit includes: Wooden handles, Legs, Decorative Inserts, Moldings, molding, glue, fasteners, sealant, primer, paint, and spare. The entire kit must be selected before starting cabinet production and marking facades.
Can polyurethane decor be used on furniture?
Yes, in areas without constant mechanical contact: facade frames, side panels, top cornice, decorative accents. polyurethane decor It is mounted with glue, accepts paint well, and is visually indistinguishable from wooden relief after painting.
What is better to make from wood?
Handles, legs, brackets, glazing bead, architraves, carved accents — everything that bears load, is touched by hands, or requires natural texture. Wood is stronger, more pleasant to the touch, and does not deteriorate under point mechanical impacts.
When is it better to choose polyurethane?
When lightweight relief decor for painting without load is needed: Moldings made of polyurethane for the front frames, Polyurethane appliqués in decorative areas, the cornice part of furniture.
How to avoid mistakes when ordering components?
Create an order map: type of furniture, number of facades, dimensions. Choose handles first — they determine the layout. Then — legs, moldings, overlays, fasteners, finishing materials. Everything — before production starts.
Is a reserve of moldings needed?
Be sure to add 10–15%. Trimming, installation errors, chips during cutting reduce the actual yield. Buying more later risks a different batch with a different shade of white or slightly different profile geometry.
Where to order furniture components?
Full range furniture decor, handles, legs, molding и moldings — in the STAVROS catalog on the website stavros.ru.