Article Contents:
- C-005-1-1: short answer
- What is a ready-made carved decor set
- The set solves the problem of random selection
- Symmetry is built in with paired parts
- Single elements help create a center
- Molding forms the composition line
- A ready-made set does not mean universality
- The article complements the product card
- Axis of one wide facade
- Axis of two adjacent doors
- Axis of three sections
- Axis relative to furniture, not the floor
- Laser, tape measure, and template
- Photo from a distance
- N-344 as the largest single element
- N-311 as a small finish
- Single parts cannot be split by an inter-facade gap
- The center does not always align with the handle
- Placement on sides from the center
- Orientation of the ornament inward or outward
- Paired doors
- One wide facade
- Mating with molding
- Left and right side
- Profile trimming after dry assembly
- Clean end face
- Start with the outer contour
- Place single elements
- Add mirrored pairs
- Try on the molding
- Check furniture opening
- Create a common template
- Paired parts are distributed naturally
- Single items require a solution
- Consider handles
- Central section
- Side sections
- Continuation of the line between sections
- Handles and hinges
- When reduction is justified
- When it's better to choose another set
- Do not separate the mirror pair accidentally
- Save unused parts
- First the outer contour
- Then the center points
- Measure not only the edges
- Consider thickness and shadow
- Check from a normal viewpoint
- Paneled facade
- Smooth facade
- Inter-facade gap
- Facade frame
- Pull-out drawers
- Prepare the facade layout
- Transfer component dimensions
- Mark sides L and R
- Draw the MLD-001 line
- Make installation control points
- Check the template on the furniture
- Lay out the complete set
- Check the marking
- Use temporary fixation carefully
- View under working lighting
- Check the distance
- Control dimensions
- Diagonals
- Photo in reflection
- Independent look
- Checking opening
- Beech for opaque painting
- Oak for tinting
- Why you shouldn't mix beech and oak
- Sanding "Standard"
- Prestige sanding
- Pair up the parts
- Do a test coat
- Don't finish parts at different times
- Consider end grains and recesses
- Keep a control sample
- Don't glue onto a dusty surface
- Check the flatness
- Consider wood movement
- Don't damage the threads when clamping
- Raw MDF
- Primed facade
- Can overlays be glued after painting
- Installation before painting
- Installation after painting
- Combined option
- Category of installation materials
- Transfer control points
- Use a guide template
- Glue in a logical sequence
- Do not apply excessive glue
- Do not rely on a single painter's tape
- Wide wardrobe
- Commode
- Sideboard or display cabinet
- Bed and headboard
- Interior wall panel
- Reception desk or commercial furniture
- Handles
- Legs
- Moldings
- Furniture cornice
- General guide to combining
- C-005-1-2
- C-005-2
- C-006-1-1
- C-006-1-2
- Single overlays
- With seven separate overlays
- With a set of eight parts
- With the C-006 series
- With polyurethane decor
- With self-adhesive stickers
- Need to design one wide facade
- Need to design two doors
- Need to design three wardrobe sections
- Need to update a finished dresser
- Need to decorate the wall panel
- Need decor for white enamel
- Need visible wood texture
- The facade is too small
- Buying without a drawing
- Counting all seven positions as identical overlays
- Confusing L and R
- Cutting the molding in advance
- Gluing the left side separately
- Ignoring the inter-facade gap
- Choosing glue only by the word "wood"
- Mix beech and oak
- Finishing parts separately in different batches
- Using the kit on a too small facade
- Not checking the opening
- Leaving excess glue in the thread
- What is included in the C-005-1-1 kit?
- How many overlays are included in the set?
- What is the main size of the set?
- What type of wood is C-005-1-1 made from?
- What sanding options are available?
- How to identify the central piece?
- Do all seven pieces need to be installed at the same time?
- Can the set be split between two facades?
- How to determine the distance between overlays?
- How to make a symmetrical layout?
- Is a paper template needed?
- Can the arrangement of pieces be changed?
- Do I need to paint the overlays first?
- What to choose for white or colored enamel?
- What to choose for visible wood texture?
- How to achieve an even shade?
- What to use to glue wooden overlays to MDF?
- Can I install decor on already painted furniture?
- How to check the composition before installation?
- Where can I see the dimensions of each element?
- Can I use the set on a wall panel?
- Where to buy C-005-1-1?
- What materials are needed for installation?
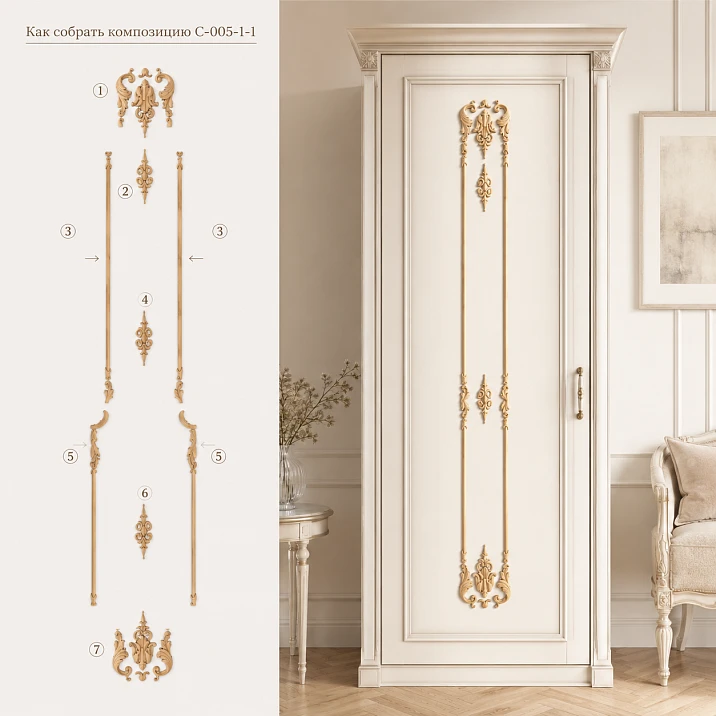
Ready-made wooden decor system for symmetrical design of furniture facade or interior panel
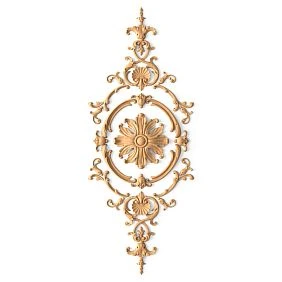
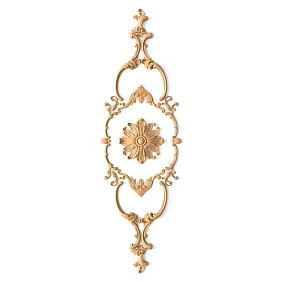
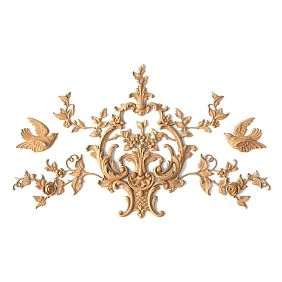
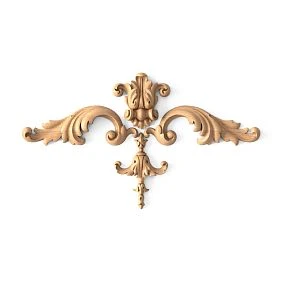

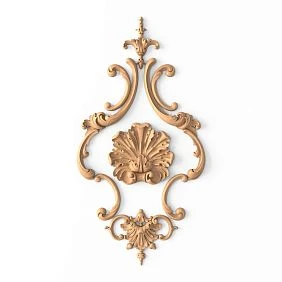
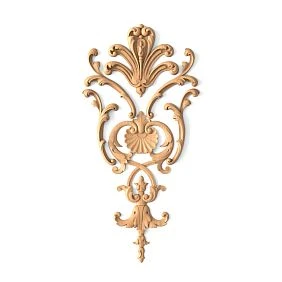

C-005-1-1: short answer
C-005-1-1 is worth buying if you need not one decorative overlay, but a coordinated composition for a wide furniture facade, two adjacent doors, or an interior panel. The kit card lists seven wooden elements made of beech or oak, designed in the same style: single parts N-344 and N-311, two mirror pairs N-438L/R and N-014L/R, and molding MLD-001. The main size of the kit is specified as 180 × 1920 × 15 mm. Before installation, all elements should be laid out without glue, the central axis determined, the orientation of parts marked L/R checked, and the layout transferred to a full-size template. The exact position of each part should be verified against drawing C-005-1-1, not determined solely from the photo.
Buy decor kit C-005-1-1 View all decorative overlays Select materials for installation Order a design project
Main size of C-005-1-1 is 180 × 1920 × 15 mm. Before laying out, open the drawing and check how the manufacturer indicates axes and outer contour.
The composition lists seven items of wooden decor. This is six carved parts and an MLD-001 profile 2400 mm long.
Two pairs are marked L/R. N-438L/R and N-014L/R cannot be swapped without checking the ornament direction.
The material is beech or oak. For beech, the card specifies preparation for enamel; for oak, preparation for tinting.
Sanding options available: "Standard" and "Prestige". It is better to order all elements of one composition in the same wood type, same sanding category, and same surface preparation.
Do not glue parts one by one "by eye". First, assemble the entire pattern on the floor or a template, photograph it from a distance, and only then transfer the control points to the facade.
It makes sense to buy a set of carved decor for furniture when the buyer wants not a random set of beautiful parts, but a connected system. The seven elements C-005-1-1 are already matched in style and scale. This reduces the risk that the central overlay will be too large, the side parts will belong to a different ornamental logic, and the molding will not support the pattern.
The main difficulty begins not at the moment of purchase, but during layout. One wide facade, two adjacent doors, three cabinet sections, and a blind wall panel require different solutions. You cannot transfer a composition from a photo to furniture without checking dimensions, axes, handles, panels, and inter-facade gaps. A ready-made kit simplifies artistic selection but does not eliminate design.
Card C-005-1-1 provides the buyer with important specifics. The set includes a single decor N-344 measuring 80 × 160 × 19 mm, paired tips N-438R and N-438L at 42 × 16 × 9 mm, paired overlays N-014L and N-014R at 140 × 48 × 15 mm, a single element N-311 measuring 38 × 25 × 9 mm, and a wooden molding MLD-001 with a cross-section of 10 × 6 mm and a length of 2400 mm. These dimensions cannot be automatically turned into a layout scheme: the final orientation and distances are checked against the kit drawing.
For a ready-made symmetrical system, you can buy a set of seven carved overlays. If the facade is too small or a different ornament is required, it is better to select wooden overlays for furniture in the general category, rather than reducing the composition by randomly removing details.




What is a ready-made set of carved decor
A ready-made kit is a set of elements that can be combined into one decorative system. The buyer does not need to start with seven separate cards and guess whether the leaf lines, curl direction, thickness, carving depth, and scale match. C-005-1-1 already links the details with a common style but leaves the possibility to adapt the layout to specific furniture after checking the drawing.
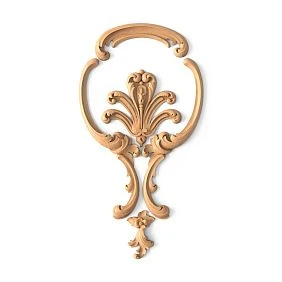
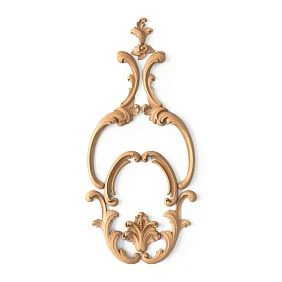
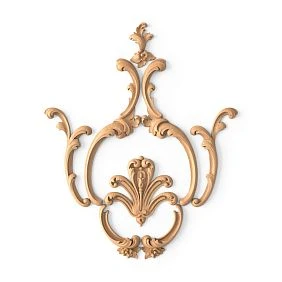
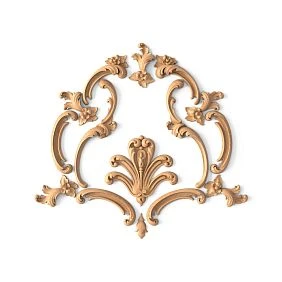
Our factory also produces:

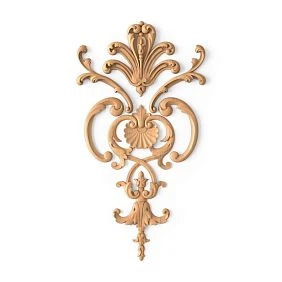
The kit solves the problem of random selection
A single overlay can look expressive on its own but get lost on a wide facade. Seven unrelated items can overload the furniture or conflict with each other. The kit sets a unified artistic language and allows focusing on proportions rather than searching for compatible ornaments.
Get Consultation
Symmetry is achieved through paired parts
The L and R markings indicate left and right versions. The C-005-1-1 set includes two such pairs. They help create mirrored movement on both sides of the central axis. Swapping a left part to the right can turn leaves or curls outward instead of toward the center.
Single elements help create a center
N-344 and N-311 are each represented by one position. The largest single part is naturally considered a candidate for the central role, but the exact position must be confirmed by the drawing. You cannot declare any element you like as central based only on a photo.
Molding forms the composition line
MLD-001 has a cross-section of 10 × 6 mm and a length of 2400 mm. It can connect tips and overlays into a frame or linear system, but the precise cutting and role of the profile are determined by the scheme. Do not cut the molding until the full composition has been calculated.
A ready-made set does not mean universality
C-005-1-1 is not automatically suitable for any facade. If the free area is smaller than the required outline, handles cross the ornament, or the panel has a different scale, a different set or individual layout is needed. A ready-made solution saves time but requires measurements.
The article supplements the product card
The card shows the composition, dimensions, materials, and preparation options. The buyer's practical task is broader: to understand how to arrange the parts, where to place the axis, when to use all elements, and how to secure them. These questions need to be resolved before ordering and installation.
Composition and confirmed characteristics of C-005-1-1
| Position | Size | Quantity in composition | Role in design | What to Check |
|---|---|---|---|---|
| Set C-005-1-1 | Main dimension 180 × 1920 × 15 mm | 7 pieces of wooden decor | Overall outline of the agreed composition | Designations A, B, C and exact factory layout according to the drawing |
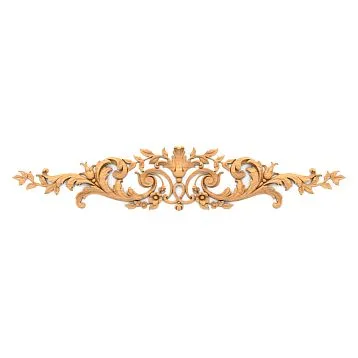
| N-344 | 80 × 160 × 19 mm | 1 | Large single element; possible center of composition after checking the scheme | Orientation, central axis, and projection relative to the facade |
| N-438R | 42 × 16 × 9 mm | 1 | Right part of mirror pair; tip for MLD-001 | Pattern direction and mating with molding |
| N-438L | 42 × 16 × 9 mm | 1 | Left part of mirror pair; tip for MLD-001 | Do not confuse with the right element |
| N-014L | 140 × 48 × 15 mm | 1 | Large left side overlay | Distance to axis, handle, panel, and facade edge |
| N-014R | 140 × 48 × 15 mm | 1 | Large right side overlay | Mirroring relative to N-014L |
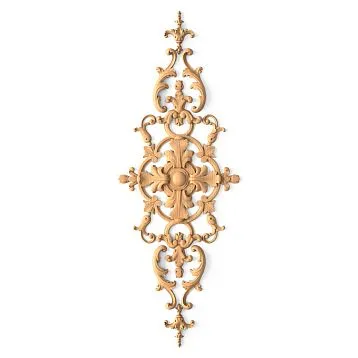
| N-311 | 38 × 25 × 9 mm | 1 | Small single element to complete or center according to the scheme | Do not assign a role without a factory drawing |
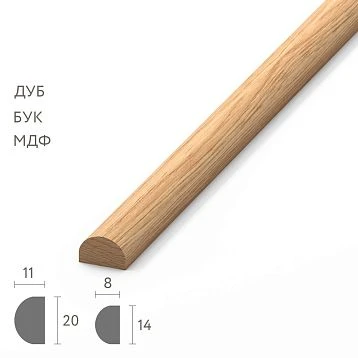
| MLD-001 | 10 × 6 × 2400 mm | 1 profile | Linear part that connects tips and carved elements | Trim length, joints and direction according to the scheme |
| Material | Beech or oak | One species for the entire order | Beech — for enamel; oak — for tinting | Do not mix species and preparation in one composition |
| Sanding | "Standard" or "Prestige" | Same for all elements | Determines the amount of subsequent manual preparation | Verify the selected category in the order |
The main size of the set and the individual sizes of components cannot be mechanically added together. The molding has a length allowance, and carved parts are positioned relative to it according to the drawing. The thickness of individual components also varies. Therefore, the overall outline of 180 × 1920 × 15 mm should be read together with the technical diagram, rather than being turned into a universal rectangle for any facade.
Why a ready-made set is more convenient than seven random overlays
| Criterion | C-005-1-1 | Random set of individual parts | Practical conclusion |
|---|---|---|---|
| Stylistics | All elements are matched within one system | Ornaments may conflict with each other | The set reduces the risk of artistic inconsistency |
| Mirror pairs | There are L/R pairs N-438 and N-014 | Pairing has to be searched separately | Symmetry is easier to build and check |
| Material | The entire order can be made in beech or oak | Species and batches may differ | Uniform finish becomes more predictable |
| Sanding | "Standard" or "Prestige" for the whole set | Different preparation increases finishing time | It's easier to achieve a uniform surface level |
| Scale | Components are designed as a coordinated group | One detail can overwhelm the rest | The composition looks more cohesive |
| Layout | You can rely on the kit drawing | The scheme has to be developed from scratch | Less risk of misalignment and random gaps |
| Reorder | The article numbers of each component are known | Repeating the set can be difficult | Easier to restore or expand the composition |
How to determine the central axis of the facade
Symmetrical layout starts not from the first overlay, but from the axis. An error of a few millimeters on one element can become noticeable after installing the entire group, especially if the facade is wide and there are handles, panels, or paired doors nearby.
Axis of one wide facade
Measure the full working width of the decorative area, not just the width of the door along the body. If the facade has a frame or panel, the axis should be built inside the plane where the overlays will actually be located. Mark the middle at the top and bottom, then connect the points with a thin line.
Axis of two adjacent doors
The center of the overall composition usually runs along the inter-facade gap. In this case, you cannot glue a single part so that it blocks the opening of the doors. The central element is either placed on one blind panel, or the composition is mirrored across two doors according to the project.
Axis of three sections
If the cabinet consists of a central and two side sections, single elements are logically checked on the central panel, and paired ones on the side panels. But this is only one of the options. The drawing, facade dimensions, and handle position may require a different scheme.
Axis relative to furniture, not the floor
The floor, ceiling, and body may have slight deviations. It is better to do the marking from the facade itself and its geometry. If the composition is tied to a countertop or furniture cornice, this connection is also checked separately.
Laser, tape measure, and template
The laser helps see the vertical on a large panel but does not replace control measurements. A tape measure checks equal margins, and a paper template allows seeing the entire pattern. Three methods work together.
Photo from a distance
After temporary layout, step back a few meters and photograph the facade strictly from the center. In the photo, it is easier to notice that one side pair is higher and the central part is shifted. The photo does not replace measurements but effectively reveals overall asymmetry.
What role do single elements play
In set C-005-1-1, there are two single carved parts — N-344 and N-311. They cannot automatically be considered interchangeable. The difference in size and pattern means each occupies its own place in the factory composition.
N-344 as the largest single element
The size 80 × 160 × 19 mm makes N-344 a noticeable focal point. In practical layout, it naturally is considered a candidate for the central position, but the final choice is confirmed by the drawing. If placed on the side without connection to other parts, the composition may lose balance.
N-311 as a small finishing piece
N-311, measuring 38 × 25 × 9 mm, is significantly more compact. It can serve as an additional accent, finishing touch, or connection to the molding. It should not be placed randomly in an empty spot just because it remains after installing the main parts.
Single parts cannot be separated by a gap between facades
If the composition is based on two doors, the large central element should not overlap the joint. When opening the doors, it will experience stress or obstruct movement. For paired doors, the central axis needs to be organized differently.
The center does not always coincide with the handle
The handle can be located on the vertical axis of the facade or shifted to the edge. The overlay and hardware should not compete. Sometimes the composition is built around the handle, sometimes the handle is moved to another zone even at the furniture design stage.
How to use paired overlays N-014L and N-014R
Paired elements measuring 140 × 48 × 15 mm help create pronounced symmetry. The L and R markings are important: the pattern of the left and right parts is mirrored. Before installation, mark the back with painter's tape to avoid mixing up the sides after sanding or painting.
Placement on sides from the center
The most straightforward scenario is equal distance from the central axis. Not only the edge of the overlay is measured, but also its conditional center. This makes it easier to maintain symmetry, even if the carving contour is complex.
Orientation of the ornament inward or outward
You cannot choose the direction by eye without checking the drawing. In some compositions, leaves tend toward the center, in others they diverge outward. An erroneous swap of L/R changes the character of the entire pattern.
Paired leaves
N-014L and N-014R are convenient to use on two adjacent doors. They can create a mirrored pair on either side of the inter-facade gap. The distance to the gap should be the same, and the parts should not fall into the handle area.
One wide facade
On a solid panel, a pair supports a large central element. It is important not to press the side overlays too close to the center and not to spread them to the edges. The proportion is checked on a full-size template.
How to work with tips N-438L and N-438R
N-438L/R measure 42 × 16 × 9 mm and are designated as tips for MLD-001. Their task is related to the profile, so these parts cannot be considered as independent miniature overlays randomly placed on free space.
Mating with the molding
The cross-section of MLD-001 is 10 × 6 mm. Before cutting the profile, you need to attach the tips, check the contact line, and understand where the molding ends. A segment that is too short or too long will disrupt the rhythm.
Left and right side
The marking helps to orient the ends mirror-wise. If the parts are swapped, the molding line may visually 'open' in the wrong direction. The check is performed before applying glue.
Cutting the profile after dry assembly
MLD-001 is supplied in a length of 2400 mm, while the main size of the kit is specified as 1920 mm. This means the profile cannot be used without calculation. First, assemble the composition according to the drawing, then mark the required length, and only then cut.
Clean end
The molding has a small cross-section, so a chip on the end is noticeable next to the carved tip. Use a suitable tool, a test piece, and careful handling. The exact method depends on the material and finish.
Composition on one wide facade
One wide facade gives more freedom because there is no inter-door gap. All seven elements can be linked by a common axis and placed within a single plane. But the width and height of the facade must allow maintaining free margins around the decor.
Start with the outer contour
Apply the main dimension 180 × 1920 × 15 mm on paper in the direction confirmed by the drawing. Do not assume that 1920 mm always goes horizontally or vertically without checking the A and B designations.
Place single elements
First, determine the location of N-344 and N-311 according to the factory diagram. They form reference points. If you start with the side parts, the center may not fit or may be offset.
Add mirror pairs
N-014L/R and N-438L/R are laid out simultaneously. Measure distances in pairs. You cannot fully secure the left side and then try to replicate it on the right from memory.
Try on the molding
MLD-001 is only trimmed after checking the tips and other parts. The profile should support the composition, not cross the handle, panel, or edge of the facade.
Check the furniture opening
If the facade is pull-out or drop-down, the relief should not collide with adjacent parts. The thickness of individual elements reaches 19 mm, so you need to consider not only the front view but also the movement.
Layout on two adjacent facades
Two doors require particularly precise symmetry. The inter-facade gap becomes the center line, but it cannot be overlapped. The entire composition must open with the furniture without parts touching each other.
Create a common template
Make a paper layout for two doors at once with the marked gap. Then cut the template along the door line. This way, you can see which elements belong to the left and right parts and do not cross the joint.
Paired parts are distributed naturally
N-014L and N-014R can be linked to the corresponding doors. N-438L/R work similarly. However, the exact position and direction should be checked against the drawing.
Single elements require a solution
N-344 and N-311 cannot simply be split in half. If the project does not include a central blank panel, their placement needs to be reworked or the full set abandoned. In such a situation, it is useful to develop a composition for the furniture facade together with the designer.
Consider the handles
On paired doors, handles are often located near the central gap. They may conflict with the main decor. Handles, overlays, and molding should be designed simultaneously, not added sequentially after furniture production.
Option for three adjacent sections
A cabinet with a central section and two side doors allows for a more logical distribution of single and paired elements. The central panel can accommodate the main motif, while the side panels can take mirrored overlays. However, this scheme requires sufficient width of all three facades and precise alignment with the overall cabinet axis.
Central section
It can be used to check the placement of N-344, N-311, and part of the molding. It cannot be stated in advance that both single parts must be located here: the factory drawing remains the main reference.
Side sections
The left and right panels naturally accept mirrored pairs. Distances to the cabinet edges and the central section must be equal. If the side facades differ in width, the symmetrical scheme may not work.
Continuation of the line between sections
The molding should not cross the inter-facade gaps in a way that interferes with opening. The line can be visually continued with separate segments on each door, maintaining a single height mark. Trimming is done after the general template.
Handles and hinges
The internal cabinet structure affects the position of the hardware. Overlays should not cover technical points, interfere with handle attachment, or create additional load on a thin facade.
Is it possible not to use all elements of the set
Physically, some parts can be omitted, but the decision must be deliberate. The buyer purchases an agreed-upon system, and excluding one element may disrupt completeness. First, you need to see the full version, then compare it with the reduced layout on the template.
When reduction is justified
The facade may be smaller than the factory composition, the handle occupies a central area, or the interior requires a more restrained decor. In such a case, part of the set can be saved for another project if the pattern remains logical without it.
When it is better to choose a different set
If you have to remove half of the parts, C-005-1-1 is likely too large or too busy. It is more rational view compact set of carved decor or select individual overlays.
Do not accidentally separate the mirror pair
Using N-014L without N-014R or a single N-438 tip changes the composition. Single use is only possible as a new independent project, not as an "almost complete" symmetrical set.
Save unused parts
Pack them with labeling of article number, material, sanding, and finish. This will help with furniture repair or expansion. Do not mix leftovers with similar overlays without labels.
How to calculate distances between overlays
There is no universal distance between elements in the source data. It is determined by the drawing, facade dimensions, and chosen composition. Do not transfer the interval from another set or measure from a photo.
First the outer contour
Determine the free decorative area. Subtract the facade frame, handles, panels, hinges, locks, and door gaps. Only the remaining field is used for layout.
Then the center points
Mark the axis and position of single elements. After that, distribute mirror pairs at equal distances. If you start from the edge, the composition may "shift" to one side.
Measure not only the edges
A carved overlay has a complex contour. The distance between the nearest leaves may differ from the distance between geometric centers. For symmetry, it is useful to control both indicators.
Consider thickness and shadow
N-344 has a depth of up to 19 mm according to the component card, other parts are 9 or 15 mm. With side lighting, they create different shadows. Too tight a layout turns the ornament into a dense spot.
Check from a normal viewpoint
On the table, the parts seem spaced apart, but on a tall cabinet, the distance is perceived differently. Attach paper silhouettes to the facade and step back to where the furniture is most often seen.
How to account for panels, frames, and inter-facade gaps
Paneled facade
Carved decor can be placed inside the central field or connected to the frame, but the part must not be glued onto a drop without checking fit. The base of each overlay must contact the plane, not hang on the edges.
Smooth facade
It gives more freedom but requires particularly precise marking: without a ready-made panel, any misalignment is noticeable. A full-size template becomes the main control system.
Inter-facade gap
Neither the overlay nor the molding should overlap the opening line. Even a small protrusion can catch the adjacent door. Check the doors in fully open and closed positions.
Facade frame
If the decor is placed inside the frame, leave equal margins. If it crosses the frame, the transition point must be provided by the design. An accidental drop creates a gap under the overlay.
Drawers
The composition can only visually continue across multiple drawers. Each element must remain on its own plane and not interfere with opening. The molding cannot be laid continuously through gaps.
How to make a full-size template
The template turns a set of parts into a controlled composition. It helps maintain the axis, intervals, and orientation, and also shows whether the main size C-005-1-1 fits a specific facade.
Prepare a facade layout
Use a roll of paper, cardboard, or several sheets joined along a precise line. Draw the outer contour of the facade, frame, panels, handles, and gaps.
Transfer the component dimensions
Draw the rectangular contours of N-344, N-311, N-014L/R, and N-438L/R according to the confirmed dimensions. For an accurate silhouette, you can trace the actual parts after receiving the order.
Mark the L and R sides
Label the left and right overlays. Do not flip paper silhouettes without marking, otherwise the template will retain the geometry but lose the direction of the ornament.
Draw the MLD-001 line
Draw the profile after positioning the tips and main overlays. Mark the trimming points and keep a margin until the final fitting.
Make mounting reference points
For each part, select two or three reference marks: top, bottom, center, or edge. Too many lines complicate transfer, too few fail to maintain orientation.
Check the template on the furniture
Secure it with removable tape that does not damage the surface. Open the facades, look from the side, take a photo. Only then transfer the markings.
Dry fit: a mandatory step before glue
Dry fit means that all elements are laid out and temporarily fixed without a final adhesive bond. It allows you to correct mistakes that would become costly after gluing.
Lay out the complete set
Even if not all parts are planned to be used, first assemble the full layout. This will show the role of each element and what is lost when reducing.
Check the marking
Verify N-438L/R and N-014L/R. Mark the back side. After priming or tinting, the packaging marking may be lost.
Use temporary fixation carefully
Masking tape can hold lightweight paper templates but should not damage the finish or threads. Heavy wooden parts must not be left on unreliable temporary fixation.
View under working lighting
Side lighting emphasizes different thicknesses and shadows. Turn on the fixtures that will be used after installation. A composition that looks balanced in daylight may appear unbalanced in the evening.
Check the distance
Look close up and from several meters away. On a large wall panel, small details may get lost, while on a dresser front, they may appear too dense.
How to check symmetry before installation
Control dimensions
For each mirror pair, record the distance from the axis to the center, the top mark, and the offset from the edge. The values on the left and right should match within installation tolerance.
Diagonals
On a rectangular composition, measuring the diagonals helps identify skew in the overall outline. If the diagonals differ, one side is raised or shifted.
Photo in reflection
The image can be mirrored horizontally: asymmetry becomes more noticeable because the eye stops perceiving the familiar side. This is an additional check, not a replacement for a tape measure.
Independent perspective
Ask another person to evaluate the composition without a hint. The layout author quickly gets used to a slight misalignment and stops noticing it.
Check opening
Symmetry at the front should not interfere with the furniture's functionality. Open all doors and drawers, ensure parts do not touch and hands freely find the handles.
Beech or oak for C-005-1-1
Both species are confirmed in the kit card. Beech is offered with preparation for enamel, oak for tinting. The material choice should be made for the entire group at once, otherwise seven parts will differ in texture and finish behavior.
Beech for opaque painting
Beech has a calmer texture and suits a composition planned to be coated with enamel. The color helps tie the decor to the painted MDF facade, doors, or furniture body. A test coat is done on a sample of the same preparation.
Oak for tinting
Oak is chosen when the natural grain should remain visible. Tinting emphasizes pores and carving. All seven elements are best laid out and finished in one batch to control the shade.
Why you cannot mix beech and oak
Even with the same color, the species have different textures. In a symmetrical composition, the difference is especially noticeable on paired parts. Order the entire kit in one material.
Sanding "Standard"
This is a machine preparation that may require additional hand finishing before the final coat. For complex carving, assess the workload in advance and do not start painting until all parts have been inspected.
Prestige sanding
The card describes a more detailed manual preparation. This option is convenient when you need to reduce finishing work and achieve a uniform level for all elements. A final inspection before finishing is still mandatory.
More about preparation can be learned about the quality of processing wooden decor.
How to achieve a uniform finish for seven elements
Symmetry is disrupted not only due to marking. If the left and right overlays have different shades or gloss, the composition looks skewed even with perfect dimensions. Therefore, preparation and finishing are performed as a single batch.
Lay out the parts in pairs
N-014L/R and N-438L/R should be together at all stages. Compare them after sanding, primer, first coat, and finish. This makes it easier to notice if one side has absorbed the compound differently.
Make a test application
For beech under enamel, a color and gloss sample is needed. For oak under tinting, the shade, transparency, and grain reveal are checked. Color cannot be confirmed by catalog name without a real sample.
Do not finish parts at different times
Different batches of stain, enamel, or varnish may differ. If part of the set is painted today and part a month later, matching is not guaranteed. It is better to prepare the entire set and perform the finish in one cycle.
Consider the ends and recesses
The carving has protrusions, depressions, and end sections. Too thick a layer of enamel smooths out the pattern, while insufficient enamel leaves unpainted areas. The application technology is chosen to preserve the details.
Keep the reference sample
A small painted fragment or a signed test will be useful during repairs. Record the material, composition, shade, gloss, and sequence of layers.
Installation on a solid wood facade
A massive wooden surface usually provides a solid base, but its moisture content, finish, and flatness must be checked. The adhesive is chosen based on the combination of wood species, coating, and usage conditions.
Do not glue onto a dusty surface
After sanding, the base and the back side of the decor are dusted. Dust reduces adhesion and can cause local detachment. The cleaning method should not damage the wood or finish.
Check the flatness
A thin carved piece should not be used to level a convex facade. If the overlay wobbles during a dry fit, first determine the cause. Forced pressing may lead to cracks.
Consider wood movement
The array reacts to humidity and temperature. The adhesive and coating system must be compatible with both parts. A universal promise for any substrate is incorrect.
Do not damage the thread when pressing
Pressure is distributed through a soft gasket and only where the structure can withstand the load. Do not use a protruding sheet or curl as a pressure point.
Installation on an MDF facade
MDF provides a smooth surface and is often used under enamel. But adhesion depends on whether the facade is untreated, primed, painted, or laminated. One adhesive does not automatically suit all options.
Untreated MDF
The substrate must be strong and dust-free. Edges and porous areas may absorb the compound differently than the flat surface. A test joint on a sample helps verify the result.
Primed facade
The primer must adhere firmly to the MDF. If it peels off, the overlay will come off with the coating. Before installation, the adhesion of the entire system is checked, not just the adhesive to the wood.
PaintedCan overlays be glued after painting
Both scenarios are possible but have different risks. When installing before finishing, it's easier to unify the decor and facade with one color, but harder to paint all recesses after gluing. When installing after finishing, parts are easier to finish separately, but the glue must be compatible with the finished coating.
Installation before painting
Suitable for compositions under a common enamel. Seams can be neatly unified, and the color will be uniform. The threads need to be protected in advance from excess primer and enamel.
Installation after painting
Convenient for oak under tinting or contrasting decor. The surface must be completely dried, and the glue tested for compatibility. Excess is especially dangerous: it can leave marks on the finished finish.
Combined option
Sometimes the facade and overlays are finished separately, then glued and local touch-ups are performed. This technology requires experience. It should not be planned without a test sample.
Category of installation materials
Before work, you can select materials for mounting wooden overlays. The specific composition is chosen after checking the base, wood, and coating.
How to avoid shifting during gluing
Transfer control points
Do not outline the entire carved contour with a thick line. It's enough to mark the center, top, bottom, and a few side points. The markings should remain hidden after installation.
Use a guide template
A paper or thin rigid template with cutouts helps quickly place all parts in the same position. It is removed after initial fixation without shifting the overlay.
Glue in a logical sequence
First, fix the support elements along the axis, then mirror pairs, controlling both sides. You cannot completely finish the left half and only then assemble the right.
Do not apply excess glue
Excess seeps into the threads and onto the finish. The amount and method of application are determined by the composition's instructions. Residues are removed before curing using a suitable method that does not damage the coating.
Do not rely solely on masking tape
Tape can help with a lightweight template or temporary positioning, but it is not a universal clamp. The weight and shape of parts vary.
Application of C-005-1-1 in furniture and interiors
Wide wardrobe
The kit helps decorate the central part of a classic cabinet and connect several doors. The most important check is the opening of the doors and the position of the handles. The decor should not turn a functional facade into a stationary panel.
Chest of drawers
On a chest of drawers, the composition can be placed on one wide facade or continue across the drawers. If multiple drawers are used, each element is attached to its own plane. The molding does not cross the gaps continuously.
Sideboard or display cabinet
A carved set can support the top cornice, panels, and classic legs. Glass doors reduce the mounting area, so a full-size template is especially important.
Bed and headboard
On a solid headboard panel, the set creates central symmetry. Contact with pillows, textiles, and hands must be checked. Protruding carvings should not be in an area of constant mechanical impact.
Interior wall panel
C-005-1-1 can be used not only on furniture but also on a decorative panel. Here it is easier to preserve the entire contour because there are no doors or handles. For ideas, it is useful to look at ideas for placing wooden decorations on an interior panel.
Reception desk or commercial furniture
The set is suitable for the facade of a counter, display case, or cabinet if the decor is not in an area of impacts and frequent contact. The finish must account for cleaning and visitor traffic.
How to combine overlays with handles, legs, and moldings
The carved composition should not exist separately from the rest of the furniture. Handles, legs, cornice, and moldings should support the scale, not repeat every curl. The richer C-005-1-1 is, the calmer the adjacent details can be.
Handles
Hardware should remain comfortable. Do not place a small handle inside active carving where it is hard to find. The contrast of metal and wood is tested on a mockup.
Legs
Turned or carved supports can maintain a classic character. However, large legs together with seven overlays can overload a small chest of drawers. The scale is assessed as a whole.
Moldings
MLD-001 is already included. Additional profiles should follow its logic or be neutral. Random mixing of several sections creates inconsistency.
Furniture cornice
The top cornice can become a frame for the composition. Leave enough space between it and N-344. Too tight placement merges two accents.
General guide to combination
Before ordering, it is useful to study how to combine overlays with other furniture decor.
When it's better to choose a different set
C-005-1-1 is not suitable for every facade. If the composition becomes too dense, too long, or requires removing several key details, it's wiser to compare adjacent sets. Such a choice preserves artistic integrity and avoids reworking the finished system.
C-005-1-2
This is a different composition from the same series. It may better match the facade in terms of pattern or element arrangement. Dimensions and composition cannot be transferred from C-005-1-1. Before choosing, you need to view another set C-005-1-2 and comparing its drawing.
C-005-2
In the SEO scheme, it is designated as an extended set of eight overlays. This option is suitable for a more saturated composition if the furniture size allows. You can view the set of eight overlays C-005-2 and decide if an additional detail is needed.
C-006-1-1
A compact set should be considered for a narrower composition. It is not a reduced copy of C-005-1-1, so not only the overall scale but also the pattern should be compared.
C-006-1-2
For a large composition, you can view the wide set of decorative overlays. Its characteristics are checked separately.
Single overlays
If the facade has a non-standard shape, handles occupy the center, or an asymmetrical pattern is needed, a ready-made set may not be the best route. Then it's easier Buy decorative furniture overlays individually and develop your own scheme.
What to buy together with C-005-1-1
The main addition to the set is not another random overlay, but a prepared installation and finishing system. Also useful are neighboring sets for comparison, the general catalog, and a design project if the facade consists of several sections.
| What to add to the purchase | Why this is needed | For which scenario | What to Check |
|---|---|---|---|
| Buy decor kit C-005-1-1 | Get a coordinated system of seven elements | Wide facade, two doors, wall panel | Drawing, material, sanding, and full composition |
| Buy glue for carved decor | Prepare a confirmed mounting system | Array, MDF, painted facade | Compatibility with base, wood, and coating |
| select wooden overlays for furniture | Complete the project or replace the set with a custom layout | Custom facade and asymmetrical composition | Style, thickness, material, and scale of each detail |
| Extended set of classic decor | Compare seven and eight elements | Larger or more saturated facade | Individual dimensions and composition C-005-2 |
| Overlays for a narrower composition | Do not reduce C-005-1-1 by randomly removing parts | Narrow facade, small furniture | Drawing and sketch C-006-1-1 |
| Order the layout of carved decor | Connect seven parts with handles, panels, and sections | Complex cabinet, commercial furniture, wall panel | Transfer facade dimensions and photographs |
| recommendations for installing wooden decor | Check preparation and work sequence | Self-finishing and installation | Do not replace specific glue instructions with general advice |
| Payment and delivery terms for the overlay kit | Plan to receive all parts in one batch | Order to another city or kit to the site | Order composition, packaging, and inspection upon receipt |
How not to confuse C-005-1-1 with similar solutions
With seven separate overlays
The main difference is consistency and known composition. Individual items may be beautiful but not form a unified system. C-005-1-1 already has two mirror pairs, single elements, and a molding.
With a kit of eight parts
C-005-2 is a separate product. The number of elements and composition differ. You cannot use the dimensions and layout of one set for another.
With the C-006 series
C-006-1-1 and C-006-1-2 have their own pattern and scale. They are chosen when the facade requires a different width or saturation, not as an arbitrary replacement for a missing C-005-1-1 part.
With polyurethane decor
C-005-1-1 is made of beech or oak. Polyurethane has a different finishing and installation technology. Materials cannot be mixed in one composition without checking thickness and appearance.
With self-adhesive stickers
A carved wooden overlay is a three-dimensional furniture part. It requires base preparation and suitable glue. A flat film or plastic sticker is not an analogue in terms of relief and durability.
Practical choice for specific situations
Need to design one wide facade
Use the full set after checking the main outline and drawing. Center single elements, place mirror pairs simultaneously, cut the molding last.
Need to design two doors
Make a common template and cut it along the inter-facade gap. Do not place a single overlay across the joint. If the central part cannot be resolved, order a project or choose separate paired overlays.
Need to design three cabinet sections
Check the option with single elements on the center panel and pairs on the side panels. Break the molding line along the doors so it does not interfere with opening.
Need to update the finished chest of drawers
First, evaluate the material and coating of the facade. If handles and drawers are already installed, the template must account for them. Test the glue on an inconspicuous area or sample.
Need to decorate a wall panel
The absence of movable doors allows using the full pattern more freely. But the surface must be smooth and durable. Lighting should not emphasize misalignment.
Need decor for white enamel
Choose a beech set prepared for enamel with one sanding category. Finish all elements simultaneously.
Need visible wood texture
Choose oak for tinting. Before finishing, lay out the parts and distribute them by shade, preserving mirror pairs.
The facade is too small
Do not try to compress the composition by reducing intervals. Compare C-006-1-1 or individual overlays. Free fields are needed no less than the ornament itself.
Errors when purchasing and laying out
Buying without a drawing
A photo does not show exact axes, intervals, and the role of the molding. Download or request a diagram before calculating the facade.
Counting all seven positions as identical overlays
The set includes molding MLD-001 and paired tips. Their function differs from the large overlay N-344.
Confusing L and R
Mirror parts change the direction of the ornament. Label them before finishing and check them in pairs.
Cutting the molding in advance
The length of 2400 mm provides a margin. Trimming is done after a full dry layout and checking the tips.
Gluing the left side separately
Symmetry is built simultaneously. After fixing one half, it is difficult to correct the interval on the right.
Ignore the inter-facade gap
The decor should not connect two opening sashes. Each element remains on its own plane.
Choose glue only based on the word "wood"
The composition must also be compatible with MDF, enamel, primer, or base varnish. There is no universal solution for any surface.
Mixing beech and oak
Different textures destroy unity, especially in paired elements. Order one species.
Finish parts separately in different batches
Even the same color name does not guarantee a match. Seven elements must go through a common cycle.
Use the set on a too small facade
Compressed intervals turn the carving into a dense spot. It is better to choose a smaller set.
Do not check opening
Protruding parts may catch adjacent doors, drawers, or handles. Check the function before gluing.
Leave excess glue in the thread
After drying, they are difficult to remove without damage. Apply the compound in a controlled manner and follow the instructions.
Who is C-005-1-1 suitable for
- a wide furniture front with sufficient free space;
- two adjacent doors after developing a common symmetrical scheme;
- three cabinet sections with a central axis and paired side elements;
- a solid interior panel without movable joints;
- a chest of drawers, sideboard, display case, or headboard in a classic style;
- a project where a ready-made set is needed instead of searching for seven parts independently;
- beech under opaque enamel;
- oak with a tinted finish and visible texture;
- furniture for which a full-size template and dry fit can be made;
- a customer ready to check the drawing, component dimensions, and mounting system;
- a composition where handles and panels align with the carved pattern;
- an order where all elements receive the same sanding and finish.
When it's better not to choose C-005-1-1
- the facade is smaller than the required outline and leaves no free margins;
- the inter-facade gap passes through a large single element;
- handles, locks, or panels intersect the main composition;
- the buyer plans to use only one or two of the seven parts;
- a modern minimalist facade without pronounced carving is needed;
- the base is uneven, loose, or does not allow reliable adhesion;
- the material and coating of the facade are unknown;
- there is no way to obtain or study the drawing;
- the kit is intended to be installed outdoors or in constant humidity without a confirmed technology;
- it is planned to mix beech and oak or different sanding categories;
- a more compact composition of the C-006 series is needed;
- an asymmetrical custom pattern of individual overlays is required.
What to Check Before Ordering
- article C-005-1-1;
- main size 180 × 1920 × 15 mm and designations on the drawing;
- presence of all seven items in the composition;
- dimensions N-344, N-438L/R, N-014L/R, N-311 and MLD-001;
- orientation of parts marked L and R;
- role of individual elements according to the factory scheme;
- trimming length of molding MLD-001;
- material — beech or oak;
- preparation for enamel or tinting;
- 'Standard' or 'Prestige' sanding;
- size of the facade working area;
- inter-facade gaps, handles, panels and frames;
- ability to open all sashes after installation;
- composition of the base and existing coating;
- compatibility of the adhesive;
- full-size template and dry layout;
- single test stain;
- current ordering, payment, and delivery terms.
How to store the kit before finishing and installation
After receiving, do not mix C-005-1-1 parts with other overlays. Keep the packaging label, mark the L/R pairs, and store the elements on a flat, dry surface. Do not stack large N-344 on thin tips or press carved protrusions with heavy objects.
Before finishing, it is useful to create a list: article number, size, side, material, and selected sanding. After priming, the factory marking may become less visible, so additional labels on removable tags help avoid mixing up left and right parts. Do not mark the face carving itself.
All seven items must be kept under the same conditions before painting or staining. Sharp temperature changes, humidity, and storage near a heating device can affect the wood. Before installation, the kit is re-inspected, checked against the list, and only then transferred to the prepared template.
How to buy C-005-1-1 at STAVROS
Before ordering, open the product card and buy the C-005-1-1 decor kit only after checking the composition and drawing. Choose one wood species for all elements: beech for enamel or oak for staining. Then determine the sanding category and fix it throughout the order.
If the facade dimensions are not yet approved, first make a paper mockup of the main outline and mark the handles, frames, and gaps. For a complex cabinet or interior panel, you can Order the layout of carved decor. This is especially useful when the set is distributed between two or three sections.
Mounting materials are selected after checking the base and coating. In the category you can select materials for mounting wooden overlays, but the specific adhesive must match the instructions and the test joint.
If C-005-1-1 does not fit or does not match the pattern, do not cut it randomly. Compare C-005-1-2, C-005-2, C-006-1-1, C-006-1-2, or choose wooden overlays for furniture separately.
FAQ: questions about the C-005-1-1 set
What is included in the C-005-1-1 set?
The card lists seven items: N-344, N-438R, N-438L, N-014L, N-014R, N-311, and molding MLD-001.
How many overlays are in the set?
The set includes seven wooden decor elements. One item is molding MLD-001, and two pairs are marked L/R.
What is the main size of the set?
The card indicates the size 180 × 1920 × 15 mm. It should be read together with the drawing and the markings A, B, C.
What wood is C-005-1-1 made from?
Beech or oak. Beech is specified for enamel, oak for tinting.
What sanding options are available?
"Standard" and "Prestige". It is better to order all elements of one composition in the same option.
How to determine the central part?
You need to open the factory drawing. N-344 is the largest single element, but its exact role and orientation are confirmed by the diagram.
Do all seven elements need to be installed at the same time?
The full set gives the most cohesive composition. Partial use is possible after a dry layout, but with a significant reduction it is better to choose another set.
Can the set be divided between two facades?
Yes, if the parts do not overlap the inter-facade gap and the doors open freely. Single elements require a separate solution.
How to determine the distance between overlays?
According to the drawing, facade dimensions, and full-size template. There is no universal interval for any furniture.
How to make a symmetrical layout?
Draw a central axis, simultaneously lay out L/R pairs, check equal distances, and photograph the composition from a distance.
Is a paper template needed?
Yes. It helps to see the main outline, handles, panels, gaps, and places for trimming the molding before gluing.
Can the arrangement of parts be changed?
Only after checking the pattern and drawing. Arbitrary rearrangement of L/R or single elements may disrupt the ornament.
Do the overlays need to be painted first?
Installation is possible before or after finishing. The choice depends on the overall facade color, material, and adhesive compatibility with the coating.
What to choose for white or colored enamel?
Beech prepared for enamel. All elements should be painted in one batch.
What to choose for visible wood texture?
Oak for tinting. A test finish is needed to control the shade of seven parts.
How to achieve an identical shade?
Order one wood species, one preparation and sanding, lay out parts in pairs, and perform finishing in a single cycle.
What to use to glue wooden overlays to MDF?
Use an adhesive compatible with wood, MDF, and the existing coating. The specific composition is chosen according to the instructions and a test joint.
Can decor be installed on already painted furniture?
Yes, if the coating holds firmly and is compatible with the adhesive. A test on an inconspicuous sample is required.
How to check the composition before installation?
Assemble it on the floor or template, temporarily attach it to the facade, check the light, opening, handles, and symmetry.
Where can I see the dimensions of each element?
In the kit contents and drawings of card C-005-1-1. Do not transfer dimensions from neighboring sets.
Can the kit be used on a wall panel?
Yes, the main application includes furniture and interior surfaces. The base must be flat, durable, and compatible with the mounting system.
Where can I buy C-005-1-1?
In the card, you can buy a set of seven carved overlays and choose beech or oak.
What materials are needed for installation?
Suitable adhesive, marking tool, full-size template, and a safe temporary positioning system. The exact set depends on the base and finish.
Result: seven agreed elements instead of a random set
C-005-1-1 helps assemble symmetrical carved decor without having to search for compatible overlays on your own. One set combines single elements, two mirror pairs, and molding. The buyer only needs to correctly match them with the facade, material, and finish.
The main stage is not gluing, but design. You need to open the drawing, determine the axis, make a template, check L/R, handles, gaps, and trimming of MLD-001. After that, choose beech for enamel or oak for tinting, uniform sanding, and compatible adhesive.
The set is especially suitable for a wide facade or a blank panel. For two and three sections, a separate layout is needed. If you have to remove a significant portion of the elements, it is better to choose another set or individual overlays.
STAVROS allows you to move from idea to finished system: open the C-005-1-1 card, compare adjacent sets, select mounting materials, and order a design project. This route preserves symmetry, a single material, and the ornamental connection of all parts.