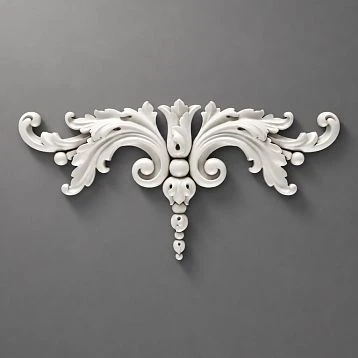
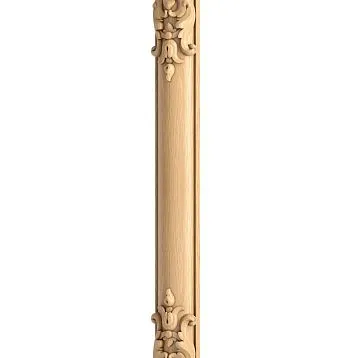
Article Contents:
- What is a house carving kit and why it matters
- What is included in a house carving kit for the facade
- Carved window casings — the foundation of everything
- Top horizontal element
- Bottom window sill element
- Brackets — volume and architectural character
- Rosettes — connection point and decorative accent
- Connecting and intermediate elements
- Balusters and flat balusters of house carving
- Decorative overlays and strips
- Wooden baguette — architectural rhythm of the facade
- Where house carving is used: all zones of a wooden house
- Windows of a residential house
- Windows of a bathhouse
- Gazebo
- Porch and entrance group
- Veranda
- Pediment
- Cornice area
- Canopy and awning
- How to choose elements in one style: principles of ornamental unity
- Trims as the basis of a facade set
- Brackets: when they are necessary and how to choose them
- Sockets and connecting parts: invisible heroes of facade decor
- How not to overload the facade with carved decor
- Ready-made kit or piece-by-piece selection: what to choose
- Ready-made set
- Piece-by-piece selection
- Kit material: why glued panel is better than solid board
- Finishing of the kit: painting, impregnation or varnish
- Carved decor for a bathhouse: selection features
- Kit for a gazebo: a separate story
- Step-by-step assembly logic of the kit: from measurement to order
- Additional keys and pages for the full set
- Frequently asked questions and answers
- STAVROS — manufacturer of the full set of house carving for the facade
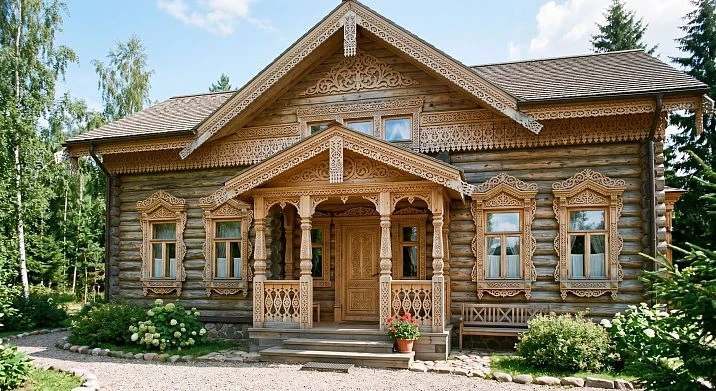
When people say "house carving," many imagine a single window casing on a village hut. But real facade decor is a system. It's a logic where each element complements its neighbor, and as a result, the facade speaks a unified language: the ornament flows from window to porch, from cornice to canopy, from bracket to rosette. That's why experienced craftsmen and designers always say: house carving should be bought not piece by piece, but as a set — then the result will be cohesive, expressive, and truly beautiful.
This article is a detailed practical discussion about how to assemble a set of house carving for the facade of a wooden house, what it includes, where each element is used, how to avoid mistakes when selecting, and how to build a unified facade system from casings, brackets, rosettes, connecting parts, balusters, and decorative strips. No fluff, no abstract reasoning — only practice and specifics.
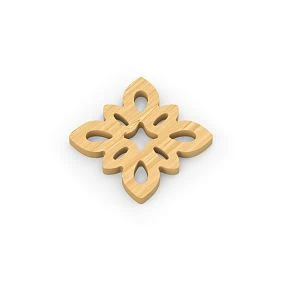
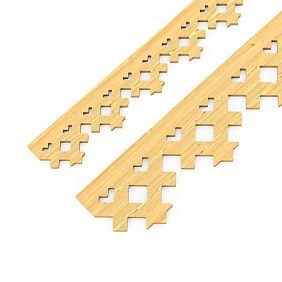
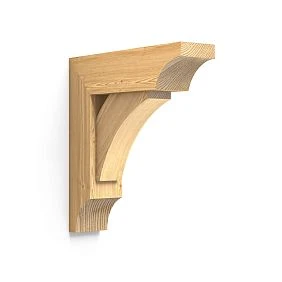
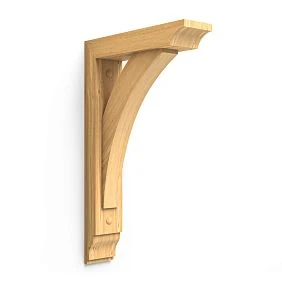
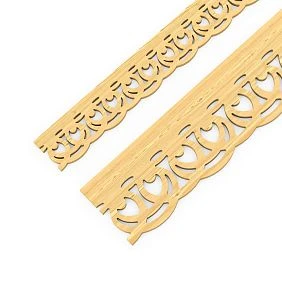
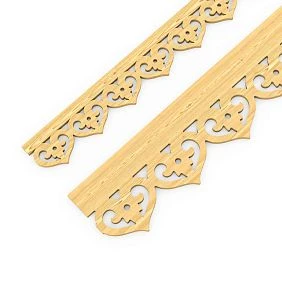
What is a set of house carving and why it matters
A set of house carving is a collection of wooden carved elements that together form the facade decor of a building. Unlike a single casing bought "for beauty," a set solves an architectural task: it creates an ornamental rhythm on the facade, linking windows, doors, porch, cornice areas, and canopies into a single visual ensemble.
Why is this important? Because fragmentary decor always looks random. A casing without rosettes — incomplete. Brackets without casings — a decorative excess. But when all elements are selected in the same ornamental key, the facade acquires character — the kind that makes people drive across town to photograph a beautiful wooden house.
The set approach is also practical: when you buy elements from the same line or collection, they are guaranteed to match in width, thickness, relief depth, and ornamental pattern. No need to try on and adjust. No need to redo after installation. The system assembles like a construction set — accurately, quickly, predictably.




What is included in a set of house carving for the facade
This is the first and most practical question. Let's examine each element in detail — not as an abstraction, but as a specific part with a function.
Our factory also produces:
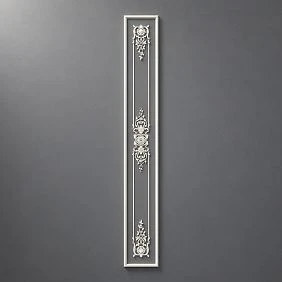
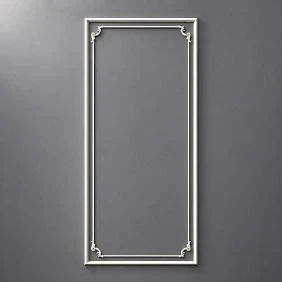
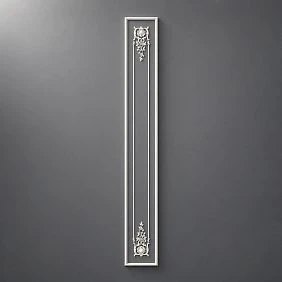
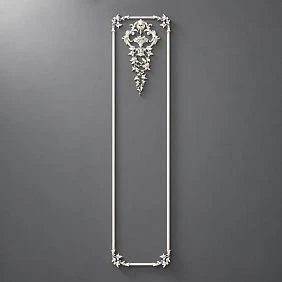
Carved window casings are the foundation of everything
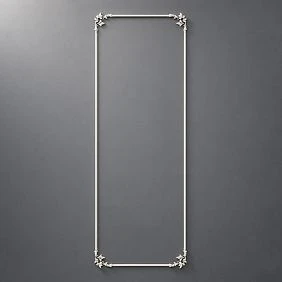
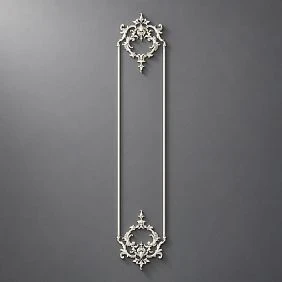
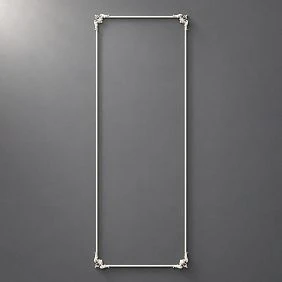
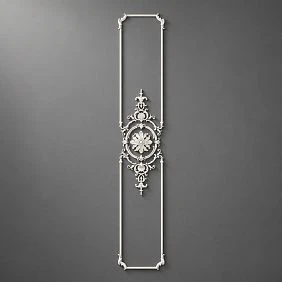
Carved Door Casings for Windows — this is the main element of window framing and at the same time the starting point for selecting the rest of the decor. It is the casing that first catches the eye, it sets the pattern and style of the entire facade system.
A standard carved casing is a vertical plank 2000 mm long and 18 mm thick, made from glued pine panel. The width can vary from narrow, almost architectural, to wide decorative. The surface is sanded after machine processing — this ensures clean relief and uniform perception of the pattern after painting.
Each window requires at least two vertical casings — on the sides of the opening. A top horizontal element is added to them, and if necessary, a bottom one. The choice of all other details: rosettes, brackets, connecting strips will depend on the width, pattern, and style of the casing.
Get Consultation
Top horizontal element
The top part of the window framing is the second most important element in the system. It is what "crowns" the window and creates completeness. The top horizontal casing can be simple — of the same profile as the side ones — or it can carry additional decor: a semicircle, an arched motif, a figured finish, an openwork extension.
From the street, the top part is often perceived first: it sets the "theme" of the window. If the side casings are the frame, then the top element is its accent, crown, culmination. That is why in some cases the top part is made richer and more detailed than the side ones.
Bottom window sill element
The bottom horizontal plank frames the opening from below. It is not needed in all projects: where the bottom part of the window is covered by a metal drip cap or adjoins wall cladding, the bottom element is not necessary. But where the opening is open on all sides — which is the case for most wooden houses with protruding casings — the bottom element creates a complete frame and protects the bottom end of the side casing from direct water ingress.
Brackets — volume and architecturality
A bracket is a carved wooden element installed on a vertical plane, serving as a support or decorative projection. In facade decor, brackets are used under roof overhangs, on the sides of window casings, under porch beams, near canopies, and in the cornice area.
A bracket adds to the facade what a flat casing cannot — volume. Thanks to it, the decor begins to work in three dimensions: a play of shadows is created, a sense of handcraftsmanship emerges, and the architectural plasticity of the facade becomes alive. Brackets can be seen in the catalog of carved decor for the facade — from laconic forms to richly ornamented ones, with floral motifs and geometric patterns.
When choosing a bracket, it is important: it must be proportionate to the casing. If the casing is narrow, the bracket should not be massive. If the casing is wide and decorative, the bracket supports its scale.
Rosettes — connection point and decorative accent
A wooden rosette in the house carving system is a square or round element that covers the corner joints between vertical and horizontal casings. Functionally, it is a seam cover. Aesthetically, it is an accent point, a small ornamental "knot" that fixes attention at key places of the composition.
A good rosette does not just cover the joint — it enhances it. It says: here is an intersection, here is a pause, here the ornament makes an accent. A rosette of the right size and ornament fits organically into the system of casings and brackets. An incorrect one conflicts with them or simply gets lost.
Rosettes are selected in the same ornamental logic as casings. If the casing is in a folk style, the rosette should be from the same tradition. If geometric, then geometric in the rosette as well.
Connecting and intermediate elements
Connecting parts are one of the most underestimated components of a facade set. These are short carved inserts that fill the space between the main elements, allow the set to be adapted to non-standard opening or wall sizes, cover gaps, and add rhythm to long horizontal sections.
Connecting elements are especially relevant where several windows are located close to each other: the vertical casings of adjacent windows need to be linked with some intermediate decor, otherwise a "blank" strip of wall forms between them, visually breaking the facade rhythm.
Balusters and flat balusters of house carving
A baluster in house carving is a flat wooden element with a carved ornament, installed in the railings of a porch, veranda, or balcony. Flat carved balusters work in the same technique as casings, and when selected from the same line, they create a unified decorative system.
This is the element that "closes" the facade decor at the bottom: casings frame the windows, brackets work in the cornice area, and balusters are at the base, near the porch, near the entrance area. Without them, the set may look unfinished from below, even if the upper part of the facade is impeccably designed.
Decorative overlays and strips
Wooden decorative inlays are auxiliary but very useful elements. They are used for additional decoration: on the central axis of the upper casing, in the inter-window space, on the ends of cornice boards, on the walls of the veranda.
Overlays are also indispensable where a "filler" is needed — a small element that occupies space without overloading the plane. They allow adding details pointwise, where needed, without duplicating the main elements.
Wooden baguette — architectural rhythm of the facade
Wooden baguette for facade and interior design This is a profile strip with a more restrained ornament or none at all. Baget is used to create architectural frames, visually separate facade zones, and design cornice belts and pediment overhangs.
If platbands and brackets are decor in the literal sense, then baget is an architectural structure. It doesn't shout; it shapes. In combination with more expressive elements, baget creates a neutral background against which the ornament sounds brighter.
Where house carving is applied: all zones of a wooden house
A house carving set is not just about windows. Let's go through all the zones where carved decor is not just appropriate but necessary.
Windows of a residential house
The most obvious and most widespread application. On each window, a full set: side platbands, top element, bottom strip, corner rosettes, brackets. If the house has multiple floors, the decor should maintain vertical unity: platbands on the first and second floors should have the same ornament, brackets should be of consistent height.
Bathhouse windows
A bathhouse is a structure with its own character. Small windows in a log or timber wall without framing look unfinished. Carved decor for a bathhouse is chosen with a slightly more restrained ornament than for the main house: concise geometric motifs, simple cut-out patterns. The main thing is that the style matches the decor of the main house and all buildings on the site are perceived as a single ensemble.
Gazebo
In a gazebo, carved decor primarily serves an aesthetic function. The window and door openings of the gazebo are framed with the same elements as the main house, but on a smaller scale. Brackets under the gazebo roof, rosettes in corner nodes, flat balusters in the railing—all this creates a complete image of the garden structure.
Porch and entrance group
The porch is the face of the house. This is where the most expressive carved decor should be concentrated: rich brackets, a platband with a figured top above the door, carved balusters of the railing. The porch is a place where the guest stops, waits, and examines. Here, the detail of the ornament is perceived and appreciated first.
Carved wooden decorative elements For the porch, it is always a complete set. The platband above the door, side brackets, railing balusters, decorative strips around the canopy perimeter—all should be in the same ornamental key.
Veranda
The veranda occupies an intermediate place between the house and the garden. There is a lot of glazing here, so there is more decor. Architraves on all window openings of the veranda, brackets under roof overhangs, balusters in the railing, decorative overlays on pillars — all this forms a cohesive architectural volume. A veranda with well-thought-out decor is perceived as a separate architectural work.
Gable
The pediment — a triangular or semicircular part of the wall under the roof slope — is one of the most noticeable facade elements when viewed from a distance. A carved board along the perimeter of the pediment, a decorative overlay along the central axis, an openwork fretwork pattern — these are traditional elements of Russian wooden architecture that are returning to facade practice today. Carved brackets are especially important for the pediment: they work in the zone of maximum visibility and must withstand the scale.
Cornice zone
The cornice board around the perimeter of the roof is a horizontal facade "belt" that visually completes the wall from below the roof. A decorative pattern on the cornice board, brackets in a rhythmic step around the entire perimeter, a smooth transition from window architraves to the cornice element — this is a real facade system. Brackets in the cornice zone should match the architraves in scale and pattern.
Canopy and awning
A canopy over the entrance or parking lot is a small architectural structure that also deserves decor. A pair of brackets under the canopy beam, a simple pattern on the end of the board — and the utilitarian structure acquires character. This technique is familiar from traditional Russian architecture: even the simplest building was decorated with at least a minimal carved accent.
How to choose elements in one style: principles of ornamental unity
This is the heart of the topic. You can buy excellent architraves, wonderful brackets, and beautiful rosettes, but if they are from different stylistic families, the facade will look like a flea market, not an architectural ensemble.
A few practical principles.
The principle of "one ornament — one collection." Choose a main ornamental motif — geometric, floral, folk, abstract — and stick to it across the entire facade. Mixing two similar ornaments from the same collection is acceptable. Mixing geometric patterns with dense folk carving is not.
The principle of scale proportionality. A small, intricate pattern on a large wall with a high ceiling gets lost. A large ornament on a small bathhouse window feels overwhelming. The scale of the decor should match the scale of the architecture.
The principle of accent hierarchy. Not every element needs to be equally decorative. Trim on main windows — richer. On side windows or attic hatches — simpler. The porch is the most expressive spot. The bathhouse — slightly more modest. This creates a visual hierarchy that doesn't tire the eye.
The principle of alignment with architecture. Rich folk carving on a Scandinavian-style house looks odd. A restrained geometric ornament on a traditional log cabin — also doesn't fit. Decor should complement the architecture, not argue with it.
The principle of color unity. All elements should be painted in a coordinated palette. A classic is white trim on a dark wall. But monochrome is also relevant, where trim, brackets, and wall are the same color — then the decor works as relief, not a color spot. You can see ready-made solutions and get inspired in the section ideas for using carved decor.
Trim as the basis of the facade set
Let's focus on trim in more detail — as the main structural element from which everything else is built.
The trim defines three things: the width of the frame around the window, the ornament (and thus the style of the entire set), and the thickness of the decor (the relief that reads from a distance). That's why selection starts with the trim. Once you've chosen it, you automatically set the parameters for the bracket, rosette, and connecting elements.
An important parameter: the width of the trim should be proportional to the distance from the edge of the opening to the corner of the wall or adjacent window. If this distance is small — a wide trim won't fit. If the wall is large and wide — a narrow trim will get lost.
The standard length of a STAVROS carved trim is 2000 mm, thickness — 18 mm. These parameters cover the vast majority of standard openings. If necessary, the length can be cut right on site. The main thing is not to cut through the pattern: if the ornament is symmetrical, cut from the neutral end, preserving the central axis.
The variety of ornaments in the catalog — from a simple "herringbone" to dense traditional carving — allows you to choose an option for virtually any architectural style. In the section house carving you can filter by product type, ornament, collection, and size — this speeds up the selection process several times over.
Brackets: when they are necessary and how to choose them
A bracket is a detail that turns a flat facade into a three-dimensional one. It works on contrast: a flat casing + a protruding bracket = a facade with a play of shadows and a sense of depth.
Where are brackets necessary?
-
Under the roof overhang — in a rhythmic step along the entire cornice. This is the most traditional place for a bracket in Russian wooden architecture.
-
On the sides of a window casing — installed under the upper horizontal element, enhancing the feeling of a "portal" around the window.
-
On the porch — under the canopy beams, on the sides of the entrance opening. Here the bracket is visible up close, so the ornament must be clear and detailed.
-
On the veranda — at the posts, at the ceiling beams, in the corners of the railing. Here the bracket works both structurally and decoratively.
-
At the gable overhang — as a finishing touch for vertical corner elements.
When choosing a bracket, not only the shape of the ornament matters, but also its size. A life-size bracket (large, with good projection) creates a strong play of shadows. A small decorative bracket without projection is more of a flat overlay; it works on the wall, not in space. For the cornice area and porch, it is better to choose brackets with real projection.
Rosettes and connecting parts: invisible heroes of facade decor
Rosettes and connecting elements are what most buyers forget to order the first time. And then they wonder why the trims are installed, but the facade still looks "raw."
A corner rosette is the intersection point of a vertical and horizontal element. Without it, an open joint of two planks is visible in the corner, which over time separates, collects moisture, and looks unfinished. The rosette covers this joint, makes it a decorative accent, and simultaneously protects the connection.
The size of the rosette should match the width of the trim. If the trim is 100 mm, the rosette should be at least 100×100 mm. The pattern should be in the same ornamental key as the trim: the same collection or at least a similar pattern.
Connecting elements are short carved inserts that:
-
fill the gap between the trims of two adjacent windows;
-
allow adapting the length of the trim to a non-standard opening without unsightly cutting along the pattern;
-
create a decorative rhythm on long horizontal sections of the cornice board or belt between floors.
Without connecting elements, a long horizontal strip of wall between windows looks like an unfilled gap. With them, it looks like a continuation of the ornamental rhythm.
How not to overload a facade with carved decor
The danger for those who fall in love with carving at first sight is one — overdoing it. A rich facade is not one with the maximum number of elements. It is one where every element is in its place.
A few specific rules that help avoid overload:
Do not mix more than two ornamental patterns. If the window casings are in a folk style, the brackets should be from the same tradition. Adding geometric rosettes from a different series creates a conflict.
Do not place fine openwork patterns on a high wall. From a distance of 10–15 meters, fine sawn carving blends into a gray grid and becomes unreadable. For large facades, ornaments with large relief and clear contours are needed.
Do not use massive brackets for small windows. A bracket with a 200 mm projection under a 600 mm wide window looks like a foreign element. Proportionality is key.
Think about color in advance. Some ornaments look expressive in natural wood but get lost after painting. Deep relief works well under paint: light and shadow are enhanced, the ornament 'comes alive.' Fine flat patterns may drown under paint. Check the ornament considering the future finish.
Consider the style of the roof, porch, and fence. Facade decor is not an isolated story. It should match the roof shape, porch material, and fence style. Rich traditional carving on a house with a flat modern roof will look strange. But with a gable or hip roof, it works perfectly.
Do not decorate everything at once. Set priorities: the main facade, entrance group, first-floor windows are areas of maximum attention. Side facades, utility buildings — more restrained. This hierarchy makes the house interesting: the eye travels across the facade, finding accents in the right places.
Ready-made set or piece-by-piece selection: what to choose
There is no universal answer — there are two scenarios, each with its own logic.
Ready-made set
Convenient if:
-
All windows are the same size and need to be styled uniformly quickly.
-
There is no need for customization — the standard pattern is acceptable.
-
Need to minimize time for selection and calculation.
A ready-made set is when all necessary elements (platbands, sockets, connecting parts) are already selected and compatible. It saves time, reduces the risk of selection errors, and is convenient for standard solutions: a dacha, a bathhouse, a small country house.
Element-by-element selection
Better if:
-
The house is non-standard: windows of different sizes, non-standard slopes, complex architecture.
-
Need to decorate several areas (windows, porch, bathhouse, gazebo) in a unified style but with varying levels of decor saturation.
-
The task is to create a unique facade ensemble, not a standard solution.
Element-by-element selection gives more freedom but requires understanding of the system. You need to know which trim matches which, how to combine rosettes with brackets, and how to calculate the number of connecting inserts for the entire perimeter.
In both cases, the catalog helps of carved decor STAVROS with filters by product type, size, pattern, collection, and price. The availability filter allows you to immediately see what is in stock and what is made to order.
Kit material: why glued panel is better than solid board
A topic many avoid, but shouldn't. For facade decor, material is not a detail, it's the foundation. A wooden trim made from ordinary pine board and a trim made from glued pine panel are not the same thing.
Glued panel is a construction material where several lamellas are glued together with cross-directional fibers. All defects are removed: knots, resin pockets, cracks. The result is a blank that practically does not warp, crack when drying, or release resin in the sun.
This is critical for the facade. An ordinary board can warp within 2-3 seasons, cracks appear along the fiber, resin comes to the surface and destroys the paint. Glued panel holds its shape much longer — provided high-quality finishing treatment.
STAVROS products are made from exactly this material. The surface is sanded after machining, the pattern is clear and deep, the relief is well readable from a distance. Supplied without a finish coating — the customer chooses the composition for their climate and project. Details on the page Materials and quality of STAVROS products.
Finishing of the set: painting, impregnation, or varnish
This is a question that should be decided before purchase, not after installation. Because the choice of composition affects how the ornament will look.
Facade paint is the most common option. White, cream, gray, blue — any color. The deep relief of the ornament under the paint creates a contrasting play of shadows, which looks especially beautiful on a sunny day. Important: at least two coats of facade paint with preliminary priming. The ends of the trim are primed separately — these are the most vulnerable spots for moisture.
Oil or alkyd impregnation with pigment is an alternative for those who want to preserve the wood texture with the desired shade. The impregnation penetrates the structure, does not form a film that peels over time. The downside is that the color is less saturated, and the ornament reads softer.
Varnish with stain is for those who want a natural look with protection. Suitable for baths, verandas, gazebos, where wood is perceived on an intimate scale. On the main facade, varnish without pigment quickly yellows from UV light — a composition with a UV filter is needed.
Colorless protective impregnation is the minimal option. Only protection without changing the color. Suitable for temporary or dacha solutions, where repainting is planned in 2–3 years.
In all cases: treatment should be done before installation, on both sides, including the ends. A trim treated only on the front side absorbs moisture from the back and deforms much faster.
Carved decor for a bath: selection features
A bathhouse is a specific building in terms of facade decor. There are fewer windows, they are smaller in size, humidity is higher, maintenance is less frequent. This means that the choice of carved decor for a bathhouse needs to be approached a little differently.
The ornament is more concise. Not because the bathhouse does not deserve beautiful decor, but because small windows cannot accommodate complex ornament without visual overload. Simple geometry, folk cut-out pattern, restrained plant motif — this is the ideal balance for a bathhouse.
The material is the same stabilized shield as for the main house. There is no point in saving here: the bathhouse operates in harsh conditions, and cheap boards will start to warp after the first winter.
Finishing must be done with moisture-protective compounds. A bathhouse is not a place where you can get by with a single coat of paint. Primer, two coats of facade paint, or a special impregnation for high-humidity conditions.
The style is coordinated with the main house. If the house is designed in a folk style, the bathhouse continues this tradition. If the house has a modern facade with geometric decor, the bathhouse should not suddenly "become traditional."
Gazebo kit: a separate story
The gazebo is the only structure on the site where decor serves almost exclusively an aesthetic function. There is no need to protect a window from the weather or cover a joint. The task here is to create a beautiful appearance for the garden object.
For the gazebo, carved brackets under the roof and flat balusters in the fencing work especially well. These are two visual accents that are noticeable when looking at the gazebo from the path. Trim on the window and door openings of the gazebo adds completeness.
The gazebo is a place where you can afford a slightly more decorative ornament than on the main house. After all, it is viewed from close range, in a calm setting, often deliberately walked around. Detailed patterns here will be appreciated.
For gazebos in a folk or estate style, trim with traditional Russian carving and richly ornamented brackets under the roof work well. This creates an image close to historical garden gazebos—light, elegant, and slightly fairy-tale-like.
Step-by-step logic for assembling the kit: from measurement to order
To avoid missing anything, use the following order of actions.
Step 1. Measure all openings and areas. Record the height and width of each window, the height from the ground to the cornice belt, and the dimensions of the porch and canopy. This is the initial data for calculating the entire set.
Step 2. Choose style and ornament. Decide on the style of the house. Browse the catalog, select trim pieces — one ornament for the entire facade or two similar ones from the same collection.
Step 3. Calculate trim pieces. Two vertical elements for each window, plus a top horizontal one, plus a bottom one if necessary. Standard length is 2000 mm — cut to the required size.
Step 4. Select brackets. By quantity: how many windows, how many points under the roof, how many positions on the porch. Style — consistent with the trim pieces.
Step 5. Rosettes. Two to four per window — corner ones. Plus additional ones for long horizontal sections if intermediate accents are needed.
Step 6. Connecting elements. Count the spaces between windows, non-standard junctions, and areas where length adjustment is needed.
Step 7. Balusters. For the porch, veranda, balcony — calculate the quantity based on the installation spacing (usually 100–150 mm between balusters).
Step 8. Decorative overlays and baguette. For additional accents, cornice belts, and gable areas.
Step 9. Form the order and check. Sum everything by item, check compatibility by ornament and size. Confirm availability.
Step 10. Purchase, delivery, final treatment before installation. Do not install untreated wood outdoors.
Additional keys and pages for a complete set
In addition to the main decor, a number of projects require a wider range of wooden products for the home. It is important here that STAVROS is not only facade decor, but also a full line of wooden products for the home, including furniture and interior wooden elements — countertops, shelves, stair parts, furniture overlays.
If the house is decorated comprehensively — both outside and inside — it is convenient to work with one supplier so that the material, wood species, and processing style match throughout the project. STAVROS solid wood products and carved decor are made from a single material and are compatible in all parameters.
For those seeking inspiration or examples of completed projects, the section ideas for using carved decor offers more than 40 ready-made solutions for the home, bathhouse, gazebo, porch, and facade — with photos, kit compositions, and installation instructions.
Frequently asked questions and answers
What is included in a house carving kit?
The basic kit includes carved architraves (side, top, and bottom horizontal elements), corner rosettes for joints, and carved brackets. The extended kit also includes connecting elements, flat balusters, decorative overlays, wooden baguettes, and other carved details.
Can I assemble a house carving kit myself?
Yes, and it is quite feasible for a person without specialized knowledge. Start with the platbands — choose an ornament and width. Then select brackets and rosettes from the same collection or the nearest ornamental series. Add connecting elements as needed. Selection instructions are available in the STAVROS catalog.
What are rosettes used for in the house carving system?
Rosettes serve two functions. The practical one is to cover the corner joints between vertical and horizontal elements of the platband, protecting them from moisture and deformation. The decorative one is to fix accent points at the corners of the window frame, making the composition complete.
Where are carved brackets used?
Brackets are installed under the roof overhang along the cornice, on the sides of window platbands under the top element, under the beams of the porch and canopy, on the gable, and near veranda posts. The bracket adds volume and three-dimensionality to a flat facade.
Is house carving suitable for a bathhouse and a gazebo?
Yes, and it is a common practice. For a bathhouse, choose more laconic ornaments — geometric or simple cut-out patterns. For a gazebo, more decorative options with detailed ornamentation are acceptable. The main rule is that the style of all buildings on the site should match.
Do I need to paint wooden carved decor?
Absolutely. Untreated wood on the facade quickly darkens, absorbs moisture, and loses its shape. The minimum option is priming and two coats of facade paint or protective impregnation. It needs to be treated on all sides, including the ends.
How to calculate the number of platbands for the entire house?
Count the number of windows. For each window, two vertical trim pieces and one upper horizontal piece. Plus a lower piece when the lower abutment is open. The standard length of 2000 mm is cut to the required size. Add rosettes (2–4 per window) and brackets according to the number of positions.
How does a ready-made kit differ from a piece-by-piece selection?
A ready-made kit is fast, convenient, and without the risk of incompatibility. It is suitable for standard projects. Piece-by-piece selection offers more freedom, precise adjustment for non-standard conditions, and the ability to create a unique facade ensemble. Both options are available in the STAVROS catalog.
STAVROS is a manufacturer of a complete set of house carving for the facade
Carved trim pieces, brackets, rosettes, connecting elements, decorative overlays, balusters, wooden baguette — the entire range of products for facade decor of a wooden house is produced and supplied by STAVROS. All products are made from glued pine panels with defects removed, on CNC machines with manual sanding. Standard trim parameters: length 2000 mm, thickness 18 mm. Supplied without a finish coating, ready for finishing according to any project.
STAVROS offers both ready-made elements for quick decoration of standard openings and piece-by-piece selection for non-standard facade tasks. The catalog with filters by product type, ornament, size, collection, and availability allows you to create an accurate order without wasting time on searching. Delivery of carved decor for wooden houses, bathhouses, gazebos, and porches — throughout Russia. Choose your kit in the section house carving and start designing the facade with the part that is most convenient for you — a trim piece, bracket, or rosette.