Article Contents:
- Why the entry area should not be left empty
- Moldings by the front door: order, structure, character
- What to buy for the wall by the front door
- Painting moldings: in the wall color or contrast?
- Mirror in the entry area: how to make it part of the interior
- Decor around the mirror: options and solutions
- Mirror and light: a connection that is ignored
- Console, bench, and cabinet: linking furniture and the wall
- Decorative overlays: accent without overload
- Ceiling cornice in the entry area: the finishing touch
- What to buy for the entry area: a practical guide
- Entry area style: how to choose molding for the interior
- How not to overdo molding in a small hallway
- Installing molding in the entry area: step by step without mistakes
- Step 1: Measurement and calculation
- Step 2: Marking
- Step 3: Cutting corners
- Step 4: Installation
- Step 5: Sealing joints and painting
- Additional features: baseboard and vertical moldings
- Three mistakes when choosing moldings for the entrance area
- Real examples: how moldings work in the entrance area
- FAQ: Answers to Popular Questions
- Which moldings to choose for the entrance area?
- What to buy for the wall by the front door?
- Can moldings be used in a small hallway?
- How to decorate a mirror with moldings in the entrance area?
- Do you need glue or can you use another fastening?
- How long will it take to decorate the hallway with moldings?
- Where to buy moldings for the entrance area in St. Petersburg and Moscow?
- About the Company STAVROS
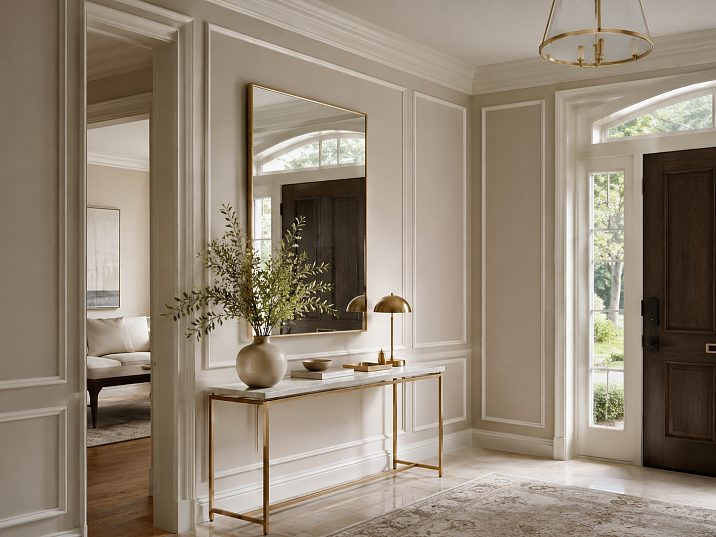
The entrance area is the first thing a person sees when crossing the threshold of your home. It is the place that forms an impression faster than any words. And it is here that an unforgivable mistake is most often made: the wall by the door is left empty, the mirror is hung without a frame, the console is placed against a background of bare plaster. The result is an interior that looks unfinished regardless of the quality of the renovation. Fixing this is easier than it seems: Buy moldings — and the entrance area begins to function as a single, thoughtfully designed architectural story.


Why the entrance area cannot be left empty
There are rooms that are forgiven for being unfinished. A storage room—sure. A utility room—of course. But the entrance area forgives nothing. It is here that the first and most lasting impression of the home is formed—the one that sticks in the memory of guests, relatives, and yourself. The psychology of spatial perception works simply: the brain registers the level of interior completeness in the first seconds, and if the wall by the door is empty and the mirror hangs like a randomly forgotten object—the feeling of incompleteness spreads throughout the entire home.
An empty wall by the front door is not neutrality. It is a lack of intent. This is especially acute in hallways where the architecture of the space offers no other advantages: no high ceilings, no panoramic windows, no accent furniture. The only tool that can change the situation without major renovation is stucco molding for the entrance area. Moldings, decorative overlays, stucco decor near the mirror and console—they turn the plane of the wall into an architectural statement.
It is important to understand: stucco in the entrance area does not work as decoration for decoration's sake. It works as a tool for organizing space. Moldings break the wall into visual panels, creating a sense of order. Decorative stucco above the mirror makes it part of the composition, not a random object. Stucco decor above the console connects the furniture with the wall, creating a unified ensemble. This is the main principle: the entrance area looks more expensive when the door, mirror, console, and wall do not live separately but are united by a single decorative language.
Polyurethane as a material for entrance area decor is an unconditional choice based on a combination of characteristics. It is lightweight, moisture-resistant, does not react to temperature fluctuations that are inevitable near the front door, accepts any paint perfectly, and can be installed in one day without professional skills. You can buy ready-made stucco matching the Baroque style. Calculate the quantity: linear meters of cornices and moldings, number of rosettes, pilasters, consoles, corner elements. Add a ten to fifteen percent allowance for trimming. today it is possible for any style, budget, and task—from minimalist thin moldings to complex decorative overlays.


Moldings by the front door: order, structure, character
The wall next to the front door is the first surface you interact with when entering the home. Your hand reaches for the switch, your gaze glides along the wall, your feet have not yet left the threshold. And it is this wall that most often remains completely empty. Not because the owners do not want to decorate it—it is just unclear where to start.
They always start with moldings. Moldings made of polyurethane — this is the basic tool for organizing the wall plane. They create rectangular frames — so-called panels — that turn the wall from a simply painted surface into a structured architectural element. Frames made of moldings can be of different sizes, placed at different heights, combined with decorative corner pieces — and each time the result will be different, but always complete.
What is fundamentally important when choosing moldings for the wall by the door? First, the profile: for an entry area with low ceilings, flat or slightly convex moldings with a width of up to 30–40 mm work best — they add structure without weighing down the space. Second, the height of the frames: the classic approach is frames from the baseboard to the middle of the wall plus a separate frame in the upper part. This creates the feel of paneling characteristic of respectable interiors. Third, coordination with the door: the moldings on the wall should echo the thickness and profile of the door trim — then the door and wall become part of a single ensemble.
The stavros.ru website offers a wide selection of moldings — from miniature HIWOOD polystyrene profiles (10–12 mm) to full-fledged MLDPU polyurethane moldings with rich relief. For the entry area in a standard city apartment, moldings from the MLDPU-001 and MLDPU-004 lines work well: they are expressive enough to hold the wall but do not overload the small hallway space.
Our factory also produces:


What to buy for the wall by the front door
The shopping list for decorating the wall by the door looks something like this:
-
Buy polyurethane moldings — the main element of frame panels
-
decorative corner pieces for frames — give the frame a finished look
-
installation adhesive for polyurethane products — a mandatory consumable
-
acrylic putty for filling joints — needed for a perfect result
-
paint in the color of the wall or contrasting — depending on the design concept
-
allow 10–15% extra for trimming and possible mistakes
The installation technology for moldings in the entry area is fundamentally no different from other rooms. The main thing is precise marking. A laser level here is not a luxury but a necessity: a crooked frame at the front door immediately catches the eye. After marking — apply glue to the molding, press for 2–3 minutes, additionally secure with painter's tape until fully set. The next day — fill joints at corners, sand, and paint. The entire process for a standard hallway takes 1–2 days.
Get Consultation
Painting moldings: in the color of the wall or contrasting?
This is the question most often asked. The answer depends on two variables: the size of the hallway and the desired effect. For a small hallway — definitely in the color of the wall. Moldings painted in the same tone as the background create a three-dimensional relief effect without visually fragmenting the space: the wall remains cohesive but gains architectural depth. For a spacious hallway or entry area in a country house — moldings in a darker or contrasting color create the effect of classic paneling, giving the space weight and status.
buy polyurethane moldings now available with delivery throughout Russia — this is important because the entry area usually requires an exact amount of material, and it's better to calculate the reserve in advance based on the actual wall dimensions.
Mirror in the entry area: how to make it part of the interior
A mirror at the entrance is a functional item: to check your appearance before leaving, to visually expand the hallway space. But in most apartments, the mirror exists on its own — hanging on the wall as a foreign object, not connected to the surrounding space. Add a proper stucco frame to it — and the mirror becomes the central element of the composition around which the entire entry area is built.
There are several proven approaches to decorating a mirror with stucco in the hallway. The first and most popular is a frame made of moldings. The moldings are mounted around the perimeter of the mirror, creating the effect of an object inserted into an architectural frame. The width of the molding for the frame is chosen proportionally to the size of the mirror: for a mirror 60×80 cm, a profile width of 25–35 mm is sufficient; for a larger one — 40–50 mm. Such a frame turns an ordinary mirror into an interior element comparable in decorative weight to a painting in a gallery frame.
The second approach is decorative stucco above the mirror. This is a horizontal decorative element that is mounted directly above the mirror and creates a "canopy" — an architectural accent that fixes the upper boundary of the mirror. Such decor can be laconic (a simple decorative overlay with a floral motif) or more complex (an ornamental composition with curls and leaves). In both cases, the effect is the same: the mirror stops "floating" on the wall and acquires a clear architectural place.
Decor around the mirror: options and solutions
Designing a mirror in the entryway is a task with no single correct solution. There is a set of tools from which you choose the ones you need:
-
A frame made of moldings around the mirror is a classic option, works in any style and with any mirror size
-
Decorative stucco on top — adds solemnity and creates an architectural "crown" above the mirror
-
Stucco decor on the sides — symmetrical overlays on the left and right, creating the effect of pilasters next to the mirror
-
Frame behind the mirror — moldings are mounted on the wall, the mirror is attached over the frame: the frame is slightly larger than the mirror and forms a visible border around the perimeter
-
Decor above the console under the mirror — if there is a console or cabinet under the mirror, a decorative overlay above it creates a horizontal accent linking the mirror to the furniture
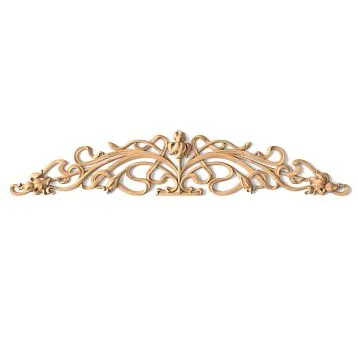
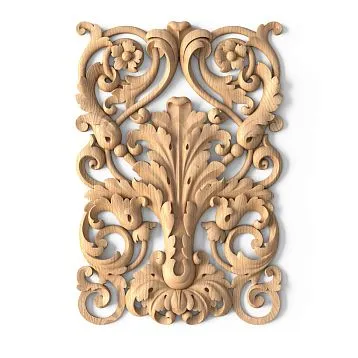
For all these tasks Buy decorative stucco you can in the STAVROS catalog — in the decorative overlays section, products of various formats are presented: from small corner elements to large horizontal decors that can become an independent accent above the mirror or console.
Mirror and light: a connection that is ignored
There is one nuance that even experienced designers miss. The mirror in the entryway reflects light — and what it reflects directly affects the perception of the space. If you install a spot light above the mirror and decorate the area above it with decorative stucco, the light will fall on the relief of the overlay, creating a play of shadows. This effect is especially valuable for small hallways: properly placed light combined with stucco around the mirror makes the entryway visually twice as spacious.
Console, bench, and wardrobe: connecting furniture to the wall
Furniture in the entryway is always a functional story. A console for keys and mail, a bench for changing shoes, a wardrobe for outerwear. But there is often a gap between the furniture and the wall: the furniture stands on its own, the wall exists separately, and the entire entryway looks like a temporary solution rather than a well-thought-out interior.
Molding solves this problem. The principle is simple: the decor on the wall should support the furniture, creating a visual connection between the vertical and horizontal planes. Moldings on the wall behind the console form a "background panel" on which the furniture looks like a built-in element, not a randomly placed object. buy decorative moldings for this task, it is worth doing before choosing the furniture itself — then the wall decor and furniture can be coordinated in style and proportions.
What exactly to choose depends on the furniture and style:
-
Classic style console — moldings on the wall behind it, a decorative panel above the console, possibly small stucco decor on the sides
-
Modern style bench — thin, laconic moldings in the color of the wall, without ornamental details
-
Sliding wardrobe — moldings on the side walls around the perimeter of the wardrobe to make it appear built-in
-
Dresser with mirror — moldings behind the dresser + stucco decor above the mirror: creating a full-fledged "dressing area"
A special scenario is a console with a mirror above it. This is the most common composition in the entryway, and it has its own decorating logic. The wall behind the console is framed with moldings — it creates a "background" for the entire group. The mirror gets a frame. Above the mirror — a decorative panel or horizontal decor. On the sides — vertical moldings that create the effect of pilasters. As a result, the console with a mirror turns into a full-fledged architectural element, comparable in weight to a fireplace or a library section.
Decorative overlays: accent without overload
Buy Moldings for the entry area should be used with moderation. The main mistake when decorating hallways is the desire to use many details at once. Two or three well-placed accents work better than a dozen elements competing for attention. For the entry area of a standard apartment, one decorative overlay above the mirror and a frame of moldings on the wall near the door are quite enough to make the space come alive.
In the STAVROS catalog, polyurethane decorative overlays are presented in a very wide range — from small corner elements NPU-470 (590 rubles) to large baroque decors NPU.VRS-006 (29,320 rubles). For the entry area of a city apartment, medium-sized overlays from the NPU.VRS-012 or NPU-116 series are optimal — they are expressive enough but do not overload the small space.
Ceiling cornice in the entry area: the final touch
The ceiling in the entry area is often forgotten. But in vain. A ceiling cornice around the perimeter of the hallway is an element that works on several levels at once. Firstly, it creates a smooth transition between the wall and the ceiling, removing the sharp border that visually 'cuts off' the space. Secondly, an LED strip can be hidden behind the cornice — and then the ceiling lighting in the entry area becomes part of the architectural solution, not a protruding garland. Thirdly, the cornice coordinates the wall decor with the ceiling, completing the vertical architectural theme.
Ceiling molding from the STAVROS catalog includes both laconic polystyrene cornices HIWOOD (from 40 to 100 mm) and more complex polyurethane profiles. For an entry area with low ceilings (standard 2.5–2.7 m), it is better to choose cornices with a width of 40–60 mm — they will add completeness without overloading the space. For a hallway with high ceilings or in a country house, you can choose a more massive profile — and even consider installing a ready-made decorative set from the CPU-P series, if the hallway is spacious enough.
What to buy for the entry area: a practical guide
| Task | What to buy |
|---|---|
| Decorate the wall at the entrance door | Polyurethane moldings, glue, paint, 10–15% spare |
| Make the mirror part of the interior | Moldings for the frame + decorative stucco on top |
| Style the console | Stucco decor above the console or decorative overlay |
| Connect furniture and wall | Frame of moldings behind furniture + vertical moldings on the sides |
| Add completeness to the ceiling | Ceiling cornice around the perimeter |
| Make the entrance area look more expensive | Moldings + decor + ceiling cornice + lighting |
| Small hallway without overload | Thin moldings in wall color, one accent decor |
The logic for furnishing the entryway is built from large to small: first, the main accent is determined — the wall by the door or the mirror area with a console — and then supporting elements are added to it. Not the other way around. Buying "everything at once" doesn't make sense: it's better to start with wall moldings and one decorative piece, evaluate the result, and add details if necessary.
Entryway style: how to choose molding for the interior
The question of style is one of the first that arises when choosing molding. And here it's important to understand one thing: the style of the molding should not perfectly match the style of the apartment — it should not contradict it. This is a subtle distinction that many miss.
Classic and neoclassical — a complete carte blanche for molding. Moldings with a relief profile, decorative overlays with floral motifs, stucco decor above the mirror with curls — all of this is organic and appropriate. There's no need to fear richness: in a classic interior, molding is not an exception, but the norm.
Modern style and minimalism — does not mean giving up molding. It means choosing different forms. Thin rectangular moldings without ornament, painted in the color of the wall — they create a relief surface structure without emphasizing details. Such moldings are available in the STAVROS assortment — from the HIWOOD series, with a minimal profile from 10 mm.
Scandi, Hygge — the same story as with minimalism. Wood textures, white walls, no unnecessary detailing. Here, thin HIWOOD moldings in white or a "wood-like" color will add structure without violating the spirit of the style.
Art Deco — geometry above all. Straight lines, strict rectangular frames, no floral motifs. Moldings with a flat or stepped profile, painted in a contrasting color or gold — an ideal solution for an entryway in Art Deco style.
How not to overdo it with molding in a small hallway
A small hallway is a special case that requires special caution. The space is already small, and any mistake in decoration immediately makes it feel even tighter. But properly selected molding for the hallway, on the contrary, can visually expand the space and make it more organized.
Three rules for molding in a small hallway:
Rule one: thin moldings. Profile width — no more than 20–25 mm. Thin lines do not fragment the space and do not create a feeling of tightness. The D22 molding from the HIWOOD series (22 mm wide) is a textbook choice for a small hallway.
Rule two: color matching the wall. Moldings painted the same color as the wall create a relief effect without visually breaking up the surface. The space remains cohesive but gains architectural depth. Contrasting moldings — only in spacious hallways.
Rule three: one accent. One decorative element — above the mirror or above the console. Not two, not three. One. A small hallway benefits from precision, not saturation.
Following these rules, decorative stucco for the hallway can be used even in the tiniest entry vestibule — and achieve a result that visually doubles the sense of space.
Installation of stucco in the entry area: step by step and without mistakes
Installing polyurethane stucco in the entry area is a task that a person without special skills can handle. Polyurethane is lightweight, flexible, easily cut with a regular utility knife or hacksaw, and adheres well with special mounting adhesive. Below is the step-by-step logic for a typical scenario: a frame of moldings on the wall near the door + decor above the mirror.
Step 1: Measurement and calculation
Measure the wall near the door. Determine the dimensions of the frames — usually from the baseboard to a height of 80–90 cm (lower frame) and from 90 to 180–200 cm (upper frame). Calculate the perimeter of each frame and sum them up. Add 15% margin for trimming and inevitable errors.
Step 2: Marking
Apply pencil markings using a laser level. Draw lines along the entire perimeter of each frame. Check the diagonals of the frames — they must be equal. A small inaccuracy at this stage will turn into a noticeable skew in the final result.
Step 3: Cutting corners
The corners of molding frames are cut at 45°. Use a miter box (manual or electric) for this. Cutting accuracy is critical: even a small gap in the corner joint will be visible after painting. If you lack experience, practice on scraps.
Step 4: installation
Apply construction adhesive to the back of the molding in a zigzag pattern or dots every 10–15 cm. Press the molding against the wall along the marked line and hold for 1–2 minutes. Secure with painter's tape until the adhesive fully sets (usually 20–30 minutes). Additionally, seal corner joints with acrylic sealant.
Step 5: Sealing joints and painting
After the adhesive has fully set (12–24 hours), remove the tape, fill corner joints with acrylic putty, and sand with fine-grit sandpaper (grit 240–320). Prime the surface. Paint the moldings in the chosen color — one or two coats. Polyurethane and polystyrene hold paint well without special preparation.
Additional options: baseboard and vertical moldings
Speaking of moldings in the entry area, we cannot fail to mention the baseboard. The baseboard is a horizontal molding near the floor, and in the hallway it plays an important role: it completes the vertical wall surface, hides the technical gap between the wall and floor, and creates a horizontal rhythm around the room's perimeter. The height of the baseboard for a hallway is 60–80 mm for standard rooms, 100 mm or more for high ceilings.
Vertical moldings are another tool that is underestimated. A vertical strip of molding on the wall does three things at once: visually stretches the room upward, creates a "pilaster" effect characteristic of classic interiors, and serves as a divider between functional zones of the hallway (door zone / mirror zone / wardrobe zone). The width of the vertical molding is typically the same as that of the frame moldings to maintain visual unity.
Three mistakes when choosing moldings for the entry area
Practice shows that when decorating an entryway with stucco, people step on the same rake. I will list the three most common mistakes so you don't repeat them.
Mistake one: inconsistent scale. Large ornamental overlays in a small entryway are a disaster. A decorative element measuring 300×400 mm, appropriate in a large living room, will look like a bull in a china shop in a 4 m² entryway. The scale of the decor should match the scale of the room. For a standard city entryway — small and medium overlays, thin moldings.
Mistake two: stucco without final painting. Polyurethane products come in white or primed form. If you leave the moldings in factory white, the result will look unfinished, especially on colored walls. Final painting is a mandatory step. It is painting that turns stucco from a building material into a design element.
Mistake three: mixing ornamental styles. Baroque overlays + geometric moldings + floral decor in one space is not "rich", it's "chaos". Stick to a single ornamental language: if you chose classic — classic everywhere, if you chose geometry — only geometry. In the STAVROS catalog, products are systematized by style, which significantly simplifies the selection of a coordinated set.
Real examples: how stucco works in the entrance area
Let's look at a few specific scenarios that occur most often.
Scenario 1: Narrow entryway, ceiling height 2.5 m, mirror on the wall. Solution: D22 HIWOOD moldings in one frame behind the mirror + small decorative overlay NPU-116 above the mirror + moldings of the same profile around the mirror as a frame. Everything in the color of the wall. Result: the mirror became an interior element, the entryway looks organized.
Scenario 2: Entryway 6 m², console with cabinet, mirror above it. Solution: frame from MLDPU-001 moldings behind the cabinet + moldings around the mirror + decorative overlay NPU.VRS-012 above the mirror + ceiling cornice LD32 around the perimeter. Color of moldings — one shade lighter than the wall. Result: the cabinet area with the mirror looks like a well-thought-out architectural element, not just a set of furniture.
Scenario 3: Country house, entryway 15 m², ceiling height 3 m, classic style. Solution: frames from MLDPU-004 moldings on all walls (from baseboard to ceiling in three levels) + decorative overlays NPU.VRS-002-3 in the corners of the frames + ceiling cornice with a relief profile + above the entrance door — horizontal stucco decor NPU.VRS-013. Everything painted white with a slight pearlescent additive. Result: the country house entryway looks like a ceremonial enfilade of a noble mansion.
FAQ: Answers to popular questions
Which stucco to choose for the entrance area?
For the entry area, the best options are Moldings made of polyurethane for structuring walls and creating frames, neat Decorative stucco for framing a mirror and one expressive Relief Decoration above a console or as an accent on the wall. For small hallways — thin profiles 20–30 mm wide in the color of the wall, for spacious ones — you can allow more complex and rich solutions.
What to buy for the wall by the front door?
The basic set includes: Buy polyurethane moldings — for frame panels, mounting adhesive, acrylic sealant for filling joints, paint or primer-enamel. Material reserve — 10–15% of the calculated amount. If necessary — decorative corner covers for frame corners.
Can molding be used in a small hallway?
Yes, and this is one of the best solutions for a small hallway. The main thing is to choose the right scale. Thin moldings 20–25 mm wide, painted in the color of the wall, create a relief volume without visually fragmenting the space. One small decorative element above the mirror will add an accent without overloading the space.
How to decorate a mirror with molding in the entry area?
The simplest way is a frame made of moldings around the perimeter of the mirror. The moldings are mounted on the wall around the mirror with a 5–10 mm gap from the edge. Additionally, you can add Buy Moldings above the mirror — a horizontal decorative overlay that will create an "architectural cap" over the mirror surface.
Is glue necessary, or can another type of fastening be used?
For polyurethane moldings and overlays, a special mounting adhesive is used — liquid nails or polyurethane-based glue. Additional fasteners (screws, dowels) are only needed for heavy facade elements. In the entry area, where lightweight interior products are used, glue is sufficient.
How long will it take to decorate the hallway with stucco molding?
Installing moldings in a standard hallway (wall frame + mirror decoration) takes 1 day of work + 1 day for glue drying + half a day for final painting. Total: 2–3 days including technological pauses. A professional team will handle it faster, but most tasks in the hallway can realistically be done independently.
Where to buy stucco molding for the entry area in St. Petersburg and Moscow?
Buy molding with delivery across Russia, as well as with pickup from St. Petersburg and Moscow, is available at the STAVROS online store. The catalog includes a full range of moldings, decorative overlays, ceiling cornices, and stucco decor — everything needed for designing the entry area from the foundation to the ceiling cornice.
About the company STAVROS
STAVROS is a Russian supplier of decorative polyurethane and polystyrene products for interiors and facades. The company offers a full range of stucco molding: moldings, cornices, baseboards, decorative overlays, ceiling rosettes, and ready-made ceiling decor sets. All products are made from European materials, feature precise relief, moisture resistance, and are ready for painting. STAVROS works with designers, construction companies, and private buyers — with delivery throughout Russia and pickup from showrooms in St. Petersburg and Moscow. If you want You can buy ready-made stucco matching the Baroque style. Calculate the quantity: linear meters of cornices and moldings, number of rosettes, pilasters, consoles, corner elements. Add a ten to fifteen percent allowance for trimming. for the entry area, hallway, or any other room — the STAVROS catalog provides a comprehensive selection for any task and any budget.