Article Contents:
- Where the correct calculation begins
- What needs to be measured and recorded before purchase
- Dimensions of each window opening
- Number of windows and their grouping
- Dimensions of door openings
- Porch and entrance group areas
- Bathhouse, gazebo, and utility buildings
- What does a set of carved architraves for one window consist of
- Side trims (2 pieces)
- Top horizontal element (1 piece)
- Top piece (1 piece, optional)
- Bottom element (1 piece, optional)
- Corner rosettes and connecting elements
- Brackets
- How to calculate trims for a standard window: example
- Side trims
- Top horizontal element
- Top piece
- Bottom horizontal element
- Recessed Outlets
- Final set for one window 1200 × 1400 mm (full framing):
- How to calculate trims for multiple windows of different sizes
- Example calculation table for a house with multiple window types
- How to calculate trims for an entrance door and doorway
- Side trims for the door
- Top horizontal element for the door
- Door header
- Door corner rosettes
- Final set for an entrance door 1000 × 2100 mm:
- How to calculate decor for the porch and entrance group
- Brackets under the porch canopy
- Decorative overlays for columns
- Balusters for the railing
- Do you need a reserve and how much to take
- Why you need a reserve
- How much reserve to take
- Example of calculating the reserve for our example
- How to calculate decor for a bathhouse and gazebo
- Bathhouse
- Gazebo
- How not to make a mistake with the quantity when ordering: main rules
- Rule 1: count not windows, but openings
- Rule 2: don't forget about doors
- Rule 3: separate the main and side facades
- Rule 4: count sockets and connectors separately
- Rule 5: check element widths against opening widths
- Rule 6: clarify standard length with the manufacturer
- Rule 7: one order — one style
- What else to consider when calculating: wooden baguette and overlays
- Wooden frame
- Decorative appliqués
- Example of a final calculation for the entire house
- House (windows and doors):
- Bathhouse (2 windows + 1 door):
- Porch (canopy, 2 columns):
- Total order list with a 10–15% margin:
- How to view ideas and ensure the right choice before ordering
- Frequently asked questions about calculating carved architraves
- How many carved architraves are needed for one standard window?
- Should I buy architraves with a margin?
- Can I calculate architraves for the whole house at once?
- Do I need to count brackets and rosettes separately?
- What if the windows in the house are of different sizes?
- How to calculate architraves for a non-standard (arched or trapezoidal) window?
- How many architraves to take for a house with 10 windows?
- About the Company STAVROS
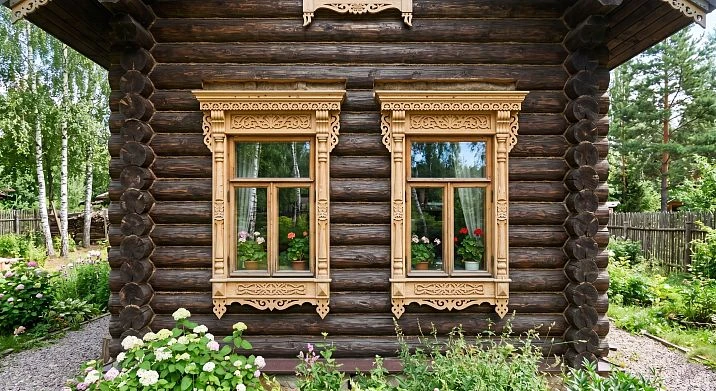
This is where people most often make mistakes when ordering: they take less than needed, forget about joining elements, do not account for doors and porch — and as a result, they get an incomplete set that ruins the whole effect. Or, on the contrary, they overstock with a margin and pay extra.
This article is a detailed practical calculation guide. No fluff, only specifics: how to calculate carved architraves for a house, what a set for one window consists of, how to account for different opening sizes, doors, porch, and the entire facade — and how to place an order Carved Mouldings without mistakes the first time.
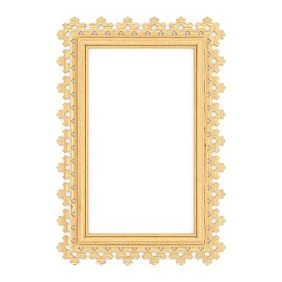
Where the correct calculation begins
The mistake most beginners make is starting to count architraves from a catalog. This is the wrong order. First — measurements and a diagram, then — the catalog.
The correct calculation of carved architraves for a house starts with a sheet of paper (or a table) where everything is recorded: the number of windows, their sizes, their location on the facades, the presence of doors, porch, bathhouse, and other objects requiring decoration. Only with this complete picture can you compile an accurate order list.
Why is this important? Because wooden facade decor is ordered from the manufacturer, delivered, and buying "a little more" later means time and additional delivery. And if the first and second batches are from different production runs, there may be discrepancies in geometry, which is noticeable during installation. A single order guarantees a unified style.




What needs to be measured and recorded before purchasing
Before opening the catalog house carving, walk around the entire house with a tape measure and notepad. Here is what needs to be recorded.
Our factory also produces:
Dimensions of each window opening
For each window, record:
-
The height of the opening — from the bottom edge of the casing or frame to the top.
-
The width of the opening — from one side edge to the other.
-
Window type — standard rectangular, arched, dormer, paired (two windows side by side without a pier).
Separately note: whether there is space above the window for a pediment (top decorative element) — i.e., whether there is enough distance from the top of the frame to the cornice or next structural element. Typically, at least 200–250 mm of free space is needed to install a standard-sized pediment.
Get Consultation
Number of windows and their grouping
Group windows by size: "large", "medium", "small" — or more specifically, by actual dimensions. This greatly simplifies calculation: instead of counting each window individually, you calculate a set for each group and multiply by the number of windows in the group.
Example grouping for a typical country house:
-
Windows 1200 × 1400 mm — 4 pieces (living room, bedrooms)
-
Windows 900 × 1200 mm — 6 pieces (kitchen, children's room, bathroom)
-
Windows 600 × 800 mm — 2 pieces (pantry, attic)
-
Entrance door opening 1000 × 2100 mm — 1 piece
-
Door opening to the bathhouse 900 × 2000 mm — 1 piece
For each group, the calculation is done separately — and then summed up.
Door opening dimensions
Doors are often left out of the calculation — and this is a serious mistake. The entrance door is the main element of the facade, and its design should be either as rich as window trims, or even more elaborate. The door trim — wide, with or without a pediment — requires a separate calculation.
For the door, measure:
-
The height and width of the opening (or door frame).
-
The distance from the top of the frame to the cornice or roof overhang.
-
Is there space above the door for a decorative canopy or wide pediment.
Porch and entrance group areas
A porch with a canopy is not just about trim. Brackets under the canopy, decorative overlays on posts or walls, carved balusters for railings may also be needed. All of this is a separate line in the calculation.
Measure the porch posts, the width of the canopy, the height from the ground to the lower edge of the canopy — this will help determine the number and sizes of brackets.
Bathhouse, gazebo, and utility buildings
If there is a bathhouse, gazebo, or other buildings on the property that you plan to decorate in the same style as the house, their windows and doors need to be measured separately. Add them to the same list — just under a different heading.
What a set of carved trim for one window consists of
Understanding the configuration logic means you are already halfway to correctly calculating the order. Let's break down the composition of a complete set for one rectangular window.
Side trims (2 pieces)
Two vertical elements form the base of the framing. They are installed to the right and left of the window opening. The standard length is 2000 mm. For most window openings up to 1600 mm high, one element is enough — it is cut to size on site.
If the opening height exceeds 2000 mm (non-standard tall window, panoramic window, or door opening), the side trim is assembled from two elements using a joining overlay.
Top horizontal element (1 piece)
The horizontal casing covers the upper area above the window and connects the two side elements. Its length is selected based on the opening width, accounting for the overlap over the side casings — typically the opening width + 2 × the width of the side casing.
If the pattern of the top horizontal element differs from the side ones (which occurs in some collections), please specify this when ordering.
Top piece (1 piece, optional)
The top piece is the upper decorative element that crowns the window frame. It can be semicircular, triangular (pediment), or shaped. It is installed above the horizontal element.
The top piece is not a mandatory detail, but it is what turns an ordinary casing into a formal window frame. For the main facade, a top piece is recommended on each window. For side facades — as desired.
Important: the top piece requires free space above the horizontal element. Make sure this space is available.
Bottom element (1 piece, optional)
The bottom horizontal casing covers the area under the window — between the windowsill and the facade board. It is not needed in all projects: sometimes a wooden windowsill with a profile serves this role. But if there is no windowsill or it is narrow, the bottom element completes the entire frame.
Corner rosettes and connecting elements
Rostettes are small decorative details installed at the corners where side and horizontal trim pieces meet. They cover technical joints and add an ornamental accent precisely where two elements come together.
Connecting elements are used when extending the length of a trim piece (when the opening height exceeds the standard 2000 mm) and when joining a horizontal element with a side piece in complex corner configurations.
For one window with four corners, four rosettes are needed. If the configuration includes only two upper corners (without a lower horizontal element), two rosettes are required.
Brackets
Brackets are not part of the trim itself but are part of the overall decorative program of the facade. They are installed near windows, under the cornice, on porch columns—creating volume and richness in the facade decor. They are counted separately: by the number of installation locations, considering paired placement (usually brackets are installed in pairs—left and right of a window or canopy).
How to calculate trim for a standard window: example
Let's break down the calculation using a specific example. Window size 1200 × 1400 mm. Design scheme—full framing with a pediment.
Side casings
Opening height—1400 mm. Standard trim length—2000 mm. One element is cut to size (1400 mm + technological allowance at top and bottom). Two standard-length elements are sufficient for both side pieces.
Total: 2 side trims.
Top horizontal element
Opening width—1200 mm. Side trims width, say, 100 mm. The upper horizontal element needs to be 1200 + 2 × 100 = 1400 mm long. But the standard element length is 2000 mm, it is cut to size.
Total: 1 horizontal element.
Finial
Installed above the top horizontal element. The width of the finial matches the width of the horizontal element — selected from the range based on the opening width.
Total: 1 finial.
Bottom horizontal element
If the scheme includes a bottom frame — 1 element. If not — not needed.
Total: 1 bottom element (optional).
Rosettes
Four corners × 1 rosette = 4 rosettes. If the bottom element is not used — 2 rosettes.
Total: 2–4 rosettes.
Final set for one window 1200 × 1400 mm (full frame):
| Element | Quantity |
|---|---|
| Side casing (2000 mm) | 2 pcs. |
| Top horizontal element (2000 mm) | 1 pc. |
| Finial | 1 pc. |
| Bottom horizontal element (optional) | 1 pc. |
| Corner rosettes | 2–4 pcs. |
To calculate several identical windows, multiply each line by the number of windows.
How to calculate trim for several windows of different sizes
A real house almost never has "all windows the same." A typical picture: large windows in the living room, medium ones in bedrooms and kitchen, small ones in bathrooms and storage rooms. Add doors, porch, bathhouse to this.
The best way to do the calculation is a table. Create it in any convenient format: paper notebook, Excel, phone notes. Columns: object (window, door, porch), opening size, design scheme, list of elements, quantity.
Example of a calculation table for a house with several types of windows
Suppose a typical two-story timber house:
Group A: windows 1200 × 1400 mm — 4 pieces (living room, study, bedrooms)
Set for one window (full frame with top piece):
-
Side casings — 2 pcs.
-
Upper horizontal — 1 pc.
-
Lower horizontal — 1 pc.
-
Top piece — 1 pc.
-
Rosettes — 4 pcs.
For 4 windows of group A:
-
Side casings — 8 pcs.
-
Upper horizontals — 4 pcs.
-
Lower horizontals — 4 pcs.
-
Finials — 4 pcs.
-
Rosettes — 16 pcs.
Group B: windows 900 × 1200 mm — 6 pcs. (kitchen, children's room, bathrooms)
Set for one window (trim without bottom element):
-
Side casings — 2 pcs.
-
Upper horizontal — 1 pc.
-
Rosettes — 2 pcs.
For 6 windows of group B:
-
Side architraves — 12 pcs.
-
Upper horizontal — 6 pcs.
-
Rosettes — 12 pcs.
Group C: windows 600 × 800 mm — 2 pcs. (attic, pantry)
Kit for one window (side trims only):
-
Side casings — 2 pcs.
For 2 windows of group B:
-
Side trims — 4 pcs.
Total for windows:
| Element | Quantity |
|---|---|
| Side trims | 24 pcs. |
| Top horizontal | 10 pcs. |
| Bottom horizontal | 4 pcs. |
| Finials | 4 pcs. |
| Rosettes | 28 pcs. |
Add a reserve (10%) to this list and elements for doors and porch — more on that below.
How to calculate trims for the front door and doorway
A door is a special opening. First, it is larger than any window. Second, maximum visual attention is concentrated around it — it is the "face" of the entrance group. Third, wider or more elaborate trims are often used for doors than for windows.
Side door trims
The door opening height is usually 2000–2100 mm. This exceeds the standard trim length (2000 mm). Therefore, the side trim must be assembled from two elements with a connecting plate — or order a non-standard length if the manufacturer allows it.
Option: first element of standard length 2000 mm + additional piece from the second element (100–200 mm) + connecting part. The second element after cutting remains as additional spare material.
For one door: 4 standard side elements (2 for each side trim with allowance for the joint) or 2 elements of non-standard length.
Top horizontal element for the door
The door opening width is usually 900–1000 mm. The top horizontal element with a length of 1200–1400 mm covers the opening considering the side trims. The standard element of 2000 mm is cut to size on site.
For one door: 1 horizontal element.
Door pediment
Above the entrance door, a pediment is not just desirable — it is mandatory if we are talking about the main facade. It is above the door that the pediment works best: it adds solemnity and emphasizes the grandeur of the entrance.
The pediment for a door opening is usually wider than for a window opening — it covers the entire width of the door frame. Its length corresponds to the width of the horizontal element.
Per door: 1 finial.
Rosettes for door corners
For a fully framed door, two top corners are needed — meaning 2 rosettes. The bottom corners of the door typically rest against the floor or porch level — rosettes are not needed there.
Per door: 2 rosettes.
Final set for an entrance door 1000 × 2100 mm:
| Element | Quantity |
|---|---|
| Side casings (2000 mm) | 4 pcs (2 × 2 with allowance for joint) |
| Top horizontal (2000 mm) | 1 pc. |
| Finial | 1 pc. |
| Connecting plate for side casings | 2 pcs. |
| Corner rosettes | 2 pcs. |
How to calculate decor for porch and entrance group
The porch is an area often underestimated when calculating decor. Yet it is here that you can create the most expressive facade image: brackets under the canopy, overlays on the posts, decorative elements around the perimeter of the awning.
Brackets under the porch canopy
Brackets are installed at the edges of the canopy — where the awning rests on a post or wall. Usually this is a paired installation: two brackets for each support point. If the canopy is supported by two posts, four brackets are needed (two for each post).
If the canopy is cantilevered (protruding from the wall without posts), the brackets are attached to the wall at the points where the awning extends outward.
Brackets are typically produced in lengths of 200–400 mm. Choose the size based on the height of the canopy and the depth of its overhang — the bracket should look proportionate and not get lost under the structure.
Calculation of brackets: number of support points × 2.
Decorative overlays on posts
Porch posts (if wooden) can be decorated wooden decorative overlays with ornament. They are attached to the four faces of the post or to one or two front faces. Calculation: number of posts × number of overlays per post (usually 2–4, per face).
Balusters for railing
If the porch has a railing, balusters are counted per linear meter of the railing. The standard installation step for flat balusters is 100–150 mm between elements. For a railing 3 m long with a step of 120 mm, approximately 20–25 balusters + two support posts are needed.
wooden decorative elements For the porch and railings, items are listed separately in the catalog — check availability of the required formats when calculating.
Do you need a reserve and how much to take
An experienced craftsman never orders "just enough." A reserve when ordering wooden decor is not wastefulness, it's insurance against mistakes that happen even to professionals.
Why a reserve is needed
-
Trimming. Any trim is cut to fit on site — precise adjustment to the opening height, joint angle, and windowsill profile is required. During trimming, 20–150 mm is lost from each element depending on complexity.
-
Cutting errors. Inaccurate cut, wood chipping, wrong angle — it happens. An extra element allows rework without delay.
-
Damage during installation. Thin openwork patterns can crack with careless handling. A spare element guarantees completion of work without urgent reordering.
-
Unexpected measurements. Sometimes during installation it turns out that one of the openings is non-standard or the design needs adjustment. A reserve gives room for maneuver.
How much reserve to take
Standard recommendation is 10% of the calculated number of side trims, rounded up. For horizontal elements and finials — 1 additional piece for every 5–8 elements.
If windows are of different sizes or the project is complex (non-standard openings, broken facade, combination of different design schemes) — increase the reserve to 15%.
For sockets and connecting elements, reserve is especially important: they are small, cheap, but their absence makes installation impossible. Take with a reserve of 20–25%.
Example of reserve calculation for our example
Add to the final window figures:
-
Side trims: 24 + 3 (10% reserve, rounded up) = 27 pcs.
-
Upper horizontal: 10 + 1 = 11 pcs.
-
Lower horizontal: 4 + 1 = 5 pcs.
-
Finials: 4 + 1 = 5 pcs.
-
Sockets: 28 + 7 (25% reserve) = 35 pcs.
How to calculate decor for a bathhouse and gazebo
If there is a bathhouse or gazebo on the plot, their decoration is calculated using the same logic as for the house — just separately.
Bathhouse
Bathhouse windows are usually small: 600 × 600 or 600 × 800 mm. For each window — a set of two side casings. A horizontal top element and a pediment — on the main facade of the bathhouse, on the sides — optional.
The bathhouse door is a full doorway with a separate calculation. If the bathhouse is decorated in the same style as the house, products from the same collection and with the same ornament are used.
Example calculation for a bathhouse with two windows 600 × 800 mm and one door 900 × 2000 mm:
| Element | Quantity |
|---|---|
| Side casings for windows | 4 pcs. |
| Top horizontal elements for windows | 2 pcs. |
| Side casings for the door | 4 pcs. (with allowance for the joint) |
| Top horizontal element for the door | 1 pc. |
| Door top | 1 pc. |
| Rosettes | 6–8 pcs. |
| Reserve 10–15% | round up |
Gazebo
A gazebo is an open structure where decor works differently. There are usually no "window openings" in the traditional sense, but there are arched or rectangular openings, pillars, and railings. Brackets, balusters, decorative overlays are the main decor of a gazebo.
For each gazebo opening with framing, the calculation is done the same as for a window. For pillars — overlays and brackets. For railings — balusters with a spacing of 100–150 mm.
How to avoid mistakes with quantity when ordering: main rules
Let's systematize everything into practical rules that protect against mistakes.
Rule 1: count not windows, but openings
Each window opening is a separate item. Windows of the same size on different facades may require different design schemes: the main facade — with a top, the rear — without. Take this into account when calculating.
Rule 2: don't forget about doors
Doors are often the most expressive trims on the facade, and they require more material (due to the height of the opening). Enter each door into the calculation separately.
Rule 3: separate the main and side facades
The main facade usually has full framing with pediments, while the side facades are more modest, without pediments. This affects the number of elements: do not multiply the "main facade" set by all windows of the house.
Rule 4: count rosettes and connectors separately
Rosettes and connecting elements are easy to forget because they are not conspicuous when choosing an ornament. But without them, installation is incomplete. Recount all corner connections and joints — and add a margin of 20–25% to them.
Rule 5: check the width of elements against the width of openings
The width of the horizontal trim should match the width of the side trims in the selected collection. The width of the pediment should match the width of the horizontal element. Inconsistency in widths creates unsightly gaps and mismatches in the ornament.
Rule 6: clarify the standard length with the manufacturer
Different manufacturers have different standard trim lengths — 1500, 2000, 2500 mm. Before calculating, clarify what length your manufacturer works with. This drastically affects the number of elements for tall openings.
Rule 7: one order — one style
Order decor for the entire house (including the bathhouse and gazebo) at the same time. This ensures uniformity of the ornament, compatibility of connecting elements, and consistent geometry. Reordering after a few months may result in minor discrepancies — they are unnoticeable individually but stand out when installed side by side.
What else to consider when calculating: wooden baguette and overlays
In addition to platbands and carved window frame decor, the facade may include other elements. Let's consider them in the context of calculation.
Wooden molding
wooden baguette for facade decoration used to create horizontal belts, frame panels, and outline architectural graphics on the facade. The baguette is calculated by linear meter: measure the total length of all lines where it will be installed, and add 10–15% margin for joints and trimming.
If the facade includes a horizontal belt around the entire perimeter of the first floor or zonal framing, calculate the perimeter of that zone and multiply by the required number of baguette rows.
Decorative appliqués
Wooden decorative inlays on piers, gables, or between windows are calculated by the number of installation locations and by the area or length of coverage. For each zone, you need to know its dimensions and choose the appropriate overlay format from the assortment.
Overlays add richness to the facade without overloading it: this is delicate decor that works at a medium distance — closer than 5–7 meters the pattern is clearly readable, further away it creates surface texture.
Example of a final calculation for the entire house
Let's put it all together for our example — a two-story house with a bathhouse.
House (windows and doors):
| Element | House (windows) | House (doors) | Total |
|---|---|---|---|
| Side trims | 24 pcs. | 4 pcs. | 28 pcs. |
| Top horizontal | 10 pcs. | 1 pc. | 11 pcs. |
| Bottom horizontal | 4 pcs. | — | 4 pcs. |
| Finials | 4 pcs. | 1 pc. | 5 pcs. |
| Rosettes | 28 pcs. | 2 pcs. | 30 pcs. |
| Connecting plates | — | 2 pcs. | 2 pcs. |
Bathhouse (2 windows + 1 door):
| Element | Quantity |
|---|---|
| Side trims | 8 pcs. |
| Top horizontal | 3 pcs. |
| Finial | 1 pc. |
| Rosettes | 8 pcs. |
| Connecting plates | 2 pcs. |
Porch (canopy, 2 pillars):
| Element | Quantity |
|---|---|
| Brackets | 4 pcs. |
| Pillar overlays | 8 pcs. (4 edges × 2 pillars) |
Total order list with 10–15% margin:
| Element | To stock | With stock (15%) |
|---|---|---|
| Side trims | 36 pcs. | 42 pcs. |
| Top horizontal | 14 pcs. | 17 pcs. |
| Bottom horizontal | 4 pcs. | 5 pcs. |
| Finials | 6 pcs. | 7 pcs. |
| Rosettes | 38 pcs. | 48 pcs. |
| Connecting plates | 4 pcs. | 6 pcs. |
| Brackets | 4 pcs. | 5 pcs. |
| Pillar overlays | 8 pcs. | 10 pcs. |
This list is the basis for the order. Before finalizing, it should be coordinated with a catalog consultant: sometimes the collection involves specific connection formats that are best clarified in advance.
How to view ideas and ensure the correctness of your choice before ordering
Before finalizing the list, it is useful to look at examples of completed projects. This helps ensure that the chosen ornament really looks as you imagined — on a real object, at a real scale, in real light.
On the page Ideas for using carved decor examples of house, bathhouse, gazebo, and porch designs with different types of platbands, brackets, and overlays are collected. This is not just a gallery of inspiration — it is a practical tool that helps make the final decision before ordering and avoid disappointment.
Look at examples of houses similar in style and scale to yours — this will give an accurate understanding of how the result will look. Details about the material the products are made from, how geometric accuracy and durability are ensured, are described on the page Materials and quality of STAVROS products.
Frequently asked questions about calculating carved platbands
How many carved architraves are needed for one standard window?
For a standard window 900–1200 mm wide with full framing and a pediment: 2 side architraves, 1 top horizontal, 1 bottom horizontal (optional), 1 pediment, 2–4 corner rosettes. Total — 5–8 items per window depending on the design scheme.
Is it necessary to take a margin when purchasing architraves?
Absolutely. A margin of 10–15% for side architraves and 20–25% for rosettes and connecting elements is standard practice. It protects against errors during trimming, damage during installation, and unforeseen non-standard situations.
Can architraves be calculated for the entire house at once?
Not only can it be done — it is the optimal approach. A single order guarantees compatibility of all elements, a unified ornament, and consistent geometry. Piecemeal reordering may lead to mismatched details from different production batches.
Do brackets and rosettes need to be counted separately?
Yes. Brackets, rosettes, and connecting elements are separate items in the order, depending on the chosen design scheme, and are not automatically included in the "architrave set." They need to be counted separately — based on the number of corner connections, bracket installation points, and element joints.
What to do if the windows in the house are of different sizes?
Divide all windows into groups by size, calculate the set for each group separately, then sum them up. Do not try to calculate an "average" — this will lead to errors in both directions.
How to calculate architraves for a non-standard (arched or trapezoidal) window?
For arched windows, side architraves are calculated standardly, while the top element may require a special curved element or a set of straight parts that follow the arch in sections. Check with the manufacturer about the possibility of producing non-standard formats when ordering.
How many architraves to take for a house with 10 windows?
Depends on the design scheme. With full framing and a pediment on the main facade (6 windows) and a simplified one on the side facades (4 windows):
-
Side architraves: 20 pcs. + reserve 3 = 23 pcs.
-
Top horizontal: 10 pcs. + reserve 1 = 11 pcs.
-
Pediments: 6 pcs. + reserve 1 = 7 pcs.
-
Rosettes: 20–40 pcs. (depending on the scheme) + reserve 20–25%.
About the company STAVROS
Correct calculation is half the battle. The other half is quality products that match the stated dimensions, have precise geometry, compatible connecting elements, and are ready for any type of final finishing.
STAVROS is a manufacturer of wooden carved decor with its own production. All architraves, brackets, rosettes, connecting elements, and other items house carving are manufactured on CNC milling machines, ensuring precise repetition of geometry in every unit — regardless of batch size.
This is especially important for large orders: when you order a set for the entire house, bathhouse, and porch at once, all products will be identical in width, pattern, and thickness. Rosettes will fit exactly into corners, connecting overlays will cover joints without gaps, and finials will match the width of horizontal elements.
In the of carved decor for the facade not only platbands are presented, but also all related elements: brackets, rosettes, overlays, balusters, Wooden Picture Frame и Decorative Inserts for comprehensive facade design. This is convenient: you can compile the entire order list in one place, without searching for compatible elements from different suppliers.
If you are ready to make a calculation or want to clarify the compatibility of elements for a specific project — start with the catalog STAVROS house carving: here everything you need for a correct order the first time is collected.