Article Contents:
- Why it's better to buy a slat panel as a set
- What's included in a complete wall set with slat panels
- Slat panels — the central element
- Wooden batten — additional and filler element
- Wooden corner — corner profile
- Molding — frame profile
- Baseboard — lower horizon
- Cornice and top profile
- Linear products for joints and additions
- When you need a wooden corner
- When you need a baseboard
- When molding is needed
- Ready-made zone configuration scenarios
- Scenario 1. TV zone
- Scenario 2. Hallway
- Scenario 3. Bedroom — headboard area
- Scenario 4. Corridor
- Scenario 5. Kitchen-living room
- Mistakes when buying slatted panels and additional elements
- How to calculate the kit before ordering
- Table: additional elements by application area
- FAQ: Answers to Popular Questions
- About the Company STAVROS
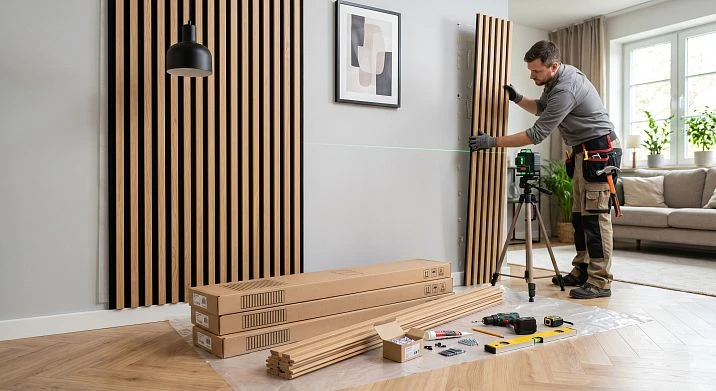
You've already chosen slatted panels — and that's the most important decision made. But here's the question that arises for everyone who reaches the final planning stage: what else is needed? What should you buy along with the panels so that the wall looks finished, not like an installation stopped halfway?
This is where most people make the same mistake: buy slatted panels — and stop. The panels arrive, are installed — and then it turns out that the left end is exposed, the baseboard doesn't match the tone, the right corner is uncovered, and the transition to the painted wall looks like an unfinished thought.
This article is about how to avoid this mistake. A complete breakdown: which additional elements are needed, when, why, and in what quantity. As a result — ready-made configuration scenarios for different areas of the apartment.
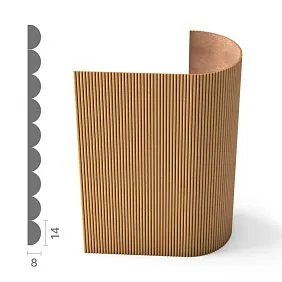
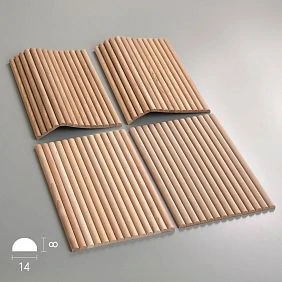
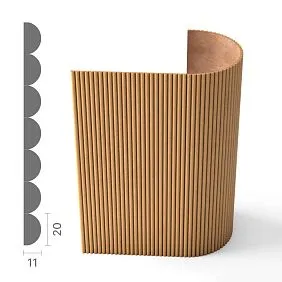
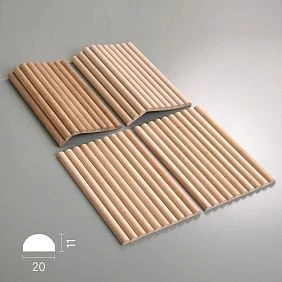
Why it's better to buy a slatted panel as a kit
Any finishing consists of the main material and additional elements. This applies to parquet (baseboard + thresholds), tiles (grout + corner pieces), and wallpaper (decorative border + corners). ready-made slatted wall panels — is no exception.
The panel itself covers the main plane of the wall — the rectangular area it is intended for. But this area has four edges, two corners (at minimum), a bottom joint with the floor, and — in most cases — a transition to an adjacent smooth wall or another material. All these places require a solution.
What happens without additional elements:
-
An open panel end — a cut of MDF or wood that looks sloppy and gets damaged over time.
-
The bottom gap between the panel and the floor without a baseboard — a space for dust and moisture.
-
An external corner without a corner profile — a vulnerable point that crumbles at the first mechanical contact.
-
A transition to a painted wall without molding — a visual break that says "the installation is unfinished."
When all elements are purchased in one order — the system works as a single unit. This saves time (no need for repeat orders with delivery waiting in the middle of installation), money (no extra charge for urgency), and nerves.
And another argument rarely spoken aloud: a properly equipped wall with slatted panels looks two to three times more expensive than the same wall without additional profiles. Molding along the edges, a wide baseboard at the bottom, a clean corner profile — these visually "elevate" the finish in price category.




What is included in a complete set for a wall with slatted panels
Let's consider each element of the system in turn — with an explanation of its role and application conditions.
Our factory also produces:

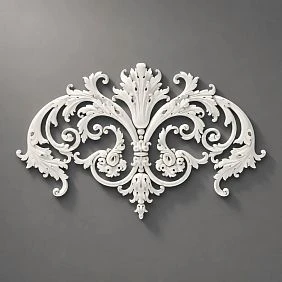


Slatted panels — the central element
Obvious, but important to state precisely. Three main options are available in the assortment:
Decorative slatted panel PAN-001 — panel with decorative coating. The surface is ready for installation without additional processing. Suitable for interiors where a specific tone and texture are needed immediately after installation.
Primed MDF slatted panel PAN-002 — panel without finish coating, primed for painting. Maximum flexibility in color choice: paint in any tone for a specific interior. This is the optimal option when you need to match the color of the panels with moldings, baseboards, and other wooden elements in a unified coating system.
Slat panel oak PAN-003 — panel with oak texture imitation. Warm wood tone without the need for painting. Pairs well with natural wooden moldings and baseboards in the same shade.
the decision to buy slatted panels for interior finishing in a specific tone or take for painting — decided based on whether the finishing color is already approved. If the color is not yet chosen — take for painting: this gives freedom.
Get Consultation
Wooden slat — additional and supplementary element
wooden plank needed in two cases.
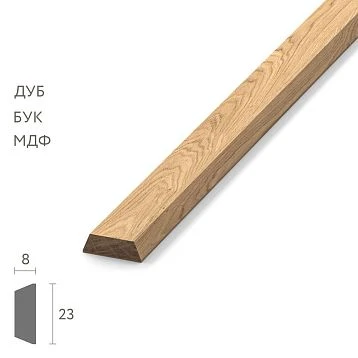
First: as a horizontal dividing profile. If the slatted panel occupies the lower or middle part of the wall — the transition to the smooth part is finished with a horizontal slat. It creates a clear line without a molding profile — a concise, modern option.
Second: as an add-on element for non-standard places. Where a ready-made panel doesn't fit in size — niches, slopes, columns, transitions between planes — Wooden plank is mounted one by one. This is an important element of "finishing" the wall to a neat finish.
Decorative wooden slat — a variant with a more pronounced profile, which is also used as an independent decorative accent. It can create a vertical rhythm on a wall section where a ready-made panel is not needed — for example, in a narrow pier or on a slope.
Wooden corner — corner profile
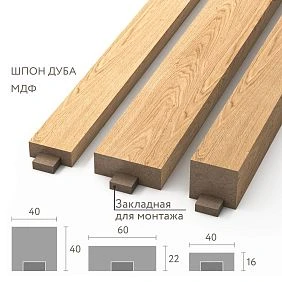
Wooden corner bracket — an element that is indispensable for any external corner transition. Its role is twofold: it protects the panel end and creates a clean, geometrically correct corner line.
Molding — frame profile
wooden molding creates a frame around the slatted area, decorates transitions, and makes the wall visually complete. This is the middle decorative level of the system — between the baseboard at the bottom and the cornice at the top.
Baseboard — lower horizon
Two options depending on style and task:
MDF Skirting Board — for painting in a single color with the panels. An ideal smooth surface for enamel. For monochrome systems for painting — the optimal choice.
Wooden baseboard — for natural and classic interiors. Solid wood with a pronounced profile, under varnish or stain.
Cornice and top profile
wooden cornice needed if the slatted panel goes up to the ceiling or to the height of furniture. It creates the upper horizontal contour — «covers» the system from above and completes it.
Molding products for joints and additions
wood trim items — this is everything that covers technological joints and ensures neat installation: glazing beads, layouts, small transition profiles. Without them, joints at door frames, sockets, and furniture may remain exposed.
When a wooden corner is needed
The corner is one of the most underestimated elements when purchasing slatted panels. It is often «forgotten» in the order — and then open ends are discovered during installation.
External corner of the wall. If the slatted panel wraps around an external corner — for example, covering two adjacent walls — a corner wooden profile. Without it, the panel end is open and vulnerable. The external corner is the first thing that gets hit during furniture movement, cleaning, or accidental impacts.
Panel end going into the air. This is a situation where the slatted panel ends not in a corner but in the middle of a wall — for example, in a TV area or behind a sofa. The edge of the panel must be covered: either with a molding (if you want to create a frame) or with a corner profile (if you want a clean closed end without additional decorative accent).
Recess. In recesses, the slatted panel is mounted on one or several surfaces — back wall, sides. At the intersection of the back wall and the side, you need corner profile — it covers the joint and makes the corner sharp.
Slope. A vertical slope next to a window or door, covered with a slatted panel, requires a corner transition to the wall. Without it, the joint is exposed, and any careless touch will damage the outermost slat.
Transition to an adjacent plane. If the slatted finish transitions from a vertical wall to a horizontal slope or windowsill — the corner profile creates a clean perpendicular transition.
Edge of the slatted area in the hallway. In the hallway — especially on external corners at the entrance — the corner profile works as protection: this is the area of maximum load on the finish.
How many corner profiles are needed? Count based on the number of external corner transitions and open panel ends. Each open edge = one corner profile of the required length.
When a baseboard is needed
A baseboard is always needed when the slatted panel starts from the floor or ends 10–20 cm above it. The question is which baseboard and what height.
If the slatted panels reach almost to the floor. The slatted panel is not installed flush with the floor — a gap of 5–10 mm is needed for deformation movement of the material due to humidity changes. This gap is covered by the baseboard. Without it, a dark gap remains at the bottom edge.
If you need to close the bottom joint. Even with careful installation, the bottom edge of the panel is a cut of the material. The baseboard covers it, creating a clean horizontal transition to the floor.
If the panel is used in a hallway. In the hallway, the lower zone of the wall experiences maximum loads: vacuum cleaner, shoes, bags, furniture. Here you need Skirting with a height margin of 80–120 mm to protect the lower part of the panel from direct mechanical impact.
If the finish should look like a unified system. Baseboard, panel, molding — in one coating and style — create visual unity. The baseboard "holds" the lower horizon, preventing the wall composition from "dissolving" into the floor.
If protection of the lower part of the wall is needed. This is especially relevant in apartments with children, pets, and high traffic. Wooden baseboard made of solid wood — durable protection for the lower zone, which takes impacts instead of the panel.
The choice between a wooden baseboard and an MDF baseboard. The main criterion is the coating of the entire system. If panels, baseboard, and molding are painted in a single color under enamel — MDF Skirting Board provides a perfectly smooth surface. If the interior features natural wood — solid wood baseboard supports the overall wooden language.
Baseboard height: 60–80 mm for small rooms and corridors, 80–120 mm for hallways and living rooms, 120–150 mm for high spaces with large panels.
When molding is needed
wooden molding — is not a mandatory element for every slatted wall. But there are specific situations where its absence immediately stands out.
Frame around the slatted area. If the slatted panel does not cover the entire wall, but only a part of it — the TV zone, the area behind the sofa, the headboard — molding around the perimeter creates a frame. This is the most powerful technique: the panel is "enclosed" in a border, and the wall acquires an architectural character.
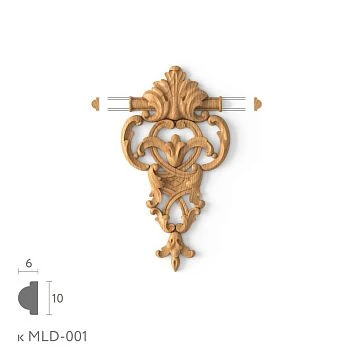
For this Wooden decorative moldings MLD-019 run horizontally along the top edge, vertically along the side edges. At the bottom — either molding on the same line or a baseboard.
Transition between the panel and the painted wall. Where the slatted area ends and the smooth painted surface begins — that's the boundary. Without molding, it's just the edge of the panel. With molding, it's a clear intentional transition that says: this is a design solution, not unfinished installation.
Decorative finish at the top. The top edge of the slatted panel is another point that requires a solution. Molding along the top edge "covers" the panel with a horizontal line, creating the upper contour of the composition. This is especially important when the panel does not reach the ceiling.
Designing the TV zone. The TV zone with a molding frame around the slatted panel is a ready-made design scenario. The screen inside the frame, the panel as a background, the molding as an architectural contour — three elements that together create the center of the room.
Separation of the slatted panel and the smooth wall by height. A horizontal molding at the transition between the slatted lower zone and the smooth upper zone is a belt molding. It "closes" the top edge of the panel and simultaneously serves as a decorative horizontal line that divides the wall into zones.
Ready-made configuration scenarios by zones
This is the most practically valuable section. Five real scenarios with specific recommendations — what to take, in what quantity, and why.
Scenario 1. TV Zone
Task: create an accent wall behind the TV with clear edges, a bottom contour, and a visual frame.
Typical zone parameters: width 180–250 cm, height — from floor to 220–250 cm.
Set:
-
slatted wall panels for interior wall finishing — on the main plane of the TV zone.
-
Wooden decorative moldings MLD-019 — along the top and side edges of the panel (three segments: top + two sides).
-
Wooden baseboard or MDF Skirting Board — along the bottom edge across the width of the zone.
-
Wooden corner piece UG-001 — if the panel extends to an external corner.
Color: wood-look panel + white molding + white baseboard — classic for modern living rooms. Or all in a single tone for painting — for monochrome solutions.
Molding calculation: TV zone width + height × 2 + 10–15% allowance for trimming.
Scenario 2. Hallway
Task: slatted panels on the lower part of the wall in the hallway with protection from mechanical damage and neat transitions.
Typical parameters: panel height 100–120 cm from the floor, length — along the perimeter of the hallway.
Set:
-
slatted panels for walls — lower zone of the wall.
-
wooden plank or molding MLD-019 — horizontal strip along the top edge of the panel.
-
Wooden baseboard 80–120 mm high — lower contour, protection.
-
Wooden corner bracket — on all external corners of the hallway (usually 2–4 corners).
-
Trimming Items — for joints at door frames.
Important point: there are many doors in the hallway. At each door frame, the lower baseboard should neatly adjoin the casing. For these junctions, additional baseboard pieces are needed and, if necessary, transition profiles from trim.
Scenario 3. Bedroom — headboard area
Task: accent slatted panel behind the bed with symmetrical side moldings and a baseboard in matching color.
Typical parameters: panel width = bed width + 15–20 cm on each side. Height — up to 150–180 cm from the floor or up to the ceiling.
Set:
-
decorative slatted wall panels — to the headboard area.
-
wooden molding — horizontally along the top edge and vertically along the side edges.
-
Skirting — the lower contour matching the floor or molding tone.
-
Trimming Items — if there are joints on the wall.
Color: wood-look panel + moldings and baseboard in white enamel — the most popular combination for a bedroom. Or primed panel in a soft pastel tone + moldings in the same tone — for a calm monochrome solution.
Scenario 4. Hallway
Task: slatted panels along the entire hallway with neat corner transitions and a durable lower contour.
Typical parameters: narrow hallway with several doorways, panels at full height or lower third.
Set:
-
buy slatted wall panels — main plane.
-
Wooden corner bracket — on all external corner transitions (especially in corridors with many corners).
-
MDF Skirting Board — lower contour, to be painted to match the panels.
-
Wooden plank — for non-standard filler places.
-
Trimming Items — for joints at door frames.
Key point: there are many doors in the corridor — and every joint of the slatted panel with the door frame must be covered. This is the most labor-intensive part of installation, and it is here that linear trim elements are especially important.
Scenario 5. Kitchen-living room
Task: slatted panels on an accent wall or in the kitchen backsplash area (if technically feasible), smooth transition between kitchen and living room zones.
Set:
-
Slat panel oak PAN-003 or primed PAN-002 — depending on the kitchen style.
-
MDF Skirting Board — to be painted to match kitchen facades or panels.
-
Decorative wooden slat — as a horizontal dividing element.
-
Wooden corner bracket — for corner transitions between zones.
-
wood trim items — for technical joints.
Mistakes when buying slatted panels and additional elements
This is not a theoretical block — these are practical mistakes that happen regularly. Each one leads to additional costs.
Buying panels without corner pieces. The most common mistake. Corner pieces are only "remembered" during installation, when it turns out the panel end is exposed and there's no way around it. You have to place an additional order — and that means waiting time in the middle of the renovation.
Not accounting for the baseboard height. Buying a 50 mm high baseboard for a slatted panel that creates a large vertical rhythm is visually inappropriate. The baseboard should be proportionate to the panel. Large slats with wide spacing — baseboard from 100 mm. Thin slats with frequent spacing — baseboard from 70 mm.
Not matching the molding color. A molding in a random wood shade next to a panel of a different tone is a conflict. Either everything in the same coating (enamel), or a single stain, or careful tone selection before ordering.
Leaving the panel end exposed. An MDF cut without protection is an unprotected surface. It gets damaged faster, paints poorly during repainting, and looks unprofessional. Buying a wooden corner piece for finishing — cheaper than replacing a damaged panel in a year.
Mixing different wood shades without a system. Three different "browns" on one wall without a unifying coating is chaos. Solution: either everything in enamel of one color, or a single stain tone for all wooden elements.
Not calculating the number of additional elements. Particularly often they underestimate the baseboard (forgetting about junctions near doors) and linear elements for joints. Rule: add 15–20% reserve for trimming to the main calculation.
Forgetting about joints at sockets, doors, and furniture. The slatted panel meets the door frame, the socket block, and the wardrobe. All these joints require a solution — a transition profile, corner piece, or additional strip. Look at the wall in advance and count all junction points.
How to calculate the kit before ordering
Step-by-step calculation logic — from measurements to the final list.
Step 1. Measure the wall (or area). Width × height of the slatted zone = main area. Convert to the number of panels based on the width of one panel. Add 10–12% reserve for trimming.
Step 2. Calculate the baseboard. Baseboard length = width of the slatted zone (if the panel is on part of the wall) or room perimeter (if panels are along the entire length). Add 10–15% for junctions and trimming.
Step 3. Calculate the corner pieces. One corner piece = one external corner or one open end of the panel. Walk around the wall and count all points where the panel ends at an external corner transition or with an open end.
Step 4. Calculate the molding. If making a frame: top + two sides + bottom (if molding, not baseboard). Perimeter of the slatted zone = molding length. Add 15% for 45° cuts and trimming.
Step 5. Count the additional battens and linear moldings. Number of door openings × 2 (joint on left and right) × panel height = approximate length of additional battens. Plus non-standard areas (niches, slopes, columns) — as needed.
Step 6. Compile the final list. Slat panels + baseboard + corners + molding + slats + linear products. This is your kit for Buy slatted panels for wall finishing — already complete and well-thought-out.
More details about How to attach slat panels to the wall и how to join slatted panels — in separate materials.
Table: additional elements by application area
| Area / situation | Corner bracket | Skirting board | Molding | Rail | Linear molding |
|---|---|---|---|---|---|
| TV zone | at corner end | Yes | yes (frame) | No | at joints |
| Hallway | yes (all corners) | yes (high) | optional | when picking up | Yes |
| Bed headboard | No | Yes | yes (frame) | optional | No |
| Corridor | yes (many corners) | Yes | optional | for extension | Yes |
| Kitchen-living room | during transitions | Yes | optional | for separation | Yes |
| Office | at external corners | Yes | yes (frame) | No | at joints |
FAQ: Answers to popular questions
What to buy together with slatted wall panels?
Minimum set: panels + Skirting + Angle for open ends. Full set: plus Molding along the edges of the decorative area and Trimming Items for joints at doors and furniture.
How to cover the end of a slatted panel?
a wooden corner piece — for external corner transitions. molding — if you want to create a frame transition. decorative batten — for a concise vertical finish.
Is a baseboard needed for slatted panels?
Yes. The baseboard covers the bottom technical gap, protects the lower part of the wall, and creates the lower horizontal contour of the system. MDF Skirting Board — for painting with enamel, Wooden baseboard — for natural and classic interiors.
Can slatted panels and wooden molding be combined?
Yes, this is one of the best combinations. wooden molding creates a frame around the slatted zone or transitions to a smooth wall. When painting the entire system in a single color, the difference in material texture disappears.
What is better: ready-made slatted panels or individual slats?
ready-made slatted wall panels — for even rectangular walls of standard sizes: faster, more precise, with guaranteed slat spacing. Individual wooden slats — for non-standard areas: niches, columns, slopes, non-standard spans. Read more in the article about what to cut slat panels with.
Which corner profile to choose for a slatted panel?
Wooden corner UG-001 is selected based on the shelf to match the panel thickness. For standard MDF panels with a thickness of 12–16 mm, a corner profile with shelves from 15 mm is suitable. Color — to match the panel or to match the molding.
Are slatted panels suitable for a hallway?
Yes, the hallway is one of the best areas for slatted panels. A panel on the lower part of the wall protects it from damage and creates a decorative accent. Mandatory additional elements for the hallway: corners on all external corners, high baseboard at the bottom, Trimming Items at door frames.
Can I buy slatted panels for painting?
Yes. Slatted panel primed MDF PAN-002 is specially produced for painting. The surface is primed and ready for any paint or enamel. This is an ideal option for monochrome systems where panels, moldings, and baseboards are painted in a single color.
About the company STAVROS
A good result starts with a complete set of materials purchased in one place from one manufacturer. This is not just convenience — it is a guarantee of compatibility in size, style, and finish.
STAVROS manufactures decorative slatted wall panels in three versions — wood-look, with decorative coating, and primed for painting — as well as a full range of additional profiles: Wooden baseboard и MDF Skirting Board, corners, Moldings, Wooden planks и Trimming Items.
STAVROS is when one order covers the entire wall: from panel to baseboard, from molding to corner. A set where everything fits together.