Article Contents:
- When a standard panel doesn't work: key scenarios
- Flexible panels vs. flexible MDF: what's the real difference
- What is flexible MDF
- What is a flexible wall panel
- Comparison table
- Flexible panels for columns: how to turn a problem into a focal point
- Slatted column wrap
- Smooth column wrap for painting
- Technical installation details for columns
- Flexible panels for curved walls: what to understand before installation
- Large radius: walls with a gentle curve
- Medium radius: bay windows and rounded niches
- Small radius: columns and round niches
- Foundation Preparation
- Flexible panels for arches: how to properly frame an opening
- Types of arches and suitable solutions
- How to use moldings to decorate an arch
- Flexible panels for niches: three scenarios with different requirements
- Niche by the bed: decorative panel behind the headboard
- Niche with backlighting: technical requirements
- Decorative niche in the living room: creating an accent
- How to choose the correct bending radius: measurement and calculation
- How to measure the radius of a surface
- Table of minimum radii for different materials
- What happens if you exceed the permissible bending radius
- Trial fitting: why it is mandatory
- Joints, ends, and additional elements: how to finish the job correctly
- Panel ends
- Joints between panels
- Baseboard at the foundation
- Cornice or profile at the ceiling
- Installation of flexible panels: step-by-step logic
- Step 1: Surface Preparation
- Step 2: Creating the frame (if necessary)
- Stage 3: Applying adhesive
- Step 4: Pressing and fixing
- Stage 5: Final Finishing
- Flexible panels for painting and for wood: two different results
- For painting
- For wood (veneer or solid slat)
- Mistakes when choosing and installing flexible panels
- What to check before buying a flexible panel
- FAQ: answers to questions about flexible wall panels
- What are flexible wall panels?
- Where is flexible MDF used?
- Can flexible panels be used to finish a round column?
- How to cover the end of a flexible panel?
- Can flexible panels be painted?
- What is the minimum radius of a flexible panel?
- About the Company STAVROS
There are tasks in renovation that cannot be solved with standard methods. A curved wall. A round load-bearing column in the middle of the living room. An arched opening with a bend. A decorative niche with rounded edges. All these are situations where a rigid panel simply won't work. It cannot be pressed against a curved surface, cannot be bent without special equipment, and cannot achieve a neat result.
It is for such cases that Flexible wall panels — a material and structural solution that allows covering a complex surface as neatly as a straight wall. But behind this solution lie several important questions that most people don't think about until the moment of purchase. What bending radius is acceptable for a specific panel? How to cover the ends? How to join them? How not to turn a good idea into a complicated failure?
In this article — honest answers to all of this.
View slat panels, linear elements, and wooden slats STAVROS — solutions for curved surfaces, columns, niches, and arches.
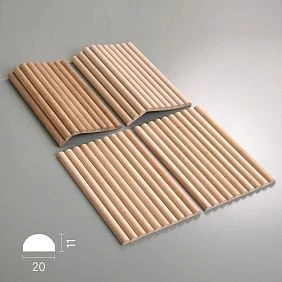
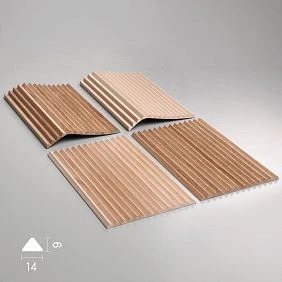
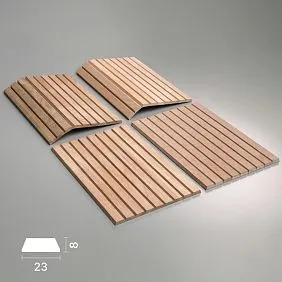
When a regular panel doesn't work: main scenarios
Before choosing a material, it's important to understand exactly what surface you'll be working with. A flexible panel is not a universal answer to all questions, but a tool for specific geometry. Where is it necessary?
Radius wall. Walls with a smooth curve are a common element in apartments with non-standard layouts, country houses, and commercial interiors. A regular rigid panel will not fit on such a wall: gaps will appear around the perimeter, the relief will not lie flat, and installation will turn into improvisation.
Round or semi-round column. A load-bearing column is an architectural "surprise" in many apartments. Leaving it exposed means accepting a technical detail in the center of a living space. Proper finishing with a flexible wall panel makes the column part of the design — not its problem.
Arched opening. An arch between rooms or an arched portal in the hallway is a classic. But finishing it with a decorative panel so that there are no visible seams or breaks is a non-trivial task. Only a flexible material gives the desired result.
Decorative niche with rounded edges. A niche by the bed, a niche for lighting in the living room, a niche in the bathroom — all can have rounded transitions. Here, a rigid panel will only fit with breaks, while a flexible one will smoothly follow the shape.
Bay window. A semi-circular bay window consists of several planes connected by smooth transitions. Finishing each section separately is labor-intensive and unattractive. A flexible panel allows you to wrap around the bay window in a single strip.
Decorative pillar or column in the interior. Decorative columns are not only load-bearing. They are placed as a design element in the living room, in a classic interior, by the fireplace. A flexible panel or Rafter panels is the basis of a decorative wrap.
Complex TV area with curved elements. TV areas with niches, arched elements, and radius panels are a popular scenario. A flexible panel here allows you to combine straight and curved sections into a single finish.




Flexible panels and flexible MDF: what's the real difference
The terms "flexible wall panel" and "flexible MDF" are often used as synonyms, but there are fundamental differences between them — and understanding these differences determines the right choice.
Our factory also produces:

What is flexible MDF
Flexible MDF is a specially manufactured board made of wood fiber material with parallel cuts on the back side. These cuts allow the board to bend along one axis — perpendicular to the direction of the cuts.
Key parameters of flexible MDF:
-
Thickness: most often 3, 6, 9 mm (the thinner, the smaller the possible bending radius)
-
Minimum bending radius: depends on thickness (3 mm — from 100 mm; 6 mm — from 300–500 mm; 9 mm — from 600 mm)
-
Surface: for painting or for veneer
-
Bends only in one direction
Flexible MDF is a "base" for finishing. It is used as a rough curved layer, onto which veneer is then glued, plaster is applied, painted, or covered with a decorative layer.
Get Consultation
What is a flexible wall panel
Flexible wall panel — is a broader concept. It is any wall panel that can wrap around non-standard surfaces. This can be:
-
Flexible MDF with a finish coating (veneer, film, paint)
-
Thin wooden slats on a flexible base
-
Slatted panels with bending capability
-
Special PVC or polyurethane profiles with elasticity
For interior finishing of columns, niches, and arches, the following are most often used:
-
Flexible MDF for painting — for smooth surfaces requiring an even finish surface
-
Thin wooden slats made of solid wood trim — for curved surfaces with decorative slat rhythm
-
Flexible veneered MDF — when a wood-like surface without painting is needed
Comparison table
| Parameter | Flexible MDF | Wooden slats | Slat panels |
|---|---|---|---|
| Minimum radius | 100–600 mm (depends on thickness) | Very small (in terms of slat flexibility) | Medium |
| Finish surface | For painting or veneer | Array (varnish, oil) | Ready decorative |
| Relief visibility | Smooth surface | Slat rhythm | Slat rhythm |
| Installation difficulty | Medium | Requires frame | Medium |
| Application | Walls, furniture, niches, arches | Columns, partitions, walls | Walls, niches |
Flexible panels for columns: how to turn a problem into an accent
A column in the middle of a living space is a challenge for any designer. It cannot be demolished (load-bearing), cannot be hidden (too noticeable), and is difficult to ignore. The only correct answer is to make it part of the interior solution.
Flexible panels for columns allow achieving this in several ways.
Slat column wrap
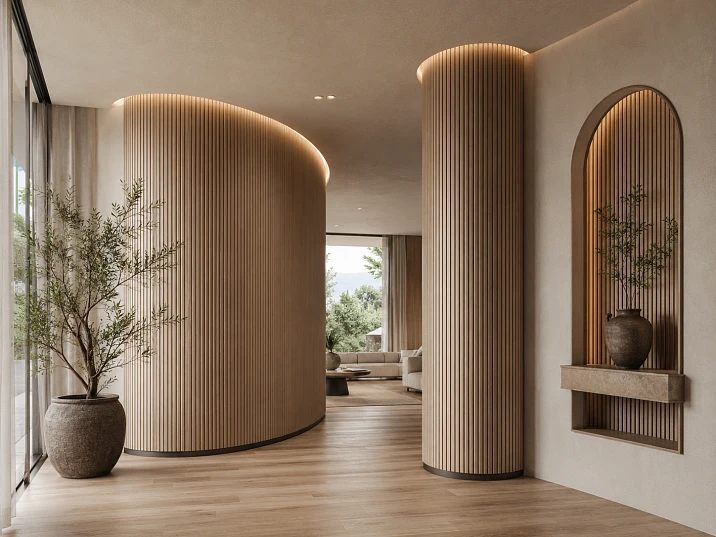
Thin wooden slats wrapping around the column circumference are one of the most striking techniques in modern interior decor. The slats are mounted vertically with equal spacing, forming a cylindrical or faceted screen around the structural column.
The result is an architectural element that has become part of the design. A slatted column can match the color of the floor or furniture, creating a unified wood theme in the interior.
Wooden slats for column wrapping made from natural solid wood are the right choice for this technique. Slats 20–30 mm wide with chamfered edges provide a beautiful rhythm and shadow that enhances the visual effect.
Smooth column wrap for painting
If a clean cylindrical shape is needed — flexible MDF or a flexible panel for painting. The material wraps around the column, is glued or fastened with screws to an intermediate frame, puttied at the joint, and painted.
Result: the column has become part of the wall — in the same color, with the same texture. If it is against the wall, it visually merges with it. If in the center of the room, it becomes a concise architectural accent.
Technical details of column mounting
Joints are the main challenge when wrapping a column. On a cylindrical column, there is usually one joint (at the back or in the least visible place) or two (symmetrically on both sides). The joint must be closed carefully: wooden batten, solid wood molding or with a decorative overlay made of trim.
At the base of the column — Skirting made of solid wood, which visually completes the structure at the floor. At the ceiling — a thin decorative cornice or profile. Without these additional elements, the column looks unfinished.
Flexible panels for curved walls: what to understand before installation
Curved walls come in different types — and this is important. A smooth curved wall in a living room (radius 3–5 m) is a completely different task than a semicircular bay window wall (radius 0.5–1 m). Different tasks require different materials.
Large radius: walls with a gentle curve
Walls with a bend radius of 2 m or more are almost flat surfaces in most areas. Here, you can work with thicker flexible panels or even regular panels cut into narrow strips.
Suitable for such surfaces:
-
Flexible MDF 6–9 mm
-
Thin slatted strips of wooden trim — they bend along a large radius without effort
Medium radius: bay windows and rounded niches
Radius 500–1500 mm is already a serious bend. Flexible MDF 6 mm works here, but requires pre-soaking or steam softening before installation. Thin wooden slats (10–15 mm thick) bend to this radius without additional treatment.
Small radius: columns and round niches
Radius less than 300–400 mm is the zone of flexible MDF 3 mm thick or special roll decorative coatings. Wooden slats work here only if their cross-section is small enough: 10–15 mm wide and 8–10 mm thick.
The most important rule: never try to bend a panel more than its minimum radius allows. This leads to cracks, material delamination, or unsightly fractures on the front surface.
Foundation Preparation
The base for a flexible panel must be:
-
Smooth in curvature (without local protrusions and depressions)
-
Dry and dust-free
-
Firm enough for reliable fastener retention
For flexible MDF — PVA-based glue or solvent-free construction adhesive. Additionally — screws every 20–30 cm along the length. For thin slatted panels — glue plus finishing nails (brads) or staples.
Flexible panels for arches: properly finishing the opening
An arch is one of the most popular architectural elements in an apartment. And one of the most difficult for decorative finishing. Why? Because an arch has a curved part (the vault) and straight side slopes — and all of this needs to be finished uniformly.
Types of arches and suitable solutions
Semicircular arch. Classic. The radius of the vault equals half the width of the opening. For finishing — flexible MDF 3–6 mm or thin wooden slats. The width of the vault is usually the wall thickness plus the decorative slope.
Pointed arch (sharp vault). Two radii converging at a point at the top. The bending radius is significantly smaller than that of a semicircular arch. Here, flexible MDF 3 mm is needed.
Segmental arch (shallow vault). Large radius, small rise. The easiest to work with — the material bends smoothly.
Romanesque arch with thick slopes. Here, it is important to finish not only the vault but also the side slopes. Wooden trim for cash and slopes in combination with a flexible panel for the arch — the right solution.
How to use moldings to design an arch
Molding for arches — is a classic way to give an arched opening a finished look. The molding follows the shape of the arch along the outer edge, creating a decorative frame for the arch.
When working with arch molding, it is important:
-
To accurately measure the radius of the arch
-
Choose a flexible molding of the correct width (a molding that is too wide on a small radius will create kinks)
-
Join the molding with the casings of straight slopes cleanly, without breaking the pattern
Radius molding made of solid wood for framing an arch — is a detail that elevates the opening to the category of "designed by a designer."
Flexible panels for niches: three scenarios with different requirements
A niche is a cutout in a wall. It can be rectangular, semicircular, or polygonal. For decorative finishing of a niche, it is important to understand two aspects: the shape of the back wall and the shape of the slopes.
Niche by the bed: decorative panel behind the headboard
A niche behind the bed headboard is currently one of the most popular interior techniques. The back wall of the niche is decorated with a decorative panel: wood-look, stone-look, fabric-look, or painted in a contrasting color.
If the niche is rectangular, you can use regular Rafter panels. If the niche has a semicircular top, a flexible panel is needed for the arch.
An important detail: the slopes of the niche by the bed should be finished the same way as the back wall — in the same material or with a decorative transition. Wooden planks on the slopes, a beautiful transition is created between the back wall and the main wall.
Niche for backlighting: technical requirements
A niche for LED backlighting requires special installation precision: an uneven back wall surface will result in uneven light distribution. Flexible MDF or flexible MDF for painting on the back wall of the niche — the right choice: the surface is smooth, paints well, does not cast shadows from unevenness.
For niches with backlighting, the reflective ability of the surface is also important. White or light painting enhances the backlight effect. A matte surface provides soft diffusion.
Decorative niche in the living room: creating an accent
A decorative niche in the living room — a place for books, sculptures, decor. The semicircular arch of the niche gives the interior a classic character. A neat transition from the arch to the vertical slopes is important here — without rough joints.
Solution: a flexible panel or flexible MDF on the arch, Wooden moldings along the perimeter of the niche as a decorative frame, Skirting made of solid wood at the base. Everything in one style and material.
How to choose the correct bending radius: measurement and calculation
This is a practical question that decides everything. Buying a flexible panel without understanding the required radius means risking installation failure.
How to measure surface radius
Method 1: Template. Press a sheet of thick paper against the curved surface, trace the outline. Use a compass or flexible ruler. The radius can be determined approximately.
Method 2: Chord and sagitta. Draw a chord (a straight line between two points on the curve), measure its length (L). Measure the perpendicular from the midpoint of the chord to the surface (h). Radius: R = (L² / 8h) + (h / 2). This formula gives a fairly accurate result for practical tasks.
Method 3: Flexible ruler. Press a flexible metal ruler against the surface, mark the shape, then measure it on a flat surface.
Table of minimum radii for different materials
| Material / Thickness | Minimum bending radius |
|---|---|
| Flexible MDF 3 mm | 100–150 mm |
| Flexible MDF 6 mm | 300–500 mm |
| Flexible MDF 9 mm | 500–800 mm |
| Solid wood batten 10×20 mm | 200–400 mm |
| Solid wood batten 15×30 mm | 500–800 mm |
| Solid wood batten 20×40 mm | 1000+ mm |
What happens if the permissible bending radius is exceeded
If you try to bend a panel or batten more than the material allows:
-
The MDF surface will crack along the face layer
-
The solid wood batten will split along the grain
-
The cuts of flexible MDF will open wider than permissible, creating visible ridges
-
The fasteners will not hold the material in the bent position
Always check the minimum panel radius before purchasing — it's not an optional specification.
Trial fitting: why it's mandatory
Before final installation — especially on complex areas with variable radius — be sure to do a trial fitting without glue. Press the panel or slat against the surface, secure it with temporary clamps. Evaluate: are there any kinks, any gaps, does the material lie flat.
Trial fitting takes 10–15 minutes. Fixing mistakes after final installation takes hours or days of work.
Joints, edges, and trim pieces: how to finish the job correctly
Uncovered edges and unfinished joints are what distinguish professional installation from amateur work. A flexible panel on a curved wall or column looks complete only when all transitions are neatly finished.
Panel edges
An edge is the open cut of the panel. On flexible MDF, the edge looks technical: gray, porous, with visible board structure. It needs to be covered.
Options for covering the edge:
-
Wooden slat. A thin flat slat made of wooden trim glued or nailed on top of the end. This is the neatest method.
-
Wooden molding. solid wood molding with a profile — covers the end and simultaneously creates a decorative frame.
-
Trim strip. A special linear element for closing joints and ends. More details in the article wooden trim strip for finishing joints.
-
Putty and painting. For smooth surfaces to be painted — the end is puttied, primed, and painted.
Joints between panels
On long sections or when bending around a large radius, joints are inevitable. The goal is to make them invisible or turn them into a decorative element.
Joint under a batten. A small gap of 5–10 mm is left between two panels, which is covered with a decorative batten. The batten is fixed over the joint, creating a rhythmic accent.
Staggered joint. Panels are installed with an offset, like brickwork. Each joint is at a different height point — and together they do not form a noticeable vertical line.
Open joint. Panels are installed with an intentional gap — a seam connection. The gap must be uniform along the entire length. This is a design technique that turns a technical necessity into decor.
Baseboard at the base
At the floor, the flexible panel ends , which covers the technological gap. The top edge may be detailed with a cornice or left open.. For a column, this is a wooden baseboard that wraps around its base in a circle. For a curved wall, a baseboard that follows the wall's curve.
A straight baseboard will not fit tightly on a curved wall. Either a flexible baseboard is needed, or Trim made of a thin slat that can follow the shape of the base.
Cornice or profile at the ceiling
At the ceiling, the task is symmetrical. A thin decorative profile or cornice made of wooden moldings and cornices finishes the top edge of the panel. For curved surfaces, a flexible profile or a cut cornice.
Installation of flexible panels: step-by-step logic
Installing a flexible panel is a step-by-step process where steps cannot be skipped.
Stage 1: Surface preparation
The surface must be even in curvature (without local bulges), dry, cleaned of dust and old coatings. Priming the base is mandatory: it improves adhesive adhesion.
If the surface is concrete or plastered — use acrylic primer. If it's drywall — use a special primer for adhesive.
Step 2: Creating a frame (if necessary)
For slatted structures on columns or for heavy panels, an intermediate frame is needed. Thin horizontal strips are attached to the main structure along the entire height with a spacing of 40–60 cm. Slats or panels are attached to them.
For flexible MDF on a flat curved wall, a frame is usually not needed — the material is glued directly to the wall.
Step 3: Applying adhesive
Solvent-free mounting adhesive is applied to the back side of the panel. For flexible MDF — water-based adhesive or special structural adhesive. For wooden slats — PVA wood glue or acrylic mounting adhesive.
The adhesive is applied along the perimeter and in a zigzag pattern in the center. For curved surfaces, a little more adhesive is needed — due to the larger peel area during bending.
Step 4: Pressing and fixing
The flexible panel is pressed against the surface and fixed. For adhesive mounting — use masking tape or temporary spacers during curing. For additional reliability — use finishing nails (brads) along the perimeter every 20–25 cm.
On columns, it is convenient to use a temporary wrapping method: after applying the glue, the panel is pressed and wrapped with stretch film around the entire perimeter. After setting, the film is removed.
Stage 5: Final Finishing
After the glue has fully set (12–24 hours):
-
Fill gaps and joints with acrylic sealant or putty
-
Cover the ends with trim elements
-
Install baseboard at the floor and profile at the ceiling
-
Prime for painting (if painting is intended)
-
Paint in 2–3 coats with acrylic paint
For more details on painting MDF panels, see the article slatted MDF panels for painting.
Flexible panels for painting and for wood: two different results
The finish surface of the flexible panel determines the entire character of the result.
For painting
Flexible MDF for painting is an opportunity to get any color, exactly matching the shade of walls, doors, or furniture. The panel is primed, puttied in one thin layer, primed again, and painted.
Advantages:
-
Maximum color freedom
-
Impeccably smooth surface
-
Pairs well with any style
Limitations:
-
Does not provide the texture of natural wood
-
Requires high-quality surface preparation: every imperfection is visible under the paint
Under wood (veneer or solid slat)
Veneered flexible MDF or Solid wood slats — this is the living texture of wood on a curved surface. The warmth of the material, the fiber pattern, natural unevenness.
Advantages:
-
Natural texture and warmth
-
Does not require painting (oil, wax, or varnish)
-
Looks significantly richer than painted panels in both classic and modern interiors
Limitations:
-
Bending radius is limited by the properties of veneer or slat
-
More expensive solution
Mistakes in choosing and installing flexible panels
This is a list of real failures that occur when working with flexible panels — and that could have been avoided.
Mistake 1: buying a regular rigid panel for a curved wall. The most common one. “It’ll probably fit” — it won’t. A rigid panel on a curved wall creates gaps, bubbles, and cracks.
Mistake 2: not measuring the radius before purchasing. Buying 9 mm flexible MDF for a column with a 150 mm radius means wasting money and time. Measure first, then buy.
Mistake 3: not considering the direction of flexibility. Flexible MDF bends only in one direction — perpendicular to the cuts. If you mix up the direction, the panel won’t bend.
Error 4: not preparing the base. Applying glue to a dusty or damp surface results in weak adhesion and peeling after a few months.
Error 5: not doing a test fit. The glue sets, but the panel is installed with a break. Redoing means tearing it off and starting over.
Error 6: ignoring the edges. An uncovered edge of flexible MDF is unsightly and non-functional. Trim pieces are not an option, but part of the installation.
Error 7: not matching the radius baseboard with the main one. At the base of a radius wall, you need a baseboard that follows the curve. A straight baseboard there will create an uneven gap.
Error 8: choosing too thin a batten for large areas. A thin batten on a wide span will sag under its own weight or pressure during cleaning. Large panels require a proper frame.
Error 9: painting flexible MDF without putty. On edges and cuts without putty, the paint applies unevenly, highlighting the base structure.
Error 10: not planning the wiring in advance. If there will be lighting or outlets behind the panel, cables must be laid before installation, not after.
What to check before buying a flexible panel
-
Surface radius — measure using one of the three described methods
-
Minimum bending radius of the panel — compare with the surface radius
-
Surface type — wall, column, niche, arch (affects material and thickness choice)
-
Finish — for painting or wood-like
-
Area size — total area for material quantity calculation
-
Number of joints — how many joints and how they will be covered
-
Additional elements — end strips, moldings, baseboards, cornices
-
Type of adhesive — solvent-free, acrylic, or PVA
-
Need for a frame — for slatted structures on columns
-
Allowance — 10–15% extra material for trimming
FAQ: answers to questions about flexible wall panels
What are flexible wall panels?
This wall panelsthat can be installed on curved, non-standard surfaces: columns, niches, arches, bay windows, and semicircular walls — where rigid panels are not suitable.
Where is flexible MDF used?
flexible MDF used for walls, columns, radius facades, niches, arches, furniture elements — everywhere a smooth curved surface is needed for painting or decorative coating.
Can flexible panels be used to finish a round column?
Yes. For a round column, flexible MDF (3–6 mm), thin wooden slats, or ready-made slatted panels on a flexible base are used. The main thing is to correctly calculate the radius and think through in advance the joints and trim elements.
How to close the end of a flexible panel?
The end is closed wooden batten, moldingwith a trim from trim or with putty and painting.
Can flexible panels be painted?
Yes. Flexible MDF for painting is primed, puttied if necessary, and painted with acrylic paint. More details in the article MDF panels for painting.
What is the minimum radius of a flexible panel?
Depends on the material and thickness. Flexible MDF 3 mm — from 100–150 mm. MDF 6 mm — from 300–500 mm. Wooden slats with a cross-section of 10×20 mm — from 200–400 mm.
About the company STAVROS
STAVROS is a Russian manufacturer of products made from natural solid wood and polyurethane for interior decor. The STAVROS catalog includes Rafter panels, wooden slats for walls and partitions, Pogonazh iz massiva, Moldings and cornices, Skirting made of solid wood and a full range of additional elements for completing complex finishing work.
STAVROS helps designers, builders, and private clients find the right materials for non-standard tasks — including finishing radius walls, columns, arches, and niches.
If you need buy flexible wall panels or select slats, moldings, and trim for complex surfaces — the STAVROS catalog offers solutions that turn architectural challenges into decorative opportunities.