Article Contents:
- Wooden overlay between handles: measuring the free space, not the holes
- N-106, 311 or 400 mm long: two candidates for one drawer
- The ornament on paper fit. Is there still room for fingers?
- One carved accent or three: choosing the composition before ordering the batch
- Color of the wooden overlay next to the previous handles
- Overlay decor on a finished facade: first the base, then the glue
- Cost of decor without mandatory handle replacement
- Request for N-106: exact size instead of "overlay about forty centimeters"
- Questions before buying a wooden overlay for a dresser
- Only the distances between the screws are known. Can I already choose the size?
- The 400 mm version fits, but 5 mm remains on top. Is this acceptable?
- The ring does not touch the overlay at rest. What else should be checked?
- Can I order a size between 311 and 400 mm instead of trimming?
- Does 'Prestige' mean that additional painting will not be required?
- There is a small scratch on the finished facade. Can it be covered with an overlay?
- On one drawer, there is a keyhole between the handles. Should I repeat the same layout?
- Do I need to consider a future handle replacement if it is currently working?
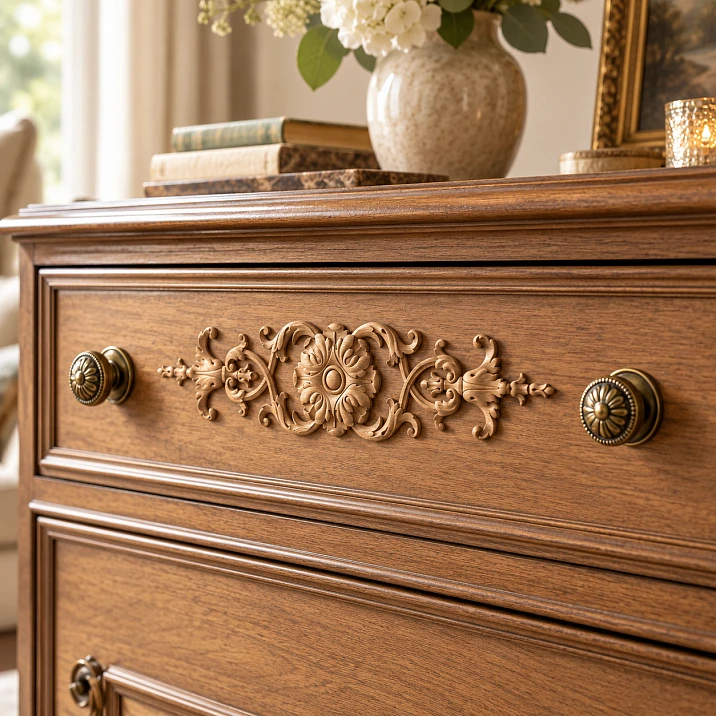
The dresser is in good condition: drawers open, handles fit comfortably in the hand, and I don't want to change their position. But the middle of the facade seems empty. Adding a carved wooden overlay N-106 there is possible if the chosen option passes three checks: it fits on a flat surface, leaves the usual grip free, and allows reliable attachment to the existing finish.
It is not necessary to move the handles for the overlay. However, matching sizes on paper does not mean the decor will fit. A ring or a drop handle has movement, a hand has its own trajectory, and threads have a protrusion relative to the facade. All of this needs to be checked before the final order.
Before buy wooden overlay N-106, prepare a layout of one drawer and compare the two closest sizes. Below is a breakdown of a conditional gap of 460 × 100 mm: it helps understand the selection process but does not replace measuring your dresser. The result will be a specific product line and a separate task for the craftsman, not a request to "add something between the handles."
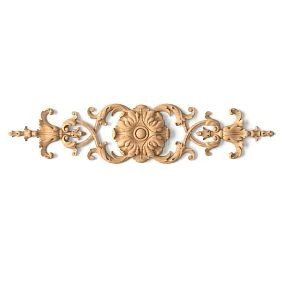
Wooden overlay between handles: measuring the free space, not the holes
The center-to-center distance of the mounts refers to the handle itself. It helps select hardware for the holes but does not describe the area for the ornament. The decor is hindered by the outer edges of the handles, their decorative bases, and moving parts. Two pairs of screws can be far apart, while wide rosettes around them can leave only a small gap.
For measuring, choose a coordinate system: for example, the origin at the lower left corner of the facade, horizontal coordinate to the right, vertical upward. First, mark the entire drawer, then both handles in their normal position. Indicate the part of each handle closest to the middle that protrudes. If the shape is complex, take measurements at several heights of the future ornament: one number along the screw line does not describe the entire free area.
| What to record | How to determine | For which solution it is needed |
|---|---|---|
| Facade boundaries | Width, height, selected coordinate origin | Find the box axis |
| Left boundary of the free area | Edge of the left handle on the middle side | Limit the position of the overlay on the left |
| Right boundary | Edge of the right handle on the middle side | Limit the position on the right |
| Flat area by height | Area without frame, chamfer, or transition | Check placement and seating |
| Moving parts | Ring or folding bracket positions | Mark zones for additional inspection |
| Assumed center of the ornament | Coordinates relative to the facade | Repeat the approved composition during installation |
By "flat area" here we mean the place where the overlay is intended to be located. The edges of the frame and chamfer are not automatically added to it. If part of the product is to be over a transition, that is a separate installation issue: the craftsman checks the support and back geometry, not just confirms a nice outline.
Mark two midpoints: the axis of the facade itself and the midpoint between the handles. With asymmetrical installation of the hardware, they will not coincide. First compare both compositions on the unfolded view. Do not try to correct a long-standing asymmetry with just an overlay: a shifted ornament can emphasize it, while a geometrically central one may come closer to one handle than to the other.
A photo is needed as a supplement. It should show the entire facade, a scale ruler, and the working position of the hardware. Write down the numbers separately: the perspective of the photo should not become the basis for an order.




N-106 with a length of 311 or 400 mm: two candidates for one drawer
The N-106 card presents five versions by dimensions: 311 × 70 × 8, 400 × 90 × 10, 488 × 110 × 13, 576 × 130 × 15, and 665 × 150 × 17 mm. Materials are beech and oak; sanding options are "Standard" and "Prestige". For the narrow middle of the drawer, we will start with the two smaller sizes. [1]
Training condition: between the installed hardware, a rectangular field with a width of 460 mm and a height of 100 mm is highlighted. The overlay is oriented horizontally, and its overall rectangle is positioned in the center of the field. Then the side field is equal to (460 − A) / 2, and the vertical one is (100 − B) / 2.
| Version N-106, mm | On each side | Top and bottom | Preliminary result |
|---|---|---|---|
| 311 × 70 × 8 | 74.5 mm | 15 мм | The dimension fits |
| 400 × 90 × 10 | 30 мм | 5 мм | Fits, but free margins are smaller |
| 488 × 110 × 13 | −14 mm | −5 mm | The dimension extends beyond the selected field |
A negative value means going beyond the boundary, not an installation gap. For the 488 mm version, 28 mm of total width and 10 mm of height are missing. Moving the rectangle within the same field will not eliminate this deficit. But even positive 30 or 74.5 mm do not yet indicate finger comfort: the table only checks the plane.
Now an additional conditional example. For the 400 mm version, after centering, 30 mm remain on the left and right. If, to align with the dresser axis, the ornament is shifted 20 mm to the right, the margins become 50 and 10 mm. With a shift of 35 mm, the right edge will extend beyond the boundary by 5 mm. This shows why a preferred position must be recalculated, not carried over from the initial symmetrical table to any layout.
For your own layout, it is convenient to calculate margins directly from coordinates. Denote the left boundary of the available area as xL, the right as xR, and the selected center of the overlay as xC. Then the left margin equals xC − A/2 − xL, the right one — xR − xC − A/2These expressions allow checking even a deliberately offset composition. Boundaries are taken within the selected contour; for complex hardware, they are not necessarily the same across the entire height. This way, the task receives an exact position rather than a vague indication like "approximately in the middle."
A drawing with an exact contour should be requested from the seller. A rectangle based on overall dimensions is a preliminary screening tool, not a thread pattern. After receiving the file, check the print scale with a control dimension; automatic fitting to the page can make the template smaller than required.
Do not buy a larger N-106 with the intention of sawing off the outer curls. Here, a complete ornament is chosen, not a linear profile for cutting. When no suitable version is available, it is wiser Buy decorative furniture overlays to choose a different shape rather than move convenient handles just for the sake of a selected pattern.
Our factory also produces:
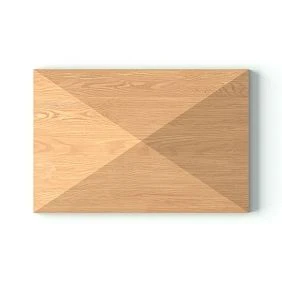
The ornament fits on paper. Is there still room for fingers?
The next check is three-dimensional. For two candidates, parameter C is 8 and 10 mm. [1] These values are considered when preparing the layout, but are not declared as a finished protrusion after installation: you need to know the back shape, the position of the part relative to the base, and the intended mounting layer. If the layer adds thickness, fitting the overlay directly to the plane without it will yield a different result.
First, compare your usual action without decor and with a safely placed mock-up. Grasp the left and right handles in the way you actually use them. Assess not only the moment of gripping but also the release of the hand after opening. An unsuccessful composition sometimes allows grabbing the hardware but forces you to pull your fingers out sideways or touch the thread with every movement.
For preliminary screening, a soft three-dimensional mock-up based on maximum dimensions is acceptable. It has a limitation: a rectangular block fills space that may not exist in the actual ornament. Collision with such a block is a reason to move to the exact contour, not an unconditional ban on N-106. The absence of collision also does not confirm the surface quality and fastening of the future product.
If rings or folding brackets are installed, check the path from the initial position to the working one and back. Ensure that the moving part does not press against the ornament, does not get stuck near it, and does not require holding it in an unusual position. Photos of only the lowered ring are insufficient: a conflict may appear when it is raised.
Then carefully check the drawer's movement without loading the temporarily fixed mockup. Look at the neighboring fronts and protruding parts of the dresser. Don't pull out all drawers at once for the check: work sequentially, maintaining a stable position of the furniture. Temporary fixation of the template should not damage the old finish; the appropriate method is agreed upon in advance with the craftsman.
Separately check household access to the space between the hardware and the carving: can dust be removed and the front wiped using the chosen method for its finish without bending thin parts of the ornament. The area may remain free for opening but turn out to be inconvenient for regular maintenance. This result also influences the choice between a larger and more compact overlay—not just the distance to the fingers.
Record the specific result: which handle was tested, which grip is used, where contact occurs, and at what ring position it is noticeable. "Seems comfortable" cannot be reproduced during a second fitting. But a note like "right ring touches the mockup on return" immediately shows which component needs to be changed.
Don't assign a universal gap for all handles. The decision is made based on specific geometry and users. If maintaining the familiar grip isn't possible, reduce the overlay, change its position, or abandon this accent. The carving itself is not used for pulling the drawer: standard handles remain for that purpose.
Get Consultation
One carved accent or three: choosing the composition before ordering the batch
Start with one overlay on the selected drawer. Show the dresser as a whole: together with the top, legs, all handles, and surrounding furniture. A close-up of the middle almost always makes the ornament the focal point, but from a normal viewing angle it may seem superfluous or, conversely, too inconspicuous.
For comparison, prepare a second layout—repetition on three fronts. Don't change size, color, and number of elements simultaneously: otherwise, it will be unclear what exactly influenced the impression. First, compare one and three overlays of the same finish, then refine the size if necessary.
Before reordering, label the drawers as D1–D3 and measure each. The overall width of the dresser doesn't prove the fronts are equal: the top one may be lower, the bottom one may have a different frame, and one handle may be positioned slightly closer to the center. Convenience is also checked at different levels: the hand position near the top drawer doesn't necessarily match the grip on the bottom one.
Each N-106 must relate to its own front. Don't connect two independently moving drawers with a single ornament, and don't extend part of it onto the fixed frame of the body. Even when the furniture is closed, such a composition may look cohesive, but the movement of parts will destroy the intended assembly.
Approve the quantity only after a full fitting. If repetition overloads the piece, keep one accent. If the design itself isn't satisfactory, transition buy decorative wooden furniture elements needed for choosing an alternative, not for automatically adding sockets, moldings, and new legs.
Color of the wooden overlay next to the previous handles
First, decide what should change visually. An overlay in a color close to the facade allows highlighting primarily the relief. A contrasting coating makes both the shape and color an independent accent. Metal handles can remain the same: it is not necessary to repeat their shade on the wood.
To compare sanding and wood veneer splicing grade, separate these parameters in the request. "Standard" involves machine surface treatment; "Prestige" includes additional detailed manual sanding. "Under enamel" and "under tinting" describe the type of lamination: in the second case, lamellas are matched by color and texture. None of these designations by itself means an applied finish coating. [2]
For N-106 in the basic configuration, the card specifies lamination "under enamel." [1] If you want to see the wood under a translucent finish, agree on a suitable execution separately. Choosing oak instead of beech does not replace this issue: the name of the species and requirements for lamella selection are different order lines.
Ask the finisher to show a sample of color and gloss next to the actual facade and handle. For a relief part, it is useful to evaluate not only a flat swatch but also the chosen effect in recesses. Do not approve an exact match of old and new finishes solely from a photo: the screen is suitable for discussing direction, not for accepting a shade.
Before payment, determine the coating contractor. In the STAVROS FAQ, factory painting is indicated for orders of products from 150,000 ₽; a small purchase of one or three overlays cannot automatically be considered an order with such a service. [5] A separate workshop must confirm in advance the scope of preparation and finishing for the selected execution.
If a trial element is already used to check the color, determine its fate. An approved suitable overlay can be included in the final quantity. A part with a damaged coating or damaged thread cannot be considered a finished part of the set just because it has already been paid for.
Overlay decor on a finished facade: first the base, then the adhesive
Before choosing a compound, determine what it will be applied to. You need the facade material, the type of existing coating, its condition, and the surface of the back side of the overlay. Identically looking white boxes may have different finishes; the color name does not determine the bonding technology.
Official tips for finishing and installing overlays they distinguish between unpainted and already primed or painted surfaces. [3] This is a useful starting point for a conversation with a craftsman, but not confirmation that one adhesive is suitable for any old varnish, film, or laminate. The applicability of the compound and base preparation are verified against the documentation of the selected mounting system.
Check whether the previous coating holds firmly in the installation area. If it is peeling, the problem cannot be considered solved after gluing decor on top. The new bond also depends on the layer it is applied to. In this case, restoration of the substrate is first agreed upon; the possibility of preserving the appearance of the rest of the facade is assessed separately.
Ask the craftsman to mark the installation zone on the precise outline. Do not strip the entire overall rectangle just because it was used for fitting: through gaps in the pattern, treated areas may remain visible. The same method is used to check the areas where the compound is applied and where excess may emerge. The method of removing them must suit the old finish, not be chosen after a mark appears.
If mechanical fastening is required, the thickness and structure of the facade, the back side of the decor, and the location of existing handle screws are checked in advance. A universal fastener length based on the maximum thickness N-106 is not assigned: the thread has different relief, and the available thickness at a specific point may differ.
Only after choosing the technology does it make sense buy materials for installing wooden decor. The task specifies preparation, the order of finishing and installation, temporary fixation, and the moment when furniture may be used according to the instructions of the materials used.
When it is better to postpone the purchase. If the type of old coating is unknown, it is peeling from the substrate, or the craftsman has not confirmed the technology, first resolve the facade issue. If the mockup forces you to use a different handle or change your usual grip, return to the size and center of the pattern. And when the only way to place it requires removing part of the carving, it is worth looking for other decor. These are different reasons to stop: the first relates to fastening, the second to convenience, the third to the mismatch of the chosen product to the task.
Preserving handle positions does not equal a promise of installation without drilling or marks. If it is fundamentally necessary to later remove the overlay without damaging the facade, agree on this requirement before purchase. In the absence of a confirmed solution, it is better to refuse the alteration than to consider any adhesive mounting reversible.
Cost of decor without mandatory handle replacement
For the calculation, we will take N-106 311 × 70 × 8 mm made of beech. Prices are verified according to the trade table dated September 6, 2026. Below is the cost of products, without painting and installation. [1]
| Sanding | One overlay | Three overlays |
|---|---|---|
| "Standard" | 2 140 ₽ | 6 420 ₽ |
| «Prestige» | 3 490 ₽ | 10 470 ₽ |
The difference is 1,350 ₽ per product and 4,050 ₽ for three. This is a reference point for comparing finisher proposals. A lower price for the blank does not prove a smaller final budget if the necessary preparation is priced separately.
Request comparable proposals: identical size, quantity, color, gloss, and required result. Have the craftsman separately specify the "Standard" preparation and work with "Prestige". If, all else being equal, the additional preparation of the first option is more expensive than the difference in product price, its advantage disappears. But you cannot substitute an estimated cost of manual labor for a real estimate.
| Expense item | What to include | How to determine the total |
|---|---|---|
| Overlays | Selected finish and confirmed quantity | Price per piece × quantity |
| Sample and finish | Required color sample, preparation, coating | Finisher's proposal |
| Installation materials | Coordinated mounting system | Selection and consumption per specification |
| Facade works | Base preparation and installation | After inspecting the dresser |
| Packaging and delivery | Confirmed delivery items | Calculation for a specific order |
New handles are not automatically included in this estimate: the preservation of functional fittings is considered. However, temporary removal and reinstallation of handles, if necessary for the work, may be a separate operation by the craftsman. Preserving their position and not touching them at all during installation are different requirements.
Verify payment and delivery terms for overlays with the selected delivery address. The manufacturer provides for ordering through the website and other channels; the request requires the article number, material, size, quality, and quantity. [4] Transportation cost depends on the cargo parameters and address, not just on the number of overlays. [5]
The three items in the example are not a factory set. If one suitable piece already remains on the dresser, for the final three you need to add two, not three more. Also include repeat delivery for phased purchases in the comparison.
Request for N-106: exact size instead of "overlay about forty centimeters"
The product specification is given to the seller, and application details are given to the craftsman. One cannot replace the other: a photo of a beautiful composition does not determine the veneer grade, and a paid article number does not confirm compatibility with the previous facade.
Order line to fill in:
N-106 / size A × B × C: ___ mm / beech or oak: ___ / sanding: ___ / veneer grade: ___ / quantity: ___ pcs. / coating and its contractor: ___ / address and recipient: ___ / required delivery date: ___ .
For example: "N-106, 311 × 70 × 8 mm, beech, 'Prestige', veneer for enamel, 1 piece. The coating is done by a separate workshop according to an agreed sample." This is an example of filling, not a recommendation for such execution for any drawer.
Include in the installation task the facade number, coordinates of the overlay center, a map of handle boundaries, their working positions, and the results of volumetric fitting. Attach photos of the base and the agreed mounting method. Separately state: handle positions are preserved; the overlay is not used for opening; the possibility of subsequent dismantling is required or not required.
Before handing parts over for work, also agree on where they will be accepted: at your place or directly at the workshop. The recipient will need the approved specification and photos of the chosen composition. Do not schedule installation based only on the production reference: the schedule includes receiving, checking, coating, and the curing times provided by the technology. Specific dates are confirmed by the executors of their stages.
After receiving, verify the article number, dimensions, material, preparation, and quantity before irreversible finishing. Inspect the threads and the reverse side, and record any visible damage. Repeat the fitting with the actual part: paper helped with selection, but the received product goes into work.
If the size, center, coating, or mounting fit changes, update the corresponding part of the task. Old approval of a different layout does not automatically transfer to the modified project. When the geometry, handle usage, and technology are confirmed, you can choose size N-106 and place the order. Before payment, check the current price of the selected execution.
Questions before purchasing a wooden overlay for a dresser
Only the distances between screws are known. Can a size already be chosen?
Only a preliminary candidate. For ordering, the boundaries of the installed handles in the ornament area are needed. Wide bases, rings, and decorative endings that are not on the hole diagram may be added to them. Ask for a measurement with the installed hardware, not just the handle's datasheet.
The 400 mm version fits, but 5 mm remains on top. Is this acceptable?
Five millimeters in the example is a result of arithmetic, not a recommendation. Check the exact contour, adjacent relief, mounting fit, and ease of maintenance. If the edge ends up too close to the frame or the handle is inconvenient to use, a positive remainder does not make such a solution suitable.
The ring does not touch the overlay at rest. What else should be checked?
Its movement into the working position and return, including the moment of finger release. Both rings need to be checked: identical appearance does not guarantee that their actual positions match. Upon contact, note the specific side and stage of movement to adjust the layout.
Can a size between 311 and 400 mm be ordered instead of trimming?
Such an option is discussed with the seller separately. In the published FAQ, size changes are related to bulk orders. [5] Therefore, an individual 350 mm for a single dresser cannot be considered a standard available option. For a one-off purchase, first compare ready-made options and alternative overlays.
Does "Prestige" mean that additional painting will not be required?
No. This is a designation of sanding, not the color you have chosen. [2] The required coating, its availability in the delivery, and the contractor are agreed upon separately. The estimate must show exactly what is being purchased: a prepared wooden part or an additionally agreed painted product.
There is a small scratch on the finished facade. Can it be covered with an overlay?
Externally, it is possible to cover the area if it falls under the actual contour. But first, the stability of the coating and the admissibility of fastening are checked. A scratch between the curls may remain visible; unstable finishing cannot be considered fixed just because it was covered with decor.
On one drawer, there is a keyhole between the handles. Should the same layout be repeated?
No, this facade requires a separate check. Preserve access to the lock, key movement, and the ability to service it. You cannot cover an active keyhole for the sake of identical ornament placement. It is acceptable to leave such a drawer without an overlay and reassess the dresser as a whole.
Should future replacement of the handle be considered if it is currently functional?
Yes, as a service requirement. Please clarify whether the handle, its base, and fasteners can be removed without damaging the overlay. Free access to the screw from the reverse side does not always describe the full removal path of the hardware. This issue will be coordinated before the final fixation of the decor.