Article Contents:
- Start with a list of parts and their purpose
- Four questions before deciding to make or buy
- How complex the shape is
- Whether you have all the necessary tools
- How many identical parts are required
- Whether you will need to repeat the order
- Separate preparation from processing each piece
- Working time and lead time differ
- Why total footage is not enough
- What changes in a relief profile
- Plan the order of finishing and assembly
- Check the joints between purchased and custom parts
- Separate the installed quantity from the purchased quantity
- Can you combine your own and purchased legs in one set
- Should all received parts be trimmed to the same size
- Should you finish a purchased set right away
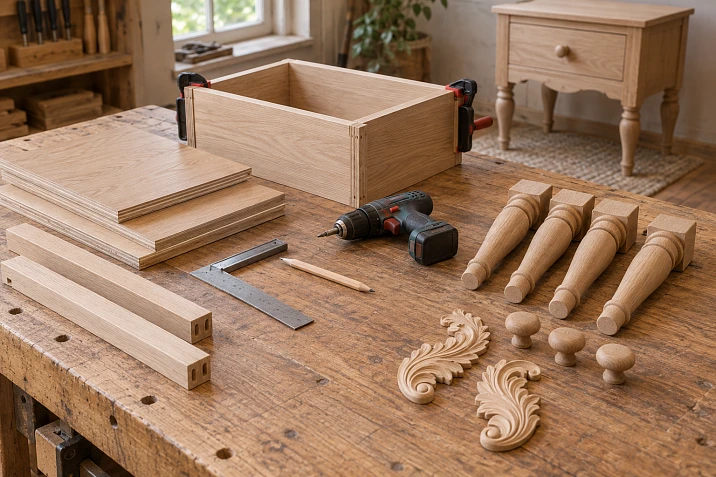
A chest of drawers can have completely simple sides and four legs, which will take more time to make than the entire carcass. A shelf only needs to be cut, have its edges processed, and be prepared for installation. A shaped support first needs to be designed, a blank selected, the profile formed, the transitions sanded, and the result repeated three more times. It is on such parts that the initial “I’ll make everything myself” begins to diverge from the capabilities of a home workshop.
It is better to divide the work by operations. Straight parts, for which the tool and a clear way to check already exist, can often reasonably be made yourself. Complex turned shapes, carved overlays, identical handles, and profiled moldings should be compared with ready-made products. Buying makes sense if it removes a difficult operation and the dimensions and fastening truly suit the project.
At the same time, a ready-made shape does not free you from fitting and checking the joints. An unpainted leg still needs to be finished, the molding cut, and the handle installed. When choosing parts for making furniture with your own hands, it is more useful to ask not “what am I capable of doing at all,” but “what part of the work can I do accurately, repeatably, and within the allotted time.”
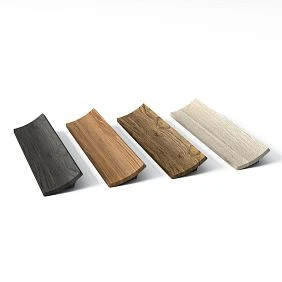
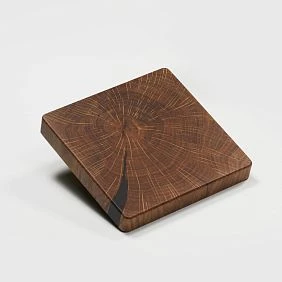

Start with a list of parts and their purpose
Draw the future item in at least two views and write out its composition. Do not combine the entire visible wood into one line. The side panel holds the structure together, the front closes the opening, the leg transfers the load to the base, the handle is used for opening, the overlay changes the appearance. The same material does not make these parts interchangeable.
For an initial breakdown, a short list is enough. Below is a conditional composition of a small cabinet with four doors; this is an example of distributing the work, not a ready cut list for cutting.
| Detail | Quantity | Task | Preliminary decision |
|---|---|---|---|
| Side panel | 2 | Hold the carcass and shelf fasteners | Make or order cutting |
| Shelf | 3 | Place the contents | Make to the dimensions of the opening |
| Front base | 4 | Close the openings | Make according to the drawing |
| Shaped leg | 4 | Support the cabinet body | Compare custom fabrication and a ready-made model |
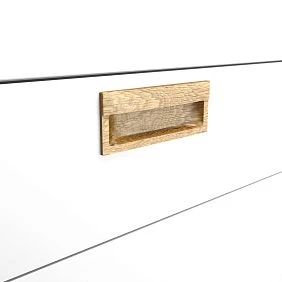
| Wooden handle | 4 | Open the door | Choose the shape and mounting |
| Carved overlay | 2 | Finish the front surface | Check the finished products |
| Molding | According to the cutting map | Form the decorative frame | Buy the profile and cut it |
Add the top, bottom, back panel, hinges, fasteners, and other elements of the specific design to this list. The table should also include inconspicuous parts: support blocks, mounting plates, and joints. It is sometimes the absence of a small internal element that halts the assembly of an already painted cabinet body.
Next to each wooden item, write down which operations separate the raw material from the installation. For a shelf, these might be cutting, edge treatment, drilling, and coating. For a carved leg, the list will be longer: preparing the blank, forming the mounting part, shaping the profile, carving, sanding, checking the set, and finishing.
Now it is clear what exactly you are buying along with the finished product. It may be an already formed relief, a repeatable cross-section, or a mounting part that is convenient for further processing. The more precisely the removed operation is named, the easier it is to evaluate the purchase.




Four questions before deciding to make or buy
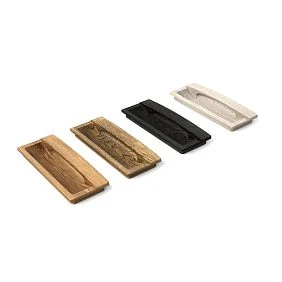
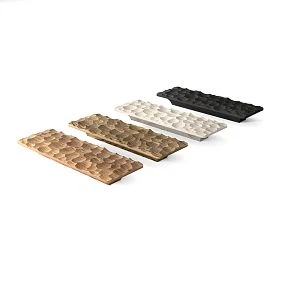
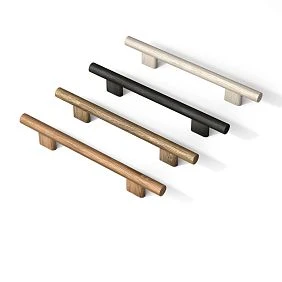
Our factory also produces:
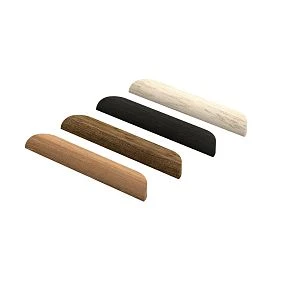
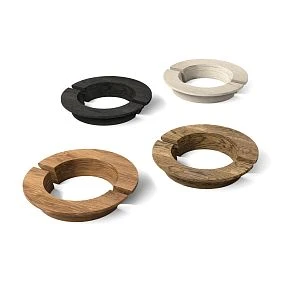

How complex is the shape
A rectangular part can usually be checked with a ruler, a square, and by comparing diagonals. A shaped support has a curved contour, transitions between volumes, narrowings, and areas that are difficult to process after the adjacent surfaces are formed. A carved overlay adds the depth of the relief.
Complexity is not always visible in a photograph. A smooth handle with a soft transition from the base to the grip area may require several setups and careful hand sanding. Therefore, evaluate not the number of decorations, but the sequence of forming the shape.
Get Consultation
Is all the necessary tooling available
Having a router does not yet mean being ready to make any profile. A suitable cutter, a copy template, a fixture for holding the part, and test material may be needed. For identical holes, a stable reference for marking is needed; for turning, a suitable blank and a way to compare profiles are needed.
Evaluate separately the fastening of small elements. A handle has to be held during processing so as not to damage the already finished surface. If a reliable fastening method has not yet been found, the time spent developing it also counts as part of making the handle.
How many identical parts are required
A single trial part and a set of four supports require different levels of control. As the quantity increases, the setup is spread across more items, but the total processing time grows. Sometimes in-house production becomes more advantageous for a batch, and sometimes the bottleneck remains the manual finishing of each piece.
Count the number of parts specifically. Five cabinets with four legs each — twenty supports, even if the customer perceives the work as five small items.
Will the order need to be repeated
If you are making a single item for yourself, you can accept complex manual work as part of the design. For repeatable furniture, you will need to keep templates, dimensions, and the processing sequence. For a purchased component, an article number partially solves this task, but it does not guarantee the item will always be available. Before the next purchase, you still check the availability of the required material, size, and finish.
After these questions, the decision usually becomes specific: we make the shelves from the chosen material, we buy the complex legs, we take the molding in long strips, we make the custom handle ourselves because there is no suitable standard shape.
Simple cabinet parts are usually convenient to make for your own project
Side panels, dividers, and shelves are closely tied to the dimensions of the future furniture. Even a small change in the width of the niche changes their length. Therefore, it is often more advantageous here to work with material cut according to your own drawing than to look for ready-made parts of a randomly suitable size.
In-house production is justified when you know how to achieve a straight cut, maintain the dimensions of a pair of parts, and make the required joints. For a wide solid wood shelf, requirements for wood preparation and the fastening structure are added. For sheet material — requirements for cut quality, edge processing, and hole accuracy.
But a simple shape does not mean it necessarily has to be cut at home. A large sheet can be inconvenient to place and safely process in a small workshop. Ordering cutting according to the parts list leaves you with design, selection of wooden elements, finishing, and assembly. This is full-fledged in-house furniture making with one operation handed off to a specialized area.
Compare the available options separately:
- buy the material and perform all the cutting yourself;
- order the cabinet parts according to your own drawing;
- buy ready-made wooden furniture components and incorporate them into your own design.
These options can be present simultaneously in a single piece. For example, cabinet parts arrive from the cutting service, facade frames are assembled in the workshop, and shaped supports are purchased ready-made.
There is also a limit to this approach. If a ready-made facade base requires changing the openings and the entire wardrobe structure, saving on one item can increase the rest of the work. First, the dimensions and functions are determined, then a convenient way of obtaining the part is chosen.
Calculate the full path to the installed part
Comparing the price of a wooden blank and the price of a ready-made leg says almost nothing about the savings. The blank still needs to be turned into a support. A purchased component may also require additional costs: delivery, surface preparation, fastening, fitting.
For making it yourself, the following record is useful:
Manufacturing costs = material + tool and fixture preparation + machining + handwork + finishing + expected defect losses.
For purchasing:
Cost of a finished part = price of the selected variant + delivery and packaging + required rework + finishing + installation costs.
To make the comparison fair, bring both calculations to the same state. If in the first option the leg is already painted and installed, in the second you cannot count only the price of the unpainted item. Fasteners and installation of your own element should also be included when they differ from the purchased solution.
Check the unit of sale. The price of one strip, one linear meter, and a set of parts means a different amount of material. The calculation should use the cost of the required variant, not the lowest price among all options on the product page. Delivery of the overall order is counted once; if it is allocated between items, the sum of the allocated costs must match the total cost. Including the full delivery in each part again will overstate the comparison result.
Separate preparation from processing each piece
You spend time on the template once, on sanding — for each part. This separation immediately shows how the work changes as the quantity increases.
Let's consider a conditional time calculation. Suppose preparation for own manufacturing takes 180 minutes, and processing one part takes another 25 minutes. Selecting an already suitable finished item takes 30 minutes, and its inspection and minor rework — 8 minutes per piece. These numbers are taken only to demonstrate the method; they need to be replaced with your own measurements. Finishing, assembly, and waiting for delivery are not taken into account here.
| Number of identical parts | In-house manufacturing | Selection and rework of finished parts |
|---|---|---|
| 1 | 180 + 25 = 205 minutes | 30 + 8 = 38 minutes |
| 4 | 180 + 25 × 4 = 280 minutes | 30 + 8 × 4 = 62 minutes |
| 10 | 180 + 25 × 10 = 430 minutes | 30 + 8 × 10 = 110 minutes |
In this example, buying saves working time at all three quantities. However, the table proves nothing about monetary benefit: it contains no price for the item, the wood, delivery, or the cost of an hour. For a home project, each person determines the value of their free time themselves. A workshop takes into account what other work could be done during the freed-up hours.
If the template has already been made and saved, a repeat order cannot again be burdened with all 180 minutes. Only the actual preparation for a repeat run is needed. Conversely: if a purchased model requires lengthy reworking each time, the conditional eight minutes per piece should be replaced with the real time.
Working time and readiness time differ
A purchased part may require only half an hour of your involvement, but several days of waiting. Making your own may take a full working day, but it will be ready tomorrow. Therefore, next to the costs, write down the date by which the element must arrive for fitting.
The dependency is especially noticeable when finishing as a single set. The carcass is already prepared, but the legs are still on the way: you cannot begin the overall painting without risking a mismatch in the result. In that case, the lead time for the supports affects the entire project more than a small difference in price.
Four identical parts require separate inspection
One successful shaped leg confirms that the form has been achieved. The set must pass another check: whether the overall height, the position of the transitions, the upper mounting areas, and the lower supporting surfaces match.
The difference in contours may become noticeable only after installation. On the workbench, the legs lie at different angles, but under the chest of drawers they stand next to the straight line of the carcass. It immediately reveals unequal shoulder heights or a shifted decorative band.
Before making the set, determine the common reference surface from which you will lay out the dimensions. If each leg is marked from a random end, small deviations will begin to accumulate. A template is useful for checking the profile, and a single stop or another proven method of repeating the dimension is useful for height. They are used taking into account the design of the equipment and its operating rules.
Check the set before finishing. Place the supports side by side in the same orientation, compare the seating areas, and do a trial assembly. Sanding cannot unnoticeably correct any difference: by removing material from one side, it is easy to change the fit or the shape of the joint.
For a purchased set, also check compliance with the chosen version and suitability for joint installation. Serial production does not eliminate the need to inspect the received batch. At the same time, natural differences in the wood grain do not by themselves mean differences in geometry. For a transparent finish, it makes sense to additionally select the arrangement of the parts according to the visible texture.
When ready-made furniture legs take on the hardest work
A straight support made from a block can be considered for own production if its cross-section, connection to the carcass, and technology are clear. For a turned, carved, or complex shaped model, the number of operations increases. Here, buying a ready-made geometry is especially useful for a craftsman who does not have the appropriate equipment or experience reproducing it.
Choosing Wooden furniture legs, start with the upper part. In a photograph, attention is usually drawn to the silhouette, but for assembly the decisive factors are the bearing area, the available thickness of the wood at the joint, and the fastening method. A beautiful taper should not force the fastener to be moved to a place where there is not enough material for it.
Divide the check of the support into two tasks. The first is whether its shape is suitable: height, overhang, overall scale relative to the furniture. The second is whether the fastening joint works: where the load goes, how the support is kept from turning and loosening, and whether there is access for assembly. The answer to the first does not replace the second.
For a table with aprons, a cabinet on mounting plates, and an armchair, the connection schemes differ. A solution cannot be transferred from one item to another just because the legs are the same height. Decorative appearance also does not confirm the permissible load. If technical data is insufficient, the design must be agreed upon, rather than determining load-bearing capacity from a photograph.
When a general painting is planned, it is convenient to first consider from STAVROS open boundless possibilities for designers, furniture makers, and anyone striving to create unique high-quality furniture.. But the word "unpainted" does not mean that any hole is already prepared or that fasteners are included. The scope of supply and further operations are checked separately.
It is reasonable to buy wooden furniture legs before their unsuitable shape has to be compensated for by reworking the bottom. If a ready-made model requires deeply cutting the top, changing the tilt, and re-forming the mounting area, compare it with custom manufacturing instead. Significant reworking can destroy the original advantage of the purchase.
Furniture height is calculated together with the selected support
For vertical legs and a simple installation scheme, the total height can be represented as the sum: height of the support part, height of the body, thickness of the top cover. Glides, plates, and adjustable elements add their actual value to the calculation.
A conditional example: an item 800 mm high is needed; the top cover is 20 mm thick, and the distance from the floor to the lower plane of the body after installing the supports should be 150 mm. Then the body is left with:
800 − 20 − 150 = 630 mm.
If, after cutting the body, you choose a support system that raises it to 180 mm, the total height will become 830 mm. Simply replacing the legs will change the result by 30 mm. These values describe a training structure, not the recommended height of a specific piece of furniture.
For an angled leg, its length along the axis is not equal to the vertical lifting height. The mounting plate can set the tilt and the offset of the support beyond the body. For such a scheme, take the installation dimensions from the documentation or measure an assembled sample of the assembly.
Checking the clearance also requires attention to the lowest point. The bottom rail, fastener, or protruding element may be located below the bottom. If a robot vacuum must pass under the furniture, compare its dimensions with the actual free space along the entire path, including the width between the supports.
In such a project, the leg becomes the base dimension of the drawing. Postponing its selection until the final purchase is only possible when the design allows in advance for a known range of sizes and mounting methods.
Handles are compared by grip shape and installation method
A handmade handle is justified when its shape is part of the author's concept or an unusual size is required. A simple bar with rounded edges can be made by a craftsman with their own tools. But even it still has repeatability tasks: identical length, finishing the ends, hole positions, comfortable space for fingers.
For four, eight, or twenty identical handles, compare the time for the entire set. A small part has a small surface area, but there are many transitions, ends, and places that are awkward to reach with abrasives. A local unevenness is especially noticeable on an object that a person touches every day.
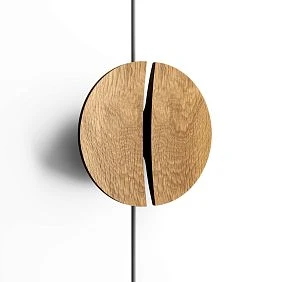
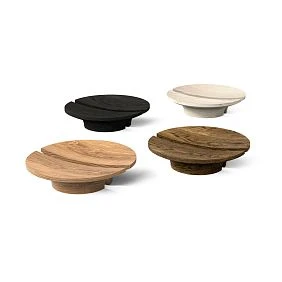
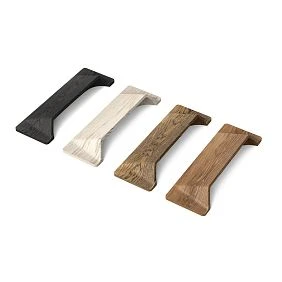
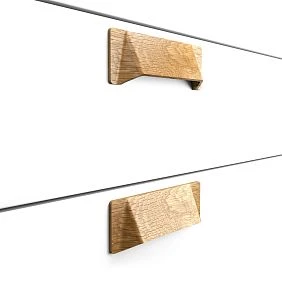
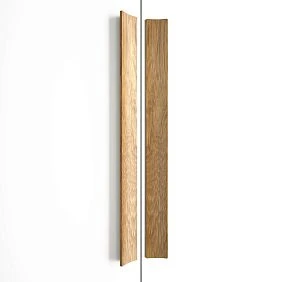
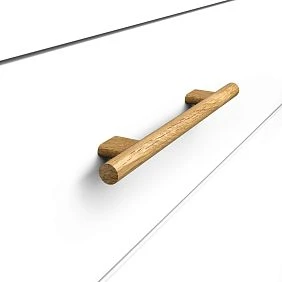
Ready Wooden furniture handles should be checked not only by overall dimensions. For a bow handle, the distance between mounting points, the projection from the front, and the free passage for fingers matter. For a knob handle — the size of the head, the shape of the base, and the position of the single installation point, if the design provides for exactly that.
Before buying, imagine the movement of the hand. On a narrow drawer, a large handle may take up a significant part of the front; near an adjacent door, its projection sometimes interferes with opening. On a heavy pull-out element, a small shallow shape may prove inconvenient, even if it looks good on the drawing.
First choose the model and finish, then determine the mounting scheme, check it on a sample, and only after that drill the fronts. The overall length of the handle and the distance between holes are different quantities. One cannot be derived from the other without a drawing or measurement.
For repeatable marking, it is convenient to keep a proven template. On it, mark the side of the front and the edge from which the handle position is measured. Otherwise, the same distance from different edges will produce mirror-shifted holes.
The screw is selected according to the actual thickness of the front and the requirements of the joint. Too long a screw may bottom out inside the handle before pressing it to the surface; too short a screw will not provide the intended engagement. The required length is determined by the specific mounting, so a universal number for all wooden handles does not work here.
If you are going to buy wooden furniture handles for your own painting, check handles without coating. The finishing and inspection of threaded or seating areas are included in the work sequence in advance.
Carved overlays are convenient to buy as a pre-formed relief
For a decorative overlay, the cost of making it yourself depends not so much on the amount of wood as on achieving the shape. You need to transfer the design, choose the depth, form small elements, treat the background, and sand the surfaces without smoothing out the ornament. For two identical overlays, these tasks also include comparing the pair.
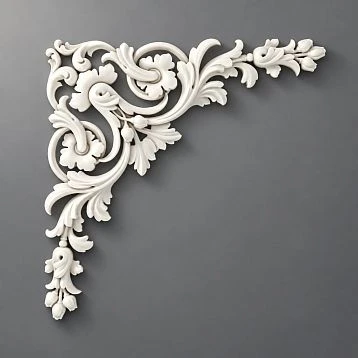
Therefore, ready-made Wooden decorative inlays often turn out to be a rational purchase even for a workshop that confidently makes cabinets and fronts. The craftsman keeps the composition, fitting, preparation for finishing, and installation. The relief itself is already formed.
However, the decorative element must fit entirely on the chosen surface. Look at the free area between the frame, handle, and edge of the front. The maximum width of the overlay does not show where its most protruding part is located. Sometimes it is closer to one end and falls into the grip or opening zone.
A concrete example — wooden overlay N-506. The product page lists a size of 12 × 205 × 5 mm and options in beech and oak. If a conventional flat area has a width of 25 mm and a height of 240 mm, when centered by overall dimensions there remains 6.5 mm on each side and 17.5 mm at the top and bottom. This calculation checks placement in the plane; the actual protrusion after installation and door movement are assessed separately.
A full-size paper outline helps to see the scale, but it does not replace a three-dimensional fitting. The thickness of the decor affects how the front passes next to the adjacent surface. On corner furniture, this may be more significant than the free areas around the ornament.
Pairs are selected especially carefully. Two asymmetrical overlays of the same design do not necessarily form the left and right sides of a composition. Rotating the piece changes the direction of the pattern, while flipping it face-to-front removes the relief. If mirrored elements are needed, check the corresponding designs and order them separately.
Buying carved wooden decor makes sense after such a check. Then the order includes a suitable part with a clear purpose. If the ornament still has to be significantly trimmed, disrupting the pattern, it is better to change the composition or look for another product.
Checking rosettes and capitals differs from checking brackets
These elements share a complex decorative form, but their functions may differ. A rosette on a facade usually participates in the composition. A capital completes a vertical decorative element. A bracket can be used as decoration or be part of a load-bearing assembly — and the latter purpose requires separate justification.
for wooden rosettes before purchase, assess the dimensions, relief depth, and mounting surface. For a capital, check the junction with the lower element: the dimensions of the base and the overhanging parts. Buying a complex shape saves work only when adjacent parts can connect with it correctly.
С with wooden brackets decorative appearance must not be taken as confirmation of load-bearing properties. If a shelf is to rest on a bracket, data is needed about the product itself, the fastening, the base, and the permissible application scheme. The load depends on the entire system, including the shelf overhang and the placement of its contents.
In furniture, functions can be separated: provide a rated load-bearing fastening, and use the decorative element for finishing. This solution also needs to be built into the design so that the ornament does not interfere with installation and subsequent access to the joint.
Buying every complex part is not necessary. For a simple modern project, a straight strip or a smooth support may be sufficient. But if a voluminous ornament is chosen, a ready-made element allows you to avoid learning a separate technique for just one item.
Purchased moulding is cut to size according to your own project
Moulding clearly shows why a furniture project cannot be divided only into “make” and “buy.” The craftsman purchases a long strip with an already formed profile, then independently obtains the needed segments, makes the corner cuts, joins the frame, and finishes it.
This approach eliminates profiling. For a single facade, buying a special router bit and setting up machining of a complex profile may be excessive. At the same time, the accuracy of the frame still depends on your own cutting and assembly.
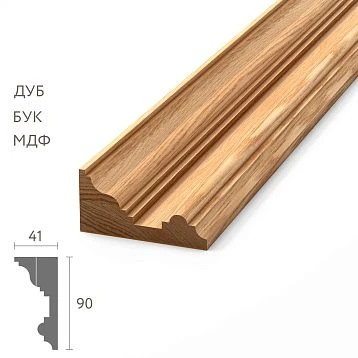
Choosing Wooden moldings, look at the cross-section, material, and length of the specific variant. For example, for molding MLD-019.1 the product page specifies a cross-section of 17 × 12 mm; the beech and oak variants are 2400 mm long, while the MDF version is 2600 mm. With the same profile, the cutting plan for them will differ. MDF is not solid wood, even if it is offered on the same product page.
Why total linear meters are not enough
Let's consider a hypothetical order: three continuous pieces of 1300 mm each and three of 250 mm each are needed. Their total length is:
3 × 1300 + 3 × 250 = 4650 mm.
Two 2400 mm strips give 4800 mm. By total linear meterage, the material would seem to fit. But you cannot place two 1300 mm pieces on one such strip: they require 2600 mm before even accounting for the cut. This means that for three long parts, you will need at least three source strips. The short pieces can be distributed among their leftovers.
This example applies to parts without an allowable longitudinal joint. If joining pieces is предусмотрено by the project, the calculation will be different, but its location and appearance must be agreed upon in advance.
Before ordering, make a plan: which part comes from which strip. Take into account the actual cut width, end alignment, and the allowance required for your specific cutting method. For frames, determine which side the length is specified by — outer or inner. With a profile of non-zero width, these dimensions do not match.
What changes with a relief profile
On a smooth molding, it is usually enough to match the cross-section and carefully assemble the corner. On trim with a repeating pattern, you additionally assess where the ornament begins and ends. Cutting at a random spot can leave unequal fragments on adjacent sides of the frame.
Therefore, the remainder is not suitable for just any short insert. Sometimes the length is sufficient, but the placement of the pattern does not fit. If this is critical for the composition, mark the desired areas already when laying out the whole planks.
Complex Wooden trim it is worth comparing with making it yourself specifically in terms of the cost of obtaining the cross-section. Cutting to size, fitting, and assembly remain separate operations in both options.
A blank and a finished part leave different amounts of work
An unpainted product is sometimes called a blank, although its shape is completely finished. Because of this, extra operations are included in the calculation or, conversely, necessary ones disappear. It is better to replace the name with a question: what exactly still needs to be done with the resulting item?
| What is being acquired | What usually remains with the craftsman | What to clarify before ordering |
|---|---|---|
| Source wood | Prepare the material and perform the entire manufacturing cycle | Moisture, dimensions, defects, yield of suitable parts |
| Blank for further processing | Form the missing geometry and prepare the joints | Allowances, grain direction, surface condition |
| Finished part without coating | Check the shape, prepare the required holes, perform finishing and installation | Sanding, seating areas, permissible rework |
| Finished coated part | Check completeness, compatibility, and install | Color, gloss, fastening, possibility of coating repair |
| Long profile strip | Cut to size, process the ends, assemble, and finish if necessary | Length, cross-section, pattern, unit of sale |
This is a guideline for planning, not a promise that all items of the same type are equally finished. A product page may include different sanding and finish options. The same word "finished" does not guarantee holes for your chosen mounting system.
It is especially risky to judge readiness by the face surface alone. A decorative overlay may look completely finished, but its back side and the furniture base must suit the chosen fastening method. On a leg, the outer profile says nothing about the internal threaded connection.
Therefore, the order should specify not a general "need finished solid wood parts for furniture" but a concrete state: formed geometry, chosen surface treatment, unfinished, holes according to a certain pattern or without them. If the supplier does not perform the required operation, it remains in your scope of work.
When a blank is more useful than a finished shape
It makes sense to buy a blank when you want to determine the geometry yourself: turn a custom support, mill an unusual handle, create your own thread. In that case, a mass-produced part can only limit the design. Material has already been removed where your project needs the mounting area or a new relief.
The allowance is needed for specific operations. If the blank is to be leveled, reduced to the final cross-section, and secured in a fixture, the initial dimensions must allow this. You cannot choose the allowance "by eye" as the same for all directions: machining the end and forming the side profile require different amounts of material.
First, draw the final contour on the sketch of the initial blank. Then mark the holding points and the surfaces from which marking will be done. It may turn out that the blank is sufficient in outer size, but cannot be conveniently secured for the last operation without damaging the already finished part.
For a turned part, additionally check the ability to achieve the required diameter along the entire length and the location of defects. For a carved part, check the allowance for the maximum relief depth and the strength of thin areas. For a part with a joint, check the material around the future hole or groove.
A finished shaped leg should not be bought as a wood supply for another leg. You pay for machining that you then remove, and you get less freedom than with a suitable blank. An exception is possible with minor planned rework, but its limits must be established before purchase.
Finished geometry without coating leaves freedom for finishing
For self-assembled furniture, an intermediate option is often convenient: buy a pre-shaped wooden part and finish it together with your own elements. This preserves the overall color and sheen concept, while the most complex shaping has already been done.
But the same can of stain does not make different surfaces identical. The result is influenced by the wood species, grain pattern, preparation, absorption, and application method. Even two elements of the same species are best compared on a test finish, especially if they will stand next to each other.
For opaque enamel, beech is often considered because of its less pronounced large surface pores. Oak is chosen when you want to preserve a noticeable texture under a clear or semi-transparent coating. This is not a ban on painting oak or clear-finishing beech: the desired result and surface preparation remain decisive.
If you need a smooth opaque surface without visible pores, clarify the entire preparation system in advance. Choosing the species alone is not enough. You should also not automatically order all elements in oak if a handle suitable in design is not available in this material: sometimes it is wiser to change the set or deliberately create a separate accent.
Plan the order of finishing and assembly
Bonding areas are prepared for the chosen adhesive. If it is intended for clean wood, painting the contact surface before assembly may disrupt the bonding conditions. Areas for threading and precise fitting also require protection from excess coating according to the working technology.
Fine carving should not be sanded heavily just to achieve a feeling of absolute smoothness: this can round the edges and lose the pattern. First find out what type of processing was ordered and what the chosen coating system requires. Preparation should improve the surface while preserving the intended shape.
After transportation and storage, assess the condition of the wood and the workshop conditions. Wood exchanges moisture with the surrounding air, so its dimensions may change. A universal promise to “let it sit for a day and then you can paint” is unreliable here: the initial condition, part sizes, and conditions vary. Follow the requirements for the material and finishing products.
It is useful to verify the manufacturer's information about processing options and materials with the section The quality of STAVROS products. A Mounting and finishing materials are selected after determining the base, joining method, and required coating. The mere fact that products are in the same catalog does not confirm the compatibility of any combination of them.
A single sample verifies the solution before purchasing a full set
A sample is needed when a question remains that cannot be confidently resolved from dimensions and a photo. Whether the handle grip feels right, whether the desired color comes through on the texture, whether there is enough space for mounting the leg, whether it is convenient to press the overlay during installation — these are different checks.
A suitable item is chosen for each of them. A material sample helps evaluate color and texture. A short section of profile — its cross-section and finish. A full leg or handle is required to check the mounting assembly and usage. A small piece of wood does not replace such a trial fit.
Section Product samples is useful for preliminary selection of available samples. If a complete part is needed, the possibility of purchasing a single piece and the required finish are clarified for the specific item.
It is convenient to carry out the check sequentially:
- Compare the received item code, material, and size with the selected option.
- Place the product against the mockup or a test area of the future furniture.
- Assemble the intended connection and check access for the tool.
- Evaluate the movement of the door, drawer, or hand in the working position.
- Perform a trial preparation and finishing on a suitable area or an additional sample.
- Record the result and approve execution for the order.
When checking the color, observe the specified drying time. A freshly applied finish may look different from the finished coating. It is useful to evaluate a sample next to the cabinet material under lighting close to the future conditions of use.
A test piece cannot always be installed on the furniture afterward. It may retain extra holes, marks from several color samples, or test fastening. Therefore, the quantity for testing is counted separately from the quantity for assembly. Saving one piece should not force a damaged sample into the finished set.
Record the parameters and remaining operations in a single list
After selecting finished products, the initial list of parts is turned into a working specification. It must link the construction, purchasing, and in-house processing. The single name "wooden leg" is not enough for this.
For each purchased item, keep the SKU, selected size, material, surface variant, and quantity. If the product page contains several versions, a link without these details does not fix the order. When the page is reopened, a different default variant may be shown.
Size designations are also read according to the diagram for the specific product. The letter index on the product page should not automatically be taken as length or height: for different product groups, the directions may differ. It is more convenient to transfer clear names of the dimensions into your own list instead
The last two decisions may be combined. An unpainted molding must both be cut and finished. Therefore, the designation in the table should not replace the full list of operations.
Below is a fragment of a training list. The internal numbers refer to the project; they are not store SKUs.
| Project item | Detail | Solution | What should be recorded |
|---|---|---|---|
| K-01 | Side panel | Manufacture | Size according to drawing, material, edge processing, holes |
| O-01 | shaped support | Buy and finish | Article number of the selected model, version, installation size, mounting |
| P-01 | Wooden handle | Buy and finish | Article number, size, installation diagram, fasteners |
| D-01 | Overlay N-506 | Buy and finish | Material, sanding option, quantity, orientation |
| P-01 | Molding MLD-019.1 | Buy and cut | Material, length of strips, number of strips, cutting map |
Such a list cannot be sent for ordering while a generic name remains in place of the selected support or handle model. It shows which decisions still need to be finalized. The final document must allow each item to be ordered without guessing from a photo.
Next to the specification sheet, keep the approved finish sample, joint drawings, and the date the execution option was chosen. For a custom part, also keep the template or its dimensions. If a second cabinet is needed six months later, these records will save you from having to reconstruct the entire project logic again.
How to distribute the work using a chest of drawers as an example
Suppose you are making a chest of drawers with four drawers, four shaped legs, two handles on each front, two carved overlays, and molded frames. We are not specifying exact dimensions yet: the purpose of this example is to choose how to obtain the parts, not to offer a universal design.
The craftsman has tools for straight cutting, drilling, and sanding. There is no lathe, and he does not do carving. In that case, shelves, dividers, and front bases can be considered for in-house production or ordered cut to size. Shaped supports and carved overlays become the first candidates for purchase. Handles are compared by labor intensity: if eight identical complex shapes are needed, making tooling just for this set may prove impractical.
Molding is purchased in long strips. What remains on your side is laying out the frames, calculating the cut lengths, sawing, trial assembly, and finishing. Having a ready-made profile eliminates one part of the work, but it does not make the frames automatically finished.
Check the joints between purchased and custom parts
This chest of drawers has several places that require joint verification. The support connects to the lower part of the carcass. The handle passes through the front with its fastener. The overlay is located inside or next to the frame. The molding meets the edges and adjacent elements.
Trial joints are made at precisely these places. If the craftsman checks each purchased part separately, he may miss their mutual influence: the overlay has taken up the space for fingers under the handle, the mounting plate does not fit between the internal strips, the molding protrusion interferes with the movement of the adjacent door.
A fully assembled chest of drawers is not always needed for verification. A fragment of the front with a handle and overlay allows you to assess the grip and placement of the decor. A section of the bottom with a support gives access to the fastener and the mating of surfaces. However, a trial fragment does not confirm the stability and strength of the entire item; these tasks are checked on the complete construction.
Separate the installed quantity from the purchased quantity
For one chest of drawers in this example, four legs and eight handles are needed. For five identical chests of drawers — twenty legs and forty handles. Overlays, respectively, two or ten.
| Detail | Per chest of drawers | For five chests of drawers | What to count additionally |
|---|---|---|---|
| Leg | 4 | 20 | Test part, if it cannot be installed |
| Handle | 8 | 40 | Trial unit and justified reserve |
| Overlay | 2 | 10 | Separate quantity of left and right versions, if needed |
| Molding | By frame layout | By the overall cutting map | Losses for cutting, trimming, pattern matching |
The reserve should not be automatically assigned as the same percentage for all groups. Damage to a thin overlay and a shortage of a long continuous segment create different problems. For an inexpensive handle, a separate spare piece may be convenient, while for a large expensive support such a solution should be evaluated based on the possible reorder lead time.
The profile consumption for five items is also not always equal to five times the consumption of strips for one. The remainder after the first frame is sometimes suitable for the second. A shared cutting map allows it to be used; five independent maps can turn the same material into extra offcuts.
For a single item and a small series, the boundary changes
In a one-off project, a craftsman may deliberately spend an evening on a single custom handle. The goal becomes obtaining their own shape and mastering the technique. Such a decision is entirely justified if the deadline and budget allow for this work.
When the construction is repeated, a different task appears: to obtain identical products within the planned time. If the next handle depends on manual adjustment of each transition, the deadline becomes less predictable. Then ready-made furniture parts or a previously developed in-house technology give a more stable result.
At the same time, increasing the batch does not mean purchasing automatically wins. A workshop may have a set-up machine, a tested template, and its own simple model. The preparation costs have already been incurred, and processing the next part takes little time. In that case, in-house series production may prove more rational than purchasing.
The boundary is determined by two practical questions: how much time remains for each additional part and how reliably the result is repeated. Compare the data from the first trial and from repeat production. If each piece still requires lengthy manual finishing, increasing the quantity does not eliminate this work.
Purchasing has its own dependency: the availability of the chosen version. For a small series, before approving the model, they clarify the possibility of obtaining the required quantity and the lead time for the next order. Replacing a discontinued leg may require changing the drawing, so it is useful to keep the item code together with the actual dimensions and photos.
The terms of regular supply can be discussed via the section for furniture manufacturers. A specific list of parts and versions is agreed upon. The intention to produce a series alone does not determine the discount, lead time, or available supply volume.
What decisions must be made before cutting
Elements that change the construction are approved before all others. These include supports with their fastening, handles with their hole pattern, moldings that define the facade field, and decor that can affect the opening or the position of adjacent parts.
For a carcass with a complex lower assembly, the chosen method of attaching the legs is required. For a facade with a frame, its actual width is required. For a handle, a verified installation pattern is required. Until this data is available, the drawing contains assumptions that may not match the purchased items.
What may be postponed? For example, the shade of a decorative accent, if the material and coating technology have already been agreed upon; a small overlay on a free fixed surface, if the permissible dimension has been checked in advance. But a late choice must not affect holes, seating points, or the movement of adjacent elements.
A useful criterion is simple: will replacing this part change at least one already assigned dimension or method of connection? If yes, the choice must be finalized before the corresponding operation. If no, it can sometimes be left to a later stage.
The detailed procedure for preliminary component selection is discussed in the article on choosing furniture components for DIY before cutting the carcass. At the work distribution stage, it is enough to establish which purchased elements determine the dimensions of your project and to obtain accurate data for them.
Mistakes in the manufacture and purchase of wooden parts
Comparing the item only with the price of the wood. The reason is clear: the material can be evaluated immediately, while the time for the template and fitting seems free. As a result, four complex parts absorb several unplanned operations. Recording the full path from blank to installation, including your own time, prevents the mistake.
Checking the shape only on the first successful part. The rest are made without a common reference dimension, and differences are discovered after finishing. The set is compared at intermediate stages, while the operation can still be corrected without losing the coating and assembly dimensions.
Buying a visually similar model with the intention of heavily reworking it. On a finished support, part of the wood has already been removed, and the carved overlay has a completed pattern. After trimming, you can lose the mounting area or the integrity of the ornament. The rework plan is checked on a drawing before payment, and its cost is included in the comparison.
Drilling fronts based on the image of the handle. The outer length is taken as the distance between the mountings. The new item does not match the holes, and the correction becomes part of the face finish. The basis for drilling is the installation data and a verified sample.
Ordering the profile only by the total linear meterage. The reason is the habit of calculating perimeters without distributing the cut lengths. The material has been received, but long parts can no longer be assembled from the leftovers. Before ordering, a cutting map with continuous sections and process waste is needed.
Not accounting for the cost of the last failed action. A part can be ruined after turning, sanding, and painting — for example, due to a mistake in the hole. All the accumulated work is lost. An untested operation is first performed on suitable test material, and the order is chosen so as not to risk the finished coating unnecessarily.
Forgetting about the completeness of the assembly. The legs have been purchased, but the mounting plates or other connection elements have not been selected. Assembly is delayed, or the craftsman tries to adapt random fasteners. A suitable furniture hardware is selected as part of a specific connection scheme, checking the dimensions and the scope of delivery.
Considering the presence of a product code as a guarantee that the order is unchanged. On a repeat purchase, a different material or processing option is selected. To avoid discrepancies, the full specification is saved, and the received batch is checked against the approved list.
When it is impractical to buy a finished wooden part
Buying does not solve the task if there is no suitable geometry. For a custom table with an unusual joint or the precise restoration of a historical piece, a mass-produced leg may be too far from the project. Here, custom manufacturing or an agreed individual order is considered.
A finished element is also unprofitable when most of the paid-for shape is still removed. If the molding is to be completely reprofiled, it is usually more reasonable to start with material of a suitable cross-section. If the handle needs to be reshaped for a different grip, the comparison should be made with the full manufacture of a custom model.
For a hidden simple part, an expensive decorative element may be unnecessary. The internal support strip is selected based on the structural task, ease of processing, and connection. Carving on its invisible side does not add any useful function.
Another case is an already established in-house production. A craftsman who regularly makes identical straight supports with the available tools is entitled to keep them in his work. A purchase must provide a measurable advantage: free up time, improve repeatability, enable the required shape, or help meet a deadline.
Finally, gaining one's own experience may be the goal of the project. In that case, labor-intensive manufacturing is justified as training. However, the costs of trial parts and mastering the technology should be separated from the cost calculation of repeatable furniture.
Additional questions before ordering
Can own and purchased legs be combined in one set?
Technically, this depends on the design, but a mere similarity of silhouettes is not enough. It will be necessary to compare the height, mounting parts, joint rigidity, and material. Under a transparent finish, the difference in texture will also become noticeable. For a new item, it is usually easier to approve a single set. When repairing a single support, the issue is decided based on the condition of the entire structure and the possibilities of accurately reproducing the part.
Should all received parts be trimmed to the same size?
Only if such an operation is provided for by the project and permissible for the product. First, it is determined whether the working size actually differs and from which surfaces it was measured. For a shaped leg, accidental trimming can change the proportion, fit, or supporting part. If it does not match the ordered specifications, first contact the supplier, keeping the parts in the condition in which they were received.
Should a purchased set be finished right away?
First, check completeness, dimensions, orientation, and installation. A finish complicates correcting holes and fitting. If a repeat order is planned, it is useful to keep a separate approved sample: it will serve as a reference for shape and finish. To test a new composition, use a suitable trial part, not the entire set at once.
Where to buy ready-made parts for furniture making
Once the work is allocated, finding the right product is easier: each item already has a purpose, a size, and a clear scope of its own processing. In the STAVROS catalog you can choose ready-made wooden furniture parts — supports, handles, decorative elements, and profile products. The material, finish, available sizes, and ordering terms are checked in the selected product card.
If you need to buy wooden decor for furniture, first determine the free area and the depth of the allowable protrusion. For ornamental compositions, it is convenient to compare Carved wooden decoration, and for combining different types of elements — wooden decorative elements. The required quantity is derived from the project, separately accounting for the test sample and the cutting of long profiles.
Before placing an order, you should have a completed parts list, selected finishes, and a list of the remaining work. If an item is still recorded as a “similar leg” or “roughly this molding,” go back to its dimensions and joint. Once these questions are resolved, buying ready-made elements really helps you finish furniture with your own hands: you receive the complex shape ready-made, while design, fitting, finishing, and assembly remain under your control.