Article Contents:
- Why an overlay may fit on the front but still block it from opening
- How to read dimensions A, B, C, and L in the overlay product page
- Thickness C and the actual protrusion above the finished front
- What counts as an obstruction
- Which part of the door is at greatest risk
- How to check paired N-322L and N-322R
- Overlay next to a moulded frame
- How to make a template step by step
- When a paper template is sufficient
- Example 1. Narrow vertical overlay on a tall facade
- Example 2. Central carved accent and frame
- Example 3. Mirrored pair on a two-door wardrobe
- After finishing, the check must be repeated
- If dimension C is 11 mm, does the overlay necessarily protrude above the front by exactly 11 mm?
- How does the additional dimension L differ from the designation A?
- Can the safe distance to the wall be determined in advance based only on the overlay thickness?
- Should different positions of the two doors be taken into account if the overlays are mirrored?
- Will an opening restrictor help resolve a collision with a decorative overlay?
- What should be done if the volumetric template touches the frame, but the actual overlay is shaped?
- Is a volumetric template needed for a solid, fixed panel?
- How can you tell that the carving is interfering with using the handle, even if the parts do not touch?
- Should you choose N-498 for a narrow door just because its width is 41 mm?
- Can a ready-made wooden overlay be trimmed if it does not fit at the frame?
- When should movement be checked — before painting or after?
- Can you order one overlay first for testing, and the rest after approval?

In the drawing, the carved overlay fits on the cabinet door: there is enough space from the edge to the design, the handle is positioned separately, and the proportions look good. But after installation, the door opens only halfway. The protruding sheet of carving passes too close to the side wall, and at a certain angle it touches it. There is no error in width or height here. When selecting, the third dimension was forgotten — the thickness of the overlay and the path it travels together with the front.
Wooden overlays on furniture fronts must be checked twice: first, make sure the item fits on the face surface, then that its most protruding part does not catch on neighboring objects throughout the entire opening range. For the second check, looking at the closed door is not enough. You need the dimensions of the specific overlay, information about the hinge, the position of neighboring elements, and a trial fitting of a three-dimensional template.
It is easiest to perform such a check before ordering and finishing. At that point, you can still move the decor away from the edge, choose a different size, change the handle position, or abandon the overlay in the problem area. After painting and gluing, the same changes already affect the finished surface and cost significantly more.
In the decorative overlays STAVROS items differ not only in design and length, but also in thickness. When choosing, you should look at the drawing of the specific size rather than rely on a photo or the number in the product name. This is especially true for hinged cabinets, kitchen fronts near a wall, furniture with paired doors, and doors where handles and moldings are located nearby.
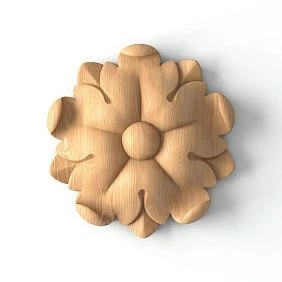
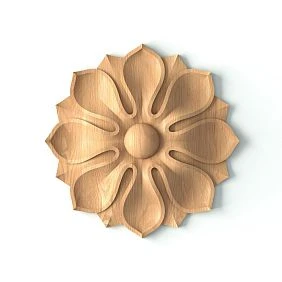
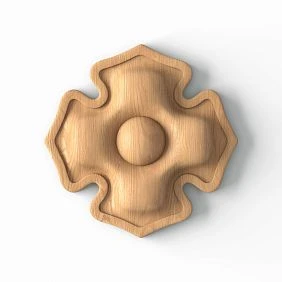
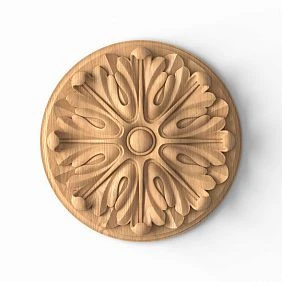
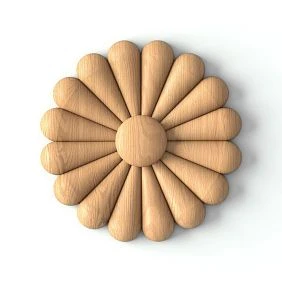


Why an overlay can fit on the front but interfere with opening it
A decorative overlay has two different geometries. The first is visible from the front: width, height, the shaped contour, and the distance to the edge of the door. The second is visible from the side: the base, the height of the relief, individual protruding leaves, scrolls, and other parts of the ornament.
While the door is closed, these measurements appear to be independent. For example, the overlay is 70 mm from the side edge, and there is a gap to the adjacent cabinet. However, when the front is rotated, the decor does not stay in place. It moves together with the door, and the most protruding point of the carving follows its own trajectory. If a cabinet side panel, a pilaster, another door leaf, or a protruding handle is located nearby, there may not be enough free space at one of the intermediate angles.
There is also the opposite situation. Two overlays in the closed position appear to be positioned too close together, but when the door is opened they move apart. Therefore, one cannot declare any close fit to be dangerous based on a photograph alone. The direction of movement and the actual dimensions of the assembly are needed.
Hence a useful rule for the furniture maker: the size of the overlay in the front view answers the question “will it fit?”, while a three-dimensional fit check answers the question “will the furniture work?” These are not one check, but two separate ones.
For a fixed decorative panel, the protrusion of the relief more often determines the light-and-shadow effect and visual expressiveness. On a door, the same dimension also becomes a structural parameter. The closer the product is to an obstacle, the less right there is to assume that “since the front opened without decor, everything will be fine after installation too.”




How to read dimensions A, B, C, and L in the overlay product page
In STAVROS product pages you may encounter the designations A, B, C, and for certain shaped items also L. In the catalog, A refers to width, B to height, and C to thickness. The additional dimension L specifies the overall size of a particular item; its direction must be checked on the drawing. For a complex contour, one cannot automatically assume that A shows the full length and that L can be ignored.
The most illustrative example is paired wooden overlays N-322L и N-322R.
|
Option N-322L/R |
A, mm |
B, mm |
C, mm |
L, mm |
|
Compact |
100 |
128 |
11 |
153 |
|
Large |
150 |
191 |
15 |
229 |
For the small version, one of the designations is indeed equal to 100 mm. But in the same dimension line, L = 153 mm is shown. For the large version, next to A = 150 mm, the full additional overall dimension L = 229 mm is indicated. If only the number 100 or 150 is transferred to the facade, the marking will be incomplete.
When moving from the small version to the large one, several parameters change at once. The L dimension increases by 76 mm, and the thickness C increases by 4 mm. This means that the large overlay cannot be assessed as the same pattern merely slightly enlarged across the front: it will require rechecking adjacent elements and the opening trajectory.
How to use the designations in practice:
1. Open the card of the selected item and find its drawing.
2. Record all dimensions of exactly the version you are going to buy.
3. Look along which directions A, B, and, if present, L are plotted on the drawing.
4. On the facade, measure not the conventional “overlay length,” but the actual extreme points of its contour.
5. Record C separately. This parameter will be needed when checking movement.
Do not transfer values from the card of a neighboring article, even if the pattern looks similar. For the left and right item, both versions need to be checked, and for a different size of the same article, the calculation must be repeated.
Our factory also produces:
Thickness C and the actual protrusion above the finished front
The value C characterizes the item itself. To assess collisions, another dimension is needed: how far the finished overlay protrudes above the surface of the finished front. If the item fits tightly with its base against a flat surface, this value is usually close to its maximum thickness. But it is not always strictly equal to it.
The reasons for the difference may be the mounting layer, the base not fitting tightly on a profiled surface, a shim, relief features, a thick decorative coating, or partial placement in a recess. Particular care must be taken when assessing an overlay on a paneled door: part of the base may rest on the frame, while another part remains above the recessed panel.
Therefore, the thickness from the card is used as the initial value, and before final installation the assembled unit is checked. It is convenient to place a straight batten against the front plane away from the pattern and measure the distance to the most protruding part. Do this carefully, without damaging the carving with the measuring tool.
Get Consultation
Two types of clearance: in the closed position and during movement
On finished furniture, it is easy to measure the distance between stationary objects. For example, you can determine the gap from the edge of the overlay to a nearby pilaster when the door is closed. Let us call this the clearance in the closed position. It is useful for checking the composition, the alignment of parts, and whether there is constant contact.
But a hinged door sweeps an arc. For a working result, the smallest clearance during opening is more important. It may occur not at 0° and not at 90°, but somewhere in between. This depends on the shape of the part, its position relative to the hinge, the type of mounting, and the outline of the obstacle.
Let us imagine a kitchen cabinet by a wall. With the door closed, 18 mm remained between the overlay and the wall. It is not acceptable to conclude “the relief thickness is 11 mm, so the margin is 7 mm.” These are quantities that may be measured in different directions. During rotation, the protrusion shifts both sideways and forward. Simply subtracting 11 from 18 does not describe the movement here.
In another case, the facade has two elements: a carved overlay 15 mm thick and a handle with an even greater projection. One cannot assume that a taller handle automatically protects the overlay: it may be located in a completely different part of the door and pass next to a different obstacle.
There is no universal safe gap of 5, 10, or 20 mm for all overlays. Even if the chosen clearance proved sufficient on one cabinet, it may not work for a different hinge, facade thickness, or placement of decor. The working clearance is determined by the specific construction, taking into account adjustments, assembly tolerances, and possible play.
What counts as an obstacle
Most often, it is not just one wall that is checked, but the entire nearby volume around the door: the adjacent hinged facade, a handle on the other leaf, a frame protrusion, molding, the side of the cabinet, a decorative column, a wall, a countertop, or a protruding element of neighboring furniture.
Mark the obstacles on the plan and top view. Even a rough pencil sketch is already useful: it forces you to take into account objects that are not visible on the facade drawing. For a tall cabinet, the height of the protrusion also matters. The relief may pass above a neighboring base unit but run into a tall architrave or shelf.
The hinge determines the path of the overlay — identical facades can open differently
The width of the door alone does not allow calculating the path of each point on its outer surface. It is influenced by the type and position of the furniture hinge, the overlay of the facade on the carcass, the thickness of the door, adjustments, and the opening angle limit.
For two cabinets 450 mm wide, identical overlays can be selected. But if the first has one hinge system installed and the second has another, the outer edge of the leaf may travel quite differently. It even matters whether the door is mounted flush with the carcass or overlaid on its end.
It is dangerous to take into account only the hinge's stated maximum angle. The facade may hit an obstacle earlier — say, at the first slight turn or closer to the middle of the travel. And changing the hinge adjustment after installation can shift the overlay relative to the neighboring item.
If there is a wall next to the cabinet and the leaf is deliberately restricted in movement, the acceptability of the restrictor must be verified against the documentation of the specific hinge manufacturer. A restrictor does not replace checking the gap: it only changes the available range within which the check must be performed. If the restriction is incorrect, the door may no longer provide convenient access to the inside of the carcass.
Before purchasing a thread set, a furniture maker should ideally have at least one assembled unit: an installed hinge, a front with the chosen thickness, and the actual position of the adjacent part. A drawing helps narrow the choice, but it should not replace a trial opening where the clearance is small.
In which part of the door the risk is especially high
Near the hinge side, you need to check how the decor passes relative to the cabinet, the wall, and a closely standing pilaster. A relief that seems safely set back from the outer edge may come closer to a fixed element during the swing.
The free edge has its own risks: a protruding overlay can meet the adjacent door, handle, or decorative element when two doors are opened at the same time. In the case of a wide wardrobe, it makes sense to check not only one door but both together.
You cannot declare in advance that the hinge edge is always more dangerous than the opposite one. First determine where the obstacle is located, then trace the movement of the point of the thread closest to it. On some designs, the decisive factor is not the edge of the overlay, but a separate protruding tip of a leaf or scroll.
Wardrobe against the wall: a check that is easy to miss
The end module of a furniture set is often installed flush against a wall or a side decorative panel. The door then opens toward the adjacent surface. Without an overlay, it may pass freely: the front does not touch the wall, and the handle is sufficiently far away. After adding a carved element near the hinge side, the picture changes.
You need to check the installed door, not a front lying separately. First look at how level the wall is and whether the architrave, tile, or skirting protrudes beyond it. Sometimes the obstacle is a small section of trim rather than the main plane.
The check procedure is as follows:
1. Close the door and measure the distance to the nearest obstacle in the overlay area.
2. Temporarily secure the volumetric template where the carving is planned.
3. Slowly open the door a small angle, watching the point of the template closest to the obstacle.
4. Continue opening through several intermediate positions up to the working limit.
5. Mark the position at which the clearance was smallest.
6. Make sure the passage remains clear after a slight change in the door position within the provided adjustments.
Do not attempt to check contact by opening sharply "all the way." The front panel may hit the sample and damage it, and with the actual overlay it may damage the finish. Move the door slowly and stop it before contact.
If a conflict is detected, start with simple changes: move the overlay away from the obstructing area, choose a more compact or less protruding option, and reconsider the position of the composition. Sometimes changing the hinge type or the manufacturer-provided angle limit helps, but that is already a modification of the furniture design. It should be agreed upon before series production.
Two hinged doors: symmetry does not yet mean compatibility
For a two-door wardrobe, it is especially tempting to place the overlays symmetrically: one scroll on the left, the second on the right, with an even central gap between them. In the closed position, such a pair reads as a single composition. When opening, however, the adjacent parts may come closer together in unexpected ways.
Three different scenarios are important for evaluation. First, open only the left door with the right one closed. Then only the right door with the left one closed. Finally, slowly move both doors through the combinations of positions possible for the user. The last check is not always needed, but for a wardrobe with protruding handles and central carving it must not be skipped.
The problem may not be with the two overlays. The edge of the left carving passes freely relative to the right ornament, but when moving it catches on the handle on the opposite door. Or the central gap is sufficient over the entire height except for one protruding carving element.
Pay special attention to doors with different opening directions and with unequal adjustments. On the drawing they look mirrored, but after hanging, the actual position of the two fronts may differ slightly. Therefore, the same calculated clearance does not guarantee the same gap on the left and right.
How to check the paired N-322L and N-322R
For mirrored placement, choose the left overlay N-322L и the right N-322R in the same size version. Both parts in the compact version have C = 11 mm in their cards; for the large one — C = 15 mm. Matching thickness simplifies symmetrical layout, but does not relieve you of checking the position relative to the handles and the central joint.
Mark the axis of symmetry on the fronts and mark the extreme points of both shapes according to the drawings. Then check the central gap with the doors closed. After that, install the volumetric templates and repeat the three opening scenarios. If in one position the shaped element comes too close to the adjacent handle, you need to correct the specific side of the composition, and not automatically increase the central gap on both parts.
For the large version, the full dimension L is 229 mm. On a narrow frame front, such a size may leave too little working field, even if the nominal A = 150 mm seems acceptable. Therefore, carefully look at the orientation drawing of each overlay, especially if you plan to place a pair around a central lock or handles.
Handle and carved decor: check more than just the distance between parts
On the front plane, the handle and the wooden overlay may appear separated. But the user grips the handle with their fingers, sometimes at an angle, and needs space for their hand. In this spot, a closely placed carved scroll can get in the way even without the two pieces physically touching.
Choose a handle and install its sample before final approval of the overlay. Check the normal grip: a person should be able to easily grasp the handle, pull the door, and release it without touching the carving. This is especially true for large pull handles and furniture handles positioned vertically near the central ornament.
A similar problem arises when using a milled grip. Here the front itself serves as the handle, so it is risky to place the overlay where the hand naturally rests on the surface. Even thin carving can be uncomfortable if it falls under the fingers.
If the handle model has not yet been approved, leave free space around the intended grip area and test it on a mockup. When choosing ready-made hardware, you can match the overlays with the assortment wooden furniture handles STAVROS. But you cannot select a handle based only on the pattern: first, it must provide convenient and safe opening.
A practical example: on a narrow front, two vertical elements — the handle and the carved overlay — may occupy different strips 40–50 mm wide. The sum of their dimensions is less than the width of the door, but the hand needs additional space between them. The free field for fingers is not measured by a single distance from the edge of the pattern; it is checked with an actual grip.
Frame and panel front: where the base of the overlay actually lies
A flat door made of furniture board provides a relatively simple mounting surface. If it is level, dry, prepared for the chosen finish, and has no interfering hardware, the base of the overlay can be tried directly on it.
With a frame front it is more difficult. The frame protrudes above the panel, the profile has bevels or curves, and the central field itself may be recessed. The shaped overlay in the drawing fits inside the frame, but the edge of its base crosses the rise of the profile. In this position, one part of the wooden piece lies on the plane, while the other hangs over the recess.
Do not glue a product with incomplete support without a solution provided by the design. Otherwise it may sit at an angle, an uncontrolled gap will appear under the base, and the load on the adhesive joint will be distributed unevenly. Thickness C specified for the overlay itself no longer describes the actual protrusion of the entire structure above the panel.
Check not the conditional width of the light field inside the frame, but the truly flat area on which the base rests. To do this, it is convenient to place a template cut to the base against the finished facade and run a thin control strip of paper along its perimeter: if a gap remains somewhere or the template rocks, the fit must be reconsidered.
You should not remove material from a carved item "on site" without understanding how permissible this is for its construction. On a shaped overlay, trimming may affect thin bridges, disrupt the pattern, and weaken the part. It is much safer to choose another position or agree on a technically suitable base.
Overlay next to a moulding frame
Even if the base lies entirely on a flat section, the relief may come too close to the wooden moulding. The moulding has its own thickness and protruding edges; two three-dimensional forms must be compared. This is especially noticeable when the decorative frame and the carving are painted the same color: visually they merge, although physically they remain separate parts.
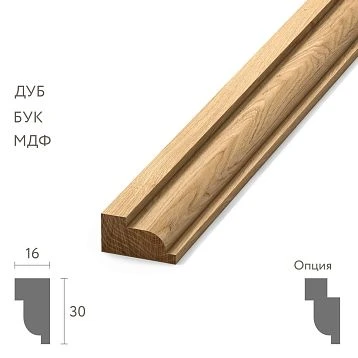
When comparing overlays with wooden mouldings for furniture facades, check the profile cross-section, not just its width in the front view. If the overlay is located close to the frame, carefully test-fit both parts at the same time. Then you can assess the actual clearance, the possibility of applying finish, and access for cleaning the recesses.
Which STAVROS overlays are convenient to compare for different facades
Choosing carved decor only by ornament is inconvenient. For technical test-fitting, it is useful to compare items of different shapes and thicknesses that solve different tasks.
|
Item |
Dimensions per card, mm |
Where to view |
What to check especially carefully |
|
N-322L/R, compact version |
A 100, B 128, C 11, L 153 |
Paired composition on hinged doors |
Additional dimension L, central joint, opposing movement |
|
N-322L/R, large version |
A 150, B 191, C 15, L 229 |
Larger fronts and an elaborate carved composition |
Increased projection and the actual full contour |
|
41 × 307 × 11 |
Narrow vertical strip or elongated field |
Large height with a small width, position relative to the handle |
|
|
250 × 250 × 13 in one of the options |
Central accent on a wide front |
Space for the base, handle, projection of the central relief |
The N-421 also comes in larger versions with a different thickness. Therefore, the number 13 mm refers to the 250 × 250 mm option, not to the entire model as a whole. On the product page, you need to select the exact size that will be used in the project.
The vertical N-498 measures 41 × 307 × 11 mm. At first glance, this is a narrow item: for a 440 mm wide front, after centering by width, there remains (440 − 41) / 2 = 199.5 mm to its side edges. However, the figure of 199.5 mm says nothing about the distance to the handle if it is located close to the center, and does not prove the absence of obstacles when opening. The overlay still has an 11-millimeter thickness.
The central N-421 measuring 250 × 250 × 13 mm creates a different challenge. If the front is 360 mm wide, then when centered by width, there remains 55 mm of free surface to the edges of the front. Such a calculation is useful for initial layout, but only provided that the central mounting area is actually large enough. On a paneled door, the frame may take up a significant portion of these 55 mm.
For an elongated composition, you can separately consider the carved overlay N-420. But its dimensions also need to be selected from the current product page, and not carried over from the example with N-421. Different product codes cannot be considered interchangeable just because they belong to the same category of decorative elements.
The most important thing is to determine not the “most beautiful solid wood overlay,” but a product that simultaneously matches the furniture design, the facade base, and the conditions of its movement. Only after that does it make sense to compare wood species, processing quality, and finish.
Volumetric template: how to check the relief before purchase and installation
A full-size paper template clearly shows the placement of the overlay on the facade. With its help, you can see whether the design falls on the frame, whether there is enough space relative to the handle, and how convincing the proportions are. But a thin sheet of paper does not test the protrusion. If you place it against the door and open it, you will be checking the movement of a flat plane, not a three-dimensional decorative element.
This requires a template with thickness. It does not have to be cut out with precision down to every carved leaf. At the first stage, it is enough to create a conventional shape that occupies the intended place of the overlay and protrudes above the facade by the specified amount C. Such a mock-up allows you to quickly detect obvious collisions.
Thick cardboard, foam board, lightweight spacers, or another material that holds its shape and will not scratch the facade finish will work. If several overlays of different thicknesses are planned, label each template, for example: “N-322L, small size, 11 mm.” Do not assume that the same blank is suitable for all products with the same design.
How to make a template step by step
1. Take the dimensions from the drawing. Take into account all specified A, B, C, and L. If the contour is complex, print the image at full scale if such printing is possible, or transfer the extreme points manually according to the dimensions.
2. Check the scale with a ruler. A 100 mm line on the template should have an actual length of 100 mm. Errors often appear because the printer automatically fits the image to the page.
3. Cut out the front shape. For the first check, the outer contour is enough; internal cutouts and small carving elements do not need to be reproduced yet.
4. Add volume. Attach a lightweight spacer to the back side so that the distance from the facade to the farthest point of the mock-up approximately corresponds to the working protrusion of the overlay.
5. Temporarily install the template. Use temporary fastening that is safe for the finish. It should hold the lightweight workpiece during slow opening, but leave no marks.
6. Check the trajectory. Open the leaf gradually, including at intermediate angles. As you approach an obstacle, stop the movement and measure the clearance.
7. Mark the critical spots. If the template comes too close to the handle, wall, or adjacent overlay, make a note on the front itself using removable painter's tape marking or on the working drawing.
There is an important limitation. A solid rectangular three-dimensional workpiece takes up more space than an openwork carved part with gaps and narrowings. It is useful as a deliberately cautious initial check: if the rectangle passes freely, that is a good sign. If it touches an obstacle, it is still too early to definitively reject the model. A more precise template along the contour needs to be made, or the actual sample needs to be checked.
The reverse is also true: an imprecise template with rounded edges may not reveal a conflict with the sharp tip of the actual carving. Therefore, after the initial screening, it is better to take the product itself or its most accurate spatial model and repeat the fitting. For series production, this step is especially useful: it allows one part to be corrected before finishing dozens of fronts.
When a paper template is sufficient
An ordinary paper shape may be sufficient for preliminary composition selection or for a stationary area where there are certainly no moving parts or depth obstacles around. For example, you need to decide whether a 41 mm wide ornament fits a long free field on a blind panel.
But even then, paper only shows the placement. It says nothing about how tightly it fits an uneven base. If the surface is profiled, a fit check will also be needed. For a hinged door near a wall or adjacent front, the paper fitting should be considered the first step, not the last.
How to measure the smallest working clearance
For a simple workshop check, no complex motion formulas are needed. An installed front, an accurate sample or three-dimensional template, a ruler, soft spacers of known thickness, and careful observation are enough. It is useful to work in pairs: one person slowly holds the door and controls its movement, while the other watches the nearest points of the decor and the obstacle.
Start with the closed front. Record the initial position of the overlay relative to obstacles: on the left, on the right, and in height. Then open the door with several small movements. Do not limit yourself to pre-selected angles. If you see that the clearance is getting smaller, switch to even smaller movements until you find the point of closest approach.
For checking, you can use thin soft pads that do not scratch the surface. Do not force them between the thread and the adjacent element: the goal is to determine the free passage, not to test the strength of the decorative part. In the working note, it is useful to record not only the minimum clearance found, but also the door position at which it was observed.
In a project with a small margin, manufacturing tolerances, hinge adjustments, the likely change in the position of the front after hanging, and operating conditions are taken into account. If, even with careful fitting, the parts pass almost flush, it is better to change the layout. The coating, temperature and humidity changes in the wood, and slight movement of the door can reduce the remaining clearance.
A convenient working note looks like this:
|
What we check |
What to record |
Why this is needed |
|
Overlay |
Item code, size, thickness C |
To repeat exactly the chosen version |
|
Base |
Installation location, shape and condition of the front |
To rule out a fitting error |
|
Hinge |
Model, installation, working angle |
To preserve the test conditions |
|
Obstacle |
Wall, sash, handle, molding or other |
To make it clear what the clearance was measured against |
|
Result |
Smallest detected clearance and sash position |
To compare options after changing the layout |
|
Solution |
Suitable, clarification required, change location or size |
To avoid sending an unverified option to production |
For responsible manufacturing, it is worth additionally photographing a successful fitting from the side and top. From such a photo, it is easier to reconstruct the reason for the decision than from the note "the overlay fits".
Three calculation examples: from free field to real constraint
The numbers allow you to quickly rule out unsuitable options. But each example below is a layout calculation, not a promise of safe movement. The final part is still checked on the installed door.
Example 1. Narrow vertical overlay on a tall front
Suppose the door width is 440 mm and the height is 720 mm. For it, an N-498 measuring 41 × 307 × 11 mm is being considered. When positioned strictly in the center, the free width will be:
(440 − 41) / 2 = 199.5 mm on each side.
In height, with the same centering, it will be:
(720 − 307) / 2 = 206.5 mm at the top and bottom.
By the two flat dimensions, the overlay fits confidently. But if the handle is directly under it, the grip area may be inconvenient. If there is a pilaster to the left of the cabinet, its influence is determined not by the number 199.5 mm, but by the actual distance and the movement of the door.
Application option: first place a paper silhouette of N-498, then move it within the free field taking the handle into account. After choosing the position, secure a three-dimensional template with a protrusion of about 11 mm and check the opening. If the vertical pattern ends up near the hand, it is more reasonable to move it than to try to keep the placement strictly at the geometric center at any cost.
Example 2. Central carved accent and frame
There is a front panel 400 mm wide and 520 mm high. For the central part, N-421 measuring 250 × 250 × 13 mm is being considered. On a regular rectangular surface, after centering, the following will remain:
• horizontally: (400 − 250) / 2 = 75 mm;
• vertically: (520 − 250) / 2 = 135 mm.
Externally, such a layout looks possible. But suppose the frame takes up 60 mm on each side. Then the actual free central field width is 400 − 60 − 60 = 280 mm. Relative to the overlay, there is now only 15 mm left to the boundary of this field.
This is a completely different result. If the frame profile has a raised or rounded edge, fifteen millimeters may not be enough for the carving base and proper finishing of the joint. Instead of relying on 75 mm to the outer edge of the door, check the drawing of the overlay base and the actual geometry of the frame. If there is no suitable surface, it is better to choose a smaller size or move the decoration.
Example 3. Mirrored pair on a two-door wardrobe
The wardrobe has two doors, each 450 mm wide. One of the N-322L/R elements is planned for each. The compact pair has values A = 100, B = 128, C = 11, L = 153 mm. The larger versions have A = 150, B = 191, C = 15, L = 229 mm.
Let us compare only the change in dimensions: the additional overall dimension L becomes 76 mm larger, and the thickness C increases by 4 mm. For a pair, this is already sufficient reason to make new templates and recheck both doors. Substituting 150 mm as the full length of the overlay would be incorrect — the product card contains a separate L = 229 mm, whose value and direction are shown on the drawing.
Suppose both compact overlays passed the check, but the customer preferred the larger design. You cannot automatically replace the parts and keep the previous axis positions. You need to measure the central gap again, take into account the position of the handles, and then open the doors separately and simultaneously. Perhaps the large pair will also fit. But this will be confirmed by checking, not by similarity of the design.
These three cases show different constraints: in the first, proportions and grip convenience decide; in the second, the mounting surface; in the third, the overall dimensions and movement. One universal formula does not replace all three checks.
Drawers: the relief moves differently, but gaps are still needed
A drawer front in a conventional design does not rotate around a hinge, but moves together with the drawer, predominantly in a straight line. This means the risk of contact with the adjacent door arises according to a different pattern. The overlay runs along the direction of extension; its protrusion may come close to the countertop, the handle of the drawer above, a fixed part of the carcass, or another protruding element.
Let's imagine a chest of drawers with three rows of drawers. The top front has a handle, the middle one has a relief overlay. If the distance between them is small, the user may find it inconvenient to grab the handle of the top drawer when the neighboring decor is near their hand. With a large protrusion, it is also worth checking the situation when one drawer is open and another is moving.
On a chest of drawers with repeating overlays, the difference in thickness is especially noticeable. If the lower element protrudes more than the upper one, this may be justified by the pattern and scale. But such a difference must be chosen deliberately, not obtained by accident due to a mix of size versions in the order.
It is convenient to plan the layout of the ornament across drawers of different heights in detail using the material “Carved overlays on a chest of drawers: how to distribute decor across drawer fronts of different heights”. Here the task is different: after choosing the composition, check that the installed relief does not interfere with extension, gripping the handles, and using the neighboring drawers.
The same principle applies to a chest of drawers: first, the location is determined by dimensions, then the actual movement of all affected parts is checked. If all drawers move freely, but the carved sheet catches clothing when passing near the furniture, a formally correct gap inside the structure does not solve the usability problem.
The depth of the relief also affects the appearance of the front
A thick overlay is not always better than a thin one. When light falls from the side, the relief creates a deep shadow, and individual leaves and scrolls stand out more clearly. On a wide cabinet door, this can support a large frame and cornice. But on a small door, the same volume can visually weigh down the center, especially if an expressive handle is already installed nearby.
Thin decor behaves differently. Under frontal soft lighting it may read more calmly, but it has less actual protrusion. This does not mean that any thin overlay is safe for a tight construction: the trajectory decides, not a single C value. However, with comparable pattern and position, the difference in thickness gives one more selection parameter.
Two wooden decorative overlays similar in frontal size can look completely different after painting. With opaque enamel, it is especially noticeable how the shadow separates the relief from the plane. With a transparent finish, the natural wood pattern is added to this. For furniture with a shallow frame profile, it is sometimes wiser to choose a more restrained protrusion so that the carved element does not look randomly attached on top of a finished facade.
It is better to evaluate this effect on a real sample and under the lighting in which the furniture will be placed. A catalog photo shows the pattern but does not give an accurate sense of volume in a specific room. It is useful to look at the overlay from the distance of normal use of the cabinet, and then from the side when the door is open.
Beech or oak: the material is chosen together with the finish
In the STAVROS range, many carved overlays are available in beech and oak versions. When choosing, the compatibility of the specific item with the project is more important than an abstract statement about the superiority of one species.
If the furniture will be painted with opaque enamel, it is often convenient to consider beech: the wood pattern does not become the main decorative element, and the carving works through form and shadow. But the quality of preparation and priming still affects the final appearance. Separately check how the recesses will be treated, since they are inconvenient to paint after final installation.
If a transparent lacquer, oil, or tinting is planned, oak allows the expressive wood texture to be used as part of the design. Here it is important to coordinate the shade of the overlay with the facade, especially when they are made of different materials. The same composition on different species and even on different areas of wood can look different; the final decision is best made using test samples.
The wood species does not remove restrictions on the relief. Beech and oak in the same size position may have the same stated dimensions, but this is not a reason to skip fitting a specific part, especially with a small gap.
After finishing, the check must be repeated
Do not assume in the project that the finish will not change the geometry at all. The thickness of a usual coating is most often small compared to the size of the carving, but on a tight assembly any additional layering matters, as well as how evenly the base fits after preparation.
After priming, painting, or lacquering, check the base and the most protruding point of the overlay once again. Pay special attention to parts that are painted before installation by technological design: paint on the contact surface may affect the joint if the mounting system is not designed for bonding over a finished coating.
To choose the composition, it is useful to look at Mounting and finishing materials, however, the specific adhesive and fastening technology must be coordinated with the facade material, its coating, and the adhesive manufacturer's instructions. There is no universal recommendation that "any wooden overlay can simply be glued with the same adhesive."
Installation: a sequence of steps that preserves the ability to correct a mistake
The main organizational mistake is to start with gluing, treating the opening check as the last operation. If the overlay is already firmly fixed and painted together with the facade, correcting its position may require removing the part, repairing the base, and refinishing.
For a one-off order or a furniture workshop, the following sequence is more reliable:
1. Approve the furniture assembly. Determine the position of hinges, handles, frames, adjacent facades, and walls.
2. Choose a specific item. Not just "a carved overlay for a cabinet," but the model and size, material, and type of finish.
3. Obtain a drawing. Transfer the values A, B, C, and L onto it, if present.
4. Make a paper layout. Check the size, symmetry, free surface, and appearance.
5. Do a three-dimensional test fit. Make sure the protruding decor clears obstacles throughout its full range of motion.
6. Try on the actual product without final fixing. Check the fit of the base, the position of the relief, and the operation of the handles.
7. Approve the finish and the mounting method. Prepare the surfaces according to the chosen technology.
8. Attach the overlay. Observe the adhesive manufacturer's requirements or those of any other specified mounting system, including the fixing and curing conditions.
9. Repeat the final check. Open the door, check the adjacent elements, the handle grip, and the absence of unwanted contact.
Do not test with a heavy actual overlay without ensuring its reliable temporary retention: a falling product can damage both the thread and the finished facade. If in doubt, first check with a lightweight template, and perform the try-on of the actual product on a horizontally positioned facade or with safe support.
If, after gluing and assembly, the furniture no longer opens freely, do not try to "work in" the catching spot by repeated movement. Friction will remove the coating, damage the thread corners, and may cause the door to skew. First identify the contact point and the cause: the position of the overlay, hinge adjustment, an adjacent handle, or the mounting base.
Parts list: how not to lose size C when handing the project over to production
For a single cabinet, the craftsman may still remember which overlay was chosen. In repeat production, the entry "carved decor — two pieces" becomes a source of errors. The purchaser does not know the size, the painter does not know the material and the finishing method, and the assembler does not know the exact installation side.
The work list needs a separate line for each version and each side. For the pair N-322L/R this is especially important: two different item codes cannot be replaced by one common name, even if the quantity and dimensions match.
|
Item |
Installation location |
Article number |
Dimensions, mm |
Material |
Finishing |
Quantity |
|
D-01 |
Left door |
N-322L |
A 100 / B 128 / C 11 / L 153 |
Beech |
For painting according to the project |
1 |
|
D-02 |
Right door |
N-322R |
A 100 / B 128 / C 11 / L 153 |
Beech |
For painting according to the project |
1 |
This is an example of filling out the specification, not a finished order: the choice of beech and the finishing method here is conditional. For a specific cabinet, they must be approved separately, as must the sanding quality.
It is useful to add to the specification a diagram showing the location of each part relative to the edge and the handle, as well as a note about the volumetric fitting. Then at production they will not have to re-decide the question of why the overlay is, for example, 15 mm farther from the central joint than the original symmetrical layout assumed.
If parts with the same article number but different sizes are used on one product, record them as separate lines. For several cabinets, the quantity is multiplied for each position, rather than summed into a total of “overlays — eight pieces.” Otherwise, during assembly you may get the correct total number of parts but make a mistake in the combinations of left and right, large and compact.
For a serial product, it is reasonable to manufacture and approve one sample with hinges, handles, and overlays installed. After that, the same parameters can be transferred to the technical documentation and process chart. If the hinge, facade thickness, or thread article number changes, compatibility is checked again — even if the external design of the furniture remains the same.
Mistakes that force a carved facade to be redone
Relying on a single number in the product name. For N-322, dimensions A and L differ. If only 100 mm is taken into account instead of the full set of dimensions, the actual contour may end up closer to the handle or edge than expected. The solution is to work with the drawing of the selected size version.
Check the clearance only with the door closed. A static fit check does not show what will happen during rotation. The solution is a trial opening with a volumetric template and inspection of intermediate positions.
Subtract thickness C from any measured distance. If the values are measured in different directions, such arithmetic says nothing about a collision. The solution is to measure the actual smallest clearance between the moving overlay and the specific obstacle.
Treat the handle as secondary. Sometimes the overlay does not touch anything, but it prevents fingers from reaching the handle. The solution is to check the grip by a person, not just the placement of parts on the front drawing.
Gluing the part onto an uneven panel. The base may only contact part of the area and increase the actual protrusion. The solution is to first find a sufficiently flat surface and check the fit.
Replacing a compact size with a larger one without a new fit check. Enlarging the pattern changes not only the proportions but also the thickness. The solution is to recheck the entire geometry of each size variant.
Checking the doors only individually. On a two-door wardrobe, a conflict is possible when both are opened simultaneously. The solution is to test all combinations of movements that are normal for the user.
Allowing for clearance without taking adjustment into account. The door was aligned after installation, and the distance to the adjacent part decreased. The solution is to perform the final check after the final adjustment of the hinges.
Treating a solid template as an exact copy of openwork carving. A volumetric rectangle may show a collision where the actual shaped element would pass freely. The solution is to make the template more accurate in the disputed area or test-fit a sample, without skipping the check of its most protruding points.
Mixing up left and right parts in the order. A mirrored composition requires the correct orientations. The solution is to specify the exact SKU for each side in the parts list and verify it before finishing.
When it is better not to install the overlay
Decorative overlays for furniture are not mandatory on every front. Sometimes omitting carving results in a more convenient and cohesive piece than trying to fit a favored ornament into too tight a space.
The first case is a door against a wall that, even without an overlay, opens almost flush against the obstruction. If the hinge or the position of the front cannot be changed, and a reduced decor still does not pass the check, it is more logical to move the design to a fixed side panel or another part of the carcass.
The second is a very narrow door with a large handle. When there is insufficient space for fingers, choosing a small relief detail may not solve the problem. It is better to keep a comfortable grip and use the decor above, below, or outside the moving leaf.
The third is a deep panel where the overlay cannot be reliably seated with its entire intended mounting surface. Do not expect a thick layer of adhesive to correct the geometry without additional technical solutions. Choose a product with a suitable base or change its location.
The fourth is a furniture series in which a repeatable working clearance cannot be ensured given the available hinges, tolerances, and adjustments. In such a case, do not put the overlay into production just because one sample opened without visible contact. The solution must be resistant to normal changes in the position of the front, rather than depend on one lucky adjustment screw position.
Where to buy wooden overlays for furniture fronts and how to prepare an order
В catalog of decorative overlays for STAVROS furniture you can choose products by design, material, and dimensions. If you need to buy wooden decorative overlays for a specific cabinet, it is reasonable to start not with quantity, but with a short list of suitable item codes and their full dimensions.
If you need carved wooden overlays for furniture with a paired composition, compare N-322L и N-322R. For a narrow vertical section, you can consider N-498and for the central accent — N-421. The listed products are not universal solutions for any facade: each item requires verification of dimensions and substrate.
Before placing an order, prepare the information that will actually help you choose the product: the width and height of the facade, the opening type, the available flat surface, the handle position, the proximity of the wall and other doors, the suitable material, and the desired finish. For a tight assembly, attach a diagram with dimensions and indicate that the limitation is specifically due to the protruding relief.
For the selected item code, check the current parameters, sanding options, price, and production time in the product page. If you are ordering a set for several cabinets, specify the quantity separately for each side and each size. Payment and delivery terms can be found on the corresponding STAVROS page. The section is also useful for workshops "For Manufacturers".
For a complex facade, it is worth using the manufacturer's drawings and materials, and if you still have questions about the substrate or the finishing sequence, take a look at installation recommendationsSo the order turns from buying a design based on a photo into selecting a specific component for a specific structure.
It is better to choose applied decor for furniture before the final finishing of the fronts. At this point, it is still possible to work out the relief thickness, gaps, and handle positions without redoing the finished coating. After a verified fitting, it already makes sense to approve the quantity and make the purchase.
Frequently asked questions about the thickness of wooden overlays and opening fronts
If size C is 11 mm, does the overlay necessarily protrude above the front by exactly 11 mm?
Not necessarily. The value C describes the thickness of the product itself, while the actual protrusion depends on the shape of the base, the mounting layer, the coating, and the geometry of the surface. On a flat front with full contact, the values will be close. For an accurate design conclusion, measure an already installed or reliably fitted sample.
How does the additional dimension L differ from the designation A?
It depends on the drawing of the specific product. For N-322, both A = 100 mm and L = 153 mm are indicated for the compact version. Therefore, A cannot be used instead of all the other overall dimensions. Look at the direction of the dimension lines on the drawing and transfer the extreme points of the actual contour to the front.
Can the safe distance to the wall be determined in advance only from the thickness of the overlay?
No. You will need the position of the overlay relative to the hinge, the thickness of the front, the type of mounting, the available opening angle, and the geometry of the wall. The gap is measured during movement, not calculated as a simple difference between thickness C and the distance in the closed position.
Should different positions of the two doors be taken into account if the overlays are mirrored?
Yes. First, the movement of each leaf is checked with the adjacent one closed, then the combinations of open positions possible during normal use of the wardrobe. The obstacle encountered may not be a paired overlay, but a handle on the opposite door.
Will an opening restrictor help resolve a collision with a decorative overlay?
Sometimes limiting the angle eliminates the conflict, but only if the obstacle is outside the new operating range. A suitable restrictor is selected based on the hinge model and its manufacturer's instructions. If the collision occurs at a small angle, limiting the maximum opening may not solve the problem.
What should be done if a volumetric template touches the frame, but the actual overlay is shaped?
A solid template can exaggerate the volume occupied. Build a more accurate contour or carefully test-fit the actual product. However, do not forget about individual protruding tips of the ornament: a simplified shape may not notice the real point of contact.
Is a volumetric template needed for a solid, fixed panel?
If there are no other protruding elements nearby and the overlay is installed on a guaranteed flat surface, a contour template is usually enough to choose the location. But when molding, a handle, or other volumetric decor is located close by, the thickness is still checked so that the elements do not interfere with each other and do not create a gap that is inconvenient for finishing.
How can you tell that the thread interferes with using the handle, even if the parts do not touch?
Place a sample handle and temporarily attach the overlay. Take hold of the handle several times with a natural movement, open and close the leaf. If your fingers are forced to go around the relief or touch it, the location is inconvenient. A ruler does not replace such an ergonomic check.
Should N-498 be chosen for a narrow door just because its width is 41 mm?
No. This product also has a height of 307 mm and a thickness of 11 mm. You need to check the free space in height, the handle, the frame, and nearby obstacles when opening. A narrow front width alone does not guarantee compatibility.
Can a ready-made wooden overlay be trimmed if it does not fit at the frame?
Trimming should not be done without understanding the product's construction. Carved parts may have thin sections and important design elements. First consider changing the position, a different size, or a different overlay. If modifying the product is absolutely necessary, coordinate the possibility and limits of processing with the manufacturer.
When should movement be checked — before painting or after?
The main fitting is done before final fixation and finishing, while the position can still be changed. After assembly and finishing, the check is repeated. This is especially useful for cabinets with small working clearances, where the final position is affected by the mounting layer and hinge adjustment.
Can I order one overlay first for testing, and the rest after approval?
For a complex front and subsequent series production, this is a reasonable order if the order conditions allow it. The first sample is used to check the base, geometry, finish, compatibility with the hinge, and neighboring elements. After approval, the specific article and execution are fixed, and the rest of the furniture is assembled according to them. For a mirrored pair, both sides need to be checked, not just one left or right element.
A carved overlay should decorate furniture, not turn every door opening into a movement around an obstacle. Therefore, the final check before purchase is simple in meaning: exact article and dimensions → place on the front → actual relief protrusion → full door travel → verified free space. If this sequence is carried out on the actual assembly, the decorative element can be chosen by pattern and finish without the risk of discovering a major geometric error after installation.