Article Contents:
- Why you shouldn't treat a chest of drawers as one large furniture front
- Create a map of the fronts before choosing the carving
- Free field: the space where the overlay must actually fit
- Why you shouldn't rely only on the length of the item
- Identical overlays on each drawer
- Overlays with the same pattern but different sizes
- Decor only on some drawers
- One main front
- What to do if two handles are already provided by the design
- How much such a set would cost
- Four fronts of equal height
- Five fronts, of which two upper ones stand side by side
- Six fronts of three different heights
- How to spot mistakes while they are still easy to fix
- What level of accuracy is sufficient at the design stage
- Do all drawers need identical overlays?
- How to determine what overlay height is acceptable for a facade
- Can different sizes of the same design be combined?
- What to put on a top drawer 100–120 mm high?
- If a drawer has a single handle in the center, is it necessary to offset the overlay?
- What should you choose for a very wide lower front?
- Can overlays be placed over furniture molding?
- For enamel, is it better to choose beech or oak?
- Should you buy spare overlays for a single piece of furniture?
- How can you check that the overlay will not interfere with using the drawer?
- Can two overlays be replaced with one large one?
- What must be specified when ordering a set for several chests of drawers?
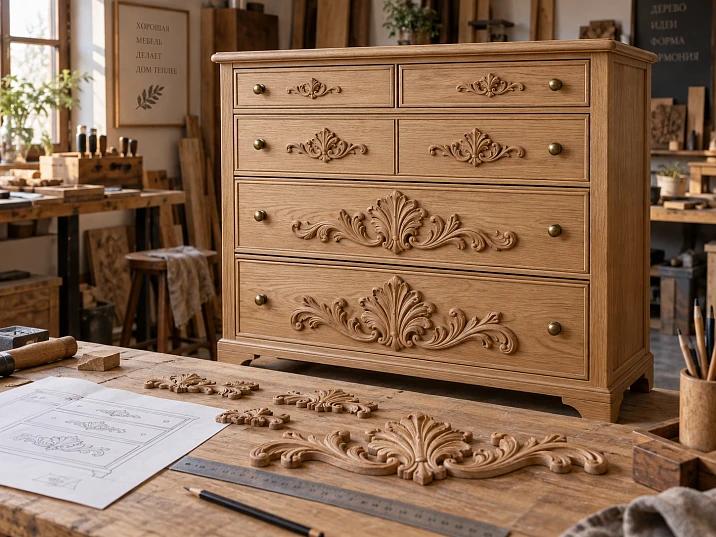
A chest of drawers has three drawers: the top one is 120 mm high, the middle one is 180 mm, and the bottom one is 240 mm. The width of each front is the same — 700 mm. In the photo, you liked a large carved overlay, and a perfectly understandable thought arises: place one such piece on each drawer. But the same decoration here will produce three different results. On the lower front it may look appropriate, on the middle one it will feel cramped, and on the top one it simply will not fit together with the handle.
For a chest of drawers with drawers of different heights, decor is usually chosen according to one of three approaches: repeat the same small overlays, select several coordinated sizes, or highlight only part of the fronts. A fourth option is to leave all the drawers without overlays and move the carving to the carcass, the sides, or the upper part of the chest of drawers. It can also be the right choice, especially with low fronts and expressive handles.
The decision does not depend on how many items you liked in the catalog. First you need to measure each front, determine the placement of handles and frames, see the free surface, and only then select the actual dimensions of the wooden parts. The difference between these actions and choosing "by eye" becomes especially noticeable when making several identical chests of drawers: a small mistake on one drawer turns into dozens of inconvenient or unnecessary overlays.
Why you shouldn't design a chest of drawers as one large furniture front
A cabinet door is one continuous plane. Even if it has a frame, the central overlay usually follows a single vertical and a single free field. A chest of drawers is structured differently: its front is cut by horizontal gaps, and each drawer moves independently. The handles are located at different heights; the top row is often smaller than the others, and the bottom one may be noticeably taller. Therefore, the carving must look good both on an individual front and as part of the whole piece.
Look at the chest of drawers first from two or three steps away, and then up close. From a distance you can see the rhythm: where the pattern repeats, why the bottom drawer is heavier than the top one, whether the overall center has shifted. Up close, completely different things become noticeable — the indentation from the edge, the density of the ornament, the ability to grab the handle, protruding leaves and scrolls. The same layout must withstand both checks.
There is also a practical feature. On a wide but low front, a small round overlay may look like a random dot in the middle of an empty strip. And an elongated horizontal element, although it fits in width, sometimes takes up almost the entire height and clashes with the handles. Assessing only the width of the overlay is not enough: both sides of its dimensions and the height of the protruding relief are checked.
When a chest of drawers is made to order, it is better to approve the decorative scheme before drilling holes for the handles. After drilling, the choice narrows sharply: the compositional center is already occupied, and moving the hardware means redoing the front.




Create a map of the fronts before choosing the carving
Start with a simple front-view drawing of the chest of drawers. A scaled artistic visualization is not needed: rectangles with dimensions and labels are enough. Number the drawers from top to bottom. If the top row is divided into two separate fronts, give each half its own number. Do not mentally combine them into one long drawer — these are two independent surfaces with their own handles.
For our example, the map will be as follows:
| Facade | Size, height × width | Facade character | What to check first |
|---|---|---|---|
| D1 | 120 × 700 mm | Low horizontal stripe | Is there enough space for decor next to the handles |
| D2 | 180 × 700 mm | Middle drawer | Will a small central composition fit |
| D3 | 240 × 700 mm | Lower deep drawer | Whether a larger element is needed or repetition is sufficient |
Such designations are not meant to complicate the work. If it later turns out that no overlay is needed on Я1, while Я2 and Я3 require different sizes, this will immediately be reflected in the order and the assembly drawing.
In addition to height and width, record four conditions:
- Facade construction. Whether it is flat or framed; whether there is milling, a panel, and raised areas.
- Handle position. One handle in the center or two symmetrical ones; what their actual size is and where the mounting holes are located.
- Visible area. Whether the edge of the facade is covered by body protrusions, side posts, an adjacent overlay, or a plinth part.
- Finish. Whether the furniture will be painted with opaque enamel or the wood will retain a visible grain.
For a tall chest of drawers, it is additionally useful to mark the countertop line and the base. A strong ornament on the topmost drawer can visually merge with a carved cornice. The same ornament at the bottom can overload the furniture if it already has expressive legs or a shaped plinth.
You cannot declare one height "small" and another "large" in advance without taking the width of the chest of drawers into account. A 180 × 400 mm front and a 180 × 1100 mm front are the same in height, but their decorative task is different. On the first, it is easy to end up with an overly dense composition. On the second, a single small element risks getting lost.
Our factory also produces:
Free field: the space in which the overlay must actually fit
The overall dimensions of the front and the space for carving are not the same thing. It is advisable to leave a visual margin from the edge, inside the frame you have to account for the moulding, and around the handle you need a zone in which fingers can freely grip it. A flat overlay on the drawing may not intersect with the handle, but its protruding parts will still get in the way of the hand.
For a preliminary calculation, it is convenient to use two formulas:
Free width = front width − left margin − right margin.
Free height = front height − top margin − bottom margin.
Margin values are not universal standards. They are chosen taking into account the nature of the ornament, the frame, the handles, and the scale of the furniture. For example, for the first paper mock-up, you can tentatively allow 25 mm on the sides and 20 mm on the top and bottom. Then check the composition at full size and adjust the distances.
On a 700 × 180 mm front, with these initial margins, the field will be 650 × 140 mm. A 120 × 75 mm overlay fits geometrically: 530 mm remains in width, and 65 mm in height. When positioned strictly in the center, the free strips will be 265 mm on the left and right and 32.5 mm on the top and bottom within the chosen field.
But this calculation says nothing about the handle yet. If it is placed at the same central point, both objects will occupy the same place. Therefore, the free field is not necessarily a single rectangle: after marking out the hardware, it may split into several separate areas.
For the three drawers from the example, with 20 mm vertical margins, the picture looks like this:
| Facade | Total height | Height after indents | Selection output |
|---|---|---|---|
| D1 | 120 мм | 80 мм | A very low composition or no carving is needed |
| D2 | 180 мм | 140 мм | Overlays with a pattern height of up to 140 mm are possible if they do not interfere with the handles |
| D3 | 240 мм | 200 мм | There is room for a larger pattern, but not for a 250 mm high part |
Imagine that the overlay you like measures 250 × 250 mm. It can be centered on a 700 mm wide front as much as you like — the height of Я3 is still only 240 mm. It does not fit even without indents. Verifying this before purchase is far more pleasant than discovering it after delivery.
Get Consultation
Why you cannot rely only on the product length
In the catalog, a size is often indicated by three numbers. The first two describe the dimensions in the plane of the product, the third — its thickness or depth. For an elongated vertical overlay, the narrow dimension may be only 28 mm, and the second — 200 mm. Calling such a part “small, 28 mm” and recommending it for a 120 mm high drawer would be a mistake.
Moreover, the overall rectangle does not show everything. On a shaped part, the cut-out contour leaves gaps, but the tips of the ornament may still end up too close to the neighboring molding. And with a deep relief, it is important to assess whether the pattern protrudes into the handle grip area. It is necessary to check the drawing, the product photo, and a template fitting.
Four layouts for decorative overlays on a chest of drawers
Identical overlays on each drawer
This is the most straightforward option for a chest of drawers with four identical fronts. Repeating a single shape creates a pronounced horizontal order, and the vertical distances between ornaments become predictable. With a uniform size and identical handles, it is enough to work out the placement once, then transfer the markings to the remaining fronts.
If the drawers differ by only a few millimetres due to construction, an identical overlay usually causes no problems. But with heights of 120, 180 and 240 mm, repeating a single piece works differently. On the top drawer it occupies a larger share of the surface than on the bottom one. Sometimes this reinforcement of the upper band is intentional; more often it results in accidental heaviness at the top.
Identical decor is chosen when its dimensions suit the smallest front, do not overlap the handles and maintain pleasing proportions on the largest one. If even one of these conditions is violated, the convenience of ordering no longer justifies the compositional shortcoming.
Overlays with the same pattern but different sizes
For drawers of different heights this is often the calmest way to decorate. The overall shape of the leaves and scrolls is preserved, but a larger element appears on the deep bottom front. The eye registers the kinship of the details before it notices the difference in size.
However, the sizes do not need to be changed strictly in proportion to the height. If a drawer has become one and a half times taller, this does not mean the overlay must also be enlarged by one and a half times. The decor is chosen from actually existing options, taking into account the ratio of width to height, the character of the pattern and the space for handles. Sometimes a difference of a few dozen millimetres is enough. Sometimes it is better to forgo the top overlay altogether.
The advantage of this scheme is especially noticeable in serial furniture: the craftsman approves two or three positions instead of selecting a random ornament for each drawer. The drawback is the need to precisely fix which size is intended for each front. The same article number in different dimensions should be counted in the order as different variants.
Decor on only some of the drawers
Shallow top drawers can be left smooth. The middle one can be decorated with a compact applique, and the bottom one with a larger applique. With this distribution, the furniture gains a gradual strengthening from the bottom, while the handles of the top row remain legible and convenient.
The scheme also works well in reverse. For example, if a chest of drawers has a tall carved base at the bottom, an additional massive pattern on the lower facade may be superfluous. Then the accent is shifted to the upper or middle drawer. Decorating from the bottom cannot be considered a mandatory rule — the actual construction is more important than a ready-made scheme.
For custom furniture, selecting individual facades is also economically beneficial. Only those carved elements that create a noticeable result are purchased. The remaining surfaces continue to participate in the composition through repeating handles, identical gaps between facades, and finishing.
One main facade
Sometimes a single central applique is enough. It can be placed on the highest drawer, on a wide central facade, or on a pull-out section that needs to be visually highlighted. The remaining surfaces remain a quiet background.
It is easy to make a mistake here: choosing the largest applique from the catalog just because it is supposed to be the "main" one. The main element is determined not by maximum dimensions, but by its relationship to the carcass and neighboring details. If a chest of drawers has thin legs, small handles, and narrow frames, too massive carving will look alien.
The single-accent option is convenient for furniture viewed from close range: against a wall in a bedroom, in a narrow hallway, or next to a bed. Here the relief is clearly visible, and it does not have to be repeated many times.
Why changing scale is not simply multiplying dimensions
The catalog may contain two appliques of approximately the same length but completely different in character. The first has a dense pattern: leaves and scrolls almost fill the rectangle. The second has a lot of air between the elements. Formally they occupy the same space, but visually they create a different load.
This is especially noticeable in a vertical row of drawers. If a dense short ornament is used on the upper facade and a large openwork composition on the lower one, a small detail sometimes seems even heavier than a large one. Therefore, one evaluates not only the dimensions, but also the amount of carved pattern per unit of surface, the depth of the relief, and the direction of the main lines.
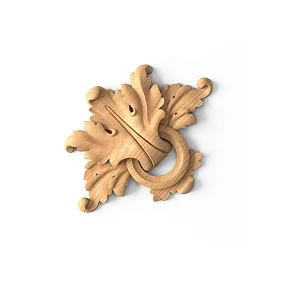
The wooden decor N-372, for example, offers options of 120 × 75 × 10 mm and 195 × 120 × 16 mm. These dimensions allow pieces with the same pattern to be considered for facades of different heights. But the larger version does not have to be intended specifically for the bottom drawer. The decision is made after trying both pieces in the context of handles and frames.
A trial guideline can be expressed as a question: do the two patterns look related even if you mentally remove the color and the wood species? If the answer is no, the same finish will not fix the problem. They will simply end up as two different overlays side by side.
Handle and overlay: who occupies the center of the facade
The most common conflict arises with a single knob handle. Its usual position is near the geometric center of the drawer. That is also where you want to place a central decorative overlay. As a result, the beautiful pattern either ends up covered by the handle or is forced to shift, breaking the symmetry.
Instead of solving this problem after purchase, consider the placement of the handles and the carving at the same time.
| Hardware | Possible placement of the decor | What to check |
|---|---|---|
| One central knob handle | Two small elements on the sides, or free space above or below | Is there enough height for the pattern and the grip area? |
| Two symmetrical knob handles | One insert between the handles | Distance between the edges of the insert and the handles, taking finger movement into account |
| One elongated bar handle | Decor in a separate strip above or below the bar | Whether the relief and the actual grip area intersect |
| Two bars | Central accent or no insert | Whether the front and its horizontal line are overloaded |
| Recessed handle or concealed opening | Central composition without an external handle | Does the relief interfere with opening, the soft-close mechanism, and surface care? |
Marking begins with the mounting axes of the handles. For a bow handle, both holes and the full outer contour are marked. For a knob, the hole, the base diameter, and the required space around it are marked. Only then is the contour of the overlay drawn.
The grip zone is wider than the handle itself. If there are 8 mm left on paper between the relief and the metal bow, formally they do not intersect. But a person may catch their knuckles on the protruding thread every time they open it. Comfort is checked with a real handle or a mock-up of it, not with a single drilling point.
Special attention should be paid to thin, tall drawers. With a handle centered on a 120 mm high front, there is little space above and below it. Moving the overlay into a narrow strip just so it is present is not worth it. It is better to use two small symmetrical side accents, change the handle layout at the design stage, or leave the drawer without thread.
In the section wooden furniture handles STAVROS hardware can be selected together with the decorative details. This way, the color, wood species, and scale of the details are coordinated before the holes are made.
What to do if two handles are already provided for by the design
Suppose the front width is 700 mm, and the centers of the two handles are 180 mm from the left and right edges. Their coordinates are 180 and 520 mm. The distance between the centers is 340 mm. If a 195 mm wide overlay is placed in the center, its side boundaries will be at 252.5 and 447.5 mm.
There are 72.5 mm left to the nearest handle centers. If the conventional outer radius of the handle is 18 mm, there will be about 54.5 mm between the handle and the overall contour of the overlay. This is already a concrete starting point for checking hand grip. The final decision depends on the actual shape of the handles and the protruding part of the pattern.
The same calculation with a 502 mm wide overlay gives boundaries of 99 and 601 mm. Now both handles with centers at 180 and 520 mm fall within the overall width of the decor. If the handles and the overlay are located in the same horizontal band, they will conflict. For a large overlay, the hardware layout or the height of the composition will have to be changed — replacing the pattern alone is not enough here.
Small top drawer: what to install and what to give up
For a low drawer front, one is tempted to look in the catalog for the piece with the smallest number in its size name. But this is exactly where a dangerous trap lies. The N-316 applique measures 28 × 200 × 6 mm. It is a narrow vertical "Bells" element, not a compact ornament 28 mm high. In its normal vertical orientation, it will not fit on a 120 mm high drawer front. Rotating it horizontally without checking the design itself is not a solution either: a vertical motif may lose its intended direction.
On upper drawers, it is better to evaluate low, visually calm elements with subdued relief that suit the chosen horizontal composition. An example of a more compact format is N-372, measuring 120 × 75 mm. But even here, a height of 75 mm does not mean the piece automatically fits any 120 mm drawer front: there are still margins, the handle, and space for fingers.
If the upper drawer is very low and there is a beautiful handle in the center, the empty surface around it is quite sufficient. The handle already forms a visual center. In that case, it is wiser to move the carving to the lower drawers, where there is a genuine free field.
On a chest of drawers with two small upper drawers, the situation is different. Their centers are located on opposite sides of the cabinet's common axis. Two identical appliques on these drawer fronts can form a paired upper band. But they should be chosen according to the dimensions of each half, not the total width of the chest of drawers.
Five STAVROS wooden appliques: actual dimensions and different tasks
The dimensions of specific pieces are more useful than conventional labels like "small," "medium," and "large." When selecting carved appliques for a chest of drawers, it is important to look at all three measurements and verify the orientation against the manufacturer's drawing.
| Article | Dimensions of the selected option, mm | What task it is worth considering for | Significant limitation |
|---|---|---|---|
| N-316 | 28 × 200 × 6 | A narrow vertical accent on a sufficiently tall surface | Length 200 mm prevents vertical use on a low drawer |
| N-372 | 120 × 75 × 10; 195 × 120 × 16 | Compact and enlarged versions of the same design | A suitable pattern direction and space between handles are required |
| N-421 | 250 × 250 × 13 | Large central motif for a tall decorative surface | It does not fit on a 240 mm drawer even without margins |
| N-420 | 502 × 250 × 16 | Wide and tall horizontal composition | Excessive in height for a shallow front |
| N-498 | 41 × 307 × 11 | Elongated vertical accent for a tall surface | Unsuitable in direction and height for most low drawers |
Dimensions are given for the specific variants shown in the product cards. N-421 and N-420 also have other sizes in the catalog, so before ordering you must select the required variant rather than relying only on the item code.
N-316 — narrow but long. Wooden decor card N-316 shows a vertical composition. It can be useful for decorating the tall part of a piece of furniture, but it does not replace the small central applique on a short drawer. Its size of 28 mm refers to only one side.
N-372 — two scales of a familiar motif. The wooden applique N-372 you can compare two sets of dimensions: 120 × 75 × 10 and 195 × 120 × 16 mm. This is a convenient example for a chest of drawers where two drawers have different heights but should look related. What matters is not a mechanical proportion, but the similarity of the pattern itself.
N-421 — not for every “medium” drawer. Applique N-421 has a variant of 250 × 250 × 13 mm. On a wide front, it can indeed look like a central accent, but its height must allow for placing 250 mm of relief plus the necessary margins. For a 240 mm front, such a detail is not suitable. If a tall drawer has a height of, for example, 330 mm, then after centering there will be 40 mm left at the top and bottom — and only then can the handle and neighboring elements be evaluated.
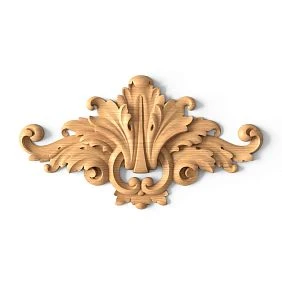
N-420 — a large horizontal composition. The size of one of the variants overlays N-420 measures 502 × 250 × 16 mm. In width, it will fit on a 700 mm front: when centered, 99 mm will remain free on each side. But in height, a minimum of 250 mm is required with no margins at all; for a more comfortable layout, it is better to allow noticeably more. This is an example of decor for a genuinely tall and wide front, not for just any lower section of a chest of drawers.
N-498 — an elongated vertical design. The wooden decor N-498 size is 41 × 307 × 11 mm. An overlay like this makes you think about a different place of application: a tall side panel, a post, or a specially designed vertical zone. You should not place the item on a drawer just because its narrow side takes up 41 mm.
This breakdown shows an important feature of the catalog: the article number by itself does not answer the question of where the overlay will fit. You need the specific size, the direction of the design, the height of the front, and the hardware layout.
Breakdown of a chest of drawers with three drawers: a layout that actually fits
Let's return to a 700 mm wide chest of drawers with fronts of 120, 180, and 240 mm. Suppose that each drawer has two knob handles: their centers are 180 mm from the side edges, and vertically they are positioned in the middle of their front. The overlays are to be installed strictly between the handles.
In that case, the following scheme is possible:
| Facade | Decorative solution | Height size check | Summary |
|---|---|---|---|
| Я1: 120 × 700 mm | Without overlay, two handles | No free field required | A calm upper band is preserved |
| Я2: 180 × 700 mm | One N-372, 120 × 75 mm | When centered, 52.5 mm remains to the facade edges | Size is suitable for fitting |
| Я3: 240 × 700 mm | One N-372, 195 × 120 mm | When centered, 60 mm remains to the edges of the facade | The enlarged motif creates a lower accent |
The table rows show the indents from the full edge of the facade. If there are frames, milling, or additional constraints, suitability must be recalculated. In particular, the distance to the handles is assessed not by their centers, but taking into account the full contour and the grip zone.
The result is a composition with a natural strengthening from the bottom. The top drawer is still connected to the others: it has the same handles and finish. The middle and bottom are united by one pattern, only in two sizes. The order includes one piece of each size per chest of drawers.
This scheme is not the only possible one. If the project requires single, central handles, two N-372 will conflict with the fasteners. Then you need to either change the handles before drilling, or look for paired side decor, or leave the carving only on the body. Adapting furniture to already purchased overlays is worse than revising the layout itself.
How much would such a set cost?
For an illustrative calculation, let's take N-372 options in beech with "Standard" sanding. At the time of checking the product card on October 9, 2026, the size 120 × 75 × 10 mm is listed at 1,250 RUB, and 195 × 120 × 16 mm at 2,840 RUB.
1,250 + 2,840 = 4,090 RUB for the carved overlays of one chest of drawers.
If 12 identical chests of drawers are planned, 12 pieces of the first size and 12 of the second will be required, and the estimated cost of the overlays themselves will be 49,080 RUB. Delivery, glue, surface preparation, and finishing work are not included in this amount. This is an example calculation based on specific options and the stated prices, not a fixed estimate: before payment, you should check the current price and production time in the product card.
Here you can clearly see why a preliminary layout is needed. If, without checking, you order one extra unnecessary overlay for each top drawer, the mistake will be repeated 12 times. Even with a relatively inexpensive part, the losses add up from the cost of the carving itself, the finishing, and the time spent.
Four, five, and six drawers: how the composition changes
Four fronts of equal height
A chest of drawers 800 mm wide with four 180 mm fronts is convenient for rhythmic repetition. Suppose each drawer has two identical handles, leaving free space in the center. In this case, you can try four overlays of the same size — for example, N-372 120 × 75 mm. When positioned at the center of the front's height, 52.5 mm remains above and below to the full edge. The repetition is sequential, and the order list contains one size position in a quantity of four pieces.
But even here you shouldn't place overlays automatically. If four hand-carved parts end up too close to prominent handles, it's better to reduce the amount of decor: for example, leave the two central drawers with carving and keep the outer ones smooth. The impression of a chest of drawers is determined by the overall density of the ornament, not by the number of decorated fronts.
Five fronts, of which the top two stand side by side
Let's imagine a chest of drawers with a total width of 1000 mm. The top row is two separate 480 mm fronts with a 20 mm gap; below are three full-width drawers. In the top row, two axes of symmetry appear, approximately at the center of each half. On the lower ones, there is one axis for the entire body.
An identical central overlay on each of the five fronts in such a design will produce three centers: upper left, upper right, and a common lower one. This is acceptable if the top pair is conceived as a separate band. But an unsuitable combination of shapes can turn the front into a set of unrelated decorations.
There are two clear solutions. The first is to leave the top pair without overlays and make one central accent on one of the lower drawers. The second is to use two identical compact elements in the upper halves, and on the full-width fronts support them with a similar but more elongated pattern. In the second case, be sure to check the distance to the central vertical joint: the ornament should not look accidentally cut into two parts.
Six fronts of three different heights
If a chest of drawers has six drawers with heights of 110, 110, 160, 160, 230, and 230 mm, the main mistake is to assume that six different ornaments are needed. In fact, there are only three size types of fronts here. First, the allowable decor height is determined for each type, after which the three possible bands are compared.
The low upper rows can be left with handles alone. On the two middle ones, install the same small model. On the two lower ones, a larger version of the same design. The result will not be six individual solutions, but a clear sequence: “no carving — small size — enlarged size.” For production, it is enough to submit one placement sample for each type of front.
If, however, all six drawers are the same height and the chest has a strict rectangular body, a scalable scheme may be unnecessary. A steady repetition of one design sometimes looks significantly more convincing than an attempt to create a decorative hierarchy where the furniture itself does not imply one.
Vertical rhythm: why a single beautiful overlay does not yet make a beautiful chest of drawers
Evaluate the drawers on the general drawing, covering the article names with your finger. Now only the spots of carving matter. Where are they located relative to the handles? Do the axes align? Is there a clear reason why one spot is larger than another? Does it not seem that the lower part of the chest has unexpectedly become heavier?
It often turns out that all the overlays are good individually, but together they combine poorly. For example, the upper drawer is decorated with a symmetrical floral motif, the middle one with an elongated branch, and the lower one with a large angular ornament. These items have different directions, different densities, and different compositional tasks. A single finish will not turn them into a set.
For one chest of drawers, it is practical to limit yourself to one main design or two or three coordinated types. This is not a prohibition on complex classical furniture. On a large model, carved legs, a cornice, side posts, and drawer decor may all exist at the same time. But each type of ornament must have its own place. If the fronts already have many moldings and shaped details, one more design may turn out to be unnecessary.
Particular care must be taken with overlays that have a pronounced top and bottom: a flower, a stem, a hanging garland, directed leaves. For the sake of symmetry, one piece must not be mechanically turned upside down. The pattern may begin to “grow” in the wrong direction, which is noticeable even to a viewer who does not know the name of the item.
How to see mistakes while they are still easy to fix
Photograph the chest of drawers mockup strictly from the front. On your phone, reduce the image so that the item does not occupy the entire screen, but approximately the same share of the field of view as from several meters away. Excessive carving on a small image merges into dark areas; the absence of rhythm becomes more noticeable. Then enlarge the photo and check the details near the handles.
Do not replace this check with a photo of a single applique from the product page. A catalog image shows the item, not its proportions relative to the furniture. Even precise millimeters do not convey how dense a row of five identical ornaments will become.
Horizontal composition on a wide lower drawer
If the width of the front approaches one meter, a small central applique sometimes gets lost. There is a temptation to stretch the design along the entire drawer. Elongated elements, repeating details, or a specially selected horizontal composition are suitable for this task. The catalog has a separate section horizontal wooden appliques.
However, length alone solves nothing. Take N-420 with a size of 502 × 250 mm. On a 900 mm front, when centered, the piece will leave 199 mm on the right and left. In terms of width, it looks quite acceptable. But if the drawer height is only 220 mm, the design will not fit. For such a front, you need to choose another, lower element, even if its length is somewhat shorter.
For a tall drawer 900 mm wide and 380 mm high, this same applique can already become the basis of the composition: when centered vertically, there will be 65 mm left to the edges. But handles cannot be placed in the same band over the ornament. A variant with handles above the applique is possible if there is enough room on top for gripping, or with another opening method provided for in advance by the design. You need to check not only the picture, but also the ability to use a filled drawer.
Repeating small elements give a different effect. Two mirrored ornaments on the sides balance the front and leave the center for a handle. Three identical pieces on one wide drawer sometimes resemble decorative trim; such a rhythm requires a precisely equal step and does not look good with every design. Before buying a set, lay out paper templates and see whether the pattern has become too dense.
Molding frame and carved applique: where the real working area begins
A framed front always limits the dimensions of the decor more strictly than it seems on the general drawing. For example, on a 700 × 240 mm front, the inner boundaries of the molding frame run 55 mm from the side edges and 35 mm from the top and bottom. The inner rectangle comes out to 590 × 170 mm.
Now let's try placing N-372 with a size of 195 × 120 mm. Formally, it fits inside the frame: when centered, there will be 197.5 mm left on the sides and 25 mm on the top and bottom. But handles may occupy the central area, and the protruding frame profile will reduce the perceived distance to the carved edge. With a more voluminous ornament, 25 mm may look cramped. Therefore, you need to check not only the actual absence of intersection, but also the visual clearance.
The N-421 overlay with a height of 250 mm no longer fits this 170 mm inner field. Such a mismatch cannot be corrected by simply "nudging" the part inside the frame.
The correct sequence for manufacturing a framed facade is as follows:
- Determine the full size of the face part.
- Mark the outer and inner boundaries of the moulded frame.
- Calculate the clear field inside it.
- Mark the handles and their grab zone.
- Place the overall outline of the overlay.
- After checking the appearance, approve its position, and only then transfer the dimensions to the production drawing.
If the frame has not yet been selected, you can view options in the section wooden moldings for furniture. It is advisable to select the frame profile and the overlay together. If a wide frame is added later, all the free field may disappear, and the chosen ornament may turn out to be unnecessary.
There is also a subtler mistake: the frame and the overlay can be of the same species and color but have different plasticity. For example, a wide smooth profile looks like a heavy straight border, while inside there is a very small and dense floral pattern. Then the eye catches on the frame, and the carving is perceived as secondary. For a narrow profile, on the contrary, too large an ornament may seem cramped. This is a question of proportions that cannot be solved by measurements alone.
Beech and oak overlays: choose the material to match the finish of the entire furniture
For a painted chest of drawers with opaque enamel, it is usually reasonable to consider beech. It has an even structure, and after appropriate surface preparation the wood grain should not become the main decorative effect. An overlay in the color of the facade is perceived as part of the overall carved composition. This is especially useful when the chest of drawers has many drawers: the same shade unites the elements, even if they are of different sizes.
If stain, oil, or clear lacquer with preservation of the natural pattern is intended, oak may be more interesting. Its texture is more noticeable and adds decorative quality on its own. Here more attention is required when selecting adjacent parts: the shade, direction of the grain, and character of the pattern must be coordinated with the visible wooden areas of the body.
In STAVROS product cards, there are preparation options for blanks "for enamel" and "for tinting." These are not decorative names. For an opaque coating, a different selection of lamellas by color is acceptable than for a semi-transparent finish, where differences in the blanks will be visible. When ordering a set for a chest of drawers, you need to choose the corresponding version for all parts, rather than mixing options randomly.
Neither beech nor oak by itself will fix a bad layout. An expensive coating will make the carving more noticeable, but it will not free up space for a handle or reduce an overly large ornament. Material and finish are chosen after the composition has already been checked
When patinating, the depth of the carving must be taken into account. On a small upper drawer, strong darkening of the recesses can make a small overlay visually heavier than a larger and lighter one below. Before patinating the entire set, compare one finished sample under normal room lighting.
Full-size paper template: checking before ordering a set
Even an accurate drawing does not replace a short trial fitting. For it, you do not necessarily need to order all the wooden items. You can print their contours at a 1:1 scale or transfer the dimensions onto thick paper. For a shaped part, it is desirable to use the outer silhouette rather than a simple rectangle: this makes it easier to see how the tips of the ornament fit the frame and handles.
The practical sequence is as follows:
- Take measurements of the actual fronts. Keep in mind that the visible surface may differ from the full dimensions of the part due to the frame and carcass construction.
- Obtain an accurate drawing of the selected overlay. Verify all three dimensions; a 28 mm designation does not mean the entire part is 28 mm high.
- Make a 1:1 template. Check the scale with a ruler after printing: the printer must not fit the image to the sheet.
- Mark the handles. It is better to place actual samples or cut out paper shapes at their full size rather than drawing dots.
- Place the templates on each drawer type. Secure them with removable tape that does not damage the prepared surface.
- Test the drawer operation. Grab the handles, open and close the drawer, and check where fingers might come into contact with the relief.
- Evaluate the entire furniture piece from the front and side. Make sure the pattern does not blur into dense spots and does not protrude awkwardly relative to adjacent parts.
- Record the final distances. Write down the dimensions from two base edges, not a wording like "approximately in the middle."
It is especially useful to make two templates when choosing between sizes. First, place the small and large overlay alternately on the same front. Then create two complete dresser layouts and compare them as a whole. Such a check often shows that the larger part is needed only on one drawer, not on the entire lower half of the furniture.
What level of accuracy is sufficient at the project stage
For a compositional choice, a paper mock-up is sufficient without attempting to depict the finest wood texture. But when approving the layout in production, precise installation coordinates corresponding to the actual products are already needed. If the pattern is asymmetrical, simply specifying the center point may not be enough: it is necessary to determine the orientation and distances to the reference edges.
Separately note which side of the part faces up. This may seem obvious on a floral ornament drawing, but when passing an order between several craftsmen, ambiguity easily turns into an error.
How to attach the overlay and still keep the drawer usable
The attachment operation itself should be planned after the layout is approved. A wooden overlay is not intended to take the force of opening the drawer instead of the handle. If the ornament is placed too close to it, a person will start catching on the protruding parts, and they will experience extra load.
Before installation, check that the base is level and strong enough, and that the back side of the overlay fits without wobbling. The choice of adhesive depends on the facade material, the type of finish, and the adhesive manufacturer's recommendations. Painted bases, veneer, and wood-based panels may require different surface preparation methods. One should not assume that the same adhesive scheme suits absolutely all materials.
If the design includes mechanical fastening, space for it must be provided in advance, without damaging the relief or the front surface. Before drilling, make sure that the overlay fastening does not intersect with the handle holes, the facade's internal fastening, or the drawer runners. Extra care is needed with thin facades and areas near the edge.
The order of work changes depending on the finish, but the check remains the same: after a trial installation, open each drawer fully, keep your hand on the handle, and make sure the overlay does not hinder movement. If the finish has not yet been applied, take into account the additional thickness of primer and paint in areas of tight adjacency. Complex carving is harder to clean after installation, so it should not be placed in an area of constant soiling without necessity.
One approved sample before producing the series
When a workshop makes a single dresser, a defect can be noticed during fitting and the layout can be changed. With a series of 12 or 30 items, the cost of a mistake is much higher. Moreover, images on a screen do not show how a particular ornament looks after sanding and the chosen enamel under real lighting.
For a production run, it is reasonable to assemble one sample dresser — or at least a set of its facades — and go through the successive stages: dry fitting, checking the handles, trial finishing, sample approval, and launching the repeating parts. After approval, the article number, overlay size, or handle position must not be changed without rechecking.
It is necessary to keep a photograph of the sample from the front, a drawing of the facades with dimensions, and a list of parts. This is needed not only by the current carpenter. Six months later, the customer may request a second identical chest of drawers, while the previous craftsman may be working on another project. A single photograph of the finished item does not indicate whether two versions of N-372 or two similar models from different series were used.
For serial production, a separate finish sample is especially useful. A short note such as “dark oak” is insufficient: the shade depends on surface preparation, application method, and the specific coating. If the facade and the carved overlay are painted separately, the samples must be compared under the same light after drying.
Parts list: how many carved overlays to order
After the drawing is approved, create a configuration table. It must include the facade designation, item code, exact size, material, sanding and finishing specification, quantity, and installation location. Do not replace this with the note “overlays for the chest of drawers — 5 pieces.” From that, it is impossible to tell which parts are intended for the upper drawer and which for the lower one.
For our three-tier example, the list looks like this:
| Designation | Facade | Item and size | Material and finish | Quantity per chest of drawers |
|---|---|---|---|---|
| D1 | D1 | Without overlay | — | 0 |
| D2 | D2 | N-372, 120 × 75 × 10 mm | Beech, prepared for enamel | 1 |
| D3 | D3 | N-372, 195 × 120 × 16 mm | Beech, prepared for enamel | 1 |
| Total | 2 |
When manufacturing 12 such chests of drawers, the quantities for each line are multiplied separately: 12 parts of the first size and 12 of the second. They cannot be summed into a single item N-372 with a quantity of 24 pieces without specifying the size.
Let's make the example more complex. If the lower wide front is decorated with a pair of identical overlays, the quantity per chest of drawers will already be two, not one. For 12 units, 24 parts of exactly this size will be required. If the decor has a left and right version, each side is listed as a separate line: the same total quantity does not yet guarantee the availability of the required sides.
When ordering, it is useful to check:
- whether the item codes match the drawings and approved templates;
- whether the dimensions of each variant are recorded, not just the general names;
- whether the same material, surface preparation, and required sanding quality are selected;
- whether the quantity per chest of drawers and for the entire batch is correct;
- whether the manufacturing timeframes for the overlays allow the fronts to be completed on time;
- whether a reserve is provided for possible damage during assembly — based on the actual needs of the project, not an arbitrary percentage.
For a one-off order, it is not necessary to buy extra items "just in case." If the overlay is expensive and large, it is wiser to first check one part and only then order the set. For serial work, the decision on the reserve is made taking into account the re-manufacturing lead time, the fragility of the chosen pattern, and the cost of stopping production.
Mistakes that are especially noticeable on fronts of different heights
| Mistake | What's happening | How to fix before buying |
|---|---|---|
| They rely on the first dimension number | A narrow vertical overlay is mistaken for a miniature one | Check three dimensions and the pattern direction against the drawing |
| They choose one size for all drawers | The top front ends up overloaded | Compare the share of occupied height on each drawer |
| They buy the decor before choosing handles | The central overlay takes up the mounting space | Mark handles and decorative elements at the same time |
| They treat the entire facade area as the working field | The carving runs onto the frame, and the margins disappear | Measure the inner field after all profiles |
| They mix several unrelated ornaments | The dresser looks assembled from random parts | Limit the set to coordinated patterns |
| They evaluate only a single drawer | The overall vertical rhythm is lost | Check the layout on the entire dresser |
| Size is not specified in the order | The correct item code arrives, but not the right variant | Record the size of each item in the specification sheet |
| No finish sample is provided | Facades and overlays differ in shade | Approve a single finish sample |
Two mistakes require special attention. The first is ignoring the depth of the relief. On the facade drawing, the overlay may not touch the bracket, but its peak protrudes closer to the hand than the smooth surface. With frequent use of the dresser, this will become immediately noticeable.
The second is a misunderstanding of symmetry. If the top pair of drawers has two separate axes, while the three lower ones share a single common axis, achieving a unified vertical line for all overlays is impossible without rethinking the composition. What is needed here is meaningful pairing, not an attempt to shift all parts toward the geometric center of the cabinet.
When carved overlays for drawers are better not purchased at all
Carving is not mandatory on every dresser. There are situations where it should be abandoned entirely or left as a single accent.
The facade height is too small. If, after installing the handle and calculating the offsets, only a narrow strip remains, selecting a tiny ornament just for the sake of decoration will not improve the piece. Smooth drawers and a decorative carcass will look more cohesive.
An expressive frame already occupies most of the surface. A shaped molding can set the rhythm on its own. A carved overlay inside a narrow field will create not additional depth, but a cramped feel. Sometimes it is enough to slightly change the profile of the frame.
Complex handles are the main decoration. Pulls with shaped bases, carved wooden handles, and large metal elements already shape the character of the facade. An additional overlay can become a third competing focal point alongside the handle and the molding.
There is no way to verify the compatibility of the finish and the fastening. If the facades are already fully finished, and the chosen compound is not suitable for bonding with the existing finish, buying the entire set before a test attachment is risky.
The dresser is intended for very intensive use in a narrow passage. A protruding relief next to the handle will be bumped more often. Here, a shallow pattern, a different placement area, or no carving on the front parts of the drawers is preferable.
Refraining from overlays on the upper drawers does not mean giving up carved decor altogether. The dresser still has side posts, an upper band, a plinth, legs, and other places where the pattern can better match the shape of the furniture.
Where to buy wooden overlays for a dresser and how to place an order without unnecessary details
If you have already calculated the dimensions and decided to buy carved overlays for a dresser, start with the main catalog of decorative furniture overlays STAVROS. In it, you can compare ornaments, dimensions, wood species, and finishing options. For wide facades, it is convenient to view horizontal shapes separately, and if frames are present, to coordinate the items with the selected moldings.
When choosing decorative overlays for furniture fronts, it helps to have on hand not a general photo of the chest of drawers you like, but its front map. From it you can immediately see which part should be about 120 mm wide, where an enlarged version is needed, and where there is no room for carving at all. Specifying the full size speeds up selection more than asking to find "a small beautiful overlay."
Carved wooden overlays for furniture are sold by specific item numbers and size versions. Before placing an order, check in the product card of the selected item the material, the three overall dimensions, the sanding option, suitability for the chosen finish, the current price, and the production time. If a set of overlays for a chest of drawers in several sizes is planned, list each item separately.
When wooden overlays for furniture, handles, and moldings are needed at the same time, it makes sense to coordinate the entire set before the fronts go into finishing. As a result, the craftsman receives not a set of random purchases, but a verified layout scheme that can be repeated on the next piece.
Frequently asked questions about carved overlays for a chest of drawers
Should identical overlays be placed on all drawers?
No. Identical items are convenient if the fronts are similar in height and the pattern does not conflict with the handles. If the drawers differ greatly, it is better to consider two sizes of the same motif or leave the upper fronts without carving. The final choice is made based on the overall layout, not on an individual product card.
How can you determine what overlay height is acceptable for a front?
Measure the height of the drawer, subtract the top and bottom clearances, then take into account the handle and frame. Compare the resulting free space with the actual height of the item according to the drawing. An overlay 250 mm high will not fit a 240 mm front, even if its width is a whole meter.
Can different sizes of the same pattern be combined?
Yes, if the manufacturer offers such options and they fit by dimensions. N-372, for example, has versions 120 × 75 and 195 × 120 mm. They can be tried on different drawers, but the position of the handles, the clearances, and the visual rhythm must be checked separately.
What should be placed on a top drawer 100–120 mm high?
Most often, you should consider a very low ornament, small paired pieces on the sides of the handle, or leave the front without an overlay at all. Don't judge the size by a single number: N-316, for example, measures 28 × 200 mm and is not a low piece when installed vertically.
If a drawer has one handle in the center, is it necessary to offset the overlay?
No. First check whether small paired pieces can be placed on the sides or the ornament can be positioned in a separate band along the height. If there is no free space, it is better to skip the overlay on this front. A random offset from the center usually looks worse than a clean surface.
What should be chosen for a very wide bottom front?
You need to find a composition that matches both the width and the height. An elongated horizontal overlay can fill a wide field well, but large models often have considerable height. For example, N-420 in the 502 × 250 mm version will not suit a low drawer, despite its convenient length.
Can overlays be placed on top of furniture molding?
This decision should not be made based on a photo alone. The intersection of relief details can result in an unreliable fit and disrupt the frame pattern. It is usually easier to determine the inner field of the molding frame and choose an overlay that fits entirely within it with the necessary clearances.
For enamel, is it better to choose beech or oak?
For opaque painting, beech is often chosen. If you want to preserve a noticeable natural texture under stain, oil, or clear lacquer, oak is appropriate. When ordering, the preparation of the blank for enamel or tinting is also important — especially when the parts for one chest of drawers are purchased separately.
Do I need to buy spare overlays for a single piece of furniture?
Not necessarily. For a single chest of drawers, it is wiser to first check the templates and, if in doubt, one actual piece. For a series, the reserve is calculated separately: the probability of damage, the lead time for re-manufacturing, and the need for continuous assembly are taken into account. An arbitrary addition of the same percentage to all SKUs is rarely justified.
How can I check that the overlay will not interfere with using the drawer?
A front view alone is not enough. Place a full-size template, attach the actual handle, open the drawer, and check finger movement. For deep relief, a trial fit of the actual piece is useful because a paper outline does not convey the protruding thickness.
Can two overlays be replaced with one larger one?
Sometimes yes, if the larger piece fits between the frames and does not overlap the hardware. But a width of 500 mm by itself does not yet mean that one overlay will be better than two smaller ones. On a low front, its height may turn out to be excessive; on a wide drawer with two handles, it may overlap their placement. Check both schemes on the overall drawing.
What must be specified when ordering a set for several chests of drawers?
For each item, write down the SKU, all dimensions, wood species, finish-ready execution, sanding quality, number of parts per unit, and number of chests of drawers. Add the designation of the front on which the overlay is installed. Such a list will make it possible to reproduce the same composition without selecting it again.
The practical criterion is simple: good decor for a chest of drawers should not require justification on every drawer. The overlay dimensions match the free fields, the handles are convenient to use, and the repetition of the pattern is perceived as a single composition. First, this system is approved on full-size fronts — and only then are the carved pieces purchased in the required quantity.