Article Contents:
- Determine which correspondence the project requires
- Map the original system and its connections
- Identify the elements that the rest of the composition depends on
- Verify the origin and material of the entire set
- Start the selection with the main molding and its profile
- Align the cornice, molding, and skirting on a single elevation
- Preserve the logic of the ornament and the level of detail
- Check the repeat on straight sections and in corners
- Select corner decor and overlays together with the frame
- Evaluate the ceiling rose as part of the ceiling
- Recalculate the layout of the entire wall when the width changes
- Compare options as complete sets
- Check the new composition in the overall scene
- Drawings confirm dimensions and junctions
- Approve samples as a fragment of the system
- When the number of SKUs can be reduced
- Define the scope of replacement on a partially completed site
- Issue a new specification with a correspondence history
- Recalculate the quantity and cost of the finished solution
- Approve the supply of related elements
- What to provide STAVROS for selection and ordering

In the project, European moulding is linked to decorative corners, cornice, skirting and ceiling rose. If each item is replaced separately, you may end up with suitably sized products that together change the character of the room: frames become more prominent than the cornice, overlays take up too much of the free field, and the rose ends up as the only element with a different pattern.
An alternative to European stucco for such a project is selected as a coordinated composition. First, determine what role each element plays and what it is linked to. Then the main profiles are selected, and the ornament, junctions and finish are checked. Only after that is the new composition translated into working documentation and the order.
Replacing imported decor can preserve the architectural logic without literally repeating every leaf and groove. But the ability to preserve the existing layout, material and all junctions must be confirmed. One well-chosen moulding does not yet confirm that the entire system is ready for purchase.
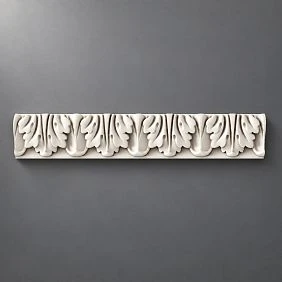
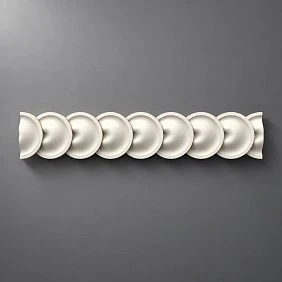
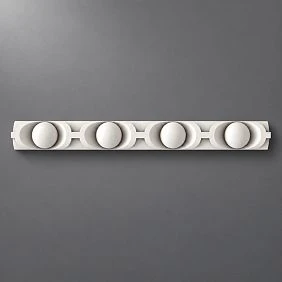
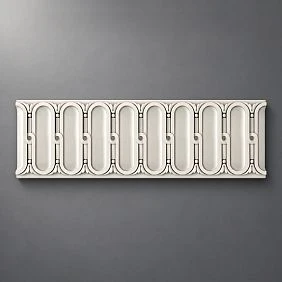
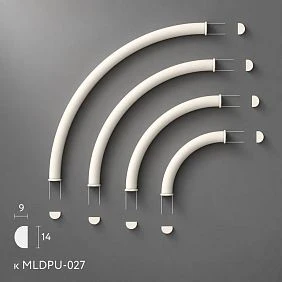
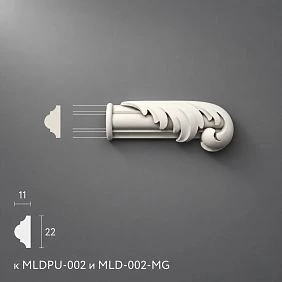
Determine what kind of match the project requires
There are several levels of replacement. Geometric matching concerns the dimensions and the full cross-section contour. Functional means that the product performs the required task in the junction. Stylistic means that the character of the relief and pattern supports the composition. Systemic combines these checks for all related elements.
Clarify right away what the customer expects to preserve: the exact silhouette, the overall impression, the finished frame dimensions or a specific combination of ornaments. The wording “an alternative is needed” without these conditions allows for too many different solutions.
If an exact copy of a unique relief is essential, selecting serial Russian stucco may not solve the task. If proportions and the character of the interior are important, the choice becomes wider. In both cases, the replacement is approved according to clear criteria, not an indefinite assessment of “almost the same”.




Create a map of the original system and its connections
List the items from the European specification along with their application locations. Preserve the manufacturer, article number, material, dimensions, drawing, and link. Project codes will help link the original positions to the new ones, even if the number of purchased article numbers changes.
| Project item | Role in the room | What it is connected to | What to check when replacing |
|---|---|---|---|
| ML-01, main molding | Forms frames | Corners, overlays, casing | Section, fields, indents |
| KR-01, cornice | Completes the top of the wall | Ceiling, niche, top of frames | Height, projection, pattern |
| PL-01, skirting board | Forms the bottom line | Floor, doors, furniture | Dimensions and junctions |
| DK-01, overlay | Creates an accent | Frame field, composition axis | Size, relief, direction |
| RZ-01, socket | Organizes the ceiling center | Chandelier, cornice, ceiling field | Scale and placement |
Add ornamental moulding, pilasters, and brackets to the map if they are included. The main thing is to show the dependencies. The same moulding in different rooms can have different constraints, so a single summary line by SKU is not enough for verification.
Separate physical and compositional connections. Moulding and a decorative corner connect directly: here the fit must match and the relief transition must be clear. A cornice and a ceiling rosette may not touch, but they must match in scale and pattern. For a skirting board and a door casing, both the actual junction and the appearance are checked at the same time.
This separation determines the scope of re-checking. A new rosette pattern requires reviewing the ceiling composition, but by itself does not change the length of wall strips. A change in the corner fit, on the contrary, may affect the moulding segments. For each change, mark the related items so that you review exactly the affected decisions and do not miss a mandatory check among the other tasks.
Our factory also produces:
Identify the elements on which the rest of the composition depends
The key element is determined by its influence on the project. Usually this is the main frame profile, a large cornice, or a rosette. But a small corner detail can also be critical if it defines the shape of all frames and does not allow any other junction.
For each item, ask the question: what will have to be revised if it changes? If the corners, inner fields, and distances to doors change along with the moulding, it is chosen among the first. If an overlay is freely placed within a large field, it can be selected later.
This order reduces rework. First, the most restrictive nodes are confirmed, then the decorative part is developed. Small overlays should not be considered secondary just because of their size: the role of a detail is determined by the composition and joints, not by its area in the catalog.
Get Consultation
Check the origin and material of the entire set
If you specifically need a Russian analogue of polyurethane stucco, record two separate conditions: the origin of the product and the material. Purchasing from a Russian supplier does not by itself confirm Russian production of each item.
For example, in the STAVROS catalog, the sections ceiling cornices и of floor skirting boards contain HIWOOD polystyrene products; on these pages the brand is listed as South Korean. Therefore, the entire composition from different sections cannot automatically be called a Russian polyurethane system.
For the project, determine whether a set made from different materials and manufacturers is acceptable. If not, the unconfirmed item is left open until a suitable product is selected. Whether the entire original specification can be closed is checked for each SKU. An approved mixed set can also solve the interior task, but its composition must be described precisely.
Start the selection with the main molding and its profile
Russian analogues of moldings are sought by width, projection, mounting side, and profile shape. The commercial length is kept as a separate parameter for future cutting. Dimensional letters are decoded according to the specific manufacturer's scheme, since the order of designations may differ.
When comparing, overlay the profiles along the mounting plane and the selected reference line. Check the steps, beads, grooves, and the orientation of the asymmetric profile. The same width does not guarantee the same position of the front faces or compatibility with the architrave.
In the section of polyurethane moldings select actual versions, then check the related decorative details. Do not stretch the digital model to bring it closer to the original: such an operation changes the product. If there is no suitable profile, this is a reason to discuss changing the composition rather than hiding the discrepancy.
Align the cornice, molding and skirting on a single elevation drawing
Polyurethane moldings and cornices are chosen with the full wall height in mind. The cornice can be the main accent, the frames a calm background, and the skirting a restrained lower boundary. Other solutions are possible too, but the distribution of attention should remain deliberate.
Compare the height and projection of the cornice, the width of the frame profile, the density of the ornament and the free gaps between them. Do not set a universal size ratio: the same profile is perceived differently on a narrow pier, a long wall and near a large door portal.
The skirting is also checked at door and furniture junctions. A deeper molding can change the impression of the lower band, but this does not mean that an already suitable skirting must be replaced. First look at the whole area. Systematic selection involves checking each participant, not automatically replacing all products.
Preserve the logic of the ornament and the level of detail
The original composition may combine large floral motifs, small beads and smooth dividing strips. It is important to understand where the main pattern is, where the supporting one is, and which areas are deliberately left calm.
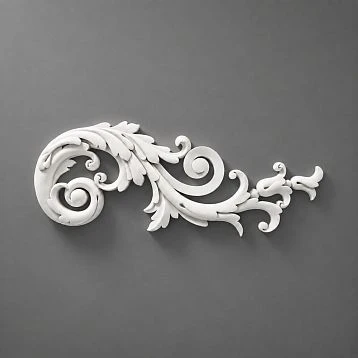
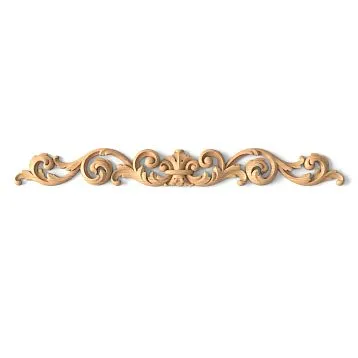
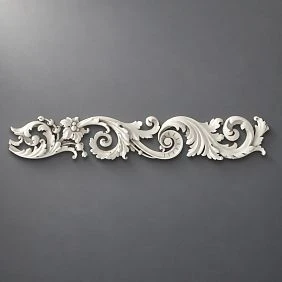
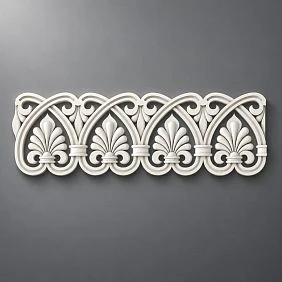
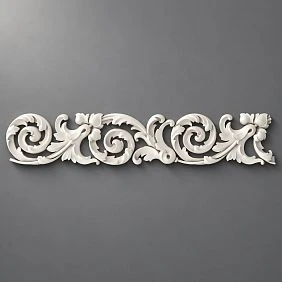
When selecting, ornamental trim compare not only the name of the motif. The size of the repeating element, the depth of the relief and the density of the pattern matter. Two strips with acanthus can create bands that are completely different in richness.
There is no need to look for a literal copy of every scroll unless this is a project requirement. You can preserve the large floral accent and the fine rhythmic contour with other standard products. But a replacement of the ornament family is shown as a whole: the new overlay must match the trim and ceiling decor, not just the nearest molding.
Check the repeat on straight sections and in corners
For an ornamental profile, the same overall dimension does not yet mean the same layout. The repeat — the step at which the pattern repeats — affects the number of motifs, the symmetry relative to the center and the finish near the corners.
Place the selected Polyurethane trim on all characteristic sections: a long horizontal, a short pier and a corner. Check where the joints run and which parts of the pattern will remain after trimming. Do not compensate for the mismatch by stretching the ornament in the model.
Sometimes a new pattern requires shifting the starting point of the layout or changing the number of repeats. This may be acceptable without changing the overall dimensions, but the decision must be shown on a working fragment. When directly continuing existing imported decor, even a small difference in pitch becomes especially noticeable.
Select corner decor and overlays together with the frame
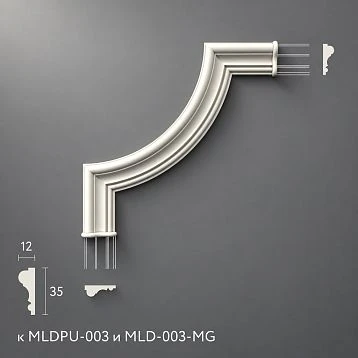
A new moulding will not necessarily connect with an old imported corner. Check the fit, the profile at the transition point, the relief height and the boundaries of the parts. A catalog resemblance in shape does not replace checking the assembly.
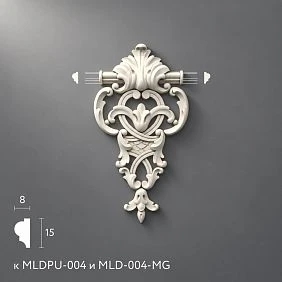
An example of a documented link is available for STAVROS: central overlay MLDPU-4-2.1 measuring 198 × 208 × 18 mm is listed as compatible with MLDPU-004 and MLD-004-MG. The polyurethane Molding MLDPU-004 has dimensions of 15 × 8 × 2600 mm. Such a link helps form a verifiable pair, but does not confirm its compatibility with any European set.
For the remaining elements of the section decoration for moldings specific executions are also checked. The left and right parts are recorded separately. For the central overlay, its overall dimensions are compared with the inner field of the frame, not just with the total width of the wall.
Evaluate the ceiling medallion as part of the ceiling
An existing medallion can remain if its size, relief and ornament support the updated composition. Replacing all wall profiles does not by itself require buying a new ceiling piece.
If the medallion is being replaced, compare it with the chandelier, cornice and free ceiling field. The diameter or two overall dimensions, relief depth, central zone and placement of the pattern are checked against the specific product. There is no universal ratio of medallion diameter to fixture size for any interior.
When selecting ceiling rosettes, include them in the overall ceiling plan and interior view. You need to see whether the main center of the composition is preserved and whether the small, dense ornament starts to compete with the calmer walls. The junction with the fixture is checked separately from the artistic choice.
Recalculate the layout of the entire wall when the width changes
If the new profile is wider than the previous one, you cannot simultaneously preserve the inner fields and the outer dimensions of the frames. On a wall with several repetitions, a small difference affects several gaps at once.
A hypothetical example: a wall 3400 mm wide contains three rectangular frames with an inner width of 900 mm each. The molding width is 30 mm, the gaps between frames are 120 mm each, and the margins at the edges of the wall are 140 mm each. Three outer dimensions of 960 mm together with the gaps and margins occupy exactly 3400 mm.
When switching to a profile 35 mm wide while preserving the inner fields, each frame will expand to 970 mm. In total, another 30 mm will be required. If the edge margins are left unchanged, the two identical gaps will decrease from 120 to 105 mm.
Another option is to preserve the outer dimensions and gaps. Then the inner field of each frame will decrease from 900 to 890 mm. This is an example of a rectangular layout without protruding corner decor; for a real system, the dimensions of the overlays and the design of the joints are also taken into account.
Before such a recalculation, verify the original dimensions of the wall itself. In a room being prepared for installation, the position of casings, the finished ceiling, and built-in furniture may differ from the earlier model. Specify which dimensions have been confirmed by measurement and which are still design values. Otherwise, the new profile will be fitted to outdated geometry, and the problem will surface during installation. The preservation of the previous axes should also be checked against the actual openings and furniture, not only against the edges of the digital wall.
Compare options as complete sets
Prepare one comparison sheet for the original system and each new composition. Specify exact product codes, dimensions, material, pattern character, and related elements. It is more important to see the consequences of a choice than to assemble a long list of similar photographs.
| What is being compared | What information is needed |
|---|---|
| main profile | Section, width, projection, length |
| Top and bottom of the wall | Dimensions of the cornice and skirting, pattern, junctions |
| Frame decor | Corners, center overlays, sides, fit |
| Ceiling center | Size and relief of the rosette, position relative to the light fixture |
| Design implications | Changed fields, gaps, nodes, and worksheets |
| Solution readiness | What has been checked and what questions remain |
Each composition must have its own designation. Do not mix molding from one approved option with overlays from another without re-checking. Otherwise, the final purchase will include a combination that no one has reviewed as a whole.
Check the new composition in the overall scene
Place the baseboard, frames, overlays, cornice, and rosette in the model at the same time. Compare the original and new options with the same camera, lighting, and design finish. Changing the lighting for only one composition makes it harder to understand how the decor itself differs.
Prepare an overall view of the room, a front elevation, and several fragments of complex junctions. The overall shot shows the distribution of accents. The front elevation helps assess the rhythm and free fields. A close-up angle reveals the transitions between details.
Enable furniture and doors at real dimensions. A replacement that looks convincing on an empty wall may look different behind a sofa or next to a tall wardrobe. With several connected rooms, also check the view through the doorway: the difference between systems is often noticeable right at their boundary.
Drawings confirm dimensions and junctions
Visual approval is complemented by a technical check. Use STAVROS drawings and 3D models, selecting the required item codes and finishes. After downloading, verify dimensions against the product cards; the file name does not automatically confirm the scale.
Check sections, mounting surfaces, projections and joint positions. If a complex assembly raises doubts, it is broken down before the final selection of the entire set. The DWG format alone does not guarantee that the part is correctly placed in the project.
For curved sections, confirm the physical flexible version, the bend direction and the permissible radius. An identical pattern on a straight and a curved model does not confirm that manufacturing or installation is possible. The transition between the straight and flexible parts must be included in the list of assemblies to be checked.
Approve samples as a fragment of the system
A separate sample shows the surface and texture of a single part. To replace the entire composition, an assembled characteristic fragment is also useful: a moulding with a corner, an overlay and the project finish. Its composition is chosen based on the most complex joint.
If the customer has already seen a European sample, compare it with the new one under the same lighting. Assess the edges, shadow depth, texture and degree of gloss. A similar color on screen does not confirm an identical surface after finishing.
Keep the approved details with article numbers and coating designations. When combining different substrates, the preparation and painting system is tested for each material. The overall color does not cancel these differences, and a positive result on a direct sample is not automatically extended to untested corners and radii.
When the number of article numbers can be reduced
Selecting analogues based on the specification sometimes allows similar original items to be combined. For example, four similar profiles can be replaced by two if the differences do not perform a separate function and the new solution is agreed for all application locations.
Check each such group by dimensions, assemblies, finish, and visual role. A single profile should not become a substitute for a wide formal surround and a thin inner line merely for purchasing convenience. Differences in scale and designer accents are preserved where they shape the composition.
Even after combining purchased products, keep the project codes for rooms and assemblies. One product can serve several designations, but calculations by zone must remain traceable. This allows demand to be summed without losing information about exactly where each detail is used.
Define the boundaries of replacement on a partially completed site
If part of the European stucco is already installed, first mark the areas to be retained. Direct continuation of a line is especially sensitive to differences in cross-sections and pattern. In such a place, an otherwise successful Russian analogue of interior decor may turn out to be a poor neighbor to the existing product.
Sometimes it is more reasonable to replace a completed fragment: the entire frame, wall, or composition within the room. But this increases the scope of work, so the decision is compared with retaining the original product. The boundary of replacement is agreed based on drawings and overall appearance, including adjacent rooms.
If a critical element has not been matched, do not declare the entire system approved. Work can continue on independent areas, while dependent items are left open. This way, the absence of one suitable corner will not lead to premature purchase of molding for all walls.
Issue a new specification with a correspondence history
Replacing the system requires preserving the link between the original project and the new composition. For each item, specify the previous article number, the selected product, the size version, the material, the finish, and the area of application. Separately record significant differences and the approval result.
Rows are divided into retained, replaced, excluded, and added. This is especially important when one new element serves the role of two previous ones or when a new moulding requires different angles. Simply replacing the brand name in the old table will hide the change in composition.
When changing frame fields, axes, overhangs, and junctions, update the worksheets. If the geometry has been preserved, the product specification must still contain current article numbers. Mark approval of the sample, composition, and purchase quantity separately: these decisions may be made at different times.
Recalculate the quantity and cost of the finished solution
The number of strips from the European statement cannot be transferred automatically. A new product length, a different repeat, or changed angles require re-placing the parts on the blanks. Linear meters, whole strips, pieces, and ready-made sets are accounted for separately.
Using the updated developments, compile a list of cut segments, a cutting map, and a justified reserve. If one profile is used in several rooms, determine whether usable remnants can be transferred between zones and work stages. Theoretical savings must not depend on offcuts that will be unavailable by the required date.
Compare the cost of the entire composition: linear profiles, piece decor, packaging, delivery, finishing, and necessary rework. The possibility of reordering and the lead times are confirmed for specific items. A lower price per meter does not guarantee a lower room cost if the new system requires significantly more parts or labor-intensive changes.
Coordinate the supply of related elements
The readiness of one profile for shipment does not yet determine the readiness of the installation stage. Compile a list of parts without which a specific frame, ceiling composition, or room cannot be completed. For these groups, clarify quantities and lead times while keeping separate article numbers in the order.
Suppose the moulding can be obtained earlier than the corner decor. Before purchasing the first batch, find out whether the selected assembly allows installation of straight sections without physically fitting the corner. If not, an early delivery of strips will not bring the completion of this wall closer. If it does and the dimensions are confirmed, the stage can be split by recording the necessary conditions for the contractor.
If one overlay is delayed, do not substitute it with an available element without checking the related decisions. If the replacement changes the dimensions or fit, you will need to return to the assembly node; if it affects only the pattern, return to composition approval. After the decision, update the composition of the relevant group and notify the project participants.
On the packaging and in the accompanying list, it is useful to retain the purpose by zones. This helps avoid using the reserve of one composition for another while installation is proceeding in parallel. During acceptance, check the completeness of related groups, not just that the total number of delivered boxes matches.
What to provide to STAVROS for selection and ordering
To select an analogue of the stucco molding for the entire composition, prepare the original specification, links and catalog data, floor plans, elevations and characteristic assembly nodes. Attach photos of samples and a list of what is already installed or must be preserved.
Specify the requirements for the material and origin of the products, the preliminary volume, the city of the site and the required delivery date. If the item codes are unknown, add photos with reference dimensions and note the missing data. Interaction questions can be clarified in the section STAVROS for designers and architects.
For the decorative part, use the catalog polyurethane molding decoration, keeping each overlay linked to its frame and assembly node. It makes sense to buy a ceiling rosette or buy stucco decor separately only after checking their place in the overall composition.
Once the system is approved, you can You can buy ready-made stucco matching the Baroque style. Calculate the quantity: linear meters of cornices and moldings, number of rosettes, pilasters, consoles, corner elements. Add a ten to fifteen percent allowance for trimming. order the moldings for the project in the calculated quantity according to the new schedule. Start with one characteristic area where the main profiles and complex decor meet. After checking it, extend the solution to the remaining zones, taking into account their dimensions and constraints. The order should include the composition that has been verified jointly, not a set of independently appealing products.