Article Contents:
- High skirting board PLT-004 160×16 mm: what to check in the product card before ordering
- Why 160 mm are responsible for architecture, and 16 mm for mechanics
- Straight end of PLT-004
- Returning the profile to the wall
- Small gap from the aluminum frame
- Why can't you simply bring the tall skirting board PLT-004 up to the door leaf
- PLT-004 and the door painted together with the wall
- PLT-004 contrasting, hidden door
- PLT-004 with wood texture
- Hinge side and lock side: where PLT-004 requires different logic
- Door opens into the room or out of the room: why these are different assemblies for PLT-004
- Why a short section near a hidden door cannot be automatically made from the offcut
- Where to position longitudinal joints of PLT-004 relative to the hidden door
- PLT-004 in wall color: how to preserve the hidden door effect
- Hidden door opens wider than 90°: when the clearance at the end becomes critical
- Two hidden doors in one room: why PLT-004 ends need to be designed as a system
- Cost of one additional strip: when saving near the door is reasonable and when it is not
- Narrow wall section between a hidden door and a corner: how to decide whether PLT-004 is needed at all
- Hidden door next to an external corner: why one PLT-004 piece becomes the riskiest
- If PLT-004 runs on both sides of a hidden door
- Final specification of the door assembly before paying for PLT-004
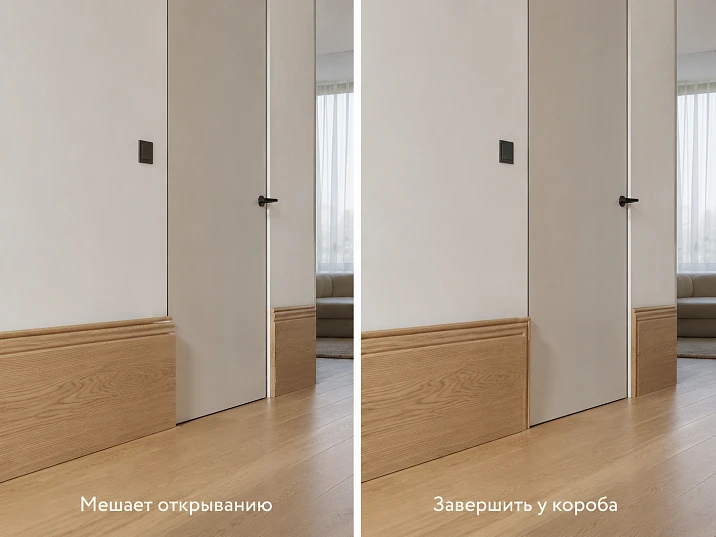
A hidden-mount door already forms one plane with the wall, there is no visible trim, and a tall PLT-004 with a height of 160 mm and thickness of 16 mm is planned around the room. In a regular doorway, the horizontal baseboard can be finished at the trim. With a hidden door, there is often no such "receiving" piece: nearby are a painted wall, a thin technical line of the aluminum frame, and a moving door leaf.
Therefore, the main question before purchasing is not "will a tall baseboard fit a hidden door at all," but more specifically:
where should PLT-004 end relative to the aluminum frame and the door leaf so that the end looks intentional and the door maintains the design opening angle?
Direct answer: PLT-004 can be used next to a hidden door if its 16 mm protrusion, actual end point, and mounting do not fall into the leaf's path and do not overlap the frame's technical elements. You need to check not only the closed position but the entire door travel from 0° to the working angle.
The 160 mm height defines the visual scale. But in the mechanical assembly of a door leaf, another number is often more important — 16 mm, i.e., the horizontal protrusion of the profile from the wall. It is this volume that can end up in the leaf's movement zone or create a sloppy step relative to the aluminum frame.
Before ordering the full batch, you need to go through the sequence:
-
determine the exact model of the hidden door system;
-
find the hinge side;
-
measure the position of the front plane of the aluminum frame relative to the finished wall;
-
establish which way the leaf opens and what working angle is required;
-
make a rigid template PLT-004 160×16 mm;
-
temporarily place it at the intended end point;
-
open the door several times from the closed position to the maximum working angle;
-
check the end face from the main viewpoint;
-
decide whether a straight end face, a return to the wall, or a deliberate setback from the box is needed;
-
only after this, calculate the actual segments and the number of planks 2400/2600 mm.
If the high profile is not yet finally approved, it is useful first to buy wooden baseboard only after comparing several geometries. If the room's architecture is already built around PLT‑004, then its specific unit with a hidden door is checked further.
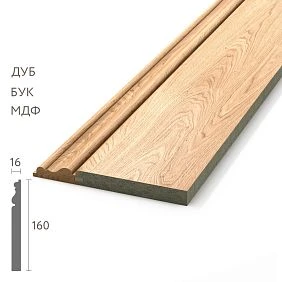
High plinth PLT‑004 160×16 mm: what to check in the card before ordering
The current product card shows three main execution lines:
| PLT-004 version | Size | Length | Price at the time of check | Status at the time of check |
|---|---|---|---|---|
| MDF | 160×16 mm | 2600 мм | 2,630 RUB | Custom Order |
| Beech/MDF/Beech veneer | 160×16 mm | 2400 мм | 7,790 RUB | Custom Order |
| Oak/MDF/Oak veneer | 160×16 mm | 2400 мм | 9,640 RUB | Custom Order |
Prices and status are fixed as of 29.08.2026 and may change. Before payment, you need to open the card again.
The first important limitation: wooden versions of PLT‑004 cannot be called a "solid oak" or "solid beech" plinth. The card describes a combined construction: the lower profiled part is based on MDF with wood veneer, and the upper decorative part is made of solid wood.
Therefore, in the article the following formulations are correct:
-
PLT-004 with oak and oak veneer;
-
combined oak finish;
-
beech/MDF/beech veneer;
-
oak/MDF/oak veneer.
It is incorrect to promise the customer solid wood throughout the entire cross-section.
For the door unit in question, the following is used Skirting / Door Trim PLT-004, but the double name "plinth / architrave" does not mean that for a hidden door it must necessarily be installed vertically as an architrave. The main scenario of the article is a horizontal floor profile.




Why 160 mm are responsible for architecture, and 16 mm for mechanics
The height of 160 mm determines:
-
how noticeable the horizontal line is;
-
how large the profile looks;
-
how it relates to a door 2–2.5 m high;
-
how noticeable the open end is.
A thickness of 16 mm determines something else:
-
how far the profile protrudes into the room;
-
whether the door leaf can come close to it;
-
what step the aluminum frame will have;
-
how far the end will protrude relative to the plane of the hidden door.
For a regular door, 16 mm is often "taken up" by the casing. For a hidden door, there is no casing, so this dimension becomes an independent part of the design unit.
Why the length of 2600 and 2400 mm affects the decision at the door
After the hidden opening, the horizontal line is broken into separate segments.
For example:
-
to the left of the door — 1780 mm;
-
to the right — 920 mm;
-
the next wall — 3150 mm.
For MDF 2600 mm and combined versions 2400 mm, the cutting map will be different. Sometimes the number of planks matches, but the location of joints changes. Sometimes one 2600 mm plank covers a section that a 2400 mm product already forces to divide.
This needs to be calculated before purchase, not after delivery.
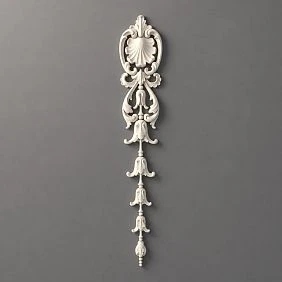
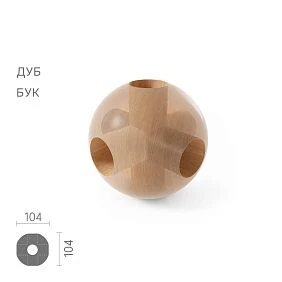
Our factory also produces:



Hidden-mount door without casing: why the baseboard becomes part of the door assembly
For a regular door, the logic is simple:
baseboard → casing → door leaf.
The casing covers the end of the horizontal profile and forms a natural vertical boundary.
For a hidden door, the scheme is different:
plinth → technological zone of the aluminum box → panel in the plane of the wall.
The familiar vertical detail disappears. As a result, the end of PLT‑004 becomes visible on its own.
This changes three tasks at once.
The first is mechanical.
The plinth must not interfere with the panel.
The second is architectural.
The endpoint should look intentional.
The third is finishing.
The exposed end has to be fully prepared and painted/tinted.
Why you can't just "run it to the box"
The aluminum frame of a hidden door is not a decorative trim. It contains:
-
a structural frame;
-
loop zone;
-
technological seams;
-
sometimes removable or adjustable elements.
If the baseboard is glued flush to the part of the frame that must remain accessible, subsequent door adjustment may become more difficult.
Why you can't just "bring it up to the door leaf"
The door leaf moves.
Even if there are 2–3 mm between it and PLT‑004 in the closed position, the nearest edge may describe an arc during rotation and approach the profile.
Therefore, a closed photo of the door does not confirm compatibility.
Get Consultation
What five dimensions to take before buying PLT‑004 baseboard
For a real solution, a small measurement sheet is needed.
1. Thickness of PLT-004 is 16 mm
This parameter is known in advance and becomes a control mock-up.
But the actual installed offset may depend on:
-
wall unevenness;
-
the mounting layer;
-
local shimming.
Therefore, after a dry template, it is advisable to check the actual strip as well.
2. Position of the front plane of the aluminum frame
Let us denote:
B — how much the fixed part of the frame protrudes or is recessed relative to the finished wall.
If the frame is flush, B ≈ 0.
If it protrudes by 3 mm, the 16 mm baseboard will extend further by about 13 mm more.
This is not automatically a defect, but such a step should be intentional.
3. Position of the panel in the closed state
A hidden door can:
-
match the wall;
-
have a minimal technological step;
-
open outward or inward into the room.
It is important to know which plane approaches the PLT‑004.
4. Working opening angle
Some doors require only 90°.
In another project, it is required:
-
100°;
-
110°;
-
the maximum angle allowed by the hinge.
The article does not prescribe a single angle for all systems. It is derived from the room's requirements and the door hardware documentation.
5. Minimum clearance on the trajectory
Let us denote:
S(α) — actual clearance between the nearest point of the moving panel and the PLT‑004 template at the opening angle α.
Condition:
S(α) > 0 along the entire working trajectory.
In practice, the actual installation and working margin of a specific system must also be considered, so the article does not declare universal 3 or 5 mm as a safe standard.
PLT‑004 and a door opening from the baseboard: when a collision occurs
On the hinge side of a hidden door, a conflict may appear where it is not expected.
Scenario 1. Door opens up to 90°
With a shallow assembly depth, the 16‑mm profile may not interfere at all.
But this is only confirmed by testing.
Scenario 2. Door must open wider than 90°
As it turns, another part of the panel or handle may approach the end of the PLT-004.
What works at 90° does not prove compatibility at 110°.
Scenario 3. Hinges are located right next to the end of the plinth
Here the geometry is especially sensitive.
A concealed hinge can provide complex panel movement:
-
turn;
-
slight offset;
-
change in the position of the nearest edge.
Scenario 4. PLT-004 protrudes further than the aluminum frame
Even with a perfectly flat wall, the 16-mm protrusion may be the most protruding part in the lower section of the assembly.
Scenario 5. Handle or magnetic hardware approaches the profile
If the handle is positioned low or the door opens toward the wall, not only the panel but also the hardware must be checked.
Why a mockup is more important than calculating "by eye"
You need to place a rigid block or template 160×16 mm at the box against the actual line of the future baseboard and open the door:
-
by 5–10°;
-
by 30°;
-
at 60°;
-
by 90°;
-
to the full working angle.
Contact may occur in an intermediate position and disappear when fully open.
Wooden baseboard at a hidden door: four ending options
There is no single mandatory method. There are four stable scenarios.
| Node | Appearance | Difficulty | For MDF | For the combined wood version | Main check |
|---|---|---|---|---|---|
| Straight end | Minimalist | Low | Yes | Yes | End face cleanliness and gap |
| Return to wall | Architectural | Medium/high | Yes | Yes | Miter cuts and location |
| Deliberate offset from the frame | Modern | Low | Yes | Yes | Same line |
| Approach to the production line | Integrated | High | Only after checking | Only after checking | Door and frame service |
Straight end face PLT-004
The plinth ends perpendicular to the wall.
Strengths:
-
simple geometry;
-
easy to control the distance to the box;
-
minimum of additional details.
The weak point is the visible end face, 160 mm high. It must be perfect.
Returning the profile to the wall
The short piece covers the cross-section and brings the relief back to the plane of the wall.
Such a joint looks more finished, but requires:
-
precise miter cuts;
-
additional length;
-
free space;
-
trial assembly.
A small offset from the aluminum box
Between the end of PLT-004 and the box, a visible field of the wall remains.
This can be the cleanest modern solution if the setback looks intentional rather than like an accidental gap.
There is no universal number.
Extending the profile to the technological line of the box
Possible only when:
-
the box is stationary in this area;
-
the door passes;
-
adjustment is not blocked;
-
the door system manufacturer does not require free access.
Why you cannot simply extend the tall baseboard PLT-004 to the door leaf
Five real reasons to reject such an approach:
-
the panel may catch the profile;
-
the end face reveals the position of the hidden door and ruins the effect of a "single wall";
-
an accidental narrow gap forms;
-
access to the box and adjustment becomes more difficult;
-
the design opening angle decreases.
There is a sixth reason: the visibility of the end face. The high 160 mm provides a large vertical surface that is clearly readable from a distance.
If the end face has to be placed almost in line with the panel, it can become the main element of the assembly instead of the hidden door itself.
MDF baseboard PLT-004 at a hidden door: how to finish the end face under enamel
For a paintable interior, MDF is often the most technologically suitable.
If the project is based on painted walls, you can buy MDF skirting board after checking the cross-section.
What happens after trimming
Even if the face surface is prepared, the fresh end after cutting requires local treatment.
It differs:
-
by absorption;
-
density;
-
the color;
-
texture.
Practical procedure
-
Make the final cut.
-
Check the dry fit.
-
Prepare the end.
-
Perform the priming operation according to the selected system.
-
Apply the finish together with the face part or in coordination with it.
Why the end face cannot be "touched up later with a brush" without testing
At a height of 160 mm, the change in gloss and orange peel is noticeable.
If PLT‑004 is painted in the wall color, local touch-up must match not only the code, but also the texture.
Hidden door in wall color
This is one of the strongest scenarios for MDF:
-
wall;
-
the panel;
-
PLT‑004
can be combined into one color system.
But the end face itself still must be neat, because the geometric line remains.
PLT‑004 with oak or beech veneer: why the open end face is designed in advance
For wood finishes, the end face problem is more complex.
The combined structure contains MDF, veneer, and a solid decorative part. After a cross cut, the structure of different materials may be visible on the end face.
Therefore, it cannot be thought of as an ordinary "cross-section of a solid oak."
What to agree on before ordering
-
where exactly the end is located;
-
whether it is visible from the hallway/room;
-
whether it will be painted with an opaque finish;
-
whether a clear or semi-transparent finish will be used;
-
is a return needed.
If the wood texture is preserved
A random exposed end can look technical.
It is better to make a test piece in advance and view it at actual scale.
If the profile is painted with an opaque finish
The combination of the base is less noticeable, but the end still requires preparation.
Why the leftover from another wall is not always the best material for a door end
It can:
-
have a previous miter cut;
-
be too short;
-
differ in veneer pattern;
-
contain a local defect.
At the most visible point of a hidden door, it is better to use a controlled part.
High baseboard 160 mm and a hidden door matching the wall color: three design schemes
Mechanical compatibility is the first condition. After that, visual logic is assessed.
PLT‑004 and the door are painted together with the wall
The calmest scenario.
if:
-
wall;
-
the door leaf;
-
MDF version of PLT-004
they get one covering color, the hidden door preserves the effect of a single plane.
The high profile remains visible due to:
-
of the relief;
-
shadows;
-
top line of 160 mm.
Advantage — the edge near the door can be made less contrasting.
But "one color" does not make poor geometry unnoticeable. If the edge is 2 mm from the panel and forms a random gap, it is still visible.
PLT-004 contrasting, hidden door
For example:
-
wall and door are light;
-
baseboard is dark.
Then the horizontal line becomes very active.
At the hidden opening, it must end deliberately, because any random end is more visible.
In such a project, the following are especially important:
-
identical ending points on both sides of the opening;
-
clean edges;
-
absence of a random joint 100–200 mm from the door.
PLT-004 with wood texture
If combined oak/MDF/oak veneer is used, the baseboard becomes an independent material line.
The hidden door can remain painted.
Then the end near the aluminum frame no longer "dissolves" — it becomes part of the composition.
For such a joint, it is useful to make a real sample:
wall + aluminum profile + PLT-004 end + door leaf.
Making a decision based on a photo of the material in the card is weaker.
How to check a hidden door with a physical template PLT‑004 160×16 mm
The most reliable test is not a calculation in SketchUp, but a full-scale mock-up on site.
What you need
Minimum:
-
a rigid strip 160 mm high;
-
actual thickness 16 mm;
-
length 300–500 mm;
-
the exact line of the future end face.
It is best to use a piece of the actual profile, but for checking kinematics, a rigid mock-up of the appropriate thickness is sufficient.
Step 1. Place the template at the design point
It should be located where the front surface of PLT-004 will be after installation.
Not 5 mm closer "for convenience."
Step 2. Close the door
Check:
-
gap to the box;
-
position of the end;
-
view from the main viewpoint.
Step 3. Open slowly
Pay special attention to:
-
the first 5–15°;
-
the zone around 90°;
-
the last working section.
Step 4. Check the handle
The handle or the edge of the panel must not approach the profile more dangerously than the panel itself.
Step 5. Check the adjustment zone
If access to the concealed hinge or box is needed after finishing, PLT-004 must not block it.
Step 6. Repeat several cycles
A single careful pass does not reflect real-world operation.
Criterion
Not just:
"the door opened."
But:
"the door opens freely to the design angle, without contact, without needing to deflect the panel by hand, and without blocking service elements."
Hinge side and lock side: where PLT-004 requires different logic
For a concealed door, the two sides of the opening may require different solutions.
Hinge side
Here, the priority is kinematics.
This is where they most often check:
-
panel movement;
-
hidden hinge;
-
opening angle;
-
the nearest door corner.
Sometimes the end of PLT-004 has to be moved further away from the box.
Lock side
Movement is usually easier.
But the following remain:
-
magnetic strike plate;
-
technological line of the box;
-
visual symmetry.
Should the indentation be the same on both sides
Not necessarily mechanically.
If the loop side requires more free space, technical asymmetry is acceptable.
But it needs to be checked visually.
In some projects, it is better to make an equal larger indent on both sides so that the composition looks intentionally symmetrical.
This is already a design decision after the technical minimum.
The door opens into the room or out of the room: why these are different nodes for PLT-004
The panel opens towards the room with the baseboard.
PLT-004 is directly involved in the movement zone.
Kinematic test is mandatory.
The panel opens in the opposite direction.
The risk of direct collision with the front part of the plinth may be lower.
But the end still needs to be aligned with:
-
aluminum box;
-
technological seam;
-
finishing.
The door opens in both directions or has a special hinge
Recommendations for a regular swing door cannot be transferred.
Data for the specific system must be obtained.
How to calculate the number of PLT‑004 if a hidden door breaks the perimeter
Usual formula:
room perimeter − width of the doorway
for a hidden door is insufficient.
Need to count the real visible segments.
Let us denote:
L1 + L2 + L3 + ... + Ln.
Each L — the area where PLT-004 will actually be installed.
Why the endpoint affects the length
Let's imagine:
-
from the corner to the aluminum box — 1830 mm;
-
mechanically, the end needs to be finished 50 mm earlier.
Working part:
1780 mm.
On the other side of the opening:
920 mm.
These two segments cannot be automatically merged into one line through the doorway.
Returns are also included in expenses
If a short return is needed on each end, it requires a separate length.
Don't count it simply as 16 mm: the actual part depends on the profile and the miter joint.
Built-in furniture
If PLT-004 is not installed behind the built-in cabinet, this section is excluded.
But behind movable furniture, the profile is usually better to keep.
PLT-004 2400 or 2600 mm: how a hidden door changes the cutting layout
The 200 mm difference seems small, but on borderline segments it changes both the number of planks and the number of joints.
Example 1. Segments 1780 + 920 + 3150 mm
Sum:
5850 mm.
MDF 2600 mm
Possible layout:
-
plank 1 → 1780;
-
plank 2 → 2600 from wall 3150;
-
plank 3 → 920 + 550.
Three planks.
Combined version 2400 mm
-
plank 1 → 1780;
-
plank 2 → 2400 from wall 3150;
-
plank 3 → 920 + 750.
Also three planks.
Conclusion: difference in length does not always change the quantity. Sometimes it only changes the remnants and the position of the joint.
Example 2. One critical segment 2520 mm
For MDF 2600:
-
one solid piece;
-
nominal remnant 80 mm before accounting for trimming.
For version 2400:
-
a one-piece part is impossible;
-
A joint is needed.
Here, 200 mm fundamentally change the quality of the visible line.
Example 3. Four segments 2520 + 2300 + 2300 + 2300 mm
Total length:
9420 mm.
For MDF:
4 × 2600 = 10,400 mm.
Each segment can be covered with a separate one-piece plank — 4 planks.
For the 2400 mm version:
-
three segments of 2300 take three planks;
-
the 2520 section requires 2400 + 120;
-
the remaining 120 mm does not fit into the 100 mm leftovers from the 2300 planks.
Total required: 5 planks.
This is a good example where the same total length results in a different number of purchased items due to SKU length.
Product cost of this conditional example
As of 29.08.2026:
MDF:
4 × 2,630 = 10,520 RUB
Beech/MDF/beech veneer:
5 × 7,790 = 38,950 RUB
Oak/MDF/oak veneer:
5 × 9,640 = 48,200 RUB
This is not a "comparison of equivalent materials" nor a recommendation to choose MDF solely by price. The table shows the commercial cost of changing the material in a specific cutting layout.
Why a short section near a hidden door cannot be automatically made from the remainder
Near an opening, a short segment is often needed:
-
300 mm;
-
500 mm;
-
900 mm.
It is logical to use the remainder from another wall. But this is not always better.
The remainder may have a previous cut
If one end is already cut for an internal corner, the useful length is shorter.
There may not be enough clean edge
At a hidden door, the edge is the most visible part.
A technical remainder with a small chip is suitable behind a cabinet, but not near a door.
For the wood version, the pattern is important
A combined profile with veneer may have a direction and shade that is especially noticeable near the door.
The remainder can create an extra joint.
Sometimes it's better to take a whole new plank, and save the short remainder for a less visible area.
Where to place the longitudinal joints of PLT‑004 relative to the hidden door
The rule is simple:
most visible area → most seamless plank.
If the hidden door is on the central wall, don't place a longitudinal joint 100–300 mm from its edge just to save material.
Undesirable places
-
right next to the aluminum frame;
-
in the center of the feature wall;
-
under strong side lighting;
-
near the outer corner.
More subtle places
-
behind furniture;
-
on a short wall section;
-
in the curtain zone;
-
where the joint naturally falls into a less visible part.
Why a joint and an end next to each other is a double complexity
The end of a hidden door already requires:
-
treatment;
-
painting;
-
precise geometry.
If a longitudinal joint is also nearby, two lines appear in one small area, which may show after finishing.
How to compare two purchase plans: minimum planks and minimum visible joints
For expensive trim, it is useful to calculate two scenarios.
Option A — minimum purchase cost
All leftovers are used to the maximum.
Advantages:
-
fewer planks;
-
less waste.
Disadvantage:
-
more seams on visible walls.
Option B — minimal number of visible joints
Main walls get long continuous sections.
Advantages:
-
cleaner interior;
-
simpler finish.
Disadvantage:
-
sometimes an additional strip is needed.
What to choose for a hidden door
The door assembly itself is already complex.
Therefore, it's better not to turn the parts closest to it into a zone of maximum savings.
PLT-004 in wall color: how to preserve the hidden door effect
If the door and wall are painted the same color, PLT-004 can support this logic.
MDF version
Most predictable under a covering paint.
After dry fitting:
-
the end face is prepared;
-
the profile is painted;
-
the end point is controlled by laser/marking.
What can ruin the effect
-
too large random indentation;
-
too small gap;
-
crooked end face;
-
distinctive shine;
-
joint next to the door.
A height of 160 mm will still remain noticeable
A hidden door 'disappears' into the wall, but a tall baseboard creates a strong horizontal line.
This is not a contradiction if the project provides for it.
Contrasting PLT-004 at a hidden door: why the end point becomes the main element
If the profile is dark or wood-toned, and the door is light, the end inevitably attracts attention.
Here, the following are especially useful:
-
straight end with a perfect finish;
-
return;
-
symmetrical setback on both sides of the opening.
You cannot expect the contrasting end face to "get lost."
How to check the adjustment of a hidden door after installing PLT‑004
Hidden doors may periodically require adjustment of hinges or the lock.
Before final gluing of the profile, you need to understand:
-
where the access to the adjustment screws is;
-
whether the decorative cover can be removed;
-
whether the baseboard overlaps the service part of the frame;
-
whether the door leaf can be removed if necessary.
Why this is important
The baseboard lasts longer than the first door adjustment.
If you have to break the end face later to gain access, the assembly is designed incorrectly.
Side cutaway of a hidden door: how to check the 16 mm offset of PLT-004 without guesswork
The frontal photo shows a height of 160 mm, but it does not answer the main mechanical question. For that, a side cutaway at the baseboard level is needed.
Let us conventionally denote:
-
W— the plane of the finished wall; -
T = 16 mm— nominal thickness of PLT-004; -
B— position of the front plane of the fixed aluminum frame relative to the wall; -
G— horizontal offset of the baseboard end from the selected fixed line of the frame; -
R(α)— actual clearance between the moving panel and the nearest point of PLT-004 at the opening angleα.
If PLT-004 is installed without an additional leveling layer, its front surface is approximately at the plane:
W + 16 mm.
But the box can:
-
be flush with the wall;
-
protrude;
-
be slightly recessed.
Therefore, you cannot compare 16 mm only with the door thickness. You need to look at the entire cross-section.
Mechanical compatibility condition
For the working range of angles:
R(α) > 0
along the entire trajectory from the closed position to the design angle.
This is a mathematical representation of a simple physical test. The article does not specify a minimum regulatory clearance because it depends on the door system, installation tolerances, and manufacturer requirements.
Why the end face may not interfere at 0°, but interfere at 30°
Hidden hinges often have multi-link kinematics. The door leaf does not have to rotate around a simple axis on the edge itself. It can simultaneously:
-
rotate;
-
shift slightly;
-
change the position of the outer plane.
Therefore, the critical R(α) may occur in the middle of the movement.
How to turn a cross-section into a practical test
Make a block or template 16 mm thick and 160 mm high.
Place it at the end point.
Then, with a marker on the painter's tape, record:
-
closed position;
-
first convergence;
-
minimum actual clearance;
-
position at the maximum angle.
This way, the furniture-construction joint is checked without trying to guess the kinematics from a photo of the hinge.
A hidden door opens wider than 90°: when the clearance at the end becomes decisive
In many rooms, 90° is sufficient. But there are scenarios where the door leaf must open wider:
-
passage with large furniture;
-
narrow corridor;
-
the door is constantly left fully open;
-
there is a cabinet nearby;
-
maximum useful width is required.
If the door is designed to open 110°, testing up to 90° proves nothing.
Example
With template PLT‑004:
-
up to 92° there is no contact;
-
at 100° the edge of the panel approaches the end face;
-
at 106° contact occurs.
Such an assembly cannot be considered compatible just because "the door opens normally."
You need to either:
-
increase G;
-
change the shape of the ending;
-
choose a thinner profile;
-
accept a smaller angle, if the project allows it.
The last option should be a conscious decision, not a random consequence of the baseboard.
Two hidden doors in one room: why PLT-004 ends need to be designed as a system
If there are two hidden doors in a room, each joint may be mechanically different:
-
one door opens into the room;
-
the other opens out of the room;
-
one has hinges on the left;
-
the other has them on the right.
But visually, the ends of PLT-004 are visible simultaneously.
What is being recorded
For each door:
-
the hinge side;
-
G on the left;
-
G on the right;
-
end type;
-
color;
-
length of adjacent segments.
Why you cannot mechanically copy the first node
The first door may have enough minimum clearance.
The second one hits the panel with the same clearance.
How to maintain visual unity
After determining the technical minimums, a general architectural principle is chosen:
-
identical large indents;
-
identical straight ends;
-
identical returns;
-
a single color.
That is, mechanics define the lower limit of what is acceptable, while design determines the final position.
Cost of one additional plank: when saving near the door is reasonable, and when it is not
Current cost of one plank as of 29.08.2026:
-
MDF 2600 mm — 2,630 RUB;
-
beech/MDF/beech veneer 2400 mm — 7,790 RUB;
-
oak/MDF/oak veneer 2400 mm — 9,640 RUB
If the cutting layout balances between five and six slats, the price of the solution differs noticeably.
MDF: 5 vs 6
5 slats:
13,150 RUB
6:
15,780 RUB
The difference:
2,630 RUB
Beech/MDF/beech veneer
5:
38,950 RUB
6:
46,740 RUB
The difference:
7,790 RUB
Oak/MDF/oak veneer
5:
48,200 RUB
6:
57,840 RUB
The difference:
9,640 RUB
Why you shouldn't save the ninth thousand at the cost of a poor joint
For the oak combined finish, the cost of an additional plank is high.
But if saving leads to:
-
a joint 150 mm from the hidden door;
-
a short residual end;
-
to a different veneer pattern;
-
the need to divide a wall of 2520 mm,
then the buyer should compare the price of the plank with the cost of a visual compromise.
When an additional plank is truly unnecessary
If the existing remainder:
-
is long enough;
-
has a clean end;
-
matches the pattern;
-
does not create an extra joint,
there is no need to buy a new plank just "just in case."
How to accept a long PLT-004 up to the finish and trimming at the door
A critical part at a hidden box cannot be cut immediately after delivery.
First, you need to accept the entire batch.
Check
-
article number;
-
execution;
-
length;
-
cross-section 160×16 mm;
-
surface quality;
-
absence of transport damage;
-
Quantity.
Lay out by future segments
Marking can be simple:
-
A1 — main length
Mistake 15. Buying PLT-004 if a more compact profile solves the assembly significantly better
The article number should not dictate poor geometry.
When a tall PLT-004 160 mm near a hidden door is better not to buy
There are projects where the product fits the room style but does not fit the specific door assembly.
The door system requires a completely free hinge zone
If the door manufacturer explicitly requires not covering the lower part of the frame, PLT-004 must not violate this condition.
The profile limits the design opening angle
This is a direct technical rejection.
If the door must open 110°, but with the PLT-004 mockup it only passes freely up to 92°, buying this profile for this assembly is impractical.
The end face ends up too close to the door leaf
If visually a random narrow gap remains between the end face and the door, it is better to change the termination point or choose a different profile.
The 160-mm line conflicts with a minimalist hidden door
A hidden door can be part of a very strict interior.
A tall classic PLT-004 in such a room sometimes becomes too prominent.
The wall section next to the door is too narrow
For example, 180 mm remains between the aluminum box and the inner corner.
A profile 160 mm high does not "not fit" in height, but a short horizontal section 180 mm long may look like a random decorative block.
Complex shaped trimming is required
If you have to cut out part of the PLT‑004 relief to preserve the opening, this is a signal to reconsider the solution.
A tall profile should retain its pattern, not turn into a technical patch.
A more compact baseboard gives a cleaner result
Then it's better buy a wooden baseboard of a different geometry than forcing PLT‑004 to work where its 160×16 mm interferes with the door.
Narrow wall section between a hidden door and a corner: how to decide whether PLT‑004 is needed at all
Let's imagine that from the box to the wall:
240 mm.
After a technical retreat, a working segment remains at the door:
190 mm.
Physically, installing PLT-004 is possible.
But we need to assess not only the feasibility, but also the visual value.
Why 190 mm may look heavy
Profile height:
160 mm.
This results in an almost square decorative area.
On it are simultaneously located:
-
the end of the door;
-
internal or external corner;
-
only 190 mm of horizontal line.
Options
-
Install a short PLT-004 and maintain the overall horizontal line.
-
Finish the baseboard at another architectural boundary.
-
Use a more compact profile in this section.
-
Reconsider the baseboard of the entire wall if a short piece looks accidental.
How to solve
Make a full-size paper mockup 160 mm high directly on the wall.
Short sections are especially hard to evaluate from a top-down plan.
Hidden door next to an external corner: why one PLT-004 part becomes the riskiest
If there is a short wall section between the door and the external corner, one part gets two complex ends:
-
end/return at the hidden box;
-
external mitered corner.
For example:
L = 620 mm.
Why can't you just cut off 620 mm immediately
The actual length depends on:
-
the long point of the outside corner;
-
the miter cut system;
-
the position of the end near the door.
Correct order
-
Make the corner joint on a long workpiece.
-
Try it against the wall.
-
Place the door template.
-
Mark the actual end point.
-
Only then make the second end.
Why the wood version requires a particularly good site
On the 620 mm part, almost the entire surface is in view.
A previous veneer defect or an unsuccessful color transition will be noticeable.
If PLT-004 runs on both sides of a hidden door
In the opening, the plinth is interrupted by the width of the door and resumes on the other side.
The ends work as a pair.
Symmetric scenario
Both ends have the same offset from the frame.
Visually, this is the calmest option.
Asymmetric technical scenario
The hinge side requires 35 mm, the lock side — 15 mm.
Technically, this may be correct.
But visually, the difference is noticeable.
The third way
Choose the same larger offset:
35 mm on both sides.
This may give a cleaner composition if the extra margin does not interfere with the style.
The numbers here are just an example. The actual offset is determined by the door system and the layout.
If there is a different baseboard in the adjacent room
A hidden door often separates rooms with different finishes.
For example:
-
living room — high PLT‑004;
-
corridor — a lower straight profile.
This is acceptable.
Where the transition occurs
The doorway becomes an architectural boundary.
It is not necessary to force two baseboards to match:
-
by height;
-
profile;
-
material.
What should be coordinated
-
end points;
-
color of ends;
-
floor line;
-
view of the open door.
Why a hidden door helps
The absence of a casing makes the transition more minimalist if both ends are finished with high quality.
High PLT-004 and door leaf painted after installation
If the door and walls have not yet received the final enamel, it is more convenient to resolve the baseboard geometry before painting.
First, the mechanics
-
install the template;
-
check the opening;
-
choose the end.
Then finishing
The MDF version can be painted in the same system as the wall/door, if the project provides for it.
Why you can't first paint, then "move by 10 mm"
After moving:
-
an unpainted area of the wall is exposed;
-
the edge of the enamel changes;
-
local repair is required.
The end point must be part of the painting project.
If the hidden door is already fully painted
Then installation of PLT-004 becomes a finishing operation.
Need to especially control:
-
glue;
-
tool;
-
paint protection;
-
fresh end grain;
-
contact of the door leaf.
Do not use the door leaf as a support
During fitting of the long strip, do not lean it against the finished door.
The high profile may damage the coating.
How to check PLT-004 after final installation
The preliminary mock-up does not cancel the final acceptance.
Closed position
Check:
-
gap uniformity;
-
end face verticality;
-
absence of glue on the box;
-
Color.
Opening
The door is tested:
-
slowly;
-
to the working angle;
-
several cycles.
Door service
If hinges are adjustable, check access.
Adjacent furniture
If there is a nearby:
-
wardrobe;
-
console;
-
dresser,
check whether the 16 mm protrusion creates a new conflict.
Final specification of the door assembly before payment PLT-004
It is useful to record one short block.
Example for MDF:
PLT-004 / MDF / 160×16×2600 mm / Prestige / ___ slats / hidden door ___ / hinges ___ / working angle ___° / edge at ___ mm from the fixed box line / straight edge or return / color ___ .
Example for oak combined finish:
PLT-004 / oak-MDF-oak veneer / 160×16×2400 mm / Prestige / ___ slats / open wood edge ___ / finish ___ / short segment near the door ___ mm / reserve ___ .
What the specification provides
It connects:
-
product card;
-
door mechanism;
-
finishing;
-
cutting.
If it still contains words:
"the end roughly near the door,"
the project is not ready for ordering yet.What to send to manager STAVROS before ordering PLT-004
The manager needs to confirm the product, not design the door hinge from a photo. But a good request helps avoid errors in the article number and configuration.
Prepare:
-
article number PLT-004;
-
selected material;
-
photo of the door closed;
-
photo of the open door;
-
name/brand of the door system;
-
the hinge side;
-
required opening angle;
-
photo of the aluminum frame at the bottom;
-
selected end assembly;
-
lengths of all segments;
-
calculation of the number of slats;
-
color or type of finish.
Ready-made wording
"For a room with a hidden door, we plan PLT-004 160×16 mm. Hinge side ___, working door angle ___°. Layout 16 mm checked, profile end is placed at ___ mm from the fixed box line. Visible segments: ___. Please confirm current price, availability of ___ execution, plank length, production time, and packaging."
What needs to be clarified separately for the current order
At the time of checking, the card shows:
-
MDF — 2630 RUB;
-
beech/MDF/beech veneer — 7790 RUB;
-
oak/MDF/oak veneer — 9640 RUB;
-
Average production time for custom orders is 5–10 days.
These data change.
Where to buy high plinth PLT-004 after checking the hidden door
After the technical test, you can proceed to ordering.
If you need the exact current model, after calculating the visible segments you can buying the tall baseboard PLT-004 160×16 mm.
If the project requires comparing adjacent profiles and moldings, the section is useful Wooden trim.
The final commercial action should follow the door test: order plinth PLT-004 should only follow after confirming the end, trajectory, and the 2400/2600 mm map.
Final check before payment
Before placing an order, consolidate four data groups into one sheet: product, door, end, and cutting layout. The product section must include the specific 160×16 mm and the length of the selected version — 2600 or 2400 mm. The door section must include the hinge side, direction, and working angle. The end section must include the actual termination point and finish type. The cutting layout must include the number of each plank and future parts.
If after the control mock-up the end shifts by even a few centimeters, the short parts near the door are recalculated before cutting. For most rooms, this will not change the total quantity, but it may change which offcut the section comes from and where the adjacent joint ends up.
Such a final sheet is especially useful if the baseboard and hidden door installation are done by different contractors: both work with the same geometry rather than verbal "bring it roughly to the frame."
Control after final painting
After finishing, the door is reopened to the full design angle. This is necessary even if the dry mock-up worked perfectly: the actual position of PLT‑004 is determined by the mounting layer, the final wall plane, and the exact end position. Not only the absence of contact is checked, but also the integrity of the paint on the nearest edge of the door panel and baseboard. If local contact appears, first determine the cause — profile shift, door adjustment, or end error — and only then adjust the assembly. Sanding the decorative profile blindly after finishing is not recommended.
Final decision tree: does PLT‑004 fit the hidden door
Step 1. Is PLT‑004 suitable in style and height of 160 mm?
-
no → choose another profile;
-
Yes → continue.
Step 2. Is the current version selected?
-
MDF 2600;
-
beech/MDF/beech veneer 2400;
-
oak/MDF/oak veneer 2400.
Step 3. Is the hinge side known?
-
no → get door data;
-
Yes → continue.
Step 4. Is a 160×16 mm mockup made?
-
no → do it;
-
Yes → continue.
Step 5. Does the door pass the full working angle without contact?
-
no → change the end point/profile;
-
Yes → continue.
Step 6. Is service access to the box and hinges maintained?
-
no → move or change the node;
-
Yes → continue.
Step 7. Is the end type selected?
-
straight;
-
return;
-
deliberate indentation;
-
approach to the permitted box line.
Step 8. Is the end face checked against the material?
MDF — preparation for enamel.
Combined wood version — separate check of the visible cut.
Step 9. Is a map of real segments built?
-
no → do not buy by the total perimeter;
-
Yes → continue.
Step 10. Is 2400 versus 2600 mm checked?
-
no → compare maps;
-
Yes → continue.
Step 11. Are the joints moved away from the most visible zone near the door?
-
no → reassemble the map;
-
Yes → continue.
Step 12. Only after this, place the order.
FAQ
What is the size of PLT‑004?
Main cross-section — 160×16 mm. MDF has a length of 2600 mm, current combined versions with beech/oak — 2400 mm.
How far does PLT-004 protrude from the wall?
The nominal profile thickness is 16 mm. The actual installed offset must be checked considering the base and installation.
Can PLT-004 be placed near a hidden door?
Yes, if the layout confirms a clear path for the door leaf and service access to the frame.
Will the baseboard interfere with the door opening?
It may interfere on the hinge side or at a large opening angle. This is checked physically.
Where should PLT-004 end on the hinge side?
At a point that is outside the door's operating path and does not block frame adjustment. There is no universal offset.
Is a gap needed between the baseboard and the aluminum frame?
Sometimes yes. Its size depends on the specific system and the chosen aesthetics.
Can the plinth be brought directly to the canvas?
Without checking, it should not be done: the canvas is a moving part.
How to finish the end of PLT-004 made of MDF?
After the final cut, the end is prepared and painted in the agreed system.
How to finish the end of the oak veneer version?
The combined structure must be considered, and the finishing or return method should be chosen in advance.
How to calculate the number of planks near the hidden door?
First, list all actual segments, then distribute them by 2600 or 2400 mm. Simple division of the perimeter is not enough.
What is the length of PLT-004 made of MDF?
2600 mm in the current product line.
What is the length of the version with oak or beech?
In the top current SKU table — 2400 mm.
Can PLT-004 be painted to match the color of a hidden door?
Yes, this scenario is especially logical for MDF if the entire finishing system is agreed upon in advance.
When is it better to choose a lower baseboard?
If the 160-mm profile overloads a minimalist opening, does not fit on a short partition, or interferes with the door mechanism.
Can PLT-004 be used as a casing for a hidden door?
The card name allows the casing function in general, but for a hidden door, vertical application requires separate design and is not mandatory.
Why can't the oak version be called solid wood?
The card describes it as a combined product with MDF, veneer, and a decorative part made of solid wood.
Short conclusion
A tall PLT-004 can work well with a concealed door, but only if the baseboard ceases to be perceived as an independent "strip around the perimeter" and becomes part of the door assembly.
The check proceeds in the correct order:
concealed door system → hinge side → working angle → mockup 160×16 mm → panel trajectory → end point → material and finish → real segments → map 2400/2600 mm → order.
The MDF version at 2600 mm is convenient for paint-grade finishing and reduces the number of joints on some boundary walls. Combined options with beech or oak at 2400 mm provide wood texture but require more careful design of the open end and cutting layout.
If PLT-004 limits opening, overlaps the adjustable part of the frame, or requires an unattractive shaped cut, the product should not be recommended at any cost. A more compact baseboard will yield a more professional result.
If the mockup confirms the mechanics, the end looks intentional, and the segment map is calculated before payment, PLT-004 160×16 mm becomes not a conflict with the concealed door but a strong architectural horizontal that neatly ends at the technical opening.
-