Article Contents:
- Quick answer: when should you use preformed molding corners?
- What is a polyurethane corner molding?
- Preformed corners versus 45-degree miters: an honest comparison
- Actual STAVROS products: matching corners with straight trim
- Which molding corner looks right in an American home?
- Minimalist and contemporary interiors
- Transitional, modern-classic and neoclassical rooms
- Traditional and ornamental interiors
- 1. Face width and edge geometry
- 2. Depth or projection
- 3. Ornament, scale and orientation
- 4. Material and finish system
- Living room: picture-frame molding behind the sofa
- Dining room: classic wall-panel rhythm
- Bedroom: one calm panel behind the bed
- Entryway: detail without reducing circulation
- Home office, built-ins and cabinet fronts
- Worked example 1: one 40 × 60 in frame with small floral corners
- Worked example 2: three large frames with MLDPU-002U corners
- Small-scale accent panel
- Statement dining-room panel
- Softly rounded wall frames
- Step 1: confirm the complete assembly on a flat surface
- Step 2: transfer the layout to the wall
- Step 3: cut and label straight sections
- Step 4: choose the correct adhesive and install
- Step 5: fill joints carefully
- Step 6: prime and paint as a unified system
- Are decorative molding corner pieces necessary for picture-frame walls?
- Do corner blocks fit any polyurethane molding?
- Can I use polyurethane corner molding on drywall?
- What is the difference between molding corners and door casing corner blocks?
- How many corner pieces do I need for three rectangular panels?
- Can I paint preformed polyurethane corners the same color as the wall?
- Is MLDPU-027U-2 compatible with both sizes of MLDPU-027?
- Are polyurethane molding corners waterproof?
- Can decorative molding corners support shelves or lights?
- Is a 102.36-in molding strip the same as an 8-ft board?
- How much extra molding should I order?
- Can I use polyurethane molding corners on cabinet doors?
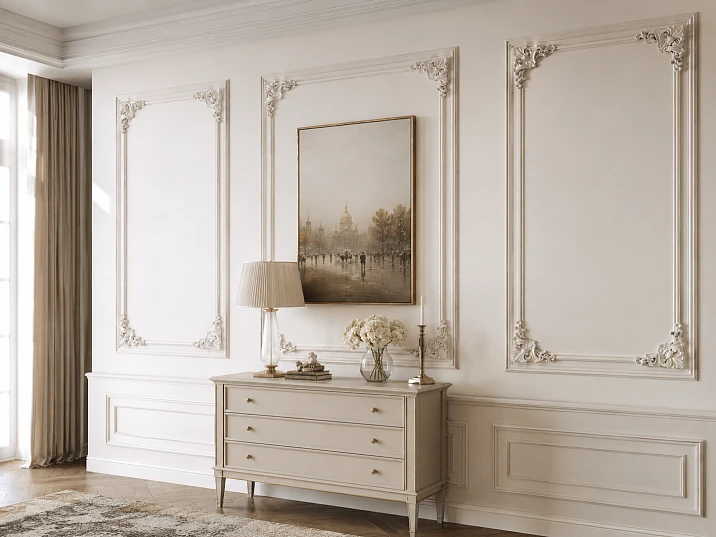
Decorative wall frames look simple until you try to make four corners look exactly alike. A small shift in a miter, a relief pattern that fails to line up, or a molding strip cut just a fraction too short can turn an otherwise balanced accent wall into a collection of visible joints. Polyurethane corner molding offers another approach: a preformed decorative corner establishes the turn, and straight lengths of picture-frame molding connect to it. The result can look architectural rather than improvised—provided the corner piece and the straight profile actually belong together.
For U.S. homeowners, designers, and finish carpenters, the useful search terms are decorative molding corner pieces, polyurethane wall molding corners, picture frame molding corner blocks, and applied wall molding. These are not the same as an outside corner guard for drywall, a square casing block around a door, or a structural connector. They are decorative components within a paintable wall-frame system.
This guide explains the choice between preformed corners and 45-degree miter joints, shows genuine STAVROS polyurethane product combinations with dimensions converted to inches, gives two working measurement examples, and covers installation and finishing. The emphasis is on a practical U.S. renovation: drywall walls, familiar paint systems, room dimensions in feet and inches, and a shopping list based on actual cut lengths rather than an attractive photograph.






Quick answer: when should you use preformed molding corners?
Use decorative polyurethane corner pieces when you want a pronounced ornamental turn, are repeating numerous identical wall frames, or need to reduce the amount of angled cutting. Use ordinary 45-degree miter joints when you want a continuous, almost invisible trim profile or a simple contemporary picture-frame wall. Neither method is automatically superior. Preformed corners still require square layouts, accurate straight cuts, reliable adhesion, and a compatible profile.
Start by choosing the polyurethane molding corner and accent collection, then compare each corner with its straight molding counterpart. A visually similar corner from a different series can have a different projection, bead shape, return detail, or attachment point. A test assembly is worth far more than assuming parts fit because both are labeled “polyurethane.”




What is a polyurethane corner molding?
In decorative wall-panel work, a corner molding is a molded piece that forms a frame's turn. Some pieces have a square, geometric or floral appearance; others create a smooth rounded transition between two straight moldings. They are attached to the wall like the adjacent decorative trim. The corner piece is not a fastening bracket: the adhesive bond, substrate condition and any product-specific attachment method still determine whether the assembly stays in place.
In the United States, the phrase corner block can also refer to a carpentry block used at the upper corners of door and window casing. That application is different. A door casing corner block is typically coordinated with casing, while the products in this guide are intended to meet narrow applied molding on a wall, ceiling, furniture front or decorative panel. Another easy mix-up is the outside corner guard, which is designed for impact protection. Decorative molding corners do not provide that type of protection.
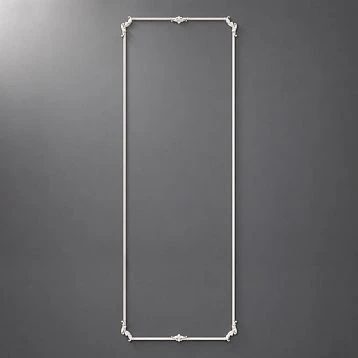
Typical assemblies consist of four preformed corners and four straight sections. A larger rectangle may require extra lengths and straight butt joints; a rounded or shaped frame may use more complex transitions. Always plan the system as a set. If the corner visibly projects past the straight run, the entire composition will draw attention to that mismatch after painting, particularly in sunlight or under wall-grazing accent lighting.
Наша фабрика также производит:

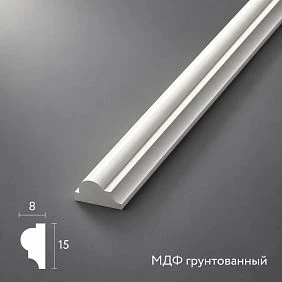
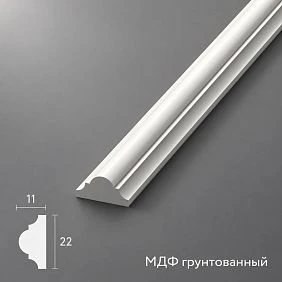


Смотреть весь Каталог продукции
Preformed corners versus 45-degree miters: an honest comparison
| Decision | Preformed decorative corners | 45-degree mitered molding |
|---|---|---|
| Visual effect | Deliberate corner detail; sometimes floral or rounded | Continuous molding line through the turn |
| Cutting | Mostly straight crosscuts; connection detail must be checked | Two accurately cut ends at every corner |
| Profile compatibility | Must match the corner component or be verified on a sample | Uses one profile, but relief must align at the joint |
| Material planning | Count both corner pieces and straight stock | Count stock for all four sides, including miter waste |
| Best fit | Classic, transitional, shaped and ornamental frames | Simple, understated and minimal picture-frame walls |
| Common failure | Wrong corner scale or a poorly matched joining edge | Open miter, poor angle or mismatched relief |
A preformed corner changes the cut geometry; it does not remove the need for skill. The wall might be out of square, a supposedly vertical panel might lean by half an inch over several feet, or paint may highlight a raised joint. Use a level or laser, not just a tape measure along the floor. If a room has noticeably uneven surfaces, test-fit the arrangement with painter's tape first and correct the substrate before applying trim.
For a long row of frames, the preformed approach can simplify repeating the same visual detail. But a simple painted frame using a fine polyurethane molding profile and precise miters can be faster and more economical when the corner accent itself is not part of the design. A quality result comes from choosing the right technique for the intended appearance rather than treating one technique as a shortcut that guarantees perfection.
Получить консультацию
Actual STAVROS products: matching corners with straight trim
STAVROS manufactures several genuine polyurethane molding families. The table below is based on published product details, not generic “small, medium, large” labels. Dimensions are shown in U.S. inches, with metric references when a product was manufactured to a millimeter specification. All lengths and sizes should be reconfirmed on the individual product pages before ordering.
| Component | Published size | How to use it |
|---|---|---|
| MLDPU-001 straight molding | 0.39 in wide × 0.24 in deep; 102.36 in long (10 × 6 × 2,600 mm) | Fine interior border or secondary line |
| MLDPU-1U-1.1 decorative corner | 3.82 × 3.82 × 0.39 in (97 × 97 × 10 mm) | Ornamental corner specified by STAVROS for MLDPU-001 |
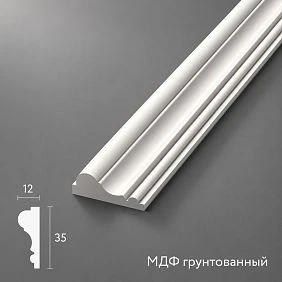
| MLDPU-002 straight molding | 0.87 in wide × 0.43 in deep; 102.36 in long (22 × 11 × 2,600 mm) | More pronounced, stepped wall-panel border |
| MLDPU-002U decorative corner | 6.77 × 6.77 × 0.51 in (172 × 172 × 13 mm) | Large, symmetrical decorative corner related to MLDPU-002 |
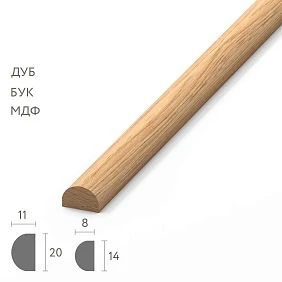
| MLDPU-027 straight molding | 0.55 × 0.35 in or 0.79 × 0.47 in; each 102.36 in long | Smooth, softly rounded half-round profile |
| MLDPU-027U-2 rounded corner | Four corner size options, with legs of 3.31, 4.88, 6.46 or 8.03 in | Rounded transitions; product description identifies the 14 × 9 mm MLDPU-027 profile |
| MLDPU-004 straight molding | 0.59 in wide × 0.31 in deep; 102.36 in long (15 × 8 × 2,600 mm) | Fine raised framing on walls and cabinets |
These are decorative products, not structural supports. The MLDPU-027 family is especially important to check: the straight profile has two sizes, but the specific MLDPU-027U-2 listing describes coordination with the 14 × 9 mm size. Do not assume that every corner option fits the 20 × 12 mm molding. Similarly, the product title of a corner piece is not enough to establish whether its full outer dimension is also the effective joining length used in a cut list.
A useful alternative for a larger shaped turn is MLDPU-003U, listed at 8.58 × 8.58 × 0.59 in (218 × 218 × 15 mm). The manufacturer describes it as a softly curved corner intended for the MLDPU-003 system. Because a shaped corner may have longer arms and a distinct meeting point, verify its drawing and connection geometry rather than applying the generic formula for a square corner without adjustment.
Which molding corner looks right in an American home?
Minimalist and contemporary interiors
In a contemporary condo or a modern family room, simplicity matters more than the number of ornaments. A thin picture-frame line can give painted drywall a subtle shadow without fighting furniture or art. If you prefer a barely visible junction, standard mitered corners may be the better design decision. If you do use preformed corners, choose a simple geometry rather than an elaborate floral turn. Keep the entire assembly in the same color as the wall so the shadow line—not high contrast—defines it.
One large frame behind a sofa often feels calmer than four narrow panels. A row of panels can still work, especially with symmetrical windows, but each additional corner piece adds visual punctuation. Draw the proposed rectangles on a photograph of the actual room or outline them with low-tack painter's tape. Stand at the entry and from the main seating position before deciding which version reads better.
Transitional, modern-classic and neoclassical rooms
These interiors can carry restrained corner detail beautifully. A frame with a slightly wider molding and a measured decorative corner can connect a traditional door casing to modern upholstered furniture. Rather than trying to duplicate a European palace, keep the panel grid clean: equal top lines, consistent gaps, and only one main molding family across a connected space. Use a related rounded corner if the room already has arched doorways or soft furniture shapes.
White-on-white is popular, but cream-on-cream, mushroom, taupe, muted blue or warm gray may be more convincing where natural light is harsh. Satin or eggshell can be practical for painted walls; the correct choice also depends on the trim texture and the paint manufacturer's guidance. A small color difference is often visible as intentional contrast, whereas an almost-matching white can look like a mistake.
Traditional and ornamental interiors
A floral polyurethane corner can be a focal element in a formal dining room, library or traditional primary bedroom. Here the corner is supposed to be noticed. Choose a decorative level that the architecture can support: tall ceilings, deep door trim, substantial furniture or richly textured wallpaper. Avoid attaching large relief corners to a small frame simply because the product photographs show impressive detail. The wall needs negative space around ornament to make that detail legible.
For an elaborate composition, compare polyurethane onlays and appliques with the corner pieces. A central decorative accent and four highly ornamented corners might compete for attention. One strong visual hierarchy—corners dominant, central field quiet, or the reverse—usually makes a better room than adding every available accessory.
Four compatibility checks before you order corner pieces
1. Face width and edge geometry
Measure the visible front of the linear molding, not just its packaging. The end of the preformed corner needs a joining surface that aligns with that front. If the corner has a bead, a step or a recessed line that is missing from the straight profile, the connection can remain obvious after caulking. A related part number is a useful clue; a manufacturer drawing or dry-fit sample is stronger evidence.
2. Depth or projection
The projection of the trim from the wall changes the way light falls across a frame. For example, MLDPU-002 is approximately 0.43 in deep, while the published overall thickness of MLDPU-002U is 0.51 in. That does not automatically mean the joint is defective—ornamental corners may intentionally stand proud—but it does mean you should expect a different profile at the turn and evaluate it visually. A flush, invisible joint should never be promised unless the actual joining faces confirm one.
3. Ornament, scale and orientation
A floral corner might be symmetrical, but a shaped component can also have a handed pattern or direction. Some accent families include left and right pieces. Check whether the selected SKU is symmetrical, supplied as a matched pair, or sold individually. Also check whether rotating the piece 90 degrees preserves the intended relief pattern. This matters for four-corner frames and especially for a repeated grid in which inconsistent orientation would be conspicuous.
4. Material and finish system
Do not assume that a similarly named MDF, wood or polystyrene molding is also polyurethane. STAVROS lists multiple material families. An MDF part may be suitable for certain interior jobs, but it has different movement, fastening and finishing considerations from a polyurethane part. The table in this guide intentionally focuses on polyurethane SKUs. If you deliberately combine materials, confirm adhesion, paint compatibility and how joints will behave before you build the entire wall.
How large should decorative molding frames be?
A frame should respond to the wall and furniture rather than a rigid universal rule. In an 8-ft-ceiling room, a tall, narrow frame often looks more natural than a huge floral corner sitting close to the baseboard. In a room with 9- or 10-ft ceilings, there may be more space for broad vertical panels, but door heads, outlets, sconces, artwork, and the top edge of large cabinets still establish constraints.
Measure the entire wall, including the usable flat field between door or window casing. Decide the outer margins before determining frame widths. For three frames across an open wall, one simple approach is to establish identical margins at the ends and between frames. Then subtract all four gaps from the usable wall width and divide the remainder by three. Check the visual result rather than treating the arithmetic as an interior-design law.
For example, a 144-in-wide usable wall with four 6-in gaps leaves 120 in for three frames, or 40 in of outside width per frame. Whether a 40-in frame looks right depends on its height, the furniture beneath it and the corner scale. If those frames use a 6.77-in corner element, the ornaments will occupy a substantial share of each corner. If the room calls for a quiet 0.39-in trim line, a 3.82-in corner detail may be more proportional.
Leave practical clearance from switch plates, outlet covers, thermostat displays, wall controls, door swings and furniture. The trim should not force an outlet cover to sit crooked or obstruct an access panel. Consider the future location of wall art and sconces before installing a complete system. A panel that looks perfect on an empty wall can become cramped after the homeowner hangs two paintings.
Where to use polyurethane corner molding: room-by-room design ideas
Living room: picture-frame molding behind the sofa
Start with the sofa width and the relationship between the sofa, windows and door openings. A long sofa generally benefits from a single broad frame or a measured series of tall frames; there is no need to copy an exact internet image. For a room with a substantial sofa and 9-ft ceilings, a larger ornamental corner can work, but test the scale using a paper mockup at the actual dimensions. Place the finished frame so a seated viewer can see its outline rather than hiding the whole bottom rail behind the furniture.
If the room already has decorative crown molding, coordinate the visual weight without assuming the same profile should be used on the wall. Crown molding belongs at the ceiling junction; picture-frame molding lies flat on the wall. The two can share a stylistic vocabulary while remaining separate products designed for different locations.
Dining room: classic wall-panel rhythm
For dining rooms, align top rails and repeat panel widths consistently. A chair rail or lower wainscoting may dictate where upper frames begin; do not squeeze every panel into the space between the rail and the ceiling. Repeated corner pieces are especially effective when the room's dining table and chandelier form a strong central axis. Design the full wall elevation before choosing individual products.
Dark paint can enhance raised molding, but it can also show imperfect filler and joints when lit from the side. Before committing to a deep green, navy or charcoal finish, paint a small test board with one assembled corner and two joining strips. This reveals whether the relief is crisp enough and whether the intended sheen emphasizes or softens the joints.
Bedroom: one calm panel behind the bed
For a primary bedroom, use fewer frames and less ornament than a formal room of the same size. One large rectangle centered over the headboard creates an architectural backdrop without turning the bed wall into a grid. Pay attention to the location of reading lights, dimmers, bedside furniture and the height of the headboard. If only the top and sides of the frame will remain visible, the lowest corner details may disappear behind the furniture; in that case, simplify or move the frame.
Rounded molding corners are a useful option in bedrooms because they soften the strict rectangular geometry. The effect is particularly good with a curved upholstered headboard or rounded nightstands. But a shaped corner has a different usable run than a sharp 90-degree turn, so measure the actual product drawing before calculating strips.
Entryway: detail without reducing circulation
An entryway or hallway rewards consistent proportions more than oversized decoration. Use modest projection where people carry bags, move furniture or pass through a tight doorway. Place corners far enough from the casing that the design looks intentional instead of crowded. For a narrow hall, tall frames can reinforce height; repeated identical outlines help the eye understand the length of the corridor.
Decorative polyurethane moldings are not substitutes for protective corner guards. On a high-contact wall, paint selection, a durable substrate and appropriate furniture placement matter more than a delicate ornamental edge. Do not add a fragile raised corner in the path of a door handle or a swinging coat rack.
Home office, built-ins and cabinet fronts
The same components may work on furniture or built-in fronts when the product is intended for that application. The difference is scale and movement. A corner piece that looks small on a 10-ft living-room wall can look enormous on a 15-in-wide cabinet door. Leave clearance for hinges, pulls, adjoining doors and drawer movement. Make a full-scale sketch of each front before ordering.
If a cabinet is finished in an existing coating, test adhesion and finishing compatibility on a hidden area. A painted furniture front can be slicker than primed drywall and may require a different approved preparation method. Do not assume that a wall adhesive works equally well on all lacquered or laminate furniture surfaces.
Ceiling frames and decorative corners: additional checks
Some molding systems can be arranged as decorative ceiling rectangles, but overhead placement deserves extra caution. Verify that the chosen product, adhesive and substrate are suitable for that orientation. Never install trim over a loose ceiling finish, a dirty textured surface or weak paint and expect the adhesive alone to correct it. Follow any manufacturer-prescribed mechanical support requirements during curing.
Plan the ceiling composition around light fixtures, HVAC registers, sprinklers, smoke alarms and access covers. Keep required safety and service clearances. A decorative frame must not surround a recessed light in a way that traps heat or interfere with a sprinkler head. Where building systems are involved, consult the relevant installer or qualified professional. The molding is decorative, not a substitute for electrical boxes, mounting hardware, or fire-rated assemblies.
A ceiling frame often appears different from a wall frame because it is viewed from below and catches light across the relief. Lay out the corner positions from a reliable centerline, then dry-fit the straight runs. Avoid assuming that four precisely sized corner pieces will compensate for a ceiling that is not perfectly square.
How to calculate decorative corners and straight molding
The first quantity is simple: one standard four-corner rectangular frame normally needs four corner pieces. Three separate rectangles need twelve. Order a spare corner or two if damage in cutting or shipping would delay the project, particularly for ornate pieces or an unusual finish. But the straight molding is a different calculation: its lengths depend on where each corner piece joins the strip.
For an illustrative rectangular layout, if the outer frame width is W, the outer frame height is H, and each corner occupies a usable run C measured from the outside corner to the precise trim joining datum on both adjacent sides, the straight cuts are:
Horizontal straight cut = W − 2C. Vertical straight cut = H − 2C.
This simplified formula applies only where the corner element's joining dimensions follow that geometry. The overall A and B dimensions printed on a decorative-corner product page may describe the ornament's bounding box rather than the exact position of the flat joining face. Before ordering, consult the manufacturer's drawing, align the pieces on a workbench and measure the actual run. For curved corners, asymmetrical ornaments, or nonstandard profiles, calculate from the true joining coordinates instead of subtracting a catalog dimension automatically.
Worked example 1: one 40 × 60 in frame with small floral corners
Suppose you want a decorative frame with an outside width of 40 in and height of 60 in. You are considering the MLDPU-001 family and its 3.82-in-square MLDPU-1U-1.1 corner. For illustration only, assume dry fitting confirms an effective straight-run subtraction of exactly 3.82 in at each end. The two horizontal cuts would be 40 − 7.64 = 32.36 in each. The two vertical cuts would be 60 − 7.64 = 52.36 in each.
The resulting cut list is two 32.36-in pieces and two 52.36-in pieces, plus four decorative corners. Total straight molding is 169.44 in, a little over 14 ft. Because one STAVROS MLDPU-001 stock length is 102.36 in, a nominal linear-foot division suggests two strips. A real cut plan can also fit one 52.36-in and one 32.36-in piece on each of two strips, leaving a useful offcut and room for a normal saw kerf. That arrangement assumes clean ends and a modest cutting allowance. Buying an extra strip can be sensible when testing profile alignment or finishing joints for the first time.
This example illustrates why the joining datum matters. If the corner's functional takeoff is only 3.4 in rather than the full 3.82-in outer dimension, all four straight sections would be cut too short by 0.84 in in total per paired side. Always dry-fit and measure your own combination.
Worked example 2: three large frames with MLDPU-002U corners
Consider three identical accent-wall rectangles, each 44 in wide and 64 in tall, using MLDPU-002 and its 6.77-in decorative corner. Once again, this is an illustrative cut plan that assumes the measured joining datum is 6.77 in along each side. Each frame then needs two horizontal pieces at 30.46 in and two vertical pieces at 50.46 in. Three frames require twelve corners, six short cuts and six long cuts.
At 102.36 in per stock strip, the cut list can be organized as follows:
| Stock strip | Planned pieces | Nominal used length, before kerf |
|---|---|---|
| 1–3 | Two 50.46-in vertical sections per strip | 100.92 in on each strip |
| 4–5 | Three 30.46-in horizontal sections per strip | 91.38 in on each strip |
| Total | Six vertical + six horizontal pieces | Five 102.36-in strips; twelve corner pieces |
Five strips are therefore theoretically sufficient for the straight sections, subject to saw-kerf allowances, usable stock length and verification of the joining positions. A sixth strip provides a practical reserve for an error, damaged end or finish test. This is a better purchasing plan than multiplying the three outside perimeters and dividing by stock length, because the outside perimeters include space occupied by decorative corners. Always test the actual cutting pattern and subtract the real material removed by each saw cut.
Do not apply either sample layout to every corner product. The MLDPU-027U-2 corner comes in several sizes and is designed for a rounded transition, so its geometry must be taken from the drawing. A well-made shopping list records all of these fields: wall-frame outer width and height, corner SKU, actual joining offset, each finished straight cut, saw-kerf allowance, number of stock strips, finish material and reserve.
How to plan the cut list before buying
Start by sketching the wall with outside frame dimensions. Give every frame a label such as A, B or C and note which molding and decorative corner family belongs to it. If a design includes upper and lower rectangles, keep those quantities separate; do not combine cuts before calculating how they fit into actual lengths. The longest run sets a hard constraint: a 102.36-in stock molding cannot supply a single uninterrupted 110-in vertical, even if your total linear-foot arithmetic seems sufficient.
For a large project, lay out the strips digitally or on paper. Group equal-length cuts, account for saw kerf, and avoid filling every bar to its absolute theoretical capacity. A strip with two 50.46-in cuts leaves only 1.44 in of nominal surplus, which may still be enough for modest kerf and end trimming, but should be checked against actual stock tolerances and cutting requirements. A supposedly more efficient cut pattern that fails in the field can be more expensive than ordering a deliberate spare length.
When the work includes ornately shaped corners, test whether straight ends need square cuts, a particular notch, or a slight return to line up with the relief. Don't assume a corner block always accepts a plain butt joint just because its name includes the word “corner.” Only the actual product geometry and installation guidance settle that question. For longer runs that need an intermediate joint, place that joint away from strong side lighting where possible and follow the manufacturer's joint treatment recommendations.
What to buy: three practical project combinations
Small-scale accent panel
A simple bedroom or office accent can use fine MLDPU-001 polyurethane wall trim with compatible MLDPU-1U-1.1 corner accents. This gives the walls a modest architectural line and a clearly decorative turn. Before ordering, check the actual outside frame size and whether the approximately 3.82-in corner is visually proportional to that frame. Choose one wall paint color for the whole assembly if you want a restrained result.
Statement dining-room panel
For a more expressive panel, consider MLDPU-002 decorative molding with the related MLDPU-002U polyurethane corner. The straight molding is 0.87 in wide, and the corner measures 6.77 in along its outer dimensions. This pairing calls for generous wall space; in a narrow panel, the corners can overwhelm the straight lengths. Measure full-scale, test the junction and decide whether one or several panels will provide the better composition.
Softly rounded wall frames
For a smoother visual language, explore MLDPU-027 half-round molding and MLDPU-027U-2 rounded corners. These can be relevant to bedrooms, curved furniture silhouettes and contemporary paneled walls. Confirm the 14 × 9 mm straight-profile variant for the specific corner and choose the appropriate radius. A rounded design may be easier to judge with a full-scale paper template than with four separate ornamental samples.
Surface preparation for U.S. drywall and previously painted walls
Most American residential remodeling happens over drywall. That does not mean every drywall surface is ready for adhesive trim. Check whether the wall is structurally sound and free of loose paint, powdery joint compound, wallpaper paste, moisture problems, grease or mold. Repair cracks and uneven patches first. A well-prepared wall creates more reliable adhesion and keeps the finished panel from telegraphing bumps along a straight line.
Glossy or heavily washable paint may require surface preparation consistent with the adhesive manufacturer's recommendations. Prime repaired drywall and other porous areas if the adhesive system calls for it. Never rely on a layer of fresh paint to hold decorative molding when the paint underneath is peeling. Remove loose coatings and correct the underlying issue. In bathrooms or damp spaces, verify the substrate and material system; decorative polyurethane is not waterproofing.
Use a level or laser to establish top and side lines. Measure from architectural reference points rather than assuming the floor or ceiling is level. On an old house, a frame that is geometrically square may expose a sloping ceiling; subtle adjustments to overall placement can produce a more visually balanced result, but the corners and straight runs should still be aligned consistently. Photograph the taped layout before installation so you have a reference when parts are laid out on the workbench.
How to install polyurethane corner molding step by step
Step 1: confirm the complete assembly on a flat surface
Before applying adhesive, arrange one full corner with its two straight sections on a table. Check bead alignment, thickness, ornament orientation, and how the joint should close. If the corner has a visible proud detail by design, confirm that you like the effect. If the parts clearly do not meet as intended, stop and verify the product pairing rather than planning to hide a large mismatch with filler.
Step 2: transfer the layout to the wall
Mark every outside edge and corner position. Use a laser or long spirit level, painter's tape and a pencil that can be removed or covered by the finish system. Verify diagonal measurements if the frame must be square. When the wall is textured, ensure the texture does not prevent the mounting surfaces from seating properly.
Step 3: cut and label straight sections
Cut on a stable bench with a sharp blade or appropriate fine-tooth saw and follow the product's cutting guidance. Wear suitable eye protection and manage dust. Label the back of each piece so that long and short sections cannot be mixed up. For decorative corners with a particular orientation, mark top, bottom, left and right. Dry-fit every section before applying adhesive; an attractive cut list still needs to survive the reality of field measurements.
Step 4: choose the correct adhesive and install
Use an adhesive explicitly approved by its manufacturer for the polyurethane product, the substrate and the installation conditions. Some adhesive systems have specific open times, bead sizes, temperature limits or requirements for temporary holding. Follow the current technical data sheet. Apply the material as directed, place the parts on their marked lines and use the recommended temporary supports while the adhesive cures. Do not use an arbitrary universal “super glue” or solvent-based product that could attack the material.
For a standard wall frame, many installers position corners first and fill the measured straight runs between them. That sequence can work when the corners define the geometry, but another sequence may be better for a particular product. The safest rule is to perform a small mockup first and follow the manufacturer’s installation guidance. On a ceiling, overhead or large assembly, verify that the specified attachment method and curing support are appropriate for the load and orientation.
Step 5: fill joints carefully
After the adhesive has cured for the specified time, treat the seams with a compatible paintable filler or caulk appropriate to the product and the expected movement. Do not use filler to compensate for a substantial dimensional mismatch or an insecure connection. Apply a small amount, tool it cleanly, let it cure and inspect the joint in raking light. Large smeared beads can erase a crisp molded profile and become more conspicuous after paint.
Step 6: prime and paint as a unified system
Remove dust, prime if needed and coat the entire molding assembly and adjacent wall as planned. Check compatibility between the polyurethane surface, any factory primer, adhesive residue, filler and topcoat. If you want the trim and wall to match, use a coordinated paint system and consider whether the same sheen works on both. Several thin coats generally preserve detail more cleanly than one heavy coat. Do a sample first if the trim has complicated relief.
For more detailed process guidance, see STAVROS's polyurethane molding installation guide. The exact adhesive and paint products should be selected for the actual project and U.S. substrate, not assumed from an overseas reference installation.
Paint, lighting and the small details that make a frame look custom
The most persuasive wall-frame installations are often monochromatic. When the frame, corner pieces and background share a consistent color, the shadows create depth without making the wall too busy. An eggshell or matte finish may visually downplay small irregularities, while a satin finish can emphasize relief and be easier to wipe clean depending on product. Test under the room's actual daylight and evening lighting rather than choosing a sheen from a small store sample alone.
Check the direction of light. A window along one side of the wall can reveal subtle unevenness in both relief and seams. Wall sconces may intentionally accent the moldings, but they can also make a poor joint obvious. Inspect the completed test assembly using a flashlight held near the surface before finishing the entire project.
In classic rooms, a subtle metallic accent may be appropriate, but it is easy to overdo. Painting only the inner relief of selected corner elements can work; painting every edge a different metallic tone often distracts from the architectural rhythm. For a timeless appearance, prioritize clean geometry, consistent corner spacing, smooth joints and quality surface preparation before adding decorative effects.
Common mistakes—and how to avoid them
- Buying a decorative corner without the matching straight molding. Compare the exact SKU family and drawings, not a generic label. A different bead or projection can remain visible after painting.
- Confusing corner dimensions with the joining datum. Published outer dimensions may include ornamental overhangs. Use actual measured takeoff lengths in the cut list.
- Ordering by linear feet alone. A total-length calculation cannot determine whether the required individual cuts fit into 102.36-in stock strips.
- Forgetting the corner count. Four corners are normally required per rectangle. Repeated frames multiply that number quickly.
- Mixing polyurethane with MDF or polystyrene unintentionally. These are different products. Check the material field of each individual listing.
- Overcrowding outlets, doors or furniture. Leave appropriate access and working clearance; trim must not become an obstacle to everyday use.
- Using glue as a substitute for substrate repair. Poor paint adhesion and powdery drywall can undermine even a correctly selected adhesive.
- Ignoring hand orientation. Some decorative accents are left- or right-specific. Confirm whether four identical pieces can form a complete frame.
- Finishing before checking side light. A joint that looks acceptable head-on may look rough when illuminated from the side.
- Assuming every product can be installed overhead or in wet areas. Verify the intended use, substrate, and adhesive system for the exact condition.
What affects the total project cost?
The cost is not simply the price of one strip. A complete molding-frame project can include straight lengths, four corner components per frame, adhesive, temporary supports, primer, filler, paint, tools, shipping and possibly labor. Ornamental preformed corners may increase the material cost compared with plain miters while reducing the number of difficult corner cuts. They can also create a richer design that cannot be reproduced by a basic seamless joint. Which option is more economical depends on the room, the desired design and the installer's experience.
Make a cost worksheet with separate lines for each SKU. Count the actual number of corners, calculate stock strips from a cutting plan and include a practical reserve. Ask about any packaging requirements for long moldings, which may need protective supports during transport. Because prices and stock can change, use the live STAVROS listings rather than an old article as the source for a quote. Do not assume shipping to every U.S. ZIP code: contact the seller with the destination and full item list before making a firm project schedule.
For a smaller project, buying one product pair to test fit may be preferable to ordering all material at once. That test helps verify the true joint geometry, paint behavior and scale on the wall. For a larger multiroom renovation, establish one repeatable assembly and keep a documented cutting schedule so that later rooms don't end up with different offsets or corner proportions.
How to order polyurethane molding corners for a U.S. project
Start at the STAVROS molding decor catalog and the straight molding selection. Verify each product's material, A/B/C dimensions, length, design family and any left/right variants. If you want a specific pairing—such as MLDPU-002 and MLDPU-002U—include both product codes in your inquiry. Add a simple dimensioned drawing showing outside frame widths, heights and total number of frames.
For U.S. delivery, also provide the destination ZIP code, preferred delivery method if applicable, and any site restrictions affecting long packages. Ask STAVROS to confirm current availability, packaging, shipping options, shipping cost and estimated arrival before assuming the materials will be available on an installation date. The online prices, any import charges and transit arrangements should be checked at order time; this guide does not promise a universal delivered price.
If you are shopping for an entire feature wall rather than just replacement pieces, consider whether the room also needs a simple decorative applique, a coordinated crown molding or a different baseboard profile. Keep those as independent specification decisions. A polyurethane decorative applique can be appropriate inside a frame, but it should not be added just to increase the product count.
Frequently asked questions about polyurethane corner molding
Are decorative molding corner pieces necessary for picture-frame walls?
No. Straight wall molding can be joined with carefully made 45-degree miters. Preformed corner pieces are an optional design and installation choice, not a structural requirement. Choose them when the corner detail or the simplified straight-cut approach is beneficial to your project.
Do corner blocks fit any polyurethane molding?
No. The face width, depth, shaped relief, orientation and joining geometry must be compatible. A matching product family is a good starting point, but confirm with the actual drawing or a test fit. A similarly colored or similarly sized piece from an unrelated series can still produce a poor joint.
Can I use polyurethane corner molding on drywall?
Often yes, provided the product and adhesive are suitable and the drywall surface is sound, clean and properly prepared. Loose paint, weak joint compound or surface contamination can cause failure. Follow the adhesive and molding manufacturer's installation instructions.
What is the difference between molding corners and door casing corner blocks?
Decorative wall-frame corners connect applied trim arranged as panels on a wall. Door casing corner blocks are typically part of the trim surrounding a door opening and are designed for a different scale and layout. Check the intended use before treating one as a substitute for the other.
How many corner pieces do I need for three rectangular panels?
Ordinarily twelve: four per panel. Depending on the design, a small spare quantity may be wise. Add the straight molding to the shopping list separately and calculate each finished cut using the actual corner joining dimensions.
Can I paint preformed polyurethane corners the same color as the wall?
Yes, with a compatible primer and paint system for the particular product and substrate. A unified color is often the easiest way to make the decorative assembly look integrated. Test filler, primer and topcoat on a sample before finishing a large wall.
Is MLDPU-027U-2 compatible with both sizes of MLDPU-027?
The MLDPU-027 product listing shows 14 × 9 mm and 20 × 12 mm straight profiles. The MLDPU-027U-2 corner description specifically references the 14 × 9 mm version. Do not infer suitability for the wider option without confirming the manufacturer drawing and current product recommendations.
Are polyurethane molding corners waterproof?
Do not treat them as waterproofing. A product may resist occasional ambient moisture, but the wall system, paint, joints, adhesive and substrate have their own limitations. For wet areas or direct water exposure, obtain project-specific confirmation of suitability and use the proper water-management system.
Can decorative molding corners support shelves or lights?
No. These are nonstructural decorative elements. Shelves, sconces, televisions and other loads require appropriate mounting to the wall structure or approved boxes. Do not rely on a molding corner or trim adhesive to hold equipment.
Is a 102.36-in molding strip the same as an 8-ft board?
No. STAVROS lists many straight polyurethane moldings at 2,600 mm, approximately 102.36 in or 8 ft 6.36 in. This is longer than a nominal 8-ft board, which can matter when arranging cuts. Measure stock on arrival and include the manufacturer's actual length and any end-trimming requirement in the layout.
How much extra molding should I order?
There is no single reliable percentage for every wall. A complicated repeated panel grid may need additional stock for miter trials, kerf, joints and damaged ends. Start with a piece-by-piece cut list, fit the cuts into actual stock lengths, then decide on the reserve based on the complexity and your confidence with the installation.
Can I use polyurethane molding corners on cabinet doors?
Some STAVROS corner products are described for furniture fronts as well as wall frames, but their dimensions may be too large for narrow cabinet doors. Check the intended application, hinge and hardware clearance, surface finish, and adhesive compatibility. A mockup on the actual cabinet dimensions is strongly recommended.
Build the frame as a coordinated system—not a collection of parts
The advantage of polyurethane corner molding is not that it magically fixes a poor layout. It is that a deliberate corner element can give repeated architectural frames a defined look while changing some of the cutting work from angled miters to simpler straight sections. The result depends on matching the profile, measuring the joining face, ordering stock by a real cut plan and preparing the wall properly.
If you're ready to plan a project, compare decorative polyurethane molding corners with polyurethane picture-frame wall molding from STAVROS. Use the actual product drawings, verify the material and dimensions, and request delivery details for your U.S. address. A single tested corner-and-trim assembly is the best starting point for a full room of beautifully aligned wall frames.