Article Contents:
- What is a decorative connecting element
- When a furniture facade needs decorative connectors
- Intersection of horizontal and vertical molding
- Gap between two sections of ornament
- Central point of the frame
- Transition from molding to carved overlay
- Furniture, door, panel or portal design
- Compare actual drawings
- Don't reduce your choice to a single number
- Consider the entry point
- Leave a visual pause
- Center from the center, not from the edge
- Consider working gaps
- Check repeatability
- Beech for enamel
- Oak for tinting
- Why the species must match
- Start by measuring the facade
- Choose the molding
- Identify connection points
- Do a preliminary layout
- Check symmetry
- Prepare the finish
- Commode
- Cabinet
- Sideboard and display furniture
- Kitchen fronts
- Built-in wardrobe
- Wall panel and door
- Connecting element and regular overlay
- Connecting and corner element
- Connecting element and carved rosette
- Wooden and polyurethane decor
- Decorative and structural element
- Check the base
- Choose the glue
- Do not use glue to fix the gap
- Secure the position
- Different species in one transparent finish
- Painting before control layout
- Attempt to use decor as fastening
- Ignoring thickness
- Installation on an unstable surface
- Mixing Styles
- Too many accents
- Need to close the joint on a small box
- Need to design the center of a high door
- Need to connect the molding with a large overlay
- Need to update a painted kitchen
- Need to preserve natural oak
- Need to decorate a wall panel
- Need to select decor based on a photo
- What is a connecting decorative element for furniture?
- How is a connector different from a regular overlay?
- How to choose an element for the width of the molding?
- Which model to choose: N-398.1, N-401.1 or N-399.1?
- What is better for enamel — beech or oak?
- Can wooden decor be installed on an MDF facade?
- Do I need to paint the parts before installation?
- Can a connecting part be used in a corner?
- Which moldings should I buy together with the decor?
- How to calculate the number of elements?
- Can I choose decor based on a photo of the furniture?
- Where to buy decor with delivery?
- What do the dimensions A × B × C mean?
- Can I put N-399.1 on a box?
- Why can't I just cover the joint with any socket?
- Do all parts need to be the same wood species?
- How to check the current price?
- Can decor be used outdoors?
- Handle and decorative axis
- Hinges and the hidden side of the facade
- Pair doors
- Drawers
- Facade photograph
- Sizes
- Material and finish
- Quantity
- Project timeline

When the buyer wants to buy wooden decor for furniture, the choice often starts with large and noticeable details: moldings, carved overlays, central medallions, or furniture handles. But it is the small connecting elements that often determine whether the entire composition will look cohesive. Without them, two lines of molding may end with a random cut, the intersection may appear too rigid, and the frame on the facade will be perceived as a set of separate strips rather than a well-thought-out design.
A connecting decorative element is placed at a nodal point. It connects horizontal and vertical moldings, decorates the gap between sections of ornament, creates the center of a symmetrical frame, or helps transition from linear molding to a large carved overlay. Such a part does not structurally fasten furniture and does not replace glue, dowel, or mechanical fasteners. Its task is to organize the facade pattern and make the connection visually convincing.
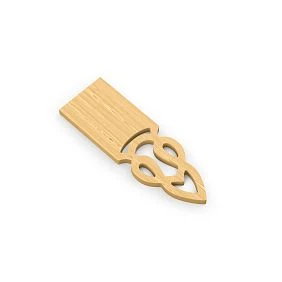
The STAVROS catalog presents three models that allow solving tasks of different scales: compact N-398.1 measuring 31 × 75 × 12 mm, elongated N-401.1 measuring 47 × 123 × 14 mm, and large N-399.1 measuring 76 × 202 × 21 mm. All three products are available in beech and oak. Beech can be chosen for enamel, and oak for tinting. This division helps not only to select the size but also to pre-link the decorative node with the future furniture finish.
In the article, we will analyze how a connecting part differs from a regular overlay and corner element, how to correlate it with the width of the molding, why thickness is no less important than length, when to choose beech or oak, how to assemble a frame on the facade without distortion, and where buy wooden decor for furniture together with compatible linear and finishing materials.

What is a connecting decorative element
A connecting element is a carved wooden part that occupies a place between other decorative parts and helps them work as a single system. In shape, it can resemble an elongated overlay, a small cartouche, leaf ornament, or a compact medallion. But its purpose is determined not only by its appearance. Such a part must continue the direction of adjacent moldings, complete their lines, and create a clear transition point.
On a furniture facade, connecting decor often ends up in the center of the upper or lower side of the frame, between two symmetrical sections of linear molding, on the vertical axis of the door, or at the point where a straight molding transitions into a more complex ornament. In a door portal, it can unite the horizontal top with vertical elements. On a wall panel, it can gather several lines into a central node. On a chest of drawers or sideboard, it can help connect the frame with a carved overlay above the handles.
The main advantage of a ready-made part is that the buyer does not have to manually cut a complex joint. A regular molding can be cut at an angle, but this method only creates a geometric connection. If the frame should have a classic, neoclassical, or expressive decorative character, a simple cut often looks too technical. The connecting overlay covers the transition point and adds ornamental logic.
At the same time, it should not be used as a mask for any mistake. If the moldings are installed crookedly, have different thicknesses, or do not align on the axis, large decor will not fix the composition. First, design the lines, check the dimensions, and lay out the parts without glue. Only after that does the connecting element become a neat completion of the node.




When a furniture facade needs connecting decor
Our factory also produces:
Intersection of horizontal and vertical molding
A direct intersection of two profiles can look too rigid, especially if the molding has a carved pattern. A 45-degree cut is suitable for a regular frame corner, but does not always solve the problem of a central T-shaped or cross-shaped joint. The connecting piece overlaps the junction and helps continue the ornament without a noticeable technical seam.
Before choosing, you need to determine how many lines converge at the node and in which direction they go. The elongated N-401.1 is logical where the composition develops vertically or horizontally. The compact N-398.1 is suitable for a small facade and short sections. The large N-399.1 requires sufficient space around it and should not be squeezed close to the edges.
Get Consultation
Gap between two sections of ornament
Sometimes it is impossible to run the molding continuously: there is a handle, keyhole, panel, or other detail in the center. The connecting decor can frame the gap so that the break appears intentional. It does not necessarily completely fill the space; sometimes it is enough to create an accent that two lines visually lead to.
This technique requires precise symmetry. If the distance on the left and right differs, the connecting overlay will only emphasize the error. Therefore, first mark the central axis of the facade, then lay out the moldings and check the uniformity of the offsets.
Central point of the frame
On a cabinet door, chest of drawers, or sideboard, the connecting piece can become the top, bottom, or side center of the frame. In this case, it does not just hide the joint, but sets the main axis. Moldings, carved leaves, or small overlays radiate from it.
The more important the central role, the more carefully the scale is chosen. N-399.1, 202 mm high, can occupy a noticeable part of a furniture door. On a small drawer it will be excessive, but on a tall door or wall panel it can organize the entire composition. N-398.1, on the contrary, works neatly and does not draw attention away from the handle or central overlay.
Transition from molding to carved overlay
A large overlay should rarely come into direct contact with a straight molding with a random cut. An intermediate element that softens the scale difference is useful between them. The connecting part acts as a transition: it takes the line of the molding and translates it into a more complex ornament.
For such a node, the height of the relief is checked. If the overlay is significantly thicker than the molding, the connecting part should appear intermediate not only in length but also in its projection above the facade. Otherwise, one element will seem glued on top of another without a common system.
Furniture, door, panel, or portal design
Connecting parts are used not only on cabinets. They are suitable for door leaves, wall panels, frames around mirrors, decorative portals, built-in libraries, kitchen fronts, and custom furniture. In each case, the viewing distance must be considered. A small detail reads well on a chest of drawers near a person but may get lost on a tall wall panel.
Which STAVROS connecting elements can be purchased
| Model | Size A × B × C | Material and preparation | Main scenario |
|---|---|---|---|
| Decorative element N-398.1 | 31 × 75 × 12 mm | Beech for enamel; oak for tinting. Sanding "Standard" or "Prestige". | Small doors, drawers, compact frames. |
| Wooden connecting element N-401.1 | 47 × 123 × 14 mm | Beech under enamel; oak under tinting. Sanding quality options available. | Elongated nodes and medium facades. |
| Connecting element N-399.1 | 76 × 202 × 21 mm | Beech under enamel; oak under tinting. Sanding is selected in the card. | Large doors, panels, and portals. |
The dimensions show not only the length and width of the part, but also its relief. N-398.1 protrudes by 12 mm, N-401.1 by 14 mm, N-399.1 by 21 mm. If the molding is almost flat, the large N-399.1 may look too bulky. If the trim is wide and textured, the small N-398.1 can get lost. Therefore, the three measurements are considered together.
Product cards indicate that selected variants are made to order, with an average production time of 5–10 days. If in stock, the item is prepared for shipment from the warehouse. The current price, availability, and lead times should be checked directly before purchase.
N-398.1: compact element for small facades
Decorative element N-398.1 has dimensions of 31 × 75 × 12 mm. It is suitable for assemblies where you need to neatly connect trim but cannot occupy a large portion of the surface. This situation occurs on dresser drawers, small cabinet doors, narrow furniture posts, and frames with limited internal fields.
The width of 31 mm makes the model convenient for relatively thin molding. The height of 75 mm is sufficient for the ornament to be readable but not turn into a standalone large medallion. The relief of 12 mm should be compared with the thickness of the trim and adjacent overlays. If the entire frame is almost flat, even a compact part may appear noticeably more voluminous.
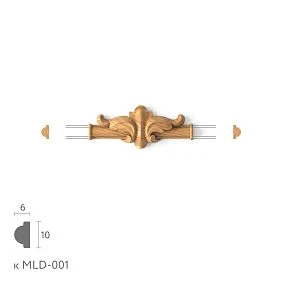
In the N-398.1 card, the related products show wooden molding MLD-001 and corner elements of the same system. This is a useful reference, but final compatibility must be checked against drawings and actual thickness. You should not choose molding just because it appears nearby on the page.
N-398.1 is especially convenient for repeating compositions. For example, on a dresser with six identical drawers, large decor on each facade would create visual overload. The compact part allows you to repeat the motif, maintain symmetry, and not conflict with handles.
N-401.1: elongated node for medium composition
Wooden connecting element N-401.1 has dimensions of 47 × 123 × 14 mm. In scale, it occupies an intermediate position between the compact N-398.1 and the large N-399.1. The elongated shape works well on the vertical axis of a furniture door, in the center of a tall frame, or at the transition point from straight molding to a larger ornament.
The width of 47 mm allows connecting medium-width moldings. The height of 123 mm is already noticeable on a standard facade but does not take up as much space as an element 202 mm long. The relief of 14 mm creates an expressive shadow and requires careful coordination with adjacent parts.
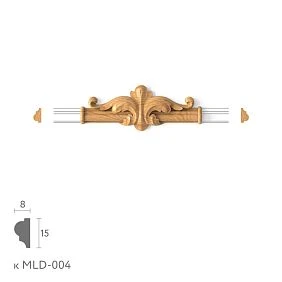
In the N-401.1 card, the related products show molding MLD-004 and corner elements of this system. Before purchasing, it is useful to download the drawings, overlay them on the facade layout, and check how the trim lines enter the carved node.
N-401.1 подходит для дверей шкафа, буфета, кухни, встроенной библиотеки и стеновых панелей среднего размера. Его можно использовать одиночно на центральной оси или повторить сверху и снизу, если фасад достаточно высокий.
N-399.1: крупный акцент для двери, панели или портала
Connecting element N-399.1 имеет размер 76 × 202 × 21 мм. Это крупная деталь, которая на большинстве мебельных фасадов воспринимается не как незаметный соединитель, а как один из главных элементов оформления. Она подходит для высокой двери, стеновой панели, портала, массивного буфета, встроенного шкафа или композиции, которую рассматривают с расстояния.
Высота более 200 мм требует свободного поля вокруг. Если поставить N-399.1 на небольшую дверцу и подвести молдинги вплотную к краям, орнамент будет выглядеть сжатым. Детали нужно дать пространство: оставить расстояние до кромок, ручки, филёнки и соседнего декора.
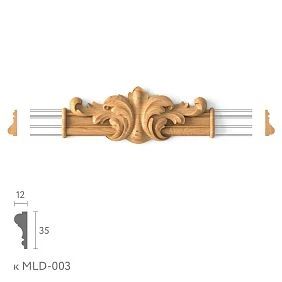
Толщина 21 мм также меняет характер композиции. N-399.1 заметно выступает над поверхностью и создаёт глубокую светотень. Рядом с ним плоский тонкий молдинг может казаться случайной линией. В карточке среди сопутствующих товаров показан MLD-003 и угловые детали этой системы, что даёт отправную точку для сравнения чертежей.
Крупный соединительный узел особенно убедителен, если вокруг него строится симметричный рисунок. Молдинги могут подходить к детали сверху и снизу, расходиться в стороны или завершаться рядом с резными листьями.
Quick selection by task
| Task | What to consider | What to Check |
|---|---|---|
| Небольшая дверца или ящик | N-398.1 | Не перекрывает ли элемент ручку и достаточно ли места вокруг рамки. |
| Вытянутый переход между деталями | N-401.1 | Совпадает ли ось элемента с линией молдинга. |
| Large door, panel or portal | N-399.1 | Is the area sufficient and is the 21 mm relief consistent? |
| Standard frame corner | Corner element or molding trim | The connector does not always change direction by 90 degrees. |
| Center of a symmetrical composition | Any of the three models after checking proportions | Facade size, offsets, handle position, and trim width. |
How to select an element for the molding width
The molding and connector should look like parts of the same pattern. If the trim line is wider than the area it enters, it appears as if a large plank is accidentally butting into a small overlay. If the connector is significantly wider than the molding, it turns into a separate medallion and visually stops continuing the frame.
Compare actual drawings
The best way to select is to download or open product drawings and assemble the diagram to scale. Dimensions A × B × C show the overall size of the connecting element, but for an accurate joint you need to see the width of the carved channel, leaves, and central part. In a photo, these relationships can be distorted.
Print the drawings at 1:1 scale or transfer the dimensions onto paper. Cut out the contours of the connector and molding, then lay them out on the facade. This mockup allows you to notice mismatches before purchase and finishing.
Don't reduce your choice to a single number
Molding width is not the only parameter. Two linear profiles of the same width can have different patterns and depths. One looks like a flat strip, the other like a three-dimensional carved branch. The latter requires a more expressive connector.
Consider the entry point
The molding may fit the part at the center, top, bottom, or on both sides. Each case requires its own layout. Sometimes the overall size of the connector seems suitable, but the carved pattern has no logical place for abutment. Then it's better to choose a different model or add an intermediate element.
Leave a visual pause
Not all moldings must physically abut the connecting overlay. In some compositions, a small gap looks neater and does not require trimming the carved edge. But the pause should be the same on all sides and be perceived as part of the design.
Why part thickness is as important as length
The front-facing photo mainly shows a silhouette, so buyers often compare only width and height. However, furniture is viewed from different angles, and the depth of the relief affects light and shadow, safety, and joint quality.
N-398.1 has a thickness of 12 mm, N-401.1 — 14 mm, N-399.1 — 21 mm. If the molding protrudes only a few millimeters above the facade, a large connector will create a sharp drop. Sometimes this is acceptable: the central node is deliberately made more voluminous. But the transition should look intentional.
Thickness is also important near the handle. The carved part should not interfere with fingers, catch on clothing, or restrict the opening of the adjacent door. In the kitchen and in the walkway area, protruding decor is placed further from the working edge.
When applying enamel, the relief visually becomes softer, but the physical size does not change. A thick layer of paint should not be used to level mismatched parts. If the molding and connector have different fits, this is corrected at the selection and preparation stage.
How to avoid an overly large central accent
The size of the connector is evaluated relative to the free area of the facade, not just its total height. An 800 mm door may have a large panel, handle, keyhole, and several frames. The actual space for the carved part will be significantly smaller.
Make a full-size paper template and attach it with masking tape. Look at the furniture from a normal distance: from the room entrance, from the dining table, from the sofa. A detail that looks neat up close may disappear from a distance; a large overlay, on the contrary, can overwhelm the entire facade.
For several identical doors, consider the repetition effect. One N-399.1 on a tall central door looks expressive. Six such elements nearby can create too dense an ornament. In a serial composition, it is often better to reduce the scale and use N-401.1 or N-398.1.
Handles also participate in the composition. If the furniture handle is complex and carved, a large connector should not compete with it. You can choose one main accent: either the central decor or expressive hardware.
Symmetry and distance from the edge of the facade
The connecting element quickly reveals any markup error. Its central axis must align with the axis of the door, frame, or entire furniture section. A shift of a few millimeters is especially noticeable next to straight moldings.
Start from the center, not the edge
The facade may have a slight factory tolerance or an asymmetrical panel. If you measure the same distance only from the outer edges, the decor may not align with the internal pattern. First, determine the compositional center, then check the distances to the edges.
Consider working gaps
On paired doors, there is a gap between the facades. The decor must not be positioned so that its relief extends into the opening area. The same applies to the top and bottom gaps of the drawer.
Check repeatability
For a series of facades, a marking template is made. It helps to place elements at the same height and maintain margins. Measuring each door anew without a template takes longer and is riskier.
Beech or oak: which material to buy
All three connecting elements are available in beech and oak. In the product cards, beech is offered for enamel, oak for tinting. This is not an arbitrary division: the species have different grain patterns and behave differently in finishing.
Beech for enamel
Beech has a dense and relatively uniform structure. It is suitable for opaque painting, when the connecting element, molding, and facade should become a single colored object. After priming and enameling, differences in the shades of glued lamellas are hidden.
The enamel option is chosen for white, gray, or colored kitchens, painted dressers, cabinets, doors, or wall panels. The decor can be so closely integrated with the facade that it is perceived as part of the relief, rather than a separately glued wooden detail.
Oak for tinting
Oak has pronounced pores and a noticeable grain pattern. It is chosen when the surface should retain a natural character. Tinting, oil, varnish, or other translucent coatings emphasize the texture and help coordinate the decor with oak molding, facade, door, or furniture frame.
A complete shade match cannot be expected without a test sample. Even products from the same species differ in pattern. If the facade is already finished, test tinting is done on a separate piece of oak.
Why the wood species should match
Within a single frame, it is advisable to use molding and connecting elements made of the same material. Under a transparent coating, the difference between beech and oak is immediately noticeable. Under dense enamel, it is hidden, but the materials may exhibit structure differently and require different preparation.
Sanding quality: "Standard" or "Prestige"
The product cards offer sanding quality options. "Standard" means machine surface preparation and may require additional finishing before the final coat. "Prestige" involves more detailed hand sanding. The choice affects the amount of preparatory work, especially in deep carved areas.
For a workshop that independently primes, sands, and paints large batches, the "Standard" option may be rational. The master controls the entire preparation system and finishes the details along with the moldings. For a single project or complex tinting, it is worth considering more thorough sanding.
Readiness cannot be assessed only by touch on the front plane. The connecting element has recesses and carved transitions. After applying enamel, a rough scratch or fuzz may become more noticeable. Before finishing, the parts are inspected under side lighting.
How to assemble a decorative frame on furniture
Start by measuring the facade
Record the width and height of the visible plane, the location of the panel, handle, hinges, and working gaps. Separately measure the distance to the edge within which decor can be placed. On a facade with a milled frame, the new composition must either support the existing geometry or be entirely within it.
Select the molding
First determine the main frame line, then the connecting parts. View Wooden moldings for furniture useful considering the width, relief, wood species, and profile length.
Determine the connection points
Not every frame needs a connector on each side. Sometimes one piece at the top or bottom is enough. In another composition, four nodes are needed. Mark the locations on the drawing and check if the ornament repeats too frequently.
Make a preliminary layout
All parts are laid out on the facade without glue. You can use painter's tape, paper templates, and thin marking lines. Check the axes, offsets, joints, and interaction with the handle.
Check symmetry
Measure the diagonals of the frame. If they differ, the rectangle is skewed. Check the distances from the connecting element to the edges and center.
Prepare the finish
Before gluing, it is useful to decide which surfaces are painted in advance and which after installation. Deep threaded areas are sometimes easier to prime before fixing, but joints require a final finish.
Detailed layout without glue
Preliminary layout is not a formality. It allows you to see not only the geometry but also the character of the ornament. On a table, individual parts may look compatible, but on the facade, too large a gap may appear between them, or conversely, the pattern becomes cramped.
Lay the facade horizontally if it can be safely removed. This way the elements will not shift. Mark the center with a thin line that can be easily removed later. First, place the connecting element, then bring the moldings. Do not cut the trim completely until all sides have been checked.
Photograph the layout from above. In the photo, it is easier to notice skew and differences in distances. For several options, take separate photos: N-398.1, N-401.1, and N-399.1. Comparison helps choose the scale without guesswork.
If the composition is painted in one color, temporarily reduce the visual difference of materials: cover the elements with paper of the same shade. The natural color of wood sometimes distracts from proportions, although after enamel all parts will become uniform.
How to use the connecting element on different types of furniture
Chest of drawers
On a chest of drawers, the connecting decor is often repeated on several drawers. Compactness and uniform installation height are important here. N-398.1 is suitable for small fronts, N-401.1 for wide or tall drawers. The large N-399.1 is usually more appropriate on doors of the lower section or central panel.
Cabinet
A small cabinet does not need a lot of decor. One connecting element can complete the frame and support the handle. Ensure the relief does not protrude beyond the body dimensions in the walkway area.
Sideboard and display furniture
Tall sideboard doors allow the use of N-401.1 or N-399.1. The connector can be positioned on the axis between the upper and lower frames, linking the glass and solid parts. The decor material is coordinated with the wooden frame and furniture cornice.
Kitchen facades
In the kitchen, decor should not interfere with opening and cleaning. Beech under enamel helps to unify the connecting element with the painted front. On many doors, it is better to use a repeating compact motif, leaving a large accent for the exhaust portal or central cabinet.
Built-in wardrobe
Tall doors provide a large area, but the connecting decor must account for vertical proportions. N-399.1 can become the center of a tall frame. On narrow doors, N-401.1 looks better. Paired doors are designed mirror-symmetrically.
Wall panel and door
On a panel, elements are perceived from a greater distance, so a larger scale is acceptable. The connecting element links moldings with a carved overlay or forms the center of a large rectangle. On a door leaf, check the placement of the lock, handle, and architraves.
What to check before purchase
| Parameter | Why it matters | How to check |
|---|---|---|
| Size A × B × C | Determines the area and depth of the relief. | Make a 1:1 template and apply it to the facade. |
| Material | Affects texture and finish. | Choose beech for enamel or oak for tinting. |
| Width and relief of the molding | Determine the quality of the transition. | Combine drawings to scale. |
| Facade area | A large element requires free space. | Measure the visible plane without working gaps. |
| Number of nodes | The kit and repeatability depend on it. | Mark all points on the development. |
| Orientation of parts | Adjacent elements can be left and right. | Check the article numbers and the image of the kit. |
| Installation method | The glue must be suitable for the wood and the base. | Clarify the system in the materials section and with the master. |
| Price and availability | Depends on the material and finish. | Check the active option in the card before ordering. |
What to buy together with the connecting decor
The connecting part works only within the system. For a full frame, you will need linear molding; for a central accent, a suitable overlay; for installation, glue and preparation materials; and to complete the facade, handles. It is better to purchase these items after the overall layout to avoid mixing styles and sizes.
| What to add | Why | What to pay attention to |
|---|---|---|
| Wooden moldings for furniture | Form the main frame. | Width, relief, wood species, and joint pattern. |
| carved overlays for furniture fronts | Create a central or top accent. | Scale, thickness, and ornament compatibility. |
| Connecting elements for moldings | Allow you to select corner, connecting, and finishing pieces. | Element function: corner, center, end, or transition. |
| Materials for installing wooden decor | Needed for gluing, priming, and finishing. | Compatibility with the base and coating. |
| Wooden furniture handles | Complete the updated facade. | Distance to the relief and ease of grip. |
The entire composition can start with a general section wooden carved decoration. It helps understand the available scale and style, but for purchasing a connecting part, it's better to go to the specialized section for molding decor.
How not to confuse a connecting element with similar products
Connecting element and a regular overlay
A regular overlay decorates a free surface and can exist independently. A connecting piece is located at a nodal point and must continue the lines of adjacent elements. If the moldings are removed, a regular overlay retains its meaning, while a connector often looks unfinished.
Connecting and corner element
A corner piece changes the direction of the frame by 90 degrees. A connecting element links lines that converge along one axis, intersect, or are interrupted. Using an elongated connector in a regular corner is only possible after checking the pattern; a special corner article is usually needed.
Connecting element and carved rosette
A rosette is perceived as an independent round or symmetrical medallion. It can be the center of a large panel without direct attachment of moldings. A connecting piece usually has a directional pattern and visual entry points for the linear elements.
Wooden and polyurethane decor
The comparison should not be reduced to stating that one material is always better. Wood is convenient to combine with wooden moldings, solid wood furniture, and joinery finishes. Polyurethane has a different weight, processing method, and application area. Materials are mixed in one frame only with coordinated preparation and painting.
Decorative and structural element
N-398.1, N-399.1, and N-401.1 do not hold the door, do not connect the body, and do not reinforce the facade. If the base is cracked or furniture parts are separating, repairs are performed first. The overlay should not mask a structural defect.
Installation of wooden decor on an MDF facade
Wooden connecting elements can be used on a paintable MDF facade if the surface is suitable for gluing and the finishing system is agreed upon. The materials have different structures, but after proper preparation and opaque enamel, they can be perceived as a single composition.
Check the base
The facade must be even, dry, and durable. Glossy or laminated coating requires a separate adhesion assessment. Do not glue decor onto peeling film or an unstable old coating.
Choose the glue
The glue must be suitable for both wood and the facade surface. In the section materials for installation and finishing you can view available compounds. The specific product is selected according to the manufacturer's instructions and the furniture's operating conditions.
Do not use glue to fix a gap
A thick layer should not compensate for the curvature of the part or base. The connector must fit evenly. Otherwise, after drying, the edge will remain raised, and a noticeable shadow will appear during painting.
Secure the position
The part may shift before setting. Use a safe temporary fixation that does not damage the thread or facade. Check the axis again immediately after pressing.
Painting: first layout, then finishing
One of the most expensive mistakes is to paint all parts completely and then discover that the molding does not fit the connector. Painted decor is harder to trim and sand without damaging the coating. Therefore, first perform a test layout and only then proceed to the finish.
For beech under enamel, the surface is dusted, primed, after drying a light interlayer sanding is performed, and the topcoat is applied. Deep areas of carving are treated with thin layers to avoid flooding the pattern. Excessive enamel thickness softens fine details.
If the entire composition should look monolithic, the final layer is often applied after installation. This makes it easier to hide small joints between the molding and the connector. However, back and hard-to-reach areas may require pre-treatment. The sequence is coordinated with the painter.
Oak for tinting requires a test sample. Stain absorbs more strongly into ends and recesses, so the color may become darker. Application must be done evenly, and planks and connectors should preferably be processed in the same batch.
Calculation of elements quantity
The quantity depends not on the area of the furniture, but on the number of nodes in the composition. For one facade, one central connector, two symmetrical ones, or four elements on the sides may be needed. First, draw each door and drawer, then sum up the positions.
If the furniture consists of repeating modules, make a table: facade type, number of facades, number of elements per one, total. For example, a chest has four identical drawers, each uses one N-398.1 — four parts are required. Two tall doors have two N-401.1 each — another four.
A small reserve is useful for a large project, especially if the finishing is complex and a repeat purchase later may differ by batch. But it is pointless to order extra large elements without a diagram.
Consider the left and right orientation of adjacent corner and
Different species in one transparent finish
Beech and oak have different grain patterns. The difference does not disappear under stain. For a transparent finish, use a matched material.
Painting before control layout
After painting, it is more difficult to adjust joints and trim molding. First, assemble a dry mock-up.
Attempting to use decor as fastening
The overlay does not connect structural parts. Cracks and weak joints are repaired separately.
Ignoring thickness
Large relief may interfere with the handle, adjacent door, or passage. Size C must be included in the drawing.
Installation on an unstable surface
Peeling paint, film, or dust reduce adhesion. The substrate must be prepared.
Style Mixing
A classic sheet connector next to a geometric modern molding looks random. Choose ornament from one system or deliberately connect with repeating motifs.
Too many accents
Connectors, overlays, carved handles, and a large cornice can overload the facade at the same time. Distribute roles: one element is the main one, the others support.
Who this solution is suitable for
- manufacturers of classic and neoclassical furniture;
- carpentry workshops assembling frame fronts;
- restorers restoring lost decorative elements;
- furniture and interior designers;
- owners of chests of drawers, cabinets, sideboards, and kitchens who want to update facades;
- projects with wooden moldings and carved overlays;
- painted MDF facades with proper preparation;
- for doors, panels, and portals with a symmetrical composition.
Connective decor is especially useful where the frame should look not just geometric, but artistically complete. It helps to connect details of different functions and create a coherent system. For a workshop, this is a ready-made unit that saves time on manual carving and simplifies repeating the same pattern on a series of facades.
When connective decor is not suitable
- for structural furniture repair;
- for a smooth minimalist facade without decorative lines;
- if the frame is not designed and the element is purchased separately;
- when the dimensions of the molding are unknown;
- for outdoor use without special coordination of material and coating;
- if only a chip or surface defect needs to be hidden;
- when the relief interferes with opening the door or using the handle;
- if it is impossible to perform a preliminary layout.
Sometimes the right decision is not to add a connecting element. If the frame already has expressive corners, a complex handle, and a central overlay, another node will create overload. The decor should solve a specific problem, not fill every free space.
Practical selection for specific situations
Need to close the joint on a small drawer
Start with N-398.1. Make a template 31 × 75 mm, mark the handle and frame. Check the relief of 12 mm. If the part takes up more than a third of the free height, the frame may need to be simplified or the connector omitted.
Need to design the center of a tall door
Compare N-401.1 and N-399.1. The first creates an elongated but moderate node. The second becomes the main accent. On paired doors, make a mirror layout and check the distance to the gap between the leaves.
Need to connect a molding with a large overlay
Choose a connector of intermediate size and thickness. If the overlay is very voluminous, N-398.1 may get lost. N-401.1 is often convenient as a transition. N-399.1 is suitable when the connecting part itself should become part of a large center.
Need to update a painted kitchen
Consider beech under enamel. Check adhesion to the existing facade, remove handles and make a layout. On multiple doors, use a repeatable pattern so the kitchen does not look motley. Leave large decor for the central section or the hood portal.
Need to preserve natural oak
Select oak moldings and connectors for tinting. Make a color test and arrange the parts according to the pattern. Do not mix oak and beech under a transparent coating if the difference is not intended in the design.
Need to design a wall panel
Increase the scale relative to the furniture. N-399.1 reads well from a distance but requires sufficient margin. Check its position relative to sockets, sconces, and furniture.
Need to select decor based on a photo
The photo is not enough for an accurate order. Add dimensions of the facade, molding, and free margins. It is useful to send a front-facing shot without perspective distortion and a diagram with dimensions to the STAVROS manager.
How to design a series of identical facades
When connecting decor is used not on a single item but on a kitchen, library, or furniture set, a single beautiful facade does not guarantee a good overall result. Repetition enhances any motif. A compact detail turns into a noticeable rhythm, and a large one into a dominant ornament of the entire wall.
Divide the facades into types: narrow, wide, tall, drawers, and central doors. Create a separate scheme for each type. Do not try to mechanically stretch one frame to all sizes. On a narrow facade, N-398.1 may be the center; on a wide one, the same model will become just a small connection, and N-401.1 will look more convincing.
Determine the overall level of decor placement. If the top connectors on adjacent doors are at different heights, the furniture looks untidy, even when each facade is symmetrical within itself. Use a base horizontal line and templates.
On the central section, the scale can be increased. For example, side doors get N-398.1, and the main tall door gets N-401.1. Such a transition is acceptable if the ornaments are related and the sizes change along with the furniture architecture. N-399.1 is best left for a truly large accent.
Before ordering, create a general visualization of the entire wall. It shows how many identical parts will be in the field of view. Sometimes the number of connectors needs to be reduced, leaving some frames without central nodes.
How to update old furniture without getting a stuck-on decor effect
During restoration, connecting elements are often installed on an already finished facade. The main danger is that the new trim looks separate from the old furniture. To avoid this, the parts need to be linked not only by color but also by proportions.
First, study the existing profiles: frame width, corner radius, handle and cornice style. If the furniture has soft rounded lines, a too rigid geometric molding will feel foreign. The connecting element is chosen after the molding, which is already consistent with the item's style.
The old coating is checked for durability. Decor cannot be glued over peeling varnish or film. The areas for installation are cleaned and prepared according to the technology suitable for the base. Sometimes it is wiser to remove the coating from the entire facade and refinish it from scratch.
Color matching also requires a sample. New white enamel next to an old yellowed surface will be noticeable. If the furniture is completely repainted, the connecting elements can be unified with it using one finish. For tinted wood, a shade is selected based on a hidden area or sample.
Do not cover a deep crack with a carved detail. First, perform structural repair, then decorative finishing. Otherwise, the damage will continue to develop under the overlay.
How to evaluate decor under different lighting
Relief exists thanks to light and shadow. The same N-401.1 on matte light enamel can look calm under diffused lighting and very voluminous next to a side sconce. Before final fixation, it is useful to view the layout in the morning, evening, and with the lights on.
Side lighting emphasizes every unevenness of the joint and sanding marks. For a wall or door near a window, the quality of preparation is especially important. Frontal lighting, on the contrary, makes the relief softer, so a small detail may get lost.
Dark tinting enhances the depth of recesses, while light enamel unifies the ornament with the facade. Glossy coating shows more defects and creates bright highlights. A matte surface is perceived as calmer but requires cleanliness of carved indentations.
If the furniture is in a narrow hallway, the connector is viewed up close. Here, the precision of each line is important. On a tall panel in the hall, details are visible from afar, so scale matters more than the finest carving.
How to organize an order for a workshop or serial project
For a workshop, it is useful to prepare a specification. It includes the article number, size, material, sanding quality, preparation for enamel or tinting, quantity, and purpose. Moldings, corner pieces, and overlays are recorded in a separate line.
Assign a code to each type of facade and attach a diagram. For example: F1 — one N-398.1, F2 — two N-401.1, P1 — one N-399.1. Such a system reduces the risk of the installer mixing up parts on site.
The received batch is inspected before painting. Count the elements, compare sizes, examine the relief, and lay out the set. After finishing processing begins, returning a mistakenly ordered model is much more difficult.
If the order is for enamel, it is better to prepare and paint parts of one composition together. For oak under tinting, plan the layout according to the grain. Store the spare with a coating label so that the color does not need to be matched again during repairs.
Current production and delivery times are agreed upon before furniture production begins. Connecting elements should not become the last missing item, due to which finished facades cannot be sent for painting.
Where to buy wooden decor for furniture
You can start the selection with the category where to buy, which will allow you to transform your furniture using carved wooden elements. You can use the C-003-3 decor set to decorate furniture, walls, doors, or any other surface. The C-003-3 decor set is made of oak or beech, known for their strength, durability, and beauty. You can buy the C-003-3 decor set at the Stavros decor store, which specializes in producing and selling decorative elements and hardware for furniture and interiors. At the Stavros decor store, you will find a wide selection of decor sets of various shapes, sizes, and styles. You can choose. For frame nodes, it is more convenient to immediately open the section decoration for moldings and compare connecting, corner, and finishing models.
The three cards under consideration allow you to check exact dimensions and choose the material:
- buy N-398.1 for a compact furniture frame;
- view connecting element N-401.1;
- check price and options for N-399.1.
Before ordering, specify the dimensions of the facade and molding, number of nodes, material, finish, and selected sanding quality. If the composition is complex, prepare a drawing. STAVROS offers manager assistance when selecting a small number of elements, and for complex projects, you can discuss the design project in advance.
Delivery is carried out across Russia. Terms, cost, and current timelines depend on the order and region, so they are checked when placing an order. For carved parts, protective packaging is important, especially if long moldings and small overlays are in the same shipment.
FAQ: questions about connecting decor
What is a connecting decorative element for furniture?
This is a carved wooden part that decorates the joint, gap, or intersection of moldings and helps assemble them into a single frame. It performs a decorative, not structural, function.
How is a connector different from a regular overlay?
A regular overlay can be a standalone decoration. A connector must interact with the molding lines and usually occupies a nodal point of the composition.
How to choose an element to match the width of the molding?
Compare the drawings to scale and check how the molding line fits into the overlay pattern. Consider not only the width but also the thickness and relief character.
Which model to choose: N-398.1, N-401.1, or N-399.1?
N-398.1 is suitable for a compact facade, N-401.1 for a medium elongated composition, N-399.1 for a large door, panel, or portal.
What is better for enamel — beech or oak?
In the product cards, beech is offered for enamel. Its even structure is convenient for opaque painting. Oak is intended for tinting when you want to preserve the expressive texture.
Can wooden decor be installed on an MDF facade?
Yes, if the surface is durable and properly prepared, and the glue is suitable for both materials. For a paintable composition, beech under enamel helps achieve a uniform color.
Do I need to paint the parts before installation?
First, be sure to do a dry layout. Some preparation can be done in advance, but it's often more convenient to finish the joints after gluing.
Can I use a connecting piece in the corner?
Only if its pattern really fits. For a regular frame turn, a special corner element or miter cut of the molding is usually used.
Which moldings should I buy with the decor?
Related product systems are shown in cards N-398.1, N-401.1, and N-399.1, but before purchasing, you need to check the drawings, width, and relief. A general selection is available in the wooden moldings category.
How to calculate the number of elements?
Draw each facade and count the nodes. Multiply the number of parts by the number of identical doors or drawers. For a large project, allow for a reasonable reserve.
Can I choose decor from a photo of the furniture?
A photo helps to understand the style, but for an accurate selection, you need the dimensions of the facade, molding, and free margins. It's better to attach a diagram and a front view photo.
Where can I buy decor with delivery?
Products can be ordered in the STAVROS online store. Delivery is carried out across Russia, and current conditions are calculated when placing an order.
What do the dimensions A × B × C mean?
These are the three dimensions of the product: width, height, and thickness or depth of the relief. All three values are important for the joint.
Can I install N-399.1 on a box?
Technically, the solution depends on the dimensions, but the 76 × 202 × 21 mm element is usually too large for a small box. Make a template and evaluate the free space.
Why can't you just cover the joint with any socket?
The socket may not continue the lines of the moldings. The connector has a directional pattern and looks like part of the frame, not a random medallion over the joint.
Is the same wood species required for all parts?
Under a transparent coating — preferably. Under dense enamel, the difference is less noticeable, but material preparation may differ. It's easier to assemble a set from one species.
How to check the current price?
Open the model card and select the material, grinding quality, and preparation. The price depends on the active option and may change.
Can the decor be used outdoors?
Outdoor use requires special material, adhesive, and a protective system. An ordinary interior part cannot be transferred to the facade without coordination with the manufacturer.
Bottom line: the connector should continue the frame, not just close the gap
A good connecting decorative element does not look like a patch. It follows the lines of the moldings, supports their relief, and creates a clear transition point. That is why the selection begins with a facade drawing, not with a separate beautiful photo.
N-398.1, size 31 × 75 × 12 mm, is suitable for small furniture compositions. N-401.1, size 47 × 123 × 14 mm, helps to design an elongated medium-scale unit. N-399.1, size 76 × 202 × 21 mm, becomes a noticeable accent on a large door, panel, or portal. Beech is chosen for enamel, oak for tinting and preserving natural texture.
Before purchasing, measure the facade and molding, check the thickness of the parts, the location of handles and working gaps. Lay out the frame without glue, compare several sizes, determine the number of units, and only then order the set. Along with the connectors, select moldings, overlays, installation materials, and hardware.
At STAVROS you can Buy furniture decor, go to the specialized section of connecting parts and select a specific model. This route helps to assemble the facade as a single decorative system, rather than masking joints with random overlays.
How to coordinate connecting decor with handles, hinges, and working areas
Even a correctly sized connecting element can be inconvenient if its placement is not coordinated with the furniture hardware. The handle, keyhole, hinges, and adjacent facades create working areas where the carved relief should not interfere with hand movement or door opening.
Handle and decorative axis
On a symmetrical facade, the handle is often located in the center. The connecting element can be placed above it, below it, or included in a general vertical composition. Do not place the relief too close to the grip area: fingers will press against the carving, and the coating will get dirty faster.
If the handle is made of wood and has its own ornament, compare its scale with the connector. Two equally active accents next to each other compete. For an expressive handle, a more compact N-398.1 is appropriate, while a large N-399.1 is better combined with calm fittings.
Hinges and the hidden side of the facade
Hinges are usually not visible from the outside, but they determine the opening direction and load. Thick decor at the edge increases the risk of contact with an adjacent cabinet or wall. Before gluing, open the door fully and check the trajectory.
Paired doors
On two doors, the decor should be mirrored. If connecting elements are located near the central gap, leave sufficient clearance between them. The relief should not collide when opening or look like a single ornament accidentally cut in half.
Drawers
On a drawer, the connecting node is placed so that it does not get under the fingers and does not interfere with pulling out. If the handle is installed in the center, the decor is often better raised higher or distributed along the sides. For small drawers, large models almost always require additional checking.
How to prepare a technical specification for selecting decor
If the selection is done by a manager, designer, or workshop, a high-quality technical specification reduces the number of clarifications and helps move to ordering faster. Instead of a general message "need decor for the cabinet," prepare a set of data.
Photo of the facade
The photo is taken directly from the front, without strong perspective. Attach a ruler or indicate the main dimensions in a separate diagram. If the furniture has not been made yet, a drawing or visualization is sufficient.
Dimensions
Specify the width and height of the facade, the free field inside the frame, the distance to the handle and edges. For an existing molding, record the width and maximum thickness of the relief.
Material and Finish
Indicate whether the composition will be painted with enamel or retain the wood texture. For enamel, choose beech; for tinting, choose oak. If the facade is already painted, attach the color name or sample, but keep in mind that an exact match requires a test swatch.
Quantity
List the types of facades and the number of identical parts. For example: four drawers with N-398.1, two doors with N-401.1, and one central panel with N-399.1. Such a record is clearer than a total quantity without purpose.
Project timeline
Cards show an average production time for custom orders of 5–10 days, but actual dates need to be confirmed. Add time for delivery, test layout, finishing, and installation. Do not plan painting of facades until all connecting parts are received and checked.
A good technical specification does not replace a design project, but allows checking the main risks: mismatch of scale, material, quantity, and timeline. For complex furniture with several types of moldings, it is better to prepare a full layout.
Final check of the kit before payment
Before placing your order, double-check the article numbers and sizes. N-398.1, N-401.1, and N-399.1 differ noticeably, but in the order list, one digit is easily lost. Check not only the model name but also the size A × B × C, material, sanding quality, and surface preparation option.
Then verify the quantity against the furniture layout. It is helpful to go through each facade on the drawing and mark the already counted parts. Separately check corner elements, moldings, overlays, handles, and mounting materials. The connecting decor will not be able to assemble the frame if one of the main sections of the molding is missing from the kit.
If the products are ordered for enamel, make sure all wooden parts of the same composition are prepared for opaque painting. For oak intended for tinting, plan a test paint in advance. Check the current price, availability, and manufacturing time in the selected card option, and delivery conditions when placing the order.
After such a check, the buyer receives not a separate beautiful overlay, but an agreed-upon kit that can be laid out, finished, and installed without unexpected replacement of parts.