Article Contents:
- What are polyurethane rustics and why they work on facades
- Where rustic decor is used on facades
- On the corners of the house
- On the plinth
- In the entrance group
- In window and door framing
- On the facade of a private house as a unified system
- What are the types of rustication patterns: from regular to corner
- How polyurethane rustics differ from concrete and foam ones
- How to choose the size of rustics for a facade: a practical guide
- Consider the facade height
- Calculate the step and quantity per corner
- Match with moldings and trims
- Account for the wall projection
- Check the distance to adjacent elements
- Practical selection table
- How to combine rustications with other facade decor
- Rustications + facade cornices
- Rustications + moldings
- Rustications + trims
- Rusts + keystones
- Rusts + pilasters
- Rusts + brackets
- Rusts + entrance portal
- Rusts + base profile
- How to calculate the purchase of rusts: step-by-step guide
- Installation of polyurethane rusts: what you need to know before starting work
- Surface Preparation
- Marking
- Glue and fastening
- Sealing and final painting
- Common mistakes when choosing and installing rust decor
- Painting rust blocks: the color that decides everything
- Solid color matching the wall
- Contrast painting
- Imitation of natural stone
- Dark tones
- How to assemble a facade decor kit: checklist before ordering
- FAQ: answers to the most popular questions about rustications
- STAVROS: facade decor you can trust
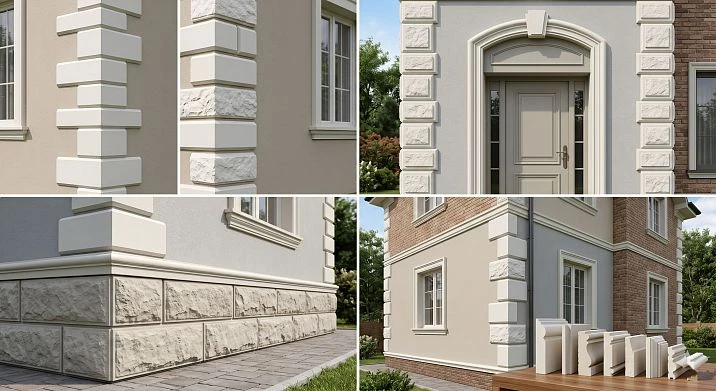
There are houses that are remembered at first glance. Their facade is not just painted — it reads. Not just plastered — it speaks the language of architecture. One of the main tools of this language is polyurethane rustications for the facade. Rectangular blocks with pronounced relief that imitate stone masonry, reinforce corners, visually give the building monumentality and make a private house look not like a standard building, but like a well-thought-out architectural object.
This is not poetry — it is a commercial fact. Rustic facade decor made of polyurethane today is one of the hottest requests in the niche of finishing country houses and cottages. People are looking not for 'stucco in general', but for a specific solution: how to design the corners of the house, how to decorate the plinth, how to make the entrance group representative. And it is rustications that give this result — quickly, reliably, at a reasonable price.
In this article, we will break down everything essential: what polyurethane rustication is, where it is used, how to choose the size, calculate the quantity, combine it with other facade decor elements, and avoid mistakes that ruin even well-thought-out projects.
What are polyurethane rustications and why they work on facades
The word "rustication" comes from the Italian architectural dictionary — rustico means "rough," "natural," "hand-finished." Historically, rusticated masonry consists of stone blocks with a deliberately rough, slightly protruding surface and clear horizontal and vertical joints. This was used for fortress foundations, basement floors of Renaissance palazzos, and grand entrances of city mansions. Rustication was seen as a symbol of strength, reliability, and architectural weight.
In modern facade decor, rustication serves the same purpose — visual. It does not bear load but creates a sense of monumentality where behind the plaster there is only ordinary aerated concrete block or brick. A rectangular decorative block protruding 20–50 mm from the wall plane creates a distinct shadow and relief that is clearly visible from a distance of 5–15 meters — exactly where a person typically perceives the facade of a private house.
Polyurethane as a material for rustications is a solution that emerged in response to a very specific demand: provide the effect of stone masonry without the weight of stone, without the cost of stone, and without the complexity of stone installation. Polyurethane rustications weigh 8–12 times less than concrete counterparts. A 250×500 mm polyurethane rustication weighs 400–700 grams — it is mounted with adhesive without reinforcing the load-bearing wall, without anchor bolts or crane equipment. This fundamentally changes the project logic.
Technical characteristics of STAVROS facade rustications: polyurethane density — 350–400 kg/m³, which meets the facade standard (1.3–1.5 times higher than interior), frost resistance — 300+ freeze-thaw cycles, operating temperature range — from -40 to +60°C, moisture resistance — the material does not absorb water and does not swell. The surface, after priming, is ready for painting with facade paints. Service life with proper installation and painting — 20–30 years.
molded decoration made of polyurethane STAVROS is a complete system of facade and interior elements, where rustications occupy their place as corner and flat decor. They can be chosen as a standalone element or as part of a comprehensive facade design system.




Where is rustication decor used on facades
Rustication decor is not a one-size-fits-all solution. It has several application scenarios, each solving its own task. Understanding these scenarios means making the right choice even before browsing the catalog.
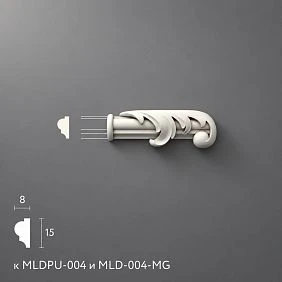
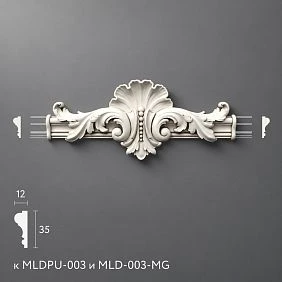
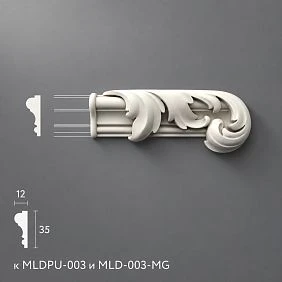
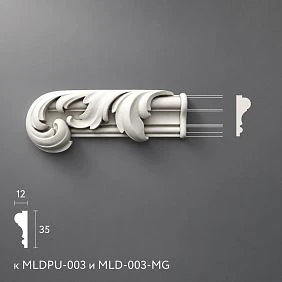
Our factory also produces:
At the corners of the house
This is the most common and most effective scenario. The corner of a building is a visually vulnerable point of the facade: here the wall ends, the volume "breaks off," and if this transition is not emphasized, the house looks unfinished. Corner rustication solves this problem radically.
Decorative rustications for the house are arranged in a vertical row along the external corner — either with bonding (as in real stone masonry, where blocks alternate face and end) or simply in two parallel rows on both planes of the corner. The effect is monumental: the corner ceases to be just a joint of two walls and becomes an architectural accent.
For corner rustication, the correct block size is especially important. Too small rustications on a high corner will create a feeling of a "fragmented" surface, too large ones will overload a small house. More on this in the section on size selection.
Get Consultation
On the plinth
The plinth is the transition between the ground and the main volume of the building. In classical architecture, the plinth was always made of a heavier, rougher material than the main walls — precisely to visually "weigh down" the base and create a sense of stability.
Rustic decor for the plinth is an ideal way to recreate this classical logic on a modern house without real stone cladding. Rustications laid in horizontal rows on the plinth part form an imitation of stone masonry. The plinth acquires "weight" and reliability. The wall above looks lighter — precisely because the base is made "heavy." This is not an optical illusion, but a proven architectural technique.
For plinth rustication, large blocks — 250×500 mm and larger — are well suited. The projection from the wall is 30–50 mm. The color, as a rule, differs from the main tone of the wall: slightly darker, slightly "earthier," imitating natural stone.
In the entrance group
The entrance group is the front part of the facade. Here, rustication works in tandem with other decorative elements: pilasters, cornice, door portal, keystone made of polyurethane, brackets. Rustications around the entrance opening or on the sides of the entrance arch create a frame that highlights the entrance from the general facade background.
Rustication of the entrance group requires special attention to symmetry: if rustications go on one side of the door, they should also go on the other. The width of the rustication should be proportionate to the width of the entrance: too narrow a rustication frame looks poor, too wide overloads.
In window and door framing
Rustication as an accent around window and door openings is a less common but very expressive scenario. Small rusticated blocks placed at the corners of the window frame create an imitation of keystones — like in a classic arched or rectangular window niche of a stone palazzo.
This solution pairs well with polyurethane window trim: the architraves define the outline, the rustication creates corner accents, and the keystone at the top completes the composition.
On the facade of a private house as a unified system
This is the most commercially significant scenario. Rustication for the facade of a private house is not bought as one or two blocks — it is bought as a system. Corner rustication + plinth rustication + window accents + entrance group = a completed facade project where each element supports the overall rhythm.
A plastered facade is an ideal base for polyurethane rustication: a smooth, monolithic surface to which the element is glued without difficulty. Rustication works especially well on houses in classical, neoclassical, or "Italian" style. For houses in a modern style, only large, concise blocks without textured relief are acceptable.
What types of rustication patterns exist: from regular to corner
Before choosing specific products, you need to decide which pattern the rustication will be laid in. The layout pattern determines the visual rhythm of the facade and affects the number of elements in the order.
| Rustication pattern | Characteristic | When to use |
|---|---|---|
| Regular | Identical blocks with equal vertical spacing | Classic facade, symmetrical house |
| Alternating | Blocks of different heights alternate: large — small — large | Livelier rhythm, neoclassical |
| Corner | Only on the external corners of the building | Emphasis on corners, main facade without rustication |
| Basement | Along the lower belt of the facade in horizontal rows | Imitation of stone base |
| Around openings | Accent rustication around windows and doors | Design of openings without corner rustication |
| Combined | Corners + basement + entrance group | Full facade design |
| Continuous (rare) | The entire facade or most of it | Large houses, castle style |
The most popular for private houses is the corner scheme combined with plinth rustication. It provides maximum architectural effect with minimal material: corners and plinth organize the facade, while the main wall planes remain relatively clean — moldings, architraves, and cornices take their place without competing with rustications.
For calculating the alternating rustication scheme, the standard rhythm is: large block (e.g., 200×400 mm) + joint 40–60 mm + small block (150×300 mm) + joint 40–60 mm + large block. This rhythm creates a lively, non-monotonous surface that the eye perceives with interest, rather than as a repetitive pattern.
How polyurethane rustications differ from concrete and foam ones
A question that arises for most buyers — and it is completely justified. There are several options for rustication decor on the market, and the difference between them is fundamental.
Concrete rustications are heavy, long-lasting, and expensive to install. One block 250×500 mm made of concrete weighs 4–8 kg. Corner rustication for a house weighing 300–500 kg requires reinforced fastening, anchor mounting, and special preparatory work. Plus, the high cost of the products themselves. Concrete is frost-resistant but brittle upon impact. For a private house, it is an excessive solution.
Foam (expanded polystyrene) rustications are cheap but unreliable. Foam is mechanically vulnerable: it scratches, breaks, and crumbles upon impact. Without surface reinforcement with fiberglass mesh and several layers of putty, it cannot withstand facade use. Service life is 5–10 years. Acceptable for a budget temporary solution. For a house built once and for a long time, it is not.
Polyurethane rustications offer a balance between ease of installation, strength, and durability. Weight of a 250×500 mm block is 400–700 grams. Installation on adhesive without mechanical fasteners (for elements up to 1.5 kg). The relief withstands mechanical impact without crumbling. Frost resistance is 300+ cycles. With proper painting using facade enamel, service life is 20–30 years.
Facade decoration made of polyurethane STAVROS covers the entire range of elements: from thin molding strips to large rustication blocks. It is a unified system where the material, density, finish, and compatibility between elements are the same — which is critically important for the joinability of decor on a real facade.
How to choose the size of rustication for a facade: a practical guide
This is a central question when purchasing. A mistake in size results in either "small peas" on a large facade or an overloaded wall with blocks that overwhelm with their scale. How to choose correctly?
Consider the height of the facade
The main reference point is the height of the corner or wall to be decorated. For a one-story house with a corner height of 3 m, blocks of 150×300 mm or 200×400 mm are suitable. For a two-story house with a corner height of 6–7 m, blocks of 200×400 mm or 250×500 mm are suitable. Large blocks of 300×600 mm are appropriate for tall facades of 8 meters and above.
Calculate the spacing and quantity per corner
The spacing between blocks (joint width) is 40–80 mm. With a spacing of 60 mm and a block height of 300 mm, one "row" takes up 360 mm. For a corner height of 3 m, about 8–9 blocks are needed. With a block of 400 mm + a joint of 60 mm, about 7 blocks. With a block of 500 mm + a joint of 80 mm, about 5–6 blocks.
According to data on polyurethane facade moldings and 2026 prices, for a corner height of 3 m, the consumption is approximately 8–12 corner rustication stones, depending on the element size and rustication pattern. Multiply by the number of building corners to get a basic calculation.
Match with moldings and trim
If Moldings made of polyurethane on the facade they have a profile height of 80–100 mm, the rustication should not be wider than 200 mm — otherwise it will visually "overpower" the molding. General rule: the thickness of the cornice sets the maximum scale, all other elements are proportionally smaller.
Consider the projection from the wall
Standard projection of rustication decor is 20–50 mm. For corner rustication, 30–40 mm is optimal: the projection creates a clear shadow under side lighting without overloading the corner. For base rustication, a deeper relief of 40–50 mm can be used to emphasize the "heaviness" of the foundation.
Check the distance to adjacent elements
If a vertical row of rustications on the corner ends at the cornice, there should be either a neat transition or a special corner element between the top rustication and the cornice. Avoid situations where the rustication "cuts into" the cornice or crosses the molding line.
Practical selection table
| Front height | Recommended rustication size | Projection | Joint | Consumption per corner |
|---|---|---|---|---|
| 2.5–3 m | 150×300 mm | 25–30 mm | 40–50 mm | 9–11 pcs. |
| 3–4 m | 200×400 mm | 30–35 mm | 50–60 mm | 8–10 pcs. |
| 4–6 m | 250×500 mm | 35–45 mm | 60–70 mm | 8–10 pcs. |
| 6–8 m | 300×600 mm | 40–50 mm | 70–80 mm | 9–11 pcs. |
| from 8 m | 350×700 mm | 45–55 mm | 80–100 mm | 10–12 pcs. |
How to combine rustication with other facade decor
Proper rustication is not a single element. It works in a system. And the STAVROS facade decor system is built precisely on the compatibility of elements: a unified style, a unified scale, a unified material.
Rustication + facade cornices
A cornice is a horizontal limiter of the facade from above. Corner rustication "enters" this horizontal belt from below. The correct combination: the top row of rustication ends under the cornice line with a gap of 60–80 mm, or the cornice slightly overhangs the corner rustication — exactly as in classical architecture the cornice molding "covers" the rusticated corner.
Rustication + moldings
If the facade has an interfloor molding belt, the rustication at the corner is interrupted at the level of this belt. The molding "crosses" the corner, dividing the rustication into two tiers. This is a classic technique of two-tier facade design: each floor gets its own corner rustication, separated by a molding belt.
Rustications + architraves
Facade molding for a house — is primarily a system of architraves and moldings. Window architraves and rustication blocks must be proportionate: the width of the architrave ≈ the width of the rustication or slightly narrower. If the architrave is 80 mm and the rustication is 300 mm, the scale conflict is obvious.
Rustications + keystones
Above a door or window opening — a polyurethane keystone as a central accent, with corner rustication inserts on the sides of the opening. This is a classic framing of the opening, reproducing the logic of stone masonry.
Rustications + pilasters
Pilasters set the vertical rhythm on the facade, rustication blocks reinforce the corners. If pilasters flank the entrance group, rustication runs on both sides of the pilasters — creating the impression that the "columns" grow into the rusticated wall.
Rustications + brackets
Polyurethane brackets Under the cornice overhang — a rhythmic horizontal accent. Rustication — a vertical accent. Together, they create an expressive load-bearing logic for the facade: the "mass" of rusticated corners supports the cornice with brackets.
Rustication + entrance portal
Polyurethane facade decor and entrance group — this is a separate topic, but rustication plays an important role here. Rusticated "pilasters" on either side of the entrance portal turn an ordinary doorway into an architectural portal. Add a cornice above the entrance with brackets and a keystone above the door — and you get an entrance group on par with a city mansion.
Rustication + base profile
The base molding is a horizontal line separating the base from the main volume of the building. Base rustication is located below this molding. Proportion: the height of the base rusticated zone is 1/5–1/4 of the total facade height. A base that is too low with rustication looks "stubby," while one that is too high overloads the lower part.
How to calculate the purchase of rustications: a step-by-step guide
Calculation is not a mathematical abstraction. It is specific actions with a tape measure and calculator that protect you from under-ordering or overspending. Here is a working method.
Step 1. Measure the height of the corners
The height of the corner from the base level to the cornice line is the main parameter. For a two-story house with an interfloor molding, measure each tier separately.
Step 2. Determine the rustication pattern
Corner, alternating, or regular — this changes material consumption. An alternating pattern with different blocks will require two catalog items.
Step 3. Choose the block size
Refer to the table above. Take one standard size and record: block height H, joint S.
Step 4. Calculate the quantity per corner
Quantity = (corner height) / (H + S). For a 3 m corner, 300 mm block, 60 mm joint: 3000 / 360 = 8.3 → 9 blocks. This is for one plane of the corner. If the corner element is double-sided — 9 pieces for the entire corner. If single-sided — multiply by 2 (both planes).
Step 5. Multiply by the number of corners
Four corners → multiply by 4. Add the base area as a separate calculation.
Step 6. Add 10–15% reserve
Reserve — for trimming, cutting defects, non-standard areas (window slopes, transitions).
Step 7. Select matching elements
PU overlays as additional accent points, moldings for the inter-story belt, cornices, architraves — all of this is ordered as a set to avoid mixing different styles.
Example calculation:
House 8×10 m, two floors, corner height 6 m, inter-story molding at height 3 m, 4 external corners. Block 200×400 mm, joint 60 mm, corner (double-sided).
-
For one corner section (3 m): 3000 / 460 = 6.5 → 7 blocks
-
Two tiers: 7 × 2 = 14 blocks per corner
-
Four corners: 14 × 4 = 56 blocks
-
12% reserve: 56 × 1.12 = 63 blocks
Final order: 63–65 double-sided corner rusticated stones 200×400 mm.
Installing polyurethane rustications: what you need to know before starting work
Good installation is half the success. Even the most beautiful and correctly selected rusticated blocks can be ruined by careless fastening. Let's break down the technology.
Surface preparation
The wall must be plastered, cleaned of dust and dirt, and dry (moisture content no higher than 5%). Grease stains, efflorescence, old peeling paint — remove. The surface is primed with a deep penetration primer — this is critically important for the adhesion of the adhesive to the mineral base.
Installation at temperatures below +5°C and above +30°C, as well as in rain or under direct solar heating of the surface, is not allowed. Optimal temperature — +10...+25°C, moderate humidity.
Marking
This is the most critical stage, which is most often skipped. Without marking, the corner rows go to the side, the seams become uneven, and the symmetry of the facade is disrupted.
Marking is done from the bottom horizontal line (strictly level) upwards, fixing the step with a pencil or a chalk line. For corner rustication, first set the vertical line of the corner axis, then the block width is laid off to the left and right.
Glue and fastening
Installation adhesive for polyurethane facade decor — specialized, with high adhesion to polyurethane and mineral bases. Do not use mounting foam: it deforms thin elements and does not ensure an even fit of the block.
The adhesive is applied to the back surface of the block in "sausages" along the perimeter and crosswise in the center. After pressing, hold for 3–5 minutes, if necessary, fix with temporary supports until fully set (24 hours).
For elements weighing more than 1.5 kg and when installing above 3 meters — additional mechanical fastening: self-tapping screws with dowels for concrete or brick. The heads are recessed and covered with putty.
Sealing and final painting
Joints between rustications and joints to the wall are filled with acrylic sealant — it is flexible, does not crack under thermal expansion, and can be painted over. Silicone is not suitable — it cannot be painted.
After the sealant has completely dried, the surface is primed and painted with facade paint with a UV filter: 1 coat of primer, 2 coats of paint. To imitate natural stone — facade acrylic paint with stone chips or textured "marble-like" in two tones. This creates a convincing illusion of natural material.
Common mistakes when choosing and installing rusticated decor
Mistakes are not theory. These are real cases that repeat from project to project. Knowing them in advance, you will avoid them.
They buy without calculating the corner height. They order 'by eye' — and either there isn't enough, or there's leftover. Always measure and calculate using the formula.
They don't account for the gap between blocks. They take the number of blocks 'by height' without considering the joints. The result is clumping of blocks or a shortage at the end of the row.
They choose too large rustication for a small house. 300×600 mm blocks on a one-story house are like a size five jacket on a person 160 cm tall. Disproportionate. A small house requires small decor.
They use fine rustication on a tall facade. 100×200 mm blocks on a two-story house with wall heights of 6–7 m — they simply don't read. The facade looks loose and unprofessional.
They don't think through the painting. White rustication on a white wall gives a weak effect: the relief is lost without color or tonal contrast. Dark gray rustication on a white wall is graphic and expressive.
They don't seal the joints. An open joint is a path for water. Water freezes, expands, and tears the decor off the wall. Sealing is not an option, but a mandatory operation.
They install without marking. The result is 'floating' rows, uneven joints, and broken verticals. A laser level and a chalk line are essential tools.
They buy one element without thinking through the set. Rustication without a cornice, without architraves, without moldings — this is an unfinished facade. Always think systematically.
Decorative elements of different scales are mixed. Large rustications + thin architraves = a conflict of scales. All facade elements should be proportionate to each other.
They don't add a reserve for trimming. 10–15% above the calculation is not greed, it's insurance against a shortage during unexpected trimming near the cornice or window opening.
Painting rustication blocks: the color that decides everything
Painting is the final and most expressive stage. It is color that turns a polyurethane rustication into a convincing imitation of natural stone or an elegant architectural accent.
Monochrome painting in the color of the wall
A minimalist approach: rustications are painted in the tone of the main facade. The decor works only through relief and shadow. The effect is subtle, aristocratic. Suitable for neoclassicism and modern architecture.
Contrast painting
The most common technique: white or light gray rustications on a warm wall tone (beige, cream, light yellow). High contrast — maximum readability of the decor. Classic, Renaissance, Italian style.
Imitation of natural stone
Textured paint with stone chips or two-tone painting (a darker tone in the recesses of the joint, a lighter one on the plane of the block) creates a convincing illusion of natural stone. For this, first apply a base tone, then a dark shade in the joint area — with a brush or roller with a squeezed-out coating.
Dark tones
Anthracite, dark gray, graphite rustication — a modern, bold, graphic solution. Works well on houses with white or light gray plaster. Requires high-quality paint with a UV stabilizer, as dark surfaces heat up more intensely in the sun.
How to assemble a facade decor kit: a checklist before ordering
This checklist is a practical tool. Go through it before placing an order, and you will avoid most mistakes.
-
Determine the facade type: classic, neoclassical, modern, Italian, "castle".
-
Measure the height of each corner separately — corners may have different heights.
-
Choose a rustication scheme: corner, base, around openings, or combined.
-
Determine the block size according to the facade height correspondence table.
-
Calculate the number of blocks using the formula taking into account the joint.
-
Add 12–15% reserve.
-
Select facade cornices — the scale should be proportionate to the rustication.
-
Select moldings for the interfloor belt.
-
Choose trims for windows and doors.
-
Determine the presence and location of pilasters, brackets, and keystone.
-
Decide on the painting scheme: monochrome, contrast, stone imitation.
-
Clarify compatibility of all elements in a single style and scale.
-
Order everything in one batch — different batches may slightly differ in shade and geometry.
FAQ: answers to the most popular questions about rustications
What are polyurethane rustications?
These are decorative rectangular blocks made of cast polyurethane with a density of 350–400 kg/m³, imitating stone masonry. They protrude 20–50 mm from the wall plane, creating relief, play of light and shadow, and a sense of facade monumentality.
Where is rustication decor installed on the facade?
On the external corners of the building, on the plinth part, around the entrance opening, around window and door openings, and also as horizontal belts on the entire facade.
How do polyurethane rustications differ from concrete ones?
Polyurethane ones are 8–12 times lighter, mounted with glue without anchor fasteners, and do not require wall reinforcement. Service life is comparable — 20–30 years with proper painting. Price is 2–4 times lower than concrete ones.
How to choose the size of a rustication stone?
Focus on the facade height. For a one-story house (3 m) — blocks 150×300 or 200×400 mm. For a two-story house (6 m) — 250×500 mm. For high facades from 8 m — 300×600 mm and larger.
How many rustications are needed for one corner of the house?
For a corner 3 m high with a block of 300 mm and a joint of 60 mm — 8–9 pieces. With a block of 400 mm — 6–7 pieces. Always add 10–15% reserve.
Can rustications be used on the plinth?
Yes, this is one of the best scenarios. Plinth rustication imitates a stone base, visually weighs down the base of the house, creating a logic of 'heavy bottom — light top'.
How to combine rustications with architraves and cornices?
Scale is a key principle. The width of the casing ≈ the width of the rustication or slightly narrower. The cornice sets the maximum scale of the system. The interfloor molding divides the rustication into tiers.
Can facade rustications be painted?
Absolutely. Painting is not an option, but a condition for durability. Use facade acrylic paint with UV filter, 2 coats over primer. Without painting, polyurethane degrades from UV radiation within 2–3 years.
How to install polyurethane rustications on a facade?
Prepare the surface (clean, prime), apply markings, apply construction adhesive in 'sausage' strips to the back of the block, press, hold for 24 hours. Fill the joint with acrylic sealant. Paint with facade enamel.
Where to buy polyurethane rustications for the facade?
In the STAVROS catalog — a full range of facade polyurethane decor, including corner rustications, base blocks, and elements for window and door framing. Order with Contact us to confirm shipping to your destination.
STAVROS: facade decor you can trust
Facade design is a decision for decades. You build a house once, and what you choose for its face will look at you and everyone passing by for many years. That is why choosing a supplier is not a question of 'where is cheaper', but a question of 'who to trust'.
STAVROS is a manufacturer of architectural decor from polyurethane and wood with many years of experience in the niche of facade and interior products. Own production lines, full quality control from raw materials to finished product, a wide range of facade decor — cornices, moldings, rustications, casings, pilasters, brackets, keystones, balustrades.
All STAVROS facade products meet the requirements of the Russian climate: frost resistance of 300+ cycles, UV stabilizers in the material composition, density of 350–400 kg/m³. White primer is standard for all products, ready for painting with any facade paints.
Catalog polyurethane molding decoration STAVROS is a system of compatible elements where rustications, moldings, cornices, architraves, and overlays are created in a unified style and scale. This is fundamentally important for a facade project: buying everything in one place means getting a facade where each element complements the others.
For private buyers — a convenient online catalog, consultations on selection and quantity calculation, Contact us to confirm shipping to your destination. For professionals — architects, designers, construction companies — wholesale terms, personal project support, priority production of custom elements.
Your home deserves a facade that doesn't just protect — but speaks. About quality. About taste. About the fact that people who value architecture live here. STAVROS polyurethane rustications are the first and one of the most expressive steps toward such a facade.