Article Contents:
- What is a polyurethane baseboard cornice: definition, material, purpose
- Why you need a baseboard belt: ten compelling reasons
- Where to use a baseboard cornice: five scenarios
- On a private house with a plastered facade
- On a facade with a stone or clinker base
- On a facade with corner rustications
- In the entrance group
- On an extended facade
- Soffit cornice, interfloor belt or facade molding: how not to confuse
- How to choose the size and profile of a soffit cornice: ten parameters
- Soffit height
- Overhang from the wall
- Lower overhang profile: drip edge is mandatory
- Profile relief
- Relation to rustication
- Distance to first-floor windows
- Soffit finishing material
- Color solution
- Facade height and number of floors
- Facade length and corner joints
- How to combine a plinth cornice with other facade decor: eight combinations
- Plinth cornice + rustications
- Plinth cornice + interfloor belt made of polyurethane
- Plinth cornice + crowning cornice
- Plinth cornice + architraves
- Plinth cornice + entrance group
- Plinth cornice + window sill belts
- Plinth cornice + keystones
- Plinth cornice + polyurethane moldings
- Installation of a polyurethane plinth cornice: from the ground to sealant
- Foundation Preparation
- Marking
- Applying adhesive and installation
- Mechanical Fastening
- Features of corner joints
- Sealing: three critical zones
- Final Painting
- How to calculate your purchase: a step-by-step algorithm
- Mistakes in selection and installation: learn in advance
- FAQ: Questions and Answers
- STAVROS: when the foundation of a house becomes an architectural statement
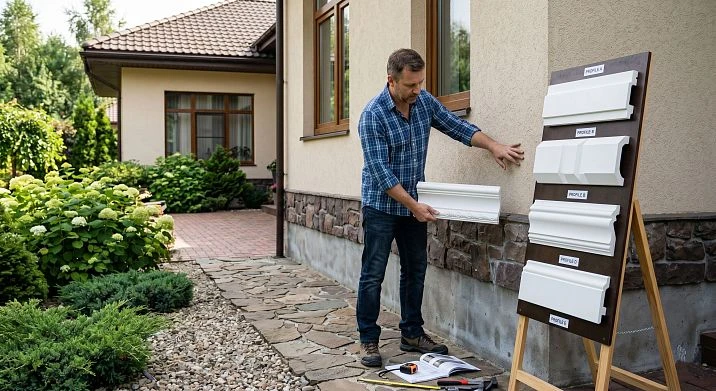
There is one detail that everyone notices — but not always understand why it makes such an impression. When you approach a well-designed house, the first thing you feel is that it stands. Not just sticks out of the ground, but truly stands: confidently, solidly, as if it grows from its foundation. This feeling is created by the plinth. And what makes it complete, architecturally convincing, and visually separate from the wall is the plinth cornice.
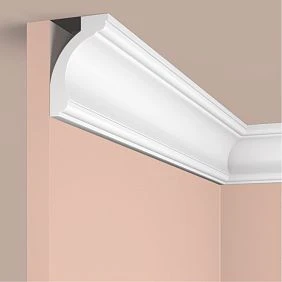
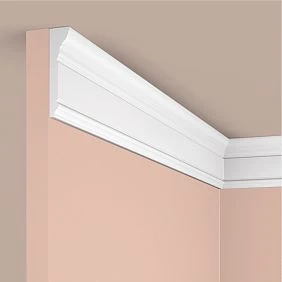
Polyurethane plinth cornice — is a horizontal facade profile installed at the boundary of the plinth and the main wall. It performs several tasks at once: architectural (visually separates the base from the facade body), structural (protects the joint from moisture penetration), and aesthetic (creates the lower belt of the facade system, without which the decor of windows, rustications, and interfloor belts 'hangs in the air').
This is not an interfloor belt, a crowning cornice, or a decorative molding on the wall. It is precisely the lower belt — the first horizontal line from which the entire architectural logic of the facade begins. About how to choose it correctly, for which plinth, of what size, with what projection, and in which system — this article covers in detail and honestly.

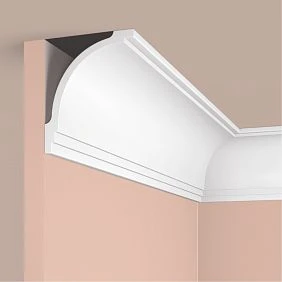


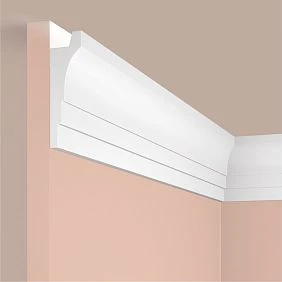
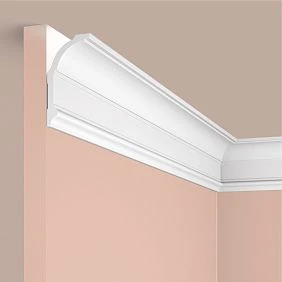

What is a polyurethane plinth cornice: definition, material, purpose
In classical architecture, the lower part of the facade was always treated specially. The plinth — the base, the "pedestal" of the building — was an area of increased strength, different texture, different color. The boundary between the plinth and the main wall was marked by a profile: a stone, stucco, or brick belt. This was not a decorative whim, but an architectural necessity: without horizontal division, the facade lacked clear structural logic.
Today in private construction, the plinth is most often finished differently: with clinker stone, decorative plaster, dark or textured paint. The main wall is light, smooth, plastered. The boundary between them is an area requiring a neat architectural solution. This is where the polyurethane plinth cornice comes in.
The profile is made of two-component cast polyurethane of facade formulation: density 350–420 kg/m³, closed cell structure, zero water absorption. The material withstands 300+ freeze-thaw cycles, is resistant to UV after painting, does not absorb moisture, and does not deform during seasonal temperature changes. The surface is white matte, primed, ready for painting without additional preparation.
Standard sizes of the STAVROS plinth cornice:
-
Profile height: 100–200 mm
-
Projection from the wall: 80–150 mm
-
Strip length: 2000–2500 mm
-
Profile body thickness: 20–35 mm
Installation position: at a height of 50–90 cm from the zero mark — depending on the plinth height. The profile is mounted so that its lower overhang overlaps the top edge of the plinth finish.
Polyurethane molding for house facades — it is a broad system in which the plinth cornice plays the role of the "zero mark" of decor: the architectural vertical of the facade begins with it.




Why you need a plinth belt: ten compelling reasons
To speak of the plinth cornice only as "decor" means to underestimate it. It is both a functional and architectural element. Let's break down each argument in favor of its installation.
Architecturally separates the plinth from the wall. Even if the plinth and wall are the same color, the profile creates a clear boundary between the lower and upper zones. The facade acquires a three-part division: base — body — top.
Protects the joint from moisture. The plinth-wall transition is a high-risk area: water flows down from the wall, splashes from the blind area, and condensation accumulates. A cornice with the correct overhang directs water forward, preventing it from flowing into the joint.
Covers the top edge of the plinth finish. The upper end of clinker tiles, decorative stone, or plinth plaster is always a vulnerable spot. The cornice covers it from above, protecting it from direct water ingress.
Visually weighs down the base. In architecture, "heavy bottom, light top" is a principle of stability. A plinth belt with an overhang of 80–150 mm creates a horizontal "shelf" at the bottom, which visually increases the mass of the base. The house appears more stable.
Creates a play of shadows in the lower zone of the facade. The protruding profile casts a shadow on the plinth surface — especially expressive in evening light and with side lighting. The lower part of the facade ceases to be flat.
Connects the facade with the blind area and porch. The horizontal line of the plinth belt "picks up" the horizontal line of the blind area and porch steps, uniting the lower zone into a single architectural plane.
Supports the rustication of corners. If corner stones are installed on the corners of the house Polyurethane rusticationThe plinth belt creates a horizontal base from which vertical rusticated blocks begin. Without this base, the rustications "start from the ground" — the architectural logic is lost.
It helps separate different materials and colors. A contrasting stone plinth + light wall plaster — without a cornice, the transition looks random. With a cornice, it looks intentional and designed.
It works in a system with an interfloor belt and a top cornice. Three horizontals — plinth, interfloor, and crowning — create a complete architectural system. Without the plinth belt, the lower horizontal is missing, and the system looks truncated.
It makes the house look more expensive visually. Not through the cost of the material itself, but through the feeling of a design approach, detailed elaboration, and attention to every zone of the facade. This cannot be bought with price — but it is easily achieved by choosing the right elements.
Our factory also produces:




Where the plinth cornice is used: five scenarios
Get Consultation
On a private house with a plastered facade
This is the most common case. The plinth is finished with decorative stone-like plaster or painted in a dark tone, the main wall is light smooth plaster. A polyurethane plinth cornice is installed at a height of 60–80 cm from the ground, separating the two zones. Profile width — 100–140 mm, projection — 80–120 mm.
Facade decoration made of polyurethane for a private house — this is a systematic approach where the plinth cornice is the reference point for all other horizontal lines of the facade.
On a facade with a stone or clinker plinth
Clinker, natural or artificial stone, decorative tiles — all this creates a textured, dark, heavy lower zone. Here, the polyurethane cornice acts as a "lid": it completes the stone zone from above and provides a clean architectural transition to the smooth plaster.
Important nuance: with a stone plinth, the cornice must have a sufficient projection — 100–150 mm — to overhang the top edge of the stone and protect its end from water.
On a facade with corner rustication
If the house is decorated with corner rustication — vertical rusticated blocks at the facade corners — the plinth belt becomes a horizontal "base" from which these blocks start. Without the plinth cornice, the rusticated blocks "start from the ground" — and the facade looks random. With the cornice, the blocks protrude from the horizontal belt — this is logical, classic, architecturally convincing.
In the entrance group
The entrance area is the most saturated part of the facade. Porch, steps, columns or pilasters, entrance door trims, an arch or triangular pediment above the portal. The plinth cornice here should continue the overall horizontal line of the facade — or, in special cases, make a "break" above the entrance portal, giving way to pilasters and the base of columns.
If the porch has columns, the plinth belt "adjoins" them, creating a horizontal base for the entire entrance group.
On a long facade
A long facade — more than 12–15 m — without horizontals at the bottom looks like a shapeless wall with neither beginning nor end. The plinth belt "anchors" the lower edge of the facade, giving it a visual "ground". In combination with an interfloor belt and a crowning cornice, the long facade acquires proper proportions and a readable horizontal structure.
Plinth cornice, interfloor belt or facade molding: how not to confuse them
| Task | Element |
|---|---|
| Separate the base from the wall | Base cornice |
| Separate the first and second floors | interfloor belt |
| Finish the facade under the roof | Crowning cornice |
| Frame the window from above | Pediment |
| Frame the window from below | Window sill belt |
| Reinforce the corners vertically | Rustication |
| Add a decorative line to the wall | Facade molding |
| Assemble the facade from bottom to top | Base + interfloor belt + cornice |
The main difference between a base cornice and other horizontal elements is its position and function. It is the lower belt. It works with an area of high humidity, mechanical loads, and visual "heaviness." That is why it typically has the largest projection among all horizontal profiles (80–150 mm) and the most developed lower drip edge — so that water flows forward rather than down the wall.
How to choose the size and profile of a plinth cornice: ten parameters
Plinth height
The first and main parameter. A plinth 40–50 cm high requires one scale of cornice, a plinth 80–90 cm requires another. General rule: the cornice height is 15–25% of the plinth height. For a 60 cm plinth — a cornice of 100–140 mm. For a 90 cm plinth — a cornice of 140–200 mm.
A cornice that is too small on a high plinth gets lost. One that is too large on a low plinth overloads the lower zone.
Overhang from the wall
This is a key functional parameter. The overhang must be sufficient to:
-
cover the top edge of the plinth finish (tiles, stone, plaster) — at least 30–50 mm;
-
divert water forward from the joint — at least 60–80 mm from the wall plane;
-
create a visible shadow — at least 60 mm.
Recommended overhang: 80–120 mm for most private houses. For formal facades with elaborate decor — up to 150 mm.
Bottom overhang profile: drip edge is mandatory
The lower part of the base cornice must have a drip groove or rounded overhang that prevents water from "sticking" to the profile and flowing down the back side onto the base. Without a drip edge, the profile gets wet, the wall behind it darkens, and streaks appear.
When choosing a profile, make sure the bottom overhang has water-diverting geometry.
Profile relief
Three main categories:
-
Simple: one horizontal shelf with a small overhang. Modern, minimalist. For minimalist and contemporary facades.
-
Classic cornice: several steps with a cyma, shelf, ogee. Developed classic style.
-
With frieze: a horizontal area with ornament or a smooth band between shelves. Formal, representative facades.
The relief style should match the rest of the decor: if the trim and rustication are classic, the base cornice should also have a classic profile.
Proportion with rustication
The height of the plinth cornice should be comparable to the width of the rusticated block. A cornice that is too thin under massive rustications is disproportionate. A cornice that is larger than the rusticated blocks "presses down" on the corners.
Optimal: the height of the cornice is equal to or 10–20% greater than the width of the rusticated block.
Distance to first-floor windows
The lower edge of the first-floor window opening is typically at a height of 80–100 cm from zero. The plinth cornice is installed at 50–80 cm. The distance between the upper edge of the cornice and the lower edge of the window (windowsill) is 100–200 mm. This is sufficient for "breathing" between the two horizontal elements.
If installed a polyurethane windowsill belt, it is located significantly higher than the plinth cornice — there is no conflict.
Plinth finishing material
With a smooth plastered plinth, the cornice profile can be more elegant, with a fine relief. With a rough textured surface (decorative stone, clinker), the cornice should be more large-scale, "weighty", to visually withstand the texture of the plinth.
Color solution
Three options:
-
In the color of the main wall: the cornice "dissolves" into the facade, working with relief rather than color. An elegant option.
-
In the color of the plinth: the cornice emphasizes the lower zone, becoming part of it.
-
Contrasting (e.g., white on a dark plinth): makes the border very noticeable, architecturally rigid. Impressive, but requires confidence in style.
Facade height and number of floors
For a one-story house 4–5 m high, a plinth cornice 100–130 mm high is proportionate. For a two-story house 7–8 m high, it is 140–200 mm. The higher the house, the larger the horizontal profiles of all tiers should be.
Facade length and corner joints
A long facade requires more planks with intermediate joints. Joints are in 'neutral' places: above piers, not under the center of a window and not in the rustication zone. Corner connections are a 45° miter cut with glue application and joint sealing.
How to combine a plinth cornice with other facade decor: eight combinations
Plinth cornice + rustications
This is a classic combination. Vertical rustication blocks start from the top edge of the plinth cornice. The cornice is the 'base' from which the corner vertical grows. At the junction of the rustication and the cornice, precise trimming is required: the rustication block either rests on the cornice or adjoins it closely with a 3–5 mm gap (sealed with sealant).
The scale of the rustication block and the cornice must be coordinated: the cornice is slightly larger than or equal to the rustication block vertically.
Base cornice + Interfloor belt made of polyurethane
Two horizontal belts on the facade — the lower (base) and the middle (interfloor) — create a two-tier system. The distance between them is the height of the first floor, usually 2.5–3 m. This is a visually correct proportion.
Important: both profiles must be from the same STAVROS series. Unified relief, unified step height, unified projection — only in different scales. The base cornice is larger (greater projection), the interfloor belt is slimmer.
Base cornice + crowning cornice
The crowning cornice is the largest horizontal element of the facade. The base cornice is the second in scale. A simple rule of proportionality: the projection of the base cornice is 60–70% of the projection of the crowning cornice. This is an architectural hierarchy: the main element (upper cornice) is the largest, secondary ones (base, interfloor) are proportionally smaller.
Base cornice + architraves
Architraves frame the windows of the first floor. Their lower edge is above the base cornice — usually by 100–200 mm. This is the "air" between the lower horizontal line and the start of window decor. Too small a distance (less than 80 mm) creates a feeling of overcrowding in the lower zone.
The style of the cornice and architraves must match: if the architraves have a simple rectangular profile, the cornice should also be strict. Rich architraves with ornamentation — a cornice with developed relief.
Base cornice + entrance group
In the entrance area, the plinth cornice plays a special role: it sets the "level" of the porch. The horizontal line of the cornice should coincide or echo the horizontal line of the top step of the porch or the area in front of the door. This is a visual link between the lower part of the facade and the entrance area.
Pilasters or columns of the entrance group "grow" from the level of the cornice — it serves as their architectural base.
Plinth cornice + window sill bands
Window sill bands are located significantly higher than the plinth cornice. But their horizontal logic is the same: they also create horizontal lines under the windows. For system unity, the profile of the band should be made in the same style as the plinth cornice: a similar step pattern, a similar projection (but smaller).
Base cornice + keystones
Keystones above the first-floor windows create vertical accents. The plinth cornice provides a horizontal base. Vertical + horizontal = classic window system. At the same time, the keystone and cornice should not "compete": they work in different zones of the facade.
Base cornice + Moldings made of polyurethane
A thin additional line of molding above or below the plinth cornice doubles the horizontal line, making it richer. The distance between the main cornice and the accompanying molding is 40–80 mm. This works on formal, representative facades. On a simple house, one cornice is enough.
Installation of a polyurethane plinth cornice: from the ground to the sealant
The plinth cornice is installed in an area of high risk for moisture and mechanical loads. The technology here is more important than anywhere else on the facade.
Foundation Preparation
The surface in the installation area must be: dry (at least 3 dry days after rain), clean (free of dust, oil, efflorescence), and strong (without plaster peeling). Treat the installation area with a penetrating primer — this sharply improves adhesive adhesion.
Prepare the area between the base finish and the main plaster especially carefully: remove old sealant or putty from the joint. After installing the cornice, this joint will be covered by the profile, but the adhesive must be applied to a clean base.
Marking
The horizontal line of the cornice's lower edge must be strictly according to the laser level. Deviation on a long facade: ±2 mm per 5 m. More — re-marking. Marking is done along the entire perimeter at once, before installing the first strip.
Separately mark corner points: external corners (45° miter cut), internal corners (reverse 45° miter cut), and junctions with pilasters and rustications.
Applying Adhesive and Installation
Adhesive — facade polyurethane or MS-polymer. Apply in a zigzag pattern to the back surface of the profile: perimeter + crosswise in the center. For profiles over 150 mm in height — three horizontal strips.
Press the strip against the wall, align the lower edge with the marking. Press and hold for 30–60 seconds. Start with corner fragments, then straight spans.
Mechanical fastening
Facade dowels — every 400–500 mm. If the cornice projection exceeds 100 mm — dowels in two rows: upper and lower. This is critically important for the lower zone of the facade, where the profile experiences loads from frozen snow and accidental impacts.
Recess dowel heads by 2–3 mm, fill with putty, and sand.
Features of corner joints
External corner: both profiles are cut at 45°. Before pressing, apply adhesive to the cut. After setting, apply acrylic sealant along the outer seam of the corner.
Internal corner: if present — similar, but the geometry is reversed. At the internal corner, the joint is more noticeable when viewed up close — so the seam must be carefully puttied and sanded.
Corner ready-made elements: if they are in the STAVROS catalog for the selected profile — use them. This guarantees perfect geometry without manual cutting.
Sealing: three critical zones
Top horizontal seam (between the profile and the wall) — the most important. This is where water flows in during slanting rain. Acrylic sealant, painter's tape along the edges, careful smoothing. The seam must be continuous along the entire length.
Bottom seam (between the cornice and the base trim) — the second critical zone. If there is a gap here, water gets behind the profile through it. Sealant is mandatory.
Corner joints — the third zone. External and internal corners, joints with rustications, junctions with architraves and pilasters.
Silicone sealant — do not use. Only acrylic. Silicone cannot be painted.
Final painting
Two coats of facade acrylic paint with UV filter and moisture protection properties. The bottom overhang of the profile — special attention: it is the first to be exposed to moisture and splashes. Paint with a brush from below and in relief parts, with a roller — horizontal planes.
First coat — 24 hours after installation and sealing. Second coat — 4–6 hours after the first. Work at temperature +5...+30°C.
How to calculate the purchase: step-by-step algorithm
Before opening the catalog, make a simple diagram.
1. Draw a house plan (top view). Mark all facades, measure their length.
2. Decide: cornice along the entire perimeter or only on the main facade? Full perimeter is architecturally more convincing, but more expensive. Only the main facade is acceptable for modest projects.
3. Add up the lengths of the selected facades.
4. Add 15% for trimming, corner joints, and allowance.
5. Divide the total length by the length of one plank (usually 2 or 2.5 m). Get the number of planks.
6. Count the corner pieces: how many external corners, how many internal corners.
7. Check compatibility with rustications, architraves, and base trim: ensure no conflicts in height and projection.
8. Select: mounting adhesive (at least 1 tube per 6–8 linear meters of profile), dowels (2 pcs per linear meter), acrylic sealant (1 tube per 10–12 linear meters), primer, paint.
9. Specify the color: matching the wall, matching the base, or contrasting.
10. Order everything in one batch — together with molded decoration made of polyurethane (moldings, rustications, architraves, interfloor belt).
Mistakes in selection and installation: learn in advance
They buy without a facade diagram. Result — incorrect quantity calculation, shortage at corners, excess trims.
They don't account for the plinth height. A profile disproportionate to the plinth ruins the proportions of the lower zone.
Too thin a profile for a large house. A cornice 60 mm high on a two-story house is practically invisible. Minimum for a two-story house — 120–140 mm.
Too massive a cornice for a low plinth. A huge cornice on a 40 cm plinth "eats" the base itself. Proportionality — always.
They don't connect the cornice with rustications. A horizontal line without verticals — a decorative strip. The system only works in pairs.
They don't account for splashes from the blind area. The lower part of the profile must have a water-drip overhang. Without it — constant wetting and streaks on the plinth.
They don't seal the top seam. Critical mistake. Water under the profile = wet joint, mold, cornice detachment after 1–2 seasons.
They don't add a reserve for trimming. Without a 15% reserve, one bad cut — and you're short a whole plank.
They use a conflicting color. A too contrasting or "random" cornice color ruins the facade's color scheme.
They buy a base cornice without the rest of the kit. The three horizontals of the facade must be a unified system — order them together.
FAQ: Questions and Answers
What is a polyurethane base cornice?
It is a horizontal facade profile installed at the boundary of the base and the main wall. It visually separates the lower zone of the house, protects the joint from moisture, and creates the first horizontal line of the facade system.
Why is a base belt needed on the facade?
Without it, the boundary of the base and wall looks random — especially with contrasting materials. The cornice covers the top edge of the base finish, diverts water, and makes the facade architecturally complete.
How is a base cornice different from an interfloor belt?
By position and function. The base cornice is at the bottom, near the foundation. The interfloor belt is at the level of the floor between stories. The base cornice is larger in projection (80–150 mm) because it works in the splash zone and under mechanical loads.
How to choose the size of the base profile?
Profile height is 15–25% of the plinth height. Projection is 80–120 mm for most houses. Relief matches the facade style.
At what height is the plinth cornice installed?
Usually 50–80 cm from the zero mark — at the upper boundary of the plinth. The lower overhang of the profile should overlap the upper edge of the plinth finish by 30–50 mm.
Can the plinth cornice be painted?
Absolutely. Without painting, UV radiation destroys the surface in 2–3 years. Facade acrylic paint with UV filter — 2 coats after installation and sealing.
How to combine the plinth belt with rustication?
Rustication blocks "rest" on the cornice from below. The height of the cornice should be comparable to the width of the rustication block. Joining requires precise cutting with joint sealing.
Is it necessary to install the plinth cornice around the entire perimeter of the house?
For architectural coherence — yes, around the entire perimeter. It is acceptable to limit it to the main facade, but then the plinth boundary on the side walls remains unfinished.
How to install a polyurethane profile on the facade?
Glue on the back surface + facade dowels every 400–500 mm. Marking — with a laser level. Corner joints — 45° cut. All seams — acrylic sealant. Painting after complete installation.
Where to buy a polyurethane plinth cornice?
The STAVROS catalog offers a full range of plinth cornices and facade profiles in various sizes and reliefs. Contact us to confirm shipping to your destination.
STAVROS: when the foundation of a house becomes an architectural statement
The foundation of a house is where the eye begins. While others think about the roof and facade color, an experienced architect starts with the plinth. Because a properly designed base makes everything else on the facade meaningful.
The STAVROS polyurethane plinth cornice is not just a horizontal strip. It is a system element designed as part of a facade set: compatible with rustications, interfloor belts, architraves, sandriks, and cornices — in a single material, a single scale, a single relief.
STAVROS produces polyurethane facade decor with its own molds, strict control of density and geometry, and factory surface priming. Every plinth cornice from the STAVROS catalog is a precise shape, stable relief, and ready for immediate painting without additional preparation.
Facade decoration made of polyurethane STAVROS is the language your house speaks to the surrounding space. And the plinth cornice is the first word in that conversation.