Article Contents:
- What are polyurethane facade trims: material, shape, purpose
- Where to use facade trims: five scenarios
- On windows of a private house
- On the front door
- On first-floor windows with elaborate decor
- On a facade with corner rustications
- In interior
- Trim, pediment, window sill belt, keystone: what each is responsible for
- How to choose trim width and profile: ten parameters
- Window width
- Opening height
- Recess depth
- Facade scale
- Distance between windows
- Facade style
- Presence of a pediment
- Presence of a window sill belt
- Presence of rustication and interfloor belt
- Floor height and number of windows
- Polyurethane or wooden architraves: an honest comparison
- How to assemble a window trim kit: from measurement to order
- Step 1: Measure each window
- Step 2: Choose the architrave profile
- Step 3: Determine the height of the kit
- Step 4: Resolve the sandrik issue
- Step 5: Add the window sill belt
- Step 6: Consider the keystone
- Step 7: Check compatibility with rustications and belts
- Step 8: Calculate the number of elements for all windows
- Step 9: Select fastening and finishing materials
- Step 10: Order everything in one batch
- Installation of facade trims: precision is not an option, but an obligation
- Surface Preparation and Marking
- Order of element installation
- Applying adhesive
- Mechanical Fastening
- Corner joints
- Sealing
- Puttying and painting
- Standard window trim sets: from simple to complex
- Basic trim
- Classic Framing
- Developed classic
- Grand window portal
- How to coordinate trim with the facade system
- Mistakes when choosing facade trim: learn from others' miscalculations
- FAQ: answers to the most frequently asked questions
- STAVROS: a window frame that transforms the entire facade
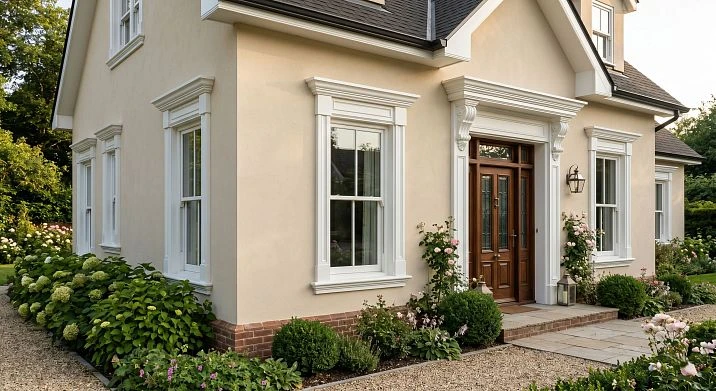
A window without trim is just a hole in the wall. Functional, perhaps convenient, well-insulated — but architecturally mute. It says nothing about what lies behind it, does not set a scale, does not create rhythm. It is the trim that turns a window opening from a technical slit into an architectural element — into an accent, a statement, a detail that everyone notices and remembers.
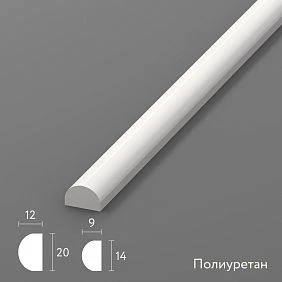
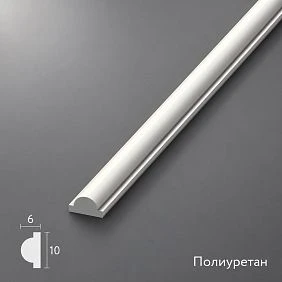
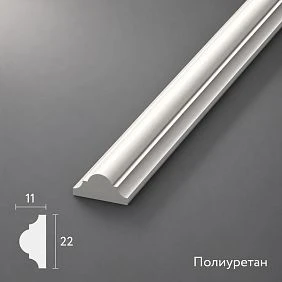
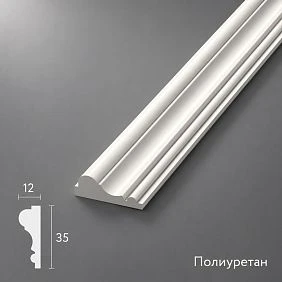
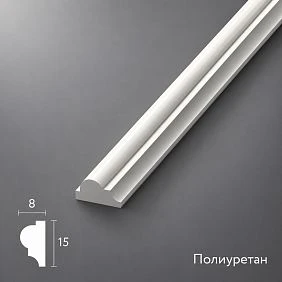
facade casings made of polyurethane — these are profile elements that frame window and door openings on the outside of a building. They cover the side lines of the slopes, conceal the installation area, form a visual frame, and — most importantly — become the basis for a full-fledged window portal: with a pediment on top, a window sill belt below, a keystone along the central axis, and brackets on the sides.
This is not just decor. It is architectural logic expressed in a profile. And choosing this profile is a task that requires understanding: window width, facade scale, house style, climate, installation nuances, and how the trim aligns with other elements of the STAVROS facade system.
What are polyurethane facade trims: material, shape, purpose
The word "trim" has existed in architecture for a long time — back in the wooden architecture of Rus', it was a carved board that covered the gap between the log crown and the window frame. Later — in stone classical architecture — the trim evolved into a profiled frame around the opening: with pilasters, entablature, pediment, keystone. In today's private construction, this tradition continues — and polyurethane has become its new material embodiment.
A polyurethane facade trim is manufactured by injection molding from a two-component composition. The facade formulation of the material fundamentally differs from the interior one: density 380–420 kg/m³, closed-cell structure, zero water absorption per DIN standard, frost resistance over 300 cycles. After painting with facade acrylic paint with a UV filter, the profile does not deform, does not lose geometry, does not delaminate. Service life with proper installation and painting is 25–30 years.
Form factor of the trim: plank length 2000–2500 mm, width (profile height) 60–200 mm, projection from the wall 20–60 mm. Surface — white, matte, factory-primed, ready for immediate painting.
Framing windows with polyurethane stucco — this is not only a facade solution. The same principle — a frame that gives the opening completeness — works in the interior as well. But for an open facade, polyurethane trims are preferable to any other material precisely because of their resistance to climate.




Where facade trims are used: five scenarios
Our factory also produces:
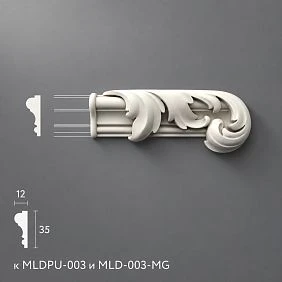
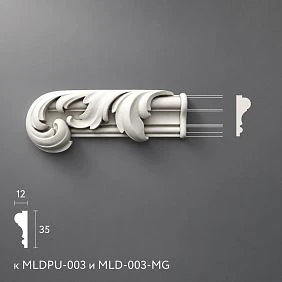
On windows of a private house
This is the main and most common scenario. A plastered facade, vertical rows of windows, bare slopes — everything that needs to be changed with one solution. Trims are mounted around the perimeter of each window, forming a frame 60–150 mm wide (depending on the scale of the facade and window size).
Result: the facade ceases to be a "plastered box with slits" and acquires visual rhythm, proportions, style. Facade window decor made of polyurethane — exactly what turns an ordinary facade into an architectural object.
Get Consultation
On the front door
The doorway is the most important part of the facade. This is where people look first. Polyurethane architraves here form the basis of the door portal: side profiles along the verticals of the door, the upper architrave or sandrik above the door, pilasters or side overlays. An entrance group with architraves, brackets, and a keystone is already a full-fledged architectural portal.
On the first-floor windows with developed decor
First-floor windows are the most "readable" from the street. This is where wider architraves (100–150 mm) are appropriate, sandriks with brackets, keystones above the opening and developed Window sill bands. On the second floor, the decor can be slightly more modest — this corresponds to the classical architectural hierarchy of "heavy bottom, light top."
On a facade with corner rustication
If the house is decorated with rustication made of polyurethane At the corners, window casings must be coordinated with them: in width, projection, and relief. A casing slightly wider than the rusticated block or equal to it is architectural proportionality. A casing significantly thinner than the rustications will be "lost." Significantly wider will "overpower" the corner vertical.
in the interior
Yes, the facade-grade polyurethane formulation is for outdoor use. But the shapes of STAVROS interior casings are identical to the facade ones. Polyurethane facade window decor — this is both exterior and interior decor: the same series, the same framing logic, the same principles of coordination with other profiles.
Casing, pediment, window sill belt, keystone: who is responsible for what
Before buying casings, it is useful to answer the question: what do you want to get as a result — just a frame or a full-fledged portal? These are different sets.
| Element | Position | Function |
|---|---|---|
| Side trims | Along the verticals of the opening | Form the verticals of the frame, cover the slopes |
| Upper casing | Horizontally above the opening | Completes the frame from above |
| Pediment | Above the upper casing | Decorative finish, diverts water |
| Window sill belt | Below the opening | Completes the window from below, creates a horizontal line |
| Keystone | At the center of the upper casing | Emphasizes the axis, adds volume |
| Brackets | On the sides of the pediment | Reinforce the pediment, enrich the decor |
| Rustications around the window | On the sides of the casings | They connect the window with the facade rhythm |
The casing is the foundation. The other elements are the superstructure. But it is the casing that determines how organically the sandrik, belt, and keystone will fit into this system. Therefore, you need to choose with an understanding of the final result.
Minimum set: side casings + upper horizontal casing + window sill belt.
Basic classic: minimum + sandrik on top.
Developed classic: basic + keystone + brackets under the sandrik.
Full portal: developed + rustications on the sides + decorative lintel.
How to choose the width and profile of the casing: ten parameters
Window width
The width of the casing is the distance from the edge of the opening to the outer edge of the profile. It should be proportionate to the width of the window. A simple proportion: the width of the casing is 8–12% of the width of the window opening.
For a window 1200 mm wide — casing 100–140 mm.
For a window 900 mm wide — casing 80–110 mm.
For a window width of 1500 mm or more — casing 120–180 mm.
These are guidelines. Adjustments — depending on style and other parameters.
Opening height
A tall window (over 1500 mm) requires a wider casing — so the frame doesn't look "thin" against a large opening. A low window (under 1000 mm) — the casing can be narrower.
Reveal depth
If the slope is deep (over 150 mm) — the casing must have sufficient projection to cover its visible part. Casing projection: 20–50 mm for standard slopes, 40–70 mm for deep ones. With a deep slope and small casing projection, the side surface of the opening remains exposed — this looks unfinished.
Facade scale
Large house — wide casings. Small house — moderate ones. Casings 60 mm wide on a two-story cottage with tall windows are almost invisible. Casings 180 mm wide on a small one-story house overload the facade.
Distance between windows
The pier (distance between adjacent windows) should be at least 2 times wider than the sum of the casings of two adjacent windows. If the pier is too small — wide casings will "glue" adjacent windows into one block. In this case, the profile should be chosen narrower.
Facade style
-
Classic, neoclassical: profile with several steps, shelves, ogee, cyma. Width 100–180 mm.
-
Modern classic: simplified rectangular profile with one or two steps. Width 80–120 mm.
-
Minimalism: thin flat frame. Width 60–80 mm, projection 15–25 mm.
-
Russian style: wide casing with rich relief, possibly with carved ornament.
Presence of a pediment
If a pediment is planned above the window polyurethane pediment — the width of the casing should be comparable to the "shelf" of the pediment. A too thin casing under a large pediment is disproportion. A too wide casing under a small pediment will "overwhelm" the upper element.
Presence of a window sill belt
The window sill belt and casing work in pairs: the belt is a horizontal line at the bottom, the casing is a vertical line on the sides. Their profiles should echo each other in style. Ideally, from the same STAVROS series.
Presence of rustications and interfloor belt
If the facade has corner rustications и Interfloor belt made of polyurethane — the width of the casing is coordinated with the width of the rustication block: equal or slightly smaller. The belt runs above the first-floor windows — and the casing must fit into the gap between the belt and the opening without conflict.
Floor height and number of windows
The higher the floor, the larger the casing — this is the rule of scale. If the facade has 8–10 windows in two rows, all window casings must have the same profile. Different profiles on different windows create visual chaos.
Polyurethane or wooden casings: an honest comparison
Every second buyer asks this question. The answer depends on the context — but for the facade, polyurethane has a convincing advantage.
| Parameter | Polyurethane | Wood |
|---|---|---|
| Moisture resistance | Does not absorb water | Absorbs, swells, rots |
| Frost resistance | 300+ cycles | Depends on the breed, coating, and care |
| Care | Painting once every 5–7 years | Painting or impregnation every 2–3 years |
| Geometric precision | Cast form, stable | Depends on the quality of the lumber |
| Painting | Facade acrylic, any color | Varnish, stain, paint — limitations |
| Installation | Glue + dowels | Nails, screws, additional waterproofing |
| Price | Medium, stable | From low (pine) to high (oak, larch) |
| Service life on facade | 25–30 years | 5–15 years without shelter |
Wooden architraves are appropriate in one scenario: traditional Russian or Scandinavian style with visible wood texture, under a canopy or with regular maintenance. For all other cases — and especially for classical and neoclassical facades without canopies — polyurethane wins unconditionally.
Polyurethane molding for house facades — is exactly the category of materials that replaced wooden and plaster elements on the modern facade: no maintenance, no rotting, no fragility.
How to assemble a window framing kit: from measurement to order
This is the practical part — the most important for those who do not want to make a mistake with the order.
Step 1: Measure each window
Record: opening width, opening height, slope depth. For facades with different window types — separately for each type.
Step 2: Choose the architrave profile
Based on window width, facade style, and presence of a sandrik. For all windows of one facade — the same profile.
Step 3: Determine the height of the kit
The side casing is installed from the lower edge of the opening (or from the upper edge of the windowsill) to the lower edge of the top casing or pediment. The height of the side strips = the height of the opening.
Step 4: Decide on the pediment
Is it needed above the window Polyurethane sandrik above the window — triangular, arched, straight with a cornice profile? Each type of pediment has its own shelf width and projection. Check compatibility with the selected casing.
Step 5: Add the window sill belt
a polyurethane windowsill belt is mounted under the opening. Its length = window width + 2 × casing width + 60–100 mm (overhang beyond the frame).
Step 6: Consider the keystone
a polyurethane keystone is installed along the central axis of the top casing — where a real masonry keystone would be in an arched window. Its height is usually = height of the top casing + 20–40 mm (the stone protrudes slightly upward).
Step 7: Check compatibility with rustications and belts
If there are corner rustications on the facade, ensure the casing width does not conflict with the rustication block width. If there is an interfloor belt, the casings of the first-floor windows should not 'press' against its lower edge.
Step 8: Calculate the number of elements for all windows
Create a table: for each window — number of side trims (2 pcs.), top trim (1 pc.), window sill belt (1 pc.), sandrik (1 pc.), keystone (1 pc., if needed). Multiply by the number of windows of each type.
Add 10% margin for cutting and installation damage.
Step 9: Select fastening and finishing materials
-
Mounting adhesive: 1 tube per 8–10 linear meters of profile
-
Facade dowels 80 × 6 mm: 3–4 pcs./m of profile
-
Acrylic sealant: 1 tube per 5–6 windows
-
Penetrating primer: according to consumption
-
Facade acrylic paint: by area
Step 10: Order everything in one batch
Different batches — possible differences in white shade. All molded decoration made of polyurethane for the facade order simultaneously: platbands, sandriks, belts, keystones, rustications, cornices.
Installation of facade platbands: precision is not an option, but an obligation
Installation of window platbands is a job where every mistake is visible. The window is the focal point of the facade. A crooked platband or a poorly sealed joint is always noticeable.
Surface preparation and marking
Slopes must be: dry, strong, without plaster peeling, treated with penetrating primer. If installation is planned after plastering the slopes — make sure the plaster is completely dry (at least 7–14 days at +20°C).
Marking: mark the positions of all four sides of the frame for each window — first on one window, check the proportions, then transfer to the rest. For a floor facade, the horizontal axes of the upper platbands of all windows on the same floor must match — use a laser level.
Installation order of elements
The correct order is critically important:
-
First — side platbands. Start from the bottom corner of the opening upward.
-
Then — the upper horizontal platband. It "covers" the ends of the side ones.
-
After — the sandrik (if present). Installed on top of the upper platband.
-
Keystone — centered on the top casing, after its installation.
-
Window sill strip — under the opening, installed last.
Why this order? Because horizontal elements overlap the ends of vertical ones — this hides cuts and makes corner joints invisible.
Applying adhesive
Glue — apply in a zigzag pattern on the back surface of the strip. Along the perimeter + one or two zigzags in the center. For wide strips (>120 mm) — three horizontal lines.
Do not use foam mounting glue: it expands when drying and can deform the profile.
Mechanical fastening
Dowels — every 300–400 mm. For side casings — two rows across the width: at the inner edge (closer to the slope) and at the outer edge. For the top horizontal casing — one row, countersink the heads.
For the sandrik — depending on its design: a sandrik with a large overhang requires additional fastening through the body.
Corner joints
The angle between the side and top casing is 90°. The side piece is cut horizontally, the top piece "covers" its end. This is called "overlap layout" — the most common method.
Alternative — a 45° joint. Both elements are cut at 45°. Visually cleaner, but requires precise cutting.
On external corners of the slope (if the slope is beveled) — cut at the corresponding angle.
Sealing
Three critical zones for trim:
External seam (trim / facade plaster) — along the entire perimeter of the frame. Acrylic sealant, painter's tape along the edges, careful smoothing with a wet spatula.
Internal seam (trim / slope) — along the entire inner perimeter. Moisture penetrates here during slanting rain — gaps are unacceptable.
Corner joints — especially carefully. After the glue sets and before painting.
Silicone — do not use. Only acrylic sealant. Silicone does not accept paint.
Puttying and painting
Dowel caps — recess by 2–3 mm, putty, sand after drying. Corner joints — putty if there are gaps.
Two coats of facade acrylic paint. First — 24 hours after installation. Second — 4–6 hours later. Brush for textured areas, short-nap roller for flat surfaces. All ends and cut edges — must be painted with a brush.
Standard window trim kits: from simple to complex
Basic trim
Composition: side trims + upper horizontal trim + window sill belt.
Style: any, including modern and minimalist.
Effect: the window gets a clear frame, the slopes are closed, the facade looks neat.
Classical framing
Composition: basic + straight pediment with cornice profile.
Style: modern classic, Scandinavian aesthetics.
Effect: the window is topped with a horizontal cornice element that diverts water.
Developed classic
Composition: classic + keystone in the center + brackets under the pediment.
Style: neoclassical, estate architecture.
Effect: a full window portal with a central accent and side supports of the pediment.
Ceremonial window portal
Composition: developed classical + pilasters or rustication on the sides + triangular or arched pediment.
Style: classicism, historical architecture.
Effect: window as an architectural monument. Suitable for the main facade, first-floor windows, entrance group.
How to coordinate window trims with the facade system
Window decor is not a separate task. It is integrated into the overall facade system, where each element has its place and role.
Window trims and the base cornice. The base cornice runs at the bottom of the facade, above the base. Its lower overhang is 50–80 cm from zero. First-floor windows start higher: from 80 to 110 cm. There should be 100–200 mm of "air" between the base cornice and the lower edge of the window frame (window sill belt) — so that the horizontals do not merge.
Window trims and the interfloor belt. The belt runs above the first-floor windows. The distance from the upper edge of the pediment to the lower edge of the belt is 120–200 mm. If the pediment and the belt "stick" to each other — the transition area looks overloaded.
Window trims and corner rustication. On the corners of the house, rustication creates a vertical rhythm. Window trims provide a horizontal-vertical accent in the center of the facade planes. Their width should be comparable: a trim equal to or slightly narrower than the rustication block is the correct proportion.
Window trims on all floors. On the first floor — maximum decor. On the second — slightly more modest. This is the classic principle of "decreasing decor with height." Side trims are the same on both floors. The pediment and keystone are only on the first floor. Or — on both, but simpler on the second.
Mistakes when choosing facade trims: learn from others' miscalculations
They buy without calculating all windows. Result — not enough for 2–3 windows, and it's impossible to buy the exact same profile from the same batch.
They don't account for the depth of the slope. A trim with a small projection on a deep slope doesn't cover the side surface — the slope is visible from the side.
Too thin a profile on a large facade. A 60 mm trim on the windows of a two-story house is practically invisible from the street. Minimum for a two-story house — 90–100 mm.
Too wide a trim on a small window. A wide frame 'eats' the window, making it visually even smaller.
They forget about the pediment. A trim without a top finish is a frame without a 'lid'. Visually unfinished.
They don't add a window sill belt. The bottom edge of the frame — without a horizontal finish — looks cut off.
They don't plan a keystone. The top trim without a central accent is just a horizontal plank. A keystone is a small detail with a big visual effect.
They mix different styles. Classic trim + minimalist pediment = stylistic inconsistency. All elements — one series, one style.
They don't seal the joints. Water under the trim → wet slope → mold → profile peeling after 1–2 years.
They buy trim separately from everything else. The right approach is a kit for the entire facade in one batch.
FAQ: answers to the most frequently asked questions
What are facade polyurethane trims?
Profile strips made of cast polyurethane with a facade formulation, which are installed around the perimeter of window and door openings on the outside of the building. They cover the slopes, form an architectural frame, and serve as the base for the pediment, window sill belt, keystone, and brackets.
Why are trims needed around a window?
Trims solve three tasks: decorative (give the window architectural completeness), protective (cover the joint between the window frame and slope from moisture), and systemic (create a base for more complex portal decor).
Can polyurethane trims be used outdoors?
Yes — provided it is a facade formulation of polyurethane (density 380–420 kg/m³, closed cell structure) with subsequent painting with facade acrylic paint with UV filter.
How do facade trims differ from interior ones?
Material density, frost resistance, and water resistance. The facade formulation is designed for open climate, interior one is not. Externally, the profiles may be identical.
How to choose the width of a trim for a window?
Guideline: trim width = 8–12% of window opening width. For a 1200 mm window — trim 100–140 mm. Adjustments — based on facade style and presence of a pediment.
Is a pediment needed along with trims?
For classical and neoclassical facades — yes, a pediment is mandatory. It completes the frame at the top and diverts rainwater from the upper trim.
What to add at the bottom — a window sill belt or a simple profile?
For a developed window portal — a window sill belt: this is an independent horizontal element with projection and relief. For a modest framing — a lower horizontal trim.
How are polyurethane trims better than wooden ones?
On an open facade — they do not absorb moisture, do not rot, do not deform, require no annual maintenance, withstand 300+ freeze-thaw cycles, and can be painted any color.
How to calculate the number of trims for a facade?
For each window: 2 side planks (height of opening) + 1 top plank (width of opening) + 1 window sill belt. Multiply by the number of windows. Add 10% spare.
Where to buy facade trims made of polyurethane?
The STAVROS catalog features a full range of facade architraves, sandriks, window sill belts, keystones, and related elements. Contact us to confirm shipping to your destination.
STAVROS: a window frame that transforms the entire facade
When you look at a well-designed facade, you rarely think "what beautiful architraves." You think: "what a beautiful house." That is the highest criterion of properly chosen decor — it blends into the overall picture, not standing out, but creating that very completeness that most private homes lack.
STAVROS produces facade architraves as part of a complete window framing system: coordinated with sandriks, window sill belts, keystones, corner rustications, interfloor belts, and base cornices. Each series is a thoughtfully designed ensemble where profiles are matched in scale, relief, and proportions.
Polyurethane facade window decor In the STAVROS version, it is a material with factory primer, precise geometry of the cast form, and climatic resistance confirmed by tests. Your facade receives not just architraves — it receives a system that works for decades.
STAVROS is architecture in details. It is the details that make a house a home.