Article Contents:
- Short answer: when Key HL-019 is suitable
- What is confirmed for Key HL-019
- A push-button handle is not a reduced bracket
- What one mounting point provides
- Why 30 mm cannot be evaluated separately from the facade
- Simple 3D mockup
- What to check near the handle
- Small dresser drawers
- Bedside table
- Narrow hinged door
- Secretary, bureau, and small cabinet
- Buffet and display case
- Furniture with many fronts
- Heavy wide drawer
- Front of built-in appliance
- Frequent use
- Accessibility for different users
- One Key HL-019 in the center
- Two identical buttons
- When two buttons don't solve the problem
- Drawer marking
- Swing door marking
- Frame facade marking
- Marking multiple facades
- Solid wood front
- MDF front
- Chipboard facade
- Frame facade and thin panel
- Why you can't just tighten the screw more
- Bill of materials formula
- Why you can't count only visible doors
- Reserve for test painting
- How to distribute handles before finishing
- Beech for covering finish
- Oak for clear or tinted finish
- Should you mix beech and oak on the same furniture
- Work sequence
- Why you shouldn't paint handles already on the facade
- Don't cover the shape with a thick layer
- Bedroom
- Living Room
- Office and Library
- Don't confuse unpainted HL-019 and HL-019M
- Do not call any size 30 mm model HL-019
- Do not mistake the button for a decorative plug
- Do not replace the bracket with a button without testing
- Do not consider the fastener universal for any thickness
- Need to update an old dresser
- Need to assemble a kit for a new dresser
- Need to choose a handle for a narrow door
- Need a handle for white enamel
- Need visible wood texture
- The drawer is wide and heavy
- The handle is needed for furniture in a narrow passage
- Choosing only by photo
- Installing a small button on a heavy facade
- Calling 30 mm diameter without a drawing
- Ordering handles individually at different times
- Drilling without a temporary template
- Fastening into a thin panel
- Not measuring the facade thickness
- Overtightening the connection
- Painting after final installation
- Mixing beech and oak without a design reason
- Placing adjacent handles at different heights
- Do not consider the user
- Suitable
- Better to choose another option
- 1. What size is Key HL-019?
- 2. What materials is Key HL-019 made from?
- 3. Is Key HL-019 sold painted?
- 4. Are fasteners included in the kit?
- 5. Will Key HL-019 fit a dresser?
- 6. Can I install Key HL-019 on a cabinet door?
- 7. Is this handle suitable for kitchen furniture?
- 8. Do I need one or two handles for a wide drawer?
- 9. Where should I place the handle on a drawer?
- 10. Where should I place Key HL-019 on a hinged door?
- 11. How can I check the handle's comfort before purchasing?
- 12. Is Key HL-019 suitable for a person with limited finger mobility?
- 13. Can I install Key HL-019 on a thin panel?
- 14. What is better for white enamel — beech or oak?
- 15. Can I tint the oak Key HL-019?
- 16. Do I need to buy all handles at once?
- 17. Is a spare handle needed?
- 18. Can I replace the old bracket with Key HL-019?
- 19. How is HL-019 different from HL-019M?
- 20. Where can I see other sizes and shapes of buttons?
- 21. Can I order Key HL-019 from different wood species for the same piece of furniture?
- 22. How do I know if the handle will snag on clothing?
- 23. Do I need to drill the facade before painting the handles?
- 24. Where can I check the price and availability of Key HL-019?
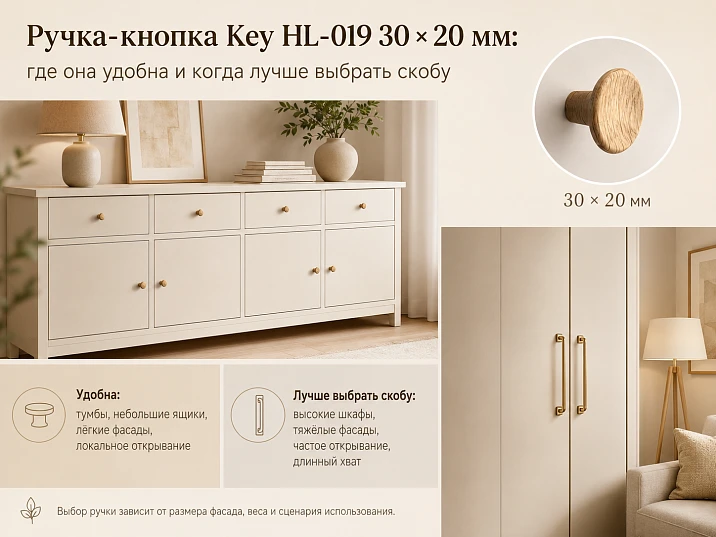
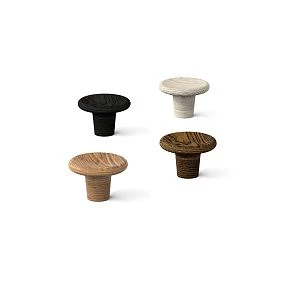
A compact furniture handle may look neat in a photo but turn out to be uncomfortable on an actual facade. This is especially common with drawers that open with noticeable effort, wide doors, facades with dense seals, and furniture used many times a day. Therefore, the Key HL-019 knob handle, measuring 30 × 20 mm, should be chosen not only by style, wood species, and color of the future finish. The main question is more practical: is one small grip point enough for the facade to open confidently and without unnecessary finger strain?
The Key HL-019 is a compact wooden knob handle. It is suitable for projects where large hardware visually overloads the furniture: small dresser drawers, nightstands, secretaries, narrow doors, sideboards, and furniture with many repeating facades. However, the size of 30 × 20 mm does not mean the handle will fit any drawer. A lightweight linen drawer and a wide dish drawer create different resistance. A small cabinet door and a tall wardrobe facade require different hand movements. On one piece, the knob works naturally; on another, it forces you to pull with two fingers and gradually loosens the fastening.
Before buy Key HL-019 in oak or beech, it is useful to check four things: the actual opening force, the grip point, the facade thickness, and the number of handles in the entire furniture series. Such a check takes less time than correcting incorrect markings or replacing an already painted set.
Short answer: when Key HL-019 is suitable
The Key HL-019 knob handle is appropriate when the facade is relatively small, opens without much resistance, and does not require a full palm grip. It is especially logical to consider it for:
-
small and medium dresser drawers;
-
nightstands and bedside tables;
-
narrow hinged doors;
-
secretaries, desks, and sideboards;
-
decorative furniture with many identical facades;
-
projects where handles are painted together with the furniture or emphasize the texture of oak.
It is better to choose a bracket handle or another larger model if the facade is heavy, wide, opens with effort, is used with wet hands, or should be convenient for a person who finds it difficult to hold a small button with their fingers.
The main rule is simple: the size of the handle is evaluated together with the opening force. External compactness is an aesthetic advantage, but not proof of convenience.




What is confirmed for Key HL-019
Key HL-019 is a specific model, not a general name for a type of hardware. The following parameters are confirmed in the product card.
| Parameter | Confirmed data | What this means for the buyer |
|---|---|---|
| Product type | Furniture knob handle | Compact grip point, not an elongated bracket |
| Model | Key HL-019 | When ordering, you need to specify the full article number |
| Size | 30 × 20 mm | The scale should be checked on the facade using a mockup and according to the drawing |
| Material | Beech or oak | The wood species is chosen taking into account the finish and the rest of the furniture |
| Surface condition | Unpainted finish | Color and protective coating are applied as part of the project |
| Preparation quality | Prestige | The prepared surface simplifies further finishing but does not eliminate inspection before painting |
| Fastening | Included in set | The fastener length is still checked against the thickness of the specific facade |
| Project materials | Drawing and 3D model are available | You can check the scale, projection, and installation location before drilling |
| Current price and availability | Checked in the product card | These parameters may change, so they cannot be fixed in the article |
The size 30 × 20 mm cannot be automatically converted to the wording "diameter 30 mm and height 20 mm" unless confirmed by the drawing notations. In the card, the dimensions are linked to parameters A and C. For the article and order, it is more correct to keep the original entry 30 × 20 mm and verify the geometry against the drawing.
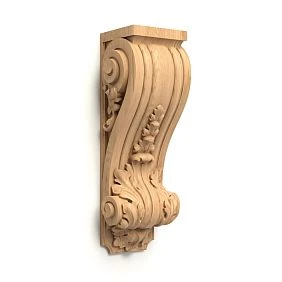
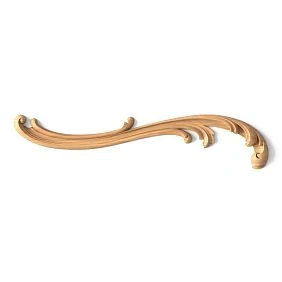
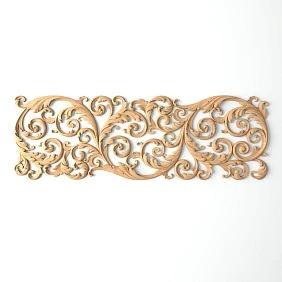
Our factory also produces:
A knob handle is not a reduced bracket.
A knob handle and a bracket handle solve one basic task — they give a person a point of force application when opening a facade. But the hand movement differs.
A knob is often held with the fingertips. The thumb and index finger grasp a small part, after which the person pulls the facade towards themselves. This movement is convenient if the resistance is low. It preserves the visual cleanliness of the facade, does not require two mounting points, and works well on small drawers.
A bracket can be grasped with several fingers or the whole palm. The force is distributed over a larger area, so opening a wide or heavy door is easier. A bracket has a center distance, two attachment points, and a more noticeable scale. It has a stronger impact on the facade composition but wins in ergonomics where a small knob is insufficient.
Before evaluating the Key HL-019, it is useful to familiarize yourself with the general rules for choosing a furniture knob handle. The general article explains the type of hardware, while here we are talking about a specific model 30 × 20 mm and its real application.
Get Consultation
What one mounting point provides
A compact knob is convenient in projects where minimal interference with the facade is important. One mounting point:
-
simplifies centering on a small drawer;
-
does not require precise center distance;
-
allows replacing the button with another model of similar mounting pattern without the two old holes;
-
makes the hardware visually lighter;
-
helps preserve the pattern of the frame facade.
But one point does not solve the problem of a heavy facade. If a person constantly pulls a small button with great force, the load concentrates in one area. Therefore, the mounting center must fall into the solid part of the facade, not into a thin decorative insert.
What does the size 30 × 20 mm mean in practice
The catalog size helps identify the model but does not convey the feel in hand. Two products with similar numbers may differ in shape, rounding, profile, and grip area. Therefore, the notation 30 × 20 mm should be considered as initial data for verification, not as a final answer.
The first dimension shows one of the overall dimensions of the handle. The second is related to another direction of the dimension and affects how much the part protrudes relative to the facade. The exact purpose of the parameters should be checked on the drawing. For the buyer, three practical questions are important:
-
Is there enough space for fingers between the facade and the outer part of the handle?
-
Does the handle look too small on the specific width and height of the facade?
-
Does the protruding part catch on clothing, the adjacent door, or a passing person?
A photo of the card does not answer these questions. Scale is lost, especially if the handle is shown separately on a neutral background. It is much more useful to print a contour or make a simple mockup.
Why 30 mm cannot be evaluated separately from the facade
The same Key HL-019 can look proportionate on a small drawer and almost disappear on a wide facade. This does not mean there is a universal width limit. Perception is influenced by:
-
drawer height;
-
number of handles;
-
presence of a frame or panel;
-
facade color and wood contrast;
-
distance between adjacent handles;
-
overall furniture style;
-
Handle placement centered or closer to the edge.
On a facade with active decor, a compact button maintains a calm balance. On a large smooth surface, it may look like a random dot. Therefore, the size is checked not in isolation, but in the full composition.
Make a mockup before drilling
A mockup is the simplest way to understand if a 30 mm button handle is comfortable on your furniture. A precise wooden copy is not required for testing. It is enough to replicate the general outline and protrusion.
Simple 3D mockup
-
Cut out a contour from thick cardboard or paper according to the size specified in the card.
-
Add a spacer underneath that roughly replicates the second dimension of 20 mm.
-
Secure the mockup with painter's tape at the intended location.
-
Open and close the facade several times.
-
Repeat the motion with a dry and slightly damp hand.
-
Check the grip with your thumb, index, and middle fingers.
-
Ask another person to open the same facade.
-
Take a photo of the furniture from a distance of two to three meters.
This test simultaneously shows ergonomics and scale. If the mockup is comfortable to hold with only two fingernails, and the drawer requires a noticeable jerk, the compact button is chosen incorrectly. If the facade opens easily and the movement does not cause tension, the Key HL-019 is suitable in terms of functional logic.
What to check near the handle
The mockup should show not only the grip. Evaluate:
-
the gap to the adjacent facade;
-
the opening trajectory;
-
the distance to the wall;
-
the possibility of full drawer extension;
-
risk of catching clothing in a narrow passage;
-
position of fingers relative to the frame;
-
symmetry of multiple handles;
-
ease of cleaning the surface around the button.
The test is especially important on corner cabinets, narrow passages, and furniture near the bed. A small protrusion may be comfortable, while a larger bracket may obstruct movement. In such cases, the compactness of the Key HL-019 becomes not only a decorative but also a practical advantage.
Where the compact Key HL-019 is truly appropriate
A button handle does not have a single mandatory purpose. The manufacturer specifies the type, size, materials, and finish, while the specific application is determined by the project. Therefore, the following are not strict limitations, but scenarios in which the 30 × 20 mm model typically reveals its advantages.
Small dresser drawers
On a small drawer, one compact handle can become a natural focal point of the composition. It does not cover the frame, does not conflict with the panel, and leaves enough free space around itself. If the slides operate smoothly and the contents do not create a heavy load, the drawer is convenient to open with two or three fingers.
Before ordering, you need to check not only the empty drawer. Place typical contents inside: linen, documents, accessories, or other items for which the furniture is intended. Sometimes an empty drawer moves easily, but after loading requires noticeable effort. Testing in working condition is more accurate than a decorative fitting.
Bedside table
In the bedroom, a large bracket can catch on bedding or clothing, especially if the nightstand is close to the bed. A small knob reduces the protrusion of the hardware and visually maintains the furniture's lightness. Here, the Key HL-019 is particularly suitable for one or two small drawers that open without a jerk.
The handle position should be checked while sitting and lying down. A comfortable height for a person standing in front of the nightstand does not always match the hand movement from the bed. A mockup helps find the grip point before drilling.
Narrow hinged door
On a narrow door, a knob handle is usually placed closer to the opening side. The geometric center of the panel is not needed: the closer the grip point is to the free edge, the less effort is required to open it. However, it is important to leave enough margin from the edge so that the fastener is in a strong area of the material.
If the door has a frame and a thin central panel, the mounting center is best placed in the frame stile rather than in the thin insert. The actual location is determined by the facade's construction, not just by the external pattern.
Secretary, bureau, and small cabinet
Furniture with many small facades can easily be overloaded with large hardware. Repeating Key HL-019 knobs create a calm rhythm and help keep attention on the furniture's shape, wood, or decorative elements. For such a project, it is especially important to order the set at the same time: differences in wood species, preparation, and future finish are more noticeable when the handles are placed side by side.
Sideboard and display cabinet
On the lower drawers of a sideboard, a knob can work well if they are not overloaded with heavy dishes. On display cabinet doors, a small handle maintains visual lightness and does not obscure the frame pattern. However, wide lower drawers that store dishes require separate testing: the mass of the contents and the resistance of the guides may make a bracket more convenient.
Furniture with many facades
When a single piece has ten, twelve, or more handles, the scale of each detail affects the overall rhythm. Large brackets can create an overly active grid. Compact knobs act as repeating points and leave more breathing room for the facades. This is especially important for dressers with many small drawers, libraries, apothecary cabinets, and furniture with sectional divisions.
When it's better to choose a handle instead of a button
A handle is not inherently "better" than a button. It is better suited for a different grip mechanism. The decision is based on opening force, frequency of use, and user capabilities.
| Scenario | Key HL-019 30 × 20 mm | Handle bracket |
| Small lightweight drawer | Usually convenient with smooth movement | May be excessively large |
| Narrow cabinet door | Preserves free facade space | Appropriate if a more secure grip is needed |
| Wide heavy drawer | Requires mandatory testing; sometimes two grip points are needed | Often more convenient due to multi-finger grip |
| Tall swing front | May be too small | Usually distributes force better |
| Frequent opening with wet hands | Small button is harder to hold | Bracket is easier to grip with palm |
| Furniture in narrow passage | Small protrusion can be an advantage | Protruding bracket may catch clothing |
| Furniture for people with limited finger mobility | May be uncomfortable | Large grip is usually preferable |
| Project with many small facades | Creates a calm, repetitive rhythm | May visually overload the furniture |
If the test shows that you want to open the facade with your whole palm, you should not keep the button just for the sake of appearance. In catalog of wooden furniture handles you can compare buttons, brackets and other options and choose the grip type based on the actual force.
Heavy wide drawer
A wide drawer may open unevenly if pulled by a single central point. This depends on the guides, the rigidity of the front, the load, and the cabinet construction. Sometimes the central button works fine, sometimes the drawer skews slightly. Installing two buttons can distribute the movement, but it does not replace proper mechanics and does not guarantee convenience.
For a heavy drawer, first check the operation of the guides and the actual load. Then compare three options on a mockup: one button in the center, two buttons symmetrically, and one handle of a suitable size. Choose not the most familiar option, but the one that opens the drawer without skewing and excessive force.
Front of built-in appliance
Doors of built-in appliances and tall fronts can create significant resistance due to seals, hinges, and the mass of the structure. A compact button 30 × 20 mm is often insufficient for them. Without a confirmed project, the Key HL-019 cannot be recommended as a universal handle for a built-in refrigerator or other heavy door.
Frequent use
One thing is a drawer that is opened a few times a week, another is a kitchen front that is accessed dozens of times a day. Repetitive motion quickly reveals ergonomic shortcomings. If fingers slip or you have to regrip the handle, it is better to choose a larger grip.
Accessibility for different users
Furniture may be used by children, elderly people, and people with limited hand mobility. A small button requires precise finger grip. In such projects, aesthetics should not override accessibility. The mockup should be tested by all primary users, and if in doubt, choose a handle or a larger button.
One or two handles on a wide drawer
The decision of "one or two" cannot be made based solely on the width of the front. The drawer construction and furniture composition must be evaluated.
One Key HL-019 in the center
One handle maintains a strict axis and simplifies marking. It is suitable if:
-
the drawer moves smoothly;
-
the facade does not warp under central pulling force;
-
the contents do not create excessive load;
-
the button size is visually proportional to the facade;
-
it is comfortable for a person to open the drawer with one hand.
The main risk is a too small grip point on a wide facade. Visually, it may get lost, and mechanically, it forces the user to apply extra effort.
Two identical buttons
Two handles create a more pronounced rhythm and allow pulling the drawer with both hands. This option is considered if:
-
the facade is wide;
-
the composition supports paired installation;
-
internal elements do not conflict with the fasteners;
-
both points can be placed symmetrically;
-
the user can conveniently grab two buttons at the same time.
Two handles cannot be placed "by eye." The slightest difference in height or offset is noticeable because the elements are on the same horizontal line. A single template is needed.
When two buttons don't solve the problem
If the guides are sticking, the body is skewed, or the drawer is overloaded, two handles will not fix the cause. They may temporarily make movement more convenient, but the incorrect mechanics will remain. First, adjust the furniture, then choose the hardware.
How to determine the position of the handle on the facade
There is no universal coordinate. The position depends on the type of facade, the direction of opening, and the height of use.
Drawer marking
For a small drawer, the geometric center of the front is often used. But even here, you need to check the internal structure. The sequence of safe marking looks like this:
-
Measure the actual width and height of the front.
-
Mark the vertical axis.
-
Determine the intended horizontal grip.
-
Check the back side of the front.
-
Make sure the hole does not hit a guide, connector, or thin insert.
-
Secure the handle template.
-
Open the drawer in the working position.
-
Transfer the confirmed point to the common template.
For a series of drawers, it is better to use one baseline. Even if the fronts differ in height, the handles should form a clear rhythm, not randomly "float".
Markup of a swing door
The handle is placed closer to the free edge opposite the hinges. The farther the point of force application is from the axis of rotation, the easier it is to open the door. However, the fastening should not be placed too close to the edge: a strong material zone is needed.
For paired doors, mirror symmetry is checked. The left and right handles must be at the same height and have the same indentation from the inner edge. An error of a few millimeters is especially noticeable on plain facades.
Markup of a frame facade
A frame facade has stiles, rails, and a central panel. The handle cannot be automatically placed in the visual center if there is a thin panel there. The mounting point must rest on a structurally suitable area. If the thickness and structure of the facade are unknown, they should be clarified with the furniture manufacturer before drilling.
Markup of multiple facades
For a chest of drawers or sideboard, a template is prepared from a dense material. It marks:
-
the base edge of the facade;
-
the handle axis;
-
the distance from the top or side edge;
-
mirror flip side;
-
type of facade for which the template is intended.
One template cannot be transferred to all doors without checking if their design differs. For example, drawers may have a solid facade, while doors have a frame one. The coordinates visually match, but the reverse side and fastening zones differ.
Facade thickness and fasteners: kit is included, but compatibility is still checked
The fastening kit is included with the Key HL-019. This is an important characteristic, but it does not eliminate the need to check the specific furniture. Facades differ in thickness, design, and material. The same fastener may fit a solid facade and be unsuitable for a thin panel or complex frame part.
Before ordering and installation, you need to compare:
-
the actual thickness of the facade at the hole location;
-
the seating depth of the fastener in the handle;
-
the presence of a washer or other distributing part, if required by the design;
-
the protrusion of the fastener on the inside;
-
location of the drawer, shelf, or inner wall behind the facade;
-
ability to tighten the fastener after installation.
The specific screw length cannot be specified without drawing data and facade measurements. If the standard fastener does not match the thickness, a replacement is selected by size and thread type, without arbitrarily changing the connection principle.
Solid wood facade
A solid wooden part usually provides a clear area for fastening but requires careful drilling. The hole must be perpendicular to the plane, without tearing fibers on the front and back sides. Excessive tightening can compress the wood or damage the finish.
The facade wood species and the handle wood species may match or differ according to the design. If the handle should appear as an extension of the furniture, finish samples are checked side by side. Even the same species name does not guarantee a complete match of shade and grain.
MDF facade
MDF is often used under a covering finish. With a proper hole and suitable fastener, the handle is installed neatly, but chips in the coating around the drilling must not be allowed. Marking and drilling should preferably be done before final assembly or with protection of the front surface.
If the Key HL-019 is made of beech and painted to match the enamel facade, a test paint-out is done. Wood and MDF absorb primer and paint differently, so the same composition can yield different textures. Matching is achieved through a preparation system, not just by a single color name.
Chipboard facade
For chipboard, it is important not to destroy the material structure with excessive tightening. The attachment point should be away from a damaged edge and not fall into a loose area. If the facade has a coating, the hole is made cleanly to avoid chipping.
Frame facade and thin panel
This is the most common source of error. Externally, the center of the facade seems obvious, but the central insert may be thinner than the frame. Attaching the handle only to the thin decorative part without confirming the structure is risky. The placement is moved to the stile or a coordinated reinforcement is provided. The decision is made by the furniture manufacturer or a specialist familiar with the facade's construction.
Why you can't just tighten the screw harder
If the handle starts to rotate, the first instinct is to tighten the fastener more. But excessive tightening can:
-
press the handle base into the coating;
-
damage the wood;
-
strip the thread;
-
deform the thin insert;
-
create a crack in the paint layer.
Proper connection depends on matching the length, thread, and facade thickness. Tightening force does not compensate for incorrect fasteners.
How to calculate the quantity of Key HL-019 for a dresser, cabinet, or furniture series
The calculation starts not with the number of facades, but with the grip pattern. One facade may require one handle, two, or a different type of handle. Therefore, a list is compiled first.
| Furniture element | Number of facades | Handles per facade | Total Key HL-019 | What to check |
| Small drawers | 4 | 1 | 4 | Smooth operation and central marking |
| Wide drawers | 2 | 2 | 4 | Symmetry and convenience of double grip |
| Side doors | 2 | 1 | 2 | Hinge side and position at the free edge |
| Main set | — | — | 10 | Same breed and preparation |
| Project reserve | — | — | 1 | Is a spare needed for cutting or future repairs |
In this example, the main set consists of ten handles. One extra part can be useful for a large series, complex custom finishing, or future restoration. But the reserve is not a mandatory manufacturer rule: it is included in the project deliberately.
Bill of materials formula
For each group of facades, record:
number of facades × number of grip points = number of handles.
Then add up the results. Separately specify:
-
model Key HL-019;
-
size 30 × 20 mm;
-
material — beech or oak;
-
unpainted finish;
-
Prestige quality;
-
number of main parts;
-
number of spare parts, if needed.
Such a list is more precise than the wording "need a set for a chest of drawers." Chests of drawers differ in the number of drawers, and a wide front may have two grip points.
Why you cannot count only visible doors
In a furniture series, internal pull-out drawers, mezzanine doors, side sections, or secret compartments are often forgotten. Before ordering, it is useful to open the furniture drawing and go through each item in order. If some fronts get brackets and some get buttons, they are recorded in separate lines.
Reserve for control sample
An unpainted handle requires finishing. If the color is complex, patinated, or custom-mixed for a project, an extra piece allows for a test application without risking the main set. On the sample, they check:
-
color;
-
gloss level;
-
visibility of wood grain;
-
coating quality on side surfaces;
-
compatibility of primer and finish;
-
feel of the handle after coating application.
After the sample is approved, the remaining handles are painted with one system.
Why it's better to buy the entire set at once
Handles are placed side by side and regularly come into view. Even small differences between batches are more noticeable than on parts located in different rooms.
Ordering at the same time helps to get:
-
one selected wood species;
-
same model and size;
-
single Prestige preparation level;
-
mounting kit for each position;
-
ability to perform a trial fitting simultaneously;
-
single cycle of priming, painting or tinting;
-
coordinated marking of all furniture.
This is not a promise of absolute identity of the natural pattern. Wood remains a natural material, and the texture of individual parts may differ. But a single batch simplifies sorting handles and distributing them across facades.
How to distribute handles before finishing
Before painting, arrange the items into groups:
-
Handles for central facades.
-
Handles for paired doors.
-
Handles for upper and lower drawers.
-
Spare or test part.
If a transparent finish is maintained, handles with the closest grain pattern can be placed on adjacent fronts. For opaque enamel, uniform preparation and coating thickness are more important.
Beech or oak for Key HL-019
Both wood species are available for this model. The choice is primarily related to the finishing system and visual task.
| Criterion | Beech | Oak |
| Visual character | Calmer and more uniform surface | More pronounced wood texture |
| Typical project route | Opaque white or colored enamel | Transparent, semi-transparent, or tinted finish |
| When the handle blends with the facade | Often convenient under a single covering color | Possible, but the texture may be part of the design |
| When the handle should emphasize the wood | May be used according to the project | Especially expressive when preserving the pattern |
| What to check | Matching texture after primer and enamel | Tinting sample, shade, and grain reveal |
This table does not mean that beech is only allowed under enamel, and oak only under varnish or oil. These are practical selection routes. The specific coating and technology are agreed upon with the finisher and tested on a sample.
Beech for opaque finish
Beech is often chosen when the handle needs to become part of a painted facade. The calm surface helps achieve a uniform visual result. However, a wooden handle and an MDF facade require different preparation. Without a test coat, the same paint can look different.
When painting, it is important to preserve the shape of the handle. Too thick a layer of primer and enamel smooths out transitions, reduces the free space for fingers, and can make the surface sticky or unpleasant to the touch. The coating is applied thinly and evenly.
Oak for transparent or tinted finish
Oak is chosen when the texture should remain visible. Stain, semi-transparent tinting, oil, or clear varnish can emphasize the wood grain, but the specific system is not confirmed by the card as a ready-made configuration. Key HL-019 is supplied unpainted, and the future finish is determined by the project.
A test sample is especially important for oak. The tinting compound reveals differences in the fibers, so the color from a photo or fan deck does not guarantee the result on a specific part.
Mixing beech and oak on the same furniture
Random mixing of species usually creates differences in grain and reaction to the coating. If the project does not intentionally provide for contrast, the entire set is chosen from one species. This is especially important for paired facades.
Unpainted Key HL-019 or Key HL-019M with a ready-made coating
The buyer has two different routes. The main model of the article is the unpainted HL-019. It is suitable for those who want to perform the finish together with the furniture, choose an individual color, or preserve the wood texture according to their own project.
Key HL-019M with a ready-made coating has the same stated size of 30 × 20 mm and allows you to choose a ready-made finish option from those available in the card. Specific colors, price, and availability should be checked on the current product page.
| Question | Unpainted Key HL-019 | Key HL-019M with coating |
| Who performs the finish | Buyer, furniture manufacturer, or finisher | Coating is already included in the product version |
| Main reason for choosing | Need to match a custom color or finish system | Need a ready-made handle without a separate painting cycle |
| What to check | Test paintout, primer and coating compatibility | Available color options and matching with furniture |
| Risk | Unsuccessful DIY finishing | Mismatch of the finished shade with a specific facade |
| Size | 30 × 20 mm | 30 × 20 mm |
The finished version does not cancel the size fitting. If the grip is uncomfortable, the same size will remain uncomfortable regardless of the coating.
How to finish Key HL-019 before installation
Unpainted hardware is easier to finish before final installation. This makes it easier to process side surfaces and avoid staining the facade.
Work sequence
-
Check the model, material, and quantity.
-
Compare each handle with the drawing and layout.
-
Perform a dry fit without final tightening.
-
Sign groups of handles by facades.
-
Prepare a control sample.
-
Remove dust after surface inspection.
-
Apply the agreed finishing system.
-
Do not fill the mounting hole and seating areas.
-
Cure the coating according to the technology of the materials used.
-
Install handles with clean tools.
In the article, a universal primer, varnish, oil, or enamel cannot be assigned: the card confirms an unpainted finish, but not a specific finishing system. It is selected per project.
Why you should not paint handles already on the facade
Painting after installation complicates furniture protection. The compound may get on the facade, into the gap at the base, and on the fastener. The coating near the joint becomes uneven, and its edge may tear off during disassembly.
Separate finishing allows control over the entire visible surface. After complete drying, handles are installed without touching the fresh coating.
Do not cover the form with a thick layer
A handle is an object of constant contact. A thick coating can change the feel of the grip, smooth out the shape, and get damaged faster. Several thin, technologically consistent layers are better than one heavy one. The exact mode depends on the chosen system.
How Key HL-019 works in different interior scenarios
A compact handle doesn't have to be inconspicuous. Its role depends on the color, wood species, and number of repetitions.
Bedroom
On bedside tables and a small dresser, Key HL-019 helps maintain a calm composition. If the handles are painted the color of the facade, they hardly break up the furniture. Oak under a clear finish, on the contrary, can add small warm accents.
Practical testing in the bedroom involves walkways and textiles. Make sure the handle doesn't catch on the bedspread or clothing, and the drawer can be opened while sitting next to the bed.
Living room
For a sideboard, secretary, or display cabinet, compact knobs support a classic or chamber-like furniture composition. On many small facades, they create a uniform rhythm. On one large smooth door, the model may get lost—this needs to be checked on a mockup.
Study and library
Small drawers for documents and supplies are suitable for knob grip if the slides work smoothly. Drawers with heavy folders and books require more robust hardware. Here, you cannot transfer the solution from the upper light drawers to the lower loaded ones without additional consideration.
What to buy and check together with Key HL-019
The handle does not work separately from the facade and the overall fitting system. The accompanying selection is not a mandatory purchase of each item, but a project verification route.
| What to add to the selection | Why is this needed | For which scenario | What to pay attention to | Where to go |
| Second or full set Key HL-019 | Keep the same model on all furniture | Chest of drawers, sideboard, series of cabinets | Wood species, quantity, and uniform finish | Order a set of Key HL-019 handles |
| Finished version HL-019M | Exclude a separate cycle of self-finishing | Furniture suitable for an available ready color | Size remains 30 × 20 mm; shade is checked against a card | Select a Key handle in a ready color |
| Other unpainted handles | Compare shape and scale for custom painting | Project with its own finishing system | Size, material, and grip type | Handles for self-finishing |
| Other button handles | Find a larger or differently shaped button | When Key HL-019 is small, but a bracket is not needed | Protrusion, size, and finger comfort | Catalog of wooden button pens |
| Handle bracket | Grip with multiple fingers | Heavy drawer, tall front, frequent use | Center distance and two drilling points | Choose a bracket handle for a heavy front |
The section should not turn into a random list of products. First, identify the problem: insufficient grip, need for a ready-made finish, too small a scale, or the need to assemble a set. Then open the corresponding category.
How not to confuse Key HL-019 with similar solutions
Do not confuse the unpainted HL-019 and HL-019M
Both models have a stated size of 30 × 20 mm, but differ in the finishing route. HL-019 is designed for independent inclusion in a finishing project. HL-019M is offered with a ready-made finish in options available on the current page.
Do not call any 30 mm size the HL-019 model
Different handles may share one dimension. The article number determines the shape, material, finish, and product card. In the order, you need to write Key HL-019, not just "wooden button 30 mm".
Do not mistake the button for a decorative plug
Key HL-019 is a furniture handle designed for a gripping function and supplied with fasteners. Decorative elements without a working function do not replace it.
Do not replace a bracket with a button without testing
If the old facade had a bracket with two holes, switching to a button will require addressing the old mounting points. Additionally, changing the grip type may affect convenience. The replacement must consider both mechanics and appearance.
Do not consider the fasteners universal for any thickness
The completeness is confirmed, but compatibility with a specific facade is checked separately. This is especially important when restoring furniture, where the thickness and structure of the facade may differ from modern standard solutions.
Practical selection for specific situations
Need to update an old dresser
First, remove one existing handle and examine the holes. If the old hardware was attached at a single point, Key HL-019 can be tried without creating a second hole, but the diameter and condition of the existing hole must match the new connection. If there was a bracket, the old holes will need to be restored or accounted for in the new composition.
Check each drawer with normal loading. The button may work for upper light drawers, but not for lower heavy ones. Mixing handle types is only allowed as a deliberate composition.
Need to assemble a kit for a new dresser
Work according to the facade list. Mark the number of small, medium, and wide drawers, select one or two grip points, add doors and reserve. Then order the entire batch from one species and carry out a general finishing cycle.
Need to select a handle for a narrow door
Make a template 30 × 20 mm and place it at the free edge. Check that the fasteners do not conflict with the frame, glass, hinge, or shelf. Open the door several times at different angles.
Need a handle for white enamel
Beech can be considered a practical option, but testing the coating system is mandatory. The color on the wooden handle and MDF facade is compared after complete drying, not in a wet layer.
Need visible wood texture
Oak is suitable for a route with transparent or tinted finishing. Order a control piece or use a spare handle for a test coat. Distribute items with similar grain patterns across adjacent facades.
The drawer is wide and heavy
Do not try to solve the issue by simply installing two Key HL-019. First, check the guides, load, and facade rigidity. Then compare two buttons with a bracket. If the palm naturally reaches for a wider grip, the bracket will be more honest ergonomically.
A handle is needed for furniture in a narrow passage
Here, compactness can be a key advantage. Check the protrusion with a mockup, walk by in outerwear, open adjacent doors. If the knob doesn't catch clothing and opens the facade conveniently, it solves two tasks at once.
Typical mistakes when buying and installing
Choosing only by photo
The photo doesn't convey the real scale and protrusion. The fix is simple: a 30 × 20 mm mockup and checking the drawing.
Installing a small knob on a heavy facade
Aesthetics don't compensate for an uncomfortable grip. You need to check the facade with a working load and, if necessary, choose a bracket.
Calling 30 mm a diameter without a drawing
Dimensions in the card are indicated by parameters A and C. It's correct to use the notation 30 × 20 mm and look at the geometry in the drawing.
Ordering handles individually at different times
This complicates a uniform finish and distribution of natural texture. The full set is calculated in advance.
Drilling without a temporary mockup
Position error is irreversible for a finished facade. The template allows moving the point before drilling.
Attach to a thin panel
The visual center is not always structurally strong. The back side of the facade is checked before marking.
Do not measure the thickness of the facade
Fasteners are included, but their length must match the specific part. A universal assumption is dangerous.
Overtighten the connection
Excessive force damages the wood and coating. The cause of handle rotation is eliminated by selecting the connection, not by endless tightening.
Paint after final installation
It is difficult to achieve a neat coating at the base and protect the facade. Handles are better finished separately.
Mix beech and oak without a design reason
Species differ in texture and response to finishing. In one symmetrical group, a single material is chosen.
Place adjacent handles at different heights
Even a small error is visible on a row of facades. A common template and baseline are needed.
Not considering the user
An adult's convenience does not guarantee convenience for a child or elderly user. Testing is done with those who will use the furniture.
Who the Key HL-019 suits, and who should choose a different handle
Suitable
-
owners of furniture with small and smoothly opening facades;
-
projects requiring a compact wooden grip point;
-
chests, cabinets, secretaries, and sideboards;
-
series with many identical small facades;
-
furniture for custom painting or tinting;
-
narrow passages where a large protrusion gets in the way;
-
customers ready to check the layout before drilling.
Better to choose another option
-
for a heavy door or a loaded wide drawer;
-
when a full palm grip is needed;
-
for users who find it difficult to hold a small button;
-
if the finished facade has two holes for a bracket and they cannot be covered;
-
if the attachment point falls into a thin unsupported insert;
-
when the 30 × 20 mm scale gets lost on a large surface;
-
if the project requires a different breed, size, or ready-made coating not available in the card.
An honest refusal of a model in an unsuitable scenario is more useful than a purchase followed by replacement.
How to buy Key HL-019 on STAVROS without error
-
Open the product card and look at the drawing of Key HL-019.
-
Keep the exact size 30 × 20 mm without unauthorized interpretation of parameters.
-
Make a mockup and check the grip on the loaded facade.
-
Measure the thickness and study the structure of the attachment point.
-
Determine the number of handles for each group of facades.
-
Choose beech or oak considering the finish.
-
Decide whether an unpainted HL-019 or a ready-made HL-019M is needed.
-
Check the current price, availability, and terms of receipt in the product card.
-
Order the entire set as one batch.
-
Before drilling, create a common marking template.
This route turns a decorative choice into a precise specification. The buyer receives not just a beautiful knob, but a set that matches the furniture in grip, scale, material, and installation.
FAQ: questions about the Key HL-019 knob
1. What is the size of Key HL-019?
The confirmed model size is 30 × 20 mm. In the card, the parameters are labeled as A and C, so without a drawing, the first number should not be called the diameter and the second the height. For ordering, keep the original record and check the geometry against the drawing.
2. What materials is Key HL-019 made from?
Beech and oak are confirmed for the model. Beech is often chosen for covering enamel, and oak for a project where you need to preserve or emphasize the wood texture. These are practical scenarios, not a ban on other finishing systems.
3. Is Key HL-019 sold painted?
The main Key HL-019 is considered an unpainted wooden handle. The finish is selected separately for it. If you need a finished version, you can look at HL-019M with coating and check the current options in the product card.
4. Is the mounting hardware included in the kit?
Yes, the mounting kit for Key HL-019 is confirmed. However, its compatibility with the specific facade thickness must be checked before installation. One cannot automatically assume that the same mounting hardware is suitable for solid wood, MDF, chipboard, and thin paneling.
5. Will Key HL-019 fit a chest of drawers?
Yes, especially for small and medium drawers with smooth operation. On wide and heavy drawers, you need to check one and two grip points, and also compare the button with a bracket.
6. Can Key HL-019 be installed on a cabinet door?
It can be considered for a small or narrow door that opens without much resistance. For a tall or heavy facade, a compact button may not be sufficient. Testing is done on a mockup and the actual working door.
7. Is the handle suitable for kitchen furniture?
It can be used on small cabinets, sideboards, and light drawers. For main kitchen drawers with dishes and built-in appliances, the weight, seals, frequency of use, and the ability to grip with a wet hand are important. There is no universal answer without testing.
8. Are one or two handles needed on a wide drawer?
The amount depends not only on the width. Check the guides, load, facade rigidity, and ease of movement. Two buttons can improve symmetry and grip, but they do not fix a sticking or skewed drawer.
9. Where to place the handle on a drawer?
For a small drawer, the geometric center often works, but the point should be checked against the back side of the facade. The hole must not hit the guide fasteners, a thin insert, or another unsuitable area.
10. Where to place the Key HL-019 on a hinged door?
Usually, the handle is shifted toward the free edge opposite the hinges. This reduces the required force. The exact offset depends on the facade design and the material strength in the mounting area.
11. How to check the handle's comfort before purchase?
Make a 3D mockup measuring 30 × 20 mm, attach it with painter's tape, and open the facade several times. Test the furniture with a normal load, not just an empty drawer.
12. Is the Key HL-019 suitable for a person with limited finger mobility?
The compact button needs to be grasped with fingers, so it may be uncomfortable. The user should personally test the mockup. If a full palm grip is required, it is wiser to choose a pull or a larger handle.
13. Can the Key HL-019 be installed in a thin panel?
Without confirmation of the design, this should not be done. A thin panel may not provide a reliable attachment point. The installation location is coordinated with the facade manufacturer or moved to the frame post.
14. What is better under white enamel — beech or oak?
Beech is often chosen for uniform opaque finishing. But the handle and facade may react differently to primer and enamel, so a test coating is needed. The color name itself does not guarantee the same texture.
15. Can the oak Key HL-019 be tinted?
Oak is logically considered for transparent or tinting finishes when texture is important. The card does not specify a specific stain, oil, or varnish as a mandatory system, so the composition is chosen in the project and tested on a sample.
16. Is it necessary to buy all handles at once?
For one dresser, cabinet, or furniture series, this is preferable. A simultaneous order simplifies the selection of wood species, texture distribution, overall coating, and marking. The quantity needs to be calculated before placing the order.
17. Is a spare handle needed?
A spare is useful for complex coating, a large series, or future repairs, but is not a mandatory requirement. The decision depends on the project and budget.
18. Can an old bracket be replaced with Key HL-019?
Technically, this is not always possible. After the staple, two holes remain, and the button uses a different layout pattern. The issue of restoring the old holes needs to be resolved, and it must be checked whether the new one provides enough grip.
19. How is HL-019 different from HL-019M?
HL-019 is an unpainted version for self-finishing. HL-019M has a ready-made coating in options available on the current page. The stated size for both models is 30 × 20 mm.
20. Where can I see other sizes and shapes of buttons?
If the Key HL-019 seems too small or doesn't fit the shape, you can compare Key HL-019 with other buttons. Compare not only the appearance, but also the protrusion, grip area, and mounting pattern.
21. Can I order Key HL-019 from different wood species for the same piece of furniture?
Technically, the range includes beech and oak, but randomly mixing species on adjacent facades usually complicates finishing and creates differences in texture. For a unified composition, it is better to choose one species, unless contrast is specifically intended by the designer.
22. How can I tell if the handle will snag on clothing?
Secure the volumetric mockup, walk near the furniture in regular and outerwear, open adjacent facades. It is especially important to check bedside tables, cabinets in a narrow hallway, and furniture near the passage.
23. Do I need to drill the facade before painting the handles?
First, it is useful to confirm the markings and perform a dry fit. The order of drilling the facade depends on the stage of furniture production, but it is more convenient to finish the handles separately from the installed product. The main thing is not to drill a finished facade without a verified template.
24. Where to check the price and availability of Key HL-019?
Current commercial parameters should be viewed directly in the model card. The article does not fix the price, stock, or delivery times, as they may change. Before placing an order, open the product page and verify the selected material, quantity, and delivery conditions.
Conclusion
Key HL-019 knob handle 30 × 20 mm is a compact wooden fitting for projects where neat scale, a single grip point, and the ability to choose beech or oak for future finishing are important. It works well on small drawers, cabinets, narrow doors, secretaries, sideboards, and furniture with many repeating facades. But it cannot be assigned based solely on a photo or a desire to make the hardware less noticeable.
Before ordering, you need to check the opening force, actual grip, design and thickness of the facade, position of the mounting point, and number of handles. The 30 × 20 mm mockup shows more than a catalog photo. It helps to understand in time whether one button, two symmetrical points, or a full bracket is needed.
The choice of material should also be deliberate. Beech is convenient for projects with covering finishes, oak for solutions where texture is important, but the final result is confirmed by a test paint. Unpainted HL-019 can be included in an individual finishing system, while HL-019M can be considered as a ready-made alternative.
On the STAVROS website, first check the price and availability of HL-019Then order the entire calculated set as one batch. This approach allows you to combine ergonomics, scale, material, finish, and installation into one solution — and avoid changing handles after the fronts have already been drilled and painted.