Article Contents:
- Two sizes of the same NL-7: a difference that cannot be judged only by the product card
- Why the window width does not determine the trim width
- The opening size is responsible for proportions
- The wall section between openings is responsible for installation feasibility
- Adjacent elements are responsible for composition
- From the frame to the external corner
- From the frame to the internal corner
- Between two windows
- Between window and door
- Up to pilaster or corner board
- Up to downspout
- Up to exterior light fixture
- From top of window to cornice
- From bottom of window to base trim
- How to build the template
- How to apply the template
- Why you can't hold the template in the air
- Checking in cloudy and sunny weather
- Checking from a distance
- Window near the corner
- Narrow wall between windows
- Small window
- Facade with several accents
- Door near an adjoining wall
- When the narrow option doesn't help
- Large single window
- Spacious facade
- High opening
- Main facade
- Free field around the window
- When 294 mm physically fit but look cramped
- Cornice
- Pediment or fronton
- Roof overhang
- Lamp
- Connecting element
- One size for all windows
- Two sizes according to the facade hierarchy
- Different sizes on one facade due to constraints
- Start with the tightest opening
- When trims almost touch
- Can two windows be joined with one carved composition
- Windows of different heights
- Physical width
- Visual wall remainder
- View from the adjacent side
- External corner with separate decor
- Door leaf and handle
- Porch and steps
- Adjacent wall
- Unified style with windows
- Enamel color changes perception
- Matte and more glossy surface
- Facade texture
- Preparation for enamel is not the finish
- Why ends require special attention
- Pine and natural wood features
- Sanding "Standard"
- Test swatch
- List for one opening
- Why the perimeter doesn't give the ready quantity
- Several identical windows
- Windows of different heights
- Two-meter length and a tall window
- Technological allowance
- Vertical joint
- Top joint
- Corner connection
- Connectors
- Cornice
- Pilasters
- Brackets
- Corner decor
- Pediment and sandrik
- Narrow variant
- Wide variant
- If both widths are used
- What else to add
- Documents
- Width
- Length and thickness
- Carved pattern
- Straightness
- Completeness
- Dry fitting
- Mistake 1. Measured only the window
- Mistake 2. Checked only one side
- Mistake 3. Did not account for the second architrave in the wall section
- Error 4. We counted the rough facade
- Error 5. A wide platband was chosen from a photo
- Error 6. A narrow option was chosen only out of fear
- Error 7. The top was not checked
- Error 8. The drain was not drawn on the plan
- Error 9. Left too narrow a field to the corner
- Error 10. Decided to trim the width
- Error 11. Mixed 164 and 294 mm without a system
- Error 12. Did not specify the width in the request
- Error 13. The perimeter was taken as the number of planks
- Error 14. Didn't account for the joint on a high vertical
- Error 15. SNL-19 was automatically recognized as compatible
- Error 16. The primer for enamel was mistaken for the finished coating
- Error 17. Painting started before the fitting
- Error 18. Ordered a small batch without checking the packaging
- Error 19. Didn't label the different widths
- Error 20. Ordered windows one by one
- What sizes are available for NL-7?
- How much wider is NL-7 wide compared to narrow?
- Which NL-7 should I choose for a window near a corner?
- Can I choose 164 mm without a template if space is limited?
- Is a width of 294 mm suitable for a large window?
- Why can't NL-7 be trimmed in width?
- Can I use different widths on the same house?
- What should I do if the wide trim fits on the left but not on the right?
- How do I measure the wall space between two windows?
- What wall space is sufficient for two NL-7s?
- What should I check above the window?
- Can NL-7 be used for a door?
- Is the top element included in one plank 2000 mm long?
- What to do if the vertical is higher than 2000 mm?
- Can the quantity be calculated around the window perimeter?
- How to calculate trims for several identical windows?
- Is a spare needed?
- What material is NL-7 made of?
- What type of sanding is provided?
- What does preparation for enamel mean?
- Can NL-7 be installed without painting?
- Paint before installation or after?
- Why is a test paint needed on the carved part?
- Do the ends need protection after cutting?
- Is NL-7 in stock?
- Can I order one plank?
- Why is a transport backing needed?
- Can 164 and 294 mm be combined in one delivery?
- Does SNL-19 fit NL-7?
- Are connecting elements needed for each window?
- How to understand that the trim is visually too wide?
- How to understand that 164 mm is too narrow?
- Does color affect the choice of width?
- Do I need to consider the wall relief?
- What to do if the facade is not yet insulated?
- How to check a window next to a pilaster?
- Do I need to account for the downspout if it doesn't touch the wall?
- How to choose the width for a dormer window?
- Can I install a wide NL-7 only on the central window?
- Where can I see other carved trim?
- Where can I see ready-made facade solutions?
- Can I order help with the layout?
- What should I specify to the designer or architect?
- How to order a sample?
- How to accept the batch at the site?
- Can I store the trim outside before installation?
- When can final installation begin?
- How do I know when an order is ready for payment?
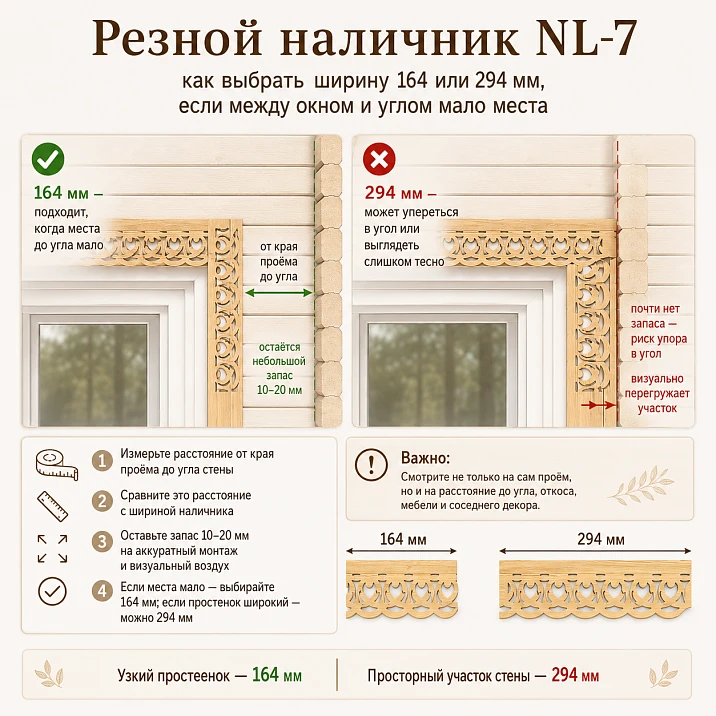
The window can be large, the facade spacious, and the space for a carved trim may still turn out to be too narrow. It is enough for the opening to approach the outer corner of the house, a neighboring window, a pilaster, a downspout, or a door portal. A buyer sees an expressive NL-7 with a width of 294 mm, evaluates it from a photo, and decides that a large window needs exactly wide decor. After manufacturing, it turns out: from the frame to the corner, there is less free wall left, the trim does not fit, overlaps a neighboring element, or requires trimming along the carved pattern.
Therefore, the request "buy wooden carved window trims" cannot be reduced to choosing a beautiful ornament. First, you measure not only the window but also all the space around it. This is especially important for NL-7, because one article is available in two noticeably different variants: 2000 × 164 × 18 mm and 2000 × 294 × 18 mm. The length and thickness are the same, but the width differs by 130 mm. On a single plank, this difference seems moderate. On the facade, it acts on both sides of the opening at once and can completely change the composition.
The narrow NL-7 takes up less wall space and fits more easily in a tight pier. The wide variant is more visible from a distance but requires free space. Neither size can be called universally correct. The decision depends on the distance to corners, neighboring openings, cornices, lights, pilasters, and other details. Before buying a carved trim NL-7, it is useful to make two full-size templates and check them on each side of the window.
This article will help you choose NL-7 with a width of 164 or 294 mm without ruining the carved pattern with accidental trimming. We will review which distances to measure, how to build a template, why side and top planks are checked separately, how to calculate two-meter pieces, what to write in the specification, and which products to add to the order.
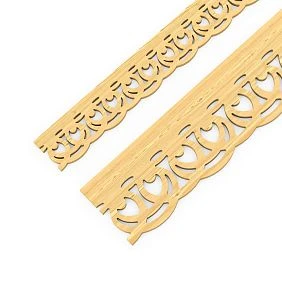
Two sizes of one NL-7: a difference that cannot be assessed only from the product card
Both options belong to the same article and retain the general character of the carved ornament. However, they work differently on the facade. The narrow strip leaves more open wall. The wide one forms a noticeable architectural framing and has a stronger effect on the distance between openings.
| Parameter | Narrow NL-7 | Wide NL-7 | What changes in the project |
|---|---|---|---|
| Length | 2000 мм | 2000 мм | The cutting principle is the same, the quantity is counted by parts |
| Width | 164 мм | 294 мм | The wide option takes up 130 mm more transverse space |
| Thickness | 18 мм | 18 мм | The projection from the plane is the same according to confirmed dimensions |
| Material | Spruce | Spruce | The finishing system is selected for one wood species |
| Sanding | "Standard" | "Standard" | Surface preparation is checked before painting |
| Preparation | For enamel | For enamel | The final exterior coating is selected separately |
| Conditions | Custom Order | Custom Order | The size must be approved before production starts. |
The 130 mm difference is not abstract. If the casing is installed on the left and right, the wide version requires more space on both sides. If there is a small pier between two windows, two wide casings may visually merge or physically intersect. The narrow option will leave more background, but on a large facade it may look less expressive.
The choice begins not with the question 'which casing is more beautiful', but with the question 'what are the real boundaries of the free field'.




Why the window width does not determine the casing width
Let's imagine a window 1200 mm wide. By overall scale, the wide NL-7 seems logical. But from the right side of the frame to the corner of the house there is 210 mm left. A plank 294 mm wide does not fit into this space. It will cross the corner line, and trimming by 84 mm will affect the carved pattern and change the proportions of the product.
The narrow version of 164 mm formally fits. But this is not the final answer yet. You need to check from which line the casing starts, whether a mounting gap is required, whether there is a slope, how the corner finish is done, and whether the downspout protrudes. The free 210 mm on the plan may turn out to be smaller after insulation, cladding, or corner board.
The window size shows the scale of the opening. The size of the free wall shows whether the selected decor can be installed. Both groups of data are needed for the purchase.
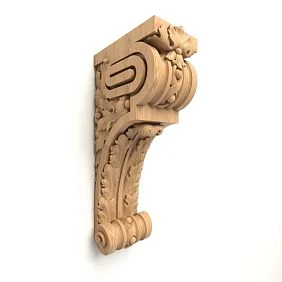
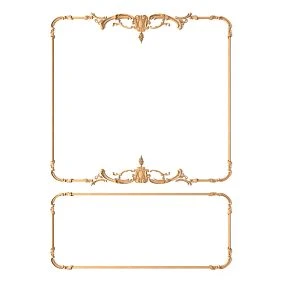
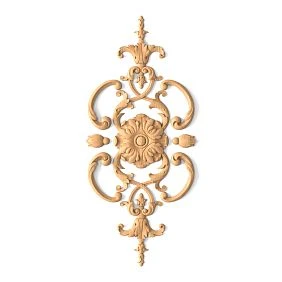
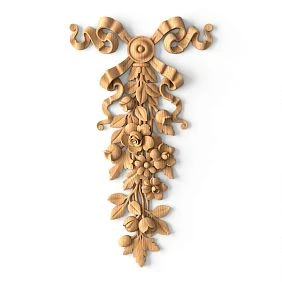
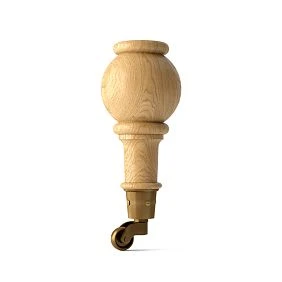
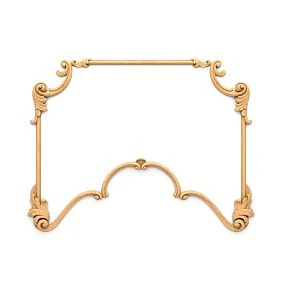
Our factory also produces:
The opening size is responsible for proportions
On a small window, a wide ornament can take up too much of the wall and visually weigh down the opening. On a large window, a narrow plank may get lost. However, the proportion is assessed only after checking the physical placement.
Get Consultation
The pier is responsible for the possibility of installation
Even a proportionally suitable trim is not good enough if it lacks space. In this case, you cannot convince yourself that "we'll trim a few centimeters." A carved trim differs from a smooth board: reducing the width changes the ornament, the edge, and the symmetry.
Adjacent elements are responsible for the composition
A pilaster, cornice, pipe, or lamp may not directly interfere with installation, but can create a visual collision. Between two expressive details, there should be a clear field or a pre-designed connection.
Map of free space around the opening
For one window, you need to take more measurements than it seems. It is convenient to draw the facade and label each distance. Do not measure only the nearest side: constraints from above and below can change the choice.
From the frame to the external corner
This is the most obvious measurement. Measure from the line where the trim will adjoin to the finished edge of the corner. If the facade is not yet finished, account for the future thickness of the cladding.
The external corner is especially sensitive to wide decor. The trim should not accidentally wrap onto the adjacent wall if such a solution is not intended by the project. Even when the board physically fits, a too-narrow strip of wall between the trim and the corner looks cramped.
From the frame to the internal corner
In the internal corner, the shadow is stronger, and access for installation is more difficult. A wide carved trim may hit the adjoining wall or lose part of the pattern in deep shadow. The template should be applied in the actual corner, not just checked with a ruler.
Between two windows
Measure the full pier between the trim attachment lines. Then check two sets: 164 + free field + 164 and 294 + free field + 294. If the windows are identical, it is desirable to make the fields symmetrical.
On a narrow pier, wide planks may almost meet. Sometimes this looks like a single carved panel, although the project intended two separate windows. If merging is not intended, the size should be reduced.
Between a window and a door
Window and door trims must exist in one composition. A wide NL-7 near a small window may approach the door frame so closely that a random gap remains between the elements.
Up to a pilaster or corner board
A pilaster itself is a vertical accent. When a wide carved plank appears nearby, they begin to compete for one facade zone. You need to decide what is more important: the window frame or the architectural division of the wall.
Up to a downspout
The pipe may not be in the plane of the wall, but in front of it. Formally, the width is sufficient, but the trim relief ends up too close to the drain. Check access to fastening, maintenance, and painting.
Up to an exterior light fixture
The luminaire creates its own shadow and requires space. A wide casing may overlap the mounting area or fall under directed light that will too sharply emphasize the relief. The position of the luminaire is marked on the facade before choosing the size.
From the top of the window to the cornice
Side strips may fit, but the top one may not. A wide carved element can enter the zone of the cornice, pediment, fronton, or roof overhang. The top is checked with a separate template.
From the bottom of the window to the plinth decor
If the design includes the lower part, a window sill board, or a decorative apron, the vertical distance to the plinth, interfloor belt, or another horizontal element must be checked.
Full-size template 164 and 294 mm: a check that is cheaper than rework
A ruler tells the distance. A template shows the composition. For NL-7, it is worth making two strips at full scale.
Thick cardboard, roll paper, thin sheet material, or painter's tape on the facade will work. The main thing is to maintain the width of 164 and 294 mm. The length of a full strip may be less than 2000 mm if only the transverse dimension is checked, but for evaluating the pattern and vertical scale, it is better to use the longest possible mock-up.
How to build a template
-
Set aside 164 mm and cut out the first strip.
-
Set aside 294 mm and cut out the second one.
-
Label the dimensions in large letters so they don't get mixed up.
-
Mark the intended line of contact with the box.
-
Add a conditional border for the carved pattern if it is known from the drawing.
-
Prepare separate fragments for the upper part.
How to apply the template
First check the left side. Then the right side. Do not transfer the conclusion automatically: there may be more space near one corner than near the other. After that, apply the top strip. Take photos from close range and from the point where the facade is usually viewed.
Why you cannot hold the template in the air
The strip must lie in the intended mounting plane. If you hold it in front of the wall, perspective will distort the width. On a facade with protruding slopes, the template must be tied to the actual mounting line.
Checking in cloudy and sunny weather
The carved profile is perceived differently. In side sunlight, a wide plank creates a strong shadow and looks more massive. In diffused light, the ornament is softer. For a final decision, it is useful to see both states, especially on the main facade.
Check from a distance
Step back to the gate, road, or opposite side of the yard. The narrow NL-7 may look good next to a window but get lost in the overall architecture. The wide one, on the contrary, may seem overly heavy up close but provide the right rhythm from a distance.
Width 164 mm: when the narrow NL-7 helps preserve the architecture
The 2000 × 164 × 18 mm option should be considered not as a reduced copy of the "main" trim, but as an independent size for specific conditions.
Window near a corner
When there is little space from the frame to the corner, 164 mm leaves a chance to preserve the strip of wall and not touch the carving. But you need to check the final size after finishing.
Narrow wall between windows
Two planks of 164 mm each take up less space, so the windows remain separate. Between them, the background is preserved, which helps the facade "breathe."
Small window
A narrow casing can match the scale of a small opening. The carving remains noticeable but does not turn the window into a heavy decorative insert.
Facade with multiple accents
If there are pilasters, cornices, brackets, and a pediment nearby, a wide NL-7 can overload the composition. A narrow option leaves visual space for other elements.
Door near an adjoining wall
For a doorway located close to a corner, 164 mm may be the only option without trimming. In this case, check the handle, opening, and casing on both sides.
When the narrow option does not help
If the free space is less than required, NL-7 cannot be trimmed automatically. Another casing, a layout change, or designing a transition joint may be needed. In the category, you can compare the width of carved casings and choose a model with a different dimension.
Width 294 mm: when the facade needs a large carved contour
Wide NL-7 is a strong architectural framing. It should be chosen not because "the bigger, the richer," but when the facade is truly capable of accommodating such a scale.
Large single window
If there is enough wall around the opening, a width of 294 mm helps make the window noticeable from afar. The carving forms an independent vertical frame.
Spacious facade
On a long blank wall, a narrow trim can get lost. The wide option ties the window to the overall architecture and creates a pronounced rhythm.
High opening
With a tall window, a large crosswise dimension can look more proportionate. But the trim length still remains 2000 mm, so cutting and joints are checked separately.
Main facade
On the side of the house facing the street or entrance area, a wide trim can become the main decorative accent. On secondary facades, the same size is sometimes used for unity, but the decision is checked for each opening.
Free field around the window
The wide option requires not only 294 mm of physical space. It is advisable to leave a visual field up to the corner or adjacent element. Its size is not set by a universal number: it depends on the scale of the house and the composition.
When 294 mm physically fits but looks cramped
The ruler may show 320 mm to the corner. Formally, a 294 mm wide plank fits, leaving 26 mm. But such a wall remnant can look like a random gap. The template will show the problem better than calculation.
Wide or narrow casing: decision based on six criteria
| Criterion | 164 мм | 294 мм | Question for the buyer |
| Free field | Requires less space | Requires significantly more space | Does the template fit without trimming? |
| Window scale | Suitable for checking on small openings | Suitable for checking on large openings | Does the frame get lost or overload the window? |
| Pier | Leaves more background | Can bring adjacent windows closer | Are windows preserved as separate compositions? |
| Proximity to corner | Easier to place | May run into corner | Does a clear strip of wall remain? |
| Expressiveness from afar | More restrained | More noticeable | How does the facade read from the street? |
| Adjacent decor | Conflicts less often | Requires more visual space | Does it conflict with the pilaster, cornice, or light fixture? |
The table does not replace the layout. It helps formulate questions that the actual facade must answer.
The top bar is checked separately from the side bars
The selection error is often detected at the top. There is space on the sides, but a cornice or roof overhang runs above the window.
Cornice
The trim should not accidentally go under the horizontal profile if the connection is not designed. Either leave a gap between them or create a deliberate joint.
Pediment or gable
The upper decorative finish may be wider than the side trims. It needs to be checked whether it overlaps NL-7 and duplicates the carved pattern.
Roof overhang
On a low facade, the distance from the window to the overhang can be limited. A wide top element may physically not fit or may end up in a permanently shaded area.
Lamp
An exterior lamp above the window requires a mounting plate and maintenance. It cannot be left "somewhere between the carvings" without a drawing.
Connecting element
In some compositions, the top and side parts are connected by separate carved elements. An example is SNL-19. However, you can only buy connecting elements for window trims after checking the drawing. Compatibility of SNL-19 with NL-7 should not be assumed automatically.
How to distribute one size across the entire facade
A house rarely consists of one identical window. The main facade may have large openings, the side one — narrow, in the attic — small, near the door — limited by the corner. There is a temptation to choose 294 mm for the central part and 164 mm for tight spaces. Technically, the article has both widths, but the mixing of sizes should look like a system, not like a random concession to a lack of space.
One size for all windows
A single width creates a calm rhythm. Windows of different sizes are united by a common frame. This approach is simpler for specification, manufacturing, and visual control.
But universality should not force placing the wide option where it does not fit. If at least one important opening conflicts with the corner, you need to either revise the entire system or justify different groups.
Two sizes according to the facade hierarchy
The wide NL-7 can be used on main windows, the narrow one — on secondary ones. Then the difference supports the architectural hierarchy. To make it look deliberate, groups are defined in advance:
-
central windows;
-
windows of the side wings;
-
attic openings;
-
door openings;
-
small windows of utility rooms.
Each group gets one size. You cannot change the width on adjacent identical windows just because one corner was measured later.
Different sizes on one facade due to constraints
Sometimes mixing cannot be avoided. Then the transition is explained by composition: for example, a wide casing on the central risalit, a narrow one on the side wall. The boundary must coincide with the architectural division of the house.
If 294 mm are installed on one window, and 164 mm on a neighboring identical one only because of a pipe, the difference will be noticeable. Perhaps it is more reasonable to move the pipe, change another element, or choose the narrow size for the entire pair.
Start with the tightest opening
When choosing a single size, it is useful to start not with the most beautiful central window, but with the opening with the minimum free space. If 294 mm do not fit there, check 164 mm on all other windows. This order reduces the risk of late concept rework.
Narrow pier between two windows: both strips must be counted
Let the distance between the boxes of two windows be 500 mm. The mistake is to compare this value with one width of 294 mm and decide that the wide casing fits. In fact, the pier includes the right strip of the first window and the left strip of the second.
For a preliminary check:
Free space between casings = distance between attachment lines − width of the left strip − width of the right strip.
If both trims are 164 mm wide, 172 mm will remain from 500 mm. If both are 294 mm, the total width will already be 588 mm, meaning the elements will overlap. The numbers in the example illustrate the principle; the actual joining lines are determined by the drawing.
When trims almost touch
Physical overlap is not the only problem. If only a few centimeters remain between two wide carved elements, the wall section looks like a random seam. The windows visually merge, and the central strip of the wall ceases to be perceived as an independent part of the facade.
Can two windows be joined with a single carved composition
It is possible to design a unified frame, but that is a different task. It will require a drawing, connecting elements, and a coordinated rhythm of the ornament. Such a composition cannot be achieved by simply overlaying two NL-7 units.
Windows of different heights
If adjacent windows have different top elevations, wide trims amplify the difference. Check not only the wall section but also the lines of the top elements. Sometimes a narrower option helps maintain the calmness of the facade.
Window near an external corner: three checks instead of one
Measuring from the frame to the corner is only the first step.
Physical width
Does 164 or 294 mm fit in the clear distance? Future finishing, corner board, and the actual junction line are taken into account.
Visual remainder of the wall
Even if the plank fits, does a clear field remain between it and the corner? A too-narrow strip looks like a layout error.
View from the adjacent side
The trim may be visible from the side facade. A wide plank located almost at the corner gives the impression that the carving wraps around to the other wall. Take a photo at an angle, not just strictly from the front.
External corner with separate decor
If the corner is finished with a carved board or pilaster, the two elements must have a consistent distance. Between the large NL-7 and the corner decor, you cannot leave a random gap or clash the ornaments without a project.
Window next to the downspout: space is there, access is not
The downspout is located in front of the facade, so on a flat drawing it may not intersect the trim. On site, another problem arises: the wide carved plank makes it difficult to access the pipe brackets, painting, and wall inspection.
Check:
-
distance from the edge of NL-7 to the pipe;
-
bracket protrusion;
-
ability to remove or service the gutter;
-
shadow from the pipe on the carved pattern;
-
drain direction and possible wetting of the area;
-
access for recoating.
The article does not specify a mandatory gap. It is determined by the specific gutter system and installation project.
Door opening: trim width is related to opening
NL-7 can be considered not only for windows. When used for doors, moving elements are added.
Panel and handle
The trim should not interfere with opening, and the handle should not hit the relief. If the door opens toward the wall, a wide option may fall into the path of the hardware.
Porch and steps
The side plank may come close to the railing or porch post. The top one — to the canopy. The check is performed in space, not just on the facade.
Adjacent wall
Doors are often located close to the corner. The 164 mm option is easier to fit, but it also cannot be chosen without a template.
Consistent style with windows
If the windows have 294 mm and the door has 164 mm, the difference must be justified. Sometimes the door portal is deliberately made more restrained; sometimes, on the contrary, it should be the largest element. The decision is made based on the overall layout.
Relief and shadow: why 294 mm appears even wider
Actual width is not the only factor in perception. Carved ornament creates chiaroscuro. Under side lighting, the relief increases the visual mass of the plank.
A narrow NL-7 may seem expressive enough on a sunny facade because shadows enhance the pattern. A wide one under the same conditions can look heavier than in the product photo.
Enamel color changes perception
A light coating unites the trim with the wall if the shades are close. A contrasting color emphasizes the boundaries and makes the width more noticeable. Dark enamel on a light facade turns 294 mm into a very strong frame.
Matte and more glossy surface
The degree of gloss affects light, but the specific coating system must be chosen according to the technical requirements for exterior use. A composition cannot be assigned solely for visual effect.
Facade texture
On a smooth wall, the carving reads sharply. On a log or richly textured facade, a wide trim may hold attention better. However, the wall material and installation method must be coordinated separately.
To evaluate real compositions, it is useful to look at windows with carved trims and compare the scale of decor on different facades. Ready-made projects serve as a source of ideas, but do not replace measurements of your own house.
Pine under enamel: what is confirmed, and what is chosen separately
Both NL-7 sizes are made of pine, have a "Standard" sanding, and are prepared for enamel. This is an important product feature, but it does not mean that the product is already coated with a ready-made system for exterior use.
Preparation for enamel is not the finish
Before installation, you need to determine:
-
Priming;
-
the selected enamel;
-
treatment of ends;
-
protection of the reverse side;
-
the order of painting before and after installation;
-
compatibility of materials;
-
conditions for updating the coating.
Specific compositions and the number of layers are determined by the coating manufacturer's technology and the project. You cannot invent a universal scheme for any facade.
Why ends require special attention
After cutting, new surfaces appear. They cannot be left untreated just because the front side is prepared. The order of protecting the ends is agreed upon before installation.
Pine and natural wood characteristics
Wood has a natural pattern and can perceive coatings differently. Under opaque enamel, the relief becomes key, but surface preparation still affects the result.
Sanding "Standard"
The card confirms the "Standard" option. Before painting, you need to check the quality of preparation of wooden trim and determine what additional operations are needed for the chosen system.
Test paintout
A test is done on a real fragment or sample with carving. A flat pine board does not show how enamel will lay in recesses and on sharp transitions.
After approving the coating, you can buy materials for painting the trim, having checked their suitability for exterior wooden decor.
Before painting, you need to finalize all decisions on size
Cutting an already painted wide casing to fit a tight corner is a bad scenario. A new end appears, symmetry is disrupted, and local restoration of the coating is required. Most importantly, the pattern itself may suffer.
Correct sequence:
-
measure the facade;
-
choose 164 or 294 mm;
-
approve the layout;
-
calculate lengths;
-
determine joint locations;
-
perform cutting;
-
conduct a dry fit;
-
prepare new ends;
-
apply approved finish;
-
perform installation according to the project.
In the recommendations section, you can study tips on installing platbands, but the final method of fastening depends on the wall, the opening structure, and operating conditions.
How many two-meter strips to order
Both NL-7 options have a length of 2000 mm. The quantity cannot be calculated only by the window perimeter: you need to check each side and the possibility of obtaining it from a single strip.
List for one opening
Write down separately:
-
left vertical;
-
right vertical;
-
top horizontal;
-
the lower part, if provided;
-
connecting or corner elements;
-
allowance according to the adopted technology.
For each part, specify the finished size, the required blank, and the original two-meter plank.
Why the perimeter does not give the finished quantity
Suppose two verticals have a length of 1800 mm, and the top part is 1400 mm. The sum is 5000 mm. By total length, it seems that three two-meter planks — 6000 mm — are enough. But from one plank, you cannot simultaneously get a vertical of 1800 mm and a useful fragment of 1400 mm. A separate cut will be needed.
The example illustrates the principle, not a standard NL-7 set. Allowances and connections are determined by the project.
Several identical windows
First, one window is calculated, then repeating parts are multiplied. After that, the cutting map for the entire batch is combined: the remainder from the top plank of one window may fit another part if the length and pattern allow.
Windows of different heights
Do not use an average size. Each type of opening is assigned a number and a separate list.
Two-meter length and a tall window
If the vertical blank is longer than 2000 mm, a joint or another design solution will be required. The joint location cannot be assigned after delivery. It must be shown on the layout and coordinated with the ornament.
Technological allowance
A universal percentage without technology does not guarantee the required part. The allowance is distributed across specific strips and risks: test cut, fitting, damage, repair element. Each additional piece must have a purpose.
Joints on carved trim: plan before purchase
The carved pattern makes the joint more noticeable. The joint affects not only the length but also the rhythm of the ornament.
Vertical joint
On a tall side strip, it is better to place the joint deliberately. Check that it does not fall on the central motif, eye level, or a bright lighting zone.
Top joint
If the top piece is wider than the length of the original strip or is assembled from parts, symmetry relative to the window axis becomes critical.
Corner joint
The connection form is determined by the drawing and the kit. It cannot be guaranteed that two straight strips will automatically form a complete corner without an additional part or adjustment.
Connectors
SNL-19 is shown in the diagram as an example of a separate product. Its compatibility with NL-7 must be confirmed. The phrase "from the same category" does not prove that the pattern and dimensions match.
Transport backing for a small batch
The NL-7 card provides for a separate transport backing for a batch of up to five items. This point needs to be checked when placing an order, but it does not determine the choice of width.
The backing is related to the transportation of a long carved product. It is important for the buyer to understand:
-
whether it is accounted for as a separate line;
-
to what quantity it applies;
-
how many packaging units will result;
-
how to accept the strips;
-
Can different widths be combined in one shipment?
-
How is the relief protected?
Do not transfer conditions from another card or another batch to NL-7. The composition of the account is checked against the current offer.
What to buy together with NL-7
| Position | Why it's needed | What to check |
| NL-7 with a width of 164 mm | Design of narrow partitions and small openings | Actual free field and scale |
| NL-7 with a width of 294 mm | Large expressive framing | Space to corners, cornice, and neighboring windows |
| Connecting element | Assembly of complex composition | Compatibility per drawing |
| Primer and enamel | Finishing of pine | Exterior application and compatibility |
| Materials for end grains | Protection after cutting | Technology of the selected coating |
| Installation materials | Attachment to the base | Wall type and assembly detail |
| Other facade decor | Cornice, pilaster, bracket, pediment | Scale and distance to NL-7 |
| Layout project | Facade check before ordering | All opening dimensions and photos |
| Delivery and packaging | Receiving two-meter parts | Number of places and backing |
When the composition is determined, you can assemble a complete set of window decor and check which parts are needed besides straight slats.
How to connect NL-7 with the rest of the facade decor
The casing does not exist separately from the house. Its width should support the overall scale.
Cornice
If the cornice is wide and rich, 164 mm may look too restrained. But 294 mm cannot be chosen just for balance if there is no space. Perhaps another part of the composition needs to be changed.
Pilasters
The pilaster and the casing are two verticals. Their width, ornament, and distance must be coordinated. A wide NL-7 next to a narrow pilaster can take over its role.
Brackets
Brackets under the cornice or pediment add volume. If they are near the top of the window, check the intersection of shadows and relief.
Corner decor
The corner board sets the boundary of the facade. Between it and the casing, either a field is left or a unified connection is designed.
Pediment and sandric
The top finish can be the main element. The side NL-7s should support it, not compete.
For a general selection, you can buy wooden decor for the facade after developing the layout, rather than assembling the composition from individual cards.
Who is the NL-7 with a width of 164 mm suitable for?
The narrow option should be included in the comparison when:
-
the window is close to the corner;
-
the wall between windows is limited;
-
a pilaster runs nearby;
-
the facade is saturated with other decor;
-
the opening is small;
-
the door frame is located next to the adjoining wall;
-
it is required to preserve more open surface;
-
the wide pattern physically does not fit;
-
two adjacent wide platbands merge;
-
the composition requires a calmer rhythm.
This is not a guaranteed list of applications. Each item means "check the 164 mm size on the layout".
Who is NL-7 with a width of 294 mm suitable for
The wide option makes sense when:
-
there is enough free wall around the window;
-
the opening is large;
-
the facade is viewed from afar;
-
the platband should become the main accent;
-
adjacent elements do not conflict;
-
sufficient margin is maintained between windows;
-
the top part does not press against the cornice;
-
the scale of the house supports a large ornament;
-
the template looks proportional;
-
a wide strip runs across all identical openings of the group.
When no size fits
Sometimes 164 mm is still too wide, and 294 mm is definitely excluded. In another situation, 294 mm is small in scale for a huge facade. Then you cannot force NL-7 to solve someone else's task.
Open the section where you can buy wooden carved trims, and compare other models. General material how to choose a wide or narrow platband will help assess the category more broadly, without substituting a specific check of NL-7.
Correct specification: the width must be written in numbers
The phrase "NL-7 wide" seems understandable only to the author of the request. The invoice and production require full dimensions.
Narrow option
Carved trim NL-7, 2000 × 164 × 18 mm, pine, sanding quality "Standard", prepared for enamel, made to order, quantity — according to the opening schedule.
Wide option
Carved trim NL-7, 2000 × 294 × 18 mm, pine, sanding quality "Standard", prepared for enamel, made to order, quantity — according to the opening schedule.
If both widths are used
Two separate lines are used. The opening or facade numbers are indicated nearby so the strips are not mixed up.
What else to add
-
drawing number;
-
version date;
-
list of windows;
-
number of slats;
-
connecting elements;
-
shipping substrate, if included;
-
ma
Order in one batch: why combine windows
Natural wood and finishing require consistency. When NL-7 is ordered in parts for one house, the risk increases:
-
confusing the width;
-
changing the quantity;
-
receiving different versions of the drawing;
-
forgetting connecting elements;
-
paying for delivery again;
-
preparing the surface differently;
-
lose the unified painting schedule.
To complete the object, you can order NL-7 in a batch, providing a list of all openings.
Delivery of two-meter carved architraves
Length 2000 mm requires careful packaging. The carved profile cannot be treated as an ordinary construction board.
Before payment, please clarify:
-
number of package units;
-
presence of a transport backing;
-
marking of 164 and 294 mm;
-
protection of the front relief;
-
method of transportation;
-
ability to combine materials;
-
inspection procedure upon receipt;
-
conditions for recording damage.
After calculation, you can order NL-7 with Contact us to confirm shipping to your destination., specifying both widths as separate items.
Acceptance before cutting and painting
Planks are checked before any irreversible actions.
Documents
Verify article number, dimensions, material, quantity, and preparation.
Width
Measure several planks from each group. Narrow and wide elements are laid out separately.
Length and thickness
Compare with the card and specification.
Carved pattern
Inspect under side lighting. Check edges, recesses, transitions, and the integrity of the motif.
Straightness
Place the two-meter part on a suitable surface without forced pressure. The evaluation method is agreed with the manufacturer.
Completeness
Check connectors, backing, and finishing materials.
Dry fitting
Before painting, apply at least one set of each window type. If the template was built correctly, the actual strip should confirm the decision.
Errors causing the wide NL-7 to require trimming
Error 1. Measured only the window
The opening size matched the scale, but there was not enough wall to reach the corner.
Fix: create a map of the free field.
Error 2. Checked only one side
On the left, 294 mm fit, on the right, a pilaster interfered.
Fix: measure each side separately.
Error 3. Did not account for the second trim in the partition
Two wide planks crossed between the windows.
Fix: subtract both widths from the distance between openings.
Error 4. Counted the rough facade
After insulation and finishing, the free space decreased.
Fix: work with final dimensions.
Error 5. A wide platband was chosen based on a photo
On a real small window, it turned out to be heavy.
Fix: full-size template.
Error 6. A narrow option was chosen only out of fear
On a large facade, 164 mm got lost.
Fix: evaluate both templates from a distance.
Error 7. The top was not checked
The side parts fit, the top one collided with the cornice.
Fix: separate top mockup.
Error 8. The drain was not included in the drawing
The pipe covered part of the relief and complicated maintenance.
Fix: account for all external elements.
Error 9. Left too narrow a margin to the corner
The plank physically fit, but the composition looked cramped.
Fix: evaluate the visual remainder.
Error 10. Decided to trim the width
The carved pattern and edge lost symmetry.
Fix: choose a different size or model.
Error 11. Mixed 164 and 294 mm without a system
Identical adjacent windows got different frames.
Fix: split the facade into reasonable groups.
Error 12. Width not specified in the request
A different version went into production.
Fix: write the full size.
Error 13. Perimeter mistaken for the number of planks
The footage matched, but there weren't enough long pieces.
Fix: cutting map by sides.
Error 14. Did not account for a joint on a tall vertical
The connection appeared in a random place.
Fix: assign it on the drawing.
Error 15. SNL-19 was automatically recognized as compatible
The drawing or dimensions did not match.
Fix: check the drawings.
Error 16. The preparation for enamel was mistaken for the finished coating
The external finishing system was not included in the order.
Fix: separately select primer, enamel, and edge treatment.
Error 17. Painting was started before the fitting
After detecting a mismatch, the coating had to be restored.
Fix: dry assembly first.
Error 18. A small batch was ordered without checking the packaging
The transport substrate unexpectedly appeared in the invoice or was not accounted for.
Fix: clarify the completeness before payment.
Error 19. Different widths were not marked.
The strips were mixed up at the site.
Fix: separate the packages and opening numbers.
Error 20. Ordered windows one by one.
The facade lost its unified system, and the delivery was repeated.
Fix: consolidate all openings into one list.
Ready purchase route NL-7
-
Take measurements of each opening.
-
Measure the free field from all sides.
-
Mark corners, windows, doors, pipes, pilasters, cornices, and light fixtures.
-
Make templates 164 and 294 mm.
-
Check the left, right, and top zones.
-
Evaluate the facade up close and from afar.
-
Determine a single size or groups of openings.
-
Record each side of the casing.
-
Calculate two-meter planks according to the cutting map.
-
Check the need for connectors.
-
Choose a pine finishing system.
-
Prepare the full specification.
-
Verify the commercial proposal.
-
Clarify the backing and delivery.
-
Conduct acceptance and dry fitting.
After this check, you can order NL-7 with a width of 164 mm for tight areas or buy NL-7 with a width of 294 mm for the facade with sufficient free space.
Frequently asked questions about the carved trim NL-7
What sizes are available for NL-7?
Two variants are confirmed: 2000 × 164 × 18 mm and 2000 × 294 × 18 mm. Length and thickness are the same, only width differs. Therefore, in the request it is not enough to write just the article number: you need to specify the full dimension line.
How much wider is the NL-7 wide version compared to the narrow one?
The difference in width is 130 mm. On two side surfaces of one window, this difference affects 260 mm of facade space at once. Between two windows, you need to account for two adjacent strips.
Which NL-7 should you choose for a window next to a corner?
First, measure the finished distance from the trim junction line to the corner. Then apply the 164 and 294 mm templates. The physically fitting size still needs to be assessed visually: no random narrow strip of wall should remain between the thread and the corner.
Can you choose 164 mm without a template if there is little space?
It is not recommended. The narrow variant indeed requires less space, but it may conflict with the slope, pilaster, pipe, or mounting line. A full-size strip will show the real boundary better than a single number.
Is the 294 mm width suitable for a large window?
It can be proportional to a large opening if there is enough free wall around it. The window size itself does not confirm the choice. Check corners, piers, the top cornice, and adjacent decor.
Why can't NL-7 be trimmed in width?
The carved pattern is designed for the full width of the product. Longitudinal trimming can remove part of the ornament, alter the edge, and disrupt symmetry. Any possibility of reworking must be agreed upon in advance, not considered a standard installation technique.
Can different widths be used on the same house?
Yes, if the dimensions are distributed according to a clear architectural system: for example, 294 mm on the main facade, 164 mm on the side ones. Random mixing on adjacent identical windows looks like a configuration error.
What to do if the wide trim fits on the left but not on the right?
A window cannot be framed with two different widths without a special project. Usually, a size that works on both sides is chosen, or the overall layout and adjacent elements are changed.
How to measure the wall space between two windows?
Determine the distance between the lines from which the trims start. Subtract the width of the right trim of the first window and the width of the left trim of the second from it. The remaining value shows the free field between the frames.
What wall space is sufficient for two NL-7?
There is no universal number. It is necessary not only to exclude intersection but also to assess the visual background between carved elements. A full-size mockup of two windows gives a more honest answer.
What should be checked above the window?
Distance to the cornice, sandrik, pediment, roof overhang, light fixture, and other upper details. Side strips may fit, but the upper composition may not.
Can NL-7 be used for a door?
It can be considered for a doorway after checking the wall width, door leaf opening, handle, porch, canopy, and adjacent decor. Size and installation are determined by the specific project.
Is the upper element included in one 2000 mm long strip?
This depends on the required blank. If the upper part with allowances is shorter than 2000 mm, it can be obtained from one strip. The exact cutting layout is made according to the drawing.
What to do if the vertical is higher than 2000 mm?
A joint needs to be designed or another solution chosen. The joint location, ornament direction, and assembly method are determined before ordering. You cannot simply add a short piece on site.
Can the quantity be calculated by the window perimeter?
The perimeter shows the total length, but does not guarantee that all parts can be obtained from two-meter strips. Each side needs to be allocated to a specific blank.
How to calculate trims for several identical windows?
First, make a list for one opening, then multiply identical parts. After that, combine the cutting of the entire batch to use suitable remnants. You cannot deduct a remnant until a specific part is assigned to it.
Is a reserve needed?
The allowance depends on cutting, joints, fitting, and technology. A universal percentage does not replace a plank map. Additional elements are better recorded separately: a test cut, a repair plank, or an allowance for a specific risk.
What material is NL-7 made of?
Both confirmed options are made of pine.
What type of polishing is provided?
The card specifies the sanding quality as "Standard". This is not a finished exterior coating. Before painting, the surface condition and the requirements of the chosen system are checked.
What does preparation for enamel mean?
The product is prepared for further painting, but the final system of primer, enamel, end protection, and back side is selected separately. Specific materials must be suitable for the project conditions.
Can NL-7 be installed without painting?
The article does not confirm such a possibility. For exterior wooden decor, an agreed protective and finishing system is required. The treatment procedure must be determined before installation.
Should painting be done before or after installation?
The decision depends on the technology. Often, part of the preparation is done before installation, and joints and fastenings are finished after. In any case, cutting and dry fitting are done first.
Why is a test coat needed on a carved part?
Enamel looks different on a flat surface and in the recesses of the ornament. A real fragment shows the color, the degree of relief filling, and the nature of shadows better than an ordinary board.
Do the ends need to be protected after cutting?
After cutting, new surfaces appear. Their treatment should be part of the chosen finishing technology. Leaving the ends unattended is not acceptable just because the front side is prepared for enamel.
Is NL-7 in stock?
In the original scheme, both versions are indicated as made to order. Current conditions and timelines need to be checked in the product card or with a manager before payment.
Can I order a single plank?
The minimum order conditions and the composition of the commercial offer should be clarified. For a batch of up to five items, the product card provides a separate transport backing, which needs to be checked in the invoice.
What is the transport backing for?
It is related to the transportation of a long carved product in a small batch. The exact packaging composition and cost are checked in the current offer. The backing does not affect the choice of width, but it affects the order set.
Can 164 and 294 mm be combined in one shipment?
Such an option and packaging should be agreed upon during ordering. In the documents, dimensions should be on separate lines, and packaging should be clearly marked.
Does SNL-19 fit NL-7?
Automatic compatibility is not confirmed. SNL-19 is given as an example of a connecting element. You need to compare drawings, dimensions, and the pattern of the specific composition.
Are connecting elements needed for each window?
Not necessarily. The composition depends on the chosen scheme of corners and top trim. Straight strips, connectors, brackets, and other parts are included only after the layout is developed.
How to understand that the casing is visually too wide?
The template starts to overwhelm the window, almost touches the corner, merges adjacent openings, or conflicts with the pilaster and cornice. It should be assessed up close and from the usual viewing point of the house.
How to understand that 164 mm is too narrow?
On a large facade, the frame may get lost, and the window may look underfinished relative to the cornice and other details. This is visible in a photo of the facade with a full-size mockup.
Does color affect the choice of width?
Yes, visually. Contrasting enamel emphasizes the borders more, so 294 mm looks even more noticeable. A color close to the facade softens the frame. The physical dimensions do not change.
Do I need to take the wall relief into account?
Yes. Logs, siding, panels, and other bases change the installation line and the perception of the carving. The mounting method and base preparation are determined by the project.
What to do if the facade is not yet insulated?
You need to calculate the future finished dimensions. The thickness of insulation, lathing, cladding, and corner details can reduce the available field. Ordering based on the rough wall creates a risk.
How to check the window next to the pilaster?
Build both elements on the facade at full scale. Assess the distance, the width of each vertical, and their ornaments. The trim should not accidentally replace or overlap the role of the pilaster.
Do I need to take the downspout into account if it does not touch the wall?
Yes. It can obstruct access, create shadows, and make it difficult to refresh the coating. The volumetric distance is checked, not just the flat projection.
How to choose the width for a dormer window?
Check the scale of a small opening, the distance to the slope, overhang, corners, and neighboring windows. A wide option may not fit at the top even if there is enough space on the sides.
Can a wide NL-7 be installed only on the central window?
Yes, if it supports the architectural hierarchy. The other windows should form a clear second group, not randomly differ by a single opening.
Where can I see other carved window trims?
The category presents Carved window trims — catalog and prices. There you can compare models when neither 164 nor 294 mm fit.
Where can I see ready-made facade solutions?
The facade decor section shows examples of combining window trims with other wooden elements. The dimensions of your own house are still checked separately.
Can I order help with the layout?
Yes, for a complex facade you can order design services and provide elevations, opening dimensions, photos, and constraints. This is especially useful when mixing two widths.
What should be specified to a designer or architect?
Article NL-7, both dimension lines, finished distances around windows, placement of corners, cornices, pipes, pilasters and lights, desired color, and groups of identical openings.
How to order a sample?
The conditions for receiving a sample should be clarified in the section for specialists or with a manager. For a project, a sample with a real carved relief is important, not just an image.
How to accept a batch at the site?
Check dimensions, quantity, pine, sanding, pattern integrity, and packaging. Separate 164 and 294 mm, label opening numbers, and perform a dry fit before painting.
Can trim be stored outside before installation?
The article does not specify storage conditions. They should be clarified with the manufacturer. Carved wooden products should be kept in packaging and conditions that do not compromise their condition.
When can final installation begin?
After checking dimensions, cutting, dry assembly, end preparation, finish approval, and confirmation of installation technology. Starting installation only upon delivery is risky.
How to know that the order is ready for payment?
The specification includes full dimensions, quantity per openings, connectors, finishing materials, substrate if necessary, and delivery. The drawing corresponds to the current version of the facade, and the templates have been checked on site.
The width is chosen not by the window, but by the free field around it
NL-7 gives the buyer a rare opportunity to choose the same carved pattern in two scales. The 2000 × 164 × 18 mm version helps work with narrow piers, close corners, and small openings. The 2000 × 294 × 18 mm size creates a larger frame when the facade has free space. But the difference between them is not just the 130 mm in the table. It changes the distance between windows, the connection with the corner, the scale of the upper part, and the overall rhythm of the house.
Before ordering, measure the left, right, and top zones of each opening. Build two templates, photograph the facade from a normal viewing point, check pipes, lights, pilasters, and cornice. Then compile a list of two-meter planks and only after that choose the card line.
STAVROS allows you to assemble the solution step by step: choose NL-7 with a width of 164 or 294 mm, compare other carved trims, view facade projects, check connecting elements, select painting materials, order a layout project, and arrange delivery. This approach protects not only from unnecessary expenses. It preserves the carved pattern itself: the trim is installed at full width, does not hit the corner, and looks like part of the architecture, not a detail that had to be cut on site.
-