Article Contents:
- High skirting board PLT-004 160×16 mm: which dimensions are actually confirmed by the product card
- MDF skirting board PLT-004 2600 mm
- Beech PLT-004 2400 mm
- Oak PLT-004 2400 mm
- Take 5–10 measurements on each wall
- Find the maximum, not the average, height of the defect
- New floor above the old one
- New floor below the old one
- Mark the 160 mm line with painter's tape
- Check the entire perimeter, not just one nice wall
- Scenario 1. Defect is entirely below 160 mm
- Scenario 2. The trace sometimes comes close to 160 mm
- Scenario 3. Defect extends above 160 mm
- Why 9620 mm is not enough for an order
- Wood finish 2400 mm
- What the control fragment should show
- Scenario A — PLT-004 actually reduces the scope of repair
- Scenario B — a high baseboard does not provide real savings
- Example for MDF
- Example for the wood version
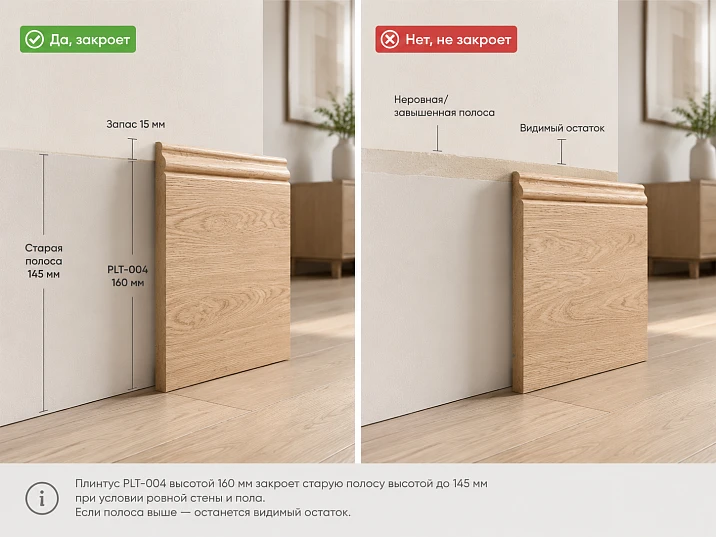
The old high baseboard was removed, and along the wall a strip appeared that no one had seen before: wallpaper is cut lower, paint is a different shade, in places there is leftover glue, mounting holes, or unpainted putty. You don't want to re-paste or repaint the entire room just for the bottom 140–145 mm, so a practical question arises: can the new PLT‑004 with a height of 160 mm cover the trace?
If the maximum top point of the cosmetic defect after installing the new finished floor is below the 160 mm line, the high PLT‑004 can potentially cover the old mounting area without fully refinishing the wall. But the comparison "the old baseboard was 145 mm, the new one is 160 mm — so it will definitely be enough" is insufficient.
You need to check four things:
-
where the defect actually ends across the entire wall, not at one convenient point;
-
whether the finished floor level has changed;
-
whether the bottom strip is only cosmetic or the base requires repair;
-
how the 160-millimeter line runs near doors, external corners, and other junctions.
In the article, 145 mm is a scenario value, not a characteristic of the old product and not a manufacturer's tolerance. A real room may yield 138 mm on one wall, 149 mm on another, and 162 mm where a piece of finish tore off during dismantling. For the solution, the maximum actual level is needed.
Practical formula:
R = 160 − Hmax,new
Where:
-
Hmax,new— maximum height of the cosmetic defect from the new finished floor; -
R— nominal vertical clearance of PLT-004 above the defect.
If R > 0, the profile is geometrically higher than the trace. If R = 0, the lines coincide. If R < 0, part of the defect will remain visible.
But even a positive R does not cancel the inspection of the wall and floor. You cannot cover peeling plaster, dampness, or a damaged base with a high baseboard just because the defect is below 160 mm.
After checking, you can buy a high wooden baseboard PLT-004 already as a deliberate decision for a specific lower zone of the wall, rather than as an attempt to hide an unknown defect.
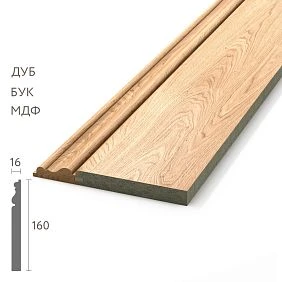
High baseboard PLT-004 160×16 mm: which dimensions are actually confirmed by the product card
The current STAVROS product card shows three main versions of PLT‑004:
| Execution | Size, mm | Price at the time of check | Status at the time of check |
|---|---|---|---|
| MDF | 160×16×2600 | 2,630 RUB | in stock, St. Petersburg — 22 pcs. |
| Beech / MDF / beech veneer | 160×16×2400 | 7,790 RUB | Made to order, 5–10 days |
| Oak / MDF / oak veneer | 160×16×2400 | 9,640 RUB | Made to order, 5–10 days |
Price, availability, and delivery times are subject to change; the product page must be reopened before payment.
The first important limitation: wooden versions of PLT-004 cannot be called a "solid oak" or "solid beech" baseboard. The product page describes a combined construction: the lower part is deep-routed MDF with wood veneer, and the upper decorative profile is solid wood.




PLT-004 baseboard made of MDF, 2600 mm
The MDF measures 160×16×2600 mm. For a room where the main task is to cover an old strip and then achieve a smooth, paint-ready finish, this option is especially straightforward: the material can be integrated into a single painting system with doors, walls, or other trim.
The 2600 mm length affects cutting. It can cover a 2530 mm section with a single piece, which the 2400 mm wooden version cannot span without a joint.
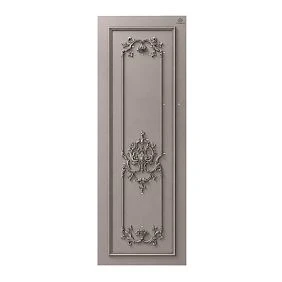
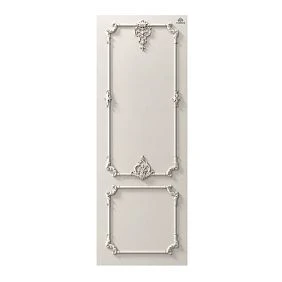
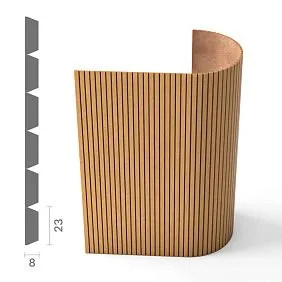
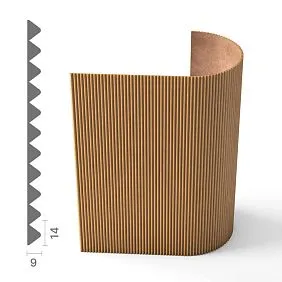
Our factory also produces:
Beech PLT-004, 2400 mm
The current product page shows beech / MDF / beech veneer, 160×16×2400 mm.
In the old strip scenario, beech is chosen not because it "hides defects better." Any PLT-004 with a height of 160 mm covers the 145 mm height equally. The material determines the appearance, finish, and cost, not the geometric ability to cover the strip.
Get Consultation
Oak PLT-004, 2400 mm
Execution oak / MDF / oak veneer, 160×16×2400 mm is chosen when the new high baseboard should become a noticeable wooden part of the interior.
This is no longer just masking old finishes. The natural texture creates a new architectural line 160 mm high, so before ordering, you need to assess the scale across the entire room, not just the problematic wall fragment.
For service inspection of the material and finish, the section is useful Materials and quality of STAVROS products.
Wooden baseboard instead of re-pasting walls: we measure not the old profile, but the top point of the defect
The main mistake is to measure the removed old baseboard and not look at the wall anymore.
Even if the old profile had a height of 145 mm, the trace after dismantling may be higher.
Causes:
-
wallpaper is cut in a wavy line;
-
paint went onto the profile;
-
the top edge of the old baseboard was not level;
-
a piece of putty tore off during removal;
-
fastener is located higher;
-
floor has a difference in level;
-
new floor changed the original elevation.
Therefore, what is needed is not the size of the removed product, but a map of the actual defect.
Take 5–10 measurements on each wall
On a short wall, a few points are enough. On a long wall of 4–6 m, it is better to measure more often, especially near corners, doors, and places where the old baseboard was damaged.
Record the distance from the new or calculated finished floor to the highest visible point that PLT‑004 must cover.
Example of one wall:
-
141 mm;
-
143 mm;
-
145 mm;
-
147 mm;
-
144 mm;
-
142 mm.
The average of about 144 mm is not significant for the decision.
Critical size:
Hmax = 147 mm.
Nominal margin:
160 − 147 = 13 mm.
Separately note the external corners
On the external corner, the finish is often damaged more severely: the old profile was pried with a tool, the edge of the putty chipped off, and the wallpaper came apart.
If along a straight wall the maximum is 145 mm, and at the corner the defect rises to 164 mm, PLT‑004 does not fully cover the problem.
You cannot make a decision based on the "main part of the wall" while ignoring the most visible spot.
Find the maximum, not the average, height of the defect
For each wall, it is useful to record:
H1 max, H2 max, H3 max...
And then:
Hmax,room = max(H1, H2, H3...)
It is this value that shows whether a single 160 mm line can cover the defect along the entire selected contour.
If one local area extends higher, it does not necessarily mean rejecting PLT‑004 for the entire room. Local wall preparation is possible. But that is a separate operation that needs to be planned before purchase.
New floor level: why a few millimeters change the result
The trace of the old baseboard physically remains on the wall, and the reference point after renovation may change.
Let us denote:
-
Hold— height of the defect from the old finished floor; -
Δfloor— change in the level of the new floor relative to the old one: a positive value means that the new floor is higher; -
Hnew— height of the same defect from the new floor.
Formula:
Hnew = Hold − Δfloor.
If the new floor has risen, the defect becomes lower relative to the new reference point.
If the new floor has lowered, the defect rises relative to the floor.
The new floor is higher than the old one
Suppose the defect was at 145 mm, and the new floor structure rose by 8 mm.
Hnew = 145 − 8 = 137 mm.
Nominal margin PLT‑004:
160 − 137 = 23 mm.
Geometrically, the situation has become calmer.
But the part of the defect that is now below the new floor or in the junction must be technically prepared — a high baseboard does not eliminate the proper floor-wall joint.
New floor lower than old one
Old defect — 145 mm.
New finished level dropped by 6 mm:
Δfloor = −6 mm.
Then:
Hnew = 145 − (−6) = 151 mm.
Stock:
160 − 151 = 9 mm.
The profile is still above the trace, but the map becomes significantly more sensitive to floor unevenness and local potholes.
Floor remained at the same level
Then Δfloor = 0.
Hnew = Hold.
For the original scenario:
160 − 145 = 15 mm.
These are the famous "15 mm of margin," which seem sufficient only until the wall is fully measured.
Buy a wooden floor plinth: first, check the 160 mm height with a full-size template.
After measurements, there's no need to place an order immediately. The next cheap test is a full-size 160 mm line.
Before buy a wooden floor plinth, mark the future upper boundary of PLT‑004 on the wall.
Suitable for checking:
-
masking tape;
-
laser line;
-
a strip of cardboard 160 mm high;
-
a real short fragment of the profile, if already available.
Mark the 160 mm line with painter's tape
The line is drawn from the new finished floor, not from the old base.
If the finished floor is not yet laid, you need an accurate calculated elevation for the future surface.
For example, the subfloor is currently at elevation 0, and the new system will add +17 mm. Then the PLT-004 line should be measured from +17, not from the current base.
Check the entire perimeter, not just one nice wall.
Five minutes on the most level wall proves nothing.
Need to pass:
-
internal corners;
-
external;
-
door openings;
-
zones behind radiators;
-
areas after furniture removal;
-
places of old fasteners.
A 145 mm strip may be stable across 80% of the room and rise to 158–163 mm only in two problem areas.
Check the line near the trims and doors
A high baseboard of 160 mm changes not only the wall masking.
It fits with:
-
door trim;
-
hidden box;
-
furniture side panel;
-
portal.
If the old profile was lower, the new PLT-004 may be higher than the lower decorative zone of the trim.
This does not make it unsuitable, but requires a separate end unit.
For the already studied complex scenario, there is a separate article PLT-004 near the concealed door frame.
Check the external corners
At the external corner, PLT-004 forms a noticeable vertical joint.
If the defect is above 160 mm on only one corner, it is more reasonable to locally repair that section rather than automatically increase the baseboard height throughout the entire room.
Take photos of problem areas before ordering
It is useful to photograph:
-
a tape measure at the highest point;
-
an external corner;
-
the door junction;
-
floor level difference;
-
the area with adhesive/damage.
This way, the installer and the client discuss a specific defect rather than the phrase "somewhere around 145 mm."
Tall wooden baseboard PLT-004: three results of checking the old strip
After the measurement map, the entire project usually falls into one of three scenarios.
Scenario 1. The defect is entirely below 160 mm
For example:
Hmax = 146 mm.
Nominal margin:
160 − 146 = 14 mm.
If the base is stable, the floor is already defined, and the 160 mm line passes normally near doors, PLT‑004 can indeed cover the cosmetic trace of the old baseboard.
This is the most straightforward scenario of "repair without repapering walls."
But the lower wall still needs to be prepared to the extent required by the installation technology of the new baseboard:
-
remove peeling fragments;
-
eliminate loose areas;
-
remove protruding old adhesive;
-
level out local bumps.
A high profile masks the visible edge, but does not turn a bad base into a good one.
Scenario 2. The trace in places comes close to 160 mm
For example:
-
most of the wall is 148–152 mm;
-
one point is 158 mm;
-
outer corner is 159 mm.
Formally, PLT‑004 is higher.
But the margin of 1–2 mm is too sensitive to:
-
floor unevenness;
-
uneven installation line;
-
local pothole;
-
actual profile geometry based on the foundation.
In this case, you cannot buy automatically.
First, you need to decide whether the upper edge of the defect will be locally restored.
Scenario 3. Defect extends above 160 mm
For example:
Hmax = 166 mm.
Formula:
160 − 166 = −6 mm.
Six millimeters of the defect will remain visible.
PLT‑004 should not be sold as a way to “hide everything.” Here are options:
-
locally restore the lower wall above the 160 mm line;
-
completely repair the wall;
-
choose a different architectural scenario with a higher profile after checking its card.
You cannot promise that putty "along the top edge of the baseboard" will automatically solve any area: you need to understand the wall material and the condition of the finish.
Cosmetic trace or poor substrate: what can be covered with PLT-004 and what cannot
The most important boundary is not 145/160 mm, but cosmetics versus a structural defect of the substrate.
What usually falls into the cosmetic zone
-
a different paint color;
-
absence of wallpaper;
-
trace of old glue after its removal;
-
small fastener holes after local repair;
-
the texture difference below the future upper edge.
What cannot simply be covered with a high baseboard
-
peeling plaster;
-
active dampness;
-
mold;
-
loose base;
-
a large crack;
-
a noticeable protrusion of old glue that interferes with adhesion;
-
a destroyed corner.
Why this is important for a high profile
PLT-004 is 160 mm high. It covers a large area of the wall.
If there is a weak foundation underneath, the problem simply becomes invisible, but it does not disappear.
How to check
A professional finisher assesses:
-
surface strength;
-
flatness;
-
the adhesion of the old layer;
-
moisture/cause of damage, if any.
The article does not prescribe a universal repair compound without knowing the wall.
A 145 mm strip after the old baseboard: five edge cases that change the decision
Edge case 1. 145 mm only in the center of the wall, 155 mm at the corner
PLT-004 potentially covers both sizes, but the actual margin at the corner is only 5 mm.
A template and floor check are needed.
Edge case 2. New floor is 12 mm higher
Old 145 mm turns into:
133 mm from the new floor.
Stock:
27 mm.
The scenario becomes much calmer.
Edge case 3. New floor is 10 mm lower
Defect:
155 mm.
remains:
5 mm of nominal clearance.
It can no longer be assessed by a single measurement.
Boundary case 4. The old profile stood in a wave
On the left, the upper boundary is 141 mm, on the right, 151 mm.
The new PLT‑004 will be installed along the new finish line, not repeating the old wave.
So, the main dimension is 151 mm.
Boundary case 5. Defect of 164 mm only on a section 180 mm long
It is not necessary to abandon PLT‑004 on a 20‑meter perimeter.
You can locally restore a small section of the wall above the profile, if the base and finish allow it.
Such a solution is usually more rational than replacing the entire architectural profile just because of one local pothole.
MDF plinth PLT-004 160×16×2600 mm: when painting helps to unify old and new finishes
The MDF version is especially clear in renovation, where the old trace needs to be visually integrated, not emphasized.
If PLT-004 is painted to match the wall color, the new 160-mm belt may be perceived as a continuation of the vertical surface.
If painted to match the doors, it appears as a separate joinery line.
Why color does not replace geometry
Even perfectly matched enamel does not hide:
-
a gap above the baseboard;
-
an uneven top edge;
-
a step in the wall;
-
an exposed straight joint.
First, geometry.
Then the finish.
Why a length of 2600 mm is useful specifically after the defect map
Before checking the wall, it may seem that PLT-004 is needed around the entire perimeter.
After measurements, part of the wall may be excluded, for example, because there is porcelain tile to the floor or built-in furniture.
Only after this do the actual segments appear, and 2600 mm can be used deliberately.
Oak and beech PLT-004 2400 mm: when the natural wood line becomes a standalone accent
The wood versions of PLT-004 are combined: the lower part is MDF with veneer, the upper decorative profile is solid wood.
This is fundamentally important for the accuracy of the description.
When wood works stronger than painted MDF
If the interior already contains:
-
oak doors;
-
parquet;
-
furniture;
-
panels;
-
a staircase.
Then a tall 160 mm plinth not just covers the old strip. It creates a new noticeable lower architectural boundary.
When the wood line can be too active
If the walls are light, the interior is minimalist, and the old trace is the only reason to buy a high profile.
In this case, it is worth first checking the entire perimeter with a cardboard template: 160 mm of natural oak can visually change the room more than expected.
Why end caps matter more in wood finishing
After cutting a combined profile, the visible end needs to be finished deliberately.
Especially near:
-
doors;
-
porcelain stoneware;
-
furniture.
For another similar scenario, there is already material PLT-004 near a porcelain stoneware wall.
Buying wooden skirting board: how to calculate PLT-004 after the defect map
Before measurements, it seems that PLT-004 is needed along the full perimeter of the room.
After the defect map, exceptions may appear:
-
one wall is completely covered by a built-in wardrobe;
-
one accent surface made of porcelain stoneware is already finished to the floor;
-
near the fireplace there is other molding;
-
for a hidden door, a separate end joint is needed.
Therefore to buy wooden baseboard rationally after the actual route of PLT-004 is determined.
Example of a room after checking the old strip
Suppose, after excluding areas where PLT-004 is not used, the following parts remain:
-
A — 2350 mm;
-
B — 2310 mm;
-
C — 1760 mm;
-
D — 1480 mm;
-
E — 900 mm;
-
F — 820 mm.
Sum:
2350 + 2310 + 1760 + 1480 + 900 + 820 = 9620 mm.
This is no longer the "room perimeter." It is a specific set of parts that must cover the confirmed cosmetic zones.
Why 9620 mm is insufficient for the order
For MDF 2600 mm:
9620 / 2600 ≈ 3.70 → arithmetically 4 planks.
For wood 2400:
9620 / 2400 ≈ 4.01 → arithmetically 5 planks.
In this example, pure arithmetic is accidentally close to the actual cutting layout, but further it is important to understand exactly how the parts fit into the strips.
Baseboard PLT-004 2400 or 2600 mm: cutting map after wall check
For MDF 2600 mm, you can build such a training map:
| Plank 2600 | Parts | Used | Nominal remainder |
|---|---|---|---|
| №1 | A=2350 | 2350 | 250 |
| №2 | B=2310 | 2310 | 290 |
| №3 | C=1760 + F=820 | 2580 | 20 |
| №4 | D=1480 + E=900 | 2380 | 220 |
Total:
4 MDF planks 2600 mm.
Purchased length:
10,400 mm.
Nominal remainder:
780 mm.
This is a compact map, but plank #3 is especially tight: 1760+820=2580, only 20 mm remains before accounting for the cut and end trimming.
Therefore, the numbers in the table are educational geometry, not a ready-made production map. A real craftsman should use stock lengths.
Wood version 2400 mm
Let's try the same parts:
-
A=2350 → separate plank;
-
B=2310 → separate;
-
C=1760 → separate;
-
D=1480 + F=820 = 2300 → one;
-
E=900 → separate.
Total:
5 planks of 2400 mm.
Purchased length:
12,000 mm.
Nominal remainder:
2380 mm.
What exactly the additional 200 mm of MDF gave
Not "savings in general."
They allowed combining:
1760 + 820 = 2580 mm.
This pair does not fit in 2400.
It was the specific combination that reduced the number of strips from five to four.
When 2600 mm will not give an advantage
If the parts:
-
2300;
-
2250;
-
1800;
-
1000;
-
1500;
-
850,
additional length may not change the quantity.
Therefore, you cannot choose MDF just for the number 2600.
Price of PLT-004: comparing not per linear meter, but the whole basket
At the time of checking, the card shows:
-
MDF 2600 — 2,630 RUB;
-
beech/MDF/beech veneer 2400 — 7,790 RUB;
-
oak/MDF/oak veneer 2400 — 9,640 RUB.
For the training map:
MDF — 4 slats
4 × 2630 = 10,520 RUB
Beech version — 5 slats
5 × 7790 = 38,950 RUB
Oak execution — 5 planks
5 × 9640 = 48,200 RUB
These amounts show only the current cost of the PLT‑004 itself for a specific example. They do not include:
-
repair of local wall sections;
-
finish;
-
installation;
-
delivery;
-
packaging;
-
glue or other fasteners.
Why you cannot conclude that MDF is cheaper than oak
Because these are different materials and finishing tasks.
The price is needed after choosing the material to understand the order size.
Why a tall baseboard is not always cheaper than wall repair
You need to compare two real estimates.
Scenario A:
-
local preparation of the lower zone;
-
PLT‑004;
-
finish;
-
Installation.
Scenario B:
-
wall restoration;
-
repainting/repapering;
-
a different baseboard or return to the old format.
If the wallpaper is expensive, discontinued, or difficult to locally reapply, PLT-004 may be particularly rational.
If the wall is being fully repainted anyway, purchasing a high profile just for the old strip may not yield savings.
Floor level change: calculation for four real scenarios
Let's take the original defect:
Hold = 145 mm.
New floor is 15 mm higher
Hnew = 145 − 15 = 130 mm.
Stock:
30 mm.
PLT‑004 geometrically covers the strip confidently.
New floor is 5 mm higher
Hnew = 140 mm.
Stock:
20 mm.
Also a calm situation with a level base.
New floor is 7 mm lower
Hnew = 152 mm.
Stock:
8 mm.
Need to check the highest point along the entire wall.
The new floor is 18 mm lower
Hnew = 163 mm.
PLT‑004 does not fully cover the defect:
160 − 163 = −3 mm.
In this case, the old "145 mm" is misleading: after the floor change, the problem becomes higher than the new profile.
If the new floor is not yet laid: how to avoid mistakes with the 160 mm mark
At the subfloor stage, you cannot simply apply a tape measure to the current surface.
The calculated height of the future finished floor is needed.
Let's denote the layers:
-
leveling —
a; -
underlayment/adhesive —
b; -
finish flooring —
c.
Total increase:
Δfloor = a + b + c
from the current control plane, if all layers raise the floor.
Example
Current subfloor is the base.
Will be:
-
3 mm underlayment;
-
14 mm engineered wood floor.
Total:
17 mm.
The 160 mm line should be built from +17 mm, not from the subfloor.
Why this is especially important near the old trace
If from the rough base the top of the defect is at 158 mm, it seems PLT-004 is almost missing.
After raising the finished floor by 17 mm, the defect will be:
141 mm from the new covering.
The situation changes fundamentally.
Uneven floor: why a single mark of 160 mm is not enough
Let the floor change by 6 mm along the wall.
If the top of the defect remains physically at the same wall mark, its height from the floor changes in the opposite direction.
For example:
-
at the high point of the floor, the defect is 143 mm;
-
at the low point — 149 mm.
The second dimension is critical.
How to check
Use a laser to fix the horizontal reference line.
Then measure at several points:
-
floor level;
-
top of the defect;
-
future top edge of PLT-004.
Why you can't "raise the baseboard" above the floor for the sake of a defect
The floor baseboard must be tied to the actual floor-wall joint.
Creating a random gap at the bottom just to raise the top edge is a separate architectural decision, not a normal way to compensate for a lack of height.
External corner: when a local defect above 160 mm does not cancel the entire project
For example:
-
along the walls Hmax = 146 mm;
-
external corner damaged up to 168 mm;
-
damage length — 120 mm.
If the corner base is stable, the upper part can be locally restored before installing PLT-004.
After repair, the visible edge becomes lower than 160 mm.
Why this is better than choosing a new baseboard 180–200 mm high just for one corner
A taller profile changes the entire interior and layout.
A local cosmetic issue does not have to dictate the architecture of the whole room.
When local preparation is not suitable
If the damage is related to:
-
dampness;
-
an active crack;
-
by the destruction of the base.
Then the cause is addressed first.
Old glue under the baseboard: what PLT-004 really needs to hide
If bumps of glue remain after dismantling, you cannot rely only on their height from the floor.
The thickness of the protrusion from the wall plane also matters.
PLT-004 must fit properly against the base.
Example
The old glue is at a height of 80 mm, that is, entirely below 160.
But it protrudes from the wall by 3–5 mm in local bumps.
If the new profile is applied on top, it may:
-
pull away from the wall;
-
to swing;
-
open the top seam.
So, the adhesive needs to be removed/leveled to the extent required by the chosen installation technology.
Masking by height is not equal to preparing the surface.
These are two independent conditions:
Hdefect < 160
и
the base is suitable for installation.
Both must be met.
Old wallpaper ends at 145 mm: when PLT-004 really allows not re-pasting the wall
Wallpaper is one of the most common scenarios for an old strip.
After removing the previous baseboard, it may turn out:
-
the panel is cut along the old top edge;
-
there is no wallpaper below at all;
-
glue remains on the wall;
-
the bottom edge is torn in places.
If the maximum wallpaper edge is below 160 mm from the new floor, PLT‑004 can cover this boundary.
What to check besides height
The wallpaper edge must be stable.
If the panel is peeling above the future baseboard line, the new profile does not solve the problem.
There should be no thick layer of loose wallpaper under the baseboard.
The mounting scheme must rely on a prepared base, not on a weak paper layer.
The wallpaper pattern must end cleanly.
If the top of the defect is in places higher than 160 mm, visible torn sections will remain after installation.
Why local patching of a wallpaper strip is not always better
If the pattern is complex, the batch is old, and the shade has changed due to light, the new lower insert may differ noticeably.
A high PLT-004 in this case turns the lower part of the wall into an independent architectural band and eliminates the need to match the old pattern.
When re-pasting is still stronger
if:
-
the wallpaper is damaged significantly above 160 mm;
-
there are several vertical tears;
-
the room needs updating anyway;
-
the high profile does not fit the style.
Then there is no need to choose PLT-004 just to save on finishing.
The old paint differs in color: can PLT-004 cover the transition without a full repaint
After removing the old profile, it is often visible that the bottom strip:
-
lighter;
-
darker;
-
without finish paint;
-
has a different gloss.
If the border is entirely below 160 mm, the new tall baseboard geometrically covers it.
But the shade of the wall above the baseboard also needs to be checked
The old profile could protect the wall from fading and dirt.
After removal, the difference sometimes extends above its top edge.
Side light
In side daylight, even a color-matched area can give away:
-
a putty step;
-
a glue bump;
-
an uneven surface.
Therefore, before purchasing, not only a vertical measurement is needed, but also a plane check.
When painted MDF is especially logical
If the new PLT-004 and trims are painted in one color, the renovation gets a new lower carpentry system.
This can be visually cleaner than local touch-up of an old wall.
Doors and architraves: the new 160 mm height may change the old junction
The old skirting board of 120–145 mm could fit neatly into the lower part of the architrave.
PLT‑004 with a height of 160 mm raises the junction point.
If the architrave is wide and tall
A tall skirting board often looks natural.
If the architrave is narrow
The 160 mm profile may appear visually larger than the lower door element.
If the architrave ends with a low plinth/pedestal
Their height ratio needs to be checked.
What to do before ordering
Make PLT-004 template next to the door.
Check:
-
height;
-
thickness of 16 mm;
-
open end;
-
the line of the top profile.
If the junction does not work, the end point may change the total order length.
Wooden floor skirting boards: when it is better not to run PLT-004 along the entire perimeter
Category Wooden baseboards is not needed to automatically continue one profile everywhere.
PLT-004 can be excluded from individual zones if there is already an independent architectural boundary.
For example:
-
built-in furniture to the floor;
-
stone wall;
-
portal;
-
stationary panel.
Why this matters for the old strip
On the wall where the new baseboard is not installed, the old trace must still be resolved in another way.
You cannot simply subtract such a wall from the cutting layout and forget about the defect.
Correct sequence
-
decide whether PLT‑004 is needed on a specific wall;
-
if not — determine the method for repairing the old strip;
-
only then exclude the wall from the number of planks.
Wood and MDF trim products: how to link high PLT-004 with the rest of the renovation
If the interior simultaneously uses Wood and MDF moldings, PLT‑004 should be coordinated with:
-
with the architraves;
-
door portals;
-
with moldings;
-
cornices;
-
furniture details.
Why does this affect the decision to "repair the wall or cover it with a plinth"
A high 160-mm profile is more justified if it supports an existing joinery system.
If PLT-004 appears in the interior only as a way to hide 145 mm of wall and is not connected to anything else, the scale needs to be assessed more carefully.
One finishing system
For painted MDF, it is reasonable to agree on:
-
color;
-
shine;
-
preparation;
-
edge treatment.
For wood finishes — tinting and shade.
Tips on finishing and installation: what to prepare before installing PLT-004
General Advice on finishing and installation useful to pass on to the contractor before work begins.
For the old strip scenario, four stages are especially important.
1. First, the poor base is repaired
Not after installing the baseboard.
2. Then a dry fit is performed
The 160 mm line is checked along the entire wall.
3. Only then the finish and installation
The sequence depends on the chosen finishing system.
4. Fresh ends are not left untreated
Especially at visible endings.
Why the article does not specify a single adhesive or fastener
The substrate can be:
-
plaster;
-
drywall;
-
brick/concrete wall with finish;
-
painted surface.
The specific mounting system is chosen by the contractor based on the substrate and the material manufacturer's recommendations.
The old baseboard was glued over wallpaper: do I need to remove wallpaper below 160 mm
It is impossible to give a universal "must remove everything" without assessing the substrate.
The main criterion is that the new PLT-004 must have a reliable mounting surface.
If the wallpaper holds poorly
Their area under the new profile should not be considered a reliable substrate.
If the wallpaper is strong, but the mounting technology requires a mineral substrate
The wall must be prepared in accordance with that technology.
If the profile is attached mechanically and the base is stable
The scenario may be different.
Why masking should not determine the installation technology
The fact that PLT-004 visually covers the wallpaper does not mean it should be attached over any existing layer.
The old strip is not uniform across different walls: when to make one PLT-004, and when to combine repairs
Let's imagine a room:
-
wall A — defect 143 mm;
-
B — 149 mm;
-
C — 167 mm locally;
-
D — 140 mm.
There are two options.
Option A. PLT-004 around the entire perimeter + local repair C
A single 160 mm line is maintained.
Option B. PLT-004 only on part of the walls
A different repair is applied to C.
This may look worse if the baseboard suddenly breaks without an architectural reason.
Prac
What the control fragment should show
-
the top edge actually covers the defect;
-
the profile fits normally against the wall;
-
old glue doesn't create a bump;
-
height 160 mm visually fits;
-
the chosen color/tint works;
-
the junction with the floor looks clean.
Why it's better to take not the most ideal wall
Control on a flat section of 140 mm proves little.
Better to take the YELLOW zone, where:
-
Hmax around 156–158 mm;
-
there is a slight floor difference;
-
nearby there is a door or a corner.
If PLT-004 works reliably there, the decision for the rest of the room becomes much more reliable.
What to do after the control installation
Measure again:
-
the actual top line;
-
the gap to the wall;
-
the position relative to the floor.
If the profile had to be shifted, the base trimmed, or the wall adjusted more than expected, the map of the entire room is revised before cutting the long planks.
When does "repair without re-gluing" actually save work, and when does it only postpone it
A high baseboard does not eliminate all finishing operations. It replaces a full re-finishing of the wall only in cases where the lower zone requires local, not major, preparation.
Scenario A — PLT-004 actually reduces the scope of repair
Terms:
-
defect below 160 mm;
-
base is solid;
-
no dampness;
-
local holes are easy to prepare;
-
upper part of the wall remains high quality;
-
the profile fits into the interior.
Then instead of re-pasting/re-painting the entire wall, the following is done:
-
local preparation of the lower zone;
-
installation;
-
finish of PLT‑004 itself.
Scenario B — high baseboard does not provide real savings
If the wall still needs to be:
-
fully putty;
-
repair cracks;
-
repaint;
-
remove old wallpaper above 160 mm,
then PLT‑004 becomes a purely design solution, not a way to avoid repairs.
Scenario C — part of the room saves on repairs, part does not
For example:
-
three walls are covered with PLT‑004;
-
one wall is completely re-papered.
This is normal if the architectural line of the baseboard is preserved and the updated wall does not require a different lower solution.
How to compare two options without invented pricing
Prepare two local estimates.
Option PLT-004:
local preparation + product + finish + installation + delivery.
Option full redecoration:
demolition/preparation + wall material + finishing + new baseboard + installation.
After this, not only the price is compared, but also:
-
deadline;
-
dust;
-
risk of damaging the finished floor;
-
availability of old wallpaper;
-
visual result.
If the defect runs exactly along 160 mm: why this is not a comfortable margin
160 − 160 = 0 mm.
The edge of the old strip coincides with the top of PLT‑004.
Everything is covered in the drawing.
At the site, zero clearance is sensitive to:
floor wave;
-
wall curvature;
-
actual profile seating;
-
measurement error;
-
local spall.
-
local chip.
What to do
Either locally prepare the upper boundary below 160 mm, or consider the section as borderline and do not make a decision based on a single digit.
Why an artificial "universal margin of 5/10/15 mm" is not needed
The article has no basis to claim one safe digit for all walls.
An actual check with a template against a specific base is needed.
After removing the old baseboard: the correct sequence before ordering PLT-004
-
Remove the old profile completely.
-
Remove debris and loosely attached fragments.
-
Fix the future finished floor level mark.
-
Create an Hmax map.
-
Highlight GREEN/YELLOW/RED.
-
Check the 160 mm line.
-
Resolve door, stone, and furniture finishes.
-
Choose the material.
-
Build a 2400/2600 map.
-
Compare the cost with wall repair.
-
Only then place the order.
This sequence protects against two opposite mistakes:
-
buying an extra tall baseboard where the wall is being repaired anyway;
-
starting to re-paste the entire room where a 160 mm profile could cover a stable cosmetic trace.
Order baseboard PLT-004 160×16 mm: what to check right before purchasing
Before order baseboard PLT-004 160×16 mm, the project must pass a short BOFU checklist.
1. Maximum defect height
Not "approximately 145 mm."
But:
Hmax,new = ___ mm from the new finished floor.
2. New floor level
Installed or has a confirmed design elevation.
3. Problem area map
Separately:
-
external corners;
-
doors;
-
stone;
-
furniture;
-
areas above 160 mm.
4. Base accepted
No loose, damp, or protruding areas that interfere with installation.
5. Material PLT-004 selected
-
MDF 2600;
-
beech/MDF/beech veneer 2400;
-
oak/MDF/oak veneer 2400.
6. Cutting map is ready
Not just the overall perimeter, but specific parts.
7. Finish is approved
Especially:
-
MDF color;
-
wood finish tinting;
-
visible edges.
8. Current price and availability rechecked
For wood versions, production time at the time of check is 5–10 days.
9. Delivery confirmed
2400/2600 mm must physically fit through to the site.
10. Reserve has a specific purpose
The additional plank is purchased not as “+10%”, but for:
-
long border piece;
-
complex external corner;
-
repair fund.
Final specification PLT-004 after checking the old strip
The working order line should look like this:
PLT‑004 / material ___ / 160×16 mm / Hmax,new ___ mm / walls A–F ___ / planks 2400 or 2600 ___ pcs. / endings ___ / finish ___ / reserve ___ .
Example for MDF
PLT-004 / MDF / 160×16×2600 / parts 2350, 2310, 1760, 1480, 900, 820 mm / pre-cut 4 strips / finish under enamel / problematic outer corner to be locally prepared.
Example for wood version
PLT-004 / oak-MDF-oak veneer / 160×16×2400 / same parts / pre-cut 5 strips / tinting ___ / visible ends E1/E2.
Why Hmax,new is needed in the specification
It confirms the very logic of the purchase.
If after a week it turns out that after laying the floor the defect is actually 164 mm, the PLT-004 cutting no longer solves the original task.
Mistakes when buying PLT-004 after dismantling the old skirting board
Mistake 1. Relying on the height of the old profile
Reason: the old 145 mm skirting board seems like a ready measurement.
Consequence: damage to the wall of 155–165 mm remains visible.
Prevention: Hmax map.
Mistake 2. Measure the defect from the old floor
After the new coating, the mark changes.
Prevention: recalculate Hnew.
Mistake 3. Take the average height
The average 144 mm does not help if there is a point of 162 mm.
Mistake 4. Check only one wall
The outer corner or door area may be higher.
Mistake 5. Cover loose plaster
Cosmetic masking replaces base repair.
Mistake 6. Not removing bumps of old glue
PLT-004 does not fit against the wall.
Mistake 7. Calling the wood version solid oak/beech
The card confirms the combined construction.
Mistake 8. Calculating only linear meters
Specific segments 2400/2600 may give a different quantity.
Mistake 9. Choosing MDF just because it is 2600 mm
The material changes along with the length.
Mistake 10. Buying the profile before checking the doors
The 160-mm PLT-004 end conflicts with the trim or hidden frame.
Error 11. Counting the stone wall automatically
On porcelain stoneware PLT-004 may not be required at all.
Error 12. Buying reserve as a percentage
One additional long plank may be sufficient — or not needed at all.
Error 13. Evaluating only height
The thickness of the old adhesive and the flatness of the wall are also important.
Error 14. Painting everything before cutting
Fresh ends will require additional finishing.
Error 15. Assuming a high profile is guaranteed cheaper than re-tiling
Need two real estimates.
When it's better not to buy PLT-004, even if it covers 145 mm
Height 160 mm may technically fit, but the product still doesn't have to be the right choice.
It's worth not buying or comparing an alternative if:
-
the interior doesn't accept a high profile;
-
the wall is being fully renovated anyway;
-
the base damage is serious;
-
new furniture covers the entire lower area;
-
door assemblies become more complex;
-
most of the room has a different type of bottom junction.
Height is a necessary but not sufficient condition
The formula 160 > 145 only answers geometry.
Commercial solution includes:
-
architecture;
-
base;
-
finishing;
-
quantity;
-
cost.
Decision tree: will PLT-004 cover the old floor without re-gluing walls
Step 1. Is the new finished floor already known by elevation?
-
no → determine first;
-
Yes → continue.
Step 2. Is the maximum defect height measured for each wall?
-
no → measure;
-
Yes → continue.
Step 3. Hmax,new < 160 mm?
-
no → local/full repair or another profile;
-
Yes → continue.
Step 4. Is the defect only cosmetic?
-
no → repair the base;
-
Yes → continue.
Step 5. Does the 160 mm template cover all problem areas?
-
no → fix local zones;
-
Yes → continue.
Step 6. Do door and exterior units work with a height of 160 mm?
-
no → change the endings;
-
Yes → continue.
Step 7. Decided on which walls PLT-004 is actually needed?
-
no → do not count the perimeter;
-
Yes → continue.
Step 8. Is the material selected?
-
MDF 2600;
-
wood combined version 2400.
Step 9. Is the map of whole planks built?
-
no → calculate;
-
Yes → continue.
Step 10. Is the cost of the solution compared with real wall repair?
-
no → compare;
-
yes → place the order.
FAQ about high wooden baseboard PLT-004 after dismantling the old profile
What is the height of baseboard PLT-004?
160 mm.
What is the thickness of PLT-004?
16 mm.
Will PLT-004 cover the old 145 mm strip?
If 145 mm is the real maximum height of the cosmetic defect from the new finished floor, nominally 15 mm will remain. But you need to check the entire perimeter, floor, and base.
Why can't you rely only on the height of the old baseboard?
Because wallpaper, paint, glue, or damage after dismantling may extend above its top edge.
How to measure the top point of the trace from an old profile?
From the new finished floor to the highest point of the defect, in several places on each wall.
What will change after laying the new floor?
If the new floor is higher than the old one, the defect becomes lower relative to it. If lower, the defect becomes higher.
How to check the height of PLT-004 before purchasing?
Draw a line 160 mm from the new floor with painter's tape or apply a full-size template.
What is the length of the PLT-004 made of MDF?
2600 mm.
What is the length of the oak and beech versions?
2400 mm.
Is the wooden PLT-004 completely solid?
No. The card describes a combined product MDF/veneer + top decorative profile made of solid wood.
Can I order PLT-004 for painting?
MDF is suitable for covering finishing; the specific finish system should be coordinated with the contractor and the current product card.
Can I cover old glue with a new baseboard?
Only if the glue does not interfere with flat and reliable installation. Protruding bumps need to be removed.
What to do if the trace is 162 mm in some places?
PLT-004 with a height of 160 mm does not fully cover it. Local preparation or another solution is needed.
What to do if only one external corner is damaged above 160 mm?
If the base is stable, it is often more rational to locally restore the corner rather than replace the profile throughout the room.
Where can I check the current price of PLT-004?
In the product card PLT-004 baseboard Before payment.
How many 2400/2600 mm planks should be ordered?
Based on the map of specific segments. In the training example, six parts require 4 MDF planks of 2600 or 5 wooden ones of 2400.
Is it necessary to buy +10% extra stock?
Not automatically. It's better to assign a whole spare plank for a specific borderline part or a complex corner.
When does a high baseboard really allow avoiding re-pasting the walls?
When the old strip is below 160 mm after the new floor, the base is sound, and the new high profile fits the interior.
Short conclusion
The initial arithmetic is simple:
160 − 145 = 15 mm.
But these 15 mm only make sense when 145 mm is the maximum actual height of the cosmetic defect from the new finished floor.
The correct check looks like this:
new floor level → 5–10 measurements per wall → Hmax → external corners and doors → 160 mm template → base assessment → PLT‑004 route → material → 2400/2600 map → cost → order.
If after the new floor Hmax equals 145 mm, PLT‑004 indeed has a nominal margin of 15 mm and can allow avoiding a full re-glue/re-paint of the wall. If Hmax rises to 158–159 mm, the decision becomes borderline. If the defect goes above 160 mm, the profile alone will not cover it.
For the current training map of 9620 mm, four MDF strips of 2600 mm give a compact cut, while wood versions of 2400 mm require five. But the material is chosen not by length, but by the interior and finishing task.
The main thing is not to use a tall baseboard as a way to hide a bad base. PLT‑004 works well as a new decorative line that covers a repairable cosmetic trace of the old profile. A problem wall is first repaired, and only then is it decided whether a tall baseboard is needed.