Article Contents:
- Why slat panels alone are not enough
- Where the combination of slat panels and moldings works best
- TV area in the living room
- Wall behind the sofa
- Bed headboard
- Hallway and corridor
- Office
- Kitchen-living room
- Niche, wall section, column
- What a molding adds next to a slat panel
- Which elements to use together
- Five combination schemes: from simple to complex
- Scheme 1. Slat panel in the center + molding around the perimeter
- Scheme 2. Slat panel at the bottom + molding belt + smooth wall + baseboard
- Scheme 3. Vertical slats + horizontal molding for visual balance
- Scheme 4. Slat panel + wooden corner on the outer edge
- Scheme 5. Slat panel + wide baseboard as bottom contour
- How to choose a color
- How not to overload the wall
- Practical kit selection: what to buy for a finished wall
- Kit 1. TV area with molding frame
- Kit 2. Hallway with slat panels and molding belt
- Kit 3. Bedroom — headboard
- Kit 4. Study with dark panels and moldings
- Kit 5. Monochrome wall for painting
- Installation nuances that are important to know in advance
- FAQ: Answers to Popular Questions
- About the Company STAVROS
You chose slatted panels — and you made the right choice. This is one of the most expressive modern tools for wall finishing: the vertical rhythm of the slats creates depth, volume, and character where there was once just a painted surface. But here's the paradox most people face: the panels are installed, the wall has come to life — and yet something is still off. The edges "hang" in the air, the transition to the adjacent wall looks random, the baseboard doesn't match the tone, and there's a gap at the bottom.
The problem isn't the panels. The problem is that slatted panels for walls — it's not the final element, but the central one. It needs a system around it: molding, corner piece, baseboard, wooden slat at transitions. When this system is assembled, the wall becomes an architectural statement, not just a collection of materials.
This article is exactly about how to assemble such a system: practical, beautiful, and without rework.

Why slatted panels alone are not enough
Put yourself in the shoes of someone who has just finished installing a slatted panel behind the TV. The slats are aligned evenly, the proportions are correct, the tone is matched. You step back two meters — and you see: the left edge of the panel simply breaks off at the junction with the painted wall. The right corner — same. At the bottom — a gap or a baseboard that clearly "doesn't belong to this story." A feeling of incompleteness.
This is not an installation error. This is a matter of the system.
Slatted wall panel creates a strong vertical rhythm. But this rhythm must have a beginning and an end — horizontal boundaries that "hold" the vertical and translate it into the surrounding space. Molding is the horizontal frame. Corner piece is a clean corner transition. Baseboard is the lower boundary of the entire wall.
Without these elements decorative slatted panels look like an unfinished thought. With them — like a well-thought-out interior architecture.
Another argument that is rarely voiced out loud: proper profile transitions increase the visual cost of finishing several times over. The same panels, the same color — but with a molding frame around the perimeter and a wide wooden skirting board at the bottom — look like a design solution from a different price segment.




Where the 'slat panels + molding' combination works best
Not every room perceives this combination the same way. Let's break it down specifically — by zones and the logic of the space.
Our factory also produces:
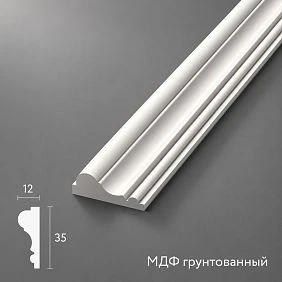
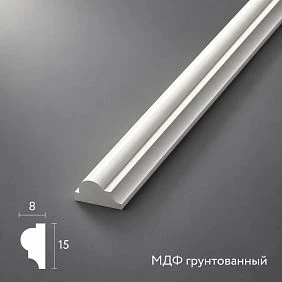
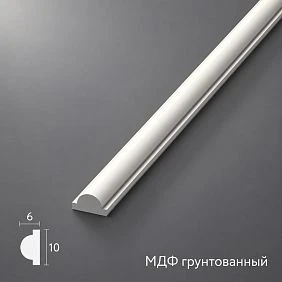
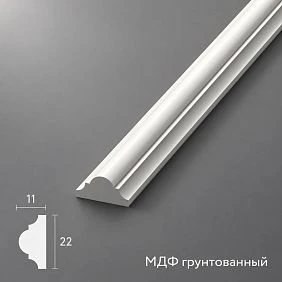




TV zone in the living room
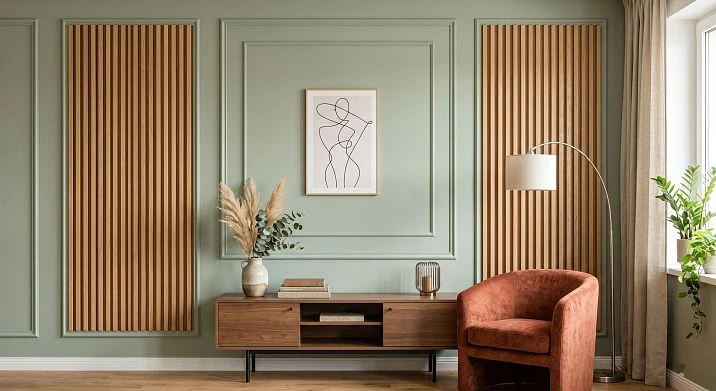
The most popular application. slatted panel for the television creates a visual center of the room — dark, structural, with a rhythm of verticals. Molding around the perimeter of this panel turns it from a 'piece of wall with slats' into a complete architectural frame around the screen.
Scheme: molding runs along the top edge of the panel horizontally, along the side edges — vertically, at the bottom — either molding or a wide baseboard in the same tone. The screen hangs inside this frame. The cabinet or console under the screen is 'fitted' into the lower horizontal. The interior comes together as a single composition.
Get Consultation
Wall behind the sofa
Here, the panels are a backdrop for the main piece of furniture. The slats create depth, the sofa visually 'leans' against them. The molding frame around the perimeter of the slatted area adds a sense of a niche, even if the wall is flat. This is a popular design technique — to create the illusion of an architectural recess where there is none.
Bed headboard
Vertical slats behind the bed — one of the most popular requests. Slatted wall panels In the headboard area, a rich warm background is created. The molding at the top defines the area and prevents it from "dissolving" into the ceiling. On the sides, there are two vertical moldings that "hold" the width of the area and prevent it from looking random.
An important detail: the molding in the headboard area should be proportionate to the width of the bed. If the bed is 160 cm, the panel area is slightly wider (180–200 cm), with the molding on the edges symmetrical.
Hallway and corridor
In the hallway, slatted panels are often placed on the lower third of the wall or at full height up to the ceiling. In the first case, molding at the transition between the slatted area and the painted wall is mandatory: without it, the joint looks sloppy. In the second case, a corner profile on the external corners covers the end.
The baseboard in the hallway should be chosen with a height margin: it's a high-traffic area with mechanical loads and vacuuming. MDF Skirting Board or Wooden baseboard 80–100 mm high in the hallway is both protection and style.
Office
An office with slatted panels on one wall and moldings on the others creates a completely different atmosphere. Dark slats behind the desk or bookshelf create a "backdrop" background, while molding frames on the side walls add architectural detail. Everything in a single tone — and the room becomes a space for concentration, not just a room with furniture.
Kitchen-living room
Here the task is different: slatted panels should connect the kitchen area and the living room without a visual break. A panel on the end wall above the work area or as an accent background for the bar counter — plus molding as a horizontal limiter — makes the transition between zones readable and beautiful.
Niche, wall section, column
These are situations where Wooden corner bracket molding is more important. A column clad in slatted panels without corner profiles is an unprotected end that will be damaged over time. The corner profile covers the end, protects it, and creates a clean geometric line.
What does molding provide next to a slatted panel
This is a key question to understand before purchasing. Molding is not a "decoration on top" — it performs specific functions, each of which is visible to the naked eye.
It covers the visual transition. Where the slatted panel ends and the painted wall begins — there is a boundary. Without molding, this boundary looks like a break, like an unfinished solution. Wall wood molding — horizontal arrangement that can run at the level of a chair back, window sill, or mid-wall. Molding divides walls into horizontal zones, creates rhythm, and structures space. It overlaps this transition: creates a clear horizontal line that is perceived as a deliberate design gesture.
Creates a frame. Molding around the perimeter of the slatted area is a frame around a painting. The panel inside the frame acquires boundaries and weight. It is the frame that turns the area from "decoration" into an "architectural element."
Separates the slatted area from the painted wall. This is about perception control. When molding clearly divides the textured area and the smooth one — each is read independently. Without molding, they "flow" into each other, creating visual noise.
Connects the panel with the baseboard and cornice. The profiles should form a single system. Decorative wooden moldings — the middle level of this system between the baseboard below and the cornice or ceiling profile above. In a single tone, they create a complete vertical wall program.
Makes the wall architectural. This is hard to describe in words, but easy to feel visually. A wall with moldings is a wall with a "skeleton," with a supporting idea. Without moldings, it's just a finished surface, even if beautiful. The difference is at the level of sensation.
Which elements to use together
Here is a practical catalog of combinations. Each element has its own role in the system.
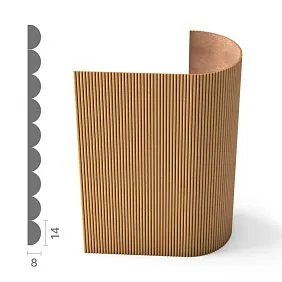
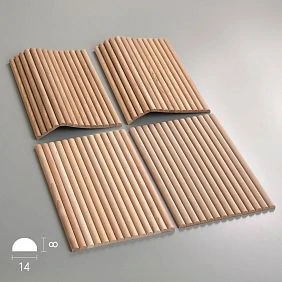
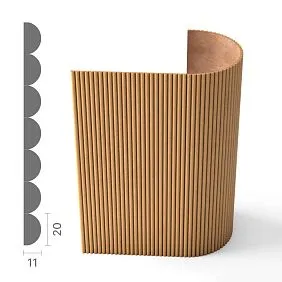
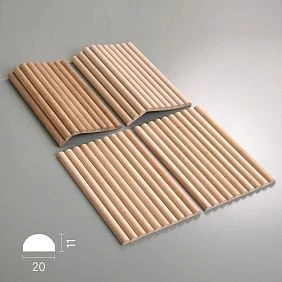
Rafter panels — central element. They create vertical rhythm, texture, volume. Can be made of MDF without coating — for painting, of MDF with oak or other decor coating. The width of the slats, the distance between them, and the panel height — these three parameters determine the character of the entire wall.
Decorative wooden slat — additional element. If a ready-made panel does not fit the size or more flexibility in arranging slats is needed — individual wooden slats are mounted one by one. Especially relevant for non-standard walls, columns, and niches.
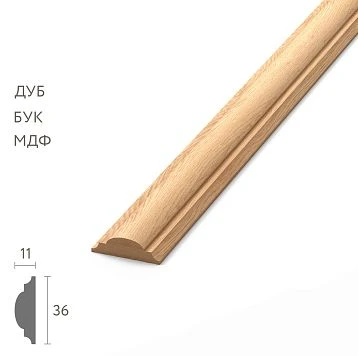
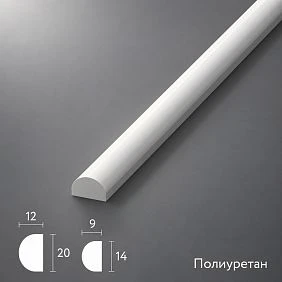
Decorative wooden moldings — frame element. Horizontal and vertical contour of the slatted area. Selected by profile and width according to the scale of the panel and room.
Wooden corner bracket — corner element. For external corners, ends, slopes, columns. Covers the panel cut, protects it, and creates a clean geometric line.
Wooden baseboard — lower horizon. Completes the wall composition from below. Must be coordinated in tone with the panel and molding.
MDF Skirting Board — lower horizon for painting. When the entire system is painted in a single color — MDF baseboard provides a perfectly smooth surface for enamel. For panels, moldings, and baseboards under a single paint — the optimal solution.
wood trim items — additional profiles. Layouts for joints, glazing beads, additional slats — everything that covers technical connections and makes installation clean.
Five combination schemes: from simple to complex
This is the main practical block of the article. Five real schemes — with specific elements and application logic.
Scheme 1. Slat panel centered + molding around the perimeter
Where to use: TV area, wall behind the sofa, headboard of the bed.
Logic: The panel occupies the central part of the wall. Along the top and side edges, there is wooden molding — horizontally at the top and vertically on the sides. At the bottom — either molding in the same line, or a baseboard if the panel goes from the floor.
Technically: the molding is attached flush to the edge of the panel — the joint is covered. The profile of the molding should not be thinner than the thickness of the slat panel — otherwise it will "sink" into the shadow.
By color: two approaches. First — molding in the same tone as the panel: the frame is present but inconspicuous, creating volume without contrast. Second — white molding with a dark panel: clear separation, classic contrast, expensive result.
Recommended elements: slat panel PAN-001 + molding MLD-019 + Skirting made of solid wood.
Scheme 2. Slat panel at the bottom + molding belt + smooth wall + baseboard
Where to use: hallway, corridor, children's room, bedroom.
Logic: The lower third of the wall (80–120 cm) — slat panel. Along the top edge — a horizontal molding belt: it visually "covers" the panel and clearly separates the slat zone from the smooth upper part of the wall. At the bottom — baseboard.
This is one of the most functional options: the lower zone is protected from mechanical damage by a textured panel, while the upper part remains light and airy. The molding belt is a key element, without which the transition looks unfinished.
Technically: the molding is attached horizontally at the level of the top edge of the panel. The height of the molding is 40–70 mm depending on the ceiling height and the scale of the panel.
By color: molding matching the upper part of the wall — a delicate transition. Molding matching the panel — a "dark belt" with an accent. White molding with a dark panel and light wall — a clear separation.
Recommended elements: primed slatted panel PAN-002 + wooden plank as a dividing belt + MDF Skirting Board.
Scheme 3. Vertical slats + horizontal molding for visual balance
Where to apply: tall narrow walls, spaces with ceilings from 280 cm, staircases.
Logic: Vertical slats without horizontal restriction on tall walls create "infinity" — the wall appears even taller and narrower. A horizontal molding at 2/3 of the height from the floor "breaks" the vertical rhythm and creates a human scale.
This is a professional technique for visual space correction. Below, from the floor to the molding — one rhythm of slats. Above the molding — a painted wall or another, lighter texture. The transition smooths out the feeling of height without losing volume.
Technically: the horizontal molding is mounted over the slatted panel — or as an overlay on the wall if the panel ends at that height. It is important to maintain horizontality: even minimal deviation will be noticeable.
Recommended elements: Slat panel oak PAN-003 + molding MLD-019 like a horizontal belt + Wooden baseboard.
Scheme 4. Slat panel + wooden corner on the outer edge
Where to use: columns, ledges, niches, window slopes, corner transitions between two walls.
Logic: When the slat panel wraps around a corner or ends on an outer end — the end needs to be closed. Wooden corner bracket is mounted over the corner and creates a clean, protected corner line.
Without a corner, the outer corner of the slat panel is a vulnerable point: under mechanical impact, the outer slat comes off or breaks. With a corner — everything is protected, the geometry is clean.
Technically: the corner is selected according to the panel thickness. It is attached with finishing nails or liquid nails. In the panel color — creates a unified contour. In white — creates an accent.
Recommended elements: decorative slatted panels + Wooden corner piece UG-001 + wood trim items for joints.
Scheme 5. Slat panel + wide baseboard as a lower contour
Where to use: living room, bedroom, study — classic and modern interior.
Logic: A wide baseboard (100–150 mm) under a slat panel is the bottom "frame" for the entire wall composition. It creates a "base" from which the slats grow, and makes the lower transition between the floor and the wall heavy, solid, and expensive.
This is a technique from architecture: the base sets the "weight" of the structure. A slat wall with a high baseboard is perceived differently than the same wall with a low baseboard. The difference lies in the sense of scale and luxury.
Technically: the baseboard is installed before the slat panel — or flush with its bottom edge. The panel "sits" on the baseboard or one step above. It is important to coordinate the tone: the baseboard and molding in the same coating system.
Recommended elements: slatted panels for walls + solid wood baseboard height 100–130 mm + molding MLD-019 along the top edge.
How to choose a color
Color is half the result. The correct tinting scheme makes the "slat panel + molding + baseboard" system cohesive and convincing. The wrong one visually destroys even a well-designed structure.
Slats and molding in the same color. A monochrome system. All elements — panel, molding, corner piece, baseboard — in the same tone. This creates maximum unity but requires careful matching of the coating. When painting with enamel, it is the ideal option: Batten panel for painting + — is a horizontal element that frames the room at the bottom of the walls where the wall meets the floor. Skirting boards perform several functions: they hide the technological gap between the wall and floor covering (necessary for thermal expansion), protect the lower part of the wall from mechanical damage, create visual completion, and may conceal wiring. + molding without coating — and everything is painted in one color in a single session.
Slat panel in wood finish + white molding. The most common and commercially winning combination. Slat panel oak PAN-003 Warm wood tone + white molding + white baseboard — this is a classic "natural wood + white frame" contrast that works in any interior from Scandinavian to neoclassical.
White molding on a dark wood panel is like a white mat around a painting. It highlights and "holds" the wood area without competing with it in color.
Dark slatted zone + light baseboard. Dark slats "ground" the wall, making it heavy and rich. The light baseboard below creates a light horizon that prevents the dark zone from "sinking" to the floor. This is a tone layering technique — dark top, light bottom — which creates interesting visual dynamism.
Panels for painting + MDF baseboard for painting. The most flexible option: everything is painted in one chosen color. Today — white, next year — gray-green, in five years — dark blue. The paintable base allows changing the wall's tone without replacing materials. buy MDF skirting board и primed slatted panel — and get a system ready for any paint.
Natural wood + painted wall. Slats in natural wood tone + painted wall in a calm tone (warm gray, light beige, deep green) + molding in the wall's tone. Here, the molding doesn't separate but creates a subtle transition: it's "the same color as the wall," but with relief — it holds the boundary of the slatted zone.
One important principle. No matter how many elements are in the system — the number of tones should not exceed three. Slats + molding + baseboard in three different mismatched colors is chaos. Two tones, maximum three — that's a working scheme.
How not to overload a wall
Mistakes in combining slatted panels and moldings occur even among experienced craftsmen. Let's break it down specifically.
Too many vertical lines. A slatted panel with a narrow slat spacing (10–15 mm) + vertical moldings on the sides + vertical lines on the adjacent wall — this is visual overload. The vertical should be one accent, not fill the entire space.
Molding is too thin next to a massive panel. A slat panel with 30 mm slats + 15 mm wide molding is a mismatch. The molding gets lost against the large slats. The width of the molding should be comparable to the width of the slats or noticeably larger.
The baseboard does not match the style. Wooden baseboard with a figured classic profile under slat panels in a modern style — a style conflict. The baseboard should match the style of the panels: a minimalist profile for a modern slat wall, a more expressive one for neoclassicism.
No gaps from the floor, ceiling, or furniture. A slat panel going flush to the ceiling without any horizontal finish is an unfinished look at the top. A panel starting from the floor without a baseboard is the same at the bottom. Gaps and their finishing with profiles are a mandatory part of the work.
The joint is left without a profile. The butt joint of two slat panels without a covering of wooden strips or molding is a visible technological seam. For a quality result, all panel joints must be covered with a profile.
Mixing different textures without a system. A slat panel with a wood finish + a molding with an ornament in a different style + a baseboard with a third profile — three different languages on one wall. All elements must be stylistically coordinated.
Absence of individual wooden slats For non-standard places. A ready-made panel is a solution for smooth walls of standard sizes. In niches, around windows, in openings, individual slats provide the installation precision that a ready-made panel does not.
Practical kit selection: what to buy for a finished wall
This is a block for those who have made a decision and want a specific list. Let's break it down by typical tasks.
Kit 1. TV area with a molding frame
Task: slatted panel behind the TV with clean edges and a bottom contour.
-
slatted panels for walls — the base of the area, wood-look or paintable.
-
Wooden decorative moldings MLD-019 — along the top and side edges of the panel.
-
solid wood baseboard or MDF Skirting Board — the bottom horizon.
-
Wooden corner piece UG-001 — if the panel extends to an external corner.
Kit 2. Hallway with slatted panels and a molding belt
Task: lower wall zone in slats, clean transition to smooth part, protection from damage.
-
Slat panel PAN-002 primed for painting — lower zone.
-
wooden molding — horizontal belt along the top edge.
-
buy MDF skirting board — the bottom horizon.
-
Trimming Items — for closing joints and corner transitions.
Set 3. Bedroom — headboard of the bed
Task: accent zone behind the bed with clearly defined boundaries.
-
Slatted wall panels — the width of the bed + 20 cm on each side.
-
Decorative wooden slat — along the side edges.
-
molding MLD-019 — horizontally along the top edge.
-
Wooden baseboard — lower contour at the floor.
Set 4. Office with dark panels and moldings
Task: a status dark accent on the feature wall with a molding frame.
-
Slat panel oak PAN-003 — warm wood tone.
-
Decorative wooden moldings — frame around the perimeter of the slatted area in matching or white.
-
Skirting made of solid wood 100–130 mm — wide lower contour.
-
Wooden corner bracket — for corner transitions.
Set 5. Monochrome wall for painting
Task: everything in one color — for maximum flexibility and a modern look.
-
Slatted panel primed MDF PAN-002 — for painting.
-
MDF Skirting Board — for painting in the same color.
-
Wooden plank — like molding transitions.
-
Everything is painted in a single color — matte enamel or paint for painting.
Installation nuances that are important to know in advance
Even the most correct set of materials won't help if the installation is done without considering the nuances. A few practical rules.
The order of installation matters. The correct order: marking → installation of baseboard → installation of slatted panels → installation of moldings along the edges → corner profiles. If you install the moldings first and then force the panel in, installation accuracy will be lost.
More details about How to attach slat panels to the wall — in a separate instruction.
Edge treatment. The edge of a slatted panel is an open cut of MDF or wood. Without treatment, it absorbs moisture and paints unevenly. Before installation, the edges need to be primed or treated with a wax impregnation.
Cutting the molding at 45°. In corners, the molding is cut at 45 degrees — for internal and external corners. An error in the cutting angle will be visible on the installed product. Use a miter box with angle fixation.
Bottom gap. The slatted panel should not rest against the baseboard — a gap of 1–2 mm is needed between them to compensate for thermal expansion. When painting or varnishing, this gap will be covered by the edge of the baseboard.
О installing slatted panels и how to join slatted panels — detailed materials on the website.
Lighting. If planned Slatted panel with backlighting — the cable is laid before panel installation. The molding along the top edge can serve as a channel for the cable conductor.
FAQ: Answers to popular questions
Can slatted panels and moldings be combined on one wall?
Yes, this is a classic and very effective combination. The molding creates a frame around the slatted area, covers transitions, and makes the wall architecturally complete. The main thing is to coordinate the scale and tone.
How to cover the edge of a slatted panel on the wall?
For external corners — Wooden corner bracketTo transition to a smooth wall — wooden molding or Decorative railFor the bottom edge — a baseboard.
Which baseboard to choose for slat panels?
Depends on the style. For a modern interior under paint — MDF Skirting Board. For classic and natural wood — solid wood baseboard. The height of the baseboard is from 60 to 150 mm depending on the ceiling height and wall scale.
Are wooden moldings suitable for MDF panels?
Yes. Wooden moldings and MDF panels combine perfectly when painted in a single color: the difference in material texture disappears under the enamel. In their natural form, the textures differ slightly, so it's better to either use everything under paint or natural wood everywhere.
What is better: individual slats or ready-made slat panels?
ready-made slatted panels — for even rectangular walls of standard sizes: fast, precise, with a guaranteed slat spacing. Individual wooden slats — for non-standard spaces: niches, columns, slopes, radius walls.
Can slatted panels be used in the hallway?
Yes, and this is one of the best options for the hallway. A slatted panel in the lower zone protects the wall from mechanical damage and creates a decorative accent. A molding belt at the top covers the transition to the smooth wall.
How to design a slatted panel behind the TV?
Molding on three or four sides — creates a frame. Baseboard at the bottom — lower contour. Optionally — backlighting behind the slats. All elements in a consistent tone. More details in the article about slatted panel under the TV.
Is a corner piece needed on the end of the slatted panel?
Mandatory — if the end faces an external corner. Wooden angle protects the end from mechanical damage and creates a clean corner line. Without a corner piece, the corner gradually gets damaged and starts to look untidy.
About the company STAVROS
Assembling a wall correctly is not difficult. It's a matter of understanding the system and having the right materials in one place.
STAVROS produces a full range of wooden and MDF elements for wall compositions: slatted panels for walls — wood-effect, paintable, and primed; Decorative wooden moldings for frames and transitions; Wooden planks for individual installation; Wooden angles for corner ends; Wooden baseboard и MDF Skirting Board for the lower horizon; wood trim items for all joints and transitions.
STAVROS is a system of wooden profiles that gives the wall a finished look. One supplier — one style — one system.