Article Contents:
- The main problem here is not the wall size, but the competition between two verticals
- 40 × 171 × 11 mm: which dimensions really matter near a vertical LED line
- Make a 40 × 171 mm template before purchasing — and check not only the outline
- During the day and in the evening, these are essentially two different walls
- Do not place the overlay on the light line itself: first find an independent mounting surface
- How to find the gap between NPU-021 and LED when there is no universal number
- Too tight
- Working distance
- Too far
- The light line runs inside the slat field
- LED runs along the boundary between slats and a smooth wall
- A separate light line is located on a smooth section between two slat zones
- LED illuminates the slats from the side, but the profile itself is visually hidden
- In the color of a smooth wall
- In the color of the slats
- Contrasting overlay
- Mistake 1. Choosing a location only when the LED is off
- Mistake 2. Treating any free strip as a mounting area
- Mistake 3. Looking for the "correct gap" based on someone else's photo
- Mistake 4. Adding several NPU-021 units when one got lost
- Mistake 5. Making the white overlay contrast by default
- Error 7. Buying the overlay just because the price is low
- Can you place NPU-021 directly between two vertical LED lines?
- Will NPU-021 suit a wall where the LED is turned on only sometimes?
- Can you rotate NPU-021 horizontally and thereby avoid competing with verticals?
- What to do if the LED casts too sharp a shadow from the overlay, but you like the spot?
- Is a separate backing needed under NPU-021 on a slat wall?
- Can the NPU-021 be placed next to the backlight switch?
- Will one NPU-021 suit a long corridor with illuminated slats?
- Do I need to order the NPU-021 at the same time as the slat panels if the wall is not yet installed?
- Can the NPU-021 be used as a decorative finish for the LED profile itself at the top or bottom?
- What matters more when choosing: the exact distance to the LED or the view from a normal vantage point?
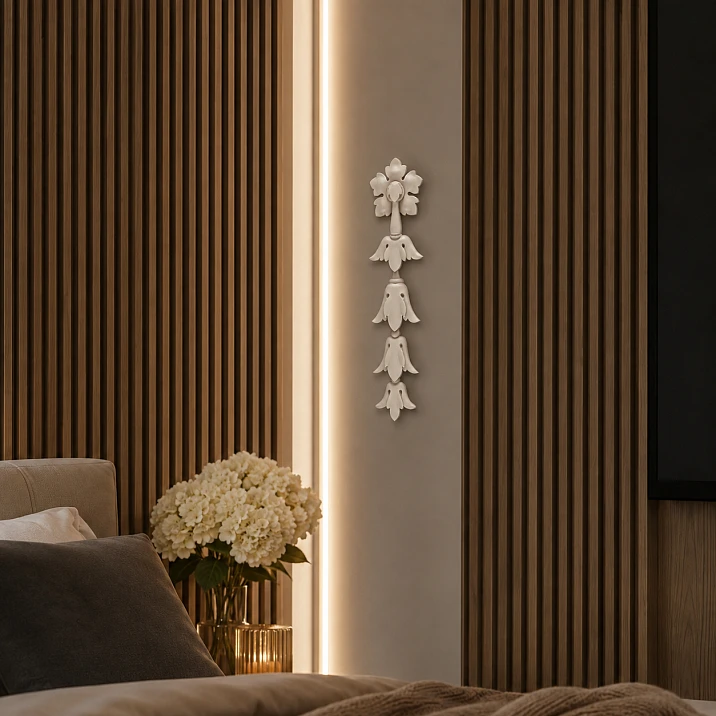
The slat wall is already assembled and illuminated vertically. The light line works on its own: it elongates the wall, emphasizes the rhythm of the slats, and in the evening becomes more noticeable than most small objects nearby. In such a composition, additional decor cannot be chosen only by a product photo. A narrow vertical overlay can support the rhythm, but it can also turn out to be superfluous — covering the light profile, falling into the bright glow zone, or simply dissolving among many parallel lines.
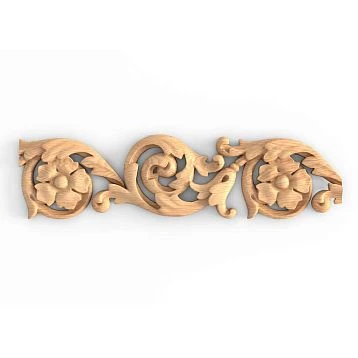
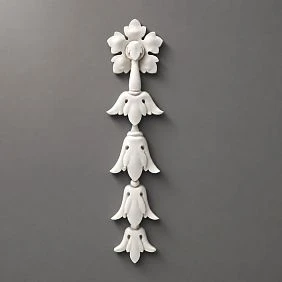
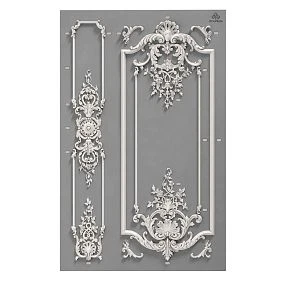
For this scenario, one specific model is considered — NPU-021, sized 40 × 171 × 11 mm, made of polyurethane. At the time of checking the STAVROS product card, the price of the selected item is 990 ₽ per piece. This is not a molding, not a pilaster, and not part of a luminaire, but a compact carved decorative overlay. Its task here is purely visual.
The direct answer is this: the NPU-021 makes sense to buy for an already illuminated slat wall only after an in-person trial in two lighting states — during the day and in the evening at normal LED brightness. To start, it is enough to cut out a paper or cardboard template of 40 × 171 mm and check it at the intended location. If the template falls on the light line, covers the diffuser, hits the removable part of the profile, gets lost among the slats, or creates another unnecessary vertical line next to the light, the purchase does not solve the task.
If, however, next to the backlight there is a calm, smooth, stationary strip where 40 × 171 mm reads as an independent motif, and a visually clear gap remains between the light and the decor, a single overlay can work more precisely than a series of identical elements.
| Parameter | NPU-021 | What to check on the finished wall |
|---|---|---|
| Type | Carved decorative overlay | use as decor, not as part of the LED system |
| Size | 40 × 171 × 11 mm | check the actual orientation and placement with a template |
| Material | Polyurethane | consider the base finish and the chosen adhesive |
| Price at time of check | 990 ₽/pcs. | for the basic scenario, 1 piece is considered |
| Main risk | conflict with the light line | evaluate the wall with the backlight on |
| Best base for the scenario | flat, stationary surface near the light | do not cover the diffuser and the serviced parts of the profile |
If after trying it on the solution works, buy the molded decor NPU-021 40 × 171 mm it makes sense after fixing the location, not before. The price is small compared to redoing the entire wall, but an extra element still remains extra if the light already fully completes the composition.
The main problem here is not the size of the wall, but the competition of two verticals
The slatted panel has its own rhythm. Even without backlighting, the viewer reads the repeating vertical strips, intervals, shadows, and texture. The vertical LED line adds another layer: it doesn't just repeat the direction of the slats, but becomes the most contrasting line in the evening. NPU-021 is also elongated vertically. So, all three elements speak the same graphic language.
That's why the usual logic of "there's free space on the wall — let's put decor there" doesn't work here. The free space may be physically free, but visually it's already occupied by light.
There are three possible outcomes.
The first is support. The overlay is placed on a calm strip nearby, retains its own contour, and is perceived as a small carved response to the strict line of light. This option is especially understandable if the interior already has polyurethane molding, classic profiles, frames, panels, or other ornamental details.
The second is competition. NPU-021 ends up too close to the LED and seems glued to the light strip. The eye tries to combine the two verticals into one object, but they are arranged differently: one glows, the other casts a shadow. Instead of a neat pair, visual noise appears.
The third is disappearance. Against the background of the frequent slat rhythm, the small overlay doesn't block the light and formally fits, but its ornament isn't readable from a normal distance. The buyer gets a physically installed decor that only works when viewed up close. For an accent wall, this is a weak result.
Therefore, before ordering, you need to answer not the question "does 40 mm fit?", but another one: does the NPU-021 get its own visual field next to the already existing verticals?
If the task is broader than one overlay and you are just designing such a combination of materials, it is useful to first look at the general principle of how they work Slatted panels with lighting. There, light is part of the wall's architecture. In our situation, the architecture is already finished, so the NPU-021 must adapt to it, not force redoing the light for the sake of a small decor.




40 × 171 × 11 mm: which dimensions really matter near a vertical LED line
The product card indicates the size A × B × C as 40 × 171 × 11 mm. For the article, the orientation is used in which the product is perceived as a narrow vertical motif: approximately 40 mm in transverse dimension and 171 mm in vertical dimension. This is exactly the orientation shown by the scenario with a vertical overlay next to a vertical light line. Before installation, it is still worth checking with the current drawing and applying the product itself or a template to the wall: the decorative contour is not equal to a simple rectangle, and the visual mass within the dimension is distributed unevenly.
Each size has its own task.
40 mm determines how much transverse space the overlay takes up. This is important when the smooth strip between the slats and the light profile is narrow. But do not substitute the visual gap with the geometric one. If a free strip 55 mm wide formally accepts a 40-mm decor, the remaining 15 mm do not yet mean the composition is good. It all depends on which side the LED runs, how brightly it shines, and where the shadow from the 11-mm relief lies.
171 mm sets the height of the accent. Small width does not automatically make the product unnoticeable: an elongated ornament can gather a fairly active vertical, especially on a plain wall. Therefore, it should be evaluated not only next to one slat, but also relative to the entire height of the visible wall section, neighboring furniture, switches, sconces, shelves, and other details.
11 mm is the depth of the relief within the dimension. Near light, it has special significance. A flat print does not create a pronounced side shadow, but a volumetric decor does. If the source is located on the side, light can emphasize the carving and make a small overlay more noticeable. But with too harsh side light, one side of the relief may turn out bright, while the other may fall into dense shadow. This is no longer a question of "is the overlay thick", but a question of the light-and-shadow pattern.
There is no universal rule like "it should be exactly 30, 50, or 100 mm from the LED". Such a standard cannot be honestly derived from the product card. The distance depends on the profile's optics, brightness, light direction, wall color, depth of the slats, and viewing angle. Therefore, instead of a made-up number, a full-scale check is needed.
Our factory also produces:
Make a template 40 × 171 mm before purchasing — and check not only the outline
The cheapest tool for this task is a sheet of thick paper or thin cardboard. Cut out a rectangle 40 × 171 mm. If you can print the front image of NPU-021 at 1:1 scale, that's even more useful: the actual ornament occupies the dimensions unevenly, while the white rectangle shows only the size.
The template is not meant to "guess beauty." It allows you to check several objective things.
First, find the intended spot. Don't place the template right against the LED profile immediately. Start with a position where a visible strip of the base remains between the light line and the future decor. See if the overlay separates from the light as an independent object.
Then step back to where the wall is usually viewed from. If it's a living room, one point might be by the sofa, another by the entrance. If it's a hallway, movement along the passage axis matters more. If it's a bedroom, check the view from the door and from the bed. Small decor often looks convincing from 40 cm and disappears from three meters — the template quickly shows this effect.
After that, turn on the LED. Not at maximum brightness for the experiment, but in the mode you actually use in the evening. If there's a dimmer, check at least the usual evening scenario and a weaker night one. If the template stops separating from the light line under working light, the real product might partially regain readability due to its relief, but counting on that without testing is risky.
The next step is to simulate volume. Place a strip of cardboard or another safe spacer material under the paper template at roughly the thickness that allows you to see the side shadow. This doesn't replace the real NPU-021, but it shows where the shadow falls when the light is on. If it covers the light diffuser, forms a dirty dark strip on the adjacent rail, or visually "cuts" the light, the spot should be reconsidered.
Finally, photograph the wall with your phone frontally and at a normal angle. The camera doesn't replace the eye, but it helps to see asymmetry: sometimes a person stands too close and doesn't notice that the overlay is actually tied to one rail, while the light line is tied to another axis.
Get Consultation
Day and evening, these are essentially two different walls
One of the most common mistakes is choosing a spot for the decorative overlay with the backlight off. During the day, the smooth strip next to the rails seems free, the relief is readable due to general light, and the vertical LED profile can look almost like a neutral insert. In the evening, the hierarchy changes: the light line becomes the main contrast, and some details fade into the background.
Therefore, the NPU-021 evaluation should be conducted in at least two modes.
Day mode addresses composition questions without dominant artificial light. Here, you can see whether verticals repeat too often, whether the overlay looks random between the slats, whether there is enough calm space around it, and whether the ornament conflicts with the wood grain pattern.
Evening mode addresses a different question: whether the decor survives LED activation. The overlay may be clearly visible during the day, but in the evening, a bright line draws attention away. Conversely, with side lighting, the relief may reveal itself better than under uniform daylight.
If there are multiple lighting scenarios, there is no need to run dozens of tests. It is sufficient to check the modes that are actually used. For example:
| Lighting mode | What to look at |
| daylight, LED off | scale, connection with slats, color, overall composition |
| regular evening LED | readability of the relief and distance from the light line |
| dimmed LED | doesn't the overlay turn into a heavy shadow |
| additional ceiling/side light | doesn't a double shadow and visual "dirt" occur |
If NPU-021 only works when the LED is off, and the wall was designed specifically for evening backlighting, this is a poor argument in favor of the purchase. The decor should be compatible with the main wall scenario, not with a rare state.
Do not place the overlay on the light line itself: first find an independent mounting plane
The phrase "do not block the light line" refers not only to aesthetics. The light profile, diffuser, groove, and its service area are an independent structure. The decorative overlay should not become a cover for the LED, fall onto the removable diffuser, or hinder access to elements that may require maintenance.
For NPU-021, it's better to look for a stationary plane nearby.
The most straightforward option is a smooth painted or prepared strip between the light line and the slat section, or next to the slat composition. On such a surface, you can properly mark the axis, check adhesion, press the element without wobbling, and see its outline in full.
A more complex option is a surface made of the protruding slats themselves. Here, the problem is not that a polyurethane overlay "cannot" be placed near the slats at all. The problem is the support. If the back side of the decorative element lands directly on protrusions and recesses, the actual contact area decreases. A small piece may rest on two narrow peaks, leaving a void between them. Visually, this is also debatable: a carved relief is placed on top of an already relief surface, and the outline gets lost.
If the wall is assembled from individual slats, sometimes there is a background plane between them. But this does not mean that NPU-021 can be thoughtlessly glued into it: you need to check the width of the available field and whether wiring or an LED profile runs there. If the slat panel is factory-made, with a backing, its construction should not be assumed based on appearance.
Separately assess where the edge of the light diffuser runs. The decor may not visually cover the glowing part, but may overhang it with its relief. When turned on, this will create a local shadow. Such a shadow sometimes looks expressive, but if it "cuts off" a straight vertical line, the result contradicts the very idea of backlighting.
The practical order is simple: first mark the boundaries of the LED profile and serviceable parts, then find a solid plane nearby, and only then try on 40 × 171 mm. Not the other way around.
If there is no suitable plane, it is better to look at other Polyurethane decorative appliques and choose a product for the real base, rather than forcing the wall to adapt to an already liked article.
How to find the gap between NPU-021 and LED if there is no universal number
The desire to get a ready-made number is understandable: for example, "step back 50 mm — and everything will be fine." But in this task, such a recommendation would be made up. The same 50 mm looks different next to a thin soft line of light and next to a bright wide profile; on a white wall and on dark wood; with frontal and side viewing.
It is more useful to evaluate the gap through three states.
Too tight
If there is almost no calm surface between the light line and the template contour, the two objects visually stick together. This is especially noticeable in the evening: the bright LED strip becomes like a border of the overlay. The ornament loses autonomy, and any slight misalignment becomes more noticeable.
Tight placement is only acceptable when you deliberately design a combination of light and decor as a single unit. But NPU-021 is not a lighting accessory, so in the basic scenario it is safer to visually separate it from the LED.
Working distance
The gap reads as a separate strip of the wall. The light remains a line, the overlay is an independent carved element. From a normal viewing point, the eye does not try to merge them. At the same time, they are still close enough to be perceived as part of one composition.
This is exactly the state that should be sought with the template. Not by a ruler, but by eye from the actual viewing distance.
Too far
If NPU-021 moves to a distant smooth strip and loses an obvious connection with the light or the slat zone, another problem arises: why is it even here? Then the decor may look like a random small detail lost on a large wall.
That is, the task is not to maximize the distance from the LED. You need to find a position where there is a connection but no conflict.
To make the check reproducible, photograph three positions of the same template: closer, medium, and farther. Compare not millimeters, but four features: separation from the light, readability of the ornament, connection with the slat field, and overall balance of the wall. Such a test gives more useful information than an artificial "offset norm."
11 mm of relief next to light: when shadow helps and when it ruins the line
NPU-021 has a depth dimension of 11 mm. On a regular wall, this is primarily volume. Next to an LED, the depth also becomes a lighting perception factor: protruding parts catch the light, recesses remain darker, and the edge can cast a noticeable shadow.
This effect in itself is neither bad nor good. It depends on the direction of the light.
If the LED strip is nearby and light partially comes from the side, the carved pattern can become more expressive. A small white overlay or one painted to match the wall, which looked calm during the day, gets a subtle relief pattern in the evening. In this case, light and molding truly help each other.
If the source is too close and the brightness is high, the shadow can become harsh. Then the viewer sees not the ornament, but a contrasting dark silhouette from the side. This is especially noticeable on a light wall. If the shadow falls directly on the diffuser or crosses the light line, the even vertical loses its purity.
If the NPU-021 is on a dark wall, the situation changes. The light decor can have high inherent contrast even before the backlight is turned on. The LED adds brightness to it from one side, and the accent becomes stronger. Therefore, the option "let's leave the overlay white — it's small anyway" is not always neutral.
To evaluate the relief before purchasing, it is useful to make not just a flat paper template. Take a small cardboard element of similar thickness and hold it to the intended spot without gluing. Look at where the shadow falls. You won't reproduce the carving, but you will understand the direction and hardness of the light and shadow.
If, with a small volume, the shadow already crosses the LED strip, this is a signal to increase the distance or change the location. If the side light softly falls on the surface, the real product has a good chance of reading better.
The slat rhythm is already vertical: one NPU-021 is usually stronger than a series of repetitions
The main mistake when working with small decorative elements is thinking that one looks "too small," so you need to place three, five, or seven. On a slat wall, this is especially risky. The slats already form a series. The light line adds another vertical. Repeating the NPU-021 can turn the wall into a set of competing stripes.
For the basic scenario, it is reasonable to first test one overlay.
A single element can serve as a local semantic marker: for example, marking the beginning of a smooth zone, supporting symmetry with another decorative object, or connecting modern slat finishing with classic molding in an adjacent part of the room.
The series requires a separate reason. Repetition is justified if the wall architecture itself is built on repeating decorative cells, there are several identical smooth piers, or NPU-021 is included in a pre-designed module. Simply "to make it more noticeable" is a weak reason.
There is also a large-scale risk. With a wall height of 2.6–3 m, an element 171 mm high occupies a small part of the vertical. Several overlays placed one above the other without a connecting frame or other system may look like separate stickers. The slats continue continuously from the floor upward, while the decorative fragments break up the adjacent plane.
Therefore, if one pattern seems lost, the next step is not to automatically add a second one. First ask: is this scale of decor even needed here? Perhaps the wall is better suited to a long molding, another vertical element, or no stucco at all.
If you want to see the entire assortment and find a different scale, it is more logical You can buy ready-made stucco matching the Baroque style. Calculate the quantity: linear meters of cornices and moldings, number of rosettes, pilasters, consoles, corner elements. Add a ten to fifteen percent allowance for trimming. after comparing categories, rather than multiplying NPU-021 just to fill the wall.
Where exactly on the wall NPU-021 can work: four different scenarios
The phrase "slat wall with vertical lighting" describes several structurally different situations. If they are mixed, the recommendations become too general. Therefore, the place for NPU-021 is better chosen based on the actual wall layout.
The light line runs inside the slat field
The LED is built between the slats or into a specially provided vertical groove. This is the most conflicting option for a small vertical overlay. Inside the slat field, there are already repeating protrusions, and the light line is part of this rhythm. Gluing NPU-021 on top of the slats themselves just to be close to the light is usually not beneficial: the base is textured, and the ornament is applied over another relief.
In such a scenario, look for an adjacent smooth field if it is provided by the composition. For example, the slat part does not occupy the entire wall but ends with a vertical boundary; next to it remains a painted pier. Then the overlay can be placed on the smooth side, maintaining a connection with the illuminated slats.
If there is no smooth section, skipping NPU-021 may be the best solution. Not every purchased element must find a place on a specific wall.
The LED runs along the boundary between the slats and the smooth wall.
This is a more interesting scheme. The light actually emphasizes the transition between materials. Here, NPU-021 can be considered on the smooth side of the line, but it is important not to turn it into an "attachment" to the LED.
Check whether the smooth strip is wide enough for the overlay to have margin on the outside as well, not just on the light side. If there are only a few centimeters of free space between the LED and the nearest corner, trim, or furniture, the 40-millimeter element may end up cramped.
Here, a frontal photo of the wall is especially useful: it shows whether NPU-021 creates a third almost parallel boundary next to the slats and the light.
A separate light line is located on the smooth section between two slat zones.
In such a composition, the LED strip itself is often already the central divider. Placing NPU-021 right next to it on one side may disrupt symmetry. If you want to add molding to the wall, first check whether paired logic is needed. But pairing does not automatically mean buying two overlays: perhaps the symmetrical light axis should remain the only center.
If one NPU-021 is offset to the side for an architectural reason—for example, there is a console, painting, switch, or another object nearby—the asymmetry can be intentional. If there is no reason, the decor looks random.
The LED illuminates the slats from the side, but the profile itself is visually hidden.
This is a separate situation. A person sees not a bright geometric strip, but a soft gradient of light and shadow. Here, the risk of "overlapping the line" is lower, but the shadow from the 11-millimeter relief has a stronger effect. NPU-021 can appear beautifully at the edge of the light gradient or, conversely, get uneven illumination.
In this case, the main test is the evening one. The daytime pattern tells little about how the carving will behave in soft side light.
These four diagrams show why an article cannot be reduced to a single distance figure. The light design changes the selection criterion itself.
Color of NPU-021 near LED: matching the wall, matching the slats, or contrasting
The color of a small overlay can completely change its role. When the light is off, the difference may seem moderate, but LED increases contrast locally and makes the mistake more noticeable.
In the color of the smooth wall
This is the calmest option if the goal is to show primarily the relief, not the silhouette. NPU-021 visually emerges through shadows and highlights. Near vertical lighting, this approach is often convenient: light remains the first accent, molding the second.
But "matching the wall" means precisely coordinated finishing, not conditionally white decor on a wall of a different white shade. Under bright LED, the difference in shade temperature can become more noticeable than under diffuse daylight. If the wall was painted long ago, rely not only on the paint name but on the actual surface color.
In the color of the slats
This option is possible if the interior is built on the connection between a wood tone and molded decor. But a polyurethane overlay and wood reflect light differently, so a simple "catalog color" match does not guarantee the same perception in the evening. If a complex imitation of a wood shade is intended, it is better to do a test paint-out.
Contrasting overlay
Contrast is appropriate only when NPU-021 truly needs to become a separate sign. For example, on a dark smooth strip, a light relief reads very clearly. But next to bright LED, these are already two strong accents in a small area. If the light line itself is white and the overlay is white, a visual echo arises between them, which may be stronger than desired.
Conversely, a dark NPU-021 on a light wall can turn into a graphic vertical stroke and compete with the slats.
Therefore, the color is checked with the same mockup. Paint a paper template approximately in the intended shade or print several options. This does not provide precise colorimetry, but immediately shows whether you want a "relief from the wall" or an independent colored detail.
The STAVROS card indicates that polyurethane decor can be painted. But the technology of a specific coating must be selected based on the primer and finish used, not by inventing a universal recipe. For preparation and mounting, you can look in advance at materials for installing stucco decor.
Light temperature and brightness change the perception of the ornament, but do not require "adjusting" the stucco to Kelvin
With warm lighting, wooden slats often appear deeper and softer, while cold white surfaces appear warmer. With more neutral or cold light, sharp boundaries of the relief may be perceived as more graphic. But it does not follow that there is a correct LED color temperature for NPU-021.
The article has no basis to recommend specific 2700, 3000, or 4000 K specifically for this overlay. The lighting system is already installed. The task is the opposite: to check NPU-021 in the existing light.
It is more useful to pay attention to three things.
The first is brightness. If LED is used as a bright decorative accent, a small non-luminous element nearby is almost inevitably secondary. This is normal if that is exactly the hierarchy you want.
The second is directionality. A narrow side flow draws the shadows of the relief more strongly. Diffused light makes the overlay calmer. Therefore, two identical interiors with the same light temperature can show NPU-021 completely differently.
The third is ambient lighting. If ceiling lights and LED work simultaneously in the evening, the relief receives light from several sides. The shadow is softened or split. Checking the overlay only with one strip turned on is pointless if this mode is rarely used in real life.
There is no need to redo successful lighting just to make NPU-021 look more impressive. A small decorative element should pass the test of the existing scenario, not dictate a new lighting project.
What to do if the overlay gets "lost" among the slats
NPU-021 can get lost for two reasons, and the solutions for them are different.
The first reason is scale. With a large slat field and a high wall, 40 × 171 mm simply takes up too little visual area. A person only sees the detail up close. In this case, moving it closer to the LED does not help: the light will make the contrast problem more complex, but it will not increase the scale of the product.
The second reason is the background. The overlay may be sufficient in size, but the ornament falls on too busy a surface or ends up next to frequent verticals. Then moving it to a smooth field can restore readability without changing the SKU.
A simple test helps distinguish the reasons. Cover part of the slat background with a sheet of plain paper or a temporary mock-up of a smooth strip, and apply the NPU-021 template. If it is immediately readable against a calm background, the problem is not size, but competing rhythms. If the detail still seems randomly small there, a different scale of decor or a blank wall is needed.
You should not automatically "treat" the lostness with contrasting paint. Contrast will increase visibility, but at the same time intensify the conflict with the LED. The result may become more noticeable and worse.
If 40 × 171 mm is objectively too small for the chosen area, moving to a catalog where you can Buy decorative polyurethane overlaysis a more rational step than installing several NPU-021 in a row.
Axial references: what to center a small vertical overlay on
On a slat wall, it is easy to fall into the trap of "everything must align with the nearest line." But NPU-021 may have a different architectural reference.
If the overlay is placed on a separate smooth wall section, its axis should logically be checked relative to that wall section itself, not a random slat. If there is a console, cabinet, narrow picture, or sconce nearby, the decorative element can be aligned with the axis of that object. If the entire composition is built around an LED line, the distance between the light and the overlay should look intentional.
A bad scenario is when NPU-021 accidentally almost aligns with the axis of one slat but is slightly offset. The eye notices the misalignment, even though no connection was actually intended.
Before installation, make two marks on painter's tape: the axis of the intended overlay location and the nearest significant verticals—the edge of the slat field, the center of the light line, the edge of the wall section. Look at them together. This helps decide which system the decor belongs to.
Vertically, you also don't have to find the geometric center of the entire wall. The height of 171 mm is small, so NPU-021 can work in conjunction with a specific object—for example, above a console or next to a frame. But in our topic, the main object is the slat composition with lighting itself. If there are no other anchors, check the vertical position based on where the ornament reads best in the wall field and does not visually intersect with outlets, switches, or furniture.
You cannot set a universal installation height like "1200 mm from the floor." There is no such standard for NPU-021. The actual reference is determined by the composition.
Does NPU-021 need a molding frame next to the light line?
Sometimes a small overlay seems too lonely, and there is a desire to immediately surround it with molding. On a slat wall with vertical lighting, this solution should be checked especially carefully.
A frame adds four more lines, corners, an inner field, and a new scale. What started as a local vertical accent of 40 × 171 mm turns into a separate panel. This might be appropriate on a large smooth wall, but next to frequent slats and LED, it's easy to get overload.
For the current scenario, it's better to first answer the question: does NPU-021 work on its own? If yes, a frame is not needed just for the sake of "completeness." A standalone carved overlay has the right to be a local element.
If a single NPU-021 looks lost, a frame doesn't always fix the problem. Perhaps the space is too large or the light nearby is too strong. Adding moldings increases the amount of decor but does not eliminate the incorrect compositional placement.
A frame is justified if the smooth area was originally intended as a separate panel and has sufficient margin. Then NPU-021 can become an internal vertical motif, while the light line remains outside. This is a different level of composition that needs to be designed as a whole.
If you are at the stage of a general wall project, it is more useful to study the combination stucco decor and wooden slats with backlighting as an architectural system. If the wall is already finished, there is no need to build a frame just to justify a single purchase.
Installation near LED: first marking and access to light, then glue
Since the NPU-021 is small, it is easy to assume that installation can be done "on site" in a few minutes. But it is precisely small details that are especially sensitive to misalignment: against the background of strictly vertical slats and a light line, even a slight deviation is noticeable.
Before applying glue, do a dry marking. Place the actual overlay against the chosen surface if it has already been purchased, or use a template. Mark the top, bottom, and axis with painter's tape. Check the verticality relative to the wall architecture, not just the spirit level: a technically level overlay can visually conflict with the actual existing geometry if the slats or the edge of the partition have a slight deviation.
Then turn on the backlight again. This is the last chance to see the shadow and understand whether the relief has come too close to the light profile.
Separately check LED maintenance. If the diffuser is removed to the side, the profile opens from the front, or there is a service cover nearby, NPU-021 should not block this access. Decor costing 990 ₽ should not complicate the replacement or maintenance of a much more important lighting system.
The base needs to be prepared for the chosen glue and the actual wall finish. The STAVROS card indicates adhesive mounting as suitable for decor, but specific adhesion depends on the surface. Painted wall, decorative plaster, laminated panel, and wood are different bases. You cannot assume that the same compound holds equally on everything.
If you need adhesives and related compounds, buy materials for installing moldings it is better to do so after checking the substrate and the instructions for the specific material.
After bonding, do not use the LED as a "test lamp" until the finishing compounds are brought into working condition according to their instructions. There is no need to invent a universal curing time: it depends on the specific adhesive, primer, and finish.
If painting NPU-021 is planned, decide the sequence of work in advance. When the part must match the wall exactly, the convenience of painting before or after installation depends on the chosen technology, the condition of the wall, and the need to carefully treat the junction. The main thing is not to paint over the diffuser, profile, or technical gap for the sake of a visually seamless connection.
Seven mistakes that cause NPU-021 to ruin already successful lighting
It is more useful to list the mistakes not as prohibitions, but as a chain of "what happens — why — how to check."
Mistake 1. Choosing the location only with the LED turned off
Why it happens: during the day it is easier to see the wall and apply the decor.
What happens: in the evening, the light line becomes dominant, and the overlay either disappears or turns out to be too closely tied to the light.
How to check: do a final fitting at the actual evening brightness before purchasing or before bonding.
Mistake 2. Considering any free strip as mounting space
Why it occurs: visually, between the slats or next to the light, there are several centimeters of empty space.
What happens: the back side of the overlay rests on an uneven surface, extends onto the profile, diffuser, or technical area.
How to check: determine the actual contact plane and boundaries of the light structure, not just the visible wall color.
Mistake 3. Looking for the "correct gap" based on someone else's photo
Why it occurs: you want to transfer a ready-made solution without a mockup.
What happens: the same distance looks different with different brightness, different profile width, and different background.
How to check: three positions of the template on your wall — closer, middle, farther — with the LED turned on.
Mistake 4. Adding several NPU-021 when one is lost
Why it occurs: it seems that the problem is only in the quantity.
What happens: vertical slats, LED, and a series of moldings create a "picket fence" of lines, but the scale of each element still remains small.
How to check: first transfer one template onto a smooth background. If it is still weak, change the scale of the decor, not the quantity.
Mistake 5. Making a white molding contrast by default
Why it happens: white polyurethane is perceived as a ready-made neutral
Mistake 7. Buying a molding only because the price is low
Why it happens: 990 ₽ is perceived as a safe experiment.
What happens: an item appears on the wall that does not solve the compositional task, and removing already glued decor without traces can be more difficult than refusing the purchase in advance.
How to check: demand a specific function from the template. It should either support the composition or create a clear local accent. "Just because" is not a sufficient function.
When not to buy NPU-021
A commercial article is useful only when it can lead not only to the cart, but also to a justified refusal.
Do not buy NPU-021 for this wall if the vertical light line already fully serves as an accent. If in the evening the eye immediately catches the light and the slat rhythm, an additional carved vertical may add nothing. In such a case, an empty smooth strip works as a pause.
Do not buy it if the only available spot is on an LED profile or a serviceable part of the system. The decor should not complicate access to light just for a visual effect.
Reject the model if there is no stable smooth mounting surface nearby. The overlay does not have to be installed over deep slats just because it thematically relates to wall decor.
Do not buy NPU-021 if the 40 × 171 mm pattern is lost from a normal viewing point. Contrast paint or a series of repeats can make the element more noticeable, but they do not automatically fix the wrong scale.
Do not buy it if the LED on destroys the readability of the relief. If in the evening only a dark silhouette or a glow without a pattern is visible, the product does not perform the decorative function for which it is purchased.
Do not buy NPU-021 if there are already too many verticals on the wall. Frequent slats, one or more light lines, tall handles, a vertical mirror, a sconce, and another narrow overlay can be too much even if each element is good on its own.
Do not buy it just to "bridge modern with classic." Such a bridge must be supported by the interior: color, profiles, furniture, other stucco decor. A single acanthus motif on a fully minimalist wall sometimes looks not like a bridge between styles, but like a random insert.
Do not buy two or three pieces before testing one. The basic scenario of this article is one NPU-021. A series requires a separate project.
Refusal in these cases does not mean the model is bad. The same NPU-021 can work perfectly on another surface. It only means that the specific backlit slat wall already has its own strong architecture.
When one NPU-021 truly improves the wall
The positive scenario should also be specific.
NPU-021 makes sense when there is a smooth vertical strip next to the slatted area that looks technical or unfinished without decor. The light line runs nearby but does not occupy that plane. When the LED is on, the relief gets soft side lighting and becomes more expressive, rather than disappearing.
A good sign is that the pattern reads as a separate element both during the day and in the evening, but in no mode does it become the main object of the wall. The light can remain the main focus, while the overlay adds a second level of detail.
Another successful case is when the interior already contains polyurethane molding: for example, a calm cornice, moldings, or decorative elements on another wall. Then NPU-021 does not appear out of nowhere but repeats the existing material language on a small scale.
The third option is when the slatted field visually ends too abruptly. On the adjacent smooth wall section, a narrow vertical overlay can provide a soft decorative finish without building an entire frame. But it should not mask a structural joint or cover up an installation flaw if a different profile is needed for that.
Fourth, side lighting truly reveals the relief. This needs to be seen in person: if the shadows are thin and readable, the 11 mm depth becomes an advantage.
If all these conditions align, order NPU-021 made of polyurethane you can use it as one local detail. The repeated URL here is justified by a different stage of the user journey: the first link at the beginning of the article provided a card for checking the product, this one appears after the decision-making algorithm.
Practical algorithm before ordering: from wall to cart in one verification cycle
To avoid returning to the same doubts, act consistently.
-
Record the real lighting scenario. Turn on the LED at normal evening brightness and see where the visible light line runs and where the side light falls.
-
Mark the constructive LED zone. Not only the glowing area, but also the profile, diffuser, removable parts, and access space.
-
Find a stationary smooth surface nearby. It should accommodate the overlay entirely and not be part of the serviced lighting system.
-
Make a template 40 × 171 mm. Preferably with a scaled ornament image, but a dimensional outline is minimally sufficient.
-
Check three transverse positions. Not for the sake of numbers, but to see a tight, working, and too distant relationship with the light.
-
Look from usual viewpoints. Entrance, sofa, bed, passage — depending on the room.
-
Repeat the check during the day and in the evening. If the solution exists only in one minor mode, it is a weak option.
-
Simulate the volume. See where the shadow from the protrusion near the LED is directed.
-
Check the color. Compare a version matching the wall tone and a more contrasting mockup.
-
Decide whether exactly one NPU-021 is needed. Do not move to a series until checking the scale of a single element.
-
Check the base and mounting method. Choose adhesive and preparation based on the actual surface and material instructions.
-
Only after this, complete the purchase. If at least one critical point fails, first change the location or model.
This order moves the decision from the category "I think it will look nice" to a testable scenario. At the same time, it does not require a complex 3D project: for one detail, a template, light, a few photos, and careful checking of the base are enough.
What to buy after trying on: NPU-021, other decor, or only slat panels
After the test, three commercially different results are possible.
Result 1 — NPU-021 works. The template is readable, the light line remains clean, there is a normal base, and the relief gets beautiful light and shadow. Then, for the basic composition, 1 piece of NPU-021 40 × 171 × 11 mm is needed. Additionally, only suitable materials for installation and, if necessary, finishing are required.
Result 2 — the location is suitable for molding, but NPU-021 is too small or too active. Do not buy several identical elements to compensate. Go to the catalog where you can you can buy polyurethane molded decoration in a different scale and shape. Keep the same criterion: the decor must not cover the LED and must have its own field.
Result 3 — the light already solves the task. Then, purchasing molding is not needed. If the slat composition itself is still being designed or planned for another wall, you can buy wall slat panels and pre-define the boundaries of light and smooth zones in the project. This is much stronger than trying to add decor after installation without a free plane.
For a new project, the query "buy slatted wall panels for interior finishing" logically should be directed to the same specialized section: slatted panels for interior wall finishing needs to be chosen together with an understanding of the spacing, background, lighting, and adjacent decor.
The main commercial idea is simple: the article does not have to lead to NPU-021 at any cost. It should lead to the correct wall configuration.
FAQ
Can NPU-021 be placed directly between two vertical LED lines?
This option can be considered only if there is an independent fixed plane of sufficient width between them and the overlay does not fall on profiles, diffusers, or service areas. Visually, it is important to check symmetry: two light lines already create a strong frame, and a small vertical detail between them can either become the center or turn out to be superfluous. Without a template and an evening check, it is better not to make such a decision.
Will NPU-021 suit a wall where the LED is turned on only sometimes?
Yes, but priority should be given to the state in which the interior is most of the time. If the backlighting is used rarely, the daytime composition is more important. At the same time, rare LED activation should still not lead to the overlay blocking the light, creating an ugly shadow, or interfering with profile maintenance.
Can NPU-021 be rotated horizontally and thus avoid competing with the verticals?
The topic of this article considers NPU-021 as a vertical motif in the dimensions 40 × 171 × 11 mm. If you want to use the product in a different orientation, that is a different compositional scenario: you need to separately check the pattern of the ornament itself, the manufacturer's recommendations, and how the element is perceived after rotation. You cannot automatically assume that changing the orientation will preserve the decorative logic of the product.
What to do if the LED creates too sharp a shadow from the overlay, but the location is appealing?
First, increase the distance between the template and the light line and repeat the test. If the shadow remains hard, check the actual working brightness level and ambient lighting. Don't change a well-tuned backlight just for one overlay. If the location requires a constant compromise in lighting settings, it's likely better to move the decor or abandon it.
Is a separate backing needed for NPU-021 on a slat wall?
If there is a flat, stationary, smooth surface, a separate decorative backing is not necessary. If the base is textured and the overlay doesn't have proper contact, a homemade backing turns the task into a new structural element. In that case, it's better to first resolve the base architecture and only then choose the decor. The backing should not cover the LED or hide access to it.
Can NPU-021 be placed next to the backlight switch?
Physically, this is possible if the switch and the overlay do not interfere with each other, but visually, two small objects on one narrow strip often start to compete. Check whether an accidental vertical grouping of "overlay — switch — LED" is formed. If the switch is used frequently, leave enough free space for the hand and for servicing the electrical installation product.
Will one NPU-021 be suitable for a long corridor with illuminated slats?
The length of the corridor itself does not determine the number of overlays. In a passage space, the point of first glance and the repeating rhythm are more important. If one NPU-021 marks a specific smooth wall section or the beginning of a composition, that may be sufficient. If it gets lost on a long wall, you should not automatically multiply the quantity — it is better to check a different scale or abandon the additional molding.
Should NPU-021 be ordered at the same time as the slat panels if the wall is not yet installed?
If the project is just starting, it is more advantageous to first determine the placement of the slats, LED profile, smooth mounting strips, and access to the lighting system. After that, it will become clear whether there is a correct place for NPU-021. Buying a small overlay in advance and then changing the lighting geometry to fit it is the reverse order of design.
Can NPU-021 be used as a decorative finish for the LED profile itself at the top or bottom?
It should not be perceived as a standard plug or a component of the lighting system. NPU-021 is a decorative polyurethane overlay. If you need to close or finish a profile structurally, use elements designed for the specific LED system. The overlay can be placed nearby as decor, but it should not replace a technical part.
What matters more when choosing: the exact distance to the LED or the view from a normal vantage point?
Both parameters are needed, but the exact distance by itself guarantees nothing. Millimeters help to replicate the chosen position after fitting, while the decision is made based on the visual result and structural compatibility. First, find the working position of the template, then measure it and transfer it to the layout.