Article Contents:
- What makes a moulding professional
- A beautiful moulding and a project-ready moulding are not the same thing
- The first criterion is a stable SKU
- The second criterion is complete dimensions
- Why profile depth is critical
- The third criterion is the actual cross-section
- Why DWG increases a moulding's project readiness
- The fourth criterion is a real 3D model
- The model and DWG must belong to the same SKU
- The fifth criterion is the ability to get a sample
- How to use a sample professionally
- The sixth criterion is compatible system elements
- A ready-made corner element or a 45° cut
- Cutting
- Ready-made corner trim

In a catalog photo, two moldings can look almost identical. Both are white, both have a similar width, both look good in a wall frame. But in a real project, one easily passes through visualization, DWG, specification, and purchasing, while the other starts raising questions at the very first detail: the depth is unknown, the actual cross-section is unclear, there is no exact SKU, the 3D model is scaled, and on a repeat order no one is sure which profile was used.
Therefore, a professional molding is not the most expensive or the most complex profile.
A professional molding is a profile that can be carried through from catalog to installation without a break.
The working chain looks like this:
task → candidate profile → geometry check → SKU → DWG/3D → sample → detail check → APPROVED → linear footage → cutting → number of strips → order.
If uncertainty arises at any stage, the profile is not yet ready for the project.
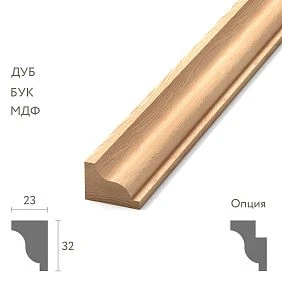
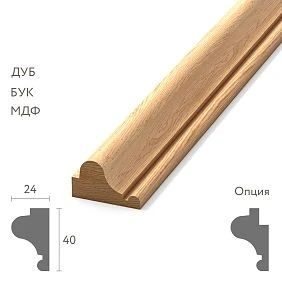
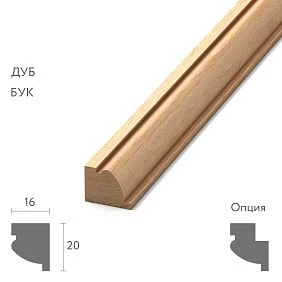

What makes a molding professional
The professionalism of a molding is determined not by its ornament or its price.
For an architectural or interior project, you need to know with certainty:
- SKU;
- the actual width;
- the depth;
- cross-section;
- the material;
- commercial length;
- associated elements;
- availability of DWG;
- availability of 3D;
- quantity to order.
A profile must exist not only as a beautiful picture.
It must be a real product that can be measured, placed into a scene at 1:1 scale, checked in a detail, added to a specification, and ordered again months later.
This is exactly what distinguishes a project-ready molding from a random decorative asset.




A beautiful molding and a project-ready molding are not the same thing
A beautiful profile may turn out to be inconvenient for the project.
For example, a designer finds a 45 mm wide molding. In the front preview it looks perfect: delicate relief, correct proportion, calm pattern.
But then it turns out:
- depth is not specified;
- there is no real SKU;
- the 3D model was downloaded from a third-party library;
- the model was scaled;
- it is unclear how to handle the corners;
- there is no data on the commercial length.
Visually, a solution exists.
Design project — it doesn't exist yet.
On the contrary, a simpler profile with a clear SKU, precise dimensions, DWG, 3D, and a sample can prove far stronger for a real project.
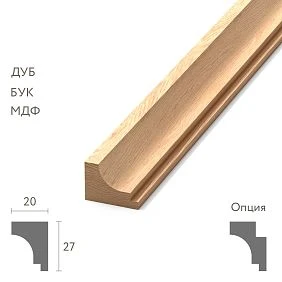
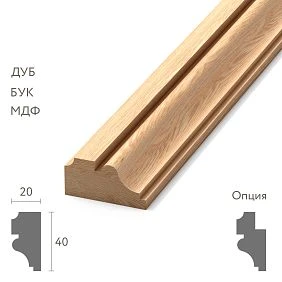
Our factory also produces:






The first criterion is a stable SKU
The project must not contain an item like:
"a molding roughly like this."
A specific SKU is required.
For STAVROS, the working combination should look like this:
STAVROS + SKU + project code.
For example:
ML-01 / STAVROS / specific SKU
The same SKU must pass through:
catalog → 3D → DWG → specification → order.
If the visualizer uses one profile, the architect specifies another, and the order assembler orders a third — the project already contains a contradiction.
A stable SKU becomes a common point between all participants.
Get Consultation
The second criterion is full dimensions
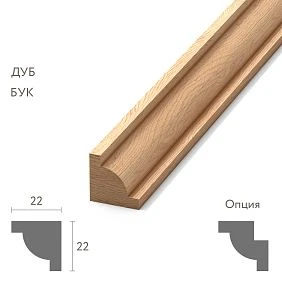
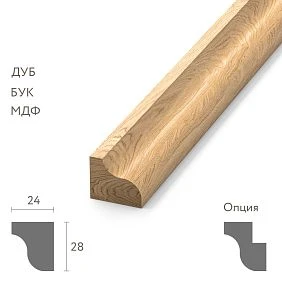
For molding, it is not enough to know only the width.
At minimum, the size is needed:
width × depth
For some profiles, additional parameters are important:
- separate steps;
- radii;
- groove depth;
- protruding elements;
- mounting plane.
Suppose two profiles have a width of 40 mm.
One protrudes 10 mm from the wall.
The other — by 24 mm.
In the frontal elevation they occupy the same band. In a real interior, their light and shadow and interaction with the door casing will be completely different.
Why profile depth is critical
Depth determines more than just visual mass.
It affects:
- shadow;
- the joint with the door casing;
- adjacency to the panel;
- adjacency to furniture;
- distance to the switch;
- installation geometry.
If the molding protrudes beyond the door casing, its termination near the door must be designed separately.
If the profile is deeper than the panel, a step appears.
If there is a built-in wardrobe nearby, the protrusion may end up on the facade or side panel.
Therefore, depth is a full-fledged design dimension.
The third criterion is the actual cross-section
A molding is a profile.
Without a cross-section, it cannot be considered fully described.
Especially if it interacts with:
- the panel;
- a door;
- furniture;
- the baseboard;
- a cornice;
- other trim.
The cross-section shows:
- where the maximum protrusion is;
- which part is adjacent to the wall;
- how the relief is structured;
- where the profile can be joined;
- how it will behave next to the adjacent material.
For a serious project, the cross-section matters more than a beautiful front preview.
Why DWG increases the design suitability of the molding
DWG allows you to move from a visual impression to geometry.
In it, you can check:
- actual cross-section;
- scale;
- an installation surface;
- outer dimensions;
- joint;
- position relative to adjacent parts.
If the molding needs to be integrated into boiserie or a panel system, DWG is especially useful.
For example, a 60 mm wide profile may visually appear to suit the panel. But the cross-section will show that it protrudes forward too much.
For design work, you can use DWG and STAVROS 3D models.
The fourth criterion is a real 3D model
3D solves a different problem.
It is needed to check:
- scale;
- relief;
- chiaroscuro;
- framed composition;
- adjacency to furniture;
- position next to the door;
- repeatability in typical rooms.
DWG and 3D do not replace each other.
DWG is responsible for geometry.
3D shows how the profile works in space.
A good 3D model must match the real SKU and be used at a 1:1 scale.
The model and the DWG must belong to the same SKU
The formula is simple:
SKU = 3D = DWG = SPEC
Prohibited:
- take the 3D of one molding;
- use the DWG of the second;
- buy the third.
Such a discrepancy often appears unnoticed.
For example, the visualizer changes the profile in the scene because another one looks better in the frame. The specification, however, remains old.
A month later, no one remembers which version was approved.
The solution is to link files by project code and SKU.
The fifth criterion is the ability to obtain a sample
A sample is especially useful when the profile needs to be repeated throughout the entire project.
With it, you can check:
- the actual width;
- the depth;
- relief;
- visual mass;
- surface quality;
- the intended finish color.
A physical sample quickly reveals what gets lost on a screen.
A profile that looks thin in a large render may appear massive on the wall.
And vice versa.
For such a check, you can use STAVROS product samples.
How to use a sample professionally
A sample is useful not just to show the client on a table.
It should be placed against a real detail:
- wall;
- a door casing;
- Panels;
- to the baseboard;
- to the furniture.
Then the true thickness becomes visible.
For example, next to the casing it immediately becomes clear whether the molding protrudes beyond it.
Next to the panel, you can see whether an unwanted step is formed.
Next to the baseboard — how well the profiles are matched in scale.
After checking, you can confirm:
ML-01 / SAMPLE APPROVED
This is better than the verbal formulation “this profile worked.”
The sixth criterion is compatible system elements
Professional molding rarely works alone.
Around it, you may need:
- corner elements;
- central overlays;
- decor for frames;
- cornice;
- plinth;
- related ornaments.
If the profile is part of a developed decorative system, the project becomes simpler.
For wall compositions, you can separately check Decor for Molding и Polyurethane wall decor.
A ready-made corner element or a 45° miter cut
These are different scenarios.
Miter cut
Suitable for smooth or geometric profiles if the corner can be neatly assembled from two segments.
Ready-made corner decor
Can be part of a composition.
It is useful if the frame is built not only on a line but also on a decorative accent.
But a ready-made corner is a separate product.
It must have:
- its own SKU;
- quantity;
- orientation;
- a separate line in the specification.
It cannot be considered merely part of the moulding's linear footage.
The seventh criterion — a clear product length
The architect needs the linear footage.
The specifier needs whole planks.
These are different values.
A project may require 40.4 linear meters.
But you cannot order 40.4 m if the product is supplied in fixed lengths.
Need to know:
- the length of one strip;
- actual linear footage;
- number of whole products;
- Cutting;
- remnants.
This is where the procurement math begins.
Why 40 linear meters is not an order
Suppose the project requires 40.4 m.
Next question:
what whole products will this length be assembled from?
Need to consider:
- commercial length;
- frame sections;
- corners;
- long continuous pieces;
- remainders;
- pattern repeat.
Two projects with the same 40.4 m may require a different number of planks.
If the first has many short sections, offcuts are used efficiently.
If the second requires long continuous elements, consumption is higher.
Cutting map as a sign of professional assembly
For a large project, it is useful to break down the linear footage by sections.
For example:
| Section | Length, mm | Code |
|---|---|---|
| A01 | 2440 | ML-01 |
| A02 | 1870 | ML-01 |
| A03 | 940 | ML-01 |
| A04 | 2310 | ML-01 |
Then these sections are distributed across whole planks.
This makes it visible:
- how much material is actually needed;
- which leftovers can be used;
- where an additional plank is required;
- which sections cannot be assembled from short offcuts.
A simple total linear footage does not show this.
The eighth criterion is profile repeatability
For a single room, you can choose a rare profile.
For a large project, repeatability becomes a separate requirement.
Especially for:
- hotels;
- restaurants;
- large apartments;
- private homes;
- serial premises;
- commercial interiors.
If a single SKU is used dozens of times, it is important that it can be identified and reordered.
Therefore, the project stores:
- manufacturer;
- SKU;
- URL;
- size;
- DWG;
- 3D;
- sample;
- the status.
Molding for one room and molding for a project site
In a single room, more unique solutions are acceptable.
On a site, what matters more is:
- unification;
- a limited pool of SKUs;
- repeatable nodes;
- predictable procurement;
- clear reserve.
If every standard number gets a new molding, the design may look varied, but the project becomes inconvenient to implement.
A professional system usually uses several profiles, each with a clear role.
Professional polyurethane moldings
Polyurethane molding is especially useful for paintable architectural systems.
When choosing, it is important to check not only the appearance, but also:
- geometry;
- cross-section;
- actual dimensions;
- associated elements;
- technical files;
- the ability to include the profile in the overall system.
The section is suitable for selection of polyurethane moldings.
When a smooth professional profile is needed
A smooth profile is especially convenient for:
- modern classics;
- geometric frames;
- calm wall compositions;
- monochrome surfaces;
- interiors where architecture matters more than ornament.
But "smooth" does not mean "simple."
With this type of molding, the following are critical:
- precise geometry;
- radii;
- depth;
- a clean joint;
- repeatability of frames.
It is on a smooth profile that a small error is often more noticeable, because it is not hidden by ornament.
When an ornamental profile is needed
Ornamental molding is suitable for:
- classical compositions;
- formal areas;
- historical motifs;
- developed decorative systems.
Here an additional parameter appears:
repeat.
The pattern must repeat and align predictably.
Therefore, ornamental profiles require more careful cutting.
Ornament repeat and consumption
Ornamental molding cannot be calculated by total length alone.
Need to consider:
- pattern repeat;
- centering;
- internal corners;
- external corners;
- acceptable cut points.
Imagine a frame where the central decorative motif must be positioned symmetrically.
If the molding is cut only by geometric length, the pattern may end with a random fragment.
Therefore, cutting becomes part of the composition.
Molding and casing
One of the most practical junctions is finishing the frame near the door.
Check:
- the depth of the molding;
- the depth of the casing;
- the distance between them;
- method of finishing the frame.
If the molding protrudes significantly beyond the casing, the junction may look heavy.
This is clearly visible:
- on the sample;
- in DWG;
- in the section;
- in 3D.
It is better to decide this before installation.
Molding and baseboard
The lower part of the frame should be connected to the baseboard.
Check:
- the height of the baseboard;
- the depth;
- lower offset of the frame;
- overall mass of the profiles.
If the molding is very thin and the baseboard is massive, the frame may seem randomly glued to the wall.
If both profiles are too active, the lower part of the wall becomes overloaded.
Here, the system matters, not individual products.
Molding and ceiling cornice
Polyurethane molding and cornice are better chosen not independently.
They participate in a single wall architecture.
Check:
- scale of the profiles;
- the depth;
- nature of the relief;
- degree of ornamentation;
- overall rhythm.
For systematic selection, you can use polyurethane molding and compare several categories in one composition.
Molding and wall panel
At the junction, it is necessary to determine:
- what protrudes forward;
- how the panel ends;
- whether a divider profile is needed;
- how the end face is finished;
- whether the thicknesses match.
This is especially important if the molding is applied over the panel or fits between its modules.
Without a cut, such a joint often looks simpler than it actually is.
Molding and built-in furniture
A professional design must decide in advance what happens to the frame near the cabinet.
Options are possible:
- the frame ends;
- continues behind the furniture;
- transitions onto the front;
- is replaced with a furniture profile.
It is too late to leave this issue to the installer.
It affects the symmetry of the wall and the amount of linear trim.
Molding and switches
A very practical check — electrical installation products.
A switch or socket should not accidentally land on the relief.
Check:
- free field;
- frame dimensions;
- vertical axes;
- distance to the molding;
- installation height.
The architectural grid and engineering services must be coordinated.
Why the profile cannot be changed with the Scale command
If a SKU has a size of 40 × 16 mm, the model cannot be stretched to 55 × 22 mm and still be considered the same product.
Such a product does not exist.
Visually, it may look convincing.
But the specification will already describe different geometry.
If a larger profile is needed, a different SKU is selected.
This is a fundamental rule for 3D models of moldings.
How to assign project status to a molding
Convenient scheme:
CANDIDATE
↓ dimension check
↓ DWG / 3D
↓ sample
SAMPLE APPROVED
↓ node check
APPROVED
Only after APPROVED the profile must be included in the final procurement specification.
This way the team can see what is still being compared and what is already frozen.
What to store in the professional molding line
| Field | Value |
|---|---|
| Project Code | ML-01 |
| Manufacturer | STAVROS |
| SKU | specific |
| Size | width × depth |
| Material | PU / wood / MDF |
| Product Length | actual |
| Sample | APPROVED |
| DWG | file |
| 3D | file |
| Quantity | Number of planks |
| URL | Product |
For a large project, you can add:
- revision;
- zone;
- the batch;
- reserve;
- comment on cutting.
How to document a molding replacement
You cannot simply change the SKU in Excel.
A new profile can change:
- frame grid;
- corners;
- thickness;
- visual mass;
- consumption;
- Cutting;
- DWG;
- 3D.
Therefore, the replacement is processed as:
OLD SKU → NEW SKU → REVISION
After that, the standard assemblies are rechecked.
If the profile is used in 20 rooms, the change must be applied across all related files.
When a professional profile is not needed
Not every project requires a complex system.
If the molding is used once in a small decorative area, there is no point in creating a separate master-spec infrastructure for it.
But even in this case, the basic parameters remain mandatory:
- the actual SKU;
- size;
- quantity;
- installation location.
A professional approach does not mean adding complexity for its own sake.
It means eliminating uncertainty where it could lead to an error.
Professional profile checklist before purchase
Before ordering, check:
- SKU exists;
- dimensions confirmed;
- depth is known;
- cross-section is verified;
- sample has been reviewed;
- DWG matches SKU;
- 3D matches the SKU;
- corners resolved;
- adjacent elements are coordinated;
- footage is calculated;
- cutting plan is done;
- the number of full planks has been determined;
- the reserve has been calculated;
- URL preserved;
- status —
APPROVED.
If uncertainty remains on at least several points, purchasing is premature.
How to buy professional moldings for a project
The commercial stage begins after the design review.
First, you need to determine which profile is actually ready for the project.
After that, you can proceed to polyurethane moldings, decor for moldings, polyurethane relief и wall decor.
If the project requires wood, you can check wooden moldings, cornices, and baseboards и Wooden trim.
Available for approval Product samples, and for design work — DWG and 3D models.
Working algorithm for choosing a professional molding
- define the task;
- select several candidate profiles;
- record the SKU;
- compare width and depth;
- check the cross-section;
- download DWG;
- download 3D;
- insert the real model into the scene;
- check the trims, panels, furniture, and skirting;
- resolve the corners;
- check the sample;
- assign
APPROVED; - calculate the linear footage;
- determine the commercial length;
- create a cutting plan;
- count the full planks;
- determine the reserve;
- add the item to the specification;
- Only after that, place your order.
The final logic remains simple:
profile → SKU → verification → APPROVED → DWG/3D → cutting → quantity → order.
Professional interior moldings are not a separate premium product class. They are moldings that withstand the entire project workflow without substituting geometry and without a gap between visualization, documentation, and procurement.