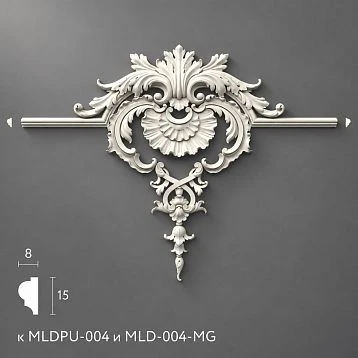
Article Contents:
- 1. What professional readiness of the decor means
- 2. Check the system at the joints
- 3. Separate the units of calculation right away
- 4. What data is needed about the straight profile
- 5. What else to check on piece moulding
- 6. The mounting plane changes the actual projection
- 7. Track left and right parts separately
- 8. Approve the sample together with the finish and the joint
- 9. Link the model, drawing, and product item
- 10. When to choose a standard product and when to order a new one
- 11. Which fields are needed in the working specification
- 12. How to convert 42.6 meters into the number of planks
- 13. How to prepare a delivery for multiple rooms
- 14. When an order can actually be sent to the supplier
- 15. How to receive decor on site
- 16. What to do about discrepancies during acceptance
- 17. Replacement and reordering require saved data
- 18. What must be ready before installation begins

Twenty-four decorative elements do not yet mean twelve finished pairs. If all the parts are left-hand, the quantity on the invoice may match the total number on the list, yet the intended composition cannot be assembled. This kind of error arises where the project, the order and the acceptance describe one set in different ways.
Professional stucco for interiors must be unambiguously defined at every stage of the work. The designer understands which profile is used, the specifier knows its article number and unit of supply, and the installer sees how the joint is constructed. On receipt, one can check not only the number of boxes but also whether their contents match the approved solution.
That is why the whole system is checked: linear mouldings, piece decor, finishing, fastening and quantity. Even a well-chosen moulding remains only part of the set until the adjacent elements and the method of their installation are agreed.
1. What professional readiness of decor means
In project work, the word "professional" is usefully understood through the verifiability of the solution. A high price or a complex ornament does not tell you whether the part will suit the chosen architrave, how many strips will be needed, or how to accept the delivered batch.
Each product needs a specific article number, material, size version and technical information. It must be clear what confirms the appearance, how the quantity is calculated, and what data will be retained for a possible repeat order.
Separate three questions: whether the designer's composition is satisfactory, whether it can be installed, and whether there is enough data for purchasing. A positive answer to the first does not settle the others. For example, a beautiful cornice may require changing the curtain recess, and a suitable moulding may require a different cutting plan because of the commercial length.
Catalog moldings from polyurethane provides the initial product data. The task of the project is to link them to a specific room and installation conditions. A general photograph of the interior does not replace this link.




2. Check the system at the joints
Assemble the skirting, wall frames, door surrounds, cornice and piece ornaments on a single elevation. First assess the distribution of visual weight: which lines are main, which support the composition, and where the accent lies.
Then mark the places where the products physically interact. This is where the difference between a consistent appearance and compatible geometry becomes apparent.
| System section | What to check in the project |
|---|---|
| Baseboard near the architrave | Protrusions, joint height, and end termination |
| Molding on the wall panel | Overall depth from the wall and edge position |
| Frame with overlay | Free field, support area, pattern direction |
| Cornice near the cabinet | Overhang, line termination, door opening |
| Socket with a light fixture | Center, lamp cup, and independent mounting |
Equally active profiles can compete with each other, but an identical pattern is not required. The system can combine a subdued molding and a more expressive cornice. Compatibility conditions are determined by the purpose of each element, not just by belonging to the same collection.
Each distinct joint requires its own section or drawing fragment. A proven assembly on a flat wall does not confirm the same result over a panel of a different thickness.
Our factory also produces:



3. Separate the units of calculation right away
Linear footage is described by the lengths of sections, then converted into whole product strips. Overlays, sockets, and capitals are counted as individual items or as kits provided by the supplier. These quantities must not be mixed in a single "quantity" column.
У of polyurethane moldings record both the cross-section and the length of the strip at the same time. The entry "18 moldings" is ambiguous: it could mean eighteen cut pieces, strips, or frames. The order needs the unit in which the product is actually shipped.
For piece-molded decor, check the composition of the item. A photo of a pair does not prove that both parts are sold as one set. The word "set" also requires clarification if it includes different elements.
Calculation polyurethane molding and count the ornaments separately, but link them to the same room and composition designations. Then changing one frame will allow you to find all affected order lines.
Get Consultation
4. What data is needed about a straight profile
The minimum entry includes the manufacturer, item code, material, cross-section and commercial length. In MLDPU-002 the product page lists dimensions of 22 × 11 × 2600 mm and the material "polyurethane". For this model, the designations A × C × L refer to the width, projection and length of the strip.
Check the letter designations against the product drawing. Dimensional diagrams may differ across categories. This is especially important for a cornice, where you need to understand the dimensions along the wall and ceiling rather than simply seeing two numbers.
A photograph does not clearly show the mounting surface and the edge construction. Therefore, examine the cross-section: where the profile rests on the base, which areas project further, and how it ends near another component.
The overall projection is not equal to the depth of the groove or the offset of individual relief parts. Both the maximum overall dimension and the local geometry in the joint area matter for compatibility. Matching widths of two mouldings does not yet make them interchangeable.
5. What else to check for piece mouldings
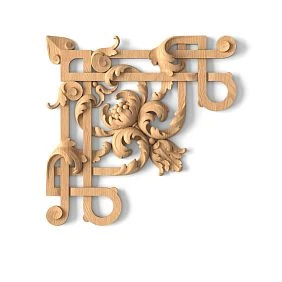
An overlay requires overall dimensions, projection, mounting surface and orientation. The geometric center of the rectangle enclosing the piece does not always coincide with the compositional axis of its pattern. The positioning should be shown on the drawing.
Corner element MLDPU-002U has dimensions of 172 × 172 × 13 mm; in the description it is linked to the MLDPU-002 profile. These overall dimensions must not be read as the length of a straight moulding that should be automatically subtracted from each side of the frame. The calculation depends on the actual joint location.
The difference between the overall projection of the corner and the straight strip also does not prove incompatibility: it is the mating areas that are compared. A drawing or a trial assembly of the corresponding parts is needed for verification.
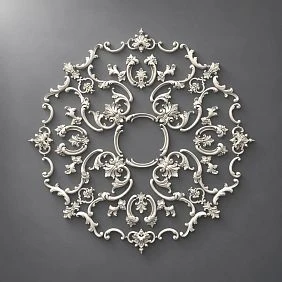
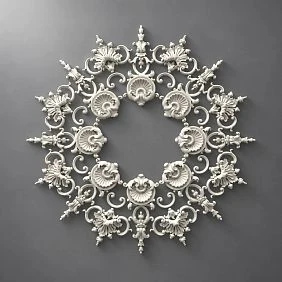
У ceiling rose Additionally, the position of the center, the size of the luminaire cup, and access to the mounting are agreed upon. A decorative rosette does not replace the luminaire suspension structure. In the schedule, the decorative item is separated from the equipment and its fasteners.
6. The mounting plane changes the actual projection
Let us consider a hypothetical assembly: a molding with an 11 mm projection is installed on a 12 mm thick panel. If the panel is in front of the original wall plane, the front point of the profile will be 23 mm from it. A casing bead projecting 18 mm from the same wall will be 5 mm behind this point.
This is not an assessment of a specific finished assembly, but an example of a dimensional check. The actual assembly layers and the edge height at the junction must also be taken into account. Comparing two numbers from the cards without a common reference plane gives an incomplete picture.
Check how the molding ends near the casing bead: with a straight end, a return, an independent termination, or a specified joint. An open end cannot be left unresolved simply because it is barely visible in the visualization.
У decoration for moldings the support area and the position relative to the profile are assessed. An overlay that overhangs the relief requires an agreed installation method. An arbitrary thick layer of adhesive must not replace a missing mounting surface.
7. Keep left and right parts separate
If the composition requires twelve mirrored pairs, the schedule must contain twelve left and twelve right elements. The total quantity of twenty-four is useful for verification but does not replace these two lines.
Keep the full manufacturer designation, including letter suffixes. Verify the orientation against the image and drawing: your own idea of which side is considered left may differ from the diagram of a specific product.
In a 3D model, mirroring is done quickly, but in procurement the mirrored object must correspond to a real product item. Rotating a left part does not always replace a right one: along with the direction of the pattern, the position of the top and bottom may change.
When assembling by room, distribute the pairs right away. If all the decor is put into one common box and counted only in total, a shortage of one orientation will be discovered on the last wall. The reserve must also account for side: a spare left-hand element is not a universal replacement for any section.
8. Approve the sample together with the finish and the joint
Physical verification is needed for those properties that cannot be confirmed by an image: scale in the room, the character of the shadow, the condition of the surface and the result of painting. For parts to be joined, a trial assembly is more useful than two samples inspected separately.
When choosing samples and stucco catalogs check the composition. A printed catalogue helps you work with the assortment, but it does not replace a fragment of the required profile. A material sample without the corresponding relief also answers only part of the questions.
The paint sample is made with the agreed preparation, the intended coating and the degree of gloss. If the profile must match the wall in colour, compare both surfaces side by side. For the joint, also check the area treated with the specified compound: it too contributes to the finished appearance.
After approval, sign the sample: item code, size, finish, date and version of the decision. Keep the information about the coating materials. Such a sample becomes the reference for execution and acceptance; a verbal "roughly like this" does not allow you to reliably distinguish the agreed result from a deviation.
9. Link the model, the drawing and the product item
A 3D model is needed to assess the product in the space of the room, a working drawing — for dimensions and the construction of joints. Both documents must relate to the selected item code and size version.
When downloading 3D models and DWG of stucco moldings, check the geometry after import. A unit error or crosswise stretching can change the cross-section, even though the object name remains the same. A 22 × 11 mm moulding after such an operation will no longer correspond to the product.
On the drawing, indicate which line the frame dimensions are referenced to: the outer edge, the inner edge, or the profile axis. Without this, changing the section width leads to the same drawing being interpreted differently by the designer and the installer.
Ensure a consistent link between files: design designation, item code, version. A note that the "visualization is approved" does not automatically mean that the installation details have been checked. Both matters must be closed before handover to purchasing, and for each unresolved area a clear record of the required check must be left.
10. When to choose a standard product and when to order a new one
First check whether the task can be solved with the ready-made range: a suitable profile, a different frame layout, or a combination of a straight strip and a separate ornament. A standard item code is easier to match against the product card, drawing, and previously received sample.
But a ready-made model should not be chosen at the cost of an unresolved joint or a noticeable distortion of the design intent. If a special section, non-standard ornament, or exact continuation of existing decor is required, prepare a brief for custom manufacturing.
Custom-made stucco requires agreement on dimensions, pattern, orientation, finish, quantity, and sample. Changes are recorded before the approved batch is launched; correcting the shape may also affect adjacent parts.
В in the answers to STAVROS questions it is stated that non-standard products made to individual designs and dimensional changes are accepted for production only when ordered as a batch. The minimum quantity and conditions for a specific job are clarified separately. It is not possible to promise the manufacture of a single arbitrary part based on a photograph alone.
11. Which fields are needed in a working specification
The specification must allow the project to be matched against the supplier's offer without guesswork. A single internal code may be used across all documents, but the full product designation must be kept alongside it.
| Field | What to fix |
|---|---|
| Design designation | For example, P-01; the same designation on the unfolded views |
| Manufacturer and item code | Full name, size variant and side |
| Category and material | Molding, corner, rosette; actual material |
| Dimensions | Dimensions, cross-section, projection, commercial length |
| Supply unit | Strip, piece or decoded set |
| Finishing | Delivery condition and reference to the approved color sample |
| Quantity | By cutting or piece-by-piece count; reserve separately |
| Placement | Rooms and corresponding drawings |
| Product link | Card for a specific item |
| Approval | Status, date and current version |
Do not mix the delivery condition with the future finishing result. Unpainted decor with on-site painting and a pre-painted finished product involve different scopes of work, even though their design color may be the same.
If the same model appears in several rooms, first save the distribution by room, then get the overall total. This way, when one area changes, you won't have to reconstruct the calculation for the entire project from memory.
12. How to convert 42.6 meters into the number of planks
Suppose the project schedule contains ten solid segments of 2400 mm and twelve of 1550 mm. A smooth profile with a commercial length of 2600 mm is used. All dimensions in this example are conditional and refer to finished segments that cannot be assembled from short parts.
| Segment group | Quantity | Net length | Cutting planks |
|---|---|---|---|
| 2400 mm each | 10 | 24 м | 10 |
| 1550 mm each | 12 | 18.6 m | 12 |
| Total | 22 | 42.6 m | 22 |
Dividing 42.6 by 2.6 and rounding up gives seventeen planks. However, even the two shortest pieces require 3100 mm. No pair from this list fits into a 2600 mm plank, so each piece will require a separate blank. That makes twenty-two planks up to the agreed reserve.
End trimming and kerf width are checked when drawing up the final cutting plan. For ornamental trim the repeat and the position of the pattern at the ends are additionally taken into account: a leftover of suitable length may not match the motif.
The reserve is allocated for possible replacement of specific parts. It differs from the inevitable cutting leftovers. Short offcuts will not replace a damaged long side, even if their total linear meters are formally sufficient. An automatic 10% does not solve this task.
13. How to prepare a delivery for several rooms
For a large project, a single total amount is not enough. Keep a distribution list: room, project designation, item code, finish and quantity. It links the overall purchase to the installation sequence.
Separately determine where the reserve is located. If spare planks are quietly included in one room's set, they may be cut as ordinary material. After that, the formal reserve in the documents will remain, but there will no longer be an actual reserve.
Agree on package labeling or prepare your own designations during distribution. Keep the factory labels and batch numbers if they are indicated. Several deliveries of the same item code should not be mixed before checking: if there is a discrepancy, it will be harder to establish which part of the order the items belong to.
The general invoice alone does not confirm that all goods were produced at the same time or have the same finished finish. For a visible continuous line, compare the delivered parts with each other and with the approved sample. This is especially useful when purchasing in parts and when combining factory painting with on-site finishing.
Before the first delivery, determine who is responsible for counting, who assesses the appearance, and who approves project changes. One person can perform several tasks, but the decision must remain documented. Otherwise, a verbal agreement during unloading risks turning into a substitution approval that the project author knows nothing about.
14. When the order can actually be handed over to the supplier
Before purchasing, check the readiness of each item. For disputed elements, keep a separate status so that the approved part of the project does not hide unresolved issues.
| Check | What result must be documented |
|---|---|
| Product defined | SKU, material, size version, orientation |
| Geometry verified | The unfolded view and required sections correspond to the product |
| Connections resolved | Compatibility confirmed by drawing or test joint |
| Appearance approved | Composition, sample and finish approved |
| Quantity is calculated | Cutting list, piece-by-piece count and separate reserve available |
| Delivery described | Units, completeness and surface condition specified |
| Documents up to date | One current version shared with project participants |
After that, you can You can buy ready-made stucco matching the Baroque style. Calculate the quantity: linear meters of cornices and moldings, number of rosettes, pilasters, consoles, corner elements. Add a ten to fifteen percent allowance for trimming. for the specific order composition. In the supplier's proposal, verify not only the total cost but also every line: plank length, side of parts, finish and quantity.
Availability, lead times and delivery terms are confirmed for the selected items. If a change is proposed, it is returned for approval before payment for the relevant order. Delivery of a "similar product" must not become a way to quietly close an unresolved project issue.
15. How to accept decor on site
Prepare an up-to-date schedule, drawings and approved samples before the goods arrive. Inspection requires a suitable surface on which the parts can be laid out without damaging protruding elements.
Start with the packaging and labelling, then check the contents. The number of boxes does not replace counting the items. For each line, check the article number, size variant, supply unit and number of parts. Count left and right variants separately.
Inspect the face surfaces, edges, thin areas of the ornament and end faces. Note visible chips, cracks, coating damage and other deviations from the agreed condition. For a painted batch, compare parts under the same lighting; different shadows on the relief should not automatically be taken as a difference in shade.
If the items are ordered unpainted, check specifically the agreed condition before finishing. The approved colour sample serves as a guide for future painting, not as a requirement for the colour of the blank received. This distinction helps separate a supply problem from an issue that should be resolved at the next stage of work.
Carry out dimensional control according to the same scheme used on the drawing. Include every group of article numbers and size variants in it according to the agreed inspection order. If a discrepancy is found, clarify how widespread it is within the relevant group.
Permissible deviations are taken from the manufacturer's technical data and the agreed order requirements. A universal tolerance "for any stucco" cannot be assigned here. If the criterion has not been defined in advance, it must be clarified rather than deciding on a self-invented figure.
16. What to do about discrepancies during acceptance
Separate the problems found: shortage, incorrect article number, different variant, damage or finish difference. Each case needs a clear subject of inspection. The wording "the decor is not suitable" does not explain which specific order line has not been fulfilled.
Record the line number, the expected and actual quantity or size. Take an overall photo of the part and a close-up of the problem area. For a dimensional discrepancy, it is useful to show the measurement together with the designation of the controlled edges. Keep the label and its link to the packaging or delivery.
Separate disputed items from those ready for installation. Until agreement is reached, do not cut, paint or attempt to hide the defect: altering the part will make comparison with its condition on receipt more difficult. Account for the remaining lines separately so that a problem with one article number does not get lost in the overall schedule.
Provide the supplier with the details for the specific line and agree on further actions. If a correction or replacement is proposed, assess the impact on appearance, joints, and installation time. After a decision is made, update the actual completeness: the shortage record does not disappear by itself after a verbal agreement.
17. Replacement and reordering require saved data
When replacing, compare the original and new item codes: cross-section, dimensions, commercial length, material, finish, and connecting sections. Check compatible decorations separately. It cannot be assumed that approval of a new molding automatically extends to the previous corners and end caps.
Changing the length of the strip requires new cutting. If 2000 mm is proposed instead of 2600 mm, a solid 2400 mm segment from the example considered will no longer be possible. A joint can only be added as a separate design decision, not as an inconspicuous order adjustment.
After the replacement is approved, update the model, working drawings, bill of materials, and order in the affected part. Mark the old version as unused. On site, a clear link must remain between the new product and its installation location.
For reordering, save the item code, selected size, delivery documents, finish details, and the control sample. Manufacturing capability or future availability must be confirmed again: a saved code makes searching easier but does not guarantee indefinite product availability. If the range has changed, a replacement check is required following the same procedure.
18. What must be ready before installation begins
Provide the installer with the current elevations, joint sections, cutting map, part distribution, and the approved sample. Separately identify reserve products and positions that cannot yet be used due to unresolved issues.
Check the actual dimensions of the base after finishing. A changed panel thickness, trim position, or ceiling height may require adjusting the detail, even if the supplied products fully match the order.
For a recurring complex joint, first approve the first assembled section. It is used to assess the position of the edges, the installation sequence, and the seam treatment. Product acceptance confirms the characteristics of the parts themselves; a trial installation shows how they work together on the actual base. These checks complement each other.
Materials for adhering to the base, joining ends and finishing seams are selected for the corresponding operation. Storage conditions, preparation and holding time before installation are specified for the specific product and the compounds used. Instructions for another material should not automatically become the rule for working with the selected moulding.
Questions about the project composition can be sent via the section for designers and architects STAVROS, attaching item codes, drawings and a description of unresolved joints. Discussing a specific detail is more productive than looking for compatibility based on the general appearance of the room.
Professional interior moulding is ready for installation when the agreed set has been received, checked and linked to the current drawings. Then on site all that remains is to execute a clear solution, and the selection, quantity and arrangement of joints no longer have to be determined anew.