

























Article Contents:
- Where to buy polyurethane ceiling medallions in Krasnodar
- How a soundproofed ceiling differs from a standard drywall ceiling
- Which documents are needed before selection and payment
- Why the size of a medallion does not indicate its load capacity
- How to avoid creating a rigid connection through vibration isolation
- How to align the medallion with the central chandelier
- CRPU-070: the most compact of the five, but not "load-free"
- CRPU-069: sixty-four parts require a detailed diagram
- RPU.VRS-001: eight parts instead of sixty-four
- CRPU-068: large pattern and a question about the kit
- CRPU-071: when a large model turns out to be unnecessary
- Five models on a 5.5 × 4.8 metre living room plan
- Approval matrix before ordering: what is known and what is missing
- How to prepare a specification for a single socket without unnecessary details
- Estimate: the cost of a socket is not the same as the price of the completed ceiling
- When changing the design is more sensible than looking for another adhesive
- How to receive the product and accept the kit in Krasnodar
- Mistakes that turn a purchase into a rework
- Finishing and fastening: why their purposes must be distinguished
- How to inspect a finished ceiling after approved installation
- Three different apartments — three different solutions
- Frequently asked questions about sockets and soundproofing
- Can a polyurethane socket be installed on such a ceiling at all?
- What should you request from STAVROS before purchasing?
- How does a soundproofing ceiling differ from acoustic panels?
- Why shouldn't you choose CRPU-070 just because of its smaller size?
- Which is more practical: CRPU-069 made of 64 parts or RPU.VRS-001 made of eight?
- Can a socket be reinforced with self-tapping screws directly to a reinforced concrete slab?
- Should a chandelier rest on the decorative composition?
- Can the installation cost be quoted before the ceiling design is chosen?
- What should I do if, after purchase, it turns out the model is not suitable?
- How do I order a socket with delivery to Krasnodar Krai?

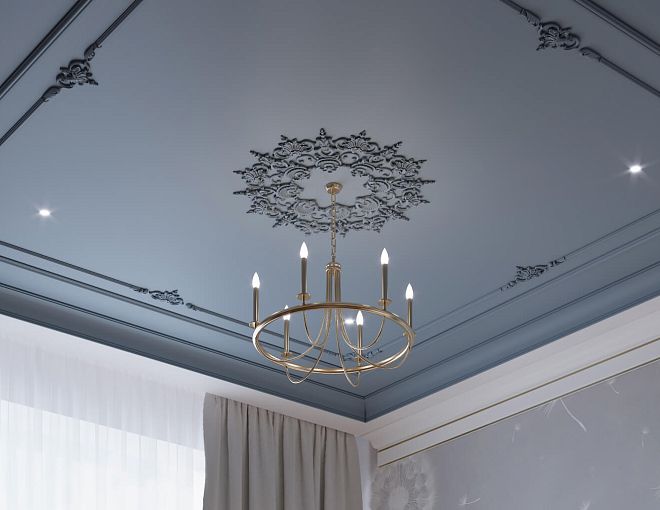
Imagine a living room in a new building in Krasnodar: the finishing is not yet complete, but the ceiling design has already been approved. Beneath the concrete slab there will be a separate frame on vibration-isolating hangers, with sound-absorbing material inside and several layers of sheet cladding below. A chandelier is planned in the center. The designer suggested framing it with a polyurethane ceiling medallion, but the installer asks not to order the decor until the weight of the composition and its mounting method are known. This is a reasonable pause: a mistake here could ruin not only the appearance of the ceiling but also the performance of the entire soundproofing structure.
Buy a ceiling medallion in Krasnodar by item code and catalog price. It is harder to determine whether additional load is permissible on a specific suspended ceiling. The product size of 765 or 1365 mm does not provide an answer; nor does the polyurethane thickness of 15–19 mm. What is needed is a ceiling design, the total weight of the selected set, a layout of its elements, a conclusion on permissible mounting, and a separate design detail for the chandelier. Until these are available, the purchase remains a preliminary choice rather than a ready-to-install solution.
This task has an important specific feature. A soundproofing ceiling is deliberately separated from load-bearing structures to reduce vibration transmission. Ill-considered fastening through the cladding to the slab or rigid contact between parts can alter the intended scheme. The decorative medallion is not a load-bearing element: it must not support the chandelier and cannot serve as a substitute for a mounting block. Below is a selection procedure that lets you first sort out the structure, then compare actual STAVROS products, and only after that place an order.





Where to buy polyurethane ceiling medallions in Krasnodar
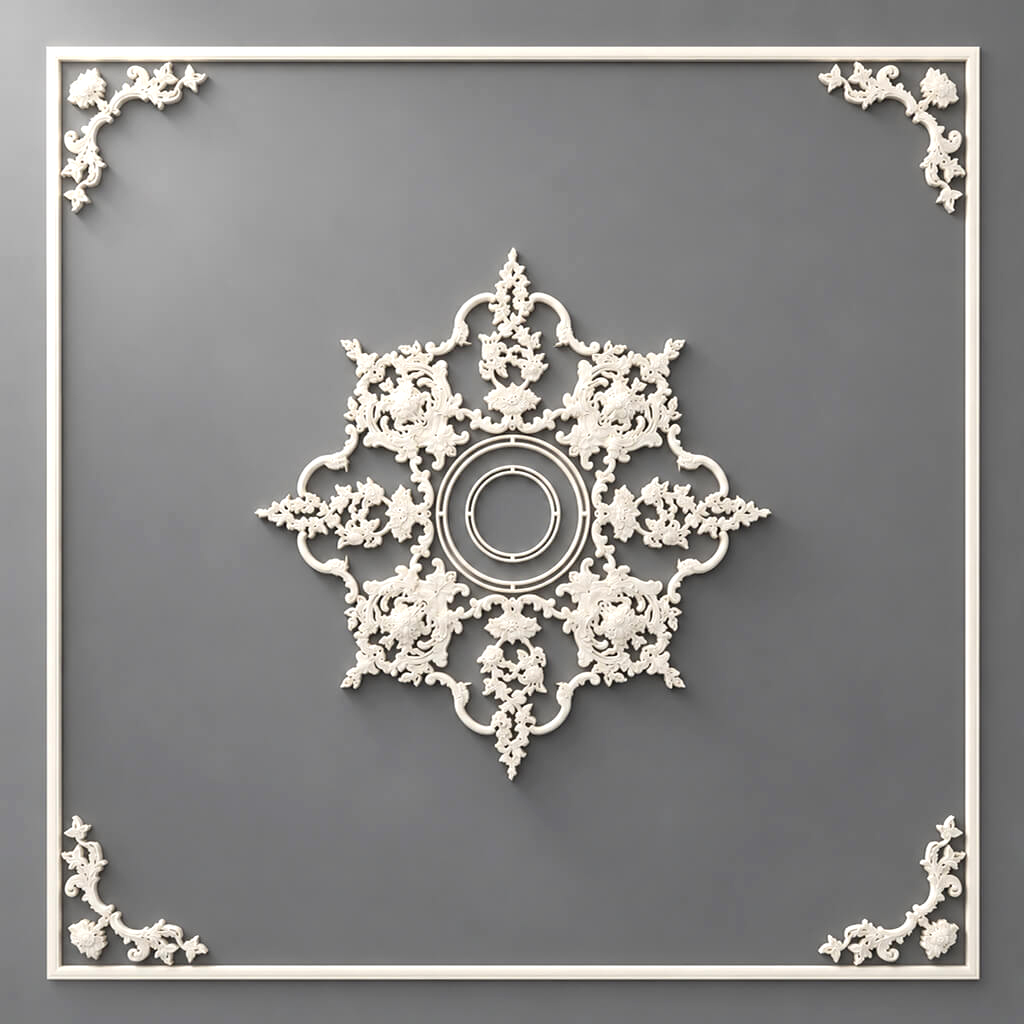
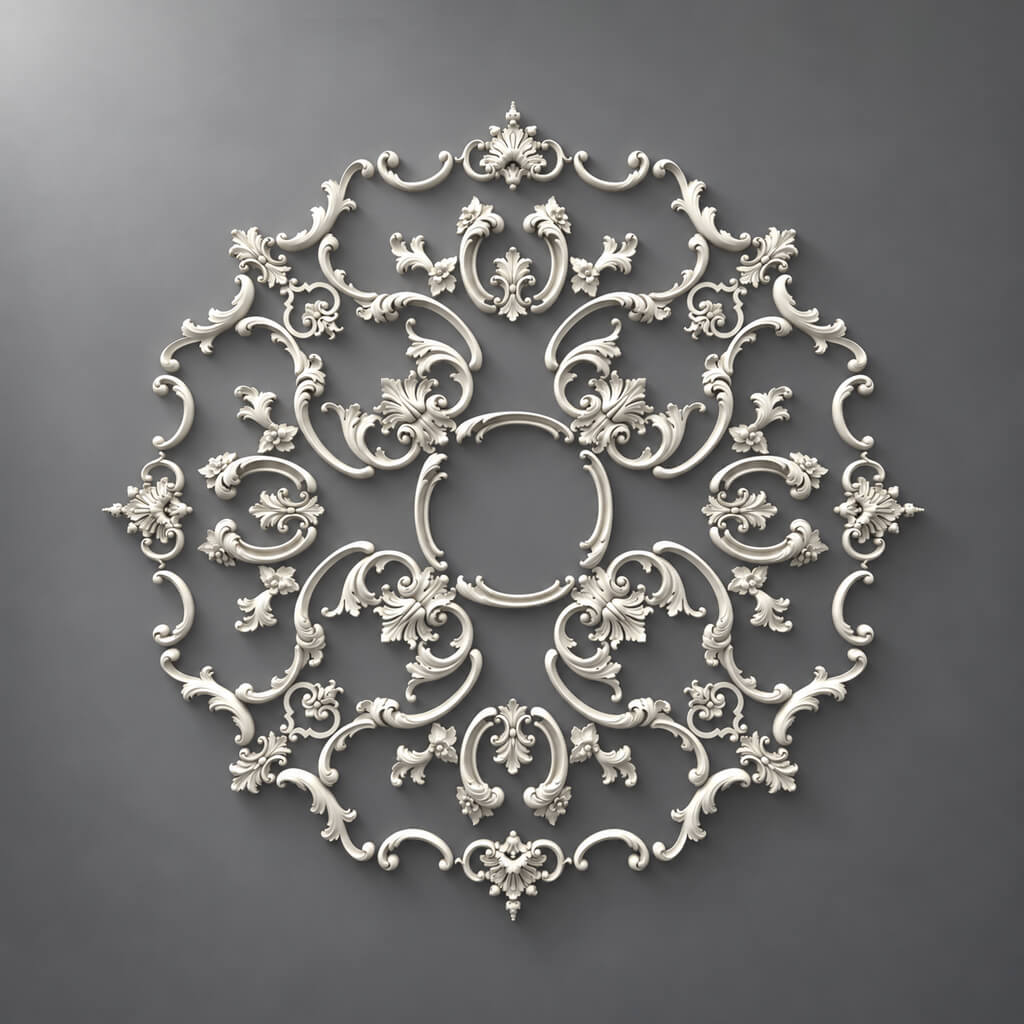
The STAVROS catalog features composite ceiling medallions with different geometries and numbers of parts. For the buyer, it is more convenient to first open Polyurethane ceiling rosettesto shortlist two or three suitable product codes and request the current product sheets, drawings and component schedules from the supplier. Comparing products by the ornament image alone is not enough: the outer square reflects neither the contact points of individual ceiling elements nor their total weight.
When the task is buy ceiling medallions in Krasnodar for an apartment with prepared sound insulation, the request to the seller should differ from an ordinary purchase of decor. It should specify the exact product code, the number of complete compositions, the delivery address, the need for a layout drawing of the modules and a request for the product weight. If the weight is not given in the public product sheet, that is no reason to derive it yourself from area or thickness. It is better to obtain a measured or documented value for the entire set.
It is useful to compare the selected medallion with the ceiling cup of the light fixture right away. In some compositions the centre is significantly open, while in others rings, leaves or separate overlays are located next to the cup. A product may look appropriate in style and fit in terms of dimensions, yet require a different layout because of the chandelier mounting. You must not shift the factory modules by eye instead of using an agreed drawing: the geometry of the pattern and the actual position of the mounting points will change.
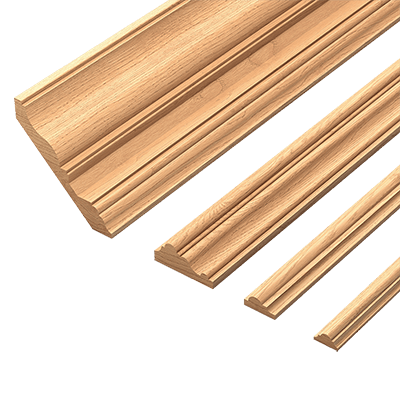
If at the same time you need Buy molding for other rooms, the order should be split by purpose. A medallion, a wall moulding and a separate decorative overlay are different items. The one specified in the catalogue Moldings does not automatically form a compatible structure for a sound-insulated ceiling; the decision on the mounting method is made by a specialist for the specific ceiling system.


How a sound-insulated ceiling differs from an ordinary plasterboard one
Ordinary plasterboard cladding primarily forms a flat surface and conceals utilities. A sound insulation system solves an additional task — reducing sound transmission through the floor slab and the structures connected to it. For this, a special hanger scheme, cladding of a certain mass and thickness, cavity filling, isolation of junctions and treatment of service line penetrations are used. The result depends on the system as a whole: a single layer of material does not replace a design and compliance with the details.
A vibration-isolating hanger is not just a metal fastening part. Its design includes an elastic element that participates in decoupling the frame from the load-bearing floor slab. During installation, the arrangement of hangers and profiles, the mass of all cladding layers and the loads specified by the design are taken into account. If an unverified structure is added after finishing, the original design scheme will change. One ceiling may have a reserve, another may not; this cannot be determined from a photograph.
Sound absorption and sound insulation also differ. Soft acoustic panels in a room primarily affect reflections and reverberation time within the space. A suspended sound-insulating ceiling with vibration isolation is designed to reduce sound transmission between rooms. Therefore, you cannot take an answer from an article about acoustic slats, apply it to a ceiling on vibration hangers, and consider both cases identical. Even a similar appearance conceals different constructions and load conditions.
For a decorative ceiling rose, this means three independent checks: whether the cladding and the designated assembly can hold its actual weight; whether such fastening is permitted by the ceiling system documentation; and whether unwanted rigid connections will appear that disrupt the chosen sound insulation scheme. A positive answer to the first question does not replace the other two. For example, a fastener may physically hold a small item, but the way it is installed will create contact with the base slab that the designer did not anticipate.
Our factory also produces:


What documents are needed before selection and payment
The most useful document is not a pretty lighting layout plan, but a working ceiling diagram. It should make it possible to establish where the profiles run, which cladding sheets were used, how they are connected, which hangers the frame is mounted on, and which loads have already been accounted for. If the ceiling was installed by a contractor, it is worth requesting the system designation and as-built documentation from them. For a new project, clarify the matter with the designer before the cladding is closed up.
It is convenient to hand over the set of initial information to the contractor as a single schedule. In addition to the room plan, you will need the thickness and number of sheet layers, the type and spacing of the frame, the hanger layout, the locations of embedded supports, the permissibility of additional items on the cladding, instructions for sealing service openings, the design of the chandelier assembly, and the requirements for maintaining vibration isolation. From STAVROS, you need the weight of the complete set, a drawing of the composition, information about the rear surface of the modules, and the available installation recommendations. A missing value is better left blank than filled in with a convenient guess.
| Data | What solution they are needed for | Who confirms |
|---|---|---|
| Design and composition of the sound-insulating ceiling | Understanding the load-bearing and decoupled parts | Ceiling designer or installer |
| Permissible additional loads | Ability to place this specific decor | Responsible for the ceiling system |
| Weight of the complete rosette set | Added weight calculation | Manufacturer or supplier per documents |
| Layout of all parts | Contact points and weight distribution | Supplier and installation organization |
| Chandelier mounting assembly | Independent transfer of its weight | Design engineer and electrical installer |
| Requirements for wire routing and penetrations | Maintaining access and sound insulation | Electrical installer and design engineer |
| Finishing method | Compatibility of coating and installation technology | Finisher and materials manufacturer |
The order of approval matters. First, documents are collected and unknown parameters are identified. Then the installation organization proposes a specific assembly or reports that the standard solution cannot be used. And only after that are the model, quantity, and delivery confirmed with the seller. If the installer asks to "take something lighter" without comparing weight and layout, this is not a technical conclusion but a reason to clarify the initial data.
Get Consultation
Why the size of a socket does not show its load
Imagine two sockets of almost the same width. The first is assembled from many small overlays, the second from eight large ones. Their outer contour may differ by just a millimeter, yet the number of contact points with the cladding, the location of heavy sections, and the installation sequence will be different. With identical geometry, different weights are also possible. Therefore, comparing only by width and thickness is suitable for evaluating the pattern, but not for calculating the fastening.
Nor should one multiply the overall dimensions 910 × 910 mm by the stated thickness of 15 mm and the density of a conventional polyurethane. The socket is not a solid slab: empty areas remain between the modules, and the pads themselves have uneven thickness and a complex rear side. Even knowing the total volume will not tell you exactly how the weight is distributed across the ceiling after installation. A genuine calculation must be based on the confirmed mass of all parts, the location of their contact areas, and the conditions of the selected fasteners.
At the same time, what matters is not only the total load but also its distribution. Twelve small pads may be located along several profiles, while a large element may concentrate the load in a small area. The load per square metre of ceiling and the force at a specific fastening point are different quantities. If a specialist is considering the permissible weight of the entire structure, they still need to know which profiles, sheets and assemblies take the impact from the decorative elements.
Technical limitations vary considerably between suspended ceiling manufacturers. A value stated in the data sheet of one system cannot be copied as a universal standard for all sound-insulated structures. Even if the document includes an allowance for luminaires or auxiliary elements, the conditions of its application must be checked: frame spacing, number of cladding layers, type of fastening and the designated design area. That is why this material does not contain an invented “permitted mass” for the socket for any ceiling.
How not to create a rigid connection through vibration isolation
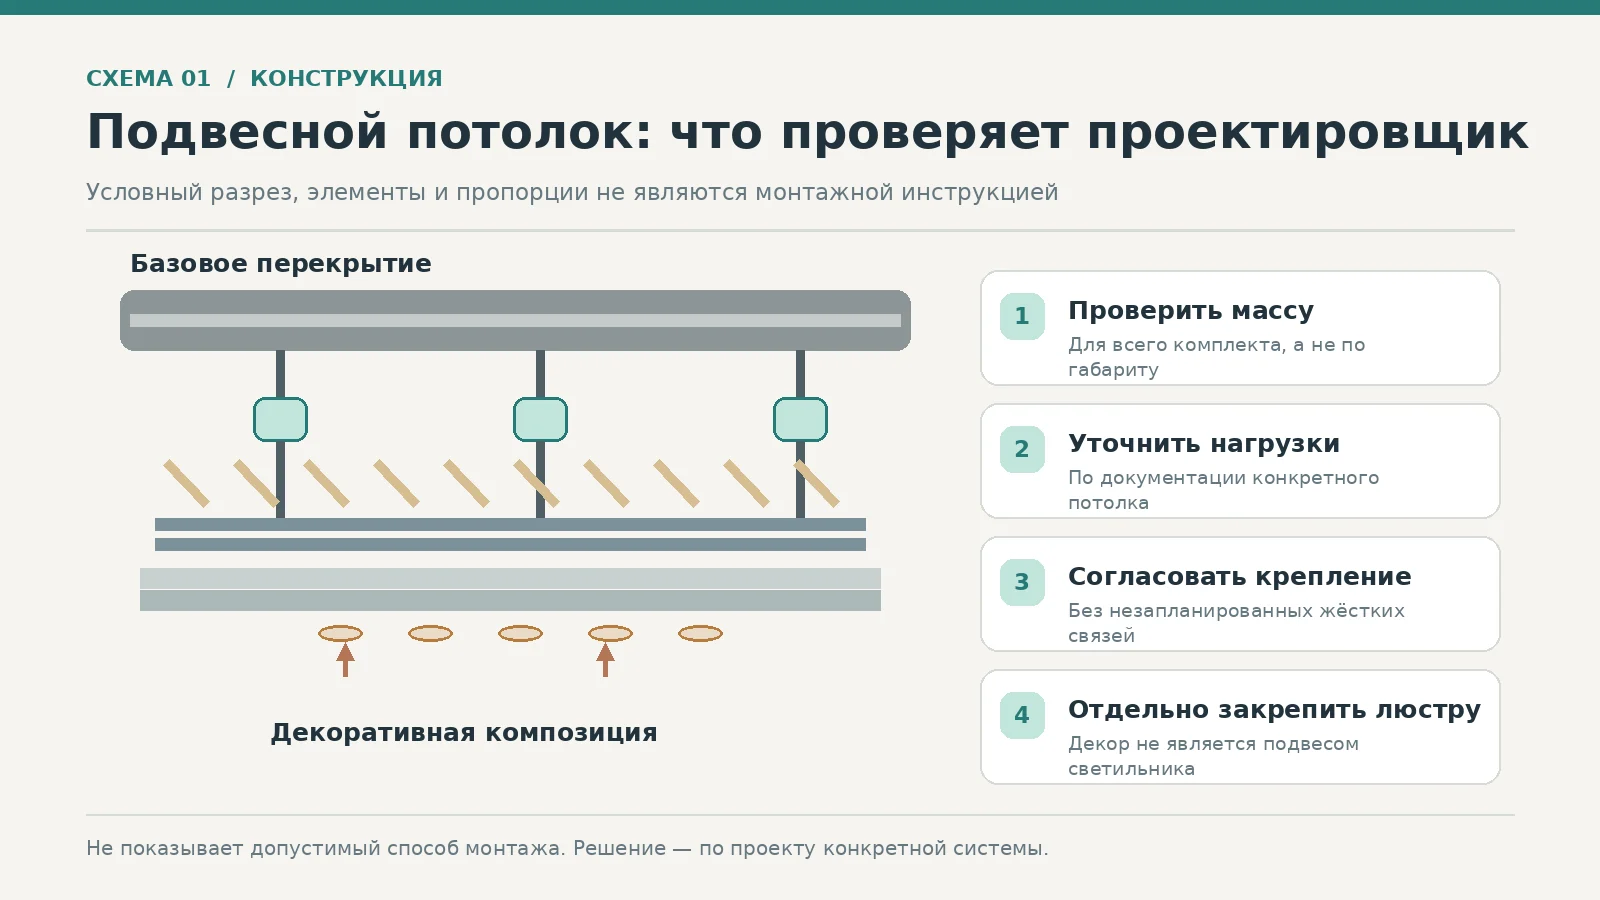
In a sound-insulated ceiling, the elastic elements specified by the design reduce the mechanical connection between the cladding and the floor slab. If these parts are additionally connected with rigid fasteners, a path for vibration transmission may appear. The installation of decor must not arbitrarily alter the assembly design. But the opposite extreme is also wrong: one cannot promise that gluing without screws is always safe. Adhesive has its own requirements for the substrate and design load; moreover, composite parts may cross construction gaps and junctions.
Particular attention should be paid to the central part of the ceiling where the luminaire is located. This is often where the chandelier suspension, electrical wiring and design-provided openings run. It would be a mistake to run the socket fastening through the sound-insulated ceiling to the reinforced concrete slab simply because “it is more reliable” without developing an isolated assembly. Likewise, the weight of the chandelier must not be transferred to the decorative pad or fixed to the luminaire body as if it were a load-bearing element.
It is useful to ask the designer to draw a section of the assembly. It should clearly show the base floor slab, hangers, profile frame, cladding, separate luminaire fastening, electrical penetrations and decorative elements. The drawing makes it possible to see possible contacts that are not visible in a normal view of the ceiling from below. The mere presence of a drawing does not mean it has been approved: it is important that it specifies permissible solutions verified by a specialist.
Where the project provides special elements for mounting equipment, they may be used only for their intended purpose and within the confirmed scheme. The chandelier mounting bar, embedded anchors and the fasteners of the decorative rosette should be considered separately. Homemade spacers, arbitrary extended anchors and unaccounted rigid bridges are not a universal way to preserve sound insulation. In the absence of an agreed solution, it is wiser to postpone the purchase and installation.
How to coordinate the rosette with the central chandelier
A chandelier has three independent parameters: mass and suspension method, the dimensions of the ceiling cup, and access to the electrical connections. The first determines the load-bearing assembly, the second the geometric compatibility with the ornament, and the third the serviceability. None of them should be derived automatically from the catalogue size of the ceiling rosette. First the method of attaching the luminaire to an acceptable structure is chosen, then it is checked whether there is still room for the decorative elements.
The upper cup may cover the centre of the composition, partially overlap the rings, or leave a gap between them. To check this, its actual outer dimension is needed, taking into account the fixing method. If the chandelier has already been purchased, the cup and the available range of its movement should be measured. If the luminaire is still being selected, the customer can include the minimum required free central area in the specification, but its exact size must be confirmed by a drawing of the rosette. It must not be assumed that any pattern with an open centre suits any shade or cup.
The electrical assembly should not be sealed under non-removable decor. Repair and inspection of the connections require access provided for by the regulations and the project. In a sound-insulating ceiling, the treatment of cable penetrations also plays a special role: the openings must not remain arbitrary gaps. The method of sealing and servicing is agreed taking into account the chosen ceiling system and the luminaire design, and not according to general advice from an article about stucco.
Finally, check the position of the chandelier centre relative to the actual room. The centre of the ceiling rectangle may not coincide with the desired lighting axis above the table. If the cup is offset, there may not be enough room around it for a symmetrical rosette. The adjustment must be made before purchase and marking out: once dozens of modules are fixed, correcting an error without traces on the painted cladding is far more difficult.
CRPU-070: the most compact of the five, but not "load-free"
Ceiling rosette CRPU-070 has external dimensions of 765 × 765 mm and a thickness of 18 mm as stated in the catalogue. As of 5 November 2026, the price of the product is 35,680 ₽. The manufacturer describes a composition of 24 parts of three types arranged radially. For a small living room this size may be more convenient than a metre-wide composition: more free space remains near the ceiling cornice. But in the case of a vibration-isolated ceiling, the main question is still not the distance to the wall.
Imagine that a designer chooses CRPU-070 as a "lightweight option" and proposes gluing all the parts directly onto the painted sheathing. Such a formulation takes into account neither the total mass of the products, nor the possible force during surface preparation, nor the compatibility of the adhesive with the specific primer and paint system. The correct next step is to request data on the mass of the entire set and show the installation layout to the person responsible for the ceiling. Only after that can it be discussed what part of the load and by what method may be transferred to the cladding, if such a method is permitted at all.
Small repeating elements provide more individual points for checking the fit. If the base has a level difference, a part may not fit along its entire edge; filling the difference with an arbitrary thick layer of adhesive is not permitted without the instructions of the adhesive manufacturer. The installer must check the evenness of the ceiling and plan the preparation before the final painting. Otherwise, after installation, individual rays of the pattern will begin to differ in height, and the correction will affect several elements at once.
Another practical subtlety is not to confuse the main set with its components. The order specifies a single CRPU-070, not 24 separate items of unknown configuration. If a damaged overlay needs to be replaced, its exact part number from the factory list will be required. At the same time, one must not automatically assume that a spare element can be installed with a different adhesive or different fasteners: the limitation is set by the ceiling design, not by the number of parts.
CRPU-069: sixty-four parts require a detailed diagram
У the ceiling socket CRPU-069 dimensions 910 × 910 × 15 mm, and the catalog price as of November 5, 2026 is 62,560 ₽. The composition includes 64 elements of fifteen types. The difference from CRPU-070 is noticeable not only in size: the pattern is more detailed, and the installation layout contains more positions to check. For a standard ready-made ceiling, this means more marking operations; for a sound-insulated system, the question of each permitted fastening area is added.
It may seem that many small overlays distribute the weight better. Sometimes such an assumption turns out to be close to reality, but it cannot be asserted based on the number of elements alone. The parts differ in shape, thickness of individual sections, and rear contact area. Moreover, the open central field does not necessarily coincide with the area where the designer permitted the installation of additional decor. A drawing will be required that shows the actual modules, not a conventional circle with a diameter of 910 mm.
It is necessary to check the pairs of mirrored elements, if they are present in the current specification, and the quantity of each position separately. Identical-looking leaves turned in different directions are not always interchangeable. A full-size paper template is especially useful for the installation organization: the manufacturer reports that it can be purchased separately. The template helps to mark out the ornament, but it does not confirm the load-bearing capacity of the cladding and is not an installation approval.
If the ceiling project is already closed and the profile locations are unknown, one should not try to reconstruct them by "tapping" and draw a conclusion about whether fastening is permissible. An as-built drawing should be obtained or a survey method agreed upon. If the finish needs adjustment, the work is best carried out before installing the chandelier and the final painting of the ceiling rose. This way, access to the center can be agreed without creating unnecessary cutouts near the electrical wiring.
RPU.VRS-001: eight parts instead of sixty-four
Ceiling rosette RPU.VRS-001 has dimensions of 911 × 911 × 18 mm and a price of 67,360 ₽ as of November 5, 2026. Its factory composition consists of eight modules: four NPU-507 and four NPU-508. When compared with CRPU-069, the outer size is almost the same, but the internal structure is completely different. Eight large parts create an openwork pattern with exposed ceiling areas between them.
For acceptance, this is convenient: it is easier to check the quantity of two types of overlays. For installation, the advantage is not obvious. A large part may have a complex-shaped rear base and require holding in a given position until the initial setting of the agreed compound is complete. Separately, it should be checked whether its contact area falls on a sheet joint, a technical opening, or an area where additional fastening is prohibited by the project. The presence of only eight elements does not exempt from such a check.
An illustrative example: one designer approved distributed fastening in certain cladding zones but did not permit loading it between the profiles. If a large overlay falls exactly on that area, reducing the number of modules does not solve the problem. It will be necessary to change the product selection, develop another approved assembly, or abandon the decorative composition. Moving a single NPU-507 to the nearest profile on your own is not allowed: the final pattern will no longer match the factory set.
It is also necessary to compare the orientation of the panels relative to the walls and the chandelier. In this model, four NPU-507 elements form the main axes, while four NPU-508 elements occupy the intermediate directions. If the chandelier's center is offset from the room's geometric center, the pattern may visually emphasize this offset. It is better to detect the problem during a to-scale layout, before payment and installation, than after the ceiling has been painted.
CRPU-068: a large pattern and a question about the component set
Ceiling rosette CRPU-068 measures 1325 × 1325 × 18 mm and costs 50,480 RUB as of November 5, 2026. In the catalog it is described as a modular composition of 72 elements of twelve types. In the previously verified open bill of materials, the per-item quantities added up to 68. Before purchasing, an up-to-date specification should be obtained from the seller: it is not possible to promise delivery of exactly 72 parts on the basis of a disputed description.
For a room with an area of about twenty-six square meters, such a product occupies a noticeable central zone. With good ceiling geometry, a large ornament can accentuate the chandelier. But for vibration-isolated cladding, its outer dimension does not indicate whether installation is permissible. Moreover, a wide layout potentially covers several sections of the frame, sheet joints, and engineering service points. The designer must see the full scheme, not just a circle drawn on the furniture plan.
In the commercial estimate, CRPU-068 is cheaper than CRPU-069 despite its larger size. This does not prove that the large model is more advantageous for a specific ceiling. The cost of developing the assembly, preparing the finish, and the labor intensity of distributing dozens of parts may turn out to be significant, and these expenses cannot be calculated by multiplying the product price by a conventional percentage. For comparison, request two separate proposals: one for the supply of the decorative set and one for performing permissible installation.
If a discrepancy is found in the bill of materials, it is useful to send the supplier a list of the disputed lines and ask for the exact quantity of each NPU. At acceptance, count not only the total number of elements but also each item separately. The risk is especially noticeable for mirrored parts: formally the total may match, while one right-hand element is missing and has been mistakenly replaced with a left-hand one. For a large composition, this can halt the installation of the entire central part.
CRPU-071: when the large model turns out to be excessive
The fifth comparison item is Ceiling rosette CRPU-071. The open catalog as of November 5, 2026 lists dimensions of 1365 × 1365 × 19 mm and a price of 72,880 RUB. This is an even larger decorative center than CRPU-068. The radial composition includes pronounced ring and floral motifs; therefore, a noticeable architectural frame appears around the chandelier. But a beautiful frame should not become a reason to redo an approved sound insulation system without a design.
For CRPU-071, it is especially important to check the combination of the composition's width with the clearance to the walls and the cornice. If the light fixture is located above the dining area rather than in the middle of the room, one edge of the ornament may come significantly closer to the cornice than the other. As a result, the large model will appear visually unbalanced. This is a design criterion for rejection; separately, there remains the technical one — the absence of a confirmed weight, an acceptable mounting scheme, or installation conditions for the specific cladding.
On a finished ceiling, you should not start by cutting out sections of the cladding to achieve the desired ornament. Changes to the sound insulation system may affect the frame, sealing, and cable passage points. The decision on such changes is made by the designer and the responsible installation organization. If they cannot confirm an acceptable assembly, it is preferable to choose a different design option or leave the center of the ceiling without molding than to risk the finish for a product with an eye-catching pattern.
The point of a product comparison is not to pick a winner by price or size. CRPU-070 has a smaller footprint; CRPU-069 offers a detailed pattern; RPU.VRS-001 has eight large parts; CRPU-068 and CRPU-071 require a wider field. None of these features on its own confirms compatibility with a vibration-isolated ceiling. You should buy only the complete set for which geometry, fastening, weight, documentation, and budget have all been resolved at the same time.
Five models on a 5.5 × 4.8 meter living room plan
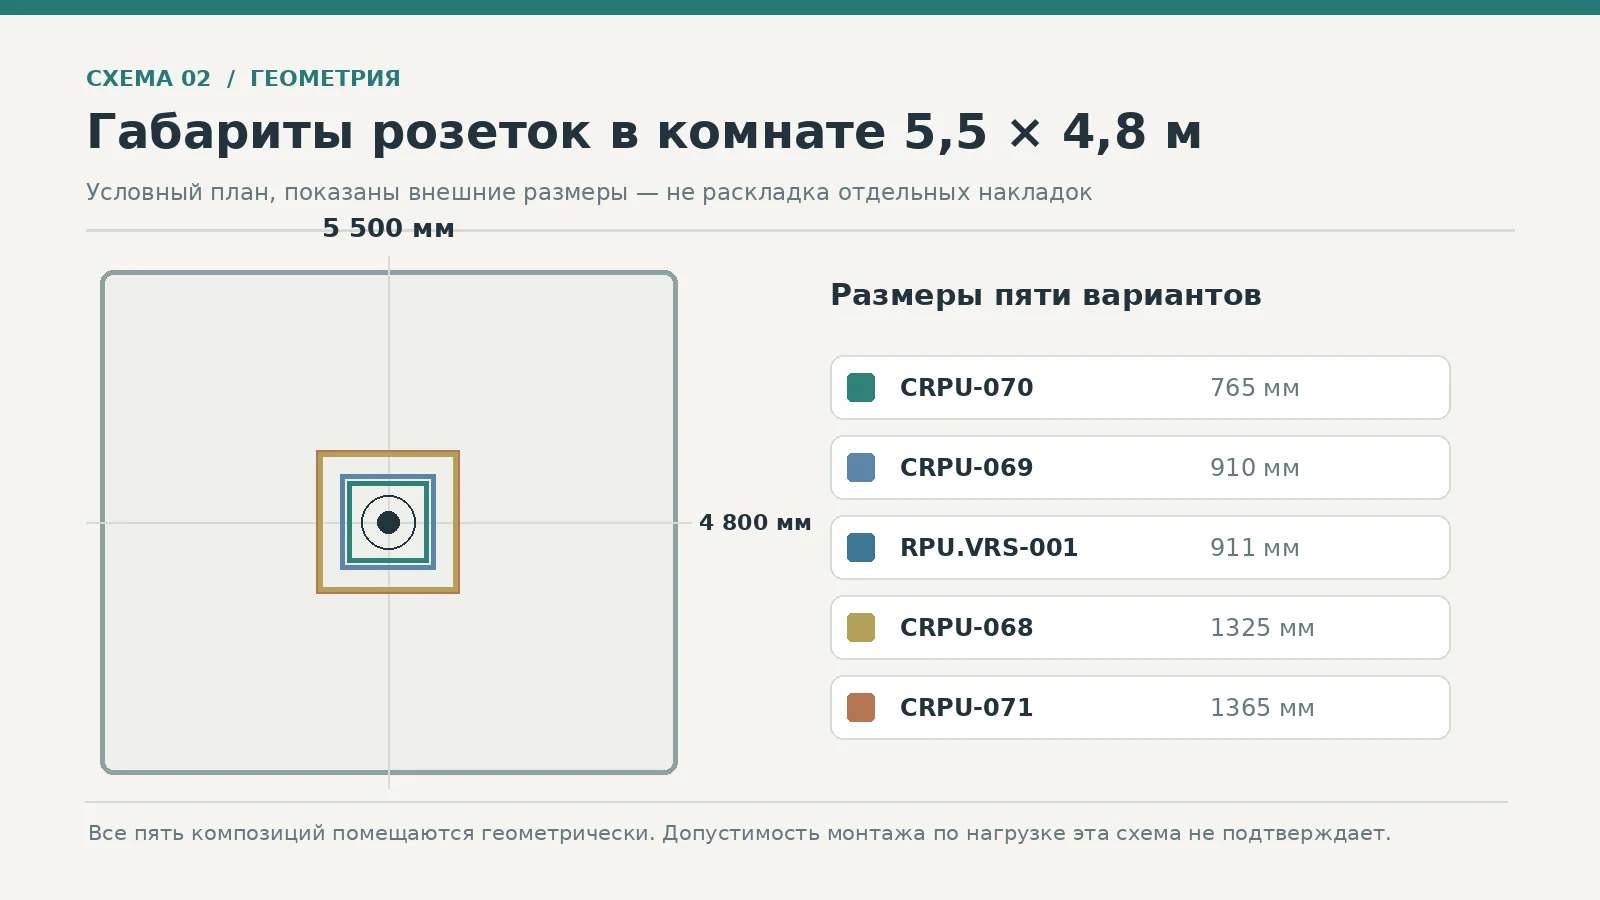
For a clear calculation, let's take a conventional living room 5.5 m wide and 4.8 m long. Assume the chandelier suspension point coincides with the geometric center of the ceiling. Then from the center to the nearest opposite walls along the short side is 2400 mm each. To compare the outer dimensions, it is enough to subtract half the size of each model. This is geometry only: the actual position of all overlays, the thickness of the cornice finish, and the feasibility of installation are determined separately.
| Model | Outer dimension | Half the size | From center to wall 2400 mm: remaining |
|---|---|---|---|
| CRPU-070 | 765 мм | 382.5 mm | 2017.5 mm |
| CRPU-069 | 910 мм | 455 мм | 1945 мм |
| RPU.VRS-001 | 911 мм | 455.5 mm | 1944.5 mm |
| CRPU-068 | 1325 мм | 662.5 mm | 1737.5 mm |
| CRPU-071 | 1365 мм | 682.5 mm | 1717.5 mm |
As you can see, all five products fit inside a simple rectangle of the room. But such a conclusion says practically nothing about whether installation on a sound-insulated ceiling is permissible. Even the smallest rosette may run into problems with an uncalculated load or improper fastening. On the other hand, a large composition does not automatically become prohibited just because of its size: the decision depends on the project, the actual weight, and the developed installation assembly.
Now let's make a small change: the chandelier is 400 mm closer to the long wall. The minimum distance along the short side becomes 2000 mm, and the geometric remainder for CRPU-071 decreases to 1317.5 mm. From the standpoint of the walls, there is still enough space. But within this zone there may be a ceiling outlet, a suspension point, the boundary of a technical area, or the junction of different sheets. Therefore, the room measurement should be supplemented with a ceiling structure diagram, rather than trying to solve an engineering problem with a single subtraction.
It is useful to produce two different layouts. On the design layout, show the actual contours of the ornament and the chandelier. On the engineering layout, show the profiles, suspension points, provided embedded parts, permissible fastening zones, and utility passages. After overlaying the drawings, it will become clear where coordination is required and which of the five options are even worth discussing. While the weight data is unknown, all models remain marked "data required" in the technical feasibility table.
Pre-order approval matrix: what is known and what is missing

It is convenient for the buyer to consolidate the findings into a short matrix without mixing decorative and technical criteria. At first glance, the model may fit the room size but lack an approved installation assembly. Such an option should not be marked as "suitable with reservations": the correct status is "data required". This is not a formality but a way to avoid paying for a product that then cannot be installed without reworking the ceiling.
| Criterion | CRPU-070 | CRPU-069 | RPU.VRS-001 | CRPU-068 | CRPU-071 |
|---|---|---|---|---|---|
| Fits in a study room 5.5 × 4.8 m | Yes, by dimensions | Yes, by dimensions | Yes, by dimensions | Yes, by dimensions | Yes, by dimensions |
| Weight of the complete set for calculation | request | request | request | request | request |
| Approved mounting method for this system | Approve | Approve | Approve | Approve | Approve |
| Independent chandelier assembly | Check | Check | Check | Check | Check |
| Completeness confirmed against the bill of materials | Check | Check | Check | Clarify the 72/68 difference | Check |
| Final status pending engineering review | Data required | Data required | Data required | Data required | Data required |
The status "approved" appears only after verification of specific source documents. "Not suitable" means either physical incompatibility with the luminaire's position, or the absence of a technically acceptable solution, or the impossibility of maintaining the ceiling requirements at reasonable cost. If a specialist proposes installation that modifies an already completed structure, the customer must receive a separate list of works and assess the consequences for sound insulation, rather than accepting such a change as a minor installation adjustment.
The matrix is also helpful when talking to the seller. The supplier is responsible for the facts about the product: dimensions, completeness, weight, availability of drawings, and delivery terms. The designer confirms the admissibility of installation on a specific system. The finisher is responsible for surface preparation and material compatibility, and the electrician for mounting and connecting the luminaire. One should not ask an online store manager for a conclusion about the load-bearing capacity of a ceiling they have never seen.
How to prepare a specification for a single socket without unnecessary details
A good request begins with the name of the main product: for example, "one complete set CRPU-069". Next, record the dimensions from the official product card, the confirmed price, the quantity, and the list of modules according to the factory bill of materials. If the installation template is sold separately, its availability and cost are listed on a separate line. NPU trims that are already included in the main set should not be added to the cart a second time: this easily results in a double quantity of goods without anyone noticing until acceptance.
In the specification, it is useful to provide columns for "document received", "weight confirmed", "mounting unit approved", and "ceiling solution". They do not replace the technical design, but they show the state of the procurement. If there is no answer in any column, the product can be viewed visually, but it is still too early to approve it for payment as a ready solution. This is especially important for large decor, where an erroneous purchase complicates storage and increases the risk of damage during re-transportation.
| Item to order | What is specified | Status in the training example |
|---|---|---|
| Main product | One specific SKU out of five | Selection not yet confirmed |
| Number of complete sets | 1 set per living room | Approximately 1 |
| Factory configuration | Each NPU item and quantity | Request current bill of materials |
| Product weight | Confirmed value for the complete set | Unknown |
| Layout template | Availability and separate price | Clarify |
| Mounting method | Approved assembly and materials | Not specified |
| Delivery and acceptance | Address, cargo units, terms | Request a quote |
An incomplete specification often creates the illusion of readiness. It may contain an item code, a price and an attractive image, but lack weight and a diagram. With such a document, buying decor for an ordinary store is possible, but handing it over to an installation crew without approval is risky. The professional sequence is the reverse: first, technical feasibility is confirmed, then from two or three suitable models the desired pattern is selected and the final order composition is fixed.
Estimate: the cost of a socket is not equal to the price of a completed ceiling
In the official catalogue as of 5 November 2026, the five products under consideration cost from 35,680 to 72,880 ₽. These amounts relate to the sockets themselves and do not include installation, finishing, possible reworking of the ceiling system and delivery. For the calculation, two independent parts need to be formed: the commercial cost of the selected product and the cost of preparing an acceptable installation solution. They are combined only after the scope of work is clear.
| Model | Price of one set as of 05.11.2026 | Additionally, per the confirmed estimate |
|---|---|---|
| CRPU-070 | 35 680 ₽ | Documentation, installation, finishing, delivery |
| CRPU-069 | 62 560 ₽ | Documentation, installation, finishing, delivery |
| RPU.VRS-001 | 67 360 ₽ | Documentation, installation, finishing, delivery |
| CRPU-068 | 50 480 ₽ | Documentation, package clarification, installation, delivery |
| CRPU-071 | 72 880 ₽ | Documentation, installation, finishing, delivery |
For clarity, two cost logics can be compared. In the first, the ceiling system is still being designed: the specialist provides for an acceptable assembly point in advance, and the sheathing and finishing work is carried out with the future socket in mind. In the second, the ceiling is already finished and painted, but the design did not provide for additional decor. Then an inspection, possible adjustment of the engineering solution, protection of the room, local restoration of the finish, and an additional visit by the installers arise. This is not grounds to automatically consider the second option more expensive by a certain percentage; different sites and different solutions require separate estimates.
Ask contractors to state the cost of design verification, surface preparation, approved materials, fastening of each module, treatment of junction points, painting, and cleaning. Transport, insurance, and lifting to the floor should be counted separately if they are paid for separately. The absence of a price in the table means there is no confirmed commercial information, not that the work is free. Nor should the cost of the socket be entered in the "turnkey installation" column: this would hide the real costs and make comparison of proposals meaningless.
Sometimes, based on the calculation results, it turns out that for the existing ceiling it is better to abandon additional moulding altogether. Such a decision saves not only the price of the product but also intervention in a sound-insulation structure that is in working order. If the designer still needs an accent near the chandelier, an alternative method of decoration that does not require unverified fastening can be discussed. Its admissibility must also be confirmed by the design, not assumed from the apparent lightness of the item.
When it is more sensible to change the design than to look for another adhesive
Let us imagine that the ceiling has already been closed with two layers of sheet sheathing and has passed sound-insulation acceptance. After that, the customer chooses a socket, and the installer reports that the fastening points are unknown. In such a situation, one should not start selecting the "strongest adhesive". The strength of the bond to a painted surface is not equal to the strength of the entire system: the load from the decorative element is transmitted further, through the finish, the sheets, the frame, and the hangers. If this path has not been verified, changing the adhesive will not fix the original gap.
The project has several reasonable paths forward. The first is to obtain the missing documentation and approve the installation without changing the structural scheme. The second is, if technically possible, to order a separate design solution and carry out the work under the supervision of a responsible specialist. The third is to revise the decorative composition or abandon it, keeping the approved ceiling. Which path is more advantageous depends on the stage of renovation, the cost of rework, and the importance of the decorative result.
Replacing model CRPU-071 with CRPU-070 cannot be considered automatically sufficient. A smaller size reduces the area occupied but does not prove the suitability of the fastening while the weight and permissible loads are unknown. Similarly, switching from CRPU-069 to RPU.VRS-001 changes the layout of the modules but does not mean a reduction in weight. Even a change of colour and finish does not affect the fundamental problem: the absence of an approved fastening assembly.
If the ceiling is only being designed, it is better to provide for the possibility of installing decorative elements in advance. Then the fastening points, the location of the chandelier, engineering penetrations, and the future finish can be agreed before the frame is installed. But even at this stage, one cannot simply add a backing or a rigid connection on one's own initiative. All changes are verified with regard to the sound-insulation characteristics and the adopted construction.
How to receive the product and accept the set in Krasnodar
When placing an order, it is useful to specify not only the address in Krasnodar, but also the actual handover location: warehouse, apartment, construction site, or contractor's premises. For modular sockets, this affects how records are organized. If the order arrives at a construction site where finishers and electricians are working simultaneously, the boxes must be marked with the article number, room number, and the person responsible for acceptance. Do not distribute various decorative parts across the site before the complete set has been checked.
Delivery terms to Krasnodar, Armavir, or Novorossiysk must be calculated based on the seller's and carrier's offer. Official product pages mention Contact us to confirm shipping to your destination., but the timing for a specific route, the number of cargo units, and the final rate depend on the order. You cannot promise that all items are in stock or a specific delivery date simply because the product is listed in the catalog. If installation depends on a specific delivery, this condition should be separately recorded when agreeing on the work schedule.
Upon receipt, check the outer packaging and markings, verify the main article number, the number of units, and the accompanying documents. Then, using the factory list, recount the elements of each type. Separately inspect the thin leaves, curls, and protruding parts of the overlays. Damage and shortages must be documented at acceptance and the procedure for contacting the supplier must be agreed upon. Do not attempt to assemble a composition from randomly found substitutes without confirming that they are compatible.
After delivery, store the parts in accordance with the manufacturer's recommendations, protecting them from mechanical damage and contamination. Do not stack heavy materials on top of the thin relief, and do not hand the set over to the installation crew without an acceptance report. If technical approval has not yet been completed, the storage room and the terms for return or exchange should be clarified in advance. It happens that the goods are already on site, and only after that does the designer report that the required installation method cannot be approved.
Mistakes that turn a purchase into a rework
Order without a ceiling design. The price and size of the model are known, but it is not known where its load should be transferred. As a result, the decor ends up in the warehouse while the contractors determine whether installation is permissible. Prevention is simple: approve the base structure before payment, not after delivery.
Calculating weight by the outer square. The 910 × 910 mm dimension is mistakenly perceived as the area of a solid polyurethane slab. For a modular socket, this approach provides neither mass nor load distribution. Confirmed data for the complete set and the layout of each element are required.
Mounting a chandelier through a decorative socket. The finishing overlay is not designed to bear the weight of the light fixture. With this approach, both the reliability of the suspension and access to the electrical junction can be compromised. The chandelier suspension should be designed independently, regardless of the decor.
Rigid connection to the base floor slab without approval. The desire to "make it stronger" can create a mechanical connection that disrupts the intended vibration isolation. The solution must be developed and confirmed by the specialist responsible for the sound insulation system, not by a random installer.
Choosing adhesive based on advice for a standard ceiling. The adhesive may be compatible with polyurethane, but this does not confirm compatibility with the specific painted cladding and design load. The entire material chain and ceiling application conditions must be verified.
Installation along the outer contour instead of the module layout. The square outlined on the drawing does not show where the parts will actually contact the ceiling. As a result, fasteners may end up on an unintended area, and individual elements may block access to the central junction.
Ordering based only on the sum of parts. If 72 elements are declared but the factory bill of materials does not match, an arithmetic total is not enough. Each NPU must be verified, including mirrored pairs, before the set is released for work. For CRPU-068 this is especially relevant due to the discrepancy identified in the public description.
Hidden budget for restoring the finish. The contractor quoted the price for gluing, but did not include protection of the premises, correction of painting, design approval, and additional acceptance. As a result, the price of the work increases after installation. Separate line items in the estimate allow this difference to be seen in advance.
Finishing and fastening: why their purposes must be distinguished
Even after a positive engineering opinion, the finishing part of the work remains. The polyurethane overlay must fit against the prepared surface; its back side and the ceiling coating must be compatible with the selected mounting system. STAVROS general recommendations discuss in detail, what to glue polyurethane molding with, but such an overview by itself is not permission to install an arbitrary load on the sound-insulated cladding. First the ceiling assembly is agreed, then materials are selected for the specific finish.
A finished ceiling may have several layers of primer and paint. If one of them is poorly bonded to the substrate, the decorative element will hold no more firmly than the weak layer. The choice of mounting compound does not eliminate the need to check the condition of the surface. A specialist determines whether local removal of the finish is needed, what preparation is permitted by the project, and how to then restore the coating. Arbitrarily sanding or wetting the sound-insulation cladding is also inadvisable: some systems impose requirements on joint treatment and finishing materials.
Grouting the seams between stucco modules relates to the decorative result. Sealing the sound-insulation structure junctions specified by the project is a separate engineering operation. The two compounds may look similar but perform completely different functions. A special junction must not be replaced with ordinary finishing putty merely because the gap became invisible after painting. In the work schedule, these operations are best listed as separate line items and assigned to the appropriate contractors.
It is useful to provide for a trial layout on a protected horizontal surface. It helps to see the turns of the elements, the outline of the central field, and the position of the chandelier cup without applying force to the ceiling. For CRPU-069 this is especially appropriate due to the large number of elements, and for RPU.VRS-001 due to the size of the individual overlays. But even a successful dry assembly does not confirm that the fastening is correct: it tests the pattern, not the load-bearing capacity of the ceiling.
If the purpose of the renovation is primarily to improve the sound inside the room, it is worth rechecking the problem statement. In the STAVROS article on ceiling sockets with acoustic panels a different type of finish is considered. Here, however, the subject is the transfer of load to a vibration-isolated system. Mixing these scenarios often leads to the decorative assembly being approved according to someone else's instructions. It is more correct to first name the structure without generalizations, and then choose a compatible solution.
At the end of the finishing stage, it is worth keeping photographs of the markings and a signed diagram of the module layout in the apartment documentation. When servicing the chandelier a few years later, they will help to understand where the decorative cover ends, how the electrical unit is positioned, and which changes cannot be made without verification. This is not a replacement for the as-built design, but a useful addition for future renovation. If there is no approval, a neat folder of photographs does not make the installation permissible — the decision still needs to be obtained in advance.
How to check a finished ceiling after approved installation
Control does not end at the moment the last element is glued on. The working documentation must retain confirmation that the chosen technology was approved and that the materials and arrangement of parts specified were actually used on site. Acceptance of the decorative result and acceptance of the sound insulation system are different tasks. A neat rosette pattern does not prove that acoustic characteristics have been preserved; the absence of visible cracks does not prove the reliability of hidden fastenings.
In the finishing work report, it is useful to record the actual product code, the location of the composition, the quality of the module joints, the absence of visible damage, and the condition of the paintwork. The accessibility of the specified electrical connections and the possibility of servicing the chandelier are checked separately. If the cladding was opened for installation, the ceiling system specialist must confirm that the relevant units have been restored. Covered service gaps, accidental holes, and unplanned fastenings cannot be considered insignificant just because they are not visible after finishing.
Comparing sound insulation "by ear" before and after installation in domestic conditions is unreliable. The result depends on noise from neighbours, furniture arrangement, open windows, and many other factors. If the project envisages instrumental testing, its methodology and criteria are determined by the relevant specialist. An article about buying stucco moulding cannot replace a measurement or a conclusion on the structural system. If a defect is identified, its cause is established first, and only then is a decision on repair made.
An example for a future apartment owner: after installing the chandelier, a decorative part began to rattle when the ventilation was running. You should not immediately reinforce it with a screw through the ceiling. If necessary, stop using the problem unit, invite the responsible installer, and check the fastening, the contact with the light fixture, and the cladding structure. Adding a rigid connection on your own may eliminate the sound at one point and create another problem in the system.
Three different apartments — three different solutions
In the first apartment, the suspended sound insulation ceiling is only being designed. The designer chooses CRPU-069 in advance, the seller provides a diagram of 64 parts and confirms the weight of the complete set, and the design engineer checks the additional load and the design of the chandelier mounting point. If these conditions are approved, the order can be included in the overall renovation specification. The advantage of this situation is not a particular model, but the ability to make a decision before the frame and final finishing are closed up.
In the second apartment, the ceiling has already been built, the documents are partially lost, and the owner wants a large CRPU-071. In this case, the design idea is not yet a basis for ordering. Information from the installer, an inspection using permissible methods, and an engineering assessment will be required. If the fastening method cannot be confirmed without extensive rework, it is more reasonable to abandon large decor. This conclusion should not be replaced with random advice to buy a product one millimetre thinner.
In the third case, renovation is being carried out in two rooms at once. The living room has a sound insulation ceiling on vibration hangers, while the study has an ordinary prepared surface with a different structure. The same rosette cannot automatically be installed in the same way in both rooms. For the study, the installation organisation may approve a standard option, whereas the living room will require a separate check. Therefore, in the order it is useful to specify the destination room and not to mix installation instructions, even if a single product code is being purchased.
Frequently asked questions about sockets and sound insulation
Can a polyurethane socket even be installed on such a ceiling?
Whether this is possible depends on the project, the actual weight of the product, the characteristics of the cladding and the approved mounting assembly. The word "polyurethane" alone proves nothing: polymer decor can be relatively lightweight, but for a ceiling system what matters is the documented load and the way it is transferred. The decision is made by a specialist for the specific structure. Until that decision is obtained, it is reasonable to choose a model only provisionally.
What should I request from STAVROS before purchasing?
You need the current product data sheet for the selected item, exact dimensions, the weight of the complete set, a drawing showing the layout of the parts and an item-by-item list of the modules. You should also ask whether a factory installation template is provided and what information is available about the recommended materials. The seller is responsible for the product description; final technical compatibility with the ceiling is confirmed by the organisation that designed or built the structure.
What is the difference between a sound-insulating ceiling and acoustic panels?
Acoustic panels usually help control sound reflection inside a room. A suspended sound-insulating ceiling is regarded as an additional structure that prevents sound from being transmitted through the floor slab. Visually, these solutions may look similar, but their calculations and mounting assemblies differ. Therefore, advice on placing decor on a smooth section between acoustic slats cannot be applied without verification to a frame on vibration-isolating hangers.
Why can't I choose CRPU-070 just because it is smaller?
It does indeed have the smallest external dimension of the five models reviewed — 765 × 765 mm. But size does not equal weight, and weight does not equal the permissible load on a specific assembly. You need to check the factory scope of supply, the contact areas of each module, the cladding surface and the ceiling system documentation. Once approved, CRPU-070 may turn out to be a convenient option, but it cannot be declared safe in advance.
Which is more practical: CRPU-069 made of 64 parts or RPU.VRS-001 made of eight?
If we are talking only about accounting at acceptance, checking eight elements of two types is simpler. If we are talking about ceiling installation, the mass, dimensions of contact areas and load distribution need to be compared. Large overlays are not necessarily easier to install, and many small ones are not necessarily held more reliably. The choice should take into account both the pattern and the drawing of the specific ceiling, as well as the agreed fastening technology.
Can an outlet be secured with self-tapping screws directly to a reinforced concrete slab?
Such a solution cannot be prescribed independently. A rigid fastening passing through a decoupled cladding can change the vibration transmission scheme for which the soundproof ceiling was installed. If the designer has provided a special assembly, it is carried out according to the documentation. If there is no assembly, additional anchors "for reliability" do not automatically become permissible. It is necessary to return to the specialist and agree on a solution.
Should a chandelier rest on a decorative composition?
No. A decorative ceiling rose does not replace the load-bearing assembly for a luminaire and is not intended for hanging a chandelier. The position of the suspension, electrical connections, the cup and access to them are checked independently. If the central ornament interferes with the cup or maintenance, the design is adjusted or other decor is chosen, rather than attaching the luminaire to polyurethane overlays.
Can the installation cost be quoted before choosing a ceiling design?
It is impossible to obtain a justified full cost based only on the price of the product. It is necessary to know the permissible fastening method, the scope of surface preparation, the need for a template, consumables, painting conditions, delivery and possible modification of the chandelier assembly. In Krasnodar, different contractors may have different offers; the article contains no unconfirmed prices. A separate estimate will allow comparing options without mixing goods and work.
What should be done if, after purchase, it turns out that the model is unsuitable?
Do not start installation in the hope that a different adhesive will solve the problem. First, record the reason for rejection — dimensions, arrangement of elements, impermissible fastening or lack of load confirmation. Then check with the supplier the exchange or return conditions for the specific order and evaluate alternatives with the designer. It is especially important to keep the packaging and documents until technical approval is completed.
How to order a ceiling rose with delivery to Krasnodar Krai?
Provide the seller with the product code and the number of full sets, and ask them to confirm the current price, the scope of the set, the number of packing units and the shipping terms. The delivery address, timing and cost of transport are agreed for each specific order. On acceptance, recount the items against the factory list and record any damage. The set should be handed over to the installers only after a full inspection and confirmation of the agreed technical solution.
Summary: at what point the order can be placed
For a sound-insulated ceiling, the correct sequence does not begin with choosing an ornament. First, a ceiling design is obtained, the actual structure of the frame and vibration isolation is checked, then the weight of the decorative sets of interest is determined and the method of their attachment is agreed. Separately, the chandelier's load-bearing system, the position of its cup and access to the electrical connections are confirmed. Only after this is it appropriate to compare prices and place the supply order.
When agreeing, it is useful to ask the contractor to state the result in writing: which model was reviewed, which parameters were checked and which limitations remain. A verbal approval to "glue it on" will not allow the logic of the decision to be reconstructed in the event of a dispute or repair. This is especially true of the ceiling, where the decorative element itself is in a prominent place, but its attachment is hidden from view. A document with the exact product code, diagram and responsible person will help avoid incorrect changes in the future.
If technical compatibility is confirmed, the final specification should contain one selected product code, the number of full sets, the factory list of elements, the terms of the template and finish, the delivery address and the agreed installation estimate. If there is no confirmation, it is better to keep the sound-insulation structure intact and postpone the purchase than to experiment with fasteners above a living room. A well-chosen ceiling rose decorates the ceiling; it should not alter the performance of the structure for which that ceiling was created.