











Article Contents:
- Three structures on one ceiling: what not to mix
- Which measurements to take before choosing a product
- Five models on a 1700 × 1700 mm area: calculation without guesswork
- If the chandelier is offset: why the previous conclusion may change
- CRPU-070: when a compact composition wins through reserve
- CRPU-069: when 64 parts are justified and when they complicate the project
- RPU.VRS-001: almost the same size, but a different assembly logic
- Why CRPU-068 and CRPU-071 should not be excluded just because of size
- How to preserve the meaning of acoustic finishing
- Where the smooth zone meets the panels: questions to resolve before painting
- The socket base: smoothness does not yet mean readiness
- Chandelier and stucco molding: two independent assemblies, one visual center
- Estimate: the product cost is only the first line
- What to include in the order so installation does not stop
- Delivery to Yekaterinburg and Sverdlovsk Oblast: what to check upon receipt
- Eight mistakes that ruin even a correctly chosen ornament
- Frequently asked questions before purchase
- Can a polyurethane ceiling medallion be glued directly onto acoustic panels?
- What size is considered suitable for a 1700 mm central zone?
- What should I do if the smooth field is already finished, but I like CRPU-068?
- Is the paper template included in the price of the composite rosette?
- Why is CRPU-069 more expensive than the large CRPU-068?
- Can I use RPU.VRS-001 instead of CRPU-069 without changing the drawing?
- Do I need to buy additional moldings around the rosette?
- Who should decide whether a chandelier can be mounted through a smooth platform?
- How can I make sure that the acoustic properties of the ceiling will not deteriorate?
- Can I order a product to the region and install it a few weeks later?

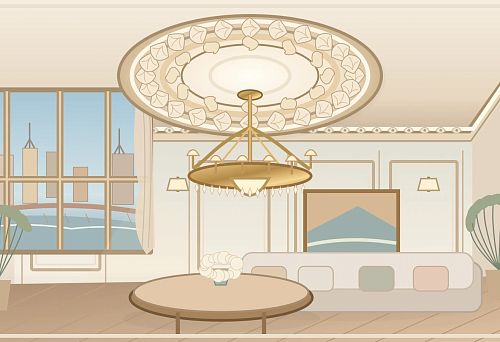
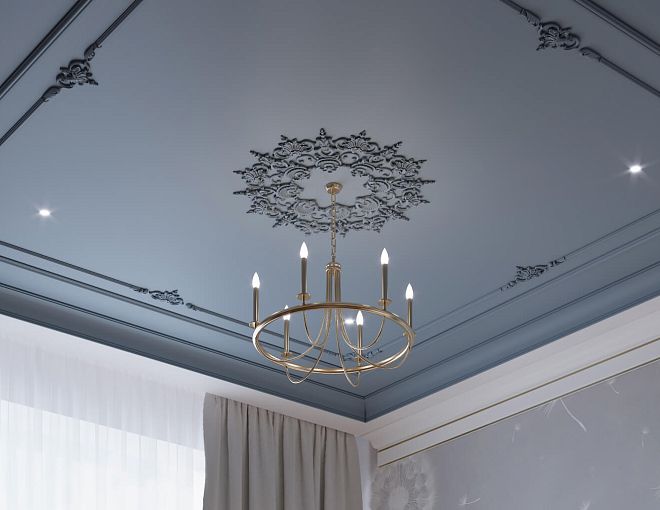
In a 30 m² living room, a ceiling with acoustic panels has already been selected. Above the sofa and table, cladding with a pronounced slat rhythm is planned, and in the center a smooth 1700 × 1700 mm platform is left for a pendant chandelier. On the drawing, the neat rosette under the light fixture looks convincing. But if you order a large set without checking the dimensions of the platform and what its parts will be glued to, two different problems may come up during installation: the edge of the ornament will come right up against the acoustic finish, and the platform itself will not be rigid enough for the chosen mounting method.
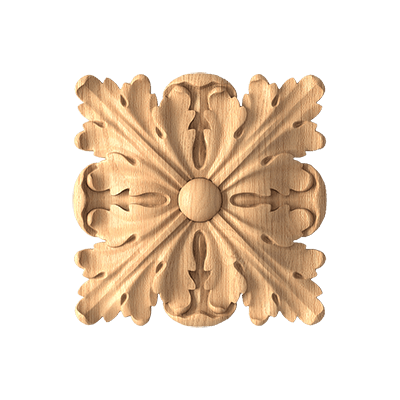
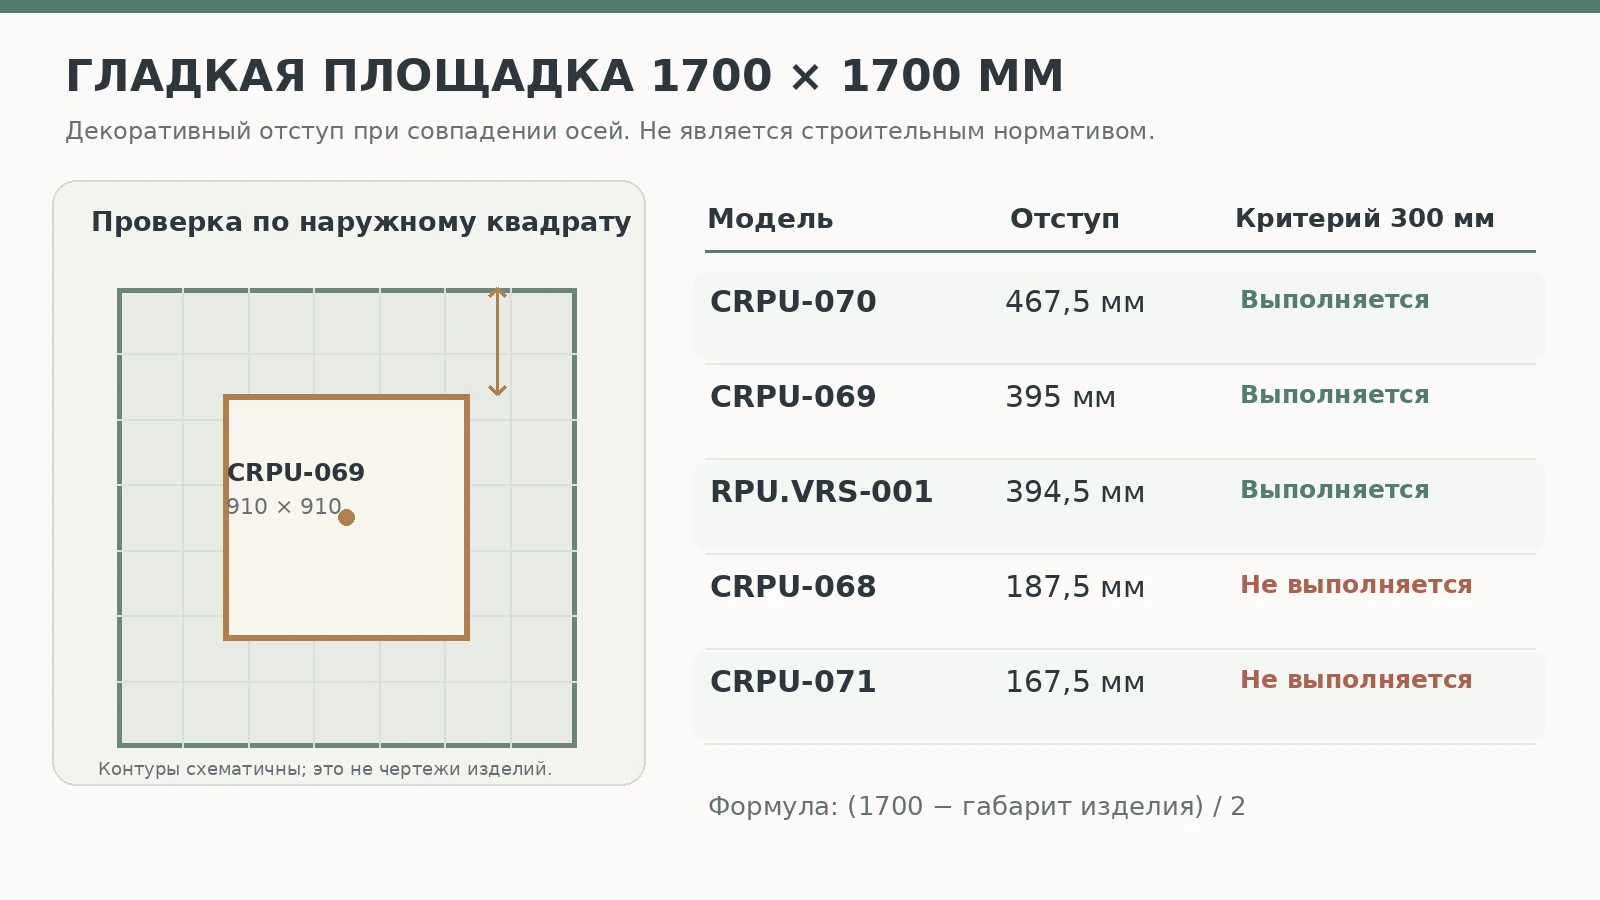
For such a ceiling, it is wiser to first choose a verified geometry, then the base structure, and only after that the decorative pattern. When the centers coincide with a 1700 mm area, the CRPU-070 medallion leaves 467.5 mm to its edge, CRPU-069 leaves 395 mm, and RPU.VRS-001 leaves 394.5 mm. The larger CRPU-068 and CRPU-071 leave only 187.5 and 167.5 mm. This is not yet an acoustic characteristic or a technical approval for installation: the numbers describe only the free space around the outer dimensions of the product.
For a buyer in Yekaterinburg, it is useful to divide the order into several independent solutions. In the catalog, you can choose Polyurethane ceiling rosettes by item code, size, and price. The suspended ceiling structure, chandelier mounting, and the junction of panels to the smooth zone require project verification on site. Even a well-chosen decor cannot be considered a replacement for a mounting plate or the load-bearing unit of the light fixture.



Three structures on one ceiling: what must not be mixed
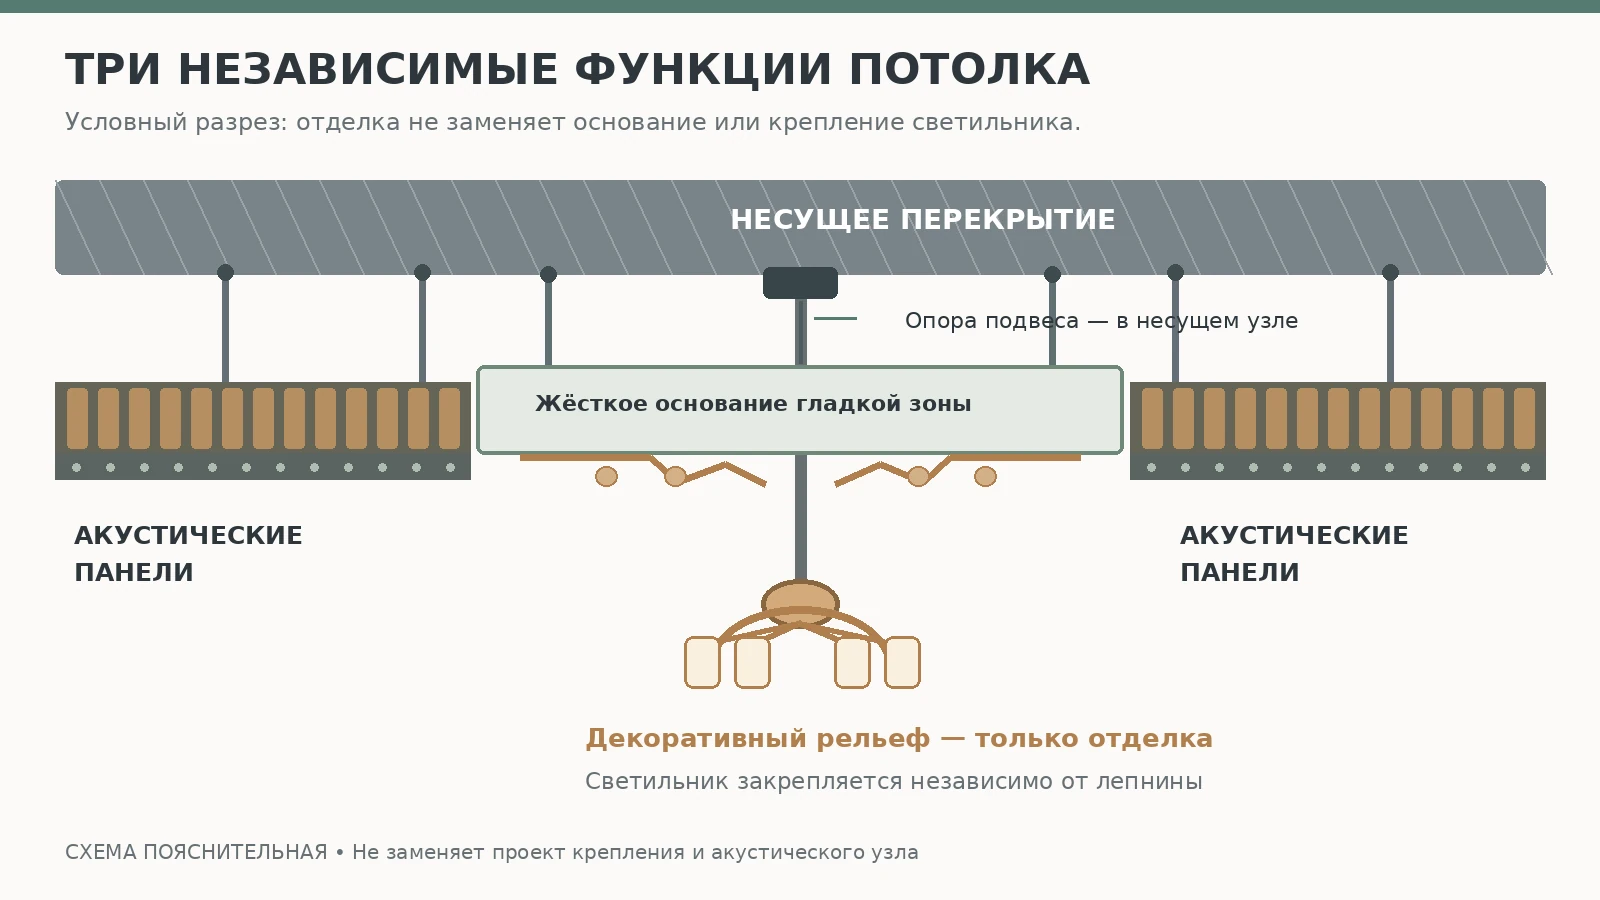
Acoustic cladding, a level field for molding, and chandelier fastening may be located next to each other, but they perform completely different tasks. The panels are part of the finish and, if confirmed by the manufacturer's system, part of the room's sound absorption. The smooth zone provides a surface with suitable geometry for decorative modules. The load-bearing unit of the light fixture bears its actual weight and must be secured according to the project regardless of the glued ornament. The mistake begins at the moment when one part of the structure is used in place of another.
The name "acoustic panels" by itself says nothing about the permissible load. Under this name, slats on a sound-absorbing layer, perforated sheets, fabric cassettes, or panels of varying rigidity may be sold. Sometimes the visible material feels dense enough, but it is mounted through an intermediate layer and is not designed to hold ceiling molding. Therefore, you cannot buy a medallion expecting to glue it directly onto a soft sound-absorbing surface. The need for and parameters of a separate base are determined by the specific ceiling system.
Let's imagine two visually similar ceilings. In the first, the central square is formed from a rigid sheet specified by the project on an independent frame, prepared for finishing, and capable of bearing loads from decorative elements taking into account the adhesive characteristics. In the second, the same white plane was obtained simply by painting a soft acoustic insert. In a photograph, there may be no difference, but for choosing an installation method, these are different structures. They also differ in the estimate: in the first case, preparation and fastening must be assessed; in the second, the mounting unit must be reworked rather than experimenting with a stronger adhesive.
First, determine the composition of the ceiling assembly: the material of the face layer, the type of frame, the location of hangers, access to the main floor slab, the provided embedded elements, the class of adhesive used, and the permissible weight of the finish. Exact decisions are made by the designer or installer according to technical documents. A polyurethane medallion does not make the surface load-bearing, and a beautiful pattern is not proof of acoustic compatibility.


What measurements to take before choosing a product
A simple measurement of "an area of about one and a half by one and a half meters" is not enough. If the boundaries of the smooth section are framed by slatted panels, the width is best measured in three places: at one side, along the central axis, and at the opposite edge. The second direction is measured in exactly the same way. A discrepancy in the readings will indicate that the shape deviates from an ideal square. For further calculation, choose the smaller confirmed dimension, not the most favorable value.
Separately mark the wiring exit point and the actual center of the chandelier suspension. This is not always the geometric center of the room and not even necessarily the center of the smooth field. The offset can be seen if you stretch two axes from opposite boundaries of the area and then compare them with the axis of the fixture. With a composite socket, all other details depend on the position of this center: an error on the first module can be repeated throughout the entire pattern.
It is convenient to record the results in a short measurement sheet:
| What is measured | What it's for | How to record |
|---|---|---|
| Width and length of the smooth field | Check the outer overall dimensions of the composition | Minimum actual values, mm |
| Offset of the chandelier axis | Recalculate the offsets on all four sides | Two signed values, mm |
| Clear ceiling height | Assess the visible scale and access for installation | From clean floor, mm |
| Thickness and level of acoustic panels | Check junctions and level differences | Per actual assembly, mm |
| Width of the luminaire ceiling cup | Check the central clear zone | Overall dimensions, mm |
| Type of smooth base | Select a suitable fastening | Material, thickness, fastening system |
| Position of lighting and technical devices | Avoid collisions | Diagram with distances to their edges |
For the training example, let us take a living room of 6 × 5 m, a height of 3.1 m, and a central smooth area of 1700 × 1700 mm. For now we assume that the center of the socket exactly coincides with the center of the area. These dimensions are conditional and are needed to demonstrate the calculation method, not to describe a finished object in Yekaterinburg.
It is worth adding to the schedule not only the dimensions but also a photograph of the ceiling base before it is covered with the cladding. On it, it is useful to mark where the profiles run, where the wires pass, and which elements secure the hangers. Subsequently, this will allow the installer not to drill or fasten decorative parts blindly. If the ceiling is still being designed, it is easier to correct the position of the embedded element on the drawing than to look for it after painting.
Our factory also produces:


Five models on a 1700 × 1700 mm area: calculation without guesswork
As a basis, let us take a specific design condition: it would be desirable to leave at least 300 mm on each side between the rectangular overall dimensions of the socket and the boundaries of the acoustic cladding. This is a wish for a conditional project, not a standard for sound absorption, strength, or safety. The actual permissible gap may differ depending on the edge design, the joint finish, and the installation method.
With the same center, the size of the free strip is calculated as follows: the outer overall dimension of the model is subtracted from the width of the smooth field, and the difference is divided in half. For CRPU-070, this is (1700 − 765) / 2 = 467.5 mm. For CRPU-069, it comes out to 395 mm. The calculation is checked in both directions because the field and the products are defined by two dimensions, although here both sides are square.
| Model | Dimension, mm | Indent on each side, mm | Margin over the design 300 mm |
|---|---|---|---|
| CRPU-070 | 765 × 765 | 467,5 | 167.5 mm |
| CRPU-069 | 910 × 910 | 395 | 95 мм |
| RPU.VRS-001 | 911 × 911 | 394,5 | 94.5 mm |
| CRPU-068 | 1325 × 1325 | 187,5 | Shortfall 112.5 mm |
| CRPU-071 | 1365 × 1365 | 167,5 | Shortfall 132.5 mm |
This table does not support the conclusion that two large rosettes cannot physically be placed inside a 1700 mm square. They fit within the outer dimensions, but they do not meet the selected visual offset condition. This distinction guards against a common mistake: calling a product "unsuitable" when in fact only a specific design solution proved inconvenient. If CRPU-068 is required, you can revise the size of the smooth zone before finishing begins, or honestly accept a different junction pattern.
To maintain a 300 mm offset, the minimum width of the square area must equal the rosette size plus 600 mm. This means CRPU-068 will require at least 1925 × 1925 mm, and CRPU-071 will require 1965 × 1965 mm. Relative to the original 1700 mm, this is an increase of 225 and 265 mm per side. If the panel portion of the ceiling has already been installed, such a revision means separate cladding work, and its cost may exceed the price difference between the rosettes themselves.
Do not multiply the product dimensions and call the result the actual area that the polyurethane will cover. The decor is composite, there are open sections between its overlays, and in some models the contour is openwork. The table compares bounding square, convenient for an initial placement check. An accurate project will require an installation drawing with the actual position of each module and all protruding ends.
Get Consultation
If the chandelier is offset: why the previous conclusion may change
In a hypothetical project, the fixture axis coincides with the center of the square. But after measuring, it often turns out that the electrical outlet is located closer to the window, while the smooth field was laid out relative to the furniture group. Geometrically the model still fits, but the margins on the right and left are no longer equal. You cannot move the decorative composition without checking the suspension center: the fixture and the outlet must form a coordinated unit, not two random points.
Suppose the chandelier axis is offset by 120 mm to the right of the middle of the smooth area. For CRPU-070, 467.5 − 120 = 347.5 mm remains on the right, and 587.5 mm on the left. The design threshold of 300 mm is maintained. For CRPU-069, the right side becomes 395 − 120 = 275 mm, and for RPU.VRS-001 — 274.5 mm. Both models still fit within the area, but the condition of a uniform decorative field with a minimum margin of 300 mm is already violated.
This is a good example of why “an outlet up to a meter works for a 1700 mm area” is not a complete recommendation. You need to look not only at the size but also at the center deviation. The maximum allowable offset along one axis for a given margin of 300 mm equals the original free field minus 300 mm. For CRPU-070 this is 167.5 mm; for CRPU-069 — 95 mm; for RPU.VRS-001 — 94.5 mm. The two large products have no margin under the same condition even in the central position.
If there is an offset along both the vertical and horizontal axes of the plan, each side is checked separately. The minimum margin along the X axis and the minimum margin along the Y axis are marked out. This check cannot be replaced by the diagonal distance: corner decorative protrusions may end up close to the rails even with quite comfortable linear distances. The working drawing retains both the values and the actual orientation of the product.
There are two solutions: change the size or position of the smooth field at the design stage, or choose a different model when the finish is already in place. A third option — moving only the outlet away from the chandelier — usually creates a new problem. Without a manufacturer-provided scheme, such a move can disrupt the symmetry of the central composition and conflict with the fixture cup. When the geometry does not work out, it is more useful to rework the design than to force the decor to mask an error.
CRPU-070: when a compact composition wins through its margin
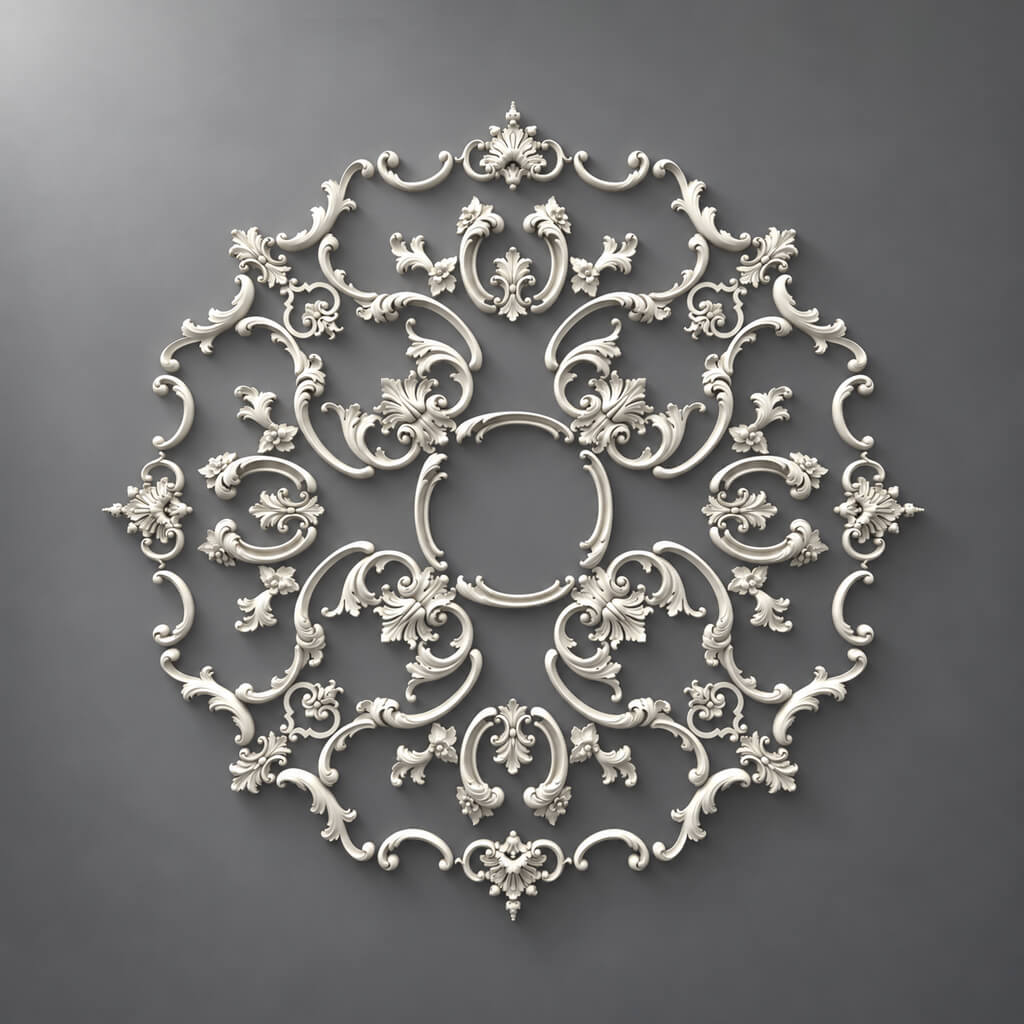
Ceiling rosette CRPU-070 has an outer size of 765 × 765 mm and a relief height of up to 18 mm. As of the check date, the catalog lists polyurethane and a price of 35,680 ₽ for the complete product. Its main advantage for the project in question is not an abstract “versatility” but a measurable margin of space: even with the chandelier axis offset by 120 mm along one direction, more than 300 mm remains to the nearest edge.
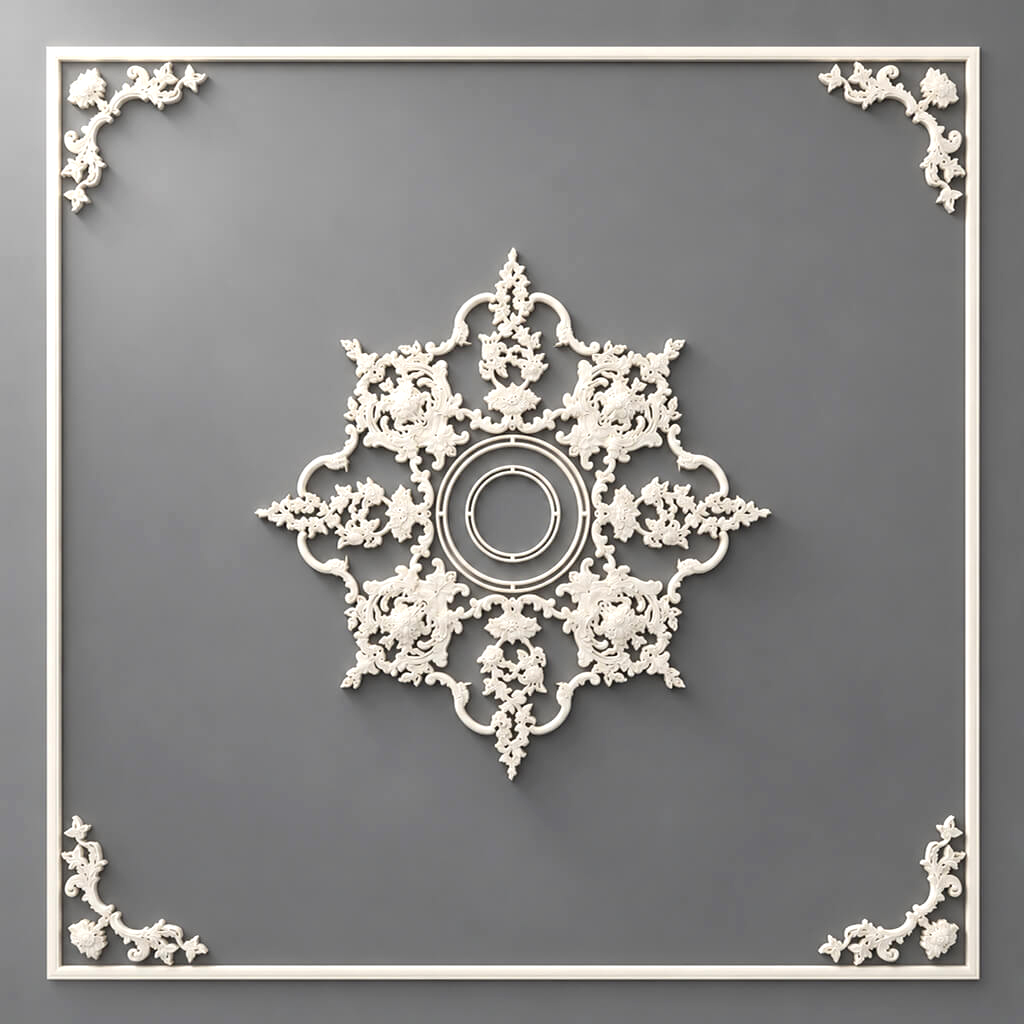
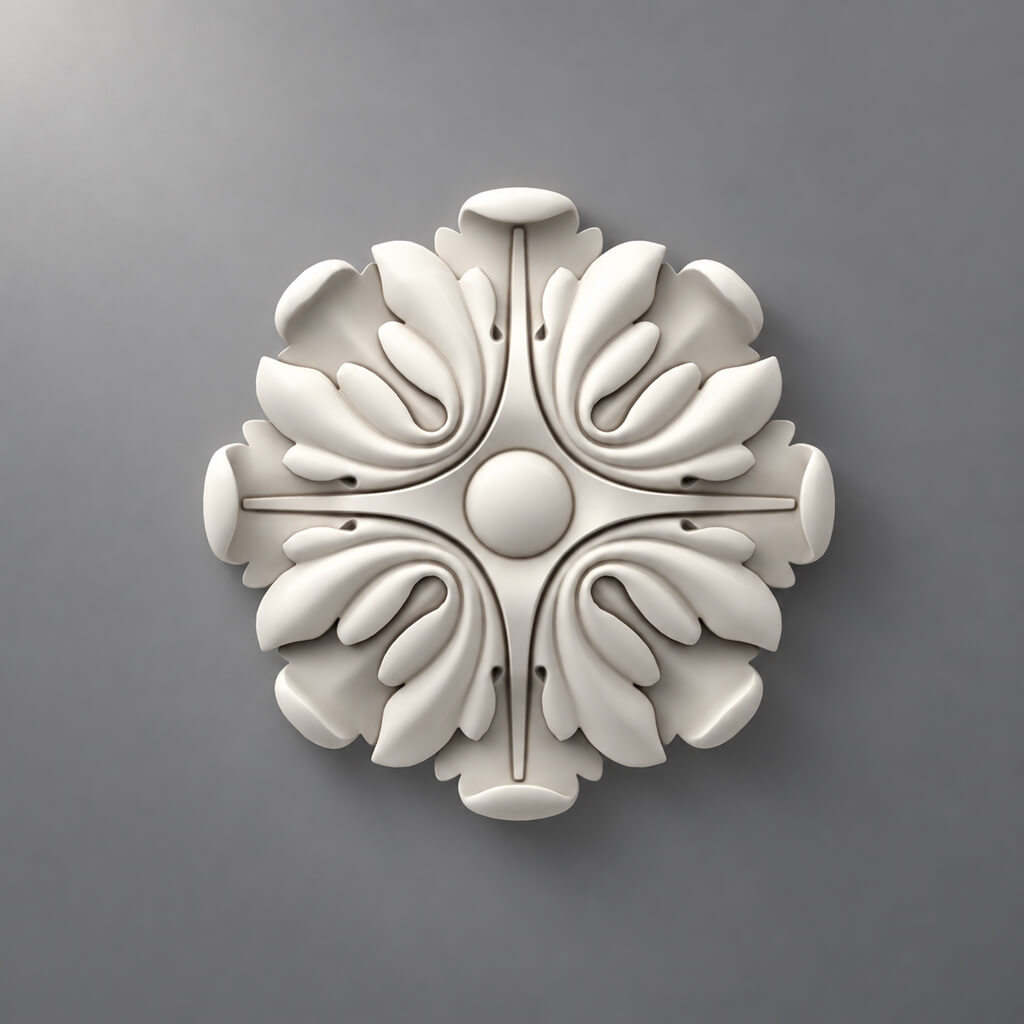
The composition consists of 24 appliqués of three types. According to the model card, these are eight NPU-309, eight NPU-244, and eight NPU-130. The products have different reliefs and different places in the star-shaped layout; hence a simple acceptance procedure — group the appliqués by article number and count each group separately, then verify the sum. You cannot count three packages of product as three parts: the number of packages and the number of modules are completely different quantities.
| Article number within CRPU-070 | Part size, mm | Quantity |
|---|---|---|
| NPU-309 | 66 × 45 × 8 | 8 |
| NPU-244 | 180 × 138 × 18 | 8 |
| NPU-130 | 120 × 268 × 15 | 8 |
| Total | 3 types | 24 pcs. |
It is important not to confuse the dimensions of one SKU across different descriptions. For example, on the CRPU-069 page, part NPU-244 appears with different dimensions than on the CRPU-070 page. To replace a damaged overlay, you need to determine the specific version from the seller's specification rather than relying only on the short designation NPU-244. You should not replace one module with a part of a similar pattern on your own to speed up installation.
In a 6 × 5 m room, such a decor creates a compact frame for the chandelier on an independent smooth area. But if the fixture is large, with a wide top mount, its ceiling cup may cover the central part of the ornament. The permissible cup diameter cannot be calculated from the outer dimension of 765 mm: you need to check the free zone in the installation diagram and the actual fixture. If the check fails, choose another fixture or composition rather than sawing off artistically important parts without approval.
Separately confirm whether a paper installation template is required. In the text description of the product page, a designation of a different model appears next to the mention of a template; from this line you cannot confidently conclude that the template for CRPU-070 is included in the price. Before payment, request the specific drawing, the template delivery procedure, and written confirmation of the order contents. This is far more reliable than calculating the layout of eight repeating rays from a small image on a screen.
CRPU-069: when 64 parts are justified and when they complicate the project
CRPU-069 at a size of 910 × 910 × 15 mm, it leaves a 395 mm margin inside our square field on each side. It differs from CRPU-070 by only 145 mm in width, but in design it is a completely different product: the catalog lists 64 separate elements of 15 types. The price as of November 3, 2026 is 62,560 ₽, that is, 26,880 ₽ more than CRPU-070. The price increase here cannot be explained by dimensions alone — the buyer receives a different composition and a different ornament.
For a flat central area, such a rosette passes our conditional threshold of 300 mm if the centers coincide. However, the margin for axis error remains only 95 mm. Visually, the difference from the star-shaped CRPU-070 may seem small, especially on a ceiling 3.1 m high. In the installation diagram, it is more sensitive: you need to mark more positions, preserve the orientation of paired overlays, and prevent error accumulation on adjacent elements. The manufacturer's dedicated diagram is more useful than arbitrary marking made from a photograph.
The list of components includes NPU-244, NPU-288L, NPU-288R, NPU-424L, NPU-424R, NPU-425L, NPU-425R, NPU-190, NPU-430L, NPU-430R, NPU-245, NPU-431L, NPU-431R, NPU-432R, and NPU-301. Here there are elements that differ in orientation in their very names. The letters L and R denote separate versions; counting only the total number of overlays would not be enough. The full bill of materials with the quantity of each SKU should be obtained from the seller and verified against the current delivery — from the public list on the product page, it is not possible to safely reconstruct the entire quantity for each item.
For acceptance, it is convenient to use two tables: a list of fifteen item codes with the planned quantity and a physical check sheet. The first is filled in according to the specification agreed with the seller, the second — according to the labelling and the physical contents of the boxes. If one part does not match the size, or the left-hand version is mixed up with the right-hand one, it is too early to start installation. The shortage will be discovered not at the purchase stage, but at the end of the layout, when part of the pattern has already been fixed and going back to the beginning will be difficult.
Before paying, it is worth checking the installation template. For CRPU-069, the manufacturer separately mentions the possibility of purchasing a paper version; you should not automatically assume it is part of the basic kit. Ask for a drawing with axes, the outer contour, the location of the NPU and the actual area for the chandelier's ceiling cup. If the project provides for a joint between the smooth field and acoustic panels at an angle or with a height difference, mark on the drawing not only the 910 mm dimension, but also the position of the outer protrusions of the ornament relative to this joint.
Buying CRPU-069 makes sense when an expressive pattern is genuinely needed and there is a craftsman ready to carry out careful element-by-element marking. If the task is solely to conceal the wiring outlet and create a small decorative border around the light fixture, such a complex composition may prove excessive. With a tight renovation timeline, choosing a simpler model is sometimes wiser, even if its outer dimension is slightly smaller.
RPU.VRS-001: almost the same size, but a different assembly logic
Ceiling rosette RPU.VRS-001 measures 911 × 911 × 18 mm. That is just one millimetre more than CRPU-069 on each side — the difference in free field will be half a millimetre, and in ordinary marking this figure by itself should not determine the purchase. Much more important is the nature of the composition: here there are not 64 small elements, but eight large ones, assembled from four NPU-507 and four NPU-508. The catalogue price is 67,360 ₽.
The size of the individual overlays is considerably larger: NPU-507 measures 392 × 336 × 18 mm, NPU-508 — 369 × 419 × 18 mm. Such a set is more convenient to check piece by piece: lay out all eight, compare the pairs and make sure nothing is missing. But this does not amount to easy installation. A large module may require more careful temporary positioning, and its contact surface and permitted fastening method cannot be guessed from the dimensions of the face relief alone.
| Composition of RPU.VRS-001 | Size of one overlay, mm | Quantity |
|---|---|---|
| NPU-507 | 392 × 336 × 18 | 4 |
| NPU-508 | 369 × 419 × 18 | 4 |
| Total | 2 types | 8 pcs. |
For a ceiling with acoustic cladding, the model has a characteristic visual feature: the pattern does not form a solid, heavy slab. The surface of the smooth field remains visible between the decorative modules, which can make the transition to slatted finishing look softer. But "openwork" does not mean "acoustically transparent" in an engineering sense. One cannot assume that the open areas automatically compensate for a change in sound-absorbing area or make it possible to skip the design verification.
Let's compare two purchases of a similar format. CRPU-069 is 4,800 ₽ cheaper than RPU.VRS-001 at card prices. The first requires laying out 64 pieces, the second — eight, and larger ones at that. However, the final installation cost cannot be obtained simply by dividing the labor price by the number of modules. The installer may take into account dimensions, the labor intensity of fitting, the need for temporary supports, the complexity of the pattern, and surface preparation. Therefore, in the estimate, the lines "product" and "installation" must exist separately.
A question for the seller: what installation drawing will you receive, what is the exact clear zone around the center point, and is the required paper template included in the specific delivery? In the product description, there is an inaccuracy in the designation of another model next to the text about the template, so it is better to request written clarification for RPU.VRS-001. This is especially important when the chandelier has already been purchased and its ceiling cup cannot be changed.
Why CRPU-068 and CRPU-071 should not be excluded solely because of size
CRPU-068 measures 1325 × 1325 × 18 mm and costs 50,480 ₽. CRPU-071 — 1365 × 1365 × 19 mm at a price of 72,880 ₽. Both large models would fit inside a conditional central square of 1700 mm without physically crossing the overall dimension frames. But from their edges to the start of the acoustic finish, less than 200 mm would remain, so they do not meet the visual condition of 300 mm chosen in the project.
This is not a prohibition on buying CRPU-068 in Yekaterinburg. If the renovation is at the stage of planning the frame, the central field can be enlarged. For the first model, the minimum square according to our rule is 1925 mm; for the second, 1965 mm. The decision must be evaluated from two sides. Enlarging the smooth part frees up space for decor but takes area away from the acoustic cladding. If the ceiling was designed for specific sound absorption requirements, its configuration cannot be changed without approval.
There is also a financial paradox: CRPU-068 at catalog price is 12,080 ₽ cheaper than the more compact CRPU-069. Therefore, the formula "smaller size — lower cost" is incorrect here even at the level of the product's own price. But when moving from a 1700 × 1700 mm field to 1925 × 1925 mm, about 0.82 m² of smooth zone is added, and along with it the cost of the frame, finish, junctions, and revision of the acoustic part may increase. A rosette that is cheap in the catalog does not necessarily mean a cheaper finished ceiling.
The second subtlety concerns completeness. CRPU-068 is stated in the description as having 72 elements of 12 types, but in the open item-by-item list, the sum of the stated quantities comes to 68. This is not grounds for independently adding four arbitrary overlays: the discrepancy should be clarified with the seller and a confirmed bill of materials obtained. When buying a composite model, such a check is more important than a beautiful photo of the ornament.
Finally, leaving a narrow smooth border around a large decorative square solely to save on panels is risky. On a real ceiling, the edge may require a separate profile, and the strong relief may visually come closer to the strips of the acoustic finish. Before changing the dimensions of the entire field, make a full-size layout and look at the ceiling from floor level. Sometimes a smaller rosette with a thoughtful pause around it turns out to be more expressive than a larger one almost pressing into the rhythm of the slats.
How to preserve the meaning of the acoustic finish
A sound-absorbing structure works as a system, not as an arbitrary set of visible parts. The result can be affected by the material type, the thickness and density of the absorbing layer, the distance to the ceiling slab, the open area, the batten spacing and the fastening arrangement. That is precisely why, without acoustic calculations, one cannot promise that replacing a section of cladding with a smooth decorative panel will not change the behaviour of the room. Nor can one attribute measurable sound absorption to a polyurethane ornament merely because its relief is complex.
For our training ceiling, the total area is 6 × 5 = 30 m². The smooth central square of 1.7 × 1.7 m occupies 2.89 m². If the remaining surfaces are in fact intended to be sound-absorbing, their potential geometric area is 27.11 m² before allowing for edge junctions, luminaires, ventilation and other devices. But area does not equal acoustic efficiency: two materials of the same size can perform differently, and the manufacturer of a specific system may set a minimum open area and installation conditions.
If the central field is increased to 1925 mm, its area will become approximately 3.71 m², i.e. 0.82 m² more than the original. For a 1965 mm square it will be about 3.86 m², an increase of about 0.97 m². This is useful data for discussion with the designer: it becomes clear which part of the ceiling is planned to be changed. These figures cannot yield a change in reverberation time or a guaranteed percentage of sound absorption. Such conclusions require system characteristics, design calculations and, where applicable, measurements.
Structural cavities must not be forgotten either. In some systems the space behind the cladding is part of the acoustic solution. If it is filled with random material or independent frame sections are rigidly joined together, an unintended result may occur. However, it is also wrong to claim that any contact between the rigid field and the battens necessarily “ruins the acoustics”. The junction details are taken from the documentation of the selected system and agreed with the installer.
The areas near the central field are studied with particular care. Batten ends, metal rails, the sound-absorbing backing, luminaires and the decorative profile may all pass through here. Each layer has its own installation tolerances and deformation requirements. The 300 mm setback is needed for our composition, but it does not replace any of these tolerances. If the selected covering requires a different expansion joint, it is provided independently of the decorative gap.
When the acoustic task is genuinely significant — for example, when a living room is used for a home cinema or music practice — the technical parameters and design solution are fixed first, and then the decor is selected for the remaining free zone. Not the other way round. In the absence of an acoustic design, it is more honest to speak of a ceiling with decorative panels than to promise the buyer an improvement in sound that is unknown in advance.
Junction of the smooth zone with the panels: issues to resolve before painting
In a photograph, the boundary between the smooth area and the acoustic finish looks like a line. In a real ceiling it is a structural junction: the ends of the battens, the supporting frame, the concealed sound-absorbing layer and the cladding surface may be at different heights. If the installer first brings the panels up to the marking and then decides to “squeeze” a decorative medallion into the centre, questions about closing the ends and compensating for possible movement will inevitably arise.
There are several different options for such a transition. A visually clean boundary without an additional decorative profile can be left where the finish and the structure allow it. A designed frame around the smooth area can be provided, but then the width of the frame must be taken into account in the calculation as well: it must not imperceptibly take a hundred millimetres away from the already selected free field. Finally, where there is a difference in levels, a separate technical junction detail will be needed, and it cannot be replaced by a thin polyurethane overlay without checking its purpose.
One calculation is enough to understand the problem. If a decorative profile 60 mm wide is added inside the perimeter of the 1700 mm area, the actual free space between the inner edges of the profile will shrink to 1580 mm. For CRPU-069 the setback will become (1580 − 910) / 2 = 335 mm. The margin above the design 300 mm will decrease from 95 to 35 mm. If the chandelier axis is offset by 50 mm, the condition will no longer be met. Such a profile may look beautiful, but geometrically it is not free.
If a frame is not provided for, it is not worth adding one just to "tie two styles together." Acoustic panels have their own rhythm, and a composite rosette has its own ornamental center. A pause between them is useful, and it is measured and preserved. The general principles of visual adjacency are discussed in the material on combining acoustic panels and stucco decor; here, the decisive factors remain the specific size of the purchase and the performance of the selected ceiling assembly.
Before the final finishing, ask the installer to mark three lines on the working drawing: the actual boundary of the panels, the boundary of the base suitable for fastening, and the outer contour of the rosette. These lines may not coincide. If on one of the sides the suitable base turns out to be narrower than the smooth decorative field, it is that base, and not the color boundary, that limits the installation of the overlays. Such a simple check can prevent rework after delivery of an expensive set.
Base for the rosette: smoothness does not yet mean readiness
A flat painted surface looks like a ready mounting area, but it gives no answer about strength. To install composite polyurethane parts, you need to check the base material, its fastening to the load-bearing structure, the condition of the surface layer, and the compatibility of the intended mounting compound. The mistake is to apply a strong adhesive to weak putty and consider the problem solved. If the layer to which the adhesive bonds remains weak, the strength of the adhesive itself will not help.
On a plaster base, check for the absence of peeling, dust, and weak coating. On rigid sheet cladding — the rules for fastening to the frame, the seams, possible movement, the permissible weight of the facing, and the condition of the finish coating. For decorative sheet materials, there may be special requirements for primer or adhesive; there is no universal compound equally suitable for any surface. Choose the fixing material according to the instructions of the decor and base manufacturer, not according to a single advertising label "for everything."
Before the final finishing, it is useful to hold a sheet of paper or a simplified cardboard template of the outer contour of the rosette against the ceiling. This is not a replacement for the factory layout template, but a way to check the dimensions. Mark the limits of the future pattern, the support area of the parts, the position of technical joints, and access to the central fastening of the light fixture. If a seam between sheets ends up under one part of the decor, provide a preparation method permitted for the specific construction. There is no need to fill a moving seam with a rigid compound just for the sake of continuous painting.
The fastening method itself must take into account both time and installation conditions. The room temperature, humidity, surface preparation, and holding time before loading can affect the result. Specific intervals are permissible only according to the instructions for the selected adhesive and products. Without them, it is impossible to prescribe universal "five minutes of pressing" or "twenty-four hours of holding" for any ceiling.
If the base under the central zone is not rigid enough, you should not try to "rescue" the purchase with a lighter model without a technical assessment. The issue is not only the total weight, but also the contact surface, the direction of loads, and the ability of the facing to hold the finishing layer. First bring the assembly to its design condition, then choose the rosette. If it is not possible to make a suitable base, it is better to exclude the decorative rosette than to glue it onto an unverified surface.
Chandelier and molding: two independent assemblies, one visual center
The ceiling medallion sits around the chandelier but must not serve as a load-bearing part of its suspension. The hook, mounting bracket, or other fixture attachment works with the main structural base or the embedded support system specified by the project. Polyurethane overlays serve a decorative function. This is especially important in a ceiling with acoustic panels: the decorative cladding may conceal the frame, but it does not thereby become a verified support for the fixture.
At the ordering stage, it is useful to place two drawings side by side: the medallion diagram and the chandelier documentation. In the first, look for the outer contour, the central free field, the locations of the modules, and their relief. In the second, look for the size of the upper cup, the type of mounting device, the connection method, and the access conditions for the connections. Sometimes the cup covers part of the ornament, even though the entire medallion formally "fits" by outer dimension. Another case: the cup fits, but the mounting screws cannot be reached without disturbing the already glued-on parts.
If the chandelier is already installed, check whether its decorative cup can be removed while preserving access to the necessary connections. A serviced assembly must not be permanently sealed for the sake of a concealed attachment. Electrical safety checks and connection are performed by a qualified specialist; an article about molding does not replace an electrical design. On the sketch, be sure to mark the actual protrusions of the fixture, not just the diameter of its main body.
Often appearance imposes another constraint: the ceiling medallion must be perceived as proportionate not merely to the chandelier's diameter but to its visible volume. A circle of eight small modules and an openwork composition of large overlays can feel different despite the same outer square. RPU.VRS-001 has a sparse contour, while CRPU-069 has a denser pattern. For a living room with wooden acoustic slats, this matters: a rich relief and a close panel spacing can compete. Therefore, the final choice is best verified with a mockup using the actual fixture, or at least with a drawing at the same scale.
The installation sequence is planned so that after marking, access to the suspension point can be obtained, then the decorative elements installed, and finally the fixture serviced. Which order is suitable depends on the shape of the cup, the mounting, and the number of modules. A convenient preliminary check is to simulate removing the cup with the medallion already installed. If this is impossible without damaging the molding, the scheme needs revision before purchase.
Budget: the product price is only the first line
As of November 3, 2026, the official product pages show CRPU-070 priced at 35,680 ₽, CRPU-069 at 62,560 ₽, and RPU.VRS-001 at 67,360 ₽. These are the prices of the products themselves, not a commitment to complete the entire ceiling assembly for the stated amount. An important distinction arises even before installation: if the smooth field is not ready or lacks sufficient rigidity, its preparation becomes a separate cost item and does not depend directly on the price of the medallion.
| Expense item | CRPU-070 option | CRPU-069 option | Option RPU.VRS-001 |
|---|---|---|---|
| Main product | 35 680 ₽ | 62 560 ₽ | 67 360 ₽ |
| Mounting template | Check with the seller | Check with the seller | Check with the seller |
| Rigid substrate preparation | Per project estimate | Per project estimate | Per project estimate |
| Adhesive, primer, finishing materials | Per master's schedule | Per master's schedule | Per master's schedule |
| Marking and installation of overlays | According to the contractor's estimate | According to the contractor's estimate | According to the contractor's estimate |
| Painting and joint preparation | Per selected technology | Per selected technology | Per selected technology |
| Delivery to Yekaterinburg | Per shipping calculation | Per shipping calculation | Per shipping calculation |
The difference between CRPU-069 and RPU.VRS-001 is 4,800 ₽. It might seem easy to compare these amounts, but the buyer still needs to find out two unknown values: the cost of the work and the cost of preparing the base. If one model requires more time for precise layout, while the other requires special temporary fastening of large elements, the preliminary difference could change in either direction. Inventing a rate for "one piece" without an actual estimate is pointless.
It is useful to divide the estimate into mandatory and conditional parts. The mandatory part is what the chosen solution cannot be reliably installed without: a confirmed base, a compatible installation compound, the necessary work, and secure chandelier mounting. The conditional part is finishing with additional moldings, decorative painting, lighting, and framing the edge of the smooth area. If funds are insufficient, it is this second group that should be reduced first, rather than excluding base preparation or electrical checks.
Another check concerns choosing a larger socket at a surprisingly lower price. CRPU-068 costs 50,480 ₽, cheaper than CRPU-069, but maintaining the accepted offset requires a wider smooth zone. The cost of such rework may prove significant. Before placing an order, compare not five price tags, but at least two viable projects as a whole — one with the field unchanged and one with it revised.
What to include in the order so that installation does not stop
It is better to buy a ceiling socket by the full article number of the main set, not by a photo of one of the overlays. In a store's search, a separate NPU may look very similar to the central part of the composition, but buying such a part is not the same as buying the entire socket. Ask the seller which item is the main product, which elements are included in the set, what is supplied separately, and which document will allow you to verify the contents upon receipt.
For a ready-made solution with an acoustic ceiling, the specification is useful in two copies: one for the buyer and the other for the installer. It should retain the model, dimensions, number of modules, material, price, installation diagram, template information, and delivery address. The technical conditions for the smooth zone and the light fixture are added to the project sheet rather than being presented as product characteristics. This is how the responsibility of the stucco supplier and the responsibility of the ceiling work contractor are kept distinct.
| Order list item | What to specify | What check is needed |
|---|---|---|
| Main ceiling socket | Exact article number CRPU or RPU.VRS | Product card and agreed invoice |
| Size and material | Full dimensions, polyurethane | Match with the selected model |
| Item-by-item completeness | List of NPUs and their quantity | Confirmed seller's statement |
| Mounting diagram | Drawing, scale, central zone | Possibility of placement on the field |
| Paper template | Included or purchased separately | Written confirmation |
| Installation materials | Brand, purpose, quantity | Manufacturer's and installer's instructions |
| Finishing | Primer, painting, joint treatment | Compatibility with materials |
| Delivery | Address, method, number of places, acceptance conditions | Confirmation before payment |
At the selection stage, do not add everything that matches the style ceiling decor to a single order. In a room with acoustic panels, each additional ring or frame changes the free zone, sometimes crosses the cladding boundary and requires new installation solutions. First make sure that the socket itself is compositionally sufficient. Additional moldings make sense only if there is a meaningful place and a technically acceptable base.
If a wider range is needed, the section Moldings helps compare different types of polyurethane products. But within this project, they should be selected according to a specific function: a socket for a chandelier, a separate profile for a coordinated junction, if provided. The desire Buy molding does not mean that the entire remaining space between the socket and the acoustic panels should be automatically decorated.
One line in the specification is especially useful and is often overlooked: "The selected socket is placed on a confirmed rigid mounting surface and does not obstruct the fixture's fastening or maintenance." Until the drawing exists, this is not a "done" checkmark but an open condition requiring the signature of the installation supervisor. This procedure saves time: a compatibility dispute arises before payment and shipment, not after the boxes are opened.
Delivery to Yekaterinburg and Sverdlovsk Oblast: what to check upon receipt
Receiving an order in Yekaterinburg, Verkhnyaya Pyshma, Beryozovsky or any other locality in the region begins not with installation but with acceptance. On the official product pages, the manufacturer states the possibility of Contact us to confirm shipping to your destination. However, the actual timeframe, delivery method to a specific address, number of packages and shipping cost must be confirmed for the current order. The average production time indicated on the product card cannot be carried over to the promised date of arrival at the buyer's home.
Before shipment, request the number of packages and a detailed inventory of contents. For CRPU-070, it is enough to verify three types of NPU, eight pieces each; for RPU.VRS-001, four NPU-507 and four NPU-508. With CRPU-069, control is more complex: in addition to the total count of 64, each of the fifteen types must be checked against the agreed list. If there are two boxes but sixty-four modules, this is not a discrepancy: packages and individual parts are counted independently.
Upon receipt, inspect the outer packaging, markings, and signs of severe impacts, punctures, opening or moisture. Record any remarks in the manner provided by the carrier and the seller before moving the contents to the construction site. If the packaging is clearly damaged, do not limit yourself to a verbal statement to the courier: follow the prescribed documentation procedure and contact the seller. The specific deadlines and conditions for filing claims depend on the parties' documents and must not be replaced by an invented universal rule.
Not all defects are clearly visible from the outside. Once indoors, on a clean surface, carefully lay out the parts by article number and check the relief, edges and quantity. Left- and right-hand versions must not be piled together. If a shortage is found, note the exact article number and the number of missing modules, keep the order data and agree on the next step. Do not begin installing an incomplete composition in the hope of replacing a part with a similar overlay from another set.
Storage conditions after delivery are determined by the instructions for the specific polyurethane product, packaging and selected installation adhesive. If the shipment arrives cold, the elements should not be attached immediately without checking the recommended temperature conditions. However, it is also wrong to claim a mandatory "exactly 24 hours" holding time for any polyurethane. In parallel with preparing the material, transport damage must be recorded promptly so as not to miss the claim procedure stipulated by the contract.
Information about payment and available shipping options is published on the page Payment and delivery. For the final estimate, it is better to obtain a calculation for a specific address, since the distance to the carrier's terminal, door delivery and additional services affect the cost. Separately agree on who unloads the fragile decorative parts and where they will be stored until the dirty work is completed.
Eight mistakes that ruin even a correctly chosen ornament
Buying based on room area. A 30 m² living room by itself does not answer the question of whether CRPU-069 will fit into a smooth field. The purchase is determined not only by the floor area, but also by the size of the central zone, the position of the chandelier and the abutment conditions. The fix is simple: first a measurement schedule, then the store cart.
Measuring only one side of the area. On the plan the square is even, but in the finish one of the sides may turn out narrower because of a profile or a non-parallel edge. If you take the maximum value, the overlays will fit closer to the cladding than expected. The way out is to measure several sections and use the minimum confirmed dimension.
Installation on an unsuitable acoustic insert. The outer surface looks flat enough, so it seems that strong glue will hold everything. But the properties of the finishing layer and its fastening are unknown. The consequence is damage to the coating or uncalculated fixation. You need to confirm a suitable base and installation technology, rather than replacing one glue with another at random.
Ignoring the offset of the chandelier axis. With a difference of 120 mm, even the 910 mm model no longer meets the design condition of a 300 mm setback from the nearest side. If you look only at the table with the central arrangement, the error will go unnoticed. The way to check is to specify the actual coordinates of the suspension and recalculate all four setbacks.
Confusion between a full set and a single overlay. Composite rosettes have many parts with their own item codes. The buyer may mistake the NPU image for the image of a finished composition. The result is an incomplete order. Check the main item code, the list of components and the final invoice price.
Treat left and right elements as identical. For CRPU-069, different versions are included in the factory composition. If they are put together during acceptance, the shortage will only show up on the ceiling. You need to check not only the total count, but also the item codes with the letters L and R.
Treat the overall square as the exact outline. Inside 910 × 910 mm there may be narrow protruding overlays and open gaps. During work they are perceived not as a solid tile, but as a complex pattern. Installation requires a drawing of the actual module positions, not just a conventional square in the illustration.
Cutting corners on invisible work. You can choose the most affordable socket, but you cannot skip base preparation or a reliable chandelier mount. Saving on optional finishing is acceptable; waiving safety and strength requirements creates a risk that the price of the product cannot justify.
Frequently asked questions before purchase
Can a polyurethane socket be glued directly onto acoustic panels?
Without confirmation of the construction and its manufacturer's recommendations, there is no basis to consider such a solution acceptable. The panel may have a soft sound-absorbing base or a finish not designed for gluing on additional decor. In our example, the socket is placed on a separate smooth area with a suitable rigid base. But even for it, the mounting compound and surface preparation are chosen for the specific system.
What size is considered suitable for a central zone of 1700 mm?
If a design gap of 300 mm on all sides is accepted and the center coincides, CRPU-070, CRPU-069 and RPU.VRS-001 fit within the outer dimensions. If the chandelier axis is offset by 120 mm, the last two models no longer meet this design criterion on the near side. Such a calculation does not replace checking the outline, the chandelier and the base.
What should I do if the smooth field is already finished, but I like CRPU-068?
First, check whether the remaining offset of about 187.5 mm suits the specific visual solution and installation requirements. If not, consider a more compact socket. Enlarging the central area is only possible after checking the ceiling structure and agreeing on the consequences for the acoustic part. Cutting factory modules to reduce the size without an approved plan is not allowed.
Is the paper template included in the price of the composite socket?
This cannot be considered mandatory for all models. In the product pages of a number of composite CRPU models, the manufacturer states that the paper installation template is purchased separately. Before paying, check the terms for the specific item you have chosen and attach confirmation to your order. The absence of a template is especially noticeable for a composition of several dozen elements.
Why is CRPU-069 more expensive than the larger CRPU-068?
In the verified product pages, the prices are indeed 62,560 ₽ and 50,480 ₽ respectively. But these products differ in composition, pattern, and construction. External size is not the only price factor. For a project with acoustic panels, work on the central area is also taken into account: a large but cheaper model according to the catalog may require more expensive ceiling modifications.
Can RPU.VRS-001 be used instead of CRPU-069 without changing the drawing?
The external dimensions are almost the same — 911 and 910 mm. But the pattern and composition differ radically: eight large overlays versus 64 parts of different types. Therefore, the installation schemes are not interchangeable. The central zone, contour shape, and module layout should be checked again, although the dimensions of the smooth square may remain the same.
Do I need to buy additional moldings around the socket?
Not necessarily. On a ceiling with a pronounced rhythm of acoustic slats, an additional frame can overload the composition and take up part of the technically required field. If the only task is to decoratively finish the chandelier mount, a standalone socket is often sufficient. An additional profile makes sense only when it supports the transition envisaged by the project and does not interfere with the cladding.
Who should decide whether a chandelier can be mounted through a smooth panel?
A specialist responsible for the light fixture and the ceiling structure, taking into account the weight and mounting method of the chandelier, the composition of the frame and the load-bearing base. The socket is not designed to support the light fixture and is not a mounting anchor. Before the final painting, access to the mounting unit must be verified, and after installation, the possibility of the specified maintenance must be confirmed.
How can one determine that the acoustic properties of the ceiling will not deteriorate?
This conclusion cannot be drawn from the appearance and area of a single socket. Data is needed on the specific panel system, the number and size of open areas, the layers behind the cladding, and the design requirements for the room. If an acoustic calculation exists, any change to the central field must be agreed with the project author. If no calculation exists, one should not promise an improvement or an unchanged result without measurements.
Can a product be ordered for delivery to the area and installed several weeks later?
This is possible subject to the current delivery and storage conditions for the specific material. Before ordering, agree on the unloading location and safe storage of the packages away from dirty and wet work. Upon receipt, immediately check completeness and record any damage in accordance with the seller's and carrier's procedures. Agree the exact installation date based on the readiness of the base and the instructions for the installation materials.
Final decision matrix for Yekaterinburg
For a living room of 6 × 5 m with a smooth field of 1700 × 1700 mm and a central chandelier suspension, the initial list of five models narrows to three if the voluntarily chosen 300 mm offset is retained. CRPU-070 leaves the greatest freedom for a possible axis shift. CRPU-069 has a denser modular structure, and RPU.VRS-001 is close to it in size but is assembled from eight larger overlays. CRPU-068 and CRPU-071 should be considered if one is prepared to change the size of the central field or to revise the decorative criterion after reviewing the project.
| Model | Geometry with the center at the suspension point | What to clarify before ordering |
|---|---|---|
| CRPU-070 | 467.5 mm; the 300 mm condition is met | Drawing of 24 parts, template, chandelier cup |
| CRPU-069 | 395 mm; condition met | Schedule of 64 parts, L/R orientations, template |
| RPU.VRS-001 | 394.5 mm; condition met | Position of eight large modules, central zone |
| CRPU-068 | 187.5 mm; condition requires review | Smooth field size, disputed completeness 68/72 |
| CRPU-071 | 167.5 mm; condition requires review | Change of platform and ceiling assembly composition |
A useful purchase sequence looks like this: measure the central field and the chandelier axis; obtain installation diagrams for the selected products; confirm the suitability of the base; agree on the light fixture mounting and the impact of changes on the acoustic ceiling; compare the product price with the full work budget; only then place the order and check the completeness upon receipt.
If the priority is a technically reliable and visually calm center of the ceiling, there is no need to buy the largest available ceiling rose. It is enough to choose one with confirmed dimensions, a mounting base, and compatibility with the light fixture. In this project, beauty comes not from the number of molded details, but from the precise place allocated to them.