










Article Contents:
- Where to buy a ceiling medallion for a kitchen-living room with track lighting
- Why a chandelier and a track should not compete for the center of the ceiling
- Three layouts for a chandelier and track lights
- What measurements are needed: from the busbar to the adjustable heads
- Where the center of the ceiling medallion should be
- Five real STAVROS models: comparison before purchase
- CRPU-070: when a smaller size is genuinely useful
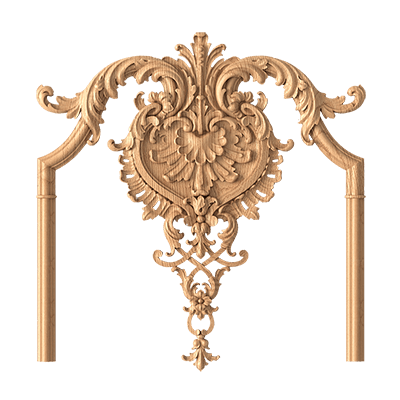
- CRPU-069: detailed ornament next to multiple light sources
- RPU.VRS-001: eight parts instead of sixty-four
- CRPU-068 and CRPU-066: when a large ornament is best avoided
- Practical calculation for a room of 6.2 × 4.6 m
- Swivel heads: checking before and after installation
- Two parallel tracks and an offset chandelier
- L-shaped track system and corner connectors
- How directional light changes the perception of texture
- Which ornament will complement a modern kitchen-living room
- If the track system is already installed: a solution without redoing the lighting
- The chandelier is mounted separately from the polyurethane ceiling rose
- How to check the contents of a factory kit before paying
- How much does a socket cost and what to include in the estimate
- How to order a ceiling socket with delivery to Yekaterinburg
- Eight mistakes that turn a purchase into a redo
- Frequently asked questions before ordering
- Can a socket be installed next to an existing track?
- How to measure the distance to the busbar?
- Is CRPU-070 suitable for any kitchen-living room?
- How does CRPU-069 differ from RPU.VRS-001?
- Should the chandelier be moved to the geometric center of the room?
- Can stucco molding be installed after the track is mounted?
- Where can I find the exact number of elements?
- Is a mounting template needed?
- How much does delivery to Yekaterinburg cost?
- When is it better to avoid a ceiling socket altogether?

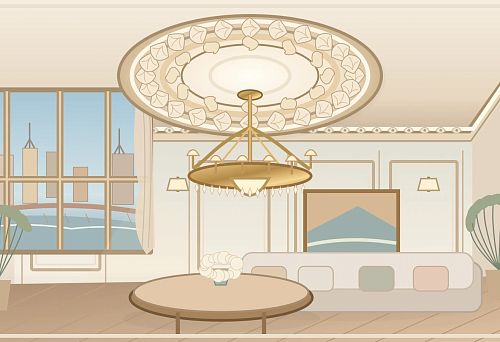
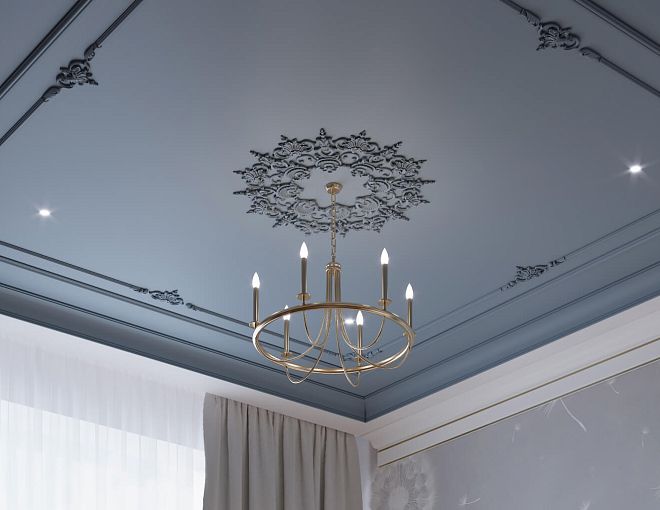
A chandelier is planned above the dining table, and a black track lighting system with adjustable spotlights is already marked out along the kitchen. In the visualization, there is enough white ceiling left between them. But replace the conventional circle around the chandelier with a real composite ceiling socket 1325 mm wide, and it turns out that the outer contour of the decor comes almost right up to the track. If the spotlight head is turned toward the table, the free space may become even smaller. It is at this stage that it makes sense to pause the purchase and check the plan down to the millimeter.
For a kitchen-living room like this, you cannot choose a product based only on the room area or the chandelier diameter. The axis of the track lighting system, its width, the location of the connectors, the protrusions of the adjustable spotlights, and the layout of the individual polyurethane parts all matter. Moreover, the geometric distance to the housing is only part of the task: the installation and maintenance zones of electrical equipment must be checked separately against the documentation for the selected system.
The customer can buy ceiling sockets in Yekaterinburg in the official STAVROS catalog, but it is wiser to place an order after three decisions: approve the chandelier suspension point, overlay the dimensions of two or three ceiling sockets onto the lighting plan, and coordinate the mounting with the installation contractor. Otherwise, even a product that fits in size may turn out to be unnecessary.
The example below uses a conventional kitchen-living room measuring 6.2 × 4.6 m. These dimensions are needed for a clear calculation and do not describe a built project. The products, prices, and item codes refer to the STAVROS catalog, while the distances to the tracks and the dimensions of the lighting units in the examples are design input data that must be measured again on a real project.



Where to buy a ceiling socket for a kitchen-living room with track lighting
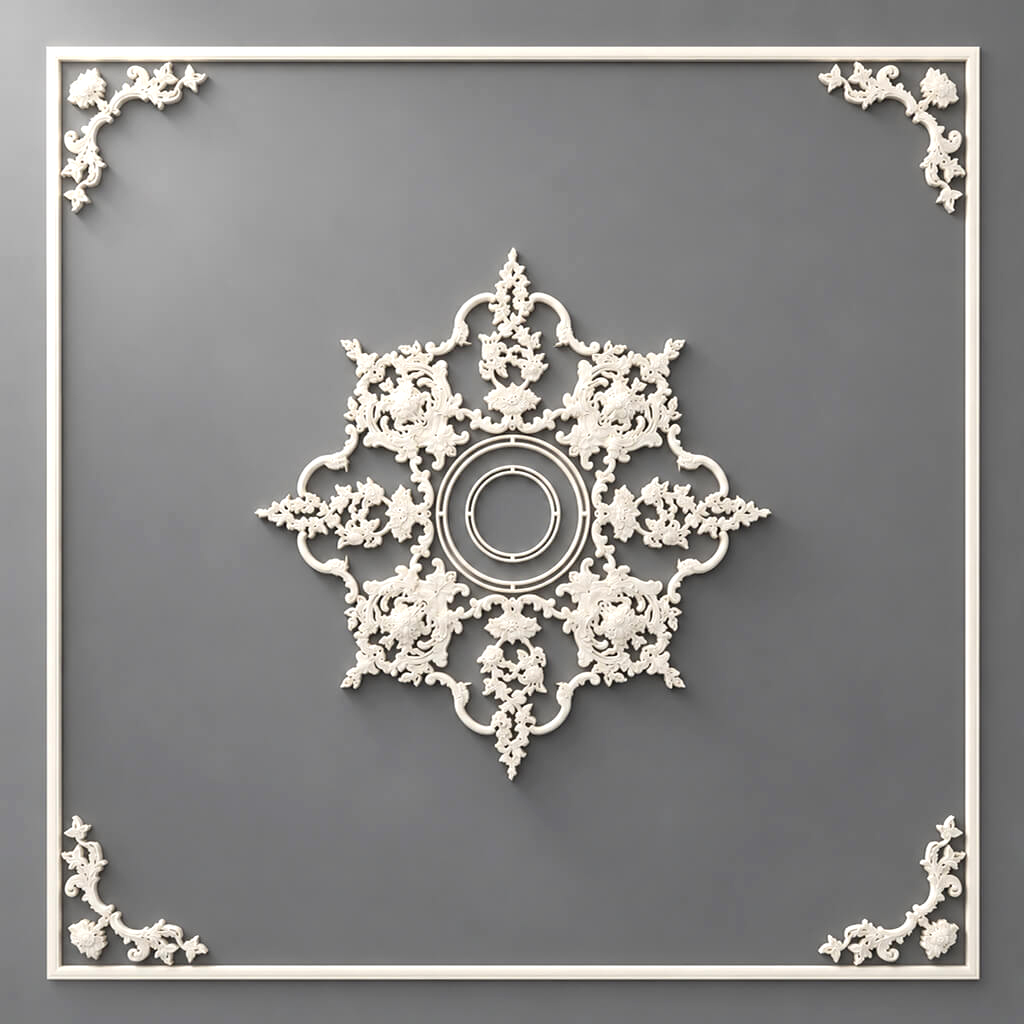
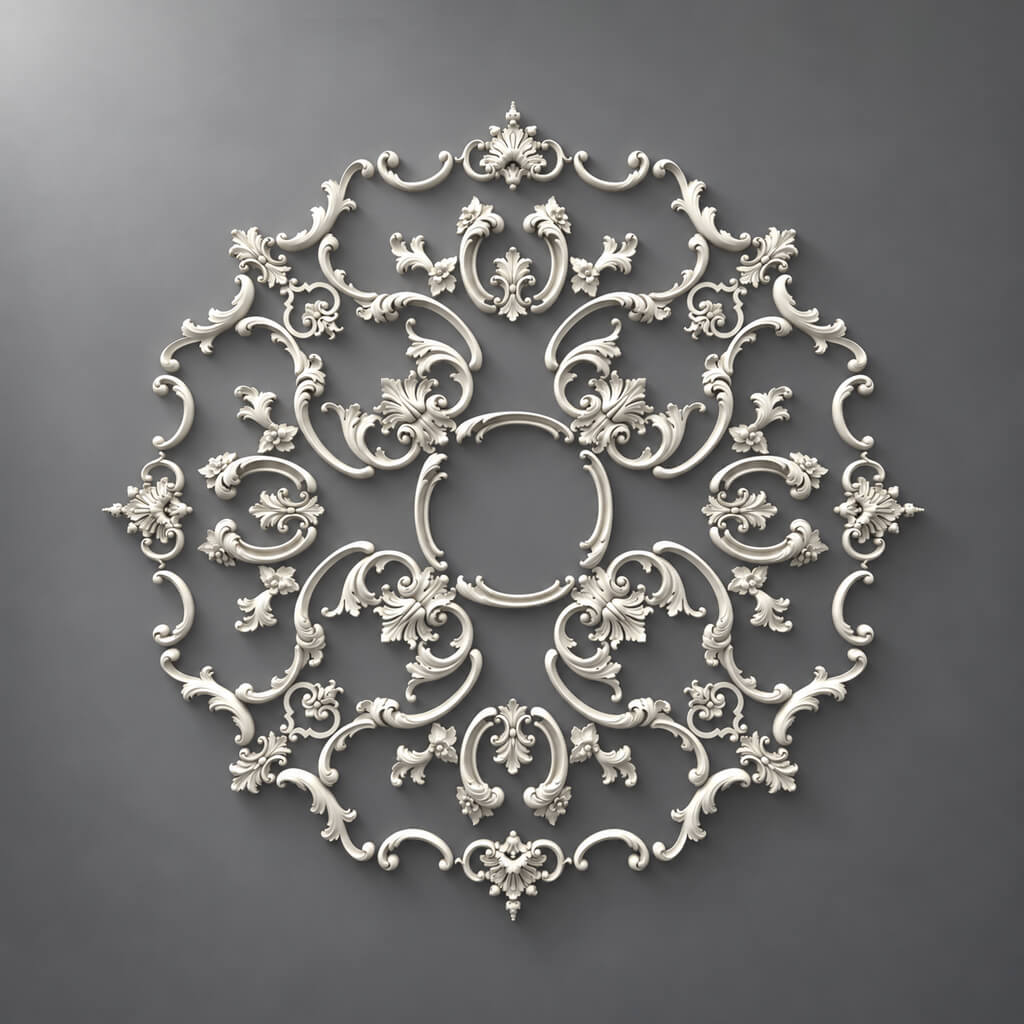
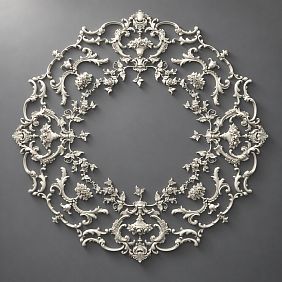
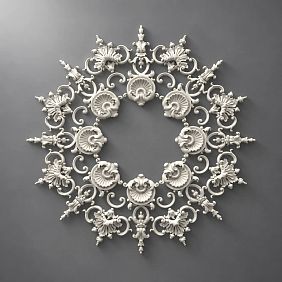
The first step is to open the section Polyurethane ceiling rosettes and to select products by size, pattern, and composition. The group under consideration contains five distinct compositions: CRPU-070, CRPU-069, RPU.VRS-001, CRPU-068, and CRPU-066. They are sold as decorative products, not as busbar or chandelier mounting elements. Therefore, the socket's product page alone cannot answer whether its position next to a specific light fixture is acceptable.
For a request to the seller, one selected SKU and the quantity of complete sets are sufficient. Preparing for installation will require more information: a layout drawing of the module positions, the condition of the base, the position of the outlet for the chandelier, and a list of areas that must not be covered by the decor. If approval has not yet been completed, it is useful to request a calculation for two options without immediately paying for a large composition.
You should not order two sets "to try them on," assuming that one can later be returned at no cost. Returns, packaging condition, and order terms should be clarified before purchase. On composite sockets, individual parts are tied to the pattern; haphazard unpacking makes it harder to verify the contents. It is far cheaper to check the scale on a ceiling plan sheet and with a full-size paper template than to open several factory sets on site.
Divide the tasks in advance. The seller confirms the SKU, price, availability, and set contents. The designer decides how well the ornament matches the interior. The installer checks the base and the position of the parts. The electrician is responsible for the suspension assembly and access to the connections. When all questions are assigned to one person without a clear division of responsibility, it is usually the technical limitation that gets lost.
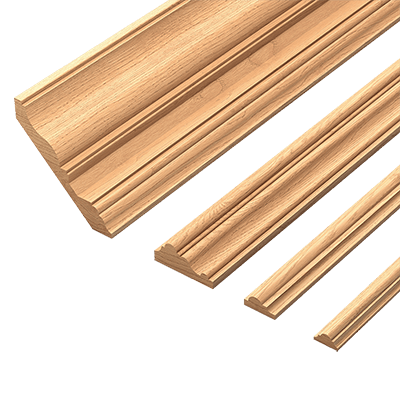
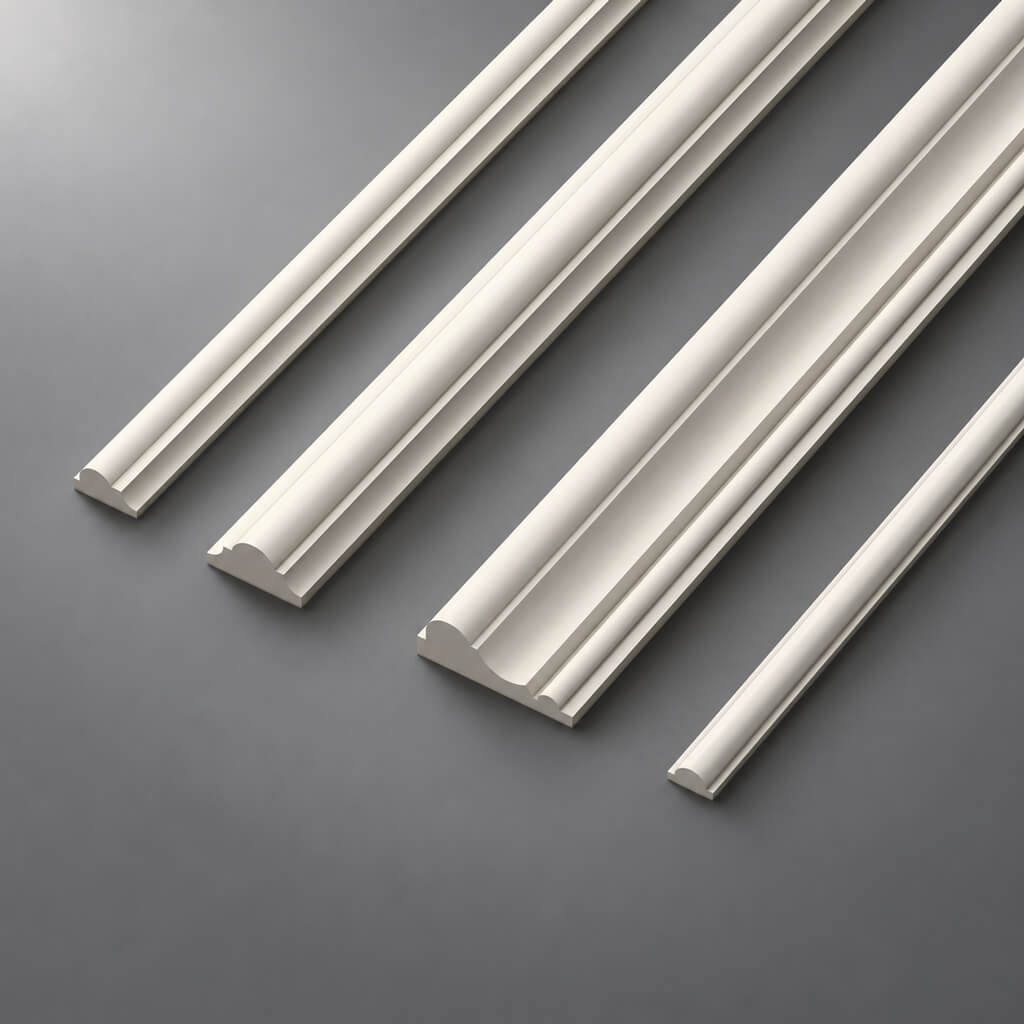
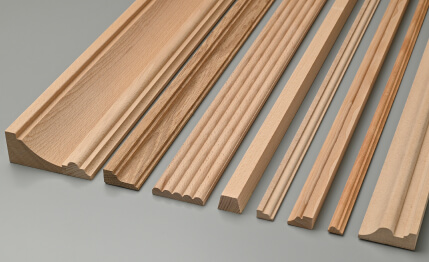
A buyer who is also planning wall frames and other decor may need Moldings from the same catalog. However, purchasing cornices, moldings, and additional overlays solely to "support" a ceiling medallion is not required in the project under consideration.


Why the chandelier and the track should not compete for the center of the ceiling
In a single kitchen-living room, two lighting systems perform different tasks. The chandelier can mark the dining table and provide soft general light around it. Adjustable fixtures on the busbar are convenient for directional lighting of the countertop, sink, walkway, and individual objects. The decorative medallion belongs to the first system: it frames the chandelier's suspension point. Moving it onto the track line solely for overall symmetry would be a mistake.
Look at the ceiling in two states. When only the chandelier is on, the eye naturally gathers the composition around the table. When only the track lights are on, attention shifts to the kitchen area, and the ceiling line of the busbar becomes more noticeable. With both lights on, the two focal points connect. An ornament under the chandelier that is too large can compete with the long, strict track; one that is too small, conversely, may get lost against the large dining table and a fixture with a wide body.
What matters here is not the style label "classic" or "modern interior," but distances and the density of elements. A narrow black busbar provides a strict straight line. A medallion with floral relief forms a complex rounded or radial center. Such a contrast can look convincing if space remains around each element. If the straight track almost touches the stucco contour, the eye perceives not a deliberate juxtaposition but an accidental collision of objects.
The reverse situation also occurs. The kitchen is compact, the chandelier is understated, and the track itself is prominent. A large ceiling medallion will not add any benefit here. It can be omitted while keeping the neat ceiling cup of the fixture. This is a fully valid design option, not an oversight: Buy molding it makes sense when it solves a specific decorative task.
The appropriateness of a medallion is assessed after the furniture is arranged. The table may stand closer to the window, while the kitchen units occupy one long wall; for this reason the chandelier often ends up noticeably offset from the geometric center of the room. The absence of equal spacing to all walls is not a defect if the decorative center is precisely tied to the dining area.
Our factory also produces:


Three layouts for chandeliers and track lights
In the first option, the chandelier is suspended above the table, and the single straight track runs along the kitchen work surface. This layout is easiest to check along one axis: measure the distance from the center of the chandelier to the nearest edge of the busbar and take into account the protrusions of the installed heads. If there is enough free space, several medallion sizes can be considered. But if the end of the track is bent toward the dining table using an additional connector, a single straight line is no longer sufficient for the calculation.
The second option uses an L-shaped busbar. One branch lights the kitchen front, the other lights the island or walkway. The nearest element to the medallion may not be the long straight section but the corner connector, a branch, or a fixture directed toward the center. The check is carried out in two directions, and the minimum gap is noted for each head position. Assessing only the distance to the most prominent branch means missing a likely point of conflict.
The third option is two parallel lines with the chandelier between them or closer to one of them. People often assume that the medallion will be in the middle. However, parallel tracks do not guarantee symmetry relative to the table, and the actual axis of the chandelier may be offset. The left and right sides must be checked separately. This is exactly how the new task differs from the usual selection of a medallion diameter for a fixture.
| Ceiling layout | Key measurement | Additional verification | When to reduce the decorative size |
|---|---|---|---|
| Straight track along the kitchen | From the chandelier axis to the nearest edge | Rotating the heads toward the dining area | If the relief falls within the fixture zone |
| L-shaped track | To each branch and connector | Corner, power supply, cable routing | If one corner of the layout is too close |
| Two parallel lines | Separately on the left and right | Difference in offsets and working positions | If one side passes and the other does not |
You cannot replace these three checks with a single rule of "keep the socket no closer than a certain number of centimeters from the track." Installation constraints depend on the equipment and its documentation; the aesthetic clearance is chosen separately. A practical diagram should show both, and safety requirements always take priority over the desired look.
Get Consultation
What measurements are needed: from the busbar to the adjustable heads
The tape measure is applied not to the middle of the visible black stripe, but to the points from which a plan can be unambiguously constructed. First, the axis of the busbar and the width of its body are recorded. Then the distance to the actual center of the chandelier suspension is noted. If the track has not yet been installed, use a scaled installation drawing; a rough freehand line is not suitable for ordering an expensive multi-part socket.
The projection of the luminaire relative to the track axis is recorded as a separate dimension. An adjustable head can be wider than the body itself, can tilt in different directions, and can have a significant offset. For the future socket, what matters is not only the "straight down" position, but all normal operating directions. If the designer plans to light the table with one of the spots, this is especially important: in one position the head does not interfere with the decor, but after rotation it ends up above its relief or too close to it.
Do not forget about connectors, end caps, and mounting parts. They may be slightly wider or longer than the main busbar. Separately mark the places where the power supply, electrical connection, or fasteners need to be serviced. You cannot assume that there is enough free space between the visible bodies if servicing requires removing a cover, taking out a module, or rotating the luminaire.
It is more convenient to compile a schedule of specific measurements rather than keep scattered photos. For a hypothetical project, it looks like this:
| Parameter | Example entry | What this means |
|---|---|---|
| Chandelier center | Point L on the survey plan | The socket dimension is laid off from it |
| Axis of the straight track | 650 mm from point L | Basic geometric measurement |
| Track width | 35 mm, nominal value | Half the width is subtracted when locating the nearest edge |
| Fixture protrusion | According to the drawing of the selected model | Must not be replaced with the width of the busbar itself |
| Head directions | Marked with arrows | Working extreme positions are checked |
| Connectors | Coordinates on the plan | Their dimensions are taken into account separately |
| Electrical components | According to the electrician's plan | Access is preserved regardless of the decorative design |
After measuring, it is useful to make a full-size template of the selected socket. Unlike a bounding rectangle, an accurate factory drawing should show the individual parts and the gaps between them. If only the external dimension is available, it is used as a cautious boundary at the first check stage, but it is not presented as the shape of the ornament.
Where the center of the ceiling socket should be located
The most common logical mistake is trying to align the geometric center of the kitchen-living room with the center of the dining group, the axis of the chandelier, and the midpoint between the tracks. In a real room, these are four different points. Let's imagine a room of 6.2 × 4.6 m. Its geometric center is at the intersection of the half-sides — 3.1 and 2.3 m. If the table is shifted closer to the window, its center may end up half a meter farther from the kitchen. Moving the chandelier back to the center of the room just for a "correct" socket means worsening the lighting of the table.
First, the chosen position of the chandelier relative to the dining group is fixed. Then the decorative composition is aligned to this axis. If the ceiling rose is symmetrical and the central cup of the fixture is within its open area, geometric coordination becomes simpler. But not all modular compositions have the same central part. Before placing the electrical outlet, it is necessary to check the manufacturer's diagram and the dimensions of the ceiling cup of the specific chandelier.
The option with an offset chandelier sometimes looks even more natural. A long track forms the working axis of the kitchen, while the dining fixture defines a separate zone. The architecture of the room is read through furniture and light, not through perfect symmetry of the ceiling pattern. Such solutions work well only when there is no accidental intersection between the systems.
When the ceiling rose is moved 100 mm toward the track, the minimum clearance decreases by the same 100 mm, if the movement occurs along the axis being checked. For CRPU-069, the margin of 177.5 mm from the following calculation will become 77.5 mm even before accounting for the fixture head. It is useful to perform this simple action with all the proposed options: sometimes moving the table by a few centimeters changes the range of suitable decor more than the difference in price.
Five real STAVROS models: comparison before purchase
In the manufacturer's official catalog on November 5, 2026, the following dimensions and prices are listed. For this comparison, one complete decorative set of each item is taken. The product price does not include the busbar, chandelier, delivery, base preparation, adhesive, installation, and painting.
| Model | Dimension A × B × C | Set price | Comparison feature |
|---|---|---|---|
| CRPU-070 | 765 × 765 × 18 mm | 35 680 ₽ | Smallest dimensions among the five |
| CRPU-069 | 910 × 910 × 15 mm | 62 560 ₽ | Detailed multi-component ornament |
| RPU.VRS-001 | 911 × 911 × 18 mm | 67 360 ₽ | Composition of eight elements |
| CRPU-068 | 1325 × 1325 × 18 mm | 50 480 ₽ | Large decorative composition |
| CRPU-066 | 1345 × 1345 × 19 mm | 96 520 ₽ | Large composition with a different pattern |
The price difference between CRPU-070 and CRPU-066 is 60,840 ₽, but it would be wrong to interpret this as the cost of the additional 580 mm of width. The products differ in their set of parts, pattern and ornament structure. Likewise, CRPU-068, despite its larger size, costs less than CRPU-069. Therefore, the price table does not replace studying a specific composition, and size is not a universal indicator of installation labor intensity.
Half of the outer dimension is needed for preliminary calculation before the track: 382.5 mm for CRPU-070, 455 mm for CRPU-069, 455.5 mm for RPU.VRS-001, 662.5 mm for CRPU-068 and 672.5 mm for CRPU-066. These are halves of the conventional bounding square along the corresponding axis, not the radii of the actual decorative contour. The ornament may be complex, with protrusions and voids. Verification of the final placement requires a factory drawing.
CRPU-070: when a smaller size is genuinely useful
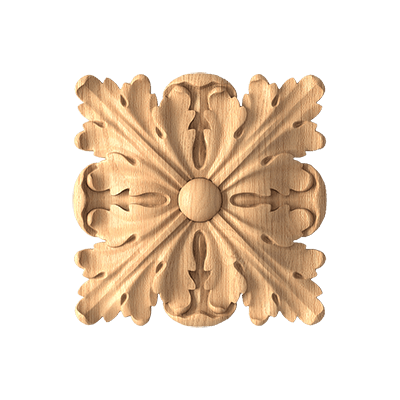
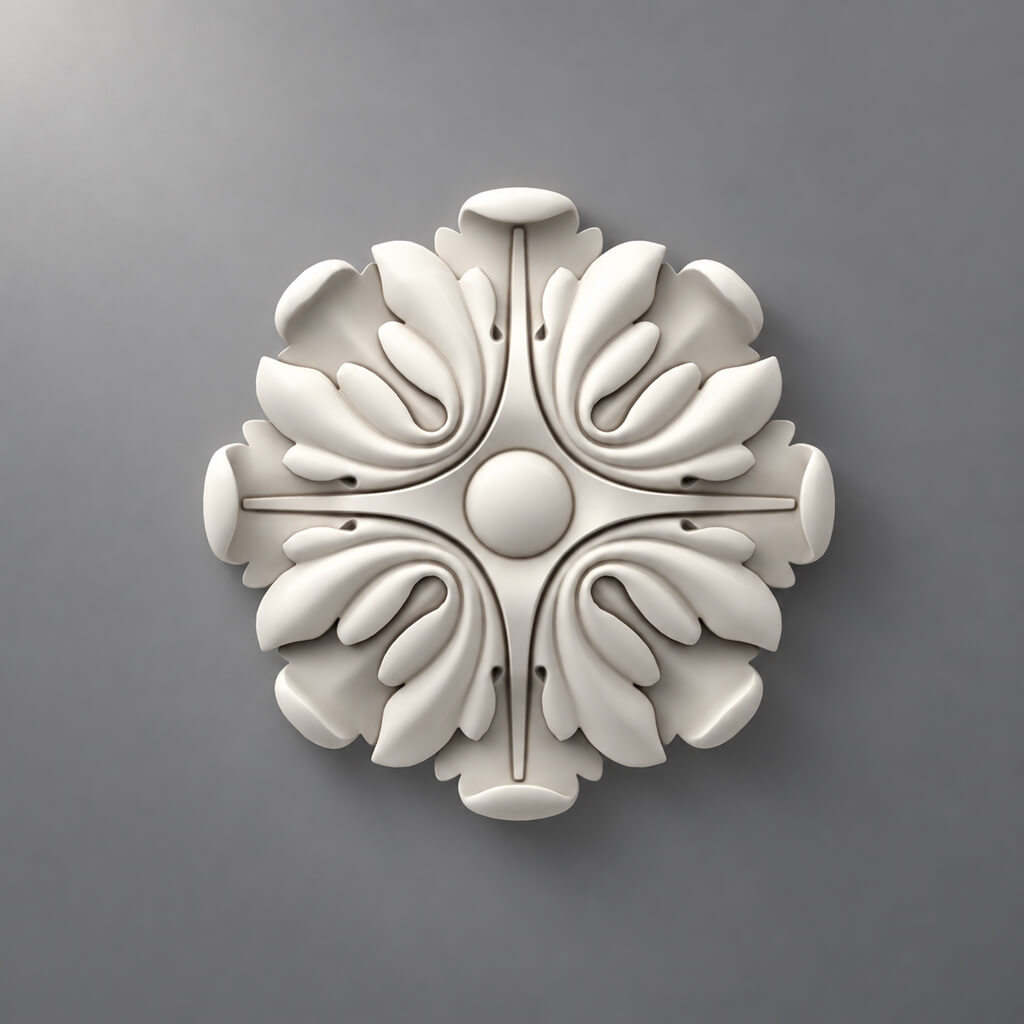
Ceiling rosette CRPU-070 measures 765 × 765 × 18 mm. Against the other four options, this is a relatively small decorative center, although a width of 765 mm is already noticeable in a residential interior. Such a composition allows more empty ceiling to be left up to the straight track line, especially if the dining table is located close to the kitchen area.
According to the manufacturer's product page, the set consists of 24 decorative parts. The buyer needs to purchase one complete set, not 24 individual elements, if they want to obtain the original factory composition. Upon acceptance, it is useful to verify the quantity against the item-by-item list: a matching total does not guarantee that all the required shapes and mirrored pairs are present.
The smaller product also has an artistic limitation. A large chandelier with a wide ring-shaped body can visually obscure part of the ornament. Looking from below, a person will see primarily the light fixture, not the ceiling medallion. Therefore, before ordering, one compares not only the dimensions of the ceiling cup but also the silhouette of the chandelier itself as seen from below. If the body hangs low, the result is one thing; if the flat base of the fixture is almost flush with the ceiling, it is another.
For a kitchen-living room with a straight track, it is advisable to keep this model first on the shortlist. But this is not a ready permission for installation. Individual elements must be placed on the plan and checked against the nearest directional head. If there is insufficient space, even CRPU-070 should not be "trimmed on site" without an agreed solution: altering the factory pattern may disrupt the symmetry and the joining of parts.
From a budget standpoint, this model offers the lowest price among the five considered. Saving makes sense only if the desired decorative effect is preserved. Ordering it solely because large medallions do not fit is not worthwhile: sometimes it is better to forgo the central stucco molding than to end up with a cramped composition of a small medallion and an overly massive chandelier.
CRPU-069: detailed ornament next to multiple light sources
Ceiling rosette CRPU-069 has an outer dimension of 910 × 910 × 15 mm. The public composition description lists a set of 64 elements of 15 types. This level of detail matters not only for completeness of the kit but also for how the ceiling is perceived. Under side lighting from track heads, the small protrusions can cast many separate shadows; under diffused light the effect will be calmer.
Suppose the dining area is furnished with a simple wooden table, flat kitchen cabinet fronts and a light fixture without pendants. Then the botanical ornament of CRPU-069 can become a deliberately highlighted classic accent. But if the dining chandelier already consists of many fine details, and several directional light sources are positioned above the kitchen, a rich pattern risks making the ceiling feel overloaded. This is a visual judgment to be verified with a mock-up and test lighting, not a technical specification of the SKU.
A composition made of many elements requires especially careful marking out. A single outer square does not show the placement of leaves, scrolls and connecting parts. Before ordering, it is useful to request the current assembly diagram, check for mirrored parts and confirm the orientation marking of each group. If the edge of the composition falls on the line next to the track, a precise diagram can sometimes help: an empty area between modules may leave room for equipment, but such proximity can only be approved after checking installation and maintenance.
The price of the set is 62,560 ₽ as of the verification date. This is not the amount for installation work. Two compositions of similar size may require different numbers of markings, joints and subsequent finishing. When comparing contractors' quotes, it is essential that both price the same set according to the same factory bill of materials.
Working drawings should mark not only the center of CRPU-069 but also the direction of the main branches of the pattern. Rotating the composition relative to the track line can change the visual dialogue between the strict straight line and the ornament. However, rotating the decorative scheme will not fix an insufficient technical clearance if the outermost parts still fall within the equipment's exclusion zone.
RPU.VRS-001: eight parts instead of sixty-four
Ceiling rosette RPU.VRS-001 has dimensions of 911 × 911 × 18 mm and costs 67,360 ₽. Its composition is eight elements: four NPU-507 and four NPU-508. Compared with CRPU-069, the outer dimension differs by only one millimeter, but the assembly scheme and the character of the ornament placement are substantially different.
A smaller number of parts makes it easier to check the total quantity on receipt. One set must contain four elements of one type and four of the other. But this does not mean that installation is automatically cheaper or simpler. Large parts may require different methods of temporary fixing, additional measurements and more careful joining. The technology is confirmed by the manufacturer of the installation materials and the specialist on site.
Under mixed lighting, it is useful to compare this model with CRPU-069 specifically by the pattern, not by the outer square. In one composition the eye lingers on a dense wreath of parts, in the other on a more separated decorative rhythm. On a ceiling with a straight track, the difference may be more noticeable than in a photo of an individual product. The physical width is almost identical, so the geometric calculation to the busbar will give practically the same result; the artistic solution will remain different.
If the chandelier has a wide ceiling canopy, the internal free area of the composition must be checked. Eight large parts do not mean that there is necessarily enough room in the center for any suspension system. The electrical unit must not be covered by a non-removable decorative part if the design requires access for maintenance. A visually successful fit is not yet sufficient grounds for installation.
For the purchasing list, write "one complete set RPU.VRS-001", and below it list the control quantities of NPU-507 and NPU-508. If the parts are already included in the main product, there is no need to add them to the cart again. This simple technique prevents a typical mistake where the buyer receives an excessive set of individual overlays instead of one complete composition.
CRPU-068 and CRPU-066: when a large ornament is better excluded
У ceiling medallion CRPU-068 dimensions 1325 × 1325 × 18 mm, and ceiling medallion CRPU-066 — 1345 × 1345 × 19 mm. Both models can form a standalone large composition. They are worth considering in a spacious dining area, when the track lines are located far enough away and the room's architecture allows for an expressive central ornament. However, the area of a kitchen-living room alone does not guarantee this.
In the conditional example, where the track axis is 650 mm from the chandelier, half the dimensions of these medallions are already greater than the distance to the nearest edge of the busbar. Therefore, the preliminary dimensional square intersects with the track zone: by 30 mm for CRPU-068 and by 40 mm for CRPU-066. This is not proof of physical intersection for each specific overlay; but it is sufficient reason not to place an order based on an outer dimension alone. The next step is to precisely overlay the individual modules onto the plan and check the equipped zones.
If the track can be moved in a coordinated way at the design stage, the choice opens up again. But changing an approved working lighting scheme for the sake of a larger medallion should only be done after assessing the functional consequences. Shifting the track by 100 mm may worsen the lighting of the countertop or leave a dark area above the sink. Decor should not dictate the placement of the main working light fixtures.
CRPU-068 costs 50,480 ₽, CRPU-066 — 96,520 ₽ as of the verification date. The seemingly paradoxical price order shows that they cannot be compared by width alone. For CRPU-068, there is separately a discrepancy in the open specification: the description states 72 parts, whereas the sum of the items in the previously published bill of materials was 68. Before purchasing, an up-to-date packing list must be obtained; until then, the number of elements cannot be considered definitively established.
For CRPU-066, the available catalog lists an expanded modular composition, and the orientation of the pattern is especially important when selecting. Large groups of leaves and scrolls can be noticeable from the opposite corner of the kitchen even when the lighting is off. If the ceiling already has a pronounced busbar line and prominent furniture profiles, the result is better assessed on a full expanded plan rather than from a product card photo.
The reason to reject a large model is not always technical. If the ornament comes almost right up to the track, visual crowding appears: one element seems to stop accidentally next to another. Reducing the size or forgoing the medallion in such a situation can give a more cohesive ceiling and save budget without sacrificing lighting convenience.
Practical calculation for a room 6.2 × 4.6 m
Let us take a specific geometry from the plan, without presenting it as the actual dimensions of an installed kitchen. Let us designate the center of the chandelier as L. The axis of the straight track runs at a distance of 650 mm from L. The width of the track body in the training example is 35 mm. If its near edge faces the chandelier, the distance from the chandelier axis to the edge is 650 − 35 / 2 = 632.5 mm. This value serves as the initial boundary for the outer overall dimension of the decor.
For each socket, divide the dimension along the axis being checked in half and subtract the result from 632.5 mm. A positive difference means that the overall square, in the accepted orientation, does not reach the near edge of the busbar. A negative one means that the squares intersect. In both cases this is a preliminary calculation: the contour of individual covers, the protrusion of heads, access to connectors, and the manufacturer's requirements are checked additionally.
| Model | Half the dimension | Conditional remainder to the edge | Preliminary conclusion |
|---|---|---|---|
| CRPU-070 | 382.5 mm | +250 mm | Passes by outer overall dimension |
| CRPU-069 | 455 мм | +177.5 mm | Passes by outer overall dimension |
| RPU.VRS-001 | 455.5 mm | +177 mm | Passes by outer overall dimension |
| CRPU-068 | 662.5 mm | −30 mm | Overall dimensions intersect |
| CRPU-066 | 672.5 mm | −40 mm | Overall dimensions intersect |
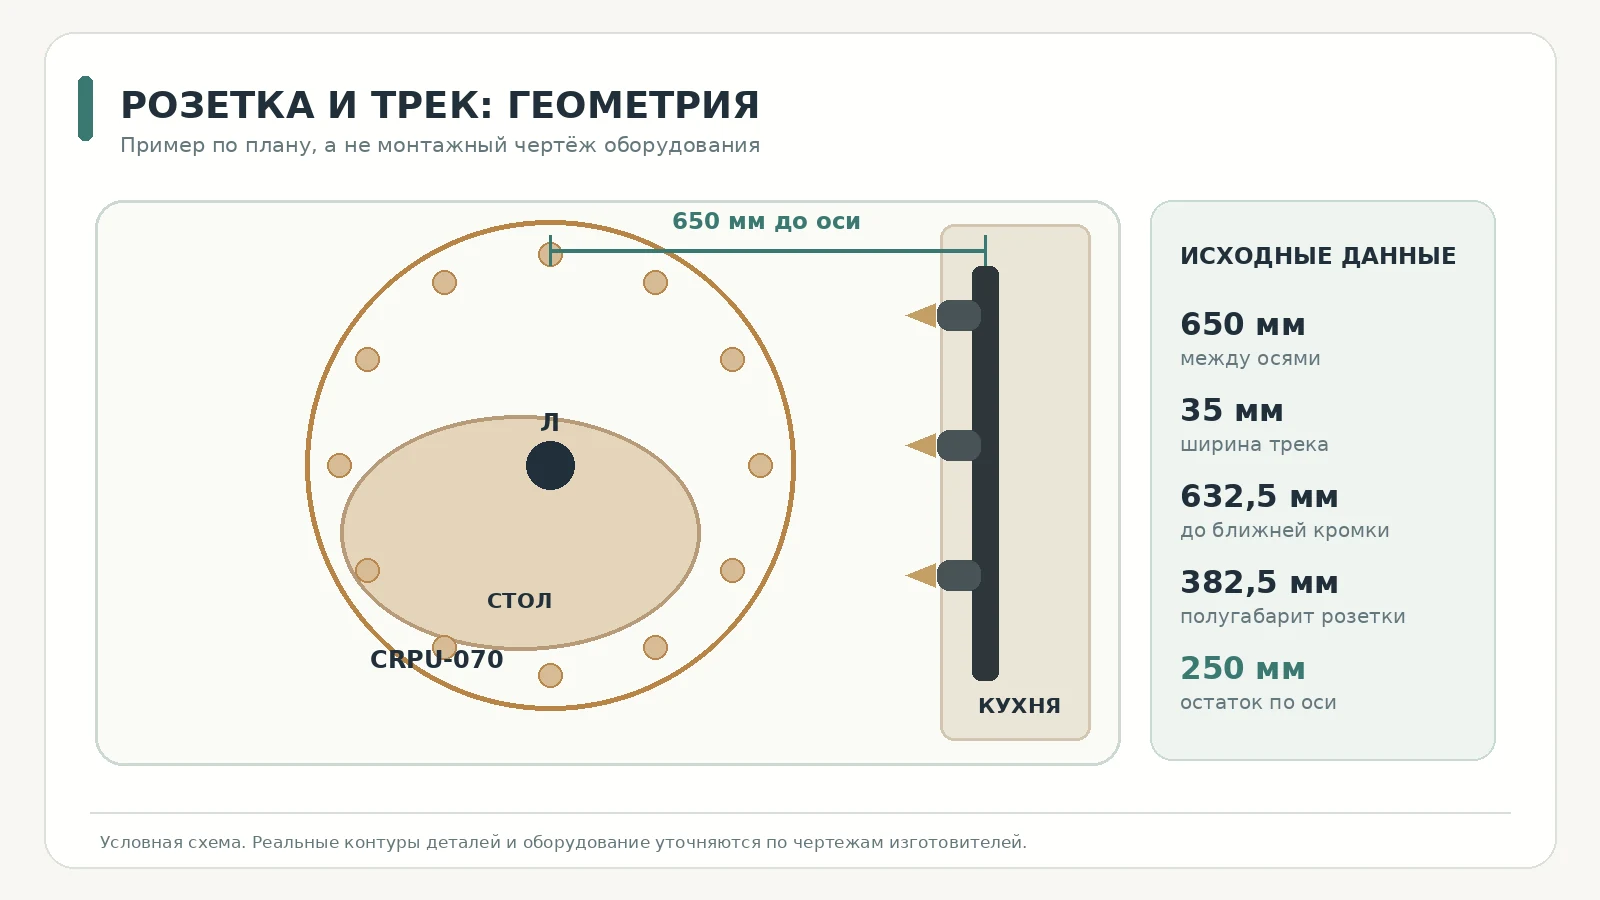
The result often creates a false sense of precision: as if 177.5 mm were a guaranteed sufficient distance. This is not the case. If, for a specific luminaire head, the working reach toward the chandelier exceeds half the width of the track, the nearest equipment dimension is no longer 632.5 mm from the center. Its actual position is determined from a drawing or by measuring the luminaire in the selected position.
For example, purely to demonstrate the method, let us assume that the section of one spotlight closest to the chandelier is 555 mm from axis L. Then CRPU-069 has 100 mm left along the conditional square, not 177.5 mm. Whether this distance is needed for specific equipment and maintenance cannot be determined without technical documentation. The figure of 555 mm is given here as an example, not as a characteristic of the luminaire being sold.
When rechecking, different coordinate systems must not be mixed unnoticed. If the dimension to the track is taken diagonally, half the width of the socket cannot be subtracted from it directly along the horizontal. On the plan, a perpendicular is drawn from the center of the chandelier to the nearest boundary, and for an L-shaped busbar the angle is additionally checked. With an inaccurate measurement, a difference of a few tens of millimeters easily turns from a plus into a minus.
Rotating heads: checking before and after installation
The track system is interesting precisely because the light can be redirected. Therefore, measuring the luminaire body while it points straight down is not enough. Note which directions are needed in daily use: onto the work surface, the kitchen backsplash, a shelf with decor, the wall, or the dining table. These positions form a working set that must remain accessible after the socket is installed.
A simple check begins with a photo of the ceiling taken strictly from below or with a measured plan. On it, the outline of the track and the extreme positions of each head are marked. If the track is already installed, the luminaire should be rotated by a person who understands the design of the selected model; excessive force must not be applied, the fastening must not be loosened, and the fixture must not be left in a position not provided for by the manufacturer. For a system not yet installed, the working dimensions are taken from the technical drawing.
During selection, one looks not only at the possibility of mechanical rotation but also at the lighting result. If a luminaire illuminating the table is forced to shine through molded relief, the composition may produce harsh, unexpected shadows. This is not necessarily a dangerous defect, but the function of such a spotlight will change. For kitchen work lighting, visibility of the countertop and the absence of uncomfortable shadows are more important than dramatic illumination of the central ornament.
Sometimes a single luminaire can be slightly reoriented without changing the overall scheme. But this decision cannot be taken instead of checking electrical and installation clearances. Another option is to choose a more compact socket or to move the decorative center itself only within the permissible alignment to the chandelier. The connector should not be left inaccessible on the pretext that the spotlight "usually points the other way anyway."
If the head is located at the very end of the track, separately check how it is removed for repair or replacement. A beautiful relief placed almost flush against it can hinder even routine maintenance. This case is often discovered after painting is finished, when redoing it is already difficult. Therefore, the final plan should include not just a drawn light arrow, but the outline of the actual fixture and the access required for it.
Two parallel tracks and an offset chandelier
With a symmetrical arrangement of two busbars, it seems that a suitable socket can be determined by half the distance between them. In practice, the dining table is often shifted toward the window or combined with the kitchen island. Its axis no longer coincides with the midpoint between the tracks. If one line is 800 mm from the chandelier and the other is 530 mm, the second will be the limiting one, although on the general plan the first may look closer due to the viewing angle.
A separate calculation is filled in for each side: the distance to the axis, half the width of the busbar, the nearest protrusion of the luminaire, half the overall dimension of the socket, and the remaining gap. If at least one side shows an intersection of the outer contours, the purchase is paused until an exact drawing of the modules is available. The two distances cannot be averaged: a value of 665 mm instead of 530 and 800 would hide the unfavorable side.
Two lines have another feature: the luminaires may face each other. Then intersecting light beams form in the center and the pattern of shadows on the decor changes. This effect sometimes makes the relief more expressive, but in a small dining area it can overemphasize the stucco. Before the final finishing, it is advisable to check at least three switching modes and evaluate the ceiling from the points where people will sit and walk.
It is useful to link the track plan with the furniture plan. If the table has not yet been ordered, indicate not only its approximate center but also the permissible movement zone. A 150 mm shift of the table means that the chandelier point may be reconsidered, and along with it the clearance to the nearest track will change. If the item is purchased before these decisions are made, the interior will have to be adjusted to the already-paid-for product. This order is almost always inconvenient.
L-shaped busbar and corner connectors
In an L-shaped scheme, it is not enough to draw two infinite straight lines and measure the distance to them. A real track has finite sections, a corner, a connecting element, and luminaires mounted on it. The nearest point to the decorative pattern may be right at the turn. If the socket has radial elements, one of them may come closer to the corner than a direct calculation based on the model's width.
The best way to check is to overlay the factory outline of the item onto the busbar plan at a one-to-one scale. On a small printed sheet, individual scrolls may merge, so for a disputed area it is worth printing a fragment at full size and applying it to the ceiling markings before installing the equipment. At the same time, the method of attaching the stucco itself is not determined by the paper template; it is agreed upon based on the substrate and materials separately.
If a ray of the decorative ornament falls near the corner connector, it is reasonable to compare another orientation of the composition. This is permissible only when the pattern and the manufacturer's scheme allow the entire item to be rotated, and the installation does not affect the chandelier mounting. Individual mirrored parts cannot be rotated arbitrarily: their mating profile may not match.
The corner of the track often serves as a reference point for two functional zones. The decor around the chandelier should not visually "continue" this corner, as if both systems formed a single mechanism. They are independent. Therefore, it is sometimes better to place a calmer ornament and leave a clear strip of free ceiling between the decorative center and the technical lighting line.
How directional light changes the perception of relief
The same ornament looks different under two lighting schemes. When a central chandelier with diffused shades is on, the shadows from thin leaves can be soft, and the decorative wreath itself reads as a single silhouette. Under the directional light of a track head, part of the relief gets a bright spot, and sharply darkened recesses appear next to it. This is an optical property of the protruding surface, not a promise of some special lighting effect from a specific model.
Three observation points are useful for checking: at the entrance to the room, from the side of the kitchen work surface, and sitting at the table. From each one, a different part of the ceiling is visible. A track that appears far from the socket in a top view may, from the doorway, almost cross its outer contour. Therefore, assessing only from the plan does not replace looking at a scale model or temporary markings.
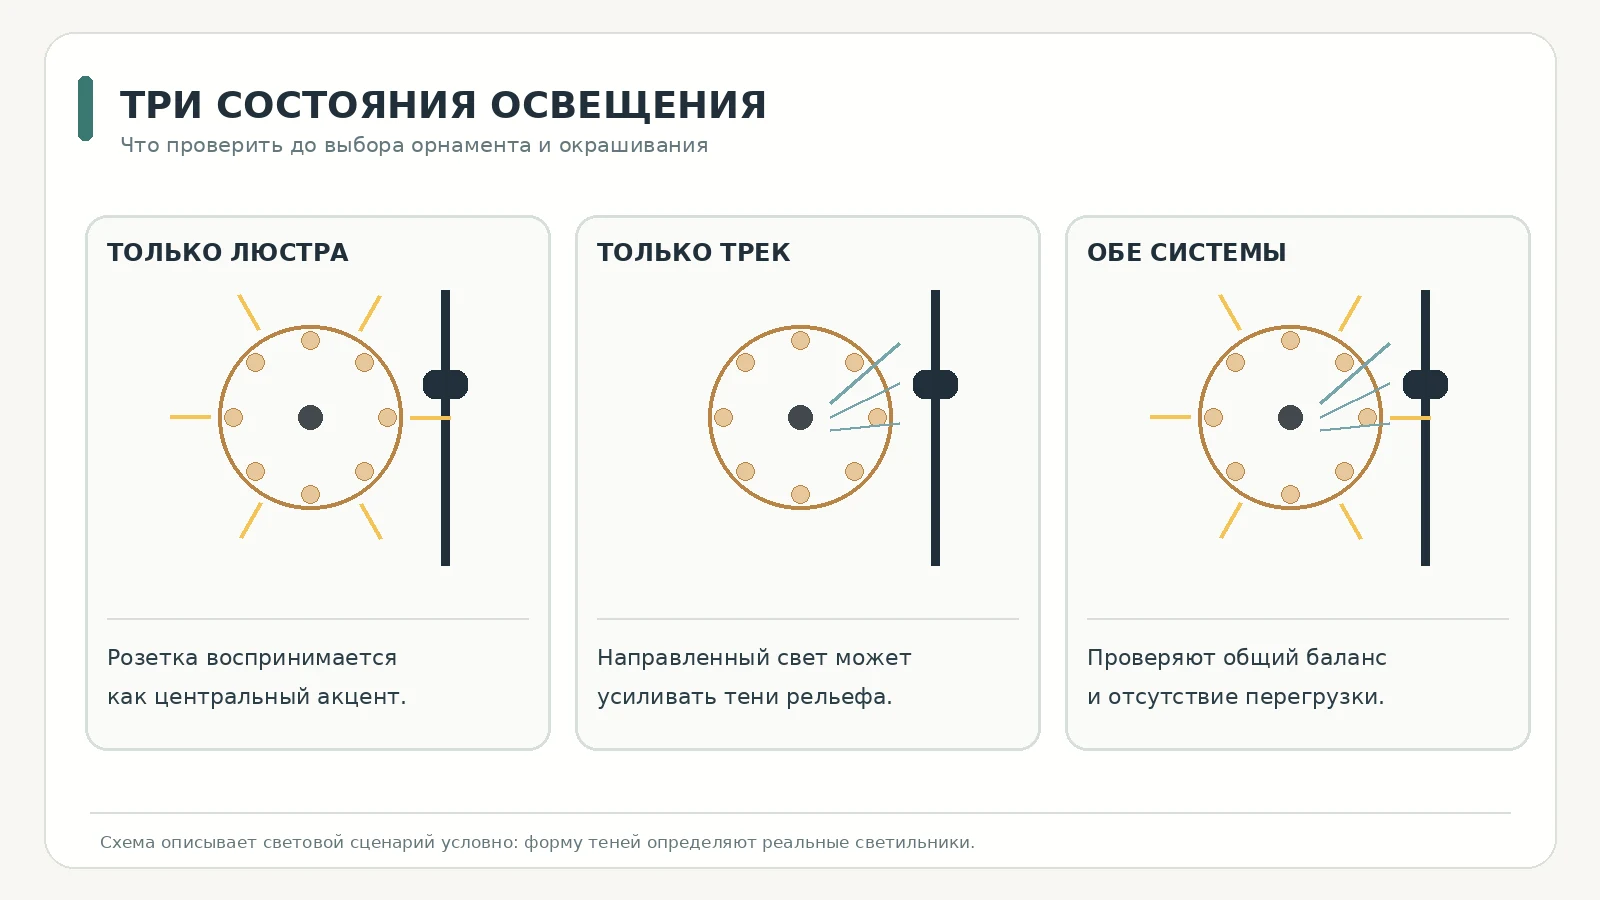
Painting also affects perception, but this article is not about choosing ceiling colors. In the kitchen under consideration, it is enough to check whether glare from the fixtures hides the fine pattern, whether unpleasant dark spots appear, and whether reflections interfere with working at the table. The shade can be selected after the dimensions and position of the socket itself have been determined.
For a model with many details, it is advisable to test the lighting scenario without permanently fixing all decorative modules, if the installation technology and work organization allow it. This could be a paper contour, a digital visualization with actual dimensions, or a trial lighting arrangement. One should not assume that after painting it will always be possible to quickly reposition the product without marks on the finished surface.
Which ornament will support a modern kitchen-living room
Strict facades, straight furniture lines, and a slim busbar do not rule out a plant pattern. The contrast can be intentional: a calm modern kitchen forms a backdrop for a dining area with a chandelier and decorative ceiling medallion. But such a solution should have one main center. If there is already a complex chandelier with dozens of pendants nearby, large, rich stucco may turn out to be excessive.
Pay attention to the scale of repeating details. Small leaves on the ceiling, viewed from a distance of several meters, begin to blend into a fine texture. Large elements create a distinct wreath. If the track is located close by, the viewer notices not only the beauty of the ornament but also the relationship between its edge and the straight line of the busbar. Therefore, choosing between CRPU-069 and RPU.VRS-001 with almost the same overall size can be no less significant than choosing between 765 and 910 mm.
At the comparison stage, it is enough to print photos or diagrams of two or three models at a uniform scale. Different image magnifications on the website make it hard to see the physical difference. If one picture fills the entire screen and another is shown as a thumbnail, they seem incomparable. Indicate the dimensions on each sheet and place them above the image of the dining table without changing the scale of the room.
The third option is to forgo the ceiling medallion. If the ceiling is already divided by track lines and the chandelier has a distinctive shape of its own, an additional ornament is optional. In this case, the customer saves on the cost of the set, materials, and installation without compromising the lighting function. The quality of an interior is determined not by the number of decorative elements, but by how they work together.
If the track lighting is already installed: a solution without reworking the lighting
In a finished kitchen-living room, the procedure differs from a paper project. The track may already be mounted, connected, and adjusted to the height of the work surfaces. Moving it for the sake of the molding would mean re-coordinating the layout of the fixtures, dismantling part of the ceiling finish, and checking the electrical connection. Therefore, options that do not affect the working lighting system are considered first.
Start by accurately recording the existing geometry. Measure the distance between the center of the chandelier and each section of the track, the width of the busbar, the coordinates of the connectors, and the minimum clearance to the heads in their normal working positions. Immediately mark the places that need to be accessible for maintenance. A smartphone photo is useful for the overall view, but the dimensions should be put on a separate drawing where they are not affected by perspective distortion.
Then check the models from smaller to larger. If the CRPU-070 does not conflict with the track along its outer contour, do not rush to pay for it: you still need a scaled drawing to coordinate with the chandelier. If the CRPU-069 or RPU.VRS-001 fit geometrically, compare their different styles of ornament. Larger options should be excluded from the shortlist when their outer contour reaches the technical zone; you can return to them only after a precise check of the modules and the permitted mounting.
A separate issue is the condition of the painted ceiling. After the track is installed, there may be installation marks, uneven areas, or finish seams. A ceiling medallion is not intended to mask defects in the substrate without preparation. If the surface is not sound, a composite composition cannot simply be glued over the existing coating. Clarify in advance the scope of local preparation and subsequent painting, otherwise the cost of the aesthetic improvement may turn out to be unexpectedly high.
If the only way to fit the chosen medallion requires blocking access to the connector or making it impossible to rotate the fixture, that is a reason to reject the model. Electrical equipment should not become dependent on a decorative overlay. The most sensible solution is sometimes to leave a neat chandelier without a medallion and direct the budget toward quality lighting for the table and kitchen.
The chandelier is mounted separately from the polyurethane ceiling medallion
A ceiling medallion is a decorative product. It must not bear the weight of the chandelier or serve as a substitute for the mounting point provided by the fixture's design. The project separately shows the load-bearing suspension point, the electrical connection, and the decorative elements around it. First the fixture and its mounting are checked, then the placement of the molding is coordinated.
If a large chandelier is planned above the table, it is important to know the dimensions of its ceiling cup. It may cover part of the central ornament, overlap the joints, or not fit within the free field of the composition provided by the manufacturer. You should not cut the factory parts on site in the hope that the cup will hide the flaws. Such a solution may impair the fit of the modules and disrupt the operation of the electrical unit.
Access to serviced connections is provided in accordance with the design and the requirements for the installed equipment. Decorative finishing must not turn a removable cover or junction box into a non-removable ceiling element. The electrical wiring work itself is performed by a specialist while observing the necessary safety precautions; the text about purchasing a socket does not replace the electrical installation instructions.
A separate check is needed at the junction of the filler, paint and polyurethane. Even if the product does not carry a chandelier, it should be fixed to a suitable base using an agreed technology. Damp, weak, peeling or unprepared layers cannot be considered a reliable fixing point simply because the decorative part looks light. The exact adhesive and preparation procedure are chosen according to the recommendations of the material manufacturers and the actual condition of the ceiling.
How to check the contents of a factory kit before paying
For a composite socket, the concept of "one piece" means one complete factory set. Inside there may be dozens of polyurethane parts. If the seller states the price of the set, this is not a reason to multiply it by the number of elements. Conversely, a set cannot be considered complete based only on a nice photo in the product listing: before ordering, you need to obtain an up-to-date item list, especially if installation will be carried out some time after delivery.
For CRPU-070, a total composition of 24 parts is known, for CRPU-069 — 64, for RPU.VRS-001 — eight. In the latter case, the check is simple: four NPU-507 and four NPU-508. In other cases, it is useful to verify the total against the itemized breakdown for each position so as not to miss a missing mirrored part. The number of elements in CRPU-068 requires separate confirmation due to a discrepancy between previously published data.
It is important to distinguish the main product IDs from the article numbers of the NPU components. The product carousel in the article uses the full CRPU or RPU.VRS models, not their individual leaves and scrolls. This matters to the reader for the same reason: when ordering, they are choosing a ready-made composition. Individual NPU items ordered separately are agreed only after the need is confirmed, otherwise positions in the invoice may be doubled.
Upon receiving the order, first check the markings on the packages and the product documents, then the completeness and integrity of the parts. If damage is recorded before installation, it is easier to establish which set the problem element belongs to. After mixing several opened boxes, this task becomes more difficult. In a single kitchen-living room, one complete set of the chosen model is usually sufficient; a second one is not needed "just in case" without a justified reason.
How much does a socket cost and what to include in the estimate
The catalogue price does not equal the cost of a finished ceiling. It is more useful for the reader to break down the expenses into independent lines in order to obtain comparable contractor proposals. The price of a specific socket may cover only the decorative composition; delivery, installation accessories, base preparation, painting and labour are calculated separately. The cost of the track system must not be quietly included in the stucco estimate, otherwise it becomes impossible to compare options.
| Expense item | What to include in the request | Where to get the amount |
|---|---|---|
| Main set | SKU of one selected socket | Catalog price with confirmation before payment |
| Installation diagram or template | Whether a separate document or accessory is needed | Seller's and installer's answer |
| Ceiling preparation | Area and condition of the base | Finisher's estimate after inspection |
| Fastening materials | Compatible compounds, consumption and quantity | Calculation based on the agreed technology |
| Module installation | Marking, alignment and temporary fixing | Installation contractor's proposal |
| Seams and painting | Scope of finishing works | Finisher's estimate |
| Delivery | Address and packing units | Carrier's or seller's commercial offer |
| Change of lighting layout | If it is actually required | Separate quote from the electrical installation contractor |
For one CRPU-070 set, the starting price of the item is 35,680 ₽, CRPU-069 — 62,560 ₽, RPU.VRS-001 — 67,360 ₽, CRPU-068 — 50,480 ₽, CRPU-066 — 96,520 ₽ according to the catalog as of November 5, 2026. The difference between the most affordable and the most expensive option is 60,840 ₽. The remaining estimate lines are unknown without a project, so assigning an arbitrary installation cost in Yekaterinburg would be incorrect.
If the customer chooses CRPU-070 instead of CRPU-066 due to insufficient space to the track, the purchase budget decreases by exactly the price difference between these products. But the overall budget may change differently: a different pattern requires different finishing, and the decision to relocate the track may add costs. Therefore, it is useful to compare two complete estimates rather than equating the cost of the decor with the total cost of the renovation.
How to order a ceiling rose with delivery to Yekaterinburg
After approving the model, record the exact article number, the number of complete sets, the dimensions, and the delivery address. For delivery to Yekaterinburg or the Sverdlovsk region, the seller needs real data: city, address, preferred method of contact, and information about whether lifting to the floor is required. Delivery terms to Verkhnyaya Pyshma and Beryozovsky should not automatically be considered the same as delivery to central Yekaterinburg.
Check whether the selected set is part of the current offer, how it is packaged, and what documents will be provided. The availability of an item on the catalog page does not guarantee that the entire composition is available at a specific warehouse on the required day. Lead times, shipping costs, and the possibility of partial delivery are confirmed at order placement and are not derived from a single general statement about Contact us to confirm shipping to your destination.
When receiving composite products, compare the markings with the order. Inspect the packaging for signs of impact, moisture, or deformation. After opening, check that all parts are present and in good condition according to the packing list. If a problem is found, record it according to the seller's and carrier's rules before installation begins. Do not cut or repair a damaged element yourself until the replacement issue has been agreed.
In the article about choosing a socket next to acoustic panels a different type of ceiling finish is discussed. For our kitchen-living room, the track system is more important, so the conditions for preparing the base and installation cannot be automatically taken from someone else's project scenario.
Eight mistakes that turn a purchase into a redo
The first mistake is paying for the ceiling medallion before the lighting plan is approved. In this order, the interior is fitted to goods already purchased. The fix is obvious: first the position of the chandelier and track, then measurement, and only after that the product code.
The second is measuring the distance only to the axis of the busbar. Half the width of the housing and the protrusion of the swivel head then drop out of the calculation. Record the axis, the edge and the nearest equipment dimension separately.
The third is checking the heads only in the downward position. After installation they are turned toward the table or cabinets, and the original clearance changes. Agree on the working end positions in advance, not forgetting access for maintenance.
The fourth is choosing a ceiling medallion by the area of the room. A 28 m² kitchen-living room can have a very small gap between the chandelier and the track. The area of the room does not show whether the ornament fits into a specific ceiling field.
The fifth is creating two equal decorative centers. A complex chandelier, a rich ceiling medallion and several directional spots can compete for attention. Make one element dominant or reduce the expressiveness of the others.
Sixth — trust the outer dimension as the exact contour of all parts. The overall square is needed for the initial filtering. Marking is done according to the factory layout of the modular product, not by a single overall figure.
Seventh — mount the chandelier through the stucco element. A polyurethane socket is not designed to serve as a load-bearing fixture node. The chandelier mounting must be provided separately and verified by a specialist.
Eighth — buy the full ceiling kit instead of a single socket. If the customer only needs a decorative center for the dining area, new cornices and moldings may be unnecessary. The order specifies the selected CRPU or RPU.VRS model and verifies that all of its components are already included in the kit.
Errors differ in their consequences. An incorrect pattern leads to an unsatisfactory ceiling appearance. A configuration error delays installation. And unjustified interference with the electrical mounting or the equipment service area can create a safety issue. Therefore, they must be corrected in a different order: first technical compatibility, then purchasing and artistic decisions.
Frequently asked questions before ordering
Can a socket be placed next to an existing track?
Yes, this option is possible given sufficient space and an agreed installation technology. Installation cannot be approved based on a model name alone or an approximate distance. Actual dimensions of the decor and electrical equipment are required.
How to measure the distance to the busbar?
First mark the chandelier axis and the track axis, then measure the body width and the nearest edge. Mark the working protrusions of the swivel heads and the connectors separately. For a complex layout, use a plan with coordinates.
Is CRPU-070 suitable for any kitchen-living room?
No. It is the model with the smallest external dimensions among the five under consideration, but it still needs to be checked against the specific chandelier, busbar, and mounting base.
How does CRPU-069 differ from RPU.VRS-001?
The external dimensions are almost identical — 910 and 911 mm — but the design and pattern are different. CRPU-069 is listed with 64 parts, while RPU.VRS-001 has eight. To choose, you need to compare the layout and ornament specifically.
Does the chandelier need to be moved to the geometric center of the room?
Not necessarily. In a kitchen-living room, the chandelier is often aligned with the dining table, which is not in the center of the room. Relocating the electrical outlet requires separate justification and approval, not just a desire for a symmetrical pattern.
Can the stucco molding be installed after the track is mounted?
This depends on access to the work area and the agreed technology. Installed equipment must not interfere with safe marking, fixing, and subsequent maintenance. Sometimes it is more reasonable to carry out the finishing before completing the lighting installation.
Where can I find the exact number of elements?
Request the current bill of materials for the selected product. The total number of parts is useful, but for verification the names and quantities of individual NPUs are especially important. For CRPU-068, an additional cross-check of the open data is required.
Is a mounting template needed?
If the manufacturer provides a suitable template or drawing, using it makes marking out easier. Whether it is included in the set and whether it must be purchased separately should be confirmed when ordering. You should not promise that a template is available for all models.
How much does delivery to Yekaterinburg cost?
The shipping cost cannot be determined from a single catalog price list. It depends on the address, the number of packages, the selected transport service and the current terms. Request a quote together with the product specification.
When is it better to do without a socket altogether?
If the decor overlaps with serviced equipment, disrupts the agreed installation layout or visually overloads the ceiling, omitting the socket may be the best solution. The central chandelier can be kept without a decorative surround.
Final specification: what to prepare before purchase
After the review, the customer should be left not with a set of pretty pictures, but with a concrete record for the seller and the installer. It states one main item code, the number of complete sets, the dimensions, the module layout and the results of the track system check. The estimate separates the price of the decor from delivery and labor. If even one technical question remains unresolved, the purchase status stays provisional.
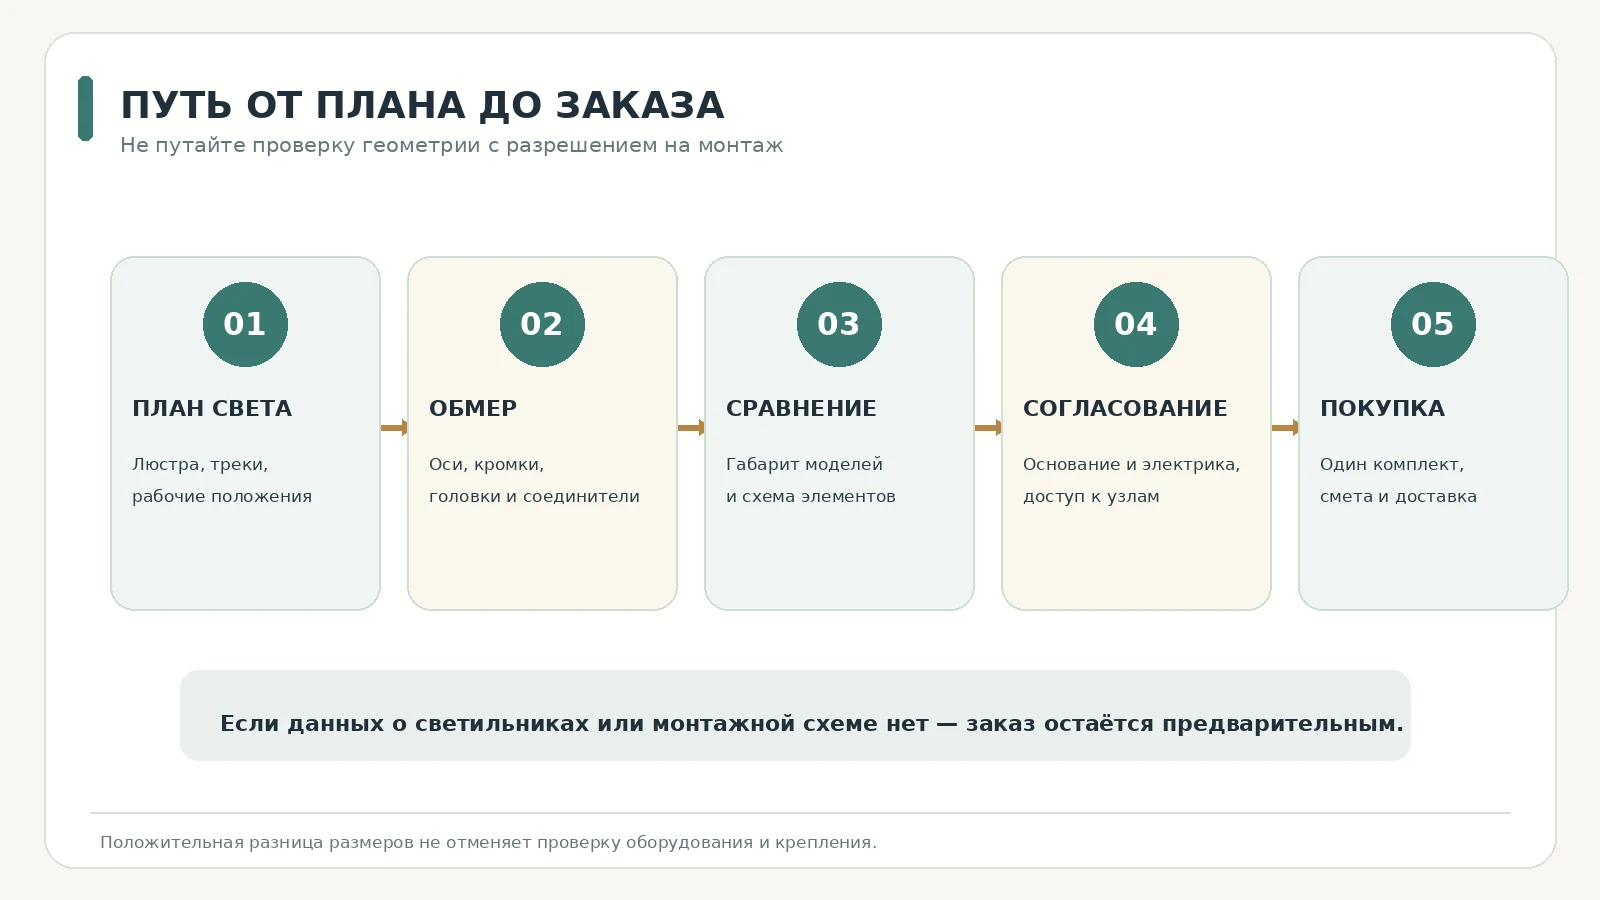
For a hypothetical room of 6.2 × 4.6 m with a distance of 650 mm from the chandelier axis to the axis of a straight track, the first candidates by outer dimensions are CRPU-070, CRPU-069 and RPU.VRS-001. CRPU-068 and CRPU-066 require precise checking of individual parts because the preliminary outlines intersect. This is only the result of the geometry of the chosen example: it does not replace coordination with the equipment manufacturer and the responsible installers.
The practical order is short. First, approve the chandelier position above the table. Then mark the rail, heads and connectors in their working positions. Compare several sockets at the same scale. Check the factory layout, the central area under the canopy and the mounting base. After that, request the final price for the complete set and delivery. This approach preserves freedom of choice and does not force you to redo convenient lighting for the sake of a randomly purchased ornament.
If both are required at the same time buy stucco in Yekaterinburg for other parts of the interior, it is better to list them as separate items. Then the documents for the ceiling medallion remain clear, and the installation team receives exactly what was agreed on the kitchen-living room plan.