Article Contents:
- Polystyrene and polyurethane for stair walls: which properties really differ
- Why polystyrene comes in different types
- What makes polyurethane interesting
- A molding is a line, an applique is a separate decorative element
- 1. Rectangular frames with a stepped rise
- 2. Panels where the bottom line follows the ascent
- 3. Central panel on the stair landing
- What to measure before choosing the frame size
- Example of determining the stair flight angle
- Why identical rectangular frames can produce different offsets
- How to check the placement without costly rework
- What will change if corner overlays are added
- What to do with short leftover pieces
- When more expensive polyurethane molding is justified
- Which is better for a stair hall — polystyrene or polyurethane?
- Which moldings to choose for a narrow wall along a staircase?
- Can sloped panels be made with regular straight molding?
- How do I calculate the amount of profile for three frames?
- How can I tell whether the molding will withstand an accidental impact?
- Which overlays are compatible with MLDPU-002?
- Can polyurethane stucco molding be painted to match the wall color?
- How do I decorate a tall wall if only its top is visible from the staircase?
- When is it better not to use decorative frames along a staircase?
- Where can I choose polyurethane stucco molding for a staircase wall?
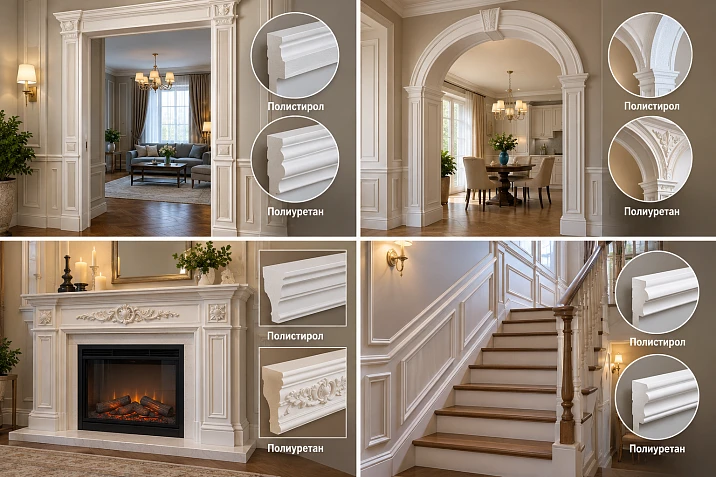
On a wall along a staircase, it is easy to make mistakes with the placement of moldings. A frame that looks straight on a separate drawing may end up too close to the handrail after installation, and the next one noticeably higher than the previous one. Such discrepancies are especially visible when a person walks up the steps: the eye consistently compares the decorative lines, and a small misalignment turns into a disruption of the overall rhythm.
The material also matters, but it does not solve the problem on its own. For simple rectangular frames, a high-quality polystyrene profile is sometimes quite sufficient. If, however, you need a tall wall composition with pronounced relief, corner ornaments, and central overlays, it is worth considering STAVROS polyurethane products. At the same time, neither expensive molding nor intricate stucco molding will fix incorrect layout marking.
In the stair hall, several related questions need to be answered: will the decor withstand accidental touches, how will it look from the lower landing, in what way should the frames be arranged along the ascent, and how many solid strips will be needed for cutting. Here it is more useful to compare finished design options rather than two white samples in a store.




Polystyrene and polyurethane for the stair wall: which properties actually differ




Why polystyrene can be different
Products with substantially different structures are sold under the name “polystyrene molding.” Expanded polystyrene is usually chosen for its low weight, ease of processing, and affordable cost. Its surface and edges may be vulnerable to localized pressure, but the specific result depends on density and manufacturing technology. Dense extruded and high-impact polystyrene profiles are a different class of product. They can have a fairly smooth surface, precise geometry, and good resistance to everyday impacts.
Therefore, the question “polystyrene or polyurethane — which is stronger?” without specifying two particular product codes has no reliable universal answer. Sometimes a dense polystyrene molding for a simple wall frame is more rational than an expensive relief product. Especially if the frame is located high up, is practically inaccessible to accidental contact, and does not require additional ornamental details.
You should check the cross-section, the nature of the surface, the ability to withstand localized impact, the permissible coating, the recommended adhesive, and the method of treating joints. For a stair area, these parameters are more important than the general name of the plastic.
Our factory also produces:
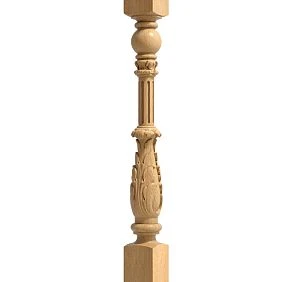
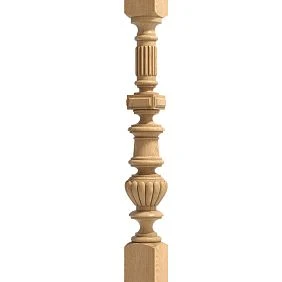
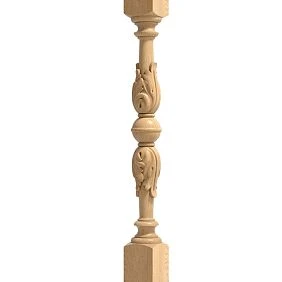
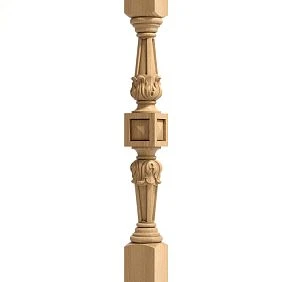
What makes polyurethane interesting
Polyurethane decorative products are produced by molding, which makes it possible to manufacture both straight profiles and individual elements with complex relief. The STAVROS range includes thin moldings, more pronounced multi-level sections, corner ornaments, and central overlays. This is convenient when one pattern needs to be repeated in several areas — along the flight, on the stair landing, and in the upper hall.
For example, Polyurethane moldings can combine a straight frame and a standalone floral ornament in its center. The molding defines the boundary of the field; the overlay occupies a chosen place inside or on the line of the composition. An important clarification: not all parts made of polyurethane are automatically compatible with each other. Dimensions and joints must be checked against the product page and drawing of the specific model.
Polyurethane itself also varies in composition and mechanical characteristics. Comparing the durability of products without data on the specific product and installation conditions is incorrect. For a staircase, it is often more advantageous to consider not the abstract “strength of polyurethane” but the set of available profiles and the ability to accomplish a specific architectural task.
Get Consultation
Molding is a line; an applique is a separate decorative element
Molding has a constant cross-section and is supplied as a long strip. It is cut into segments and joined into frames. An applique is a standalone piece with specified dimensions and relief. A corner applique can replace part of a joint or decorate it on top of the main composition, depending on the system design. A central decorative element is placed at a specific point, but one should not assume it can be installed without preparation at the intersection of any two profiles.
This is precisely where a noticeable difference arises between a simple polystyrene frame and a complex stucco decoration system: in the latter case, you need to plan the placement of several types of products, not just the length of the linear material.
What is better for walls along a staircase: a comparison without advertising exaggeration
| Criterion | Polystyrene decor | Polyurethane decor |
|---|---|---|
| Cost of a simple contour | Inexpensive options are often more advantageous | Depends on the selected cross-section and series |
| Resistance to accidental impact | Depends heavily on the type of polystyrene, density, and shape | Depends on composition, thickness, geometry, and coating |
| Painting | Suitable compositions for the product | Suitable compositions for the product |
| Rectangular frames | Possible with precise geometry and proper installation | Possible; STAVROS offers several profile sizes |
| Pronounced textured corners | Depends on the availability of compatible parts | Corner overlays are provided for a number of STAVROS systems |
| Central ornament | Depends on the manufacturer's range | Individual polyurethane overlays can be selected |
| Repair of a separate area | Depends on the coating and mounting method | Also depends on the coating and mounting method |
| Working at height | Requires safe access and surface preparation | The same requirements apply; the material does not remove them |
Three factors are especially significant for a staircase.
Contact zone. The lower sections of the wall next to the flight may be brushed by hands, bags, or objects when carrying furniture. The upper panel is sometimes located where it cannot be touched without special equipment. The same profile is not necessarily needed at both heights. Near movement areas, it is safer to keep a flatter design and avoid protruding decorative elements.
Light. On a high wall with upper windows, side light intensifies the shadow from protruding profiles. A molding with a pronounced cross-section may look more voluminous than on a sample under even lighting. But if the wall receives almost no directional light, a thin relief at the top will be barely distinguishable. Therefore, it makes sense to evaluate samples on site or on a test section of the wall.
Joints and mounting system. Even a durable molding can come loose if it is glued to a weak paint layer. A well-preserved finish is determined by the combination of a suitable substrate, compatible adhesive, joint treatment, and final painting. In a stairwell, where fixing a defect at the top is especially inconvenient, the cost of rework may matter more than the difference in the price of the strips themselves.
If the task is several simple geometric frames without ornaments, high-quality dense polystyrene deserves consideration. If the project involves complex decorative corners, a central panel, and a coordinated series of details, the STAVROS polyurethane range offers more substantive options to choose from.
What is special about the wall along the staircase flight
First, it is necessary to distinguish between two geometries that are often combined under the term "sloped wall." In a typical staircase, the wall surface at the side remains vertical. What is sloped is the line of the stair rise, the handrail, and often the lower boundary of the open space above the flight. It is with these that decorative frames must be aligned. If the surface itself is genuinely slanted, for example under the flight or under a pitched structure, its geometry is measured separately; standard vertical layout no longer applies.
There is no single convenient vantage point on the wall next to the staircase. From below, a person notices the upper panel before the lower details, while on the landing they see the nearest frame almost up close. When moving to the upper floor, the perspective foreshortening changes. Therefore, one should not rely solely on a photograph taken from a single point.
Another feature is the impossibility of occupying space arbitrarily. The handrail and railings must remain convenient and safe to use; the decorative overlay must not catch clothing, reduce the usable width of the passage, or interfere with gripping the handrail. Even relief that protrudes above the wall by only a few millimeters must be assessed next to the railing fastenings and existing light fixtures.
On the wall with a door on the landing, decorative fields have to be laid out relative to the actual architectural boundaries. If 900 mm of wall remains to the left of the opening and 450 mm to the right, two equal frames on both sides will create not symmetry but a cramped look. Sometimes one full frame and one free zone look calmer than an attempt to fill everything with molding.
Hence a useful order of actions: first determine the free planes and constraints, then choose the composition, and only after that buy moldings made of polyurethane or polystyrene.
Three ways to arrange moldings on a staircase wall
1. Rectangular frames with a stepped rise
Imagine three identical vertical frames on the wall along a straight flight of stairs. Their upper and lower boundaries are strictly horizontal, and their sides are vertical. At the same time, each subsequent frame is positioned higher than the previous one, following the overall rise of the staircase. The result is a stepped rhythm without diagonal joints.
The advantage of such a scheme is straightforward cutting. Each frame requires four straight segments; the corners are usually joined at 45° or finished with system-provided parts. Standard straight profiles fit without forced bending. To obtain identical fields, it is convenient to use a template of one frame and transfer it to subsequent sections along the measured axes.
But there is a particularity: the distance from the lower horizontal of each frame to the inclined line of the staircase varies across its width. At one end of the frame it is greater, at the other less. Therefore, control is needed at the highest point of the stepped line under each frame, not only in the middle.
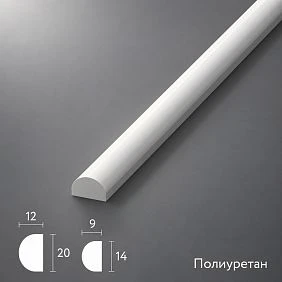
For a laconic finish, one can consider a thin polyurethane molding MLDPU-001Its cross-section of 10 × 6 mm leaves a relatively delicate relief line on the wall; this is one of the possible options when you don't want to visually weigh down a narrow flight.
2. Panels whose bottom line follows the rise
Another option is to make the bottom profile of each panel parallel to the conventional line of the flight. For example, keep the top horizontal, the side lines vertical, and make the bottom at an angle. Such a panel becomes trapezoidal in shape: the height of the right and left vertical sections differs.
In the drawing it may seem simpler than a stepped layout: the bottom contour appears to continue the staircase. In manufacturing, it's the opposite. The frame no longer has four right angles identical in geometry, and standard ready-made corner ornaments for rectangular frames cannot be used without checking their fit. You will need to determine the actual miter angles, the length of the slanted piece, and the position of the relief at the joint.
If an ornament at the corners is intended, a drawing or full-size template is required first. A ready-made polyurethane overlay designed for a right angle does not become a universal overlay for any slope. In a doubtful case, it is better to abandon a complex corner element than to trim it by eye and ruin the pattern.
3. Central panel on the stair landing
The third scheme moves the main decorative accent to where there is no slanted bottom border. On the vertical wall of the intermediate landing, a large rectangular frame is formed, and a central element is placed inside. The flight itself can be left with simpler lines.
For a classic panel, a system based on polyurethane molding MLDPU-002 is suitable. With a cross-section of 22 × 11 mm, it is more noticeable than a thin glazing bead. As a separate decorative accent, you can explore Stucco decor MLDPU-2-2.1whose dimensions are 235 × 237 × 21 mm. The manufacturer states that this part is compatible with the MLDPU-002 system.
Here it becomes possible to build a composition rather than simply repeating a single line several times. However, even confirmed compatibility does not mean that the overlay will fit a frame of any width. Check the free field, the position of the relief, and the mating drawing.
The most balanced result often comes from combining different levels of complexity: simple frames on the flight and a more elaborate panel on the landing. They are linked by a common geometry and material, but are not equally overloaded.
Which STAVROS polyurethane products to choose for a stair hall
Below are actual catalog items suitable for designing wall decor. Moldings' dimensions indicate the cross-section and length; for overlays, the overall dimensions of the finished part are given. All values are in millimeters.
| STAVROS product | Size, mm | Role in composition |
|---|---|---|
| MLDPU-001 | 10 × 6 × 2600 | Thin frames on a narrow wall, inner contours |
| MLDPU-002 | 22 × 11 × 2600 | Main frames for classic wall decoration |
| MLDPU-003 | 35 × 12 × 2600 | Wider frames and pronounced architectural lines |
| MLDPU-2U-1.1 | 210 × 210 × 18 | Corner decorative element for the MLDPU-002 system |
| MLDPU-2-2.1 | 235 × 237 × 21 | Central decorative overlay for the MLDPU-002 system |
| NPU-506 | 12 × 205 × 5 | A narrow standalone ornament on a flat surface |
MLDPU-001 has a semicircular compact cross-section. It is appropriate where a large ornament would compete with the handrail, doors, or already expressive wooden steps. MLDPU-002 produces a more noticeable shadow from the profile and suits a medium-scale composition. MLDPU-003, with a 35 × 12 mm cross-section, is best viewed on a more open wall: its outline reads more distinctly, although the final choice depends on viewing distance and lighting.
The small detail NPU-506 measures 12 × 205 × 5 mm. It can be placed on flat areas of wall decoration if it matches the composition's pattern. However, it is not a corner detail of the 002 system and does not replace the profile. A catalog is provided for finding standalone ornaments polyurethane decorative overlays.
A simple technique is useful when assessing size: mark the outline of the future frame on the wall with painter's tape, and place a paper rectangle in the actual dimensions of the proposed overlay on top of it. Already at this stage it will become clear whether the central ornament occupies almost the entire inner area or, conversely, gets lost on a tall wall.
How to mark moldings along the sloped line of a staircase
What to measure before choosing the frame size
Start with a finished or fully designed staircase. You need the horizontal length of the flight, its rise, the position of the first and last steps, the wall dimensions, and the boundaries of landings and doorways. Separately record the handrail line, the protrusions of its mounting brackets, switches, wall lights, ventilation grilles, and equipment service access points.
Then mark the area that can actually be decorated. On a 4 m long wall, the available zone for frames may be considerably smaller: the first meter is occupied by a door, and a light fixture is placed near the landing. If you calculate from the entire wall length, you will get a plan that cannot be transferred to the room.
Work from a single measurable coordinate system: mark the horizontal level and verticals, and transfer key points from the tape measure to the drawing. Checking lines only relative to the steps is risky. Riser heights and finish coatings may differ slightly, while the marking of a decorative wall must remain geometrically consistent.
Example of determining the angle of a staircase flight
Suppose the horizontal projection of a straight section is 3600 mm, and the vertical rise is 1800 mm. For an idealized straight rise line, the length along the slope is:
L = √(3600² + 1800²) ≈ 4025 mm.
The angle of inclination relative to the horizontal can be determined from the ratio of rise to horizontal run: 1800 / 3600 = 0.5, meaning the angle is approximately 26.6°. For every meter of horizontal travel, the line rises by about 500 mm.
This arithmetic is useful when marking the lower sloped line of decorative panels. It does not mean that any molding can simply be cut to a length of 4025 mm and installed along the steps: you need to account for the actual ends, the position of the handrail, the joint points, and the chosen profile measurement line.
Why identical rectangular frames can produce different offsets
Take a frame 800 mm wide on a wall along a flight with the specified rise-to-run ratio of 0.5. Over these 800 mm, the sloped line rises by a nominal 400 mm. If the bottom edge of the frame is horizontal and the distance to the stair line on the right, at the upper point along the rise, is 250 mm, then on the left it will be about 650 mm.
There is no calculation error here. This is a geometric consequence of the slope. For all three frames, you can set the same distance from their lower corner nearest the steps to the chosen reference line. Visually, they will be perceived as a repeating rhythm. But if you set the same distance strictly from the center of the frame, while the actual rise line is interrupted by a landing, the placement may look random.
The wider the frame, the greater the difference in distance between its edges at the same flight steepness. For a frame 1200 mm wide, it would be 600 mm. Therefore, you should not transfer wide rectangular fields to a staircase just because they looked good on a straight living room wall.
How to check the placement without costly rework
- Choose a reference line: along the nominal rise of the steps, along the direction of the handrail, or along a specially marked architectural boundary. Do not mix several lines in one layout.
- Mark the positions of the outer frames, including the free margins at the start and end of the flight. It is more convenient to agree on the extreme points first, and then distribute the intermediate ones.
- Stick strips of painter's tape on the wall with a width close to the future profile. Also mark the paper silhouettes of the overlays at full size.
- Inspect the composition from below, from an intermediate step and from the upper landing. Check the visual rhythm and the absence of obstructions to the handrail or light fixtures.
- Only after the scheme is approved, take the final dimensions of each segment and draw up a cutting map.
If access to the upper points is unsafe, do not carry out such marking from a stepladder placed on the steps. For work at height, a specially selected stable access is required.
Calculation of moldings: three frames 800 × 1200 mm
Let's consider a clear example: three rectangular frames, each 800 mm wide and 1200 mm high. In this example, the dimensions are measured along the outer extreme points of the profile, including the 45° cuts. It is important to specify this in advance: if one side is measured along the inner edge and the other along the outer edge, the calculation will be incorrect.
For one frame, the four sides have a total length of 2 × (800 + 1200) = 4000 mm. Three frames require 12,000 mm of profile along the chosen reference line. With a strip length of 2600 mm, dividing 12,000 by 2600 gives a mathematical minimum of five pieces, rounded up.
But the mathematical minimum must be confirmed by cutting. In this specific case, it is achievable:
| Strips 2600 mm long | Details from each strip | Nominal remainder before cuts |
|---|---|---|
| № 1, № 2, № 3 | On two sides 1200 mm | 200 mm each |
| № 4, № 5 | On three sides 800 mm | 200 mm each |
As a result, we get six vertical pieces of 1200 mm and six horizontal pieces of 800 mm. On three long strips, two segments are cut each; on the other two, three each. The 200 mm remnants on each strip provide room for normal cuts, but the actual margin is determined taking into account the cut direction, the width of the cutting tool, the miter trim, and possible defects.
Cutting is possible if 1200 and 800 mm are indeed the design dimensions of the parts along a consistently adopted outer line. Before ordering, it is worth verifying this against a sample and the profile joining method. Moldings with a pronounced pattern may require additional allowances for pattern alignment.
Why this matters: if you simply divide 12 meters by 2.6, you get the same figure, but without proof that the required segments can be obtained from five strips. In another project where long continuous segments are needed, such a calculation easily leads to a material shortage.
What changes if corner overlays are added
If the frame includes separate decorative corners, the lengths of the straight sections may change. The corner Molding MLDPU-2U-1.1 measures 210 × 210 × 18 mm and is intended for the MLDPU-002 system. However, these dimensions are not a ready-made number to be automatically subtracted from the length of each molding. You need to look at the joint drawing, the position of the profile entry, and the line along which the manufacturer defines the connection.
If the corner overlay merely sits on top of a finished joint, the calculation will be one thing. If it occupies a place in the frame line, it will be another. Without a selected installation method, an accurate cutting map cannot be provided. The same applies to the central element on the molding line. The decorative pattern itself and its dimensions do not indicate how many millimeters of straight profile it replaces.
What to do with short offcuts
Not every remaining piece has to become a new joint. On the wall along the staircase, an extra seam is especially noticeable under side lighting. If a short offcut can only be used in the middle of a large frame, it is sometimes wiser to keep a continuous section from the next plank. At the same time, it is useful to distribute offcuts among small internal lines or separate smaller frames, if the project provides for them.
For several dozen elements, it is convenient to make a simple table: frame number, required lengths, quantity, assigned source plank, and offcut. Such a map saves material more precisely than the universal advice to add ten percent.
If the bottom line of the panel is slanted: a separate calculation
For a trapezoidal panel, the length of the diagonal section is calculated from its horizontal projection and the height difference. Suppose the line runs 1200 mm horizontally and rises 600 mm over that section. Its length is √(1200² + 600²) ≈ 1342 mm. This is the length between the specified calculation points, without specifying the shape of the cuts at the ends.
Suppose the left vertical of such a field is 1000 mm high, the right one is 1600 mm, and the top horizontal is 1200 mm. Then the total length of the four sides is 1000 + 1600 + 1200 + 1342 = 5142 mm. By total footage, two planks of 2600 mm each seem sufficient: 5200 mm in total. But seamless cutting is impossible from two planks — the 1600 and 1342 mm parts do not fit together in one plank, and the remaining two parts do not form a suitable pair under such a constraint.
Let us check the possible distribution options. If a 1600 mm side is cut from the first plank, about 1000 mm remains without taking cuts into account; a 1200 or 1342 mm segment can no longer be placed there seamlessly. The remaining parts of 1342, 1200, and 1000 mm require 3542 mm in total, more than the length of the second plank. Therefore, under the condition of four continuous sides, a minimum of three planks will be needed — or a different division with additional joints.
In such an example, cutting three planks can be organized with one part each of 1600 and 1000 mm, one each of 1342 mm and one each of 1200 mm, taking into account the kerf width and end cuts. The first pair totals exactly 2600 mm, which leaves no technological margin; therefore it is safer not to plan them from one plank. A practical scheme: a separate plank for 1600 mm, a separate one for 1342 and 1000 mm (2342 mm), and a third for 1200 mm. This is not necessarily the least wasteful option for the whole house, but it is feasible without intermediate seams.
In addition to the quantity, the angles become more complicated. The slanted bottom profile meets the vertical side pieces at angles other than 90°. You cannot simply install a ready-made overlay for a rectangular frame at these joints. In the complex version, a full-size template of the joint is made first, and only after trial trimming do they proceed to the main cutting.
How to coordinate the central panel, corners, and molding pattern
The most common compositional mistake in a high hall is to emphasize every corner, every frame, and every free area equally. The relief stops highlighting what matters most: the wall turns into a uniform pattern. To preserve a clear structure, choose one zone with a pronounced ornament and design the rest more calmly.
On a stair landing, you can create the main frame from MLDPU-002 and place a matching central overlay inside it. Corner pieces from the same system will give the frame a more developed architectural character if its size allows four large elements to be placed. For a small 600 mm wide panel, corner overlays measuring 210 mm on each side may look visually excessive. Therefore, you should start with the dimensions of the finished composition, not with the desire to use the entire catalog.
A pair of decorative elements must have a meaningful placement. If the ornament is directional or asymmetrical, you cannot automatically rotate one overlay by 180° and consider it mirrored. Check whether left and right versions are available if required. For symmetrical products, clarify the axis along which they are intended to be placed.
A staircase wall can have two different scales: on the flight, a person perceives the repetition of frames in motion, while on the landing they examine a separate ornament from close up. The difference can be emphasized deliberately. Leave the lower frames simple, and place in the center of the large field molded decoration made of polyurethane, selecting a product based on real compatibility with the chosen profile.
It is not necessary to place stucco on every staircase wall. If there are expressive wooden balusters, a heavy carved handrail, and large light fixtures nearby, additional three-dimensional ornament may create excessive fragmentation. Sometimes one system of simple frames painted in the wall color is enough to keep the staircase as the main architectural element.
Finishing cost: you need to compare complete configurations
The cost of the material alone says little about the value of a solution. For a wall composition, you pay not only for the profiles but also for wall preparation, layout, installation, corner cutting, seam filling, painting, and providing safe access to the upper areas. On a staircase, the latter can be a significant part of the labor costs.
Let us show a comparison using three rectangular frames that have already been calculated. Each version requires five strips 2600 mm long if the same cutting plan is retained and there are no decorative elements replacing parts of the sides. According to the STAVROS product cards as of the check date of October 21, 2026, the following prices are indicated:
| Polyurethane profile option | Price per single strip, ₽ | Five strips, ₽ |
|---|---|---|
| MLDPU-001, 10 × 6 × 2600 mm | 1 740 | 8 700 |
| MLDPU-002, 22 × 11 × 2600 mm | 5 460 | 27 300 |
| MLDPU-003, 35 × 12 × 2600 mm | 7 580 | 37 900 |
This is a comparison of three polyurethane decor options, not of polystyrene and polyurethane prices. It helps you understand how much different levels of profile expressiveness can cost within the same geometric scheme. For a fair comparison with polystyrene, you would need current prices for specific comparable products, which are not included in this calculation.
If you supplement one of the MLDPU-002 options with the central element MLDPU-2-2.1, whose price at the time of checking is listed as 5350 ₽, you get 32 650 ₽ for five strips and one overlay — before the cost of adhesive, painting, labor, and delivery. If you add four corner overlays MLDPU-2U-1.1 at 4490 ₽ each, their separate cost will be 17 960 ₽. However, the final configuration with corner pieces requires re-checking the drawing and cutting plan; you cannot automatically add them to a finished project as an unconditionally suitable set.
Also consider packaging and delivery conditions, which may depend on the number of items. STAVROS product pages note costs for transport backing or framing for certain product groups. Before final ordering, you need to verify current prices and the invoice contents.
When more expensive polyurethane molding is justified
The extra costs make sense when you actually use the system's capabilities: choosing a more relief-textured profile, overlays coordinated with it, and a complex central panel. But if you don't need all the decorations and only require a thin geometric line from the molding, a more expensive material won't necessarily produce a proportionate visual difference.
Polyurethane is also worth considering when you want to repeat the same ornamental composition on several floors. It is easier to choose products from an available system with specified item codes and dimensions than to search separately for random overlays that differ in thickness, scale, and pattern.
For those searching by the query “Buy moldings”, it is useful to first determine the type of decorative element: a separate overlay or a linear molding. One generic word is not enough to place an order; you need a scheme, quantity, and the selected model.
How to install moldings in a stairwell without unnecessary rework
The first requirement concerns not the adhesive but the substrate. Wipe a small area and check whether the plaster is crumbling and the old coating is peeling. If the paint adheres poorly, the molding will be fixed only to a weak layer; even a good adhesive bond will not prevent it from coming off together with the finish. Glossy and poorly absorbing surfaces require separate preparation according to the instructions of the chosen adhesive system.
Then transfer the agreed layout onto the wall. Check horizontals with a level, verticals with a suitable instrument, and the diagonals of rectangular frames by measuring between opposite corners. If the diagonals should be equal but differ, do not try to compensate with filler at the final stage: correct the marking before gluing.
Cut the parts, label them by frame numbers, and do a dry fit. On a large stair wall this allows you to detect mixed-up short segments, mismatched relief, and insufficient length on individual sides in advance. Only after checking, apply the mounting compound compatible with the specific product and substrate. Work according to the adhesive instructions, including application conditions, temporary fixing, and curing before finishing.
Treat the joints with materials compatible with polyurethane and the future paint. Do not allow a thick layer of filler over fine relief: after painting, such areas no longer match the neighboring ones in shape. A test coat on a small sample helps choose the number of layers and understand how light will emphasize the joints.
Working at height requires a separate solution. An ordinary stepladder placed on steps of different heights and held by an assistant cannot be considered acceptable. For extended work along a high wall, use suitable work platforms or special stair scaffolding with a stable base, appropriate to the specific conditions of the site. If safe access is impossible, entrust the work to equipped specialists. Do not design decor that then cannot be inspected or repaired without risky access.
Eight mistakes when choosing polystyrene and polyurethane for a staircase
1. Equating dense polystyrene with ordinary foam. As a result, the material is rejected without comparing specific profiles. Instead of a general opinion, check the type of polymer, the cross-section, and the purpose of the product. For a simple tall frame, quality dense polystyrene may be sufficient.
2. Placing large relief at the level of frequent contact. A protruding overlay near the handrail can catch clothing and be subject to impacts. In such spots it is wiser to use a flatter profile or leave the wall without additional elements, and move the large ornament to a quieter zone.
3. Considering the stair wall physically sloped just because the steps rise next to it. This leads to incorrect determination of verticals and angles. First clarify the geometry of the plane itself; in a normal situation it is vertical, and the slope refers to the line of the flight.
4. Align all frames with the slope of the handrail. A rectangle rotated relative to the horizontal begins to be perceived as a diamond-shaped panel rather than as an ordinary wall frame. This technique is acceptable in a specially designed geometric composition, but it should not appear due to a marking error. First determine which visual solution is required.
5. Placing ready-made rectangular corners into a trapezoidal frame. An overlay designed for 90° may not match the joint angle. Before ordering such parts, check the drawing, the profile layout, and the dimensions of the future corners. Sometimes it is better to make simple mitre cuts without overlays.
6. Buying mouldings by total length without cutting. Two projects with the same twelve metres of profile may require a different number of strips. The reason is the maximum length of a single continuous piece and the set of intermediate elements. Make a map of the specific parts and check that each one fits into the original strip with the necessary allowances.
7. Joining random mouldings and overlays. Differences of even a few millimetres in thickness or shape can make the joint untidy. Check the compatibility system; for MLDPU-002, STAVROS provides its own corner and centre decorative parts.
8. Not providing access for installation and repair. The mistake is discovered after purchase, when a tall frame cannot be safely fixed or painted. Before choosing a product, you need to plan a stable working platform, space for tools, and the ability to reach all joints.
Frequently asked questions
Which is better for a stairwell: polystyrene or polyurethane?
For several inexpensive geometric frames, a quality dense polystyrene may be suitable. For an architectural composition with central relief overlays and coordinated corner ornaments, STAVROS polyurethane systems are worth considering. Reliability is determined not only by the profile material: the substrate, fixing, coating, and accessibility of elements for maintenance are also important.
Which mouldings should I choose for a narrow wall along a staircase?
First determine the space between the handrail, light fixtures, and other objects. If the free area is small, a thin profile usually leaves more visual breathing room than a wide relief one. Among the STAVROS polyurethane examples is MLDPU-001 with a 10 × 6 mm cross-section. For pronounced frames on a spacious wall, MLDPU-002 and MLDPU-003 can be considered.
Can sloped panels be made with ordinary straight moulding?
Yes, if we are talking about the straight sides of a trapezoidal field. The molding itself remains straight, but some of the miter angles become different from the standard 45°. You need to calculate the geometry of each side and make test joints. Complex decorative corners intended for rectangular frames should not be used without verification.
How do I calculate the amount of profile for three frames?
With each frame measuring 800 × 1200 mm along the outer cut line, the total perimeter is 12 meters. For strips 2600 mm long, five pieces can be used: cut three strips into pairs of 1200 mm, and two into sets of three at 800 mm. But this scheme is only applicable with the appropriate measuring method and if there is room for the cuts.
How can I tell whether the molding will withstand an accidental impact?
The name of the polymer alone does not give a precise answer. Take into account the type of polystyrene or polyurethane, the cross-section geometry, the paint thickness, and the nature of the contact. Ask the seller for the technical specifications of the specific product, and position the most vulnerable areas out of the path of items being carried. Be especially careful when choosing large protruding overlays.
Which overlays are compatible with MLDPU-002?
For the MLDPU-002 system, STAVROS offers, in particular, the corner element MLDPU-2U-1.1 and the center overlay MLDPU-2-2.1. Series compatibility is a starting point, not a guarantee of suitability for any frame. Check the drawing, the dimensions of the composition, the position of the ornament, and the available space between the parts.
Can polyurethane stucco molding be painted to match the wall color?
Yes, provided that a preparation and painting system compatible with the specific surface is chosen. A single-color finish visually unites the molding with the wall and makes the relief an architectural part of the plane. Before work, clean the product, follow the manufacturer's recommendations for primer and paint, and check whether a thick coating layer hides small details.
How should a tall wall be decorated if only its upper part is visible from the staircase?
At a high elevation, the overall outline of the composition matters more than many small elements. Try an expressive frame in the area that is visible from the lower hall, and leave small details where they can be examined from the landing. Preliminary marking with tape helps to assess the scale. Do not add ornament just to fill an empty surface.
When is it better not to make decorative frames along the staircase?
If the handrail occupies almost the entire available strip of the wall, the space is overloaded with light fixtures or fastenings, and there is no access for safe installation, it is wiser to forgo frames. Sometimes one neat decorative composition on the landing will give a more cohesive result. A wall without stucco can be a deliberate decision, especially with expressive wooden railings.
Where to choose polyurethane stucco for a staircase wall?
It is more convenient to buy after preparing a scheme: the profile type, segment lengths, the number of right-angled and non-standard corners, and the need for separate overlays are known. You can start with the catalog polyurethane wall moldings STAVROS, then open specific product cards and check the drawings. For linear profiles, the section of moldings, cornices and skirting boards is also useful.
How to choose decor and place an order without excess material
Before purchasing, prepare one sheet with the dimensions of all frames and a list of elements. Mark which lines are horizontal, which are vertical, where there are actually slanted joints, and how many identical parts are required. For each profile, record the article number, cross-section size and strip length. Count the central and corner overlays separately. This way the order will not consist of a random set of beautiful products that do not match each other.
For a staircase with simple rectangular frames, it is acceptable to compare ready-made options made of polystyrene and polyurethane on the same layout. When the project requires complex decor, it is wiser to choose a specific STAVROS system in advance and work with its drawings. The section will help when planning an order moldings and profiles made of polyurethane, where different cross-sections can be compared.
For those planning to buy polyurethane stucco for several walls at once, it is useful to coordinate not only the overall style, but also the height of the profiles, the repetition of decorative accents, access to upper areas, and a margin for real cutting patterns. Separately, clarify the transport packaging for long planks: its cost may affect the final invoice.
What to choose in the end
For a laconic finish of a staircase wall, it is not necessary to buy a complex polyurethane composition. High-quality polystyrene profiles can handle the task of simple frames if they suit the geometry, coating, and installation conditions. Their suitability is determined by the specific product, not by promises of a universal material advantage.
STAVROS polyurethane stucco becomes especially interesting where frames must combine with three-dimensional decor: on a high wall, near a landing, next to a grand staircase flight. Linear moldings and compatible decorative overlays allow you to build a composition with repeating architectural details. But expressiveness arises only after precise marking, checking joints, and a reasonable distribution of ornaments.
First measure the wall and the available areas near the handrail, then choose one of the layout methods and draw up a cutting map. After that, you can already select STAVROS stucco and polyurethane products by size, purpose, and compatibility. This way, the decorative design of the staircase will be justified in terms of pattern, material consumption, and budget.