Article Contents:
- 1. Create a room dimension passport
- 2. Determine which part of the interior should be the focal point
- 3. Choose moulding based on the available wall field
- 4. Compare narrow, intermediate and wide options
- 5. Check the projection relative to the architrave
- 6. Match wall frames with the skirting board
- 7. Choose the cornice along two dimensions at once
- 8. Take into account the material of each element in the system
- 9. First, determine the free ceiling area
- 10. Compare the socket with the area, not just the room size
- 11. Consider the chandelier and its ceiling cup separately
- 12. Select the overlays based on the remaining inner area
- 13. Assess the scale through relief, color, and distance
- 14. Vary the scale by zones while maintaining the connection between rooms
- 15. Compare candidates under the same conditions
- 16. Check the final option at full scale
- 17. Finalize the final set and replacement rules
- 18. Convert the selected items into an order
A ceiling height of 2800 mm does not yet tell you which cornice a room needs. With a door 2100 mm high, one field remains above the opening; with a tall portal, another. A wardrobe that reaches almost to the ceiling can limit the profile's projection, while a curtain niche can change the entire upper perimeter. A "room height — molding size" table does not account for these differences.
To select molding for a project, you need to match the products to the available surfaces, furniture, and viewing points. A molding is assessed within a specific frame, a cornice in its installed section, and a ceiling medallion together with the light fixture and the free ceiling field.
Below is the procedure for such a selection: from room dimensions to a coordinated set of item numbers. The numerical examples show a method of verification, not universal proportions for all interiors.




1. Create a room dimension passport
To begin, you need a plan with furniture, elevations of the main walls, and a ceiling plan. Dimensions should be taken based on the future finished surfaces: panel thickness, flooring, and a lowered ceiling change the available space.
A conditional passport for one room might look like this:
| Parameter | Example data | Why account for it |
|---|---|---|
| Room size | 4200 × 3600 mm | Overall scale of the walls and ceiling |
| Finished height | 2800 мм | Vertical fields and cornice placement |
| Top of the door frame | 2350 mm from the floor | Clear area above the door |
| Casing | Width 80 mm, protrusion 16 mm | Alignment with the wall profile |
| Narrow pier | 460 мм | Compact frame check |
| Floor skirting board | Height 100 mm | Lower boundary of the wall composition |
| Built-in wardrobe | Top at 2600 mm | Junction with ceiling decor |
| Luminaire | Overall diameter 620 mm, cup 160 mm | Separate check of the chandelier and its mounting unit |
Add the location of ventilation, curtain niche, switches and other permanent elements. Separately mark the dimensions that have not yet been approved. If the cabinet height is preliminary, the selection of a cornice near it also remains preliminary.
Such a passport helps compare options under the same initial conditions. It does not replace drawings, but it prevents losing an important constraint when moving to the catalog.
If the ceiling or floor has a level difference, record several measurements rather than one average value. For a cornice near a tall cabinet, the actual height at that specific location is significant. On the preliminary design, note which dimensions must be clarified after the final finishing. Until then, the character of the decor and the shortlist of candidates can be agreed upon, but the final trimming and tight adjacencies are calculated based on confirmed geometry. A change of base must be included in the same version of the documents used for the subsequent purchase.




2. Determine which part of the interior should be the main one
The scale of the stucco depends on the distribution of attention. A room may be dominated by a ceiling center with a chandelier, a large wall panel, or expressive door architecture. The rest of the decor supports the chosen center.
If the wall behind the sofa is important, it is reasonable to first select the molding for its main field, then compare the upper and lower terminations with it. If the project is built around a complex ceiling composition, the check begins with the ceiling plan and the light fixture.
This does not necessarily require making the cornice larger than the molding or the rosette more noticeable than the overlays. It is more important to see how many elements simultaneously claim the main role. Repeating equally active relief on all surfaces can make even small items visually heavy.
For each zone, formulate the task in one phrase: “the frame unites the panel,” “the cornice completes the tall portal,” “the ceiling rose highlights the dining table.” If the purpose of the item comes down to a desire to fill an empty space, first check the option without it.
Our factory also produces:






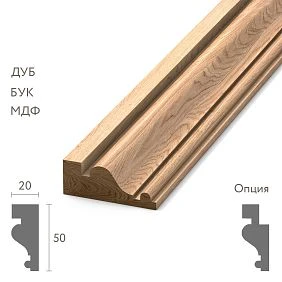
3. Choose the molding based on the available wall field
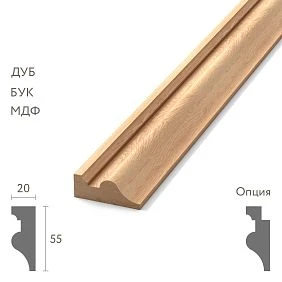
In the photo, the molding takes up almost the entire frame, so its scale is hard to judge. On the layout, it appears next to the door, the socket block, and the furniture. This is where it becomes clear whether the width is suitable.
Let’s take a 460 mm wall pier from a conventional specification. If 70 mm is left on each side between the frame and the adjacent boundaries, its outer width will be 320 mm. With a 14 mm profile, the inner field will be 292 mm; with 20 mm, 280 mm; with 35 mm, 250 mm.
The 70 mm offsets are chosen only as an example. What matters more is that increasing the profile width takes up space on both sides. If an insert or switch must fit inside, you need to check the remaining field, not just the outer dimension of the frame.
For a large wall, repeat the calculation with its actual dimensions. One profile may suit a wide central field and not suit a narrow wall pier. This is grounds to change the layout or introduce an auxiliary section.
Get Consultation
4. Compare narrow, intermediate, and wide options
For a preliminary comparison, it is convenient to select several real products. For example, in the STAVROS catalog you can compare the following polyurethane profiles:
| Candidate | Width A, mm | Thickness C, mm | Length L, mm | What to compare on the wall |
|---|---|---|---|---|
| MLDPU-027, small version | 14 | 9 | 2600 | Compactness of the contour |
| MLDPU-027, large version | 20 | 12 | 2600 | A more pronounced semicircular line |
| MLDPU-003 | 35 | 12 | 2600 | Wide multi-level framing |
У MLDPU-027 two size versions, with MLDPU-003 — a different cross-section shape. Therefore, the comparison shows the combined effect of the geometry, not just the difference in width.
A wide wall molding is considered for a large frame, panel, or area perceived from a distance. A narrow one is useful in a small field, an inner contour, or where more free surface needs to be left. A narrow profile by itself does not make an interior modern, and a wide one does not require a mandatory classical ornament.
Choosing Moldings made of polyurethane, transfer the exact version into the project. One SKU with several sizes is not a sufficient product description.
5. Check the protrusion relative to the casing
Two nominal sections, 40 × 8 and 40 × 22 mm, occupy the same strip on the wall but project into space differently. Under side lighting, the difference may be more noticeable than a small change in width.
In the example, the door casing projects 16 mm. A 12 mm thick molding installed on the same base plane will project 4 mm less, excluding installation layers. If this molding is placed on an 8 mm panel, the total projection becomes 20 mm — already 4 mm more than the casing.
This does not mean an automatic prohibition of the second option. It is necessary to show how the profile terminates next to the door: with a free setback, a return, a connector, or another specified detail.
Dimension C should not be taken as the depth of each groove. It describes the overall size of the section in the accepted product scheme; the distribution of the relief is visible in the drawing. For precise adjoining, the height at the connection point matters, not just the maximum projection.
6. Compare the wall frames with the baseboard
The floor baseboard sets the lower boundary of the composition. If its height changed after selecting the frames, the free distance below will also change. Such a shift is especially noticeable in a row of identical lower margins.
Look at the wall as a whole: baseboard, frames, doors, and cornice. A tall smooth baseboard can support calm lines, while a small profile with an active pattern can attract more attention. A simple comparison of heights is not enough.
Check the furniture against the wall. The projection of the baseboard and moldings affects the position of a wardrobe, cabinet, or headboard. If the item must stand flush, its rear part and decorative lines must be coordinated in advance.
It is not necessary to continue the frames behind a stationary built-in wardrobe. But the decision on how the decor ends must be reflected in the design; otherwise, the installer will either waste material on an invisible area or cut off the profile in a random place.
7. Select the cornice in both directions at once
For a cornice, both the size along the wall and the projection onto the ceiling matter. A tall profile with a small projection and a wide ceiling cornice can look completely different despite having a similar overall size. They should be compared in the installed position.
In a typical room, between the top of the door frame at 2350 mm and the ceiling at 2800 mm, 450 mm remains. If the chosen cornice drops 80 mm down the wall, the open strip above the door will be 370 mm. With a 160 mm drop, 290 mm will remain. These numbers show the change in the field, not the limit of the allowable size.
Above a 2600 mm high wardrobe, the initial gap is only 200 mm. The same cornice options will leave 120 and 40 mm vertically. Additionally, the ceiling projection, opening, and the way the furniture is finished need to be checked.
With the same ceiling height, rooms of different widths provide different viewing points. Therefore, selecting a cornice based on height alone often misses the main point: how much free space will remain next to it and how the profile will be seen from the room.
8. Consider the material of each element of the system
A visually coordinated set does not necessarily consist of a single material. But the material of each product must be specified in the specification: it affects preparation, installation, and finishing.
For example, cornice L1902S HIWOOD has dimensions of 80 × 27 × 2000 mm and is made of polystyrene. It cannot be listed as polyurethane just because the section address contains the corresponding name.
This profile can be considered alongside polyurethane moldings in terms of scale and shape, but a combined composition requires checking coatings and joints. Preparation recommendations for one material do not automatically transfer to another.
Skirting boards and additional inserts are checked in the same way. The section name, the white color in the photo, and a similar cross-section do not confirm identical properties. If the project strictly specifies a single material, this becomes a separate condition for selecting products, not an assumption based on appearance.
9. First, determine the free field of the ceiling
Polyurethane ceiling molding is positioned next to light fixtures, ventilation, niches, and the boundaries of different levels. All of these elements must be present on the ceiling plan before choosing a ceiling rose or decorative outline.
The geometric center of the room may not coincide with the center of the illuminated area. In a combined living room, the chandelier above the table is usually tied to the furniture group. The ceiling rose is then checked relative to the same compositional axis, rather than automatically moved to the center of the entire room.
Separate the free area from the overall ceiling size. If part of the area is occupied by a curtain niche or ceiling box, large decor will be positioned relative to the remaining boundaries. Centering within the structural rectangle may result in unequal gaps to the visible lines.
Do not block access to serviceable devices with decor. When choosing a location, not only the external dimensions of the grille or light fixture matter, but also the space needed to remove their components.
10. Compare the ceiling rose with the area, not just the room size
For selection the ceiling rosette its full dimensions, thickness, and pattern are needed. If the product has a complex silhouette, dimensions A and B cannot automatically be called a diameter. It may be a rectangle containing the entire composition.
У CRPU-070 the product page states 765 × 765 × 18 mm, while CRPU-068 — 1325 × 1325 × 18 mm. The same maximum thickness does not make them equal in scale. The second option is described as a modular ceiling composition made of individual elements.
Suppose a strip 1400 mm wide is available between adjacent ceiling trim lines. When centering a 765 mm dimension, 317.5 mm will remain on each side. For a 1325 mm dimension — only 37.5 mm. Formally, both fit, but in the second case the surroundings become significantly tighter.
These distances are not installation standards. They help to see that a large ceiling rose requires revising the adjacent pattern, even if the room area seems sufficient. The second direction and the extreme points of the ornament are checked in the same way.
11. Consider the chandelier and its ceiling cup separately
A light fixture has an overall size and the size of the part covering the mounting point. In a conventional datasheet, these are 620 and 160 mm. The first is needed to assess the overall composition, the second to check the center of the ceiling rose and the installed assembly.
The ratio of the chandelier and ceiling rose diameters alone does not determine a successful choice. A chandelier with diverging thin branches and a dense closed shade of the same size are perceived differently. The suspension height and the view from the main places in the room also matter.
With a complex light fixture, first compare a calmer ceiling decor. With a minimalist pendant, an expressive ceiling rose can become a standalone accent. These are options for checking, not a mandatory compatibility rule.
Separately coordinate the hole, the cup fit, access to the connection, and the mounting of the light fixture to the intended base. A decorative ceiling rose does not replace the load-bearing mounting of the chandelier. If the cup lands on a high relief, it cannot be considered installed merely because the centers coincide on the plan.
For a stretch or suspended ceiling, the assembly is checked with its installer before ordering the decor. Suitability is determined by the design of the base and the mounting, not by the name of the ceiling rose material alone.
12. Select the overlays based on the remaining inner field
After choosing the molding, clarify the free dimensions of the frame. The overlay should fit within this field with the intended space around it, unless the project involves a special connection to the contour itself.
For example, a frame with an outer width of 600 mm made from 35 mm profile leaves 530 mm inside. A nominal applique 480 mm wide, when centered, will leave 25 mm to the molding on each side. It fits, but its outer parts may look pressed against the frame. The size should be assessed on a layout and a sample, not just by the inequality 480 < 530.
Choosing Decor for Molding, distinguish a standalone accent from a connecting element. A decorative corner should match the profile at the joint; for a separate applique, the overall dimensions, position, and free margins matter.
If the main element becomes ornamental trim, additional appliques may not be needed. Check the simple option before adding another motif to the same wall.
13. Assess scale through relief, color, and distance
Visual weight is made up of several features: size, projection, pattern density, contrast with the background, and lighting. That is why a small, deep ornament is sometimes more noticeable than a wide, calm profile.
Wall molding for painting allows you to match the color to the surface. With the same shade, the contour is read mainly through light and shadow; with a contrasting one, it also reads as a separate color line. But painting to match does not physically fix a tight abutment or restore the space occupied by the frame.
Check the close view in the passage, the normal view from the sofa, and the distant view from the entrance. In a narrow hallway, a person views the relief almost up close, while in a large hall small details can get lost. Making all profiles larger just for one distant angle is not necessary: sometimes it is enough to highlight the main contour.
The same color with different sheen also changes perception. In the final comparison, the intended finish and lighting scenario should match, otherwise the choice of scale will be based on different conditions.
14. Vary the scale by zones while maintaining the connection between rooms
A project may require several sizes: a bold accent in the hallway, calm frames in the corridor, an intermediate solution in the bedroom. Cohesion is maintained by related profiles, repeating lines, and coordinated endings.
When in doubt, it helps to determine which specific constraint has been identified:
| What is visible in the project | What to check first |
|---|---|
| There is almost no free space in a narrow frame | Profile width, number of inner contours |
| The molding protrudes in front of the casing | Overall assembly thickness and end joint |
| A tight strip remains between the cabinet and the cornice | Installation height and cornice profile |
| The socket almost touches the ceiling trim | Composition dimensions and available field |
| From a distance, the wall looks empty | Main contour, relief, contrast, and lighting |
| Each section looks self-contained | Number of different motifs and profiles |
First change the parameter that is related to the problem. If a protrusion is in the way, reducing the width without changing the thickness may not fix anything. If the inner margin is lost, changing the color will not solve the lack of space.
Do not automatically create a new SKU for each room. A separate scale is needed where the task or geometry changes, not just the room name.
15. Compare candidates under the same conditions
For key positions, choose several suitable options: a more compact one, the intended main one, and a larger one. This is a way to see the boundaries of the solution, not a requirement to buy three samples of every product.
In the 3D model, keep the camera, furniture, color, and light unchanged. Change the item with its actual dimensions. If you simultaneously reduce the cornice, move the chandelier, and lighten the walls, the influence of the selected profile will be difficult to assess.
In the section 3D models and DWG STAVROS provides materials for design, including for polyurethane decor. Verify that the file matches the article number and dimensional specification. Stretching the section for a nice picture creates an image of a different product.
After the general view, examine the details according to the drawings: the cornice above the cabinet, the molding at the architrave, the center of the rosette under the lamp cup. A visualization shows perception, while a dimensional drawing allows you to verify physical placement. One does not replace the other.
16. Check the final option at full size
A flat marking on the wall helps assess the dimensions of the frame and the offsets. For a large rosette, an outline of the full composition on a plan or template is useful. However, such a check does not show the protrusion, shadow, and quality of the joints.
A physical sample is needed for those properties that cannot be assessed with a flat line. For molding, the section and finish are examined; for a pair of profiles, the gap and joint; for ornament, the character of the relief and the pattern repeat.
In the section samples and catalogs clarify the composition of the selected set. A printed catalog, an exhibition stand, and a fragment of the desired product provide different information. The presence of a sample in the set cannot be assumed solely from the series name.
Approve the sample together with the color, gloss, and intended substrate. If the molding will be mounted on a panel at the site, testing directly on the wall will not confirm the overall projection of the finished assembly.
After checking, record the selected article number and specification. A verbal agreement to “take the middle one” loses its meaning as soon as someone changes the list of candidates.
17. Lock in the final set and replacement rules
The result of the selection is a list of items linked to specific zones. The project code helps locate an element on the drawing, but it does not replace the manufacturer's SKU.
| Project code | Product type | What must be preserved | How to account for quantity |
|---|---|---|---|
| M-01 | Molding | SKU, material, A × C × L, role in the frame | Strips according to the cutting map |
| K-01 | Cornice | SKU, material, cross-section in installed position | Strips with angles and joints taken into account |
| P-01 | Baseboard | SKU, height, protrusion, terminations | Strips by sections |
| P-01 | Ceiling rosette | SKU, A × B × C, diagram and scope of delivery | Items or sets according to delivery terms |
| D-01 | Overlay | SKU, overall dimensions, execution side | Pieces separately for each item |
For each line, add the product link, room, finish, and current drawing. For a composite ceiling rose, check the kit contents: one composition on the ceiling may consist of many parts. Overall dimensions do not mean delivery of a single solid casting.
When replacing, it is necessary to preserve the proven solution, not just the visual similarity. A new profile may change the frame field, a different cornice may change the strip above the door, and a new ceiling rose may change the position of the outermost elements. The affected dimensions and quantities are recalculated before order confirmation.
18. Convert the selected products into an order
Linear decor is calculated by segments of each SKU, then distributed across commercial lengths. Dividing the total linear meters by the length of the strip gives only a preliminary estimate: long parts and short remnants may not combine well in cutting.
Ceiling roses are counted by the number of compositions and delivery contents, while overlays are counted individually. If four mirrored pairs are required, the specification records four left and four right elements. Reserve is assigned separately for the selected products, not as a single line for all decor.
Before You can buy ready-made stucco matching the Baroque style. Calculate the quantity: linear meters of cornices and moldings, number of rosettes, pilasters, consoles, corner elements. Add a ten to fifteen percent allowance for trimming., match the offer with the approved SKUs, dimensions, and materials. For polyurethane molding check the lengths and pattern; before purchasing a ceiling rose, check the assembly diagram and central unit. Availability and delivery terms are confirmed for specific items.
To discuss the set via the section for designers and architects Please provide the dimension passport, elevations, and ceiling plan. This will allow us to discuss the products in relation to the actual space.
Selecting mouldings for a project means coordinating their scale on the wall, ceiling, and in junctions. When thoughtful margins, clear abutments, and precise product codes remain after selection, the decorative system can be reproduced during purchasing and installation.