Article Contents:
- Start with the routes and the role of the rooms
- Assemble a small base set
- Distribute the elements in a table by room
- Repeat the profile while keeping differences between rooms
- Living room and dining room: choose a shared anchor for the composition
- Coordinate the activity of the walls and ceiling
- Assign the wall system based on visible areas
- Treat the ceiling set as a separate system
- A ceiling rose needs its own reason to appear
- In the bedroom, first determine the role of the headboard
- Design the corridor as a sequence of transitions
- The hall and the study can represent different sides of the project
- Connect the rooms through the lower zone and adjacencies
- Assign ornament and overlays to specific accents
- Introduce a new product code for a new task
- Check the route through several rooms in 3D
- Check the repeat under different conditions on samples
- Link the room table to the general product list
- Consolidate quantities while preserving the distribution across rooms
- Order the approved set with clear boundaries
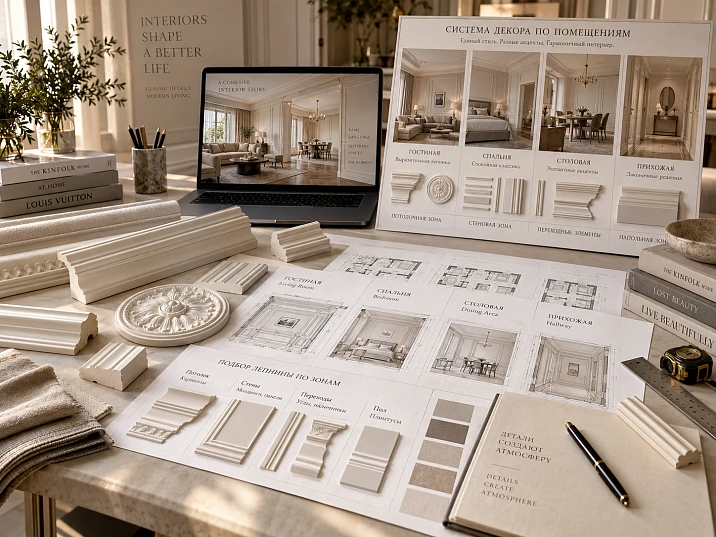
From the hallway, the corridor and part of the living room are visible. In three separate renderings, everything is convincing: in the hallway — frames, in the corridor — a thin band, in the living room — a cornice and ceiling composition. But from the entry point, these solutions meet simultaneously. The profiles differ, the horizontals break at random elevations, and each doorway looks like the boundary of a new project.
Such inconsistency is difficult to fix by replacing a single appliqué. First, a master table is needed: which elements repeat across the property, which belong to a specific room, and where decor is deliberately absent. Selecting stucco for an interior becomes manageable when the designer sees the full set of rooms before final approval of individual walls.
The working result is a decorative program for the property. In it, every item has a place, a role, and a reason for appearing, and every room has a connection to neighboring spaces.
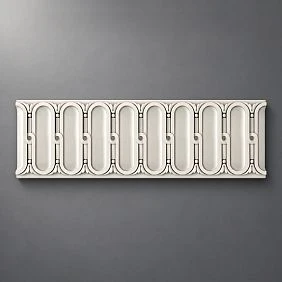

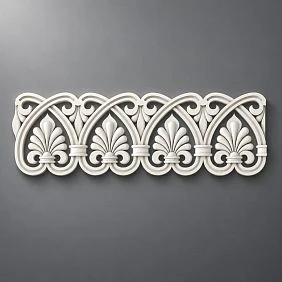
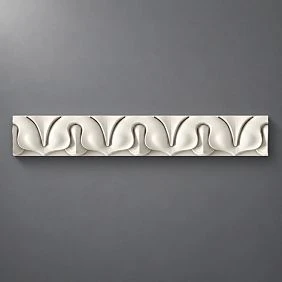

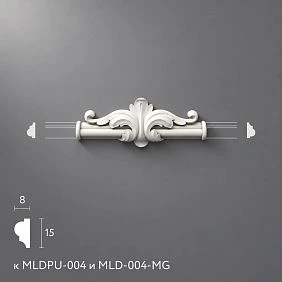
Start with routes and the role of the rooms
On the plan, mark not only the room names but also the viewing directions: from the entrance door, from the living room into the dining room, from the corridor into the bedroom. An open doorway connects spaces more strongly than a solid door. Two rooms may be adjacent but almost never perceived together; others are connected by a long perspective across the entire property.
Then assign roles. One space represents the interior, another receives the main decorative accent, and a third provides transition. These roles are not tied to room names. A study with an art collection can become the most expressive room, while a large living room can be a calm backdrop for furniture and the view from the window.
Write the role as a specific action: “support the passage axis,” “highlight the library wall,” “connect the entry and living zones.” The wording “make it beautiful” will not help you choose between a cornice, a molding, and a bare surface.
It is useful to note the constraints right away: floor-to-ceiling built-in wardrobes, varying ceiling heights, hidden doors, technical access panels. They affect the composition of the decor earlier than the pattern of the chosen ornament.




Assemble a small basic set
For the first option, a few items with different purposes are enough. The main molding sets the character of the frames, while the additional one works where a different scale is needed. The cornice completes the wall. The rosette and overlay take on independent accent roles. This is a list of possible tools, not a mandatory kit for every room.
Below is a conditional set for the following example. Two moldings are shown as actual product candidates; the remaining designations currently describe tasks and require the selection of specific products.
| Project code | Product or task | Where it is intended to be used |
|---|---|---|
| M01 | MLDPU-003: width 35 mm, thickness 12 mm, length 2600 mm | Hallway, living-dining room, study |
| M02 | MLDPU-001: width 10 mm, thickness 6 mm, length 2600 mm | Bedroom, separate section of the corridor |
| K01 | Main cornice, article to be selected | Hallway, living-dining room, study |
| R01 | Ceiling rose, article to be selected | Living room area |
| D01 | Local overlay, article to be selected | Single living room panel |
| P01 | Skirting board, finish to be selected | Rooms with compatible junctions |
In STAVROS cards MLDPU-003 и MLDPU-001 are listed as polyurethane products. Their dimensions allow a distinction to be made between the main and additional profiles, but by themselves do not confirm compatibility in a specific interior. This is verified on layouts and samples.
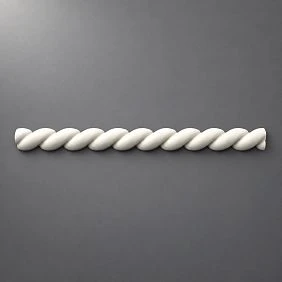
Our factory also produces:
Distribute the elements in the table by room
Now the basic set can be distributed across rooms. In each line, separate the wall, upper border, ceiling center, and local accent. Otherwise, the word "molding" will hide several independent solutions that will then unexpectedly meet in one room.
| Room | Walls | Crown Molding | Ceiling center | Local accent |
|---|---|---|---|---|
| Hall | M01 on open sections | K01 | — | — |
| Living room-dining room | M01 along the common frame system | K01 | R01 above the living room area | D01 in one panel |
| Bedroom | M02 near the headboard | — | — | — |
| Office | M01 on a free wall | K01 | — | О01: separate ornamental band |
| Corridor | М02 on one free section | — | — | — |
This is an example of role distribution, not a standard or a ready-made recipe. A dash means a deliberate absence of an element, not an incomplete selection. It is better to label an undetermined position as "under approval" so that the specifier does not confuse the two states.
The table immediately shows where the profile repeats and which products serve only one accent. Skirting П01 is considered separately as the common lower boundary. If in one room it does not fit the doors or built-in furniture, the exception is recorded directly in the program.
Get Consultation
Repeat the profile while preserving differences between rooms
One article can work in three different compositions: framing a mirror in the hallway, forming large frames in the living room, and highlighting the wall section next to the bookcase. The cross-section remains recognizable, while the purpose and rhythm change. Therefore, repetition does not require identical wall patterns.
The advantage of a common polyurethane molding is especially noticeable during specification: fewer visually similar items, easier to distribute strips and check compliance with drawings. At the same time, the same product in different colors remains a common profile, but already requires separate finish control.
Do not transfer all composition dimensions along with the article. The width of the wall section, furniture, and doorways change the placement of the frames. The molding can be repeated; mechanically copying the layout from one room to another is usually not possible.
Also check the actual visibility of the repetition. A profile completely hidden by curtains in one room and by a wardrobe in another hardly contributes to the visual connection between the rooms.
Living room and dining room: choose a shared anchor for the composition
In a combined space, first determine what connects the two zones: a continuous cornice, the same profile of wall frames, a shared lower band. Then decide what distinguishes them. The dining group can be highlighted by a light fixture, and the lounge area by a single decorative panel. Not every functional area needs its own outlet and a separate set of overlays.
Imagine the view from the table toward the sofa wall. If an ornamental frieze, a shaped cornice, double frames, and a large ceiling center all read at once, the whole picture needs to be compared. Each element on its own may fit, but together they create several competing focal points.
In the conditional table, the living room received more product types. This is the solution for a specific example, not a privilege of the room's name. If an expressive fireplace or a large painting becomes the main object, the set of stucco molding can be reduced to frames and a top finishing element.
Also discuss rearranging the furniture. The ceiling composition above the current table will stay in place, even if the table is moved to the window.
Coordinate the activity of the walls and ceiling
Evaluating walls separately from the ceiling is convenient when drafting, but insufficient for choosing decor. From a doorway, a person sees both surfaces. A complex upper band may almost disappear in the frontal elevation and occupy a significant part of the actual field of view.
First assign the leading system. If wall panels should hold attention, a perimeter cornice may be enough for the ceiling. If the project is built around a ceiling frame with ornamental corners, wall moldings can work as a sparser and simpler accompaniment.
This is not a rule requiring one surface to be simplified. A rich interior can also be consistent when the patterns are subordinated to common axes, rhythm, and scale. The check is different: can you explain what task each additional level performs?
It is useful to place the labels “active wall” and “active ceiling” next to each other in the table. They remind you which decisions need to be considered together the next time the project changes.
Assign the wall system based on visible sections
A single room rarely requires the same treatment for all walls. The area behind the sofa, the pier next to the door, and the surface with a built-in wardrobe have different available areas. Assigning the main molding to the entire room does not yet mean that frames should appear on every free fragment.
In the program, specify the area of application: "wall behind the console," "piers between windows," "panel opposite the entrance." Such a note turns a general choice into a specific task for the layout. To compare solutions, you can use the section wall decor, checking the composition of a liked arrangement on its card.
Start with one contour. Add a second if it changes the perception of the panel in the desired way, rather than simply filling the remaining space. A decorative corner is also not mandatory just because a frame has four corners.
On walls with frequent switches, grilles, and doors, a free section is sometimes more valuable than an additional frame. The absence of decor here supports the readability of the neighboring composition.
Consider the ceiling set as a separate system
A ceiling program may include a perimeter, an inner frame, a central motif, and corner elements. Selecting everything piece by piece makes sense when the architecture requires a special arrangement. If a coordinated composition is suitable, it is worth considering ready-made solutions from the section ceiling decor.
For a specific CPU-P5 set The product card specifies dimensions of 2500 × 2500 × 83 mm and a combination of polyurethane with primed MDF. The composition lists, in particular, moldings MLD-003-MG and MLD-002-MG. Therefore, the catalog section name does not replace checking the materials of each item.
The set is considered as a ceiling solution option, rather than automatically added on top of already selected frames and a ceiling medallion. If it is accepted, the room's line item is reassembled: it is clarified which individual products are no longer needed and which remain outside the composition.
The stated dimensions refer to the product and do not determine a suitable room size. Clearances to walls, light fixtures, ventilation, and curtain niches are checked against the ceiling plan and the set's drawings.
A ceiling medallion needs its own reason to be there
A medallion can support a chandelier, highlight the ceiling center, or complete an inner frame. These tasks sometimes coincide, but they do not have to. The center of the room, the center of a furniture group, and the light fixture's suspension point may be in different places.
Before selection the ceiling rosette determine which axis it belongs to. In a living-dining room, it is especially easy to end up with two mismatched centers: one based on the ceiling geometry, another above the table. If both points matter, this should be a deliberate decision for the entire composition.
In the program, do not just write “R01 — one piece,” but “R01 — ceiling accent of the lounge area.” This wording preserves the meaning of the item if the layout changes.
A medallion is not a mounting base for a chandelier: the light fixture's mounting is handled separately. The product's composition is also clarified — whether it is a single piece or assembled from several parts. One composition on the plan does not always equal one supplied part.
In the bedroom, first determine the role of the headboard
A tall upholstered headboard already divides the wall and creates a noticeable boundary. If several independent frames are added around it, some lines may end up hidden, while others may randomly coincide with the edges of the upholstery. Therefore, the furniture here is part of the decorative program before the moldings are finalized.
Check the headboard together with the nightstands, wall lights, and the open position of the curtains. Sometimes a single frame combining the bed and the light fixtures is enough; sometimes separate side panels are needed. In another project, the ceiling will be the expressive element, while the wall remains free.
A bedroom does not have to be less rich than a living room. If its architecture features complex moldings, the connection with the rest of the property can be maintained through a shared profile or finish. In our example, M02 was chosen for a local task near the headboard, and the cornice is deliberately absent.
After changing the bed model, this line is checked again. An approved room name does not guarantee that the previous composition still suits the new furniture.
Design the hallway as a sequence of transitions
A hallway has its own job: to prepare the eye for the next room and to connect several doorways. For this, it is sometimes enough to repeat a single profile or the lower boundary of the wall. A new ornamental motif can only complicate an already door-heavy surface.
Look along the passage. A frame that looks proportional in the elevation may appear as a narrow strip between the architraves when viewed from the end. Here, the sequence of visible sections matters more than an equal number of panels on both sides.
In the conventional program, M02 appears only on one free section. The rest of the connection is provided by the baseboard, the finish, and coordinated elevations where this supports the composition. There is no need to draw a symmetrical element on the opposite wall if a door intersects it.
For complex passage geometry, mark the endpoints of the profile. The installer should not independently choose where the decorative band ends before a turn or a built-in wardrobe.
The hall and the study can represent different sides of the project
The hall shows the interior from a short distance and often through several reflections. A mirror can double the visible ornament, while a wardrobe can remove half the wall from view. Therefore, it is useful here to check not only the frontal view of the console group but also the first glance when the front door is opened.
In our example, the hallway introduces M01 and K01 without a separate trim. This is enough to then recognize the same profiles in the living room.
The study, by contrast, can receive its own ornamental band O01. Its independence supports the purpose of the room, while the shared M01 links the study to the property. When choosing the band, consider how the bookshelves are filled: an empty library in a visualization looks considerably calmer than a shelving unit with books and objects.
If the study is separated by a closed door, the degree of difference can be greater. When its wall is constantly visible from the hallway through a wide opening, both rooms should be assessed as a single visual sequence.
Connect rooms through the lower zone and junctions
A baseboard can unite rooms where the upper decor differs. But continuity must account for door frames, floor level changes, built-in furniture, and the thickness of the finish. The same product code does not guarantee the same junction to different substrates.
| Situation | What can link rooms | What to check at the boundary |
|---|---|---|
| Wide open opening | Profile, finish, coordinated horizontal line | Visible ends and transitions between planes |
| Door with architraves | Skirting board or the character of the frames | Joint with the architrave on each side |
| Different ceiling heights | Wall moulding and lower band | Independent termination of each cornice |
| Different thickness of wall finish | Colour and pattern of the profile | Offset of the front surfaces |
Do not force the cornice to run through the entire object if the ceiling geometry does not support it. Sometimes it is more correct to terminate it within the boundaries of the room and transfer the connection to another element.
In a conditional program, the absence of K01 in the corridor is not a system break in itself. A break occurs when the transition is not designed: the end is visible by accident, the lines almost coincide, or the profile rests against an unsuitable surface.
Assign ornament and appliqués to specific accents
Once the main contours are distributed, it is easier to understand whether ornamental trim and where it will be read. A border has length and a repeating pattern; an appliqué has a local position. These elements cannot be considered interchangeable ways to “add decor.”
For ornament, check how the pattern ends at doors and on short wall sections. If the motif is cut off at a random place, the problem concerns distribution across the walls, not only installation quality.
In the section decoration for moldings select elements taking into account their pairing with a specific profile. decorative appliqués assign a panel or architectural axis where they are actually needed. In our example, D01 remains the accent of one living room panel.
The sequence may change if the project’s initial value is already an expressive historical element or a work of art. Then the surrounding system is built around it. But a detail from a catalog that you happen to like does not yet become a reason to complicate every room.
Introduce a new item code for a new task
Before adding a profile, compare it with the approved candidates. If the difference is barely visible in a real room and the function matches, the new item may be redundant. When purchasing and distributing, two similar profiles, on the contrary, will require constant differentiation.
A different article is justified when the scale, surface radius, ceiling construction, application conditions, or the nature of an individual accent change. In this case, the suitability of the product matters more than the minimum number of items in the schedule.
There is no strict rule of "no more than five articles per apartment." It is more useful to record the reason for each exception: "profile for a radius wall," "study belt," "cornice for a different ceiling construction." Such a record helps protect the necessary solution and remove the accidental one.
Do not substitute selection with arbitrary changes to the model's dimensions. A profile stretched in the visualization does not become a new available product. If the required version is not available in the selected group, you need to look for a real product or separately clarify the possibility of manufacturing it.
Check the route through several rooms in 3D
For the overall program, a series of eye-level views is useful: entrance, hallway, turn into the corridor, living room, open bedroom door. The cameras show not only the main walls but also the ends of the profiles, side surfaces, and adjacent spaces.
Use real models of the selected products; materials for work are presented in the STAVROS section 3D models and drawings. Check that the file matches the article and version, especially if the product has several sizes.
Compare views under comparable light and exposure settings. Otherwise, one room will appear more saturated due to contrasting lighting, while another will appear calmer due to flat light. A simple view without expressive materials is additionally useful: it shows the geometry of the transitions.
If, after viewing, you want to replace almost all the profiles in one room, first determine the cause. The issue may be the frequency of the frames or their placement, and the base set may not need to be changed.
Check the repeatability on the samples under different conditions
It is better to come to the on-site check with a short list of candidates. Two or three profiles for a specific unresolved task provide more information than many unrelated samples. Available formats should be confirmed via the section samples and catalogs; the presence of a category does not mean that any item is available as a separate free cut.
First, compare the candidates on the same base, with the same finish, and under the same light. Then move the selected profile to the characteristic areas of the site. One SKU near a side window and under diffused artificial lighting can produce a shadow of different visibility.
For the repeating M01, it is important to check not only the living room but also the hallway or study, where the conditions differ. If the profile looks different in one room, this is not yet a reason to introduce a new SKU: you need to understand the influence of light, color, and adjacent surfaces.
After approval, record the finish sample and the acceptable application options. The decision “I like the profile” is too vague for further ordering.
Link the room table with the general item list
The program has two sides. The room table shows what is located in each room. The general list shows where each item is used. An unambiguous link must be maintained between them via the project code and the exact SKU.
For a position, specify the material, finish, dimensions from the product card, commercial length, trim, unit of account, and rooms of application. On the layout drawing, add the specific zone. M01 in the living room and M01 in the study may have different segment lengths while remaining the same product.
Check both sides: every filled cell in the program has a position in the schedule, and every position has a place on the drawings. This is how both forgotten elements and items left over from a rejected option are detected.
If replacing M01 affects three rooms, update all three applications. At the same time, a local change to D01 in one panel does not automatically require reassembling the ceilings for the entire project. The scope of the check is determined by the actual relationships of the position.
Consolidate the quantities while preserving the distribution by room
Linear footage is calculated from the lengths of the parts and the cutting plan for commercial planks. Sockets, overlays, and decorative corners are counted by pieces or sets according to the delivery. Left and right versions are recorded separately.
Suppose that after cutting for a hypothetical project, the following quantities of 2600 mm planks are obtained. This is a training example of accounting, not consumption by room area.
| Position | Distribution of planks | Base quantity | Separately assigned reserve | To order |
|---|---|---|---|---|
| M01 | Hall — 4; living room — 8; study — 3 | 15 pcs. | 1 pc. | 16 pcs. |
| M02 | Bedroom — 6; hallway — 2 | 8 pcs. | 1 pc. | 9 pcs. |
The reserve here is assigned conditionally for each item. In an actual order, it is determined by the cutting plan, the complexity of the parts, and the possibility of using offcuts. A single percentage for all products does not account for these differences.
You can combine identical SKUs in the same finish. When several rooms are cut together, the total sometimes changes, but then an updated parts map is required. Simply adding up the meters does not prove that there will be enough strips. The distribution by room is retained even after the order is combined.
Order the approved set with clear boundaries
Before purchasing, check the room schedule, the elevations, and the bill of materials. It should be clear which curtain rods run through several rooms, where only the additional molding is installed, which ceiling kit has been approved, and which accents have been excluded.
After that, you can buy polyurethane moldings by the calculated product lengths and select the remaining items in the catalog of polyurethane moldings STAVROS. Availability, kit contents, and lead times are confirmed for the required finish and quantity. The terms of cooperation on projects are presented in the section for designers and architects.
Give the order assembler not only the total amount of the products but also the distribution by room. The installation crew needs the designated application areas and the approved profile ends. Then the same strip will not be arbitrarily moved from the hallway to the bedroom, and a missing cover will not appear on the wall just because it was left in the box.