Article Contents:
- Define the role of each room in the overall interior
- Choose the base products before detailing individual rooms
- Start with repeatable moldings
- Assign the required decor composition to the walls
- Divide the ceiling design into three options
- In the hall, showcase the main elements of the system
- In the living room, coordinate a single leading composition
- In the bedroom, link the stucco with the bed and textiles
- The corridor connects the rooms; the study may differ
- Set conditional finish levels, including the absence of moulding
- Fill in the general table by room
- Check the transitions and the lower edge of the wall
- Distribute ornament and piece decor locally
- View the object from the perspective of each item code
- In 3D, check the sequence of rooms
- Use samples to agree on the base set and main accents
- Create a general specification linked to zones
- Combine identical linear profiles before cutting
- Find errors before submitting the order
- Hand over the approved system to purchasing
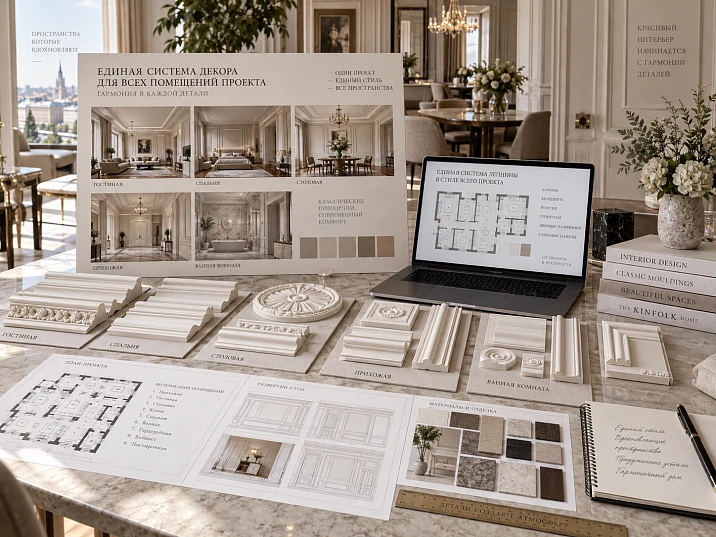
In the living room, the molding was approved, in the bedroom a similar one was chosen, and for the hall a third was found. The differences between them are noticeable only up close, but the order already has three SKUs, three calculations, and three stock groups. At the same time, the living room ceiling was designed separately from the walls: after merging the drawings, it turned out that the frames, the ceiling rose, and the ornamental cornice all claim the main attention.
These problems appear even before installation. They can be detected in a single table where each room is assigned wall profiles, ceiling decoration, and accents. Selecting stucco for an interior should begin with just such an overall program: it shows which products repeat, where a standalone composition is needed, and which surfaces are best left free.
As a result, the designer receives a connected set of solutions for the entire property, and the order assembler receives a clear basis for the order with materials distributed by room.

Define the role of each room in the overall interior
The list of rooms should be supplemented with their role and connections. The hall can represent the main character of the decor, the living room can take on an expressive ceiling composition, and the corridor can connect two parts of the apartment. However, room names do not set a mandatory hierarchy. The main decorative space could well be the study, while the living room remains restrained thanks to the view from the window and large furniture.
Mark on the plan which rooms are visible at the same time. A wide opening unites two rooms in a single field of view. A closed door allows their finishes to be more strongly differentiated. A long perspective from the entryway into the dining room is sometimes more important than the adjacency of two rooms on the plan.
For each room, formulate a task: “highlight the library,” “support the passage axis,” “unite the dining and sofa zones.” Then mark the existing accents — the fireplace, textured stone, a painting, a tall headboard. Stucco should receive a role alongside them, rather than being added as an independent mandatory layer.




Choose the base products before detailing individual rooms
The first set can conveniently be designated with short project codes: M01 — main molding, M02 — additional molding, K01 — cornice, R01 — rosette, O01 — ornamental trim, D01 — overlay. The baseboard can be assigned a separate code, P01. These designations link drawings, tables, and samples, but do not replace the manufacturer's article numbers.
For a conditional example, let's consider two real STAVROS candidates. MLDPU-002 has a width of 22 mm, a thickness of 11 mm, and a length of 2600 mm. The MLDPU-001 the corresponding dimensions are 10, 6, and 2600 mm. Both products are listed in their product cards as polyurethane.
The first profile can be checked in the role of M01, the second — M02. This is a preliminary distribution, not a universal pair for any interior. The remaining codes so far describe tasks: the specific cornice, rosette, and overlay still need to be selected.
Do not include a product in the set just for the sake of a complete list. If there is no ceiling rosette in the project, the corresponding item is not needed.
Our factory also produces:
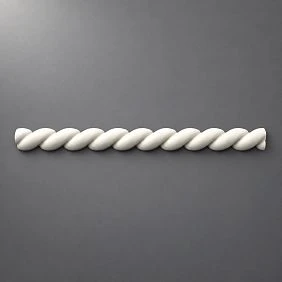
Start with the repeatable trim
The main molding and cornice affect several rooms at once: they set the pattern of lines, repeat at corners and junctions, and occupy a significant part of the schedule. Replacing such a profile after approval affects more drawings than moving a single overlay. Therefore, it is useful to define linear elements before local decorations.
A single molding can form wide frames in the living room, a narrow mirror frame in the hallway, and a separate panel in the corridor. The cross-section remains common, while proportions and rhythm change. The interior maintains a connection without literally copying the walls.
The advantage of repetition also shows in purchasing. Strips of the same finish can be distributed among rooms according to a shared cutting plan. But the same pattern does not yet mean the same product: material, size, length, and factory finish must match.
If the project's starting value is already historical decor or a significant art object, the order of selection may change. In that case, base profiles are chosen with this object in mind, rather than trying to subordinate it to a pre-selected set.
Get Consultation
Assign the required decor composition to the walls
The wall program starts with visible areas, not with the room's total area. The wall behind the sofa, the pier between windows, and the surface near a built-in wardrobe solve different tasks. The label “M01 — living room” should be clarified: exactly where the profile runs and which areas remain free.
One contour defines the boundary of the panel. An additional molding creates a second level of framing. An overlay highlights a separate point or axis. These techniques can be combined, but each subsequent element must change the composition meaningfully. Free space inside the frame does not by itself require filling.
Ready-made solutions from the section wall decor help compare different ways of joining profile and accent. For example, with CPU-1-1 from the “Neoclassic” collection the composition includes polyurethane part NPU-399 and primed MDF molding MLD-003-MG.
Such a composition can be studied as an example of coordinating elements. If its dimensions, material, or composition change, the resulting variant must be re-checked against joints and drawings. It is no longer identical to the ready-made set from the product card.
Divide the ceiling design into three options
The ceiling is considered together with the walls, but is recorded as a separate part of the program. For discussion, it is convenient to distinguish three options.
Cornice only. It completes the wall along the perimeter. In a room with expressive wall panels, this may be sufficient. Check the continuity of the line near curtain niches, tall cabinets and ceiling level changes.
Cornice and inner contour. An additional frame highlights the ceiling's own field. Its position is tied to furniture, light fixtures and the geometry of the room; an equal setback from all walls does not always give the desired result.
Central composition. A rosette, ornamental corners or a coordinated set of details take on an independent role. At the same time, the center of the ceiling may differ from the center of the dining table or sofa group.
These are composition options, not mandatory stages of complexity. A rosette is possible even without an inner frame. Before Buy a ceiling rosette, determine its axis, dimensions and connection with the light fixture. The chandelier mounting is provided separately from the decorative item.
In the section ceiling decor ready-made compositions are presented. At CPU-P5 the dimensions 2500 × 2500 × 83 mm and a combination of polyurethane with primed MDF are indicated. Such a set is considered as a standalone option for the ceiling program. If it is accepted, the previously selected frames and accents are reviewed so as not to order the same functions twice.
In the hall, show the main elements of the system
The hall introduces the interior from close range. Here the eye meets doors, a mirror, a console and a cabinet, so even a small area of relief can be clearly visible. Decorative richness depends on this picture, not on the status of the space as an entrance area.
For the first option, it is enough to check the main molding M01 and the cornice K01. A distinctive accent is added if it has a visible place. For example, the overlay above the mirror should relate to the frame, the light fixture, and the upper termination of the wall.
Also look at reflections. A mirror can show the decor of the opposite wall and visually double the number of details. A solution that is convincing on one elevation may look different from the entrance point.
In the program, separately mark the areas hidden by an open door or furniture. It is not necessary to distribute the stucco evenly around the entire perimeter of the hall: the surfaces on which its pattern is actually legible are enough.
In the living room, coordinate one leading composition
The leading one can be a wall with a panel, a ceiling frame, or a separate architectural object. The other elements support the chosen system through profile, rhythm, and placement. Otherwise, each type of stucco will begin to require its own symmetry and its own center.
In a living-dining room, it is especially important to separate the functional axes. The light fixture above the table belongs to the dining group, while the ceiling rose above the lounge area belongs to another part of the room. Both points can exist simultaneously if their connection is clear on the general plan.
Check the view from the sofa and from the table. The wall with the TV, which looks empty in an image with the screen off, receives a noticeable light accent in real use. Additional ornamental framing here requires separate justification.
A rich interior does not necessarily need to be simplified to a single item. However, it is useful to name what exactly unites its details: a common axis, a repeating module, one characteristic profile, or coordinated finishing.
In the bedroom, link the stucco with the bed and textiles
Before marking out the frames, determine the position of the bed, the width of the headboard, the dimensions of the nightstands, and the installation points of the sconces. The geometric center of the wall does not always coincide with the axis of the furniture group: there may be a door, a wardrobe, or a passage to the dressing room nearby.
There are various possible solutions. One large frame unites the headboard and the light fixtures. Side panels highlight the nightstands. A small overlay creates a local accent above the bed. The choice depends on which part of the wall remains visible after the furniture is installed and the curtains are hung.
Do not automatically assign the bedroom a "lightweight version of the living room." A more expressive composition can appear here if it suits the project. A connection with the other rooms will be maintained by the shared profile, cornice, or trim.
Pay especially close attention to the boundaries of the soft headboard. If the fabric almost touches the molding, the accidental narrow strip of wall between them becomes a line of its own. Such a gap should be set intentionally, not left as the result of approximate model placement.
The corridor connects the spaces; the study may differ
It is useful to assess the corridor along the direction of movement. From this point, the ends of the profiles, the frequency of doors, and the sequence of wall sections are visible. Frontal elevations do not always show how closely the decorative frames sit next to the door casings.
Repeating M01 on one free section can help maintain the connection with the hall. There is no need to introduce a new molding simply because the corridor is narrower and longer than the other rooms. First, check a different rhythm and number of frames with the same profile. If necessary, you can omit the cornice while keeping the lower band or the overall trim.
The study allows for a separate motif: an ornamental frieze, a more pronounced library surround, an accent wall. But it is easier to tie its own character to the object if at least one element is already part of the base set.
Take into account how the shelving is filled. Books and objects create many small lines; an empty library model does not show their influence. Compare the ornamental band with realistically filled shelves, especially if the study is constantly visible through an open doorway.
Define conditional levels of decoration, including the absence of stucco
Levels help discuss the set of solutions quickly. They should be treated as working designations for the project, not as a scale of quality or cost.
| Level | Conditional composition | What to check |
|---|---|---|
| U0 | No stucco molding provided | Is there a connection through furniture, finishes, or openings |
| U1 | One linear element | Is it sufficient for the selected task |
| U2 | Molding and upper termination | Are the wall and ceiling coordinated |
| U3 | Base lines and a local accent | The accent has a specific place and role |
| U4 | Comprehensive wall or ceiling composition | All parts checked together |
The number of product types does not directly measure visual richness. One wide ornamental band may be more noticeable than several thin contours. Therefore, alongside the level, it is useful to record the leading surface: wall, ceiling, or a local object.
U0 — a complete solution. In a walk-in closet with floor-to-ceiling wardrobes, a hallway with expressive stone, or a room with complex furniture architecture, additional relief may not be needed. The absence of stucco does not mean the absence of design: junctions, finish boundaries, and transitions to adjacent rooms remain.
Fill out the general table by room
Consolidate the decisions into a single table before the detailed material calculation. Below is a conditional project consisting of six rooms. The levels apply only to the described option; no set is a recommendation for all living rooms or bedrooms.
| Room | Wall profile | Ceiling | Local accent | Level |
|---|---|---|---|---|
| Hall | M01 | K01 | — | U2 |
| Living room | M01 | K01 and R01 | — | U3 |
| Bedroom | M02 | — | D01 near the headboard | U3 |
| Corridor | M01 on one section | — | — | U1 |
| Office | M02 | K01 | O01 above the bookcase | U3 |
| Wardrobe | — | — | — | U0 |
Socket R01 in the living room is counted once in the ceiling schedule. In the bedroom, U3 denotes a combination of a wall line and a local accent, although there is no cornice. The levels table serves as a guide, and the specific composition is always recorded in words and codes.
A dash means a confirmed absence of the item. If the question is still open, write “not selected” or “pending approval.” Otherwise, the specifier may mistake an unfinished part of the project for a deliberate refusal of decor.
Check the transitions and the lower edge of the wall
The same profile on both sides of the opening does not guarantee a coordinated transition. You need to see its elevation, its position relative to the architrave, the direction of the pattern, and the termination point. Lines that almost coincide but diverge over a short distance are especially noticeable.
A shared skirting board P01 can be the connecting element. It is checked against door frames, built-in wardrobes, and different wall finish thicknesses. When the wall material changes, the face plane can shift even if the base position remains the same.
The cornice does not necessarily have to run continuously through rooms with different ceiling heights. In such a case, each section is given its own termination, while the connection is conveyed through the wall profile, the lower line, or the color.
On a wide open opening, the combined appearance of the two spaces matters. Behind a closed door, a more independent solution is acceptable. Therefore, the same transition cannot be automatically repeated throughout the entire property: it is determined by the specific architecture of the boundary.
Distribute ornament and piece decor locally
An ornamental band has length, direction, and pattern repeat. An applique occupies a specific place. Their impact on the room differs, so the entry "add decor" should be replaced with a precise designation.
For the study from the example ornamental trim O01 runs above the library. The length of the zone is checked against the repeating motif: its ending near the side post should not appear accidental. If the pattern requires a special termination, the corresponding detail is included in the same local system.
Decor for Molding are selected based on the junction with the actual profile. For decorative inlay D01 is checked for its dimensions within the panel, its position relative to the headboard and light fixtures.
Do not extend the accent to neighboring rooms merely for the sake of repetition. The overall connection is already provided by the base elements. A local motif retains its meaning precisely because of its limited application, if such a distribution corresponds to the concept.
Look at the property from the perspective of each item code
The room table answers the question "what is in the room". The inverse matrix shows where each product is used. It is needed to assess repeatability and the consequences of replacement.
| Code | Lobby | Living room | Bedroom | Corridor | Study |
|---|---|---|---|---|---|
| M01 | Yes | Yes | — | Yes | — |
| M02 | — | — | Yes | — | Yes |
| K01 | Yes | Yes | — | — | Yes |
| R01 | — | Yes | — | — | — |
| О01 | — | — | — | — | Yes |
| D01 | — | — | Yes | — | — |
The walk-in closet with У0 is not included: it does not contain the listed products. The skirting board is checked in a separate line after selecting its finish and junctions.
A single use is not an error. A socket or frieze may have a single justified role. A position that differs from the main one only very slightly and does not solve a new task requires re-checking.
A new item code is justified by a different scale, surface radius, application conditions or ceiling construction. The reason for the choice is recorded for it. The schedule should not be artificially shortened at the cost of unsuitable material or shape.
In 3D, check the sequence of rooms
Capture several views along a route: entrance, hall, corridor, living room, open bedroom door. The cameras should show adjacent spaces and the ends of the profiles. A separate beautiful angle of each room will not reveal all the gaps between them.
Use STAVROS 3D models and drawings, cross-checking the article number and dimensions. Scaling a finished profile in cross-section changes the product geometry: after such an operation, the model may end up containing an item that is not available in the selected finish.
When comparing rooms, keep lighting and exposure settings consistent. Additionally, consider the geometry without bold materials: this makes it easier to see the rhythm of the frames and the nearly matching horizontals.
If the transition looks unconvincing, first check the placement of the lines. Replacing the profile is not always necessary. Sometimes it is enough to remove one frame, change its proportions, or end the band before the doorway.
Use samples to agree on the base set and the main accents
You should check the items on which the entire system depends: M01, M02, K01, the local ornament, and the main piece accent. For an unresolved task, a short list of comparable candidates is enough. You do not need a sample for every room if the same finish is repeated.
The formats and composition of the available sets are specified in the section samples, catalogs, and display stands. Do not assume that any article number is necessarily supplied as a separate free cut.
First compare the profiles on the same base and under the same light. Then check the chosen solution under the characteristic conditions of the site. Side light by a window and diffused light in a hall give different readability of the relief. The same color is also perceived differently next to warm wood and cool stone.
For wall stucco to be painted, record the agreed finish and surface preparation. A sample without a topcoat confirms the shape but not the final appearance of the finished surface.
Create a consolidated specification linked to zones
In the specification, the project code is combined with the exact article number, material, finish and dimensions. For linear products, the commercial length is added; for a composite product, the supply unit and completeness are added. Dimension designations are read from the specific product card and drawing.
In addition to the room, a zone is needed: the wall behind the sofa, the ceiling center, the band above the bookcase. A single line “M01 — 44 m” without distribution is insufficient for checking drawings and issuing material to installers.
Separate the calculated requirement from the quantity to order. Meters of finished parts, the number of whole strips and the reserve are different values. Sockets, covers and corners are counted by pieces or sets; left and right versions are recorded separately.
When including a ready-made composition, choose a clear accounting method. You can order a set or list its agreed components, but you cannot count both options simultaneously as independent requirements. After changing the composition, all related room lines are checked.
Combine identical linear products before cutting
First obtain the parts lists by room, then combine identical versions. For example, M01 requires 21 m for the living room, 14 m for the hall and 9 m for the corridor. The total is 44 m, but this does not yet determine the number of strips: the lengths of individual blanks are needed.
We will show the advantage of joint cutting using another small training example. The living room needs six blanks of 1800 mm, the hall needs six of 700 mm. A smooth profile of one version, 2600 mm long, is used. Additional joints inside the blanks are not allowed.
| Calculation method | Layout on the strip | Number of strips |
|---|---|---|
| Living room separately | One blank 1800 mm | 6 |
| Hall separately | Three blanks of 700 mm each | 2 |
| Separate purchase | Two independent cards | 8 |
| Joint cutting | 1800 + 700 mm on each strip | 6 |
The total length of the parts is 15 m. The joint option uses six strips with a total length of 15.6 m. Each retains 100 mm for end trimming, saw cuts, and process allowances. The layout is applicable only if the actual consumption for these operations fits within this remainder; the lengths of the blanks must be specified unambiguously.
Two saved strips do not mean guaranteed reduction of waste on any project. The result depends on the combination of lengths, grain direction, finish, and work sequence. The reserve is assigned separately after verifying the cutting plan.
If long parts are installed before short ones, usable offcuts are labeled and kept according to the card. Without such organization, the calculated savings may disappear: the needed piece may be used or discarded before the next stage.
Find errors before submitting the order
The overall program is easy to verify by several criteria. A new molding in each room requires an explanation of the differences. The same saturation across all rooms — verification of their roles. An overlay selected before the frame is defined — verification of dimensions and junctions. Separate purchases of the same profile — comparison with the overall cutting plan.
Then compare the two tables: by room and by product. If K01 is listed in the study, it must also be present in the corresponding row of the matrix. A position without a place on the drawing may turn out to be a leftover from a rejected option.
Also check unfinished decisions. "Not selected" must not be turned into a random product when placing the order. If purchasing is done in stages, separate the agreed part that does not depend on the remaining questions.
When reducing the budget, first evaluate local additions and duplicate contours. Arbitrarily replacing the common M01 in one room can break the connection for which it was repeated. Any reduction is reflected simultaneously in the drawings, the program, and the product quantities.
Submit the approved system for purchasing
After the program is approved, you can buy polyurethane moldings using the overall cutting plan and order piece decor for specific zones. In the catalog of polyurethane moldings STAVROS verify the selected finishes, while availability and lead times are confirmed for the actual quantity. For ready-made sets, materials and composition are checked separately.
For a consultation, provide the plan, the room table, the item list, and the list of unresolved junctions. The terms of cooperation and available project materials are presented in the section for designers and architects.
In the order, keep the distribution of products by room, even when identical items are combined into a single purchasing line. Installers receive part designations and installation locations, while the assembler receives the final quantities and reserve. This way, a repeatable profile remains part of the overall design from the first selection to the last installed trim.