Article Contents:
- Understanding Interior Door Trim: American Architectural Terminology
- Door Casing: The Architectural Frame Around the Opening
- Door Jamb: The Frame That Receives the Door
- Door Panel Molding: Decoration Applied to the Door Slab
- Decorative Door Onlays and Appliques
- Doorway Portals and Architectural Surrounds
- Detailed Ornamental Reproduction
- Relatively Low Weight
- Paintable Surfaces
- Resistance to Normal Indoor Humidity
- Design Flexibility
- What Polyurethane Cannot Replace
- Simple Flat Door Casing
- Stepped and Profiled Door Casing
- Colonial-Inspired Door Trim
- Craftsman-Style Door Trim
- Victorian and Ornamental Door Casing
- Neoclassical Door Surrounds
- French Classical and Baroque Door Decoration
- Typical Design Ranges
- Consider the Door Height
- Coordinate Door Casing With Baseboards
- STAVROS MLDPU-001: Delicate Door Panel Detailing
- STAVROS MLDPU-002: Stronger Architectural Relief
- STAVROS MLDPU-003: A More Substantial Decorative Profile
- Selecting the Correct System
- Step 1: Inspect the Existing Door Assembly
- Step 2: Remove the Existing Casing
- Step 3: Evaluate the Wall-to-Jamb Transition
- Step 4: Establish the Casing Reveal
- Step 5: Cut the Casing
- Step 6: Dry-Fit the Components
- Step 7: Attach the Casing
- Step 8: Finish the Joints
- Step 9: Prime and Paint
- The Classic Two-Panel Door Design
- The Single-Panel Contemporary Door
- Three-Panel and Multi-Panel Doors
- Door Panel Molding With Decorative Onlays
- Hinge-Side Clearance
- Latch-Side Clearance
- Top and Bottom Clearances
- Hardware and Lockset Areas
- Fire-Rated Doors
- Step 1: Identify the Door Surface
- Step 2: Clean the Door
- Step 3: Establish the Decorative Layout
- Step 4: Cut and Dry-Fit the Pieces
- Step 5: Apply the Compatible Adhesive
- Step 6: Allow Proper Curing
- Step 7: Prepare and Finish the Joints
- Step 8: Paint the Composition
- Where Doorway Portals Work Best
- The Elements of a Classical Door Portal
- Choosing Decorative Capitals and Brackets
- Portal Proportions
- Establish the Composition
- Prepare the Substrate
- Mark the Architectural Axes
- Install the Primary Architectural Members
- Add Capitals and Decorative Details
- Complete the Upper Surround
- Finish the Assembly
- Traditional American Interiors
- Neoclassical Interiors
- French Classical Interiors
- Modern Farmhouse Interiors
- Contemporary and Minimalist Interiors
- Art Deco-Inspired Interiors
- White Casing With White Doors
- Door Trim Painted to Match the Wall
- Door Casing Painted to Match the Door
- Contrasting Door Trim
- Antiqued and Decorative Finishes
- Drywall
- Plaster Walls
- Brick and Concrete
- Painted Surfaces
- Wallpapered Surfaces
- Example 1: A Standard Interior Door Casing
- Example 2: Decorative Frames on a Door Slab
- Estimate Ornamental Components Separately
- Prepare a Professional Door Trim Schedule
- Simple Decorative Casing
- Applied Decorative Door Panels
- Classical Door Surrounds
- How to Compare Costs
- Using Wall Molding as Full Casing Without Checking Its Function
- Ignoring Door Swing and Hardware
- Choosing Oversized Ornament
- Combining Incompatible Profiles
- Poorly Fitted Joints
- Inadequate Surface Preparation
- Excessive Paint Thickness
- Ignoring the Architectural Context
- Assuming All Polyurethane Products Are Identical
- What Is the Best Material for Decorative Interior Door Trim?
- Can Polyurethane Molding Be Used on Interior Doors?
- Can You Add Decorative Molding to a Hollow-Core Door?
- Can Polyurethane Onlays Be Installed on Metal Doors?
- Is Polyurethane Better Than MDF for Door Decoration?
- Can You Install Decorative Door Trim Without Removing the Door?
- Can You Paint Polyurethane Door Molding?
- What Paint Finish Works Best for Decorative Door Trim?
- How Do You Hide Joints in Polyurethane Door Molding?
- Can Polyurethane Door Trim Be Used in Bathrooms?
- Is Decorative Polyurethane Casing Suitable for Exterior Doors?
- Can Decorative Trim Be Removed Later?
- How Do You Choose Matching Decorative Door Moldings?
- Where Can You Buy Polyurethane Door Molding?
- Polyurethane Molding for Door Panel Frames
- Decorative Door Onlays and Appliques
- Decorative Corners and Molding Accents
- Decorative Trim for Classical Doors
- Capitals and Brackets for Doorway Surrounds
- What to Confirm Before Ordering for a U.S. Project

An interior door is more than a functional opening between rooms. It is one of the most frequently viewed architectural elements in a home, defining transitions, organizing sightlines, and connecting different spaces through a consistent design language.
Yet doors are often treated as secondary details. Homeowners invest in flooring, furniture, wall finishes, and lighting while leaving ordinary factory-installed casing around every doorway. The result may be a beautifully furnished interior that lacks architectural coherence.
Decorative door trim offers a way to change that perception.
A carefully selected door casing can make a standard interior door appear taller, more substantial, and more integrated with its surroundings. Applied door panel molding can transform a plain flush door into a composition resembling traditional raised-panel millwork. Ornamental appliques introduce artistic detail, while architectural doorway surrounds establish a more formal relationship between adjoining rooms.
Modern polyurethane molding makes many of these treatments possible without commissioning hand-carved woodwork or traditional plaster decoration.
However, successful door decoration requires more than choosing an attractive profile.
The molding must be proportionate to the opening. Its projection must allow the door to operate normally. The decorative components must be compatible with the substrate, the selected finishing system, and the architecture of the room.
For American homeowners, designers, remodeling contractors, and finish carpenters, understanding these relationships is essential to creating door details that look permanent rather than improvised.
This guide examines the complete process of designing and installing decorative interior door trim, including door casing, applied door moldings, ornamental door panels, decorative doorway portals, surface preparation, painting, material estimation, and purchasing considerations.
Throughout the article, we examine how products from the STAVROS polyurethane architectural decoration collection can be incorporated into coordinated interior door designs.
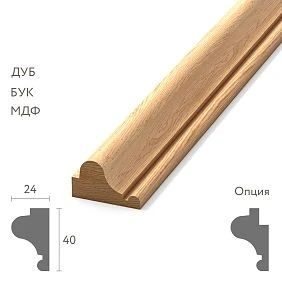
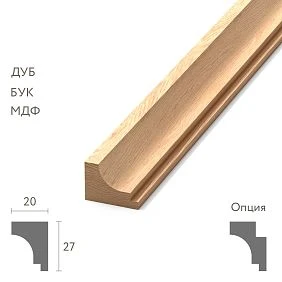
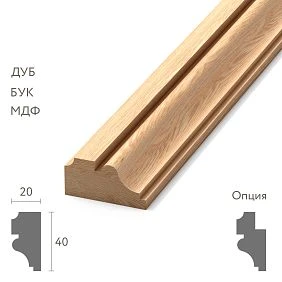
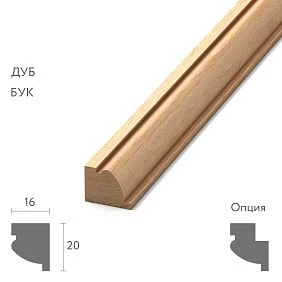
Understanding Interior Door Trim: American Architectural Terminology
Before selecting materials, it is important to distinguish several components that are often described informally as door molding.
Although these terms are related, they are not interchangeable.




Door Casing: The Architectural Frame Around the Opening
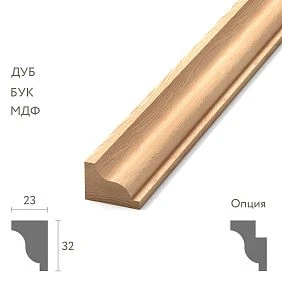
Door casing is the finished trim installed around a door opening, typically consisting of two vertical side pieces and one horizontal head piece.
Its primary practical purpose is to conceal the transition between the door jamb and the surrounding wall.
The casing also establishes the visual width, weight, and character of the doorway.
A simple flat casing creates a restrained, contemporary appearance. A stepped casing adds architectural depth. A wider casing with additional decorative profiles can create a traditional or formal impression.
In American construction terminology, the vertical pieces are commonly called side casings or casing legs, while the upper horizontal component is called the head casing.
Casing may be manufactured from solid wood, MDF, PVC, composite materials, or other suitable trim products.
Polyurethane decorative molding can be used as an applied ornamental component around or alongside a suitable casing system. However, a narrow polyurethane molding intended for decorative panels should not automatically be treated as a complete replacement for full-width structural finish casing.
The distinction matters when selecting profiles from the STAVROS polyurethane molding catalog.
Наша фабрика также производит:






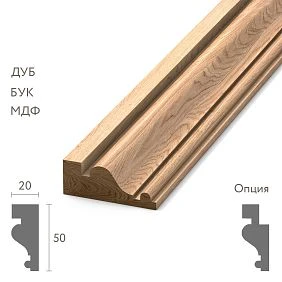
Смотреть весь Каталог продукции
Door Jamb: The Frame That Receives the Door
The door jamb is part of the actual door frame.
It provides the surfaces where hinges, the strike plate, and door stops are located.
Unlike decorative casing, the jamb performs important functional duties.
It establishes the position of the door and influences how smoothly the door swings, closes, and latches.
Decorative polyurethane elements should not be installed in a way that interferes with the jamb, hinges, latch, stops, or required clearances.
Получить консультацию
Door Panel Molding: Decoration Applied to the Door Slab
Door panel molding is installed on the door itself rather than around the opening.
It can create rectangular panel outlines, decorative divisions, or ornamental frames on an otherwise flat door.
For example, a plain painted bedroom door may receive two rectangular molding frames that resemble traditional recessed or raised-panel door construction.
This technique changes the visual design of the door without necessarily replacing the existing slab.
Because the door moves, applied moldings must also account for vibration, repeated operation, clearances, and the nature of the door surface.
The STAVROS decorative molding profiles include narrow and medium-width polyurethane products that can be considered for suitable interior decorative applications.
Decorative Door Onlays and Appliques
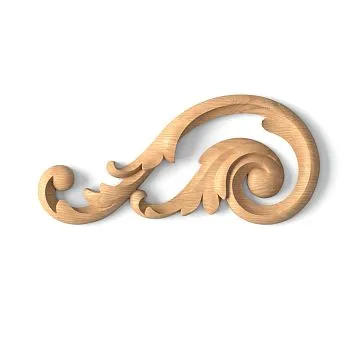
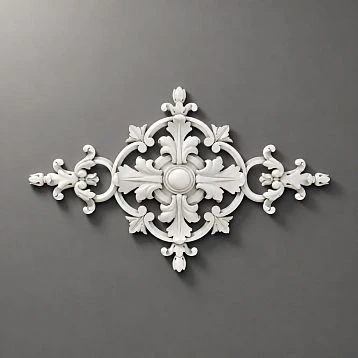
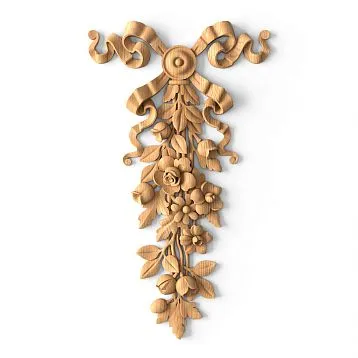
A decorative door onlay is an individual ornamental component attached to a door surface.
Onlays may feature leaves, scrollwork, floral compositions, geometric motifs, or other sculptural details.
Unlike straight molding, these pieces typically function as focal points.
They can be placed within a framed door panel, above a central molding division, or as part of a larger decorative composition.
Explore STAVROS polyurethane onlays and appliques for examples of individual ornamental pieces suitable for selected decorative applications.
Doorway Portals and Architectural Surrounds
A decorative doorway portal is a more substantial architectural composition surrounding an opening.
It may incorporate wide vertical trim, pilasters, capitals, an ornamental header, and a projecting upper molding.
A portal can surround a conventional hinged door, a set of double doors, or an open passage between rooms.
The result is more architectural than an ordinary casing treatment because the entire doorway becomes an intentional focal point.
In American interiors, comparable arrangements are often described as decorative doorway surrounds, classical door surrounds, pilaster door trim, or ornamental door casing.
Why Choose Polyurethane Molding for Interior Door Decoration?
Traditional decorative door treatments have long been associated with carved hardwood, cast plaster, and carefully assembled millwork.
These materials remain appropriate in many projects, but polyurethane offers several practical advantages for decorative applications.
Detailed Ornamental Reproduction
One of polyurethane's greatest strengths is its ability to reproduce complex sculptural geometry.
A decorative applique may include small leaves, scrolls, recessed patterns, and layered curves.
Reproducing these shapes consistently through traditional carving can require considerable fabrication time.
Molded polyurethane allows ornamental details to be repeated across multiple doorways or door panels.
This is especially useful when a design calls for several identical interior doors.
Relatively Low Weight
Polyurethane decorative elements are generally lighter than comparable cast plaster pieces, although weight depends on product dimensions and density.
For surface-applied decoration, lower weight can make handling, cutting, positioning, and installation more convenient.
However, attachment requirements should always be determined by the actual product.
Large decorative components may need additional support or a manufacturer-specified fastening method.
Paintable Surfaces
Many polyurethane architectural products are available with white primed or otherwise paintable surfaces.
This allows designers to coordinate the ornament with the door, casing, walls, or surrounding architectural details.
A polyurethane molding can be painted white for a traditional finish, dark green for a dramatic library interior, or the same color as the door slab for a monochromatic result.
The coating must be compatible with the molding and its surface preparation.
Resistance to Normal Indoor Humidity
Suitable polyurethane products can be useful where moisture-related movement is a concern.
Unlike untreated wood or ordinary MDF, polyurethane does not rely on wood fibers that swell when exposed to moisture.
This makes selected decorative polyurethane components relevant to powder rooms, bathrooms, and adjacent kitchen areas.
Nevertheless, a moisture-resistant ornamental material does not automatically create a waterproof installation.
Adhesives, coatings, joints, substrates, and the specific exposure conditions must all be considered.
Design Flexibility
Polyurethane decoration allows the same basic door to receive different architectural treatments.
A narrow frame can create a restrained neoclassical door.
A more elaborate molding and central applique can introduce French-inspired ornament.
Decorative corner elements and a formal upper surround can establish a stronger classical composition.
The ability to coordinate profiles and ornaments makes polyurethane particularly useful in multiroom interior projects.
What Polyurethane Cannot Replace
Polyurethane ornament should not automatically replace components that perform structural, fastening, security, weatherproofing, or fire-resistance functions.
For example, a decorative polyurethane bracket must not be assumed to support a heavy architectural header.
Similarly, attaching decorative molding to a fire-rated door may be restricted by the door's certification.
The correct application is determined by the intended function of the component, not simply its appearance.
Types of Decorative Door Trim for American Homes
The strongest door designs use profiles that correspond to the scale and architectural character of the surrounding rooms.
Simple Flat Door Casing
Flat casing is a familiar feature of modern American homes.
It emphasizes clean edges and relatively simple geometry.
The casing may have a square, eased, or lightly beveled edge.
Flat profiles work well with contemporary slab doors, modern farmhouse interiors, and minimalist designs.
A small polyurethane decorative accent may be added where appropriate, but extensive ornament is usually unnecessary.
Stepped and Profiled Door Casing
Stepped casing introduces multiple levels across the face of the trim.
These transitions create a controlled sequence of highlights and shadows.
The additional relief can make the doorway feel more architectural without introducing floral ornament or historical motifs.
Stepped profiles are particularly effective in traditional and transitional homes.
Colonial-Inspired Door Trim
Colonial-inspired casing commonly emphasizes symmetry, measured proportions, and understated classical references.
Decorative treatment may include a shaped casing profile, an upper header, or coordinated corner blocks.
The objective is usually architectural restraint rather than excessive ornamentation.
A simple doorway can become more substantial through profile depth and a carefully designed upper trim arrangement.
Craftsman-Style Door Trim
Craftsman-style casing generally favors visible construction logic, simple profiles, square edges, and distinct horizontal and vertical components.
A common arrangement uses relatively wide side casings and a separate head casing.
The meeting points may be treated as deliberate square joints rather than mitered connections.
Ornamental polyurethane appliques are generally less central to this style than clean architectural geometry.
Victorian and Ornamental Door Casing
Victorian-inspired interiors permit richer detail.
Doorways may incorporate decorative corner blocks, elaborate profile combinations, and stronger upper architectural elements.
Ornamental trim can reinforce the period character.
However, the level of decoration should be consistent with the room.
A highly elaborate surround may look disconnected when installed beside plain contemporary baseboards and doors without other coordinating details.
Neoclassical Door Surrounds
Neoclassical interiors combine traditional architectural references with a more restrained decorative vocabulary.
A typical treatment may include moderately wide door casing, a defined header, and selected ornamental accents.
The composition should emphasize balance, symmetry, and proportion.
This approach works particularly well in formal living rooms, dining rooms, bedrooms, and home offices.
French Classical and Baroque Door Decoration
French classical and Baroque-inspired interiors can support more elaborate decorative systems.
These may include acanthus leaves, scrollwork, sculptural corner details, decorative capitals, and richly profiled surrounds.
The architectural structure remains important.
Even an elaborate decorative portal needs a clear relationship between the vertical sides, upper header, and central ornament.
The STAVROS decorative polyurethane trim collection offers ornamental components suitable for exploring these more expressive design directions.
How Wide Should Interior Door Casing Be?
Casing width has a strong influence on the perceived scale of an interior door.
Narrow trim can make an opening appear visually modest.
Wider casing introduces stronger framing and can create a more formal effect.
However, the appropriate dimension depends on the door, ceiling height, nearby trim, and available wall space.
Typical Design Ranges
The following are approximate architectural starting points for American residential interiors.
| Interior condition | Typical casing width to consider | Architectural effect |
|---|---|---|
| Compact room with an 8-foot ceiling | 2 1/4–3 inches | Restrained, conventional or transitional |
| Average room with an 8–9-foot ceiling | 3–3 1/2 inches | More substantial architectural framing |
| Larger room with a 9–10-foot ceiling | 3 1/2–4 1/2 inches | Formal and visually prominent |
| Expansive classical interior | 4 1/2–5 1/2 inches or more | Monumental or heavily articulated doorway |
These measurements refer to the overall casing system, not necessarily the width of an individual decorative polyurethane molding.
For example, a 3 1/2-inch paint-grade casing might receive a narrower ornamental profile as an applied detail.
That approach can create a layered architectural effect without requiring a single large sculptural component to perform every function.
Consider the Door Height
Many American residential doors have a nominal height of 80 inches, although taller and custom doors are also common.
A 96-inch door can generally support a more substantial architectural surround than a short door in a compact room.
The upper header requires particular attention.
If a doorway sits close to the ceiling, an elaborate entablature may appear compressed.
In this situation, a slimmer casing with carefully selected ornament is often more successful than a tall decorative header.
Coordinate Door Casing With Baseboards
Door casing and baseboards should appear to belong to the same architectural system.
If the baseboard is unusually tall and strongly profiled, an extremely delicate door casing may seem disconnected.
Conversely, oversized door trim beside minimal baseboards can create an imbalance.
The two elements do not need identical profiles.
They should, however, share a logical relationship in visual weight and detail.
Polyurethane Door Molding vs. Full-Width Door Casing
This distinction is especially important when purchasing decorative components.
A narrow polyurethane profile can be ideal for adding detail to a door slab or enhancing an existing casing.
It is not necessarily wide enough or configured correctly to conceal the entire wall-to-jamb joint by itself.
STAVROS supplies a selection of polyurethane molding profiles that can be used for surface decoration and suitable applied architectural detailing.
STAVROS MLDPU-001: Delicate Door Panel Detailing
The STAVROS MLDPU-001 polyurethane molding has a nominal cross-section of approximately 0.39 × 0.24 inches and a length of approximately 102.36 inches.
Its relatively narrow profile is useful for delicate framed compositions.
On a suitable interior door slab, this molding can introduce a fine rectangular outline without the visual weight of a large casing profile.
It can also serve as a secondary decorative detail in a more elaborate door surround.
STAVROS MLDPU-002: Stronger Architectural Relief
The MLDPU-002 polyurethane molding has a nominal width of approximately 0.87 inches and a projection of 0.43 inches.
Its stepped geometry produces a more pronounced shadow line.
This makes it useful for larger decorative door panels, formal framed arrangements, and applications where the molding should remain visually distinct after painting.
STAVROS MLDPU-003: A More Substantial Decorative Profile
The MLDPU-003 polyurethane molding measures approximately 1.38 inches wide with a projection of 0.47 inches.
Its substantial cross-section makes it appropriate for stronger decorative accents.
In a classical door design, it can serve as part of a layered architectural treatment.
It may be used with other suitable casing materials or decorative components to create a coordinated doorway surround.
Selecting the Correct System
The key is to evaluate the entire assembly.
If the project requires replacing conventional casing, identify a suitable full-width casing product or properly constructed casing base.
If the project requires decorative enhancement, determine whether the polyurethane molding is intended as an overlay, panel frame, ornamental border, or part of another compatible system.
This approach prevents one of the most common specification mistakes: assuming that every product described as molding can perform the same function.
How to Replace Existing Door Trim With Decorative Casing
Replacing plain interior door trim is one of the most effective ways to update a home's architectural appearance without replacing the doors themselves.
However, the installation should be planned carefully.
Step 1: Inspect the Existing Door Assembly
Begin by checking the door's operation.
Open and close the door several times.
Confirm that the slab swings freely, the latch engages, and the frame is secure.
Inspect the existing casing for damage or signs of movement.
If the door is misaligned, rubbing against the jamb, or failing to latch, correct the underlying problem before installing decorative trim.
New casing should not be used to conceal a defective door assembly.
Step 2: Remove the Existing Casing
Existing casing may be attached with finish nails, adhesive, or a combination of methods.
Use a utility knife to cut any paint or caulk joining the casing to the wall.
This reduces the risk of tearing the finished drywall surface.
Insert a thin pry tool behind the casing and gradually release it.
Use a protective block against the wall when applying leverage.
Work slowly to avoid damaging the jamb, drywall, or surrounding finish.
Once the trim has been removed, extract exposed nails and remove loose adhesive residue.
Step 3: Evaluate the Wall-to-Jamb Transition
The new casing must bridge the finished transition between the jamb and surrounding wall.
Check whether the jamb and drywall surfaces are flush.
If the jamb is recessed or projects beyond the wall, a standard casing may not sit correctly.
Depending on the condition, jamb extensions, suitable shims, or modifications to the casing assembly may be required.
Decorative polyurethane overlays should not be relied upon to compensate for major underlying geometric problems.
Step 4: Establish the Casing Reveal
In American trim carpentry, the casing is usually installed with a small intentional setback from the inside edge of the jamb.
This is called the casing reveal.
A reveal around 1/8 to 1/4 inch is a common approach, with the exact dimension depending on the casing and architectural style.
The purpose is to create a consistent shadow line rather than align the casing directly with the jamb edge.
Mark the reveal before cutting the trim.
Important: The casing reveal is not the same as the operating clearance between the door slab and jamb.
These are separate dimensions serving different purposes.
Step 5: Cut the Casing
There are two common corner arrangements.
Mitered casing uses angled joints, typically 45 degrees at square upper corners.
This is appropriate for many continuous profiled trim designs.
Butted casing uses square-cut components, often with the horizontal head casing extending beyond the vertical pieces.
This is common in Craftsman-inspired and other traditional architectural treatments.
Choose the joint arrangement according to the casing profile and overall design.
Step 6: Dry-Fit the Components
Hold the two side casings and head casing in their intended positions.
Confirm that the reveal is consistent.
Check the corner joints and the relationship to the baseboards.
Ensure that no component interferes with hinges, door swing, or nearby architectural details.
Make adjustments before permanently attaching the trim.
Step 7: Attach the Casing
Full-width casing should be installed according to its manufacturer's specified fastening method.
Traditional wood or MDF casing is commonly mechanically fastened to appropriate jamb and wall framing locations.
A decorative polyurethane overlay may use an approved adhesive when attached to a suitable prepared surface.
Do not assume that adhesive alone is adequate for every complete casing assembly.
If a combination of materials is used, verify the fastening requirements for each component.
Step 8: Finish the Joints
Inspect the upper corners and wall transitions.
Use suitable filler for nail holes and small rigid surface defects.
Use compatible paintable caulk where flexible wall-to-casing transitions are appropriate.
Allow finishing materials to cure before painting.
A well-fitted joint requires less filler and will generally produce a better appearance.
Step 9: Prime and Paint
Factory-primed products may need only appropriate cleaning, spot priming of repaired areas, and compatible finish coats.
Unprimed products may require additional preparation.
Water-based acrylic trim paint or compatible waterborne enamel is suitable for many interior applications.
Apply controlled coats to preserve the profile's relief.
Decorative Door Panel Molding: Transforming a Plain Interior Door
Replacing casing changes the architectural frame around the door.
Adding molding directly to the door slab changes the visual character of the door itself.
This is especially effective for plain flush doors, which provide an uninterrupted surface for decorative compositions.
The Classic Two-Panel Door Design
A traditional two-panel appearance can be created using two rectangular molding frames.
The upper panel is often shorter than the lower panel, although proportions vary by style.
For example, consider a nominal 32-inch-wide by 80-inch-high interior door slab.
A hypothetical decorative layout could use:
A consistent 4-inch horizontal margin from each side.
An upper frame measuring 24 inches wide by 22 inches high.
A lower frame measuring 24 inches wide by 39 inches high.
A 4-inch separation between the frames.
A 6-inch top margin and a 9-inch bottom margin.
These are illustrative dimensions for planning, not universal installation specifications.
The position must be adjusted to account for the actual door construction, hinges, lockset, and other hardware.
The finished design should also be checked for visual balance at normal viewing distance.
The Single-Panel Contemporary Door
A single tall rectangular frame can create a restrained neoclassical appearance.
This approach is effective in bedrooms and contemporary living spaces where the goal is to add depth without excessive ornamentation.
A narrow polyurethane profile is often sufficient.
Painting the molding and door slab the same color reinforces the architectural effect.
Three-Panel and Multi-Panel Doors
Taller doors may accommodate more complex divisions.
A three-panel composition can emphasize vertical proportions, particularly on 8-foot doors.
However, the spacing must be considered carefully.
Too many small decorative frames can make a door appear fragmented.
The number of frames should relate to the door's size, the architecture of the room, and the character of the selected molding.
Door Panel Molding With Decorative Onlays
A central ornament can make a framed door panel more expressive.
For example, a symmetrical floral applique may be positioned inside the upper frame of a traditional door.
The selected ornament should be proportionate to the panel and should not interfere with hardware or normal handling.
The STAVROS NPU-501 polyurethane decorative onlay provides an example of a vertically oriented ornamental component intended for decorative surfaces including door panels and furniture.
Its nominal dimensions are approximately 2.28 × 11.81 × 0.43 inches.
Such a format may suit an elongated decorative field, provided the available clearances and mounting surface are appropriate.
Critical Clearances When Adding Molding to Door Slabs
Door decoration is fundamentally different from decorating a stationary wall.
A door moves through an arc.
Its edges approach the jamb, stops, casing, adjacent walls, and surrounding furniture during operation.
Raised decorative details therefore require special attention.
Hinge-Side Clearance
The hinge side experiences complex relative movement as the door opens.
A molding positioned too close to the edge may interfere with the jamb or adjacent trim.
Check the profile's projection as well as its position on the face of the slab.
Latch-Side Clearance
Decorative elements near the latch side must not interfere with the strike area, handle operation, or normal hand clearance.
Avoid placing projecting ornament where users frequently push or pull the door.
Top and Bottom Clearances
Molding should not interfere with the head jamb, door sweep, threshold, or flooring.
The clearance needed depends on the door assembly.
Do not assume that a small decorative projection is harmless simply because it does not touch the frame while the door is closed.
Hardware and Lockset Areas
Keep ornaments away from handles, rosettes, escutcheons, keyholes, and other operating hardware.
For doors with closers or special mechanisms, check the entire range of motion.
A decorative design should never reduce usability.
Fire-Rated Doors
Do not modify a labeled fire-rated door or fire-door assembly with applied decorative molding unless the modification is permitted by the applicable listing, manufacturer, and authority having jurisdiction.
This is particularly important for doors between a garage and living space, certain apartment entrance doors, and regulated commercial openings.
Decorative upgrades must not compromise safety certification.
How to Install Polyurethane Molding on a Door Slab
Installing decorative trim on a moving door requires careful preparation and adhesive compatibility.
Step 1: Identify the Door Surface
Common interior door surfaces include painted wood, MDF, hardboard, factory-coated composite, and other manufactured finishes.
Some products have relatively low surface energy or specialized coatings that can affect adhesive performance.
Do not assume that an adhesive suitable for drywall is automatically appropriate for a door slab.
Verify compatibility with both the polyurethane molding and the door surface.
Step 2: Clean the Door
Remove dust, grease, cleaning residue, and other contaminants.
Use a cleaning method approved for the existing finish.
Allow the surface to dry.
If the door has a glossy coating, the selected adhesive system may require preparation such as light abrasion.
Follow the adhesive manufacturer's recommendations.
Step 3: Establish the Decorative Layout
Measure the usable face of the door.
Include all required clearances and hardware exclusion zones.
Mark the molding frames using a square, tape measure, and suitable removable layout tools.
A paper template or temporary tape layout can help reveal proportion problems before installation.
Step 4: Cut and Dry-Fit the Pieces
Cut the molding according to the approved dimensions.
For rectangular frames, check the mitered corners carefully.
Place the pieces temporarily on the door and inspect the design.
Open and close the door with the proposed pieces positioned safely to check for interference.
Step 5: Apply the Compatible Adhesive
Use an adhesive approved for the actual decorative product and receiving surface.
Apply it according to the manufacturer's instructions.
Avoid excessive adhesive that could spread beyond the molding edges.
Where the system requires temporary support, use a suitable method that will not damage the door finish.
Step 6: Allow Proper Curing
A door is subjected to movement and repeated mechanical vibration.
The adhesive must cure adequately before the door returns to normal use.
Do not rely on a short initial grab time as proof of full bond strength.
Step 7: Prepare and Finish the Joints
Inspect all mitered corners and exposed transitions.
Use compatible materials to correct minor imperfections.
Follow the specified curing and surface preparation requirements.
Step 8: Paint the Composition
A monochromatic finish usually provides the most convincing applied-panel effect.
When the door and molding share the same color, the raised profiles appear integrated with the slab.
Use a coating system suitable for both surfaces and their respective primers.
Apply thin, even coats without obscuring detailed relief.
Designing Decorative Doorway Portals
A decorative portal is appropriate when the opening itself should become a major architectural feature.
Unlike ordinary casing, the portal establishes a larger composition around the transition between rooms.
Where Doorway Portals Work Best
Portals are particularly effective between formal living and dining rooms, in large entry halls, around important double-door openings, and in rooms with generous ceiling heights.
They can also be used around selected open passages where no door slab is installed.
The purpose is to give the opening architectural importance.
However, the scale must remain appropriate.
A massive classical portal can overpower a narrow doorway in an 8-foot-ceiling room.
A more restrained arrangement may produce a better effect.
The Elements of a Classical Door Portal
A traditional decorative portal may contain the following components.
Pilasters: Shallow vertical architectural elements that resemble flattened columns.
Pilaster bases: Lower elements that visually support the vertical members.
Capitals: Decorative upper elements that complete the pilasters.
Architrave: The principal horizontal architectural member above the opening.
Decorative brackets or corbels: Ornamental elements positioned near the upper corners.
Central ornament or keystone-like accent: A decorative element establishing the central axis of the header.
Additional molding: Secondary profiles that create depth and connect the composition to the surrounding wall.
Polyurethane components are especially useful for reproducing sculptural ornament.
However, the visual appearance of a structural system should not be confused with actual load-bearing capacity.
Choosing Decorative Capitals and Brackets
The STAVROS brackets and capitals collection includes polyurethane elements that can support the visual language of classical doorway designs.
For example, a decorative bracket can emphasize the transition between a vertical pilaster and the horizontal header.
A capital can establish a stronger classical reference through its relief and proportions.
These components should be used ornamentally unless the specific product is independently rated and approved for a structural function.
Portal Proportions
The proportions of a portal should follow the dimensions of the actual opening.
Begin with the clear width and height.
Then establish the desired outer width of the architectural composition.
Calculate the space available between the opening and adjacent walls, windows, cabinetry, or other features.
The upper portion must also fit between the top of the opening and the ceiling or crown molding.
When the available upper wall space is limited, reducing the header height may be preferable to forcing a complete classical arrangement into an unsuitable area.
Step-by-Step Installation of a Decorative Door Portal
Portal installation should begin with an elevation drawing rather than an improvised assembly.
Establish the Composition
Prepare a dimensioned drawing showing the opening, vertical architectural members, header, capitals, decorative accents, and surrounding trim.
Check symmetry and confirm that the design does not obstruct circulation or required door clearances.
Prepare the Substrate
Inspect the wall for soundness, flatness, and suitable adhesion.
Remove unstable finishes and repair significant defects.
Large components may require support or fastening methods beyond those used for small decorative appliques.
Mark the Architectural Axes
Identify the centerline of the opening.
Mark the vertical positions of the pilasters and the horizontal position of the header.
Use a level to control alignment.
A small error at the base of a tall portal can become highly visible near the top.
Install the Primary Architectural Members
Install the main support or casing system according to its construction and fastening requirements.
Do not rely on decorative polyurethane components to perform unspecified structural functions.
Add Capitals and Decorative Details
Position the capitals, brackets, and other accents according to the approved elevation.
Check their projection and alignment before permanent attachment.
Complete the Upper Surround
Install the horizontal molding and ornamental components.
For wide openings, plan joints and stock lengths in advance.
Try to place unavoidable joints where they will be least noticeable or where the decorative design provides a logical transition.
Finish the Assembly
Allow adhesives and joint materials to cure.
Prepare the surface, spot-prime where required, and apply the selected finish.
Painting the portal as one architectural composition can visually unify multiple individual components.
Matching Decorative Door Trim to Interior Design Styles
A door should not be designed in isolation.
Its casing, slab treatment, hardware, baseboards, and nearby architectural molding form a visual system.
Traditional American Interiors
Traditional homes often benefit from symmetrical casing arrangements, modest classical profiles, and coordinated painted trim.
A restrained stepped profile can provide sufficient architectural definition.
Additional ornament may be introduced at important doorways rather than repeated around every opening.
Neoclassical Interiors
Neoclassical spaces can support decorative casing, framed door slabs, and selected applied ornament.
The strongest results usually come from clear proportions and controlled symmetry.
Use one dominant molding profile and a limited family of compatible accents.
French Classical Interiors
French-inspired doors may use more decorative panel frames, floral appliques, and sculptural corner elements.
A monochromatic cream or soft gray finish can create an elegant result without strong color contrast.
Metallic accents or restrained patina may be introduced selectively.
Modern Farmhouse Interiors
Modern farmhouse door trim generally emphasizes straightforward geometry, painted finishes, and a visible relationship between casing and baseboards.
Broad flat casing and square-cut headers are often more appropriate than elaborate floral decoration.
A small secondary decorative profile may be used when it supports the overall design language.
Contemporary and Minimalist Interiors
Modern interiors often use flush doors, simple casing, concealed hardware, and limited visual ornament.
Where decorative molding is desired, narrow profiles and tone-on-tone painting can introduce relief without compromising the clean aesthetic.
Avoid making every door a competing focal point.
Art Deco-Inspired Interiors
Art Deco interiors can support pronounced geometric divisions, symmetrical frames, and selected stylized ornaments.
The decorative treatment may use dark painted doors, metallic hardware, and controlled contrasting accents.
The emphasis should remain on geometric order rather than unrelated ornamental complexity.
Choosing Door Trim Colors and Finishes
Color determines whether the casing acts as a strong architectural frame or blends into the surrounding wall.
White Casing With White Doors
White-on-white remains a versatile option in American residential interiors.
It can work with traditional, transitional, and contemporary design schemes.
Profile geometry determines the architectural character.
A flat casing appears modern, while a stepped or ornamented casing introduces a more traditional reference.
Door Trim Painted to Match the Wall
Painting decorative trim to match the wall creates a more integrated appearance.
The opening becomes defined through relief and shadow rather than strong color contrast.
This approach is particularly effective in contemporary and monochromatic interiors.
Door Casing Painted to Match the Door
Matching the casing to the door creates a cohesive door assembly.
Dark navy, charcoal, muted green, and other saturated colors can produce a dramatic architectural effect.
Where multiple doors appear in one corridor, consistent coloring can help establish visual rhythm.
Contrasting Door Trim
Contrasting casing emphasizes the doorway.
White trim around a dark door produces a strong classical contrast.
Dark casing around a pale door may support contemporary or eclectic designs.
The effect should be coordinated with nearby baseboards and other trim.
Antiqued and Decorative Finishes
For classical ornament, glaze, patina, or selective metallic finishes can emphasize sculptural relief.
Use these techniques sparingly.
Applying metallic or antiqued effects to every component may overwhelm the architectural composition.
Installing Decorative Trim on Different Wall Types
The receiving substrate influences adhesive selection, fastening, and preparation.
Drywall
Drywall is common in American residential interiors.
Lightweight decorative polyurethane components may be installed on sound, properly prepared painted drywall using an approved adhesive system.
However, the bond depends on the strength of the existing wall finish.
Peeling paint, damaged drywall paper, or poorly bonded joint compound must be repaired before installation.
Full casing assemblies should be fastened according to their applicable construction requirements.
Plaster Walls
Traditional plaster walls may provide a durable substrate, but their condition can vary.
Check for loose material, cracks, or poorly bonded areas.
Unstable plaster requires repair before decorative components are installed.
Avoid assuming that an apparently smooth painted surface is mechanically sound.
Brick and Concrete
Masonry surfaces introduce differences in porosity, texture, and moisture behavior.
A decorative profile may require surface preparation, leveling, and a compatible adhesive or approved fastening system.
The correct method depends on the product and masonry condition.
Large components may require additional measures.
Painted Surfaces
Previously painted walls can provide suitable installation surfaces when the coating is well bonded.
Glossy coatings may require preparation according to the adhesive system.
The wall should be clean and free from contaminants.
Do not install heavy decorative components over an unstable paint film.
Wallpapered Surfaces
Attaching molding directly to wallpaper is generally less reliable because the bond depends on the wallpaper's attachment to the wall.
For a durable installation, exposed areas intended to receive adhesive should be evaluated and prepared appropriately.
Removing wallpaper from the bonding area may be necessary.
How to Calculate Door Casing and Decorative Molding Quantities
Accurate material estimation requires more than measuring the overall height and width of the door.
Separate the fixed casing from the decorative elements attached to the slab.
Example 1: A Standard Interior Door Casing
Suppose a proposed casing layout requires two vertical pieces with finished long-point lengths of 82 inches and one horizontal head piece measuring 38 inches.
The total nominal molding requirement is:
82 + 82 + 38 = 202 inches.
This equals 16 feet 10 inches of linear trim.
However, the stock quantity depends on the supplied lengths.
If the selected profile is available in 102.36-inch lengths, each 82-inch vertical requires its own stock piece.
The 38-inch horizontal section requires another piece.
The result is three stock lengths, not simply the theoretical minimum based on linear footage.
This calculation is illustrative. The actual pieces must be measured from the approved casing layout.
Example 2: Decorative Frames on a Door Slab
Consider a door with two applied frames.
The upper frame measures 24 × 22 inches.
Its perimeter is:
2 × 24 + 2 × 22 = 92 inches.
The lower frame measures 24 × 39 inches.
Its perimeter is:
2 × 24 + 2 × 39 = 126 inches.
The combined nominal requirement is:
92 + 126 = 218 inches, or 18 feet 2 inches.
The actual purchasing quantity depends on the profile length, cutting arrangement, saw kerf, and any ornamental pattern matching.
With nominal 102.36-inch stock pieces, three lengths can accommodate this simplified cutting schedule, subject to the precise cutting details.
Additional stock may be appropriate for installation mistakes and future repairs.
Estimate Ornamental Components Separately
Central onlays, corner blocks, decorative capitals, and brackets should be counted individually.
If a door design includes one central ornament per panel and two panels per door, five identical doors require ten ornaments.
Directional left-hand and right-hand decorations must be counted according to their intended positions.
Prepare a Professional Door Trim Schedule
For multiple openings, create a schedule that records:
Door or opening identification.
Finished opening dimensions.
Casing profile and material.
Applied decorative molding series.
Stock length and cutting quantity.
Corner and central ornamental components.
Surface finish.
Installation requirements.
Any special door clearances or limitations.
This makes product selection, purchasing, installation, and future maintenance more predictable.
How Much Does Decorative Door Trim Cost?
The cost of a completed door trim project depends on more than the price of individual molding pieces.
The principal cost factors are profile selection, ornament complexity, material quantity, surface preparation, installation labor, and finishing.
Simple Decorative Casing
A restrained casing upgrade may require only a new casing system, necessary attachment materials, joint preparation, and paint.
This is generally the least complex design.
Applied Decorative Door Panels
Adding frames to an existing slab requires precise measurement, multiple cuts, compatible adhesive, joint treatment, and finishing.
The material quantity may be moderate, but the number of cuts and joints can influence labor requirements.
Classical Door Surrounds
A decorative portal may include several material types, architectural profiles, capitals, ornamental brackets, and additional finishing work.
The project should be estimated as a complete assembly.
How to Compare Costs
Compare the total installed cost per doorway rather than the price of individual molding lengths.
A relatively inexpensive profile may require additional components or extensive finishing.
A coordinated system may reduce selection complexity and improve visual consistency.
For current STAVROS product pricing, refer to the relevant catalog pages and verify the final order conditions before purchasing.
Common Mistakes in Decorative Door Trim Design
Even attractive materials can produce disappointing results when they are incorrectly specified or installed.
Using Wall Molding as Full Casing Without Checking Its Function
A narrow polyurethane decorative profile may not conceal the wall-to-jamb transition.
Choose a suitable primary casing system and use decorative polyurethane elements where their geometry and attachment are appropriate.
Ignoring Door Swing and Hardware
A decorative onlay placed too close to an edge or handle may interfere with normal operation.
Check the complete swing path and all hardware clearances.
Choosing Oversized Ornament
Large decorative appliques can overwhelm ordinary residential doors.
Select ornaments according to the usable panel area rather than their appearance in a close-up product photograph.
Combining Incompatible Profiles
Decorative molding and ornamental corner elements may have different dimensions or connection geometry.
Confirm product-series compatibility.
Poorly Fitted Joints
Large gaps at casing corners or panel molding miters rarely disappear simply because they are painted.
Cut and fit accurately before using finishing materials.
Inadequate Surface Preparation
Adhesive applied over loose paint, dust, or unsuitable coatings may not develop a reliable bond.
Prepare every surface according to the selected installation system.
Excessive Paint Thickness
Heavy paint buildup can obscure fine decorative relief.
Apply compatible coatings in controlled layers.
Ignoring the Architectural Context
A richly ornamented Baroque casing may look inappropriate beside minimal doors and contemporary baseboards.
Coordinate the decorative treatment with the room's overall architectural language.
Assuming All Polyurethane Products Are Identical
Different polyurethane formulations and manufactured products can have different densities, surface finishes, rigidity, and installation requirements.
Follow the specific product information.
Caring for Decorative Polyurethane Door Trim
Door trim requires occasional cleaning and inspection, particularly because doors are exposed to frequent use.
Remove dust with a soft cloth or suitable brush.
Clean painted surfaces using methods compatible with the selected coating.
Avoid aggressive solvents or abrasive cleaning products.
Inspect projecting decorative details for accidental damage.
Small cosmetic defects may be repairable using compatible filler and touch-up paint.
Check joints if visible cracking develops.
If an applied decorative component becomes loose, do not simply paint over the defect.
Determine whether the issue originates from adhesive failure, substrate movement, or damage to the product.
Repair the underlying condition before restoring the finish.
Frequently Asked Questions About Decorative Door Trim
What Is the Best Material for Decorative Interior Door Trim?
The answer depends on the function.
Solid wood and MDF are common choices for conventional casing.
Polyurethane is useful for molded ornament, decorative overlays, selected applied profiles, and architectural accents.
A coordinated doorway may use more than one material.
Can Polyurethane Molding Be Used on Interior Doors?
Yes, suitable decorative polyurethane molding may be installed on selected interior door slabs.
The door surface, adhesive compatibility, weight, projection, clearances, and operational requirements must be evaluated first.
Can You Add Decorative Molding to a Hollow-Core Door?
It may be possible to add lightweight surface decoration to a suitable hollow-core door.
However, hollow-core construction varies.
Use only an attachment method compatible with the door skin and approved by the relevant product manufacturers.
Avoid excessive weight or modifications that could damage the slab.
Can Polyurethane Onlays Be Installed on Metal Doors?
Certain decorative products may be compatible with appropriately prepared metal surfaces.
However, adhesive compatibility and the door's construction must be verified.
Do not modify fire-rated, security-rated, or otherwise certified doors without the required authorization.
Is Polyurethane Better Than MDF for Door Decoration?
Polyurethane is useful for detailed molded ornament and certain environments where moisture sensitivity is a concern.
MDF is often effective for smooth, paint-grade casing and other conventional interior trim applications.
The better choice depends on the desired geometry, finish, substrate, and installation conditions.
Can You Install Decorative Door Trim Without Removing the Door?
In many cases, decorative casing can be upgraded without removing the existing door slab.
Applied door panel molding may also be installed with the door in place when adequate access is available.
However, the work must allow safe preparation, positioning, curing, and finishing.
Can You Paint Polyurethane Door Molding?
Yes. Many decorative polyurethane products are intended for painting.
Factory-primed surfaces may accept compatible finish coatings after appropriate preparation.
Cut ends, repaired joints, and unprimed products may require additional treatment.
What Paint Finish Works Best for Decorative Door Trim?
Satin and semi-gloss finishes are common for architectural trim, while matte or eggshell finishes can create a more subdued monochromatic appearance.
The best choice depends on the desired visual effect and the expected level of contact and cleaning.
How Do You Hide Joints in Polyurethane Door Molding?
Accurate cutting is essential.
Use the specified joint adhesive or compatible filler where appropriate, prepare the repaired surface, and apply the approved coating system.
Different joint conditions may require different finishing products.
Can Polyurethane Door Trim Be Used in Bathrooms?
Suitable polyurethane decorative products may be appropriate for certain bathroom applications.
Verify the intended environmental exposure and the compatibility of the adhesive, coating, and receiving substrate.
Is Decorative Polyurethane Casing Suitable for Exterior Doors?
Exterior applications require products specifically approved for outdoor exposure.
Do not assume that a polyurethane element intended for indoor decoration is appropriate for exterior weather conditions.
The complete exterior door assembly must also retain its required weather resistance, security, and functional performance.
Can Decorative Trim Be Removed Later?
Removal may be possible, but adhesive-installed molding can damage the underlying paint, wall, or door surface.
The amount of repair required depends on the attachment method and substrate.
It should not be assumed to be a completely reversible modification.
How Do You Choose Matching Decorative Door Moldings?
Begin with the overall architectural design.
Select the primary casing and door panel geometry.
Then choose compatible molding profiles, corner details, and central ornaments.
Check dimensions, materials, relief projection, and product-series compatibility.
Where Can You Buy Polyurethane Door Molding?
STAVROS offers decorative polyurethane molding profiles, onlays, ornamental trim, and architectural accents that can be used in suitable interior door decoration projects.
Explore the STAVROS architectural polyurethane decoration catalog to compare available products.
STAVROS Decorative Polyurethane Molding for Door Design
Creating an attractive interior door is fundamentally a specification problem.
The casing must be appropriate for the opening. The decorative molding must be proportionate to the door. Applied ornaments must be compatible with the selected profile. Finishing materials must produce a consistent architectural appearance.
STAVROS offers a range of polyurethane decorative elements that can support these design goals.
Polyurethane Molding for Door Panel Frames
For narrow and medium-width decorative frames, explore the STAVROS polyurethane molding collection.
Profiles such as MLDPU-001, MLDPU-002, and MLDPU-003 provide different scales of architectural relief.
Their dimensions can be incorporated into a professional cutting schedule before purchasing.
Decorative Door Onlays and Appliques
For sculptural details, explore the STAVROS polyurethane onlays collection.
The assortment includes individual decorative components and larger compositions.
Choose according to the available mounting area, ornamental style, relief projection, and intended position.
Decorative Corners and Molding Accents
For compositions requiring ornamented intersections or central details, browse STAVROS molding decor.
Some elements are associated with specific molding series.
For example, the MLDPU-1-2.1 decorative center element is designed to coordinate with the MLDPU-001 and MLD-001-MG molding series.
Selecting compatible components creates a more coherent result than assembling visually similar pieces without checking their geometry.
Decorative Trim for Classical Doors
For more elaborate designs, the STAVROS decorative polyurethane trim collection includes ornamental profiles that can be considered for classical door panels and suitable architectural borders.
Floral, geometric, and other repeating patterns allow the door to become a distinctive decorative feature.
Capitals and Brackets for Doorway Surrounds
A formal doorway portal may require larger ornamental accents.
The STAVROS decorative brackets and capitals collection provides options for selected classical compositions.
The architectural design should distinguish decorative appearance from actual support requirements.
What to Confirm Before Ordering for a U.S. Project
Before purchasing products for an American residential or commercial project, verify the material, actual dimensions, supplied lengths, profile compatibility, and surface preparation requirements.
Confirm whether the selected component is intended for a fixed wall application, a door slab, or another substrate.
Review its installation instructions and any limitations.
Because STAVROS product pages describe primarily domestic and regional shipping arrangements, customers planning installation in the United States should confirm international shipping availability, transportation costs, customs requirements, and total delivered cost before placing an order.
A complete specification can help avoid ordering decorative components that do not suit the opening or cannot be installed using the intended method.
Conclusion: Turn Ordinary Interior Doors Into Architectural Details
An interior door does not need elaborate carving or an expensive custom slab to contribute meaningfully to a home's design.
Often, the greatest improvement comes from correcting the proportions of the casing, introducing a more expressive profile, or adding carefully measured decorative panel molding.
Polyurethane expands these possibilities by making detailed ornamental elements available in repeatable manufactured forms.
A simple framed door can introduce classical elegance. A restrained casing treatment can strengthen a contemporary interior. A carefully designed doorway portal can turn the transition between two rooms into an architectural focal point.
But the strongest result always begins with the same principles: understand the function of each component, respect the dimensions of the opening, select compatible materials, preserve the operation of the door, and treat installation and finishing as part of the design.
The most successful decorative door trim does not merely surround an opening. It establishes a convincing architectural relationship between the door, the wall, and the room itself.
Explore the STAVROS polyurethane moldings, onlays, and architectural decorations to develop a coordinated decorative system for interior doors, door panels, and doorway surrounds.