Article Contents:
- What Is a Decorative Pilaster?
- Pilaster versus column, half-column, door casing, and wall molding
- The shaft: the visual height of the composition
- The base: where the pilaster meets the floor or baseboard
- The capital: the top needs a purposeful finish
- 1. The doorway between a living room and dining room
- 2. A living-room accent wall
- 3. A TV or media wall
- 4. Built-in bookcases and wardrobes
- 5. A fireplace surround
- 6. A hallway, entry, or commercial reception area
- Measure height at both sides
- Plan width from the opening outward
- Check depth in three dimensions
- Proportion is a design test, not a rigid mathematical law
- A useful elevation drawing
- Decorative blocks are not interchangeable across every profile
- Example A: two vertical borders plus a top band
- Example B: three rectangular panels beside a portal
- Example C: matching pairs and decorative blocks
- The cut-list worksheet
- Scheme 1: restrained neoclassical doorway
- Scheme 2: formal dining-room focal wall
- Scheme 3: modern media-wall surround
- Scheme 4: integrated wardrobe surround
- Scheme 5: decorative niche or mirror wall
- Step 1: Confirm the wall and all clearances
- Step 2: Make a full-size layout
- Step 3: Dry-fit every component
- Step 4: Prepare the substrate and cut as required
- Step 5: Attach components in a controlled sequence
- Step 6: Finish the joints carefully
- Step 7: Prime and paint according to the finish system
- Is a polyurethane pilaster the same thing as a structural column?
- Can I make a pilaster-like feature with regular polyurethane molding?
- Do I need both a base and a capital?
- How wide should pilasters be around a standard door?
- Which STAVROS molding is the largest of MLDPU-001 through MLDPU-004?
- Are all STAVROS pilasters and capitals made from polyurethane?
- Can polyurethane pilasters be used beside a fireplace?
- Can the same pilaster design frame built-in cabinets?
- Do I calculate molding by square feet or linear feet?
- How much extra molding should I order?
- What is the easiest way to make the pieces look like one architectural feature?
- Where should I start if I do not know which product series to choose?
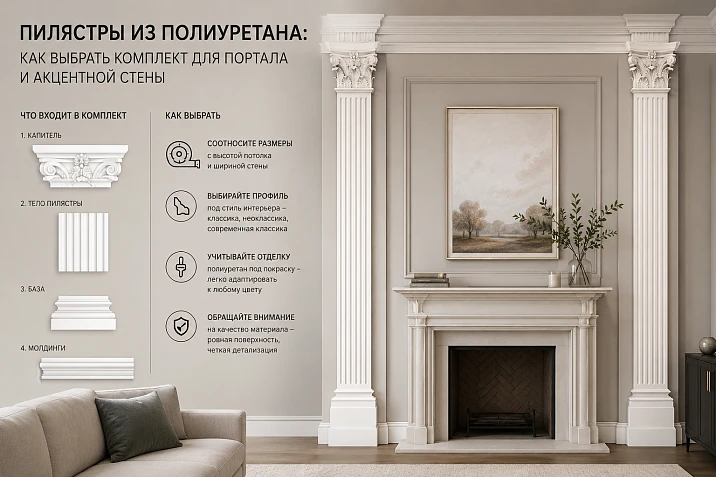
An architectural doorway or accent wall does not have to begin with structural columns or a complete renovation. A carefully proportioned pair of decorative pilasters can give an ordinary opening a deliberate frame, connect built-in cabinetry to the surrounding trim, or make a living-room wall feel more composed. The key is to plan the entire assembly, not shop for two attractive upright pieces in isolation.
This guide explains how to choose polyurethane pilasters and compatible decorative trim, measure the installation, assemble a realistic shopping list, and avoid common design and installation problems. It is written for U.S. homes, so examples use inches, feet, and linear feet. Where STAVROS offers a specific polyurethane molding rather than a complete pilaster shaft, the distinction is made explicit. Decorative polyurethane parts are not structural supports, and the actual product specification should always determine how a component is used.
If you are starting a project now, compare the available STAVROS polyurethane decorative elements and molding profiles for walls and door surrounds before finalizing the drawing. The second category includes materials other than polyurethane, so filter or confirm the material of every item.

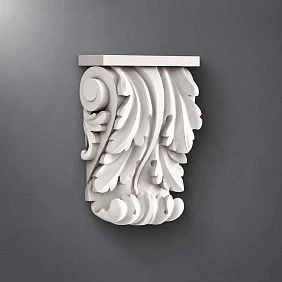
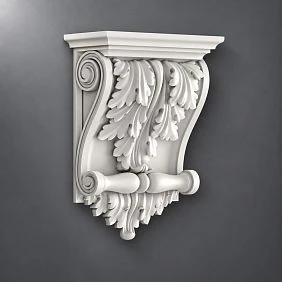
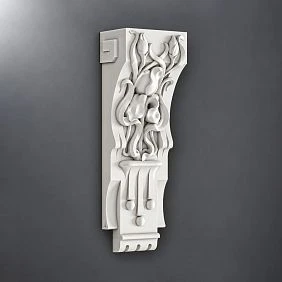

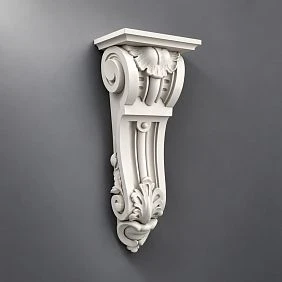
What Is a Decorative Pilaster?
A pilaster is a column-like architectural feature attached to a wall. In classical architecture it has a shaft, a base, and often a capital at the top. Unlike a freestanding column, it remains visually and physically connected to a vertical surface. For contemporary interior decoration, a pilaster can be a manufactured component or an assembly of compatible applied pieces that suggests the same form.
A polyurethane pilaster is intended to create architectural relief with comparatively little added weight. It can frame a doorway, establish a rhythm on a long wall, define the sides of a niche, or finish a built-in wardrobe. It is a decorative treatment, not a substitute for a structural column, a wall stud, a load-bearing header, or approved fire-resistant construction.




Pilaster versus column, half-column, door casing, and wall molding
| Element | What it looks like | Main design job | Typical planning concern |
|---|---|---|---|
| Decorative pilaster | Flat or shallow projecting vertical assembly | Create a column-like edge on a wall or portal | Matching base, shaft, and upper termination |
| Freestanding column | Full round or polygonal form | Occupy space as a distinct vertical object | Structural status, diameter, and clearance |
| Half-column | Strongly projected half-round form fixed to a wall | Make a bolder classical accent | Depth and interference with circulation |
| Door casing | Narrow continuous trim around a door jamb | Finish the joint between wall and frame | Door operation and reveal consistency |
| Applied wall molding | Linear profile used in frames and decorative bands | Draw lines, panels, and borders | Profile size, mitering, and cut layout |
This distinction prevents an expensive ordering mistake. A small molding profile cannot become a full pilaster simply because it runs vertically. It can, however, form one edge of a constructed pilaster-like feature or connect a finished pilaster to adjacent wall panels.
Наша фабрика также производит:
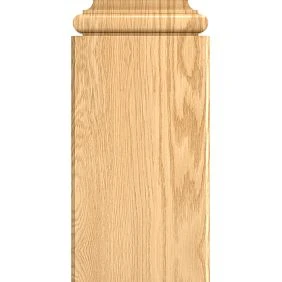
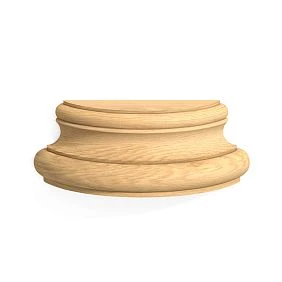
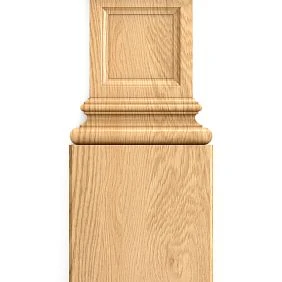
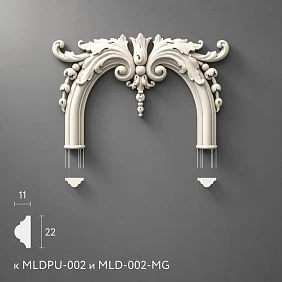
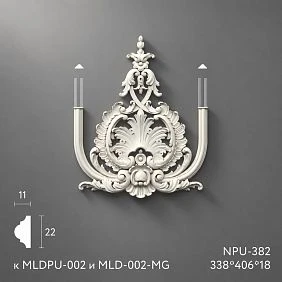
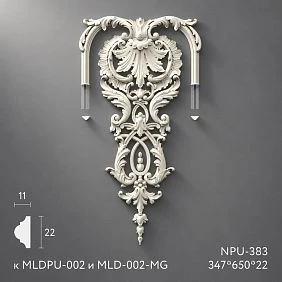
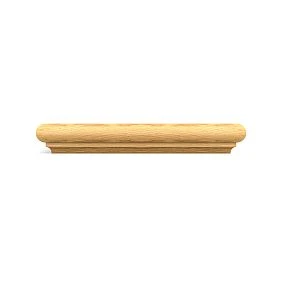

Смотреть весь Каталог продукции
Buy a Complete Pilaster Set, Not Two Unrelated Pieces
Start with the result you want: a full decorative portal, a shallow wall accent, or a framed architectural panel. Then list each part by function. A classic paired portal may require two matching shafts, two bases, two capitals, a horizontal top member, decorative connecting moldings, adhesive, finishing materials, and a plan for where the assembly meets the existing baseboard and door casing.
| Component | Typical quantity for a symmetrical portal | Purpose | What to check before ordering |
|---|---|---|---|
| Pilaster shaft or verified shaft assembly | 2 | Primary vertical accent | Height, width, depth, left/right compatibility |
| Base | 2 | Visually connects verticals to floor or lower trim | Height, footprint, baseboard junction |
| Capital or top termination | 2 | Completes each vertical and meets header | Width, relief, style, clearance |
| Top horizontal trim or lintel | 1 assembly | Joins the composition across the opening | Overall span, profile, corner details |
| Applied molding | Calculated linear length | Outlines shafts or adjoining wall panels | Material, exact stick length, cut plan |
| Decorative onlay or accent block | Optional | Adds a focal point at center or corners | Correct series, orientation, scale |
| Installation and finishing supplies | Per project | Adhere, secure, caulk, prime, and paint | Compatibility with substrate and product finish |
The word kit does not necessarily mean a single SKU containing all of these pieces. Some decorative systems are assembled from separate components. Confirm that the chosen items belong together by checking the manufacturer's dimensions, drawings, and installation recommendations. A matching color in a product photo does not prove physical compatibility.
For a detailed comparison of traditional component roles, read the STAVROS guide to pilasters and capitals. Use its architectural logic while verifying the material and dimensions of the particular components you plan to order.
Получить консультацию
The shaft: the visual height of the composition
The shaft should have a consistent vertical alignment and enough uninterrupted length for the eye to read it as one architectural element. A fluted shaft suits more traditional work; a plain or shallow relief works well in transitional spaces. Decide whether the shaft will end below the ceiling, continue toward a ceiling cornice, or align with the top of nearby cabinetry.
If the shaft is built up from several applied trims rather than purchased as a full-height molded part, draw the assembly in cross-section. It should look intentional from the side, not just in a straight-on elevation. The thickness of adhesive, any backing strips, and the relief of each molding affect the final projection from the wall.
The base: where the pilaster meets the floor or baseboard
A base provides a visible starting point. The lower transition is often the hardest part of a retrofit because the existing baseboard may project farther than the new detail. You can align the pilaster above the baseboard, use a deliberately designed plinth block, or terminate a shallow decorative vertical above the baseboard rather than imitate a full classical order. Avoid an unexplained gap where the shaft appears to float.
Check baseboard height before picking a base. An 8-inch baseboard changes the available composition considerably compared with a 3-inch baseboard. Draw both elements in elevation and profile before ordering.
The capital: the top needs a purposeful finish
A capital is not simply a decorative sticker above a molding. It typically widens or otherwise visually terminates the upright and provides a place for the top horizontal assembly to begin. A detailed Corinthian-inspired capital can suit a formal dining room, while a simplified geometric termination is generally easier to integrate into a modern living space.
Do not assume that a carved wooden capital from the carved-decor section is polyurethane. STAVROS also lists wooden pilasters and capitals in a separate product family. Check each selected item for a stated polyurethane material if that is the specification for your project.
Where Polyurethane Pilasters Work in American Homes
The best application gives a reason for the vertical lines to exist. Start with a real opening, architectural transition, cabinet edge, or focal zone. Adding two columns merely because a wall has empty space often produces a crowded result.
1. The doorway between a living room and dining room
A doorway is a natural site for a matched pair. Two shallow uprights can sit outside the existing casing, and a horizontal member can visually connect them above the head of the door. The assembly gives a simple doorway the character of a portal without changing its structural framing. Coordinate the new trim with the existing casing: an elaborate capital adjacent to tiny builder-grade casing may look disconnected unless a transition is designed.
Measure from the finished floor rather than the subfloor, and check whether the opening is truly plumb. In older homes, the two sides may differ slightly in height or width. Design a consistent top reference line and plan how to disguise small wall irregularities without producing mismatched visible gaps.
2. A living-room accent wall
A pair of pilasters can bookend a fireplace wall, a large artwork, a console, or a paneled feature. The verticals should support the focal point, not compete with it. In a room with an 8- or 9-foot ceiling, a modest projection and quiet profile often read more clearly than a large classical composition with multiple ornamental layers.
When the pilasters meet a horizontal band, a crown molding, or rectangular panels, keep profile weights in a deliberate hierarchy: primary vertical, secondary border, small accent. Consider an architectural wall with coordinated pilasters and moldings as a planning system rather than a collection of unrelated trim pieces.
3. A TV or media wall
Vertical elements can help frame a television, but the composition needs breathing room around the screen. Leave space for a future, possibly larger TV and for access to cables, outlets, and mounting hardware. Avoid raised trim directly behind a mount or over a recessed cable path. Never cover an electrical box or compromise the manufacturer's ventilation clearances.
A useful option is to keep the uprights simple and make the framed field behind the screen a different paint sheen rather than using heavily ornamented capitals. The result feels architectural without turning the media wall into a historical reproduction.
4. Built-in bookcases and wardrobes
A vertical decorative treatment can conceal the visual boundary between a built-in cabinet and a wall. First decide whether the decorative parts will attach to the wall, a paintable cabinet face frame, or another approved substrate. Those are not interchangeable surfaces. Cabinet doors and drawers need room to swing or slide; even an extra half-inch of relief can interfere with a handle or a full-overlay door.
Test a small piece at the most constrained point: the top cabinet door, hinge-side clearance, and baseboard junction. If the cabinetry is finished with a factory laminate or another low-adhesion coating, do not assume a standard wall adhesive will bond to it. Use the compatibility and surface-preparation instructions for that exact finish.
5. A fireplace surround
Pilasters can create symmetry around an electric, gas, or wood-burning fireplace, but this is a design scenario with additional safety restrictions. Decorative polyurethane must stay outside all required clearances to combustibles and must never replace a code-compliant surround or noncombustible material where one is required. The fireplace manufacturer's installation manual, local building code, and the authority having jurisdiction take precedence over a decorative rendering.
For some fireplaces, the correct solution is to keep polyurethane entirely on a distant accent wall and use approved materials close to the firebox. Do not decide safety clearances from a photograph.
6. A hallway, entry, or commercial reception area
In a hallway, repeated verticals can give a long wall a measured cadence, but protruding features should not reduce an already tight path. Keep decorative projection low where people carry luggage, furniture, carts, or mobility equipment. For public or commercial areas, review applicable egress and accessibility requirements before finalizing the design.
How to Measure a Pilaster Portal Before Buying
Good design begins with four measurements: the available height, the clear opening width, the usable wall width, and the maximum projection from the wall. Then record the obstacles: baseboards, switches, outlets, vents, furniture, crown molding, and door casing. A phone photograph with a tape measure in the frame is useful for reference, but it is not a substitute for written dimensions.
Measure height at both sides
Measure from the finished floor to the intended underside of the top member on the left and right. If the floor slopes or the door head is out of level, decide which line the eye will follow. In most decorative portals, a level top line is more important than making every hidden spacer identical. Never cut both shaft pieces to a theoretical number before checking the actual surfaces.
If the design does not reach the ceiling, leave deliberate negative space above it. A short gap of uneven size looks accidental. A planned reveal or a substantial section of wall above the header reads as part of the design.
Plan width from the opening outward
The visible door opening is not the same as the overall width of the new portal. Add casing width, any gap between casing and pilaster, the pilaster's own width, and any outside reveal. For example, imagine a 36-inch doorway with a 4-inch outside casing treatment, a 3-inch breathing gap, and a 5-inch decorative upright on each side. The estimated overall composition is:
36 + 2 x (4 + 3 + 5) = 60 inches.
That is a planning example, not a universal design rule. The 36 inches may describe the nominal door slab rather than the full finished outside opening in a real house. Measure the existing casing's outside-to-outside dimension and calculate from that real reference when creating the final drawing.
Check depth in three dimensions
An upright that looks slim from the front may project enough to catch a swinging door, touch a cabinet, or create a dangerous point in a narrow walkway. Measure the deepest part of the capital, not only the shaft. Compare it with door stop positions, nearby furniture, and the height of shelves or art.
Also check the wall itself. A shallow bow is common even in newer drywall. A rigid decorative piece may not follow that bow neatly; shimming or minor surface correction may be necessary, provided the chosen adhesive and substrate permit it.
Proportion is a design test, not a rigid mathematical law
Traditional classical orders use historical relationships among the base, shaft, and capital. Those relationships can be inspiring, but a modern 8-foot ceiling, narrow door opening, and existing 5-inch baseboard rarely fit a textbook order exactly. Work at full scale with painter's tape and paper templates before ordering.
As a practical starting point, narrower details usually suit standard residential openings, while more substantial shafts can work in a high-ceiling foyer. Compare a 4-inch and 6-inch paper mockup side by side. Stand at the normal viewing distance, not only two feet from the wall. The correct proportion is the one that supports the room and clears every obstruction.
Worked Example: An 8-Foot-High Room
Suppose a room has a finished ceiling 96 inches above the floor. You want an interior decorative portal with an architectural top below the ceiling. You decide the decorative vertical assembly should end at 88 inches, leaving room for a deliberately separated top zone. These values are hypothetical project dimensions, not measurements of a specific STAVROS pilaster kit.
| Planned part | Height in inches |
|---|---|
| Base element or plinth zone | 8 |
| Shaft zone | 70 |
| Capital or upper termination | 10 |
| Decorative vertical assembly | 88 |
| Space above assembly to ceiling | 8 |
The sum 8 + 70 + 10 = 88 inches. If the actual room slopes by half an inch across the doorway, the installation drawing needs an adjustment plan. Do not silently shorten one visible shaft and assume nobody will notice.
For a smaller home, consider a simplified scheme in which the top is a narrow rectangular block rather than a full classical capital. The geometry of the door and the existing ceiling cornice should be the deciding factors, not a desire to use the most ornamented SKU in the catalog.
A useful elevation drawing
Your rough sketch should show the finished floor, baseboard, underside of header, actual door-casing outline, shaft centerlines, capital width, and the outer edge of the whole composition. Mark mounting holes, light switches, outlets, and any furniture that will overlap the view. Label each zone with an actual dimension and whether that dimension is clear opening, finished outside width, or center-to-center spacing.
Keep a second small sketch in section view. Show the deepest projection and each transition. This catches problems that the front elevation misses, such as a decorative base running into a thicker baseboard or a capital touching a door's top hinge.
Which STAVROS Polyurethane Moldings Fit the Project?
STAVROS offers polyurethane linear moldings that can help form secondary borders, panel outlines, and trim around a constructed pilaster-like feature. The examples below are verified product profiles, not complete pilaster shafts. Each listed stick is 2,600 mm long, about 102.36 inches or 8.53 linear feet. Check the product page again at purchase time, since specifications and availability can change.
| STAVROS item | Face x projection | Length | Useful role |
|---|---|---|---|
| MLDPU-001 | 0.39 x 0.24 in (10 x 6 mm) | 102.36 in | Fine inner detail, restrained vertical line |
| MLDPU-004 | 0.59 x 0.31 in (15 x 8 mm) | 102.36 in | Medium-weight applied border |
| MLDPU-002 | 0.87 x 0.43 in (22 x 11 mm) | 102.36 in | Stronger panel or portal-side outline |
| MLDPU-003 | 1.38 x 0.47 in (35 x 12 mm) | 102.36 in | Wide outer border on a larger wall |
These sizes matter visually. A 0.39-inch bead is attractive for a delicate outline but would be visually lost if treated as the only major feature around a large entry. A 1.38-inch profile draws a stronger line but is not necessarily appropriate beside a narrow door casing. In a layered scheme, use the wider profile to establish the outside contour and a thinner profile as an inner accent, with enough plain wall visible between the lines.
An important material warning: the general STAVROS molding category also includes MDF and polystyrene products. When the design specification calls for polyurethane, check the material on the particular SKU. The name of a category alone is not evidence that every item inside it is polyurethane.
Decorative blocks are not interchangeable across every profile
Ornamental components can make a straight molding assembly look less like ordinary picture-frame trim and more like purpose-designed architecture. For example, the MLDPU-1U-1.1 polyurethane corner block is documented as part of the 001 molding series. Its stated face dimensions are about 3.82 x 3.82 inches (97 x 97 mm). That does not make it suitable for every width of vertical trim.
The MLDPU-1-2.1 central decorative overlay is another confirmed polyurethane accent associated with that series. Use a central overlay only when the composition has a natural center point and the ornament scale fits the available width. Never substitute it for a load-bearing bracket, capital, or engineered connector.
A directional ornamental component also needs the correct orientation. The MLDPU-1U-2.1L left-hand overlay is not automatically equivalent to a right-hand part. Confirm the paired product if your design is symmetrical. This matters most on door portals, where mismatched ornament direction is obvious at eye level.
Estimate Material by Cut List, Not Only by Linear Feet
A shopping estimate should distinguish linear footage from number of full sticks. Divide the total footage by the available stick length to get a theoretical minimum, then test the actual cut arrangement. A piece that is 78 inches long cannot be cut from two leftover 39-inch sections unless an additional joint is acceptable and specified.
Example A: two vertical borders plus a top band
Assume the design calls for two straight decorative borders 78 inches long and a top decorative band 54 inches long, all in one of the STAVROS 102.36-inch polyurethane molding profiles. The total length is:
78 + 78 + 54 = 210 inches = 17.5 linear feet.
Dividing 210 by 102.36 gives about 2.05, so you need at least three full sticks. The cut plan confirms that three sticks work: one 78-inch vertical from each of two sticks, and one 54-inch top band from the third. Offcuts remain. If you also need angled cuts, decorative returns, or sacrificial test cuts, include the extra length in the plan rather than pretending a zero-waste calculation is a purchase order.
Do not multiply the count by two again if you already included both verticals in the measurement. This surprisingly common mistake results in a large overorder.
Example B: three rectangular panels beside a portal
Suppose an adjacent accent wall has three rectangles, each 28 inches wide and 64 inches tall. Ignoring the tiny change at the miter line, each frame needs:
2 x 28 + 2 x 64 = 184 inches.
Three frames require 552 inches, or 46 linear feet of visible perimeter. With a nominal 102.36-inch stick, the theoretical minimum is six sticks (552 / 102.36 is about 5.39). A possible cut arrangement is one 64-inch vertical plus one 28-inch horizontal from each of six sticks. That gives all six verticals and all six horizontals, before allowance for saw kerf and damage. Because 64 + 28 = 92 inches, this example has reasonable room for the saw cuts.
For actual ordering, a spare seventh stick may be prudent if the profile has to match a continuous batch or you anticipate re-cuts. Do not present the spare as a fixed percentage that applies to every project. The correct allowance depends on the layout, installation experience, and access to replacement material.
Example C: matching pairs and decorative blocks
If a symmetrical arrangement needs one corner block in each corner of two rectangular fields, the count is 2 frames x 4 corners = 8 blocks. If you use a left-oriented accent and a right-oriented accent in each frame, the count is two left and two right, not four of the same orientation. Give these items their own lines on the bill of materials; do not bundle them into a linear-foot estimate.
The cut-list worksheet
| Part | Quantity | Finished length each | Material | Notes |
|---|---|---|---|---|
| Left vertical border | 1 | 78 in | Selected PU profile | Verify against plumb line |
| Right vertical border | 1 | 78 in | Same PU profile | Mirror the left |
| Top band | 1 | 54 in | Same PU profile | Confirm finished outside width |
| Optional panel frames | 3 sets | 28 x 64 in | Selected PU profile | Six sticks possible in example |
| Corner/ornamental blocks | As drawn | Per product | Matched series only | Check left/right and physical fit |
Use a cut diagram for every stick. Mark actual usable length, miter allowance, blade kerf, and the direction of any ornamental relief. Where a decorative pattern repeats, a joint may need extra material for visual alignment, even if the raw lengths appear to fit.
Five Design Schemes That Do Not Require the Same Ornament Everywhere
A good portal is a design system, not a contest to fit as many details as possible onto a wall. Match the amount of ornament to the room's architecture, ceiling height, and major furniture. Here are five schemes that can be tested with simple scale drawings.
Scheme 1: restrained neoclassical doorway
Use two clean vertical elements with simplified terminations and a confident horizontal top band. Paint the entire assembly the same white or warm neutral as the existing casing. The relief reads through light and shadow rather than contrast. This is a sensible starting point for a living-room-to-dining-room opening in a typical suburban home.
A wider outer molding can strengthen the header while a narrow inner strip adds definition. Avoid crowding the door's latch-side wall with oversized ornament. The vertical lines should frame the transition, not make the doorway seem narrower than it is.
Scheme 2: formal dining-room focal wall
A more decorative capital and framed wall fields can suit a room with enough width to appreciate symmetry. Keep the central area clear for artwork, a mirror, or a sideboard. Use the same top reference line on both pilasters and repeat a simplified part of the molding language elsewhere in the room, perhaps as a wainscot or an upper panel border.
Do not add a detailed ceiling medallion simply because the wall has classical details. The chandelier, ceiling trim, and wall portal must read as one composition. One visual focal point is usually stronger than three competing ones.
Scheme 3: modern media-wall surround
Create two shallow vertical boundaries and a single understated upper band. Skip ornate capitals or reduce them to flat termination blocks. Paint the decorative structure the same color as the wall for a quiet relief effect, or use a neighboring paint tone only slightly different from the background.
Plan future screen dimensions and service access before placing molding. A decorative feature that prevents a TV mount from being adjusted later is not a successful design, regardless of how good the initial photo looks.
Scheme 4: integrated wardrobe surround
Use vertical details at the outside edges of a floor-to-ceiling built-in, then align a top horizontal band with the cabinet's upper fascia. A consistent painted finish can make the wardrobe feel built into the room's architecture. Keep the decorative work on appropriate non-moving surfaces; the door edge and hinge clearances come first.
If the wardrobe will be replaced later, consider whether the decorative parts should attach to the wall instead of the cabinet. Also measure the trim's relationship to air returns, access panels, and any concealed service components.
Scheme 5: decorative niche or mirror wall
A pair of compact applied uprights can frame a tall mirror or recessed shelf without demanding a complete classical portal. Choose a modest projection, especially in a narrow entry. Keep the niche or mirror centered between the verticals, and plan the mounting system separately. Polyurethane trim must not be used to support a heavy mirror.
For a deeper look at vertical decorative applications, see STAVROS ideas for columns and pilasters. The article illustrates how decorative vertical lines can organize a wall even when no freestanding column is present.
Choosing a Style: Traditional, Transitional, Art Deco, or Modern
In a traditional interior, fluting, molded bases, and recognizable classical capitals can create a coherent architectural language. Still, match the scale of an interior door rather than copying the proportions of an exterior civic building. Deep relief can look heavy against an 8-foot ceiling.
A transitional or updated-classic room often benefits from a simpler shaft and a clean capital with only one or two changes of plane. Here the design relies on symmetry and paint finish rather than overt ornament. This is an especially adaptable approach when existing baseboards, window casings, and interior doors are relatively plain.
An Art Deco-inspired interior can use a stepped vertical design, geometric termination, and deliberate repetition. Avoid mixing stylized Deco lines with leafy classical capitals. Even if both products look decorative, they tell different visual stories.
For a modern interior, think of the pilaster as a shallow architectural boundary: two vertical lines and one measured horizontal line. Flat faces and precise shadows can create depth without any figurative ornament. If the room uses flush doors and minimalist cabinetry, an oversized Corinthian capital may be the wrong choice.
For a highly ornamental room, decide which feature has the richest relief. If the fireplace mantel already carries most of the visual detail, keep the surrounding pilasters quieter. Ornament should guide the eye; it should not erase the shape of the wall beneath it.
Color and Finish: Let the Architecture Read Clearly
A painted polyurethane assembly can either blend into a wall or stand out as a distinct feature. Painting everything the same color often provides the most convincing integrated effect. The face, edge, and shadow line remain visible, but different materials and joined components appear more unified.
White trim against a colored wall produces a traditional contrast. A tone-on-tone combination creates depth without strong graphic lines. A dark monochrome finish can make a simple pilaster scheme feel contemporary, but reveals bumps and poorly finished joints more readily under raking light. Before choosing a very glossy finish, view a sample under the actual room lighting.
Use a coating system approved for the product's surface and intended room conditions. Some polyurethane elements arrive primed; others may have different preparation requirements. Check the manufacturer's current finishing guidance rather than assuming every item needs exactly the same primer or exactly two coats. A small test panel can prevent adhesion or sheen surprises.
Installation Planning: The Steps That Protect the Result
The final appearance depends heavily on the layout and substrate. For a lightweight, manufacturer-approved polyurethane trim assembly, adhesive installation may be appropriate. Larger components, difficult substrates, or commercial applications may require a different attachment method specified by the manufacturer or installer. Do not transfer the installation instructions for a 0.39-inch decorative bead to a large manufactured shaft or capital.
Step 1: Confirm the wall and all clearances
Identify the substrate: finished drywall, plaster, masonry, painted wood, cabinet material, or another surface. Check for flaking paint, powdery plaster, dampness, and loose patches. Determine where the product will interfere with door hardware, controls, wall outlets, furniture, and trim already in place. Mark any areas where drilling or cutting could encounter electrical wiring or plumbing and get qualified help when required.
Step 2: Make a full-size layout
Use a laser or spirit level and a plumb line to mark the shaft axes, base heights, capital heights, and top band. Apply painter's tape at the actual intended width. Compare the left and right sides from across the room. Check that the centerline of the opening remains centered within the composition, even if the existing casing is slightly uneven.
Step 3: Dry-fit every component
Lay the decorative pieces out on a clean surface. Confirm that bases, shafts, and capitals fit in their intended order and that any shaped joints follow the same decorative language. Temporarily position pieces against the wall using safe supports or a helper; do not rely on an unsupported heavy component staying in place. Mark the backs and final locations before applying adhesive.
Step 4: Prepare the substrate and cut as required
Clean away dust and grease. Remove unstable paint or finish only as appropriate for the substrate, and follow the selected adhesive manufacturer's sanding and priming instructions. Check that the adhesive is compatible with the polyurethane and the wall finish. Make cuts with a suitable fine-tooth tool and support the profile to avoid chipping or ragged edges. Use eye and respiratory protection suited to the cutting process.
For the full adhesive selection process, see how to choose glue for polyurethane molding. The adhesive must be suitable for both the decorative piece and the receiving surface. A label that merely says "construction adhesive" is not enough information.
Step 5: Attach components in a controlled sequence
A common sequence for a paired decorative portal is to install the two bases or bottom reference pieces, then align the upright components, then fit the upper terminations, and finally install the horizontal connecting trim. However, if the product has an integrated fastening system, use that manufacturer's sequence instead.
Check alignment after each piece. Temporary painter's tape, supports, or clamps may be useful within the installation instructions, but they do not replace required cure time. Do not attach an upper piece to a lower component that has not yet achieved the handling strength required by the adhesive.
Step 6: Finish the joints carefully
Once the adhesive has reached the specified cure stage, inspect every junction. Small paintable perimeter gaps may be finished with a compatible flexible acrylic caulk. Larger mismatches should be corrected at the source; a large mass of caulk cannot fix a badly aligned capital. If an intended construction joint must remain open for movement, do not fill it merely to make the photograph look seamless.
The separate STAVROS guide to mitered molding corners and trim junctions offers additional detail on making lines and transitions look continuous.
Step 7: Prime and paint according to the finish system
After the adhesive and filler are ready for finishing, clean the surfaces, spot-prime if required, and apply the specified topcoat. In highly detailed relief, avoid building thick paint ridges in corners. Check the work under side lighting, since that reveals uneven joints and sanding scratches that disappear under straight-on light.
Common Problems and How to Prevent Them
| Problem | Likely planning issue | Better approach |
|---|---|---|
| Portal looks too wide and heavy | Shaft or capital chosen before measuring wall width | Mock up two or three widths in painter's tape |
| Top band appears crooked | One upright was measured from an uneven local reference | Use a common level reference, then adjust the fit |
| Base collides with baseboard | Profile projections were not checked in section | Draw the lower joint from the side and test a sample |
| Ornamental pattern changes direction | Left and right details were not checked | Specify orientation and match product series |
| Joints remain visible after paint | Pieces do not meet flush or filler shrank | Correct geometry, use suitable filler, allow cure |
| Door or cabinet no longer opens fully | Trim projection was ignored | Test every door, hinge, and handle before gluing |
| Trim begins to release | Incompatible adhesive, poor substrate, or inadequate cure | Recheck product and substrate preparation instructions |
| Design feels cluttered | Too many competing ornaments and horizontal bands | Reduce to one dominant feature and supporting lines |
The most preventable error is buying visually appealing individual items without a complete elevation and cut list. Once the drawings are done, it becomes obvious whether the design needs actual pilaster shafts, a constructed vertical frame from smaller moldings, or simply a well-proportioned wall panel. Those are different purchases and different installation jobs.
Checklist Before You Order Polyurethane Pilaster Decor
- Define the project: doorway, accent wall, media zone, fireplace wall, built-in, or niche.
- Measure the surfaces: finished height, outside opening width, wall width, and maximum allowable projection.
- Identify the assembly type: complete pilaster parts or a decorative pilaster-like frame built from specified moldings.
- Verify material by SKU: do not mistake carved wooden pilasters or MDF/polystyrene moldings for polyurethane.
- Match the style: bases, shafts, capitals, header, and adjoining trim should feel like one system.
- Confirm matching parts: verify dimensions, left/right orientation, series compatibility, and finish.
- Make a cut list: record each straight run and every decorative block separately.
- Check substrate and attachment: follow the chosen product and adhesive instructions, not a generic internet trick.
- Plan the finish: primer requirements, compatible paint, joint treatment, and cure intervals.
- Review safety: fireplace clearances, egress, electrical access, and cabinet or door operation.
Keep the product page open while entering dimensions into your final order sheet. A helpful next step is to browse STAVROS polyurethane onlays and architectural accents alongside the verified polyurethane molding profiles. Add only the pieces that match your measured drawing.
Frequently Asked Questions
Is a polyurethane pilaster the same thing as a structural column?
No. Decorative polyurethane pilasters are architectural surface details. They do not carry building loads and must not replace engineered structural members. If you are altering a real support or a load-bearing opening, use a qualified professional and applicable building-code requirements.
Can I make a pilaster-like feature with regular polyurethane molding?
Yes, a layered arrangement of linear moldings can suggest a shallow pilaster or vertical architectural panel. It is not identical to a manufactured shaft. Plan the cross-section and transitions so the result reads intentionally from both front and side views.
Do I need both a base and a capital?
For a traditional full pilaster, matching lower and upper terminations help explain the form. A modern simplified vertical design can omit elaborate classical components, but the bottom and top still need purposeful visual endings. Do not leave a random gap and call it minimalism.
How wide should pilasters be around a standard door?
There is no single correct width. It depends on the finished outside width of the door casing, wall space to each side, ceiling height, desired projection, and room style. Mock up two or three widths at full scale before choosing components. A profile that looks modest in a large product photo may overwhelm a narrow hallway.
Which STAVROS molding is the largest of MLDPU-001 through MLDPU-004?
By visible face width among these four examples, MLDPU-003 is the widest at about 1.38 inches (35 mm). The other faces are approximately 0.39, 0.87, and 0.59 inches for 001, 002, and 004 respectively. These are decorative moldings, not automatically full pilaster shafts.
Are all STAVROS pilasters and capitals made from polyurethane?
No. The catalog contains separate material families, including carved wooden architectural pieces. Check each item's material listing. A related design style or product-category label does not establish that two parts are made from the same material.
Can polyurethane pilasters be used beside a fireplace?
Only where the fireplace manufacturer and applicable codes permit the material and installation. Polyurethane is not a substitute for required noncombustible material. Keep it outside all specified clearances, and do not use a general decorative-adhesive recommendation as a fire-safety approval.
Can the same pilaster design frame built-in cabinets?
Often yes, but decorative projection, door swing, sliding mechanisms, access panels, and finish compatibility become critical. Test the location and ensure the attachment method is suitable for the cabinet surface and the planned maintenance of the built-in.
Do I calculate molding by square feet or linear feet?
Linear molding is measured by length, usually in inches or linear feet. Calculate the length of each separate run, then plan cuts from the actual stick length. Square footage is relevant to paintable surface area or broad wall panels, not to the purchase count for straight trim profiles.
How much extra molding should I order?
Order from a cut plan, then add a reasonable project-specific allowance for mitering, pattern matching, damage, and replacement. One complex design may need more spare material than a simple set of straight runs. A fixed percentage without a cut list can underorder or overorder.
What is the easiest way to make the pieces look like one architectural feature?
Use consistent alignment, compatible profiles, carefully prepared joints, and a coordinated finish. A single paint color across the pilaster-like assembly and surrounding trim can visually unify separate pieces, but it will not hide badly matched geometry or incompatible materials.
Where should I start if I do not know which product series to choose?
Begin with the measured elevation and the intended scale of the main vertical feature. Then compare actual STAVROS item drawings and dimensions rather than selecting solely by ornamental style. For a constructed vertical frame, first choose the appropriate molding width, then add only compatible decorative blocks, making sure the selected SKU states polyurethane if that is your requirement.
The Best Pilaster Project Starts with a Drawing
A convincing decorative portal comes from a few clear decisions: where the uprights begin, where they end, how they connect to the top horizontal line, and how all of the pieces relate to the real room. Polyurethane can make detailed applied architecture practical in many interior projects, but the material alone cannot solve inaccurate measurements or mismatched components.
Use the STAVROS catalog to confirm actual materials, dimensions, compatible decorative parts, and available options, then translate the design into a complete bill of materials. If the result is a restrained doorway surround rather than a grand classical portal, that is still a successful architectural choice. The finished room should look intentionally designed, with each visible line serving the whole composition.