Article Contents:
- A wall is not just a surface
- What is a "wall with architecture" and why it's not just decor
- Moldings: the foundation of any architectural composition
- Frame panels made of moldings
- Ceiling cornice as the top finish
- Horizontal molding as a dividing belt
- Pilasters: when a wall needs verticality
- Where pilasters work
- A pilaster is not a molding: the fundamental difference
- Size and scale of the pilaster
- Capitals: the top finish of the pilaster
- What types of capitals exist
- How to Choose the Size of a Capital
- Stylistic unity is a mandatory condition
- Capital for the pilaster at the portal
- Decorative stucco and stucco decor: the accent that brings everything together
- Corner decors for molding frames
- Central decorative overlay
- Decor above the opening: the pediment
- Stucco decor at the fireplace
- Decorative elements in the niche
- How to assemble the system: step-by-step logic
- Combination of elements for different spaces
- High wall in the hall
- Accent wall in the living room
- Fireplace wall design
- Wall niche
- Practical table: what to buy for different tasks
- Material matters: why polyurethane
- How not to overload the wall
- Frequently Asked Questions
- About the Company STAVROS
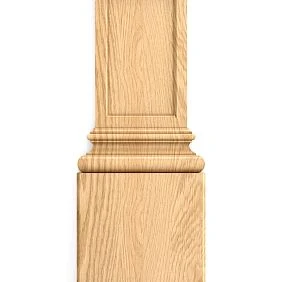
A wall is not just a surface
There is a moment in any renovation when everything is ready: furniture is arranged, appliances are connected, lighting is set — and still something is off. The wall looks like just a painted surface. Large, flat, neutral. And the room, despite all its furnishing, feels unfinished — because the wall doesn't work. It just exists.
This feeling is familiar to everyone who has designed an interior on their own. And this is exactly where the request for what designers call an "architectural wall" comes from — a wall that has structure, rhythm, verticals and horizontals, a top finish, and a central zone. A wall that speaks.
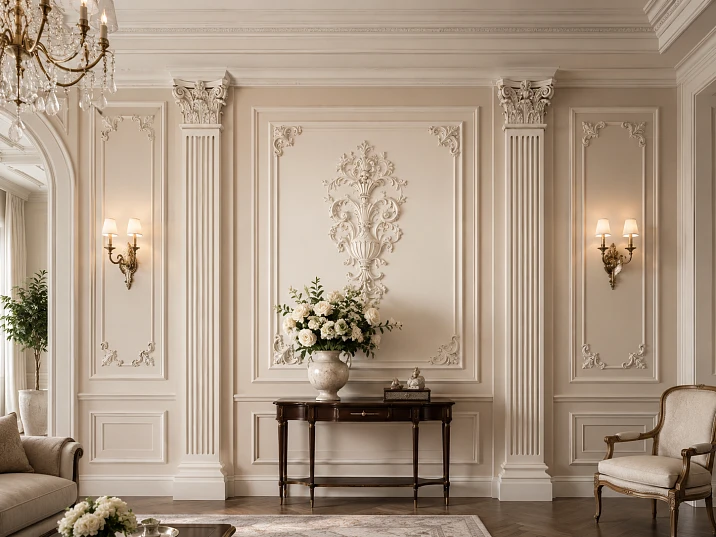
Polyurethane moldings — the main tool for creating such a wall. Not a single overlay, not one frame of moldings. It is a system: moldings set the frame, pilasters provide the vertical, Capitals complete the vertical elements, decorative stucco adds an accent, and stucco decor brings everything together into a finished architectural composition.
This article is a practical guide on what to buy and in what order for a wall with architecture. For a living room, hall, entryway, study, portal, niche, or double-height space. For any case where an empty wall should become expressive.




What is a "wall with architecture" and why it's not just decor
It's important to immediately distinguish two approaches. The first is to apply several decorative elements to the wall: an overlay here, a molding there, a rosette in the corner. The result is a set of details. The second is to create an architectural system where each element performs its function and works together with the rest. The result is a wall that looks like part of a designed space.
The difference is not in the number of details. The difference is in the logic. An architectural wall is built on principles inherited from classical architecture: vertical rhythm, horizontal divisions, top and bottom completion, central dominant. It is these principles that make the wall readable and complete — whether it's a palace or a modern apartment with classical notes.
Why are architectural walls created?
-
In the living room — behind the main furniture group, behind the sofa, behind the fireplace. This is an accent wall that is constantly looked at.
-
In the hall and entryway — to create a first impression: a hall with an architectural wall speaks to the character of the entire home.
-
In the study — for status and monumentality of the space, especially behind the workspace.
-
At the portal — framing a door or arch opening with pilasters and a cornice.
-
In a niche — a molding frame and decorative elements inside the niche turn it into an architectural scene.
-
On a high wall of the second light, pilasters make the high wall proportionate to a person by breaking it into vertical sections.
Our factory also produces:
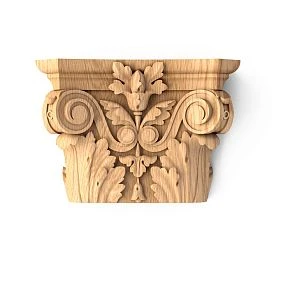


Moldings: the foundation of any architectural composition
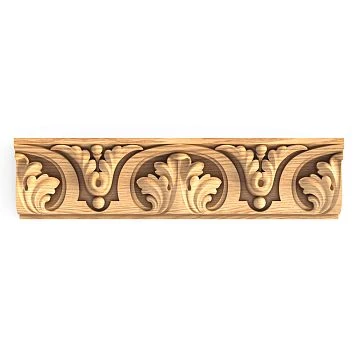
Molding is the first thing any wall with architecture starts with. These are lines, frames, proportions. Without moldings, pilasters look like glued-on strips, and capitals look like detached details. Molding ties everything together.
Moldings made of polyurethane — the main working material of an architectural wall. Lightweight, geometrically precise, cut at any angle, glued with construction adhesive without dowels or drills, accept any paint. The range of profiles is huge: from the thinnest flat strips of 10 mm for minimalist solutions to massive classical cornices of 120 mm for high spaces.
Get Consultation
Frame panels from moldings
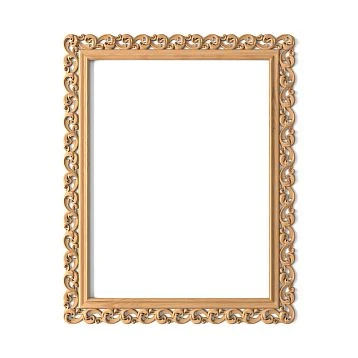
The most common technique for an architectural wall is panel frames. Moldings are cut along the perimeter of rectangles and glued to the wall, creating a grid of frames of different sizes. Inside the frames is the same paint as on the wall, or a different shade.
How is the frame system built? The bottom row consists of taller vertical frames from the baseboard to a horizontal molding at about 1/3 of the wall height. The top row consists of horizontal or square frames from this molding to the ceiling cornice. The dividing horizontal molding between the rows is a structure-forming line that "reads" the wall into two fields.
This is the basic architectural wall system. Nothing extra, but already architecture.
Ceiling cornice as the top finish
Without a ceiling cornice, an architectural wall remains unfinished. The cornice is the top horizontal line that separates the wall from the ceiling and closes the entire vertical system. For an architectural wall, choose a cornice of the same scale as the main molding of the system: if the wall moldings are 25 mm, the cornice is 80–100 mm. If the moldings are 40 mm, the cornice is 120–140 mm.
buy polyurethane moldings for an architectural wall should come from one line: coordinated profiles of the same scale and the same stylistic tone create a unified system. A mix of collections breaks the entire logic.
Horizontal molding as a dividing belt
A dividing molding at a height of 90–110 cm (sometimes at 2/3 of the wall height for high ceilings) is a classic architectural technique: a miniature entablature. It divides the wall into two fields of different character. The lower field is heavier and more structural. The upper field is lighter.
A denser grid of frames or uniform vertical panels works well on the lower field. On the upper field, more spacious frames or no frames at all, just a flat surface with a ceiling cornice, work better.
Pilasters: when the wall needs verticality
If moldings give the wall a horizontal structure—frames, lines, proportions—then pilasters give it verticality. It is verticality that makes the wall monumental, lifts the gaze upward, and gives the space a sense of height and significance.
A pilaster is a flat decorative column glued vertically onto the wall. Unlike a real load-bearing column, it does not bear weight—it carries a semantic and visual function: dividing the wall into sections, emphasizing openings, and creating a vertical rhythm.
Where pilasters work
On the sides of a portal. A door or archway with pilasters on the sides is a classic architectural technique. The pilasters frame the opening, give it status, and make it part of the wall's architectural system. Above the pilasters is a horizontal cornice or architrave that closes the arch and creates a portal.
In the hall. A hall with pilasters on the walls is no longer a corridor—it is an architectural space. The pilasters break up the long walls of the hall into vertical sections, between which are framed molding panels. Between the pilasters, you can place mirrors, sconces, or consoles.
On a double-height wall. A tall wall with ceilings of 4–5 m or more looks simply empty if not structured. Pilasters running the full height—from floor to entablature—make such a wall architectural and proportionate to the human scale.
By the fireplace. Pilasters on the sides of the fireplace portal are a classic solution. They frame the fireplace, give it monumentality, and the wall behind it is perceived as a single architectural scene.
In the living room. On the accent wall of the living room — pilasters at the edges, framed molding panels between them, a ceiling cornice at the top. This is a complete architectural system that makes the wall the main one in the room.
Around the niche. Pilasters on the sides of the niche frame it as an architectural element. The niche ceases to be just a recess in the wall and becomes a decorative scene — for a TV, for a sculpture, for books, for a lamp.
A pilaster is not a molding: what is the fundamental difference
It is important to understand this correctly. A molding creates a line or a frame — horizontal or vertical. A pilaster creates a three-dimensional vertical element that has a body, a profile, a projection from the wall. It is read as an architectural detail — not as a "strip," but as a "part of the building."
That is why pilasters are purchased with a different motivation than moldings. Moldings are for structuring the surface. Pilasters are for a status, architectural statement. A wall with pilasters makes a different impression than a wall with only moldings.
Size and scale of the pilaster
The pilaster should be proportionate to the height of the room. For a room with ceilings of 2.7–3 m, a pilaster the full height of the wall (from the baseboard to the ceiling cornice) is a standard solution. The width of the pilaster is from 60 to 150 mm, depending on the scale of the room and the character of the interior.
The projection of the pilaster from the wall surface is usually 15–30 mm. This is enough for the pilaster to be read as a three-dimensional element and give an expressive shadow, but not so much that it looks rough or interferes with furniture.
polyurethane moldings for pilasters — the optimal option: lightweight, does not create a load on the wall, cuts precisely, glues reliably. Polyurethane architectural decoration for walls allows you to implement a full architectural system without construction work — only glue, a level, and precise marking.
Capitals: the top finish of a pilaster
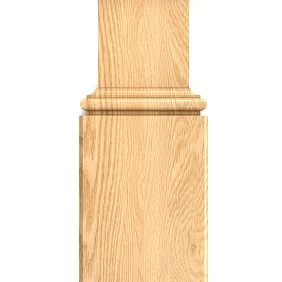
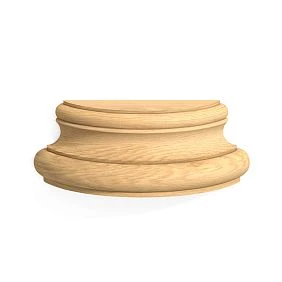
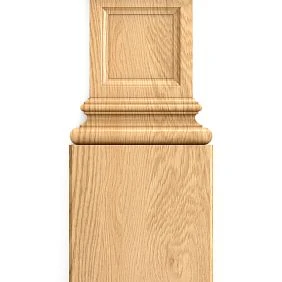
A pilaster without a capital is an unfinished architectural element. It looks like a strip glued to the wall. It is the capital that Capital completes it from above, turning the vertical detail into a full architectural object.
A capital is the crowning part of a column or pilaster. In classical architecture, the capital solved a structural problem: it widened the upper part of the support, creating a transition to the horizontal beam. In interior design, a polyurethane or wooden capital performs the same decorative function: it creates a transition from the vertical element to the horizontal system — cornice, entablature, ceiling molding.
What types of capitals are there
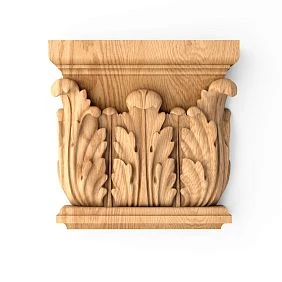
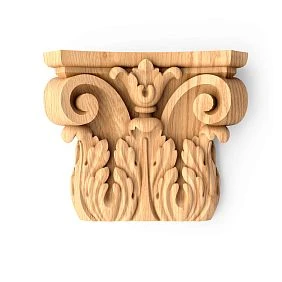
The STAVROS catalog features over 60 models capitals made of wood — from simple geometric to richly ornamented classical ones. All are made using precise milling from solid wood, with the possibility of painting in any color.
Styles of capitals in the catalog:
-
Classic — acanthus leaves, Ionic volutes, Doric order. For classical, neoclassical, and baroque interiors.
-
Empire — strict forms with laurel wreaths and geometric motifs. For interiors with a monumental character.
-
Art Nouveau — more concise forms, clean lines, minimal ornamentation. For modern classics and neoclassicism.
-
Gothic — pointed arch motifs, medieval ornament. For interiors with a historical or romantic character.
-
Grapevine, floral ornament — lively, natural motifs. For Tuscan, Provencal, Italian styles.
By base shape — square, rectangular, semicircular — in accordance with the shape of the pilaster.
How to choose the size of a capital
The capital should be wider than the pilaster. Classic ratio: capital width = pilaster width + 30–50% on each side. This creates a natural "flare" at the top, characteristic of classical architecture.
Capital height — from 60 to 200 mm, depending on room height and pilaster scale. A taller capital is more expressive, more monumental. A more compact one is delicate, suitable for small spaces.
Stylistic unity is a mandatory condition
The capital must match the style of the moldings, cornice, and other stucco on the wall. If the moldings are calm, geometric — a capital with lush acanthus will be a dissonance. If the entire system is executed in the key of a classical order — a capital with Ionic volutes will be organic.
buy a capital from the same stylistic family as the moldings — a key condition that distinguishes a professionally assembled composition from a set of random elements.
Capital for pilaster at the portal
A separate and very advantageous case is the portal solution. Pilasters on the sides of the opening with capitals at the top, connected by a horizontal architrave (cornice above the opening), form a full-fledged architectural portal. Above the architrave is a decorative sandrik, a small element of stucco decor. This solution turns an ordinary doorway into an architectural dominant of the room.
Decorative stucco and stucco decor: an accent that brings everything together
Moldings provide a system. Pilasters provide verticality. Capitals complete the elements. But even the most correctly built architectural system can look too strict, too geometric, devoid of liveliness and character. This is where it comes into play Decorative stucco — overlay elements with ornamental relief that add an accent and make the composition lively.
Corner decors for molding frames
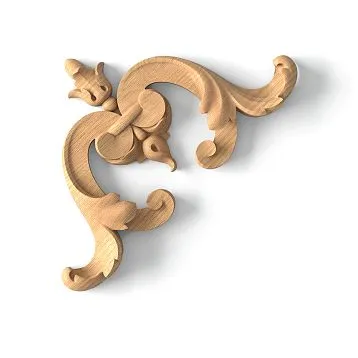
Corner decor is a small ornamental element placed at the intersection of horizontal and vertical molding. It is the "lock" of the frame, turning it from a "set of strips" into an architectural detail. Corner decors can be geometric, floral, or laurel. A correctly chosen corner decor instantly elevates the quality of the entire molding system.
Central decorative overlay
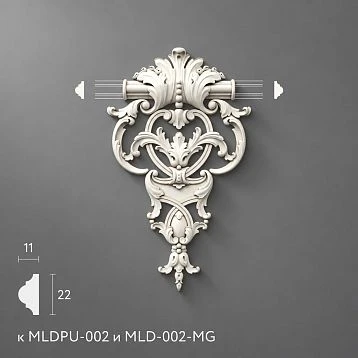
In the center of the main frame on the accent wall is a decorative overlay. This can be an ornamental medallion, a bas-relief element, a laurel wreath, a rosette, or any other central accent. It works as a "point of attraction" — the eye finds it in the center of the composition and stops.
The size of the central overlay is proportionate to the frame: no less than 1/5 of its area and no more than 1/2. The central element should be visible but should not overpower the entire frame system.
Decor above the opening: sandrik
Sandrik is a decorative cornice-canopy above a door or window opening. A small horizontal element with an ornamental relief placed directly above the architrave of the portal. In an interior, a sandrik makes the opening significant: the door becomes "part of the architecture" rather than just a functional opening.
Stucco decor at the fireplace
The fireplace area is a special case. Buy Molded Decoration for the fireplace area can be in the form of special elements: framing of the portal shelf, decorative overlays on the sides, an ornamental frieze above the shelf. This turns the fireplace from just a "heating appliance" into the architectural center of the room.
Decorative elements in a niche
A niche with stucco decor is a technique where a recess in the wall becomes a decorative scene. Buy decorative stucco for a niche — a molding frame around the perimeter, corner decors in the corners, a central accent element on the back wall. Together, this creates the effect of an architectural niche, not just a recess.
How to assemble the system: step-by-step logic
An architectural wall is not created randomly. There is an assembly logic that ensures the correct result.
Step one: ceiling cornice. You need to start from the top. The cornice around the perimeter of the ceiling is the first and most important element that sets the scale of the entire system. The width and profile of the cornice determine the scale of the moldings on the walls.
Step two: horizontal dividing molding. At a height of 90–110 cm — a dividing molding that splits the wall into two fields. This is an optional element — suitable for walls from 2.7 m high. With ceilings of 2.5 m, you can limit yourself to only frame panels without a divider.
Step three: vertical moldings or pilasters. Now — the vertical structure. If pilasters are needed, mark their positions. The distance between pilasters is approximately 2–3 times the width of the pilaster itself. This is a classic order proportion.
Step four: frame panels. Moldings for frames are glued into the sections between pilasters and horizontal moldings. The frames should have uniform indents from the edge of the section — this creates rhythm and order.
Step five: capitals. Capitals are mounted on the top points of the pilasters. It is important to check that the capitals do not touch the ceiling cornice — there should be a small gap between them (usually occupied by an architrave or horizontal molding).
Step six: decorative accents. After the main system — corner decorations for frames, central overlays, sandriks above openings. This is the final layer that enriches the system with details.
Step seven: painting. The entire system is painted in a single color — or with slight color differentiation: the ceiling white, the walls slightly warmer, the stucco matching the ceiling or wall. This choice determines the final character of the composition.
Combination of elements for different spaces
High wall in the hall
A hall with high ceilings is a complex space. Height without division is oppressive. Pilasters along the entire height from floor to ceiling, frame molding panels between them, a horizontal molding belt at 1/3 of the height, a ceiling cornice — this is a system that makes the height work, not oppressive.
Accent Wall in Living Room
Wall behind the sofa: ceiling cornice, pilasters along the edges of the wall, three vertical frame moldings in the space between the pilasters, corner decorations in the frames, one central accent element in the central frame. Capitals on the pilasters. This is a complete system in one go.
Fireplace wall design
Fireplace as center: the fireplace portal itself is an architectural element. Pilasters on the sides with capitals, a horizontal cornice above the portal, decorative elements on the shelf. Molding frames on the wall on the sides of the fireplace. A ceiling cornice completes everything from above.
Niche in the wall
Molding frame around the perimeter of the niche, corner decorations, a decorative accent in the center of the back wall. Inside the niche — a different color or texture of the wall. Lighting inside the niche (built-in light fixture) makes the stucco decor especially expressive: the relief works differently in light than without it.
Practical table: what to buy for different tasks
| Task | What to buy |
|---|---|
| Make the wall stricter and more structured | Polyurethane moldings + panel frames |
| Design the portal | Pilasters + capitals + horizontal architrave |
| Make the hall more expensive and prestigious | Pilasters + decorative elements + ceiling stucco |
| Design a niche | Moldings around the perimeter + stucco decor on the back wall |
| High empty wall of the second light | Pilasters + large moldings along the entire height |
| Need one bright accent | Decorative stucco or central stucco decor |
| Fireplace wall | Pilasters + capitals + cornice + decor near the fireplace shelf |
| Study with classic shelving | Pilasters between sections + molding panels |
| Budget solution for an accent wall | Only moldings: frame panels + ceiling cornice |
Material matters: why polyurethane
This question arises for everyone. There is plaster, there is wood, there is polyurethane — which to choose?
For wall architectural systems, the answer is clear: polyurethane. Why?
Weight. Polyurethane products are 5–7 times lighter than plaster ones. This is crucial when installing pilasters 2.5 m long: they are glued with mounting adhesive without anchors, dowels, or wall loosening.
Geometric accuracy. Polyurethane is molded with perfect geometric precision. Moldings are straight, pilasters are even, joints are minimal. Plaster during production gives slight shrinkage and geometric deviations.
Moisture resistance. Polyurethane is not hygroscopic — it does not absorb moisture and does not change dimensions with humidity changes. For pilasters near external walls or in rooms with variable humidity, this is critical.
Painting. The polyurethane surface is non-porous, paint lays evenly and lasts long. One coat of acrylic primer — and you can paint with any water-based or alkyd paint.
Installation. No special tools needed: mounting adhesive, level, miter box for cutting. A 2 m long pilaster can be installed by one person in 15–20 minutes.
Buy moldings Polyurethane today can be used for any task: from the thinnest moldings to large architectural cornices and pilasters.
How not to overload a wall
The main mistake when creating an architectural wall is 'overdoing it'. Too many elements, too fine ornament, too active decor — and instead of an architectural system, you get an overloaded surface.
A few principles that always work:
-
One accent — not seven. If there are pilasters and frames — one central decorative element is enough. Corner decors — if needed, then in all frames, not just one.
-
Scale in proportion to height. Ceilings 2.5 m — thin moldings, compact pilasters. Ceilings 3.5 m and higher — everything can be enlarged.
-
Stucco in the tone of the wall — more delicate than contrasting. In a system with pilasters, stucco in the color of the wall creates an architectural effect through shadow, not through color.
-
Less, but more precise. Two pilasters with capitals at the right distance work better than five pilasters cluttering the wall.
Frequently asked questions
What to buy for an architectural wall?
Basic set: polyurethane moldings for frame panels, ceiling cornice, pilasters along the edges of the accent zone, capitals for pilasters, decorative stucco for corner accents and the central element. Plus mounting glue, paint, primer, 15% spare.
How is a pilaster different from a molding?
A molding is a profile strip that creates a line or frame. A pilaster is a three-dimensional vertical element with a body, profile, and protrusion from the wall. It reads as a flat column — an architectural, not decorative, element.
When are capitals needed?
Whenever there are pilasters. A pilaster without a capital is an incomplete element. The capital completes its top point and creates a transition to the horizontal system of the cornice or architrave.
Can pilasters be used in an ordinary apartment?
Yes. The main thing is to choose the right scale and zone: not on all walls at once, but in one accent zone. Hall, living room, study — these are ideal spaces. For small apartments — thin pilasters 60–80 mm and compact moldings.
Can pilasters be installed independently?
Yes. Polyurethane pilasters are glued with mounting adhesive. You will need: a laser or bubble level, painter's tape for marking, mounting adhesive for polyurethane, a miter box for trimming ends. No drills, dowels, or professional skills required.
Is primer needed before installation?
Yes. The wall must be clean, level, and primed. This ensures reliable adhesion of the glue. It is especially important to degrease the surface at the installation points — grease deposits reduce adhesion.
How to calculate material quantity?
Moldings: total perimeter of all frames + ceiling perimeter (for cornice) + 15% reserve. Pilasters: number of vertical positions × room height + 10% reserve. Capitals: number of pilasters. Decorative accents: number of frames and accent points.
How to paint an architectural wall with stucco molding?
First prime: one layer of acrylic primer on the wall and stucco. Then paint in 2–3 layers. If the stucco is the same color as the wall, paint everything at once. If the stucco is contrasting, first paint the wall, then carefully paint the stucco with a brush along the relief.
About the company STAVROS
All the elements for an architectural wall discussed in this article — Moldings made of polyurethane, Decorative stucco, Relief Decoration, Wooden capitals, Polyurethane Items for walls and ceilings — STAVROS produces and sells.
STAVROS is a Russian company with its own production of architectural decor from polyurethane, polystyrene, and solid wood. The STAVROS catalog offers a full range for architectural walls: moldings from 10 mm to massive cornices of 150 mm, ceiling rosettes, decorative overlays and stucco decor, wooden capitals with over 60 models, as well as classic furniture of its own production for comprehensive space design.
All STAVROS polyurethane products are made from moisture-resistant material, precise in geometry, and ready for painting without complex preparation. Wooden capitals are made using 3D milling from solid oak and beech. Installation without special tools — only glue, a level, and precise marking.
You can buy ready-made stucco matching the Baroque style. Calculate the quantity: linear meters of cornices and moldings, number of rosettes, pilasters, consoles, corner elements. Add a ten to fifteen percent allowance for trimming. for an architectural wall, buy decorative moldings и Capitals available in the STAVROS online store with Contact us to confirm shipping to your destination.