Article Contents:
- One KON-001 means one vertical post
- Confirmed characteristics of KON-001
- What is included in one kit
- Why 2400 plus 1000 does not mean a post height of 3400 mm
- Short answer before calculation
- Measurement starts after finishing
- Height is measured at several points
- The width of the opening must be usable
- The floor and ceiling line is being checked
- Finish height is close to 2800 mm
- Opening below 2800 mm
- Opening above 2800 mm
- Example for an opening width of 2000 mm
- Example for an opening width of 2400 mm
- Concrete floor and ceiling
- Wooden floor
- Drywall and suspended ceiling
- Tension Ceiling
- Underfloor heating
- Marking
- Dry installation
- Fixation
- Row control
- Count one set as the entire partition
- Measure the rough opening
- Confuse center distance with clearance
- Ignore edge margins
- Trim MLD-060 without vertical sweep
- Remove shape to reduce height
- Attach to decorative cladding
- Drill above heated floor without a diagram
- Mix materials and finishes
- Start finishing before trial assembly
- Do not recalculate nine shapes
- Calculate budget based on a single card price
- Is one KON-001 the entire partition?
- What is the height of the assembled stand?
- What is included in the KON-001 kit?
- Why does the kit include 3400 mm of molding if the post is 2800 mm high?
- How many posts are needed for an opening 2 meters wide?
- How does the center-to-center spacing differ from the clearance?
- Can the quantity be calculated by simply dividing the width by the spacing?
- Can the KON-001 be shortened for a 2700 mm ceiling?
- What to do if the ceiling is higher than 2800 mm?
- Can the KON-001 be installed under a stretch ceiling?
- Can I drill into a heated floor?
- What material is available for the KON-001?
- Are the floor and ceiling mounting brackets included in the kit?
- When should the final measurement be taken?
- Do I need to order a spare set?
- How to check the quantity upon receipt?
- Can I change the order of the figures?
- Is KON-001 suitable instead of a fence?
- How is the final cost of the partition calculated?
- Where can I check the current price and place an order?
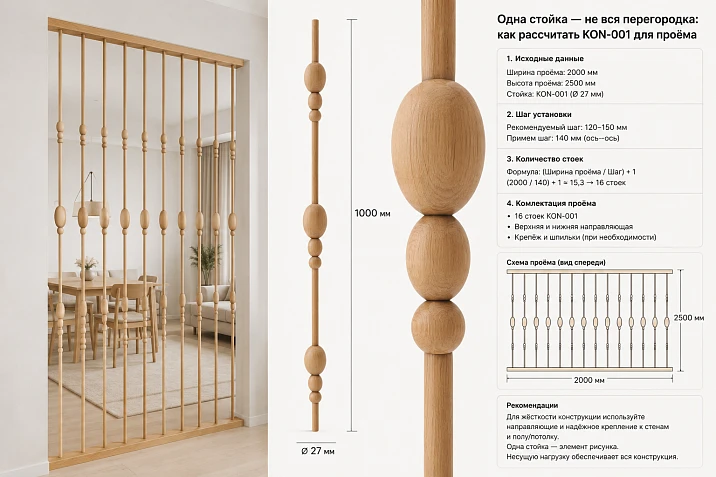
Buy a KON-001 partition set only after calculating the entire opening: one product set assembles into one vertical decorative post 2800 mm high, and does not automatically turn into the entire partition shown in the interior photo. Before placing an order, you need to measure the finished height and width, determine the number of posts, edge offsets, center-to-center spacing, actual clearance between wide figures, and the method of attachment to the floor and ceiling. This procedure protects against the main mistake — putting one KON-001 in the cart when the project actually requires five, seven, or another number of identical sets.
A buyer who is looking for where buy a wooden partition for room zoningusually evaluates the finished composition as a whole. However, KON-001 is designed differently: the image shows a possible result from a series of verticals, and the card refers to the details of one assembled rack. Therefore, the order cannot be counted by the number of rooms, cabinet width, or impression from the photo. A specification is needed where each rack has a number, axis coordinate, selected material, finish option, and reference to a specific point on the floor and ceiling.
KON-001 is useful precisely as a module. Several identical racks allow creating a transparent boundary between the hallway and living room, kitchen and relaxation area, workspace and the common part of the studio. But modularity does not eliminate design. The height of the assembled composition is 2800 mm, the maximum width of the decorative figure is 132 mm, the diameter of the wooden axis is 34 mm. These three numbers account for different things: height for matching the opening, 132 mm for visual density and minimum clearance, 34 mm for the axis structure and mounting holes of the figures.
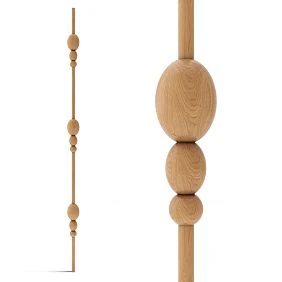
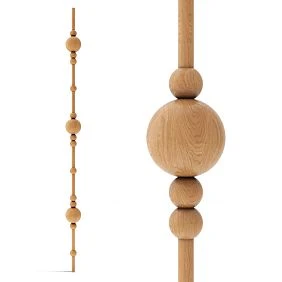
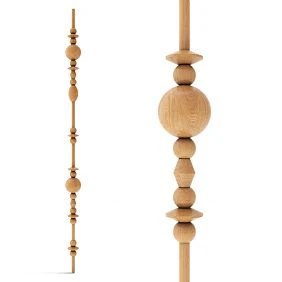
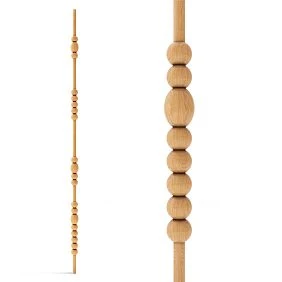
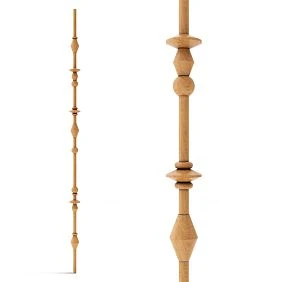
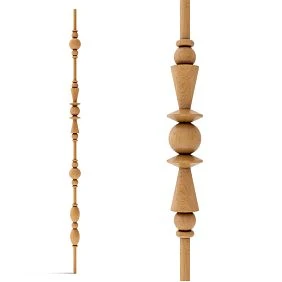
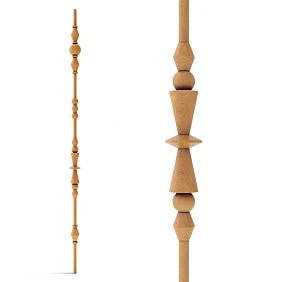
One KON-001 means one vertical rack
The main meaning of the card should be read literally: KON-001 is a set of compatible wooden parts for assembling one decorative vertical. A full-fledged partition appears only after repeating this vertical the required number of times. If the project shows six racks, the basic product requirement is six sets of KON-001, not one. Then, agreed fastening solutions, finishing, installation, delivery, and possible height adaptation are added to this base.
It is useful to review the material about how ready-made KON partition kits are arranged. It helps to understand the logic of the series but does not replace the calculation of a specific opening. For KON-001, not only the selected model and number of repetitions are important. The calculation involves room geometry, finished coatings, baseboard placement, ceiling structures, switches, furniture, and a safe passage zone.
| What the buyer sees | What actually relates to one KON-001 | What is calculated separately |
|---|---|---|
| Partition of several verticals | Details of one decorative post | Number of identical sets per opening width |
| Repeating rhythm | One set of nine figures and two segments of MLD-060 | Center-to-center spacing, edge offsets, and gaps |
| Posts from floor to ceiling | Assembled height of 2800 mm | Adaptation for other finished height |
| Finished interior product | Disassembled set of wooden elements | Fastening, embedded parts, assembly, finishing and installation |
| Total cost of the partition | Cost of one selected set | Full budget of all posts and related works |




Confirmed characteristics KON-001
For the initial specification, a few precise parameters are sufficient. They do not provide a ready-made installation project, but set the calculation boundaries. The assembled post has dimensions 2800 × 132 × 34 mm. The set is supplied disassembled. In the current card, beech and oak are available, with a "Prestige" sanding quality, and the choice of lamination is related to the future finish: for enamel or for tinting. Before payment, you need to reopen the card and check the current options, because the availability of a specific configuration and commercial terms change.
| Parameter | Confirmed value | Practical significance for the order |
|---|---|---|
| Article number | KON-001 | Specified in each line of the post list |
| Product type | One decorative post kit | The number of sets equals the number of design posts |
| Finished height | 2800 мм | Compared only with the finished height of the opening |
| Maximum width | 132 мм | Used when evaluating minimum clearance and visual density |
| Diameter of the axis and holes | 34 мм | Ensures compatibility of MLD-060 with kit figures |
| Material | Beech or oak according to the current card | Selected together with the type of future finish |
| Sanding | «Prestige» | Considered when approving final preparation |
| Supply | Disassembled | Requires a diagram, dry assembly, and installation preparation |
| Main card | KON-001 partition kit | Price, execution and order check point |
Our factory also produces:
What is included in one set
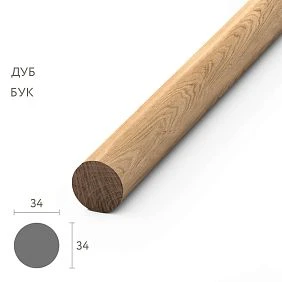
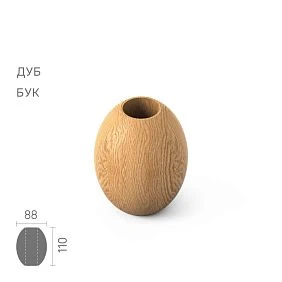
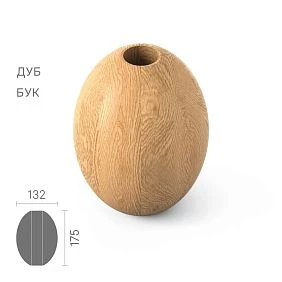
Inside KON-001 there are three groups of turned figures and two sections of MLD-060 molding. Nine figures form a decorative rhythm, and the molding with a cross-section of 34 × 34 mm works as an axis passing through holes with a diameter of 34 mm. The composition is selected as a compatible system. This saves the buyer from separately searching for each figure, but does not mean that the elements can be strung in random order or cut without a diagram.
| Element | Confirmed Size | Quantity in one set | Role in composition |
|---|---|---|---|
| KN-001 | 110 × 88 × 88 mm, hole 34 mm | 3 | Forms one of the repeating volumes of the stand |
| KN-002 | 175 × 132 × 132 mm, hole 34 mm | 3 | Sets the maximum width of 132 mm and the main large rhythm |
| KN-005 | 66 × 76 × 76 mm, hole 34 mm | 3 | Creates more compact transitions between large figures |
| MLD-060 | 34 × 34 × 2400 mm | 1 | Main part of the wooden axis |
| MLD-060 | 34 × 34 × 1000 mm | 1 | Additional segment for assembling the design axis |
When accepting one set, you need to recount not the "five positions", but the actual parts: three KN-001, three KN-002, three KN-005, and two segments of MLD-060. For a partition of six posts, this check scales: 18 pieces of each article and six segments of molding of each length are expected. It is better to perform this recount before opening all packages and before distributing parts across the work area.
Get Consultation
Why 2400 plus 1000 does not mean a post height of 3400 mm
The total length of two MLD-060 segments is 3400 mm, however the confirmed height of the assembled post is 2800 mm. The difference shows that the set contains material for design cutting and joining, not two parts that should be mindlessly butted end to end. Where the joint is located, which section is reduced, and how the figures are positioned around it are determined by the drawing and the accepted assembly scheme.
The independent decision to "cut off the extra 600 mm from the top" may disrupt the composition. The upper part will be shorter than the lower part, a large figure will move closer to the ceiling, and the attachment point will end up in an inconvenient area. Even more dangerous is removing one of the figures to reduce the height: then the product no longer matches the agreed rhythm, and adjacent posts may look visually different. For a non-standard opening, first draw up a scheme, then agree on the possibility of changing the height, and only then cut the material.
Short answer before calculation
- One KON-001 is assembled into one vertical decorative post.
- The height of a standard assembled post is 2800 mm.
- Several identical sets are needed for the partition.
- The quantity is calculated based on the finished width, edge offsets, and center-to-center spacing.
- The clearance between the posts is not equal to the center-to-center spacing.
- When calculating the clearance, the maximum figure width of 132 mm is taken into account.
- The height is measured after the floor is installed and the final ceiling level is determined.
- If the height differs from 2800 mm, the adaptation scheme is agreed upon before ordering.
- The type of mounting depends on the base and is not chosen from a single photograph.
- The total cost equals the cost of all kits plus the associated design expenses.
The measurement begins after the finishing work is completed.
Rough dimensions are suitable for a preliminary budget estimate, but not for the final order. Screed, parquet, tiles, underlayment, ceiling leveling, stretch ceiling, or decorative beams change the actual height. Baseboards, wall panels, and trim alter the available width. If the posts are ordered before these works, the installer receives a product designed for a geometry that no longer exists.
The height is measured at several points.
The floor and ceiling are rarely perfectly parallel. For a series of uprights, it is useful to take the height at each future axis, or at least on the left, center, and right. The minimum and maximum values are recorded in the list. If the difference is noticeable, you cannot simply take the average: the outermost upright may not fit into the opening, and another may have too large a top gap.
The width of the opening must be usable
The calculation includes not the entire length of the wall, but the section where the uprights can actually stand. It excludes door opening zones, access to switches, protruding baseboards, furniture fronts, curtains, radiators, and other obstacles. The usable width should be marked on the plan with clear boundaries, not written as a single number without reference.
The floor and ceiling line is checked
Uprights form a straight row only when their axes on the floor and ceiling lie in the same vertical plane. Laser marking helps to see if the top line conflicts with a duct, lighting track, or embedded element. If the ceiling structure is offset relative to the floor, installation cannot be corrected by randomly tilting the upright: a design solution is required.
| What to measure | How to record | Why this affects KON-001 |
|---|---|---|
| Finished width | From the actual left boundary to the right | Determines the available number of axes and extreme offsets |
| Height on the left | From finished floor to ceiling mounting base | Shows the geometry of the first section |
| Height at center | In the area of the middle post | Reveals sagging or difference |
| Height on the right | In the area of the last post | Does not allow focusing on only one corner |
| Position of the baseboard | Thickness, height, end line | May interfere with the end post and mounting plate |
| Ceiling structure | Material, level, presence of embedded part | Defines the permissible method of top mounting |
| Utilities | Heated floor, wiring, pipes, lighting | Prohibit drilling at specific points |
| Furniture and passage | Dimensions and opening trajectories | Determine safe extreme margins |
Three scenarios for opening height
The number 2800 mm should not be perceived as a promise of installation in any room. This is the standard height of a finished rack, which is compared with the actual object. Even a millimeter match does not eliminate the issue of the installation gap, fastening units, and assembly sequence. The rack should not be held only by accidental spreading between two surfaces.
Finished height is close to 2800 mm
This is the most straightforward scenario, but even here the base is checked first. If there is a concrete slab above, the scheme is one; if a stretch ceiling covers the rough ceiling, a pre-prepared embedded element or another agreed-upon unit is required. The floor may have tiles, parquet, stone, or a wooden base. For each material, a fastener is selected that does not damage the covering and withstands the intended installation loads.
Opening below 2800 mm
With a ceiling of 2700 mm, you cannot automatically subtract 100 mm from any end of the MLD-060. You need to see the entire vertical composition and determine the section whose change least affects the rhythm. Check the upper and lower smooth sections, the position of the axis connection, the distances between KN-001, KN-002, and KN-005, as well as the mounting location. If the project consists of several racks, one adaptation scheme is applied to the entire row so that the figures remain at the same height.
Opening above 2800 mm
With a height of 3000 mm or more, you cannot leave a random two-hundred-millimeter gap just because it can be covered by a ceiling element. Possible solutions include an individual increase of the smooth section, an additional agreed-upon element, a change of axis, or the design of a structural gap. The specific option depends on the design and fastening. The possibility of a non-standard execution must be discussed before placing the order, not after receiving the standard kit.
| Scenario | What to Check | What not to do | Preparation result |
|---|---|---|---|
| Opening corresponds to 2800 mm | Mounting gap, base, embedded parts, verticality | Assume that the post is automatically installed by expansion | Confirmed fastening scheme for standard composition |
| Opening below 2800 mm | Allowable trim line and preservation of figure rhythm | Remove figure or cut all posts in different places | Single drawing of shortened post |
| Opening above 2800 mm | Possibility of individual adjustment and gap design | Arbitrarily extending the axis with a random part | Agreed scheme of enlarged or extended structure |
| Height varies across width | Minimum, maximum, and height for each axis | Use one average value for the entire row | List of posts with individual height marks |
Center-to-center spacing and clearance are not the same number
Center-to-center spacing denotes the distance from the center of one post to the center of the adjacent one. Clearance is the free distance between their surfaces. For KON-001, the axis has a size of 34 mm, but the widest figure KN-002 reaches 132 mm. Therefore, the visual and physical density of the row is determined not only by the thin axis. When two wide figures are at the same height, the approximate clearance between them equals the center-to-center spacing minus 132 mm.
G = S − 132 mmwhere G is the estimated minimum clearance between synchronously placed wide figures, and S is the center-to-center spacing.
With a spacing of 350 mm, the approximate clearance is 218 mm. With a spacing of 400 mm, it is 268 mm. These are geometric examples, not a universal recommendation. If adjacent posts are rotated, compositions are shifted in height, or figures are arranged differently, the actual sense of density changes. Additionally, comfortable clearance depends on the task: visual zoning allows one rhythm, while protection from accidental passage of a child or animal would require a separate calculation and should not be assumed from a decorative card.
How to calculate the number of posts by width
Simply dividing the opening width by the desired spacing often gives the wrong answer because it ignores the position of the first and last axis. First, assign the edge offsets, then check how many steps fit between them. For a preliminary estimate, the model can be used:
N = floor((W − E₁ − E₂) / S) + 1
- W is the finished usable width of the area;
- E₁ is the distance from the left boundary to the axis of the first post;
- E₂ is the distance from the axis of the last post to the right boundary;
- S is the adopted center-to-center spacing;
- N is the number of posts;
- floor — rounding the result down to an integer.
The formula helps start the layout but does not replace the drawing. After calculation, check the actual right margin. If it differs noticeably from the left, center the row or change the pitch. For a symmetrical layout with a pre-selected number of posts, it is convenient to check the edge margin using the formula. E = (W − S × (N − 1)) / 2A negative result means that the selected number of posts with this pitch does not fit into the opening.
Example for an opening width of 2000 mm
Suppose the designer wants five posts with a pitch of 350 mm. Between the first and last axis there will be four steps, i.e. 1400 mm. For symmetrical installation, 600 mm remains, so each outer axis is 300 mm from the edge. The approximate clearance between wide figures is 218 mm. Then check on the plan whether the outer posts conflict with the baseboard, furniture, and passage.
Example for an opening width of 2400 mm
Six posts with a pitch of 400 mm occupy 2000 mm between the outer axes. 400 mm remains, so the symmetrical edge margins are 200 mm each. The clearance between figures 132 mm wide will be approximately 268 mm. Visually, such a row will feel more spacious than the previous one, although the number of posts is larger. This is why comparing only the number of sets is meaningless: the opening width, pitch, and figure scale matter.
| Useful width W | Quantity N | Pitch S | Calculated edge margin E | Approximate clearance G |
|---|---|---|---|---|
| 2000 мм | 5 | 350 мм | 300 мм | 218 мм |
| 2400 мм | 6 | 400 мм | 200 мм | 268 мм |
| 1800 мм | 4 | 400 мм | 300 мм | 268 мм |
| 3000 мм | 7 | 400 мм | 300 мм | 268 мм |
These lines show the methodology, not ready-made standards. Before ordering, each option must be transferred to a scaled plan. With the same clearance, compositions may be perceived differently due to room height, finish color, lighting, and adjacent furniture.
Why edge offsets determine the quality of the entire composition
The outermost post should not appear where space is "left over" after calculation. It sets the beginning of the rhythm. Too small an offset presses the figures against the wall and complicates cleaning. Too large an offset makes the partition visually unfinished. Different offsets on the left and right shift the entire composition, even if the intermediate step is perfectly maintained.
The left and right boundaries are linked to the architecture: a slope, a doorway, the edge of a ceiling box, the axis of a light fixture, a furniture group, or another clear line. Sometimes symmetry relative to the opening is less important than alignment with a sofa or kitchen island. Such a solution is acceptable if it is fixed on the plan and repeated on the floor and ceiling.
Full-scale layout before purchase
Before ordering multiple sets, it is useful to reproduce the future row at a 1:1 scale. Mark the axes on the floor with painter's tape. On each axis, make a transverse mark 132 mm wide — this helps to see the protrusion of the largest figure. On the wall or temporary film, you can mark verticals 2800 mm high. This fitting shows not the beauty of the carving, but the actual density, passage, and interaction with furniture.
- Determine the useful width of the opening.
- Mark the left and right design boundaries.
- Mark the axis of the first post.
- Postpone the selected center-to-center pitch.
- Repeat the axes up to the last post.
- Check the rightmost offset.
- At the level of wide shapes, mark the dimension 132 mm.
- Open doors, drawers, and adjacent furniture fronts.
- Pass through the zone in both directions.
- Assess the rhythm from the main entry point of the room.
If the layout seems too dense, first increase the pitch or reduce the number of posts, rather than relying on a light color to "lighten" the structure. If the row appears sparse, check for an additional post and new extreme offsets. Only after this check does the quantity become an order line.
Bill of materials for kits KON-001
For a project with multiple posts, a table linking the product kit to the architectural plan is needed. The entry "KON-001 — 6 pcs." informs the purchasing department of the quantity but does not help the installer. A complete bill of materials includes the post number, axis coordinate, height at that point, material, finish, top and bottom attachment method, and a note about adjacent objects.
| Rack number | Axis coordinate | Opening height | Set | Material and finish | Installation note |
|---|---|---|---|---|---|
| 1 | 300 mm from left border | Check on site | KON-001, 1 set | Per approved sample | Check baseboard and switch |
| 2 | 650 мм | Check on site | KON-001, 1 set | Same execution | Standard node |
| 3 | 1000 мм | Check on site | KON-001, 1 set | Same execution | Central axis of composition |
| 4 | 1350 мм | Check on site | KON-001, 1 set | Same execution | Standard node |
| 5 | 1700 мм | Check on site | KON-001, 1 set | Same execution | Check the right border |
How to calculate the total cost, not the price of one rack
The product card shows the price of the selected configuration of one KON-001. The partition budget starts by multiplying this price by the number of kits. But the final amount is broader: it includes fastening nodes, embedded parts, paint and varnish materials, test samples, delivery, lifting, assembly, installation, and possible height adaptation. If the project requires a spare rack or separate reserve elements, they are also included in the specification.
Base cost of racks = current price of one KON-001 × number of kits.
The current price cannot be fixed in a long-lived article. It is checked in the card before ordering. When comparing options, it is important to use the same configuration: beech cannot be compared with oak without considering lamination and finishing, and the cost of one rack cannot be compared with the cost of a fully installed partition. The commercial offer should separate the product, related materials, and work.
Beech or oak for KON-001
The current card shows options in beech and oak. The choice is not related to an abstract rating of wood species, but to the future surface. Beech is convenient for covering enamel, when the racks should become white, colored, or match painted furniture. Its calm texture does not distract from the turned shape. Oak is chosen when a pronounced natural texture under tinting, oil, or clear varnish is important.
It is better to order all racks of one row simultaneously in the same configuration. Natural wood inevitably differs in shade and pattern, but a single batch simplifies sorting and finishing. Before installation, the parts are laid out by racks: the closest in tone figures are distributed along adjacent verticals, and noticeable differences are not concentrated in one place.
| Criterion | Beech | Oak |
|---|---|---|
| Main visual task | Emphasis on precise shape and coating color | Emphasis on shape and natural texture |
| Typical finish | Opaque enamel, painting in a single color | Tinting, oil, clear varnish |
| Combination | Painted doors, furniture, and panels | Oak furniture, floor, and other visible wooden details |
| What to coordinate | Color, gloss level, test sample | Tone, transparency, difference in natural pattern |
| What cannot be promised | Absolutely identical shade of all details without color sampling | Photographically identical texture of all elements |
"Prestige" and surface preparation
For KON-001, the card indicates "Prestige" sanding. This is important because relief figures have transitions, edges, and areas around the hole. The prepared surface reduces the amount of manual finishing but does not eliminate incoming inspection and technological preparation for the chosen coating. Before painting, check the nap after moistening, cleanliness of the mounting channels, and absence of contamination in the glue zones.
Re-gluing for enamel and for tinting solves different tasks. Under an opaque coating, a blank without visual selection of lamellas by pattern is acceptable. For semi-transparent finishing, coordination of color and texture is more important. In the order line, you need to specify not just "oak" or "beech", but the combination of material, re-gluing, and future finish.
Paint before or after assembly
The card recommends performing painting or tinting after complete assembly and installation of elements. The practical reason lies in the mounting holes: the paint coating can change the working size and make it difficult to thread figures onto the axis. During preliminary finishing, the channel is masked, and the glue zones are left compatible with the chosen composition.
For a serial project, a control sample of one rack is useful. It checks the order of figures, the MLD-060 connection, glue, color, and gloss. After approval of the technology, the remaining kits are assembled according to one map. This is more reliable than painting nine kits and then discovering that the coating interferes with the fit or visually emphasizes the axis joint.
The base of the floor and ceiling determines the fastening
KON-001 cannot be equipped with universal fasteners for any room. Concrete, wood, drywall, stretch ceiling, and suspended system have different load-bearing capacities. The fastening must transfer the load to a reliable base, not just to the decorative layer. The top node is checked especially carefully: a visually level ceiling may hide voids, utilities, or a fabric that cannot be loaded.
Concrete floor and ceiling
Before drilling, check the thickness of the finish, the location of hidden wiring, and the permissible hole depth. The anchor type is selected based on the actual base and the design load. You cannot transfer a solution from another site just because both surfaces are called concrete.
Wooden floor
The fastener must hit the load-bearing element, not the thin cladding. The direction of the beams and the thickness of the deck are clarified in advance. If the top and bottom points do not coincide with accessible load-bearing areas, provide a distribution part or an embedded element.
Drywall and suspended ceiling
The cladding itself is not a sufficient base for a high stand. An embedded element connected to the frame or floor is needed. Its position must coincide with the axes of all KON-001, so the row is calculated before the ceiling is closed.
Stretch ceiling
The stand is not attached to the fabric. Before installing the ceiling, prepare a rigid node on the rough base and coordinate the passage through the decorative plane. If the fabric is already installed, coordinate the work with a ceiling system specialist.
Heated floor
Drilling the floor without an as-built diagram can damage the heating circuit. In the project, either safe installation zones are left in advance, or another agreed-upon node is chosen. The phrase "we'll drill shallowly" does not replace checking the location of utilities.
What to purchase and coordinate together with the kits
The partition does not end with purchasing the required number of KON-001. For a complete result, installation and finishing materials will be needed, and sometimes embedded parts or additional elements made for a specific base. The list cannot be compiled using a universal template, but it must be finalized before work begins so that installation does not stop due to a lack of glue, paint, or a prepared ceiling unit.
In the catalog you can explore materials for assembling and finishing a wooden partition. The link helps to assemble a related cart, but the compatibility of a specific composition with beech, oak, the chosen enamel, and operating conditions must be checked separately.
| What to add to the project | Why this is required | What to Check | When to coordinate |
|---|---|---|---|
| Glue for connecting shapes and the axis | Fixing elements in the accepted sequence | Compatibility with wood, coating, and room conditions | Before assembling the control panel |
| Temporary fixation | Holding shapes during polymerization | To prevent tape or clamp from damaging the surface | When developing assembly technology |
| Top and bottom fasteners | Reliable fixation of the panel in the design position | Base material, utilities, embedded parts | Before closing the floor and ceiling |
| Primer and finish coat | Color, protection, and uniform appearance of the partition | Test coating, gloss, layer compatibility | Before ordering the entire finishing batch |
| Masking of mounting channels | Preservation of hole diameter during finishing | No coating in adhesive and mounting area | Before applying the finish |
| Embedded parts | Transfer of fastening to the supporting structure | Coordinates of all axes and accessibility after finishing | At the stage of ceiling and floor work |
| Packaging and protection at the site | Preservation of polished figures | Separate marking of racks and absence of part friction | Before delivery and storage |
Layout drawing is more important than interior picture
An interior photo shows an image but does not contain object dimensions. It cannot be used to determine the number of racks, pitch, distance to the wall, or mounting method. For ordering, a simple top view plan and vertical elevation are needed. The plan marks the opening boundaries, rack axes, pitch size, and edge offsets. The elevation marks the finished height, figure positions, and top and bottom nodes.
Accurate files and available materials for products can be conveniently checked in the section where you can download STAVROS element drawings. Even if a ready-made product drawing is available, the project layout remains the responsibility of the customer and installation team: the factory file describes a part, not a specific room.
Technical specification for order KON-001
A good request allows the manager to see not only the article number but also the task. The earlier non-standard height, ceiling system, and number of identical verticals are indicated, the lower the risk that the commercial offer will be calculated as a simple supply of piece goods.
| Request field | What to write | Why this is important |
|---|---|---|
| Article number | KON-001 | Eliminates confusion with another model in the series |
| Quantity | Number of complete sets per list | Defines the product volume of the entire partition |
| Finished width | Size of the usable area in millimeters | Allows checking the layout |
| Finished height | Minimum, maximum, and values along axes | Indicates the need for adaptation |
| Edge offsets | From boundaries to the first and last axis | Fixes the position of the row |
| Center-to-center spacing | Accepted distance between adjacent axes | Links quantity and visual density |
| Desired clearance | Estimation between wide figures | Helps verify zoning expectations |
| Material | Beech or oak according to the current card | Connects with finishing and budget |
| Re-gluing and finishing | For enamel or tinting, color and gloss | Determines appearance and preparation |
| Floor and ceiling | Base material, embedded parts, utilities | Needed for selecting the installation scheme |
| Delivery | Address, lifting, storage on site | Allows organizing the acceptance of kits |
Assembly of one control upright
Before serial assembly of several KON-001, it is useful to make one control vertical. It confirms the order of shapes, the length of smooth sections, the connection point of MLD-060, the fit of elements, the selected glue, and the finishing technology. The control upright becomes a physical reference for the remaining kits.
- Check the composition of one set by item numbers and quantity.
- Arrange elements in the design sequence.
- Check the top and bottom of the composition.
- Assemble the stand without final fixation.
- Measure the actual height.
- Check the position of the axis connection.
- Compare the assembled stand with the vertical layout.
- Test the selected adhesive technology on an acceptable area.
- Perform a trial finish or paint.
- Record the approved distances and take photographs.
After approval, the control rack must not be disassembled unnecessarily or used as a random source of spare parts. It is needed for comparison with the series, especially if installation is performed by multiple craftsmen or on different days.
How to transfer the project to the installer
The installer must receive not only boxes and a photo. The minimum set of documents includes an axis plan, a rack list, a vertical layout, a fastening diagram, a materials list, an approved color sample, and photos of the control assembly. Each KON-001 or its packaging indicates the rack number corresponding to the plan.
In the section Tips for installing STAVROS wooden products General recommendations for preparation and finishing can be checked. However, site-specific responsibility remains with the designer and the installation organization: the base, fasteners, and concealed utilities must be inspected on site.
Installation sequence for a row of racks
Sequence is important because an error on the first axis is carried over to the entire row. First, secure the design boundaries and check the laser plane. Then transfer the axes to the floor and ceiling. Before fixing all racks, it is useful to install the outer and central verticals, assess the rhythm, and then fill in the gaps.
Marking
Axes and rack numbers are marked on the floor. These same coordinates are vertically transferred to the ceiling. The alignment of the plane, edge offsets, and spacing is checked. All holes are compared with the utility diagram.
Dry installation
The rack, assembled without final finishing, is placed at the design point and checked for verticality, clearance, and proximity to furniture. If the series is height-adjusted, each rack is checked against its own mark.
Fixation
The type of fastening is determined by the project. First, the top and bottom nodes are confirmed, then the post is fixed without creating an axis bend. The next vertical is installed only after checking the step from the actually fixed axis, not from the inaccurate edge of the shape.
Row control
After several posts, the overall plane, alignment of shape heights, and visual line are checked. The error cannot be left until the last one.
Posts near the TV zone
Near the TV, the partition should not fall into the screen field or create irritating reflections. The plan checks the viewing angle from the sofa, the placement of acoustics, wires, and sockets. Turned shapes create an active light-and-shadow rhythm, so too dense a step near the screen can compete with the image.
The edge of the row can be tied to the boundary of the cabinet or wall panel. If the axis of the first post is accidentally shifted by a few centimeters, the composition looks like an attached element. A clear reference to furniture turns the row into part of the architecture.
KON-001 in a studio and home office
To separate the workspace, the posts preserve daylight access and create a psychological boundary. However, they do not provide acoustic isolation and do not completely hide the work area. The step calculation depends on the desired transparency. Before ordering, it is useful to place temporary vertical tapes and see how visible the desk is from the main part of the room.
Commercial interior: salon, showroom, restaurant
In a public space, the calculation is supplemented by operational requirements, object norms, and traffic intensity. Posts can mark a waiting area, visitor route, or exhibition boundary, but they cannot be used as an uncalculated barrier where a special protective structure is required. The designer checks stability, accessibility, fire safety requirements, and maintenance conditions.
For a large series, a single batch, control swatch, and marking are especially important. Differences in the position of figures are more noticeable in a long row, so height lines are fixed with a template. Installation should be accepted not only up close, but also from the main visitor traffic point.
How KON-001 differs from a regular slatted partition
A straight slat has a constant cross-section along its height. KON-001 alternates a thin 34 mm axis with turned figures up to 132 mm wide. Therefore, it cannot be calculated using the rules of a simple row of identical bars. The gap varies in height, the chiaroscuro is more active, and the alignment of figure levels becomes part of the composition.
| Criterion | KON-001 | Ordinary straight slat |
|---|---|---|
| Silhouette | Variable, with turned volumes | Constant cross-section |
| Maximum width | Determined by KN-002 and reaches 132 mm | Equal to the width of the slat |
| Clearance | Varies in height | Usually constant |
| Rhythm calculation | By axes and levels of figures | Primarily by the same pitch |
| Assembly | From an axis and individual figures | From solid straight elements |
| Visual character | Decorative, figurative | Linear, neutral |
When a different set is needed instead of KON-001
KON-001 doesn't have to fit every opening. If the 132 mm width creates too dense or too calm a rhythm, it's worth comparing all KON wooden post sets. An overview helps evaluate other silhouettes, but the choice is still verified with full-scale marking.
Another option is needed when the project requires a more direct geometry, a different scale of shapes, or a composition better related to existing furniture. Changing the model after the step calculation is not allowed without re-checking: another rack may have a different maximum width, so the clearance and number of kits will change.
How assembly works using the example of a neighboring model
To understand the general logic, you can read the material about how a wooden rack is assembled from constructor elements. This is mounting support, not a replacement for the KON-001 diagram. The composition, order of shapes, and dimensions of a specific article must be taken from its card and drawing.
Delivery and storage of multiple kits
Transportation conditions and cost calculation are checked in the section delivery of wooden partition kits. For the project, it is important to report the number of kits, address, access restrictions, floor, and lifting conditions in advance. Disassembled parts are easier to transport, but they cannot be mixed without labeling.
On site, boxes are stored in a dry room, protected from dirt and sharp changes in conditions. Parts are not piled up. Long MLD-060 are placed on a flat support, and shapes are kept by kits until incoming inspection. If the material needs to acclimate, the mode and duration are determined according to the manufacturer's recommendations and finishing technology.
Incoming inspection before assembly
| Check | What to do | What to fix |
|---|---|---|
| Article number | Verify KON-001 on documents and packaging | Compliance with order |
| Number of sets | Recount complete sets | Shortage before installation begins |
| Shapes | Check three each of KN-001, KN-002, and KN-005 | Quantity and visible damage |
| Axes | Check MLD-060 with lengths 2400 and 1000 mm | Straightness and integrity |
| Material | Verify beech or oak | No mixing of versions |
| Preparation | Inspect the grinding and mounting channels | Areas requiring approval |
| Texture and tone | Arrange elements under uniform lighting | Distribution to adjacent racks |
| Documents | Match the invoice with the project bill of materials | Batch readiness for assembly |
Before drilling and irreversible finishing, disputed areas are photographed next to the packaging label and part number. This allows for a detailed discussion of the issue with the supplier. After mixing all kits and applying the coating, it is more difficult to determine the element's origin.
Partition passport after approval
Once the geometry and finish are approved, it is useful to compile the project into a short passport. It remains with the client after installation and aids in repairs, replacement of a damaged part, or expansion of the row. The passport includes the article number, number of kits, material, finish, actual pitch, edge offsets, post height, type of fastening units, and installation date.
The final plan, photographs of hidden anchors before ceiling closure, and a list of materials used are attached to the passport. Without this data, subsequent maintenance turns into a re-survey. The underfloor heating and wiring diagram is especially valuable: it prevents dangerous drilling during future work.
What to do if one post is damaged
Damage to one vertical post does not always require dismantling the entire partition, but the solution depends on the fastening and the nature of the defect. First, determine whether the post can be safely removed without affecting adjacent ones. Then, check the project passport and find out which part is damaged: MLD-060, KN-001, KN-002, or KN-005.
A new element made of natural wood may differ in shade from an already finished series. Therefore, when ordering, it is useful to discuss spare parts or preserve the approved coating composition. If an entire post is replaced, it is laid out next to the adjacent ones before final finishing, and the tone is matched to the actual sample. Complete visual matching of new wood to the old coating cannot be guaranteed without a test swatch.
Care and operational logic
The care method is determined by the finish coating, not just the wood species. A surface painted with enamel is cleaned with products compatible with the specific paint system. Oil, varnish, and tinting require their own recommendations. In any case, relief figures are easier to clean with a soft, non-abrasive tool, avoiding moisture accumulation in the joints.
During operation, periodically inspect the upper and lower nodes, especially after repair work, shifts in the ceiling structure, or floor replacement. The decorative post should not be used as a piece of sports equipment, a handrail, or a support for heavy hanging objects, unless such use is provided for by a separate calculation.
Mistakes that turn a purchase into a rework
Counting one kit as the entire partition
This is the most expensive expectation error. The KON-001 card refers to one post. The fix is simple: draw all axes before the cart and get the final number of complete sets.
Measure the rough opening
After the floor and ceiling, the height changes. Ordering based on the rough size creates a risk of trimming on site or a noticeable gap. The final list is formed based on finished marks.
Confusing center-to-center pitch with clearance
A pitch of 350 mm does not mean a free distance of 350 mm. At the KN-002 level, approximately 218 mm will remain. The error makes the partition denser than the customer expected.
Do not account for edge offsets
Even the correct pitch does not save a row if the first post is against the wall and a large random gap remains on the right. Edge axes are assigned before calculating the quantity.
Trim MLD-060 without vertical unfolding
The total length of the segments is not equal to the finished height. Cutting on site without a diagram can shift the shapes and ruin the repeatability of the row. First, one control composition is approved.
Remove a shape to reduce height
Such a pitch changes the model. If a change in composition is actually required, it is agreed upon as an individual composition and repeated identically on all posts.
Attach to decorative cladding
Drywall, stretch fabric, and thin panels do not replace a load-bearing embedded part. The mounting assembly must be connected to a reliable base.
Drilling over a heated floor without a diagram
Even a small depth can damage the circuit. Safe points are determined by as-built documentation or inspection, not by assumption.
Mixing materials and finishes
Beech for enamel and oak for tinting serve different purposes. Random mixing within a single row is noticeable in texture and color. The execution is recorded in each order line.
Starting finishing before a trial assembly
The coating may get into the mounting channels and alter the assembly. First, check the geometry and technology, then proceed to the series.
Not recounting nine pieces
Five product items in the composition do not mean five physical parts. One set contains nine pieces and two axle segments. Acceptance is based on the actual quantity.
Calculating the budget based on a single card price
For a partition, multiply the price of one set by the number of posts and add associated costs. Otherwise, the commercial expectation will be several times lower than the reality.
Who KON-001 is really suitable for
- A buyer who needs a transparent decorative border, not a solid wall.
- A project where expressive turned rhythm is important, not neutral straight slats.
- A room with a prepared base for top and bottom mounting.
- A customer ready to take final measurements and compile a list of uprights.
- An interior where beech under enamel or oak under a clear finish is combined with other finishes.
- A serial project where a control upright and unified markings ensure repeatability.
- A commercial space where decorative zoning is designed by a designer.
When it's better to choose another solution
- Sound insulation, airtightness, or complete visual closure is needed.
- A sliding, folding, or mobile partition is required.
- It is impossible to prepare a reliable ceiling or floor base.
- The passage is so narrow that figures 132 mm wide obstruct movement.
- The interior requires a strict constant cross-section without turned volumes.
- The height is non-standard, and the possibility of adaptation has not been agreed upon.
- The posts must serve as a protective barrier without a separate structural calculation.
In these cases, it is worth choosing a different model, straight slats, a solid structure, or a specially designed railing. An honest refusal of KON-001 is better than trying to make a decorative kit perform an unconfirmed function.
How to check the cart before payment
- The number of KON-001 matches the number of axes on the approved plan.
- One agreed material has been selected for all kits.
- The re-gluing matches the future coating.
- The opening height was measured after final finishing.
- Non-standard height has been confirmed in writing.
- Edge offsets and center-to-center spacing are specified in the schedule.
- The approximate clearance has been calculated considering a width of 132 mm.
- Embedded parts and fastening units are prepared for the actual substrates.
- Related materials are included in the procurement.
- Delivery, lifting, and storage conditions have been verified.
- The installer has received the drawings and rack numbering.
- Current price, availability, and lead time have been rechecked in the product card.
How to order KON-001 on STAVROS
A commercial route starts not with the cart button, but with measurement. After the final measurement, an axis plan is drawn up, the quantity is selected, and the height scenario is checked. Then, in the card, you can order KON-001 posts for the entire opening, choosing the available execution and specifying design questions to the manager.
If the opening differs from the standard 2800 mm, there is a stretch ceiling, underfloor heating, or a complex embedded element, these circumstances are reported before payment. The buyer needs not a formal set of boxes, but an agreed specification. It is this that connects the product, architecture, and installation.
How to accept a finished partition after installation
Acceptance should not be limited to the phrase "the posts stand straight." The entire logic laid out in the specification is checked: the number of verticals, axis coordinates, edge offsets, figure height, verticality, fastening units, joint quality, and finish. The row is inspected under both daylight and artificial light, because side lighting better reveals displacement of turned elements and surface differences.
| Control point | How to check | Sign of an accepted result |
|---|---|---|
| Number of posts | Compare with the approved specification | All axes are present, no extra verticals |
| Edge offsets | Measure from design boundaries to axes | Left and right positions match the plan |
| Center-to-center spacing | Check several adjacent intervals | Rhythm does not accumulate error towards the end of the row |
| Verticality | Check with a level or laser | Posts are not tilted and lie in the same plane |
| Height of shapes | Compare horizontal lines KN-001, KN-002 and KN-005 | Identical elements match in level |
| Surface | Inspect under side light | No unpainted areas, drips, or accidental damage |
| Mounting | Check against the design node | No play, axis bending, or load on decorative cladding |
| Passage and furniture | Open adjacent doors and walk along the route | The composition does not interfere with the use of the room |
A slight deviation of one post may be almost imperceptible up close, but disrupts the entire row when viewed from afar. Therefore, inspection proceeds from general to specific: first evaluate the partition axis and rhythm, then individual joints and finishing. All comments are tied to the post number from the list, not described with words like "third approximately on the right."
Control of equal height of figures in a long row
KON-001 is perceived as a single partition due to the repetition of turned volumes. If KN-002 on one post turns out to be higher than the adjacent one, the eye will notice a break in the horizontal line even with correct center-to-center spacing. To avoid this, the installer uses not only individual dimensions of each post, but also common height marks of the figures.
At the control station, the distance from the finished floor to the characteristic points KN-001, KN-002, and KN-005 is measured. These values are transferred to a vertical development. In case of non-standard height, it is decided in advance which smooth section is changed so that the decorative levels are preserved. If the floor has a difference, the project must determine the priority: repeating the levels relative to the room's horizontal or the same reference of each composition to the local floor. Such a decision cannot be left to the installer without instructions.
Reordering after a few months
Sometimes the partition is expanded after installation: two posts are added, the row is continued in an adjacent opening, or a second zone is designed. For a repeat order, it is not enough to remember the article KON-001. The material, re-gluing, preparation quality, coating recipe, figure order, height, and date of the original batch are needed. Natural wood and finishing materials may differ, so new elements are first compared with the existing partition.
The project passport simplifies repeat purchasing but does not guarantee an absolute shade match. The practical approach is to order new parts, perform a test coating, and only after comparison under the same lighting finish the entire additional group. New posts are best placed as a separate completed section or distributed throughout the project deliberately, rather than placing one noticeably different vertical in the geometric center of the old row.
Why the calculation must be approved by one responsible specialist
In a complex project, dimensions are often passed on by the designer, measurer, furniture maker, ceiling team, and installer. If each person changes one digit verbally, the final basket ceases to correspond to the object. One current set of documents and a responsible specialist who records changes are needed. After adjusting the width, the quantity, pitch, and edge offsets are recalculated. After changing the ceiling, the height and top node are checked. After replacing the material, the finish and cost are updated.
The version of the list must have a date. Old plans are marked as invalid so that the procurement department does not order six sets according to the initial scheme when the final one has five. Such an order seems formal only until the first mistake: the cost of an extra KON-001, repeat delivery, and downtime of the installation team are usually significantly higher than the time spent on version management.
FAQ: calculation and order of KON-001
Is one KON-001 the entire partition?
No. One set contains parts for assembling one vertical decorative post with a height of 2800 mm. The partition in the photo usually consists of several such posts. Therefore, the quantity of KON-001 equals the number of verticals on the approved diagram. Before ordering, the useful width, edge offsets, and center-to-center pitch must be determined.
What height does the assembled post have?
The standard height of KON-001 is 2800 mm. This value is compared with the finished height from the finished floor to the mounting base of the ceiling. If the room is lower or higher, you cannot independently consider the change obvious: you need to agree on a trimming, extension, or gap design scheme.
What is included in the KON-001 kit?
One set includes three KN-001, three KN-002, three KN-005, one MLD-060 2400 mm long, and one MLD-060 1000 mm long. All figures have holes for a 34 mm axis. The kit is supplied disassembled, so the assembly order and technology must be prepared in advance.
Why does the kit have 3400 mm of molding if the post height is 2800 mm?
The total length of the two MLD-060 segments is indeed 3400 mm, but this is not the finished height. The material is used according to a cutting and joining scheme considering the placement of the figures. The excess length cannot be removed at a random location. The exact geometry is determined by the drawing or an agreed assembly map.
How many posts are needed for an opening 2 meters wide?
There is no single answer without step and edge offsets. For example, five posts with a center-to-center step of 350 mm can be symmetrically placed on a width of 2000 mm with edge offsets of 300 mm each. But this is just an example. On a real site, passage, furniture, baseboard, switches, and desired transparency are checked.
How does the center-to-center step differ from the clearance?
The step is measured between the centers of adjacent posts. The clearance is between their surfaces. At the level of the widest figure KN-002 with a size of 132 mm, the approximate clearance equals the step minus 132 mm. With a step of 350 mm, this is about 218 mm. The actual perception depends on the placement of the figures along the height.
Can the quantity be calculated by simply dividing the width by the step?
This calculation ignores the left and right margins. It's better to first set the row boundaries, then determine the number of intervals and check symmetry. After calculation, all axes are drawn on the plan and full-scale on the floor.
Can the KON-001 be shortened for a 2700 mm ceiling?
The possibility of adaptation must be confirmed before ordering. You cannot simply cut off 100 mm from either end or remove a shape. The trimming must preserve the order of elements, the same pattern height on all posts, and space for the mounting bracket.
What to do if the ceiling is higher than 2800 mm?
Check the possibility of a custom design, an additional smooth section, or another agreed solution. Do not randomly extend an axis with an unconfirmed part. The project must show where the added length is located and how the top and bottom nodes are designed.
Can the KON-001 be installed under a stretch ceiling?
The post cannot be attached to the ceiling fabric itself. A rigid embedded element or a node connected to the rough ceiling is required. Its position is agreed upon before the stretch ceiling installation. If the system is already in place, the solution is developed together with the ceiling installer.
Can I drill into a heated floor?
Only after confirming safe zones. The heating circuit layout must be known before marking the posts. Without it, drilling is dangerous. The project may include pre-left areas or another mounting node, but there is no universal solution for all floors.
What material is available for KON-001?
The current product card shows beech and oak. Beech is usually chosen for covering enamel, oak when visible texture under tinting, oil, or varnish is required. Before ordering, you need to re-check the availability of the specific design and link the material to the lamination and finish.
Does the kit include fasteners for the floor and ceiling?
The card describes wooden figures and MLD-060 for one rack. Fastening to a specific base must be designed separately and verified when ordering. Concrete, wood, drywall, stretch ceiling, and heated floor require different solutions.
When should the final measurement be taken?
After installing the finished floor and determining the final ceiling level. Baseboards, ceiling boxes, embedded elements, and the position of adjacent furniture must also be known. At an early stage, a preliminary calculation is acceptable, but not the final cutting and installation layout.
Is it necessary to order a spare kit?
There is no universal requirement. The decision depends on the series size, site conditions, possibility of reordering, and requirements for finish consistency. For a large commercial project, a reserve may be reasonable, but it is included in the specification deliberately, not as a random percentage.
How to check the quantity upon receipt?
First, count the complete kits, then the contents of each: three figures KN-001, KN-002, and KN-005, as well as two MLD-060 of different lengths. Material, sanding, and visible damage are checked before mixing parts and applying coating.
Can the order of the figures be changed?
The card allows creating your own composition, but any change must be by design. For a series of racks, the order is fixed during a control assembly and repeated identically. Randomly rearranging one figure disrupts the overall height line and rhythm of the partition.
Is KON-001 suitable as a railing?
KON-001 is designed for decorative posts and zoning. Using it as a protective barrier, balustrade, or structure bearing special loads requires separate calculation and confirmation. It cannot be assigned functions not included in its intended purpose.
How is the final cost of the partition calculated?
The current price of one selected KON-001 is multiplied by the number of posts. Then fasteners, embedded parts, finishing, delivery, assembly, installation, and adaptation for non-standard height are accounted for separately. Therefore, the price of one item does not equal the budget for the entire composition.
Where can I check the current price and place an order?
The price, available materials, and commercial terms are checked in the main KON-001 product page immediately before ordering. It is best to attach an opening plan and a list of posts in the request so that the order is discussed as a complete project, not as a single random product item.
Conclusion: first the opening, then the number of kits
The photo of KON-001 shows a result made of several verticals, but the cart counts individual kits. An informed order begins with acknowledging this difference. One KON-001 provides one decorative post 2800 mm high; the entire partition requires repeating the module along calculated axes.
Before purchasing, you need to measure the finished opening, determine the edge offsets, choose the center-to-center spacing, check the clearance relative to the 132 mm width, address the non-standard height issue, and prepare the mounting. Then choose beech or oak, finish, number of complete kits, and related materials. This sequence turns an impressive photo into an accurate list understandable to the customer, manager, and installer.
STAVROS allows you to order a ready-made agreed set of shapes and axes without selecting compatible parts individually. But the quality of the final partition is determined not only by the product: it depends on measurement, calculation, and installation. Therefore, the final commercial step is — view the composition of the KON-001 kitverify the current executions and arrange exactly the number of racks specified in the approved plan.