Article Contents:
- First, the answer: an opening of 453 × 250 mm is too tight for CH-001
- What exactly the buyer gets in CH-001
- Why the dial deceives the scale
- How to measure an already finished molding frame
- Do not trust a single measurement in the center
- Record the width and protrusion of the profile
- Find the real center of the composition
- Three trial options instead of one random indent
- How to make an accurate working mockup
- Checking from three distances
- Side angle cannot be replaced by a frontal photo
- Check the ability to remove the watch from the hanging bar
- Access to the battery is also part of the calculation
- Geometric center and optical center
- The frame does not have to repeat the proportions of the clock
- The same material is not always necessary
- Order the profile after checking the template
- A simple profile gives more room for intricate carving
- Painting finishes but does not fix proportions
- "Standard" and "Prestige" are not color or finish
- For enamel and for tinting — different tasks
- Living room with a console
- Dining Room
- Study or Library
- Hall and staircase area
- Bedroom
- Increase the inner opening
- Replace a profile that is too wide
- Skip the inner frame only for the central field
- Choose a different clock model
- Don't add corner decor automatically
- Check the proximity to the console and mirror
- First mark the outline, then the mounting point
- Check the wall base
- Finish painting before installing the mechanism
- Prepare the battery in advance
- Dense enamel
- Translucent finish
- Patina and relief highlighting
- Clocks for a free wall and clocks inside a frame are different scenarios
- A picture frame is not the same as a frame for three-dimensional clocks
- Product size does not equal mounting opening size
- "Prestige" does not mean painted clocks
- Mistake 1. Measuring only the dial
- Mistake 2. Leaving clearance only "to fit"
- Mistake 3. Not accounting for molding depth
- Mistake 4. Forgetting to remove from the hanging rail
- Mistake 5. Ordering clocks before choosing material and finish
- When it's better to choose another option
- Step 1. Save the frame measurements
- Step 2. Approve the template
- Step 3. Choose the CH-001 execution
- Step 4. Check the kit
- Step 5. Coordinate logistics
- Step 6. Proceed to purchase
- Control points are more convenient than a long description
- The glare on the glass changes the viewing point
- Narrow wall space between doors
- Tall boiserie panel
- Frame above a low console
- Frame within a group of three fields
- Commercial space
- Check the hanging bar separately
- Secure the product with photographs
- Can the inner opening be made exactly 453 × 250 mm?
- What indentation from the clock to the molding is considered correct?
- How to quickly check if CH-001 will fit into a ready-made frame?
- Why consider the depth of 49 mm?
- Can I rely on the dial size?
- Is the mounting hardware included in the set?
- Is the battery included?
- Can the clock be removed if there is a small gap on top?
- What to choose for CH-001 — beech or oak?
- How is "Standard" different from "Prestige"?
- Are CH-001 supplied painted?
- Can the clock and molding be painted in one color?
- Will a polyurethane frame fit wooden clocks?
- When is it better to choose a wooden frame?
- Can CH-001 be installed inside boiserie?
- What to do if the frame is already too small?
- Do I need to order the clock before installing the molding?
- How to understand if the wall is overloaded with decor?
- Where to see other carved clocks and home goods?
- Can I order a project for the entire wall?
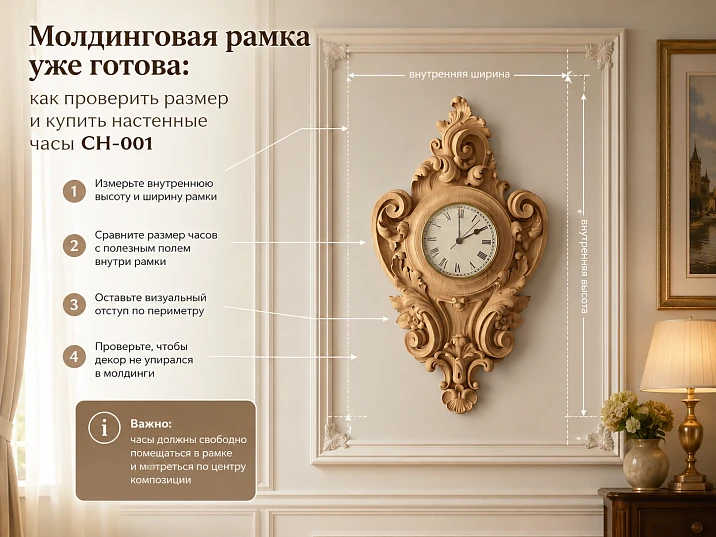
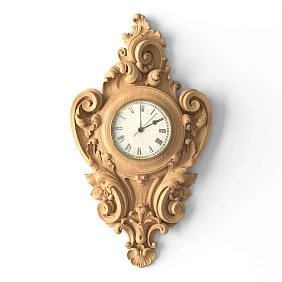
The molding frame is already glued, the wall is painted, but the clock for the center of the composition has not been ordered yet. On the screen, the carved wall clock seems compact: the eye catches the dial, and the openwork wooden case is perceived as a light frame. But the full size of Versailles CH-001 is 453 × 250 × 49 mm. If the inner opening of the frame is only slightly larger than these values, the clock may physically fit but look cramped, overlapped by the profile, or shifted relative to the center.
Customer who plans buy wooden clock CH-001, must check not only the width and height of the free field. It is necessary to take into account the full carved contour, the depth of the case, the protrusion of the molding itself, the position of the hanging plate, and the movement by which the clock is removed from the wall. This is where the difference arises between the phrases "fits into the opening" and "looks free in the frame and is installed without rework."
The task of this article is not to assign one universal indentation. It does not exist: a thin wooden frame, a wide polyurethane profile, and complex boiserie require different proportions. It is much more reliable to take real measurements, make a CH-001 template at 1:1 scale, check three options for the free field, and only then order CH-001 from beech or oak. This order helps preserve the already completed finish and not turn the center of the wall into a cramped decorative niche.
First, the answer: an opening of 453 × 250 mm is too tight for CH-001
The full size of CH-001 is 453 mm in height, 250 mm in width, and 49 mm in depth. These numbers describe the external dimensions of the clock, not the recommended internal size of the molding frame. If the frame has an opening of exactly 453 × 250 mm, there is no free space left between the profile and the extreme points of the carving.
The physical coincidence of dimensions creates several problems at once. Even a slight deviation of the frame from a rectangle becomes noticeable. A shift of the mounting by a few millimeters cannot be compensated. When viewed from the side, the protruding molding may visually cover part of the carved edge. Hanging the clock and then removing it for mechanism maintenance will be more difficult. As a result, the clock and the frame cease to be read as two coordinated elements and merge into one heavy contour.
Therefore, the internal frame size is calculated not as "watch size plus a technical millimeter," but as a composition with a deliberately left margin. The size of this margin is chosen on the wall, not from an abstract table. The wider and more relief the molding, the more carefully you need to look at the side angle and the shadow boundary. The larger the wall itself, the freer the frame around the watch can be.




What exactly the buyer gets in CH-001
Versailles CH-001 — carved wall clock made of solid wood with a decorative case in the style of French Baroque. The ornament is built on acanthus leaves, S-shaped lines, rocaille curves, and floral motifs. Such a case cannot be evaluated only by the size of the round clock capsule: it is the carved frame that sets the full scale of the object and determines how much air will be needed inside the molding frame.
| Parameter | Confirmed value | What to check before ordering |
|---|---|---|
| Model | Versailles CH-001 | Not to be confused with CHPU-001 and other clocks in the series |
| Type | Carved wall clock | Evaluate the full case, not just the dial |
| Size | 453 × 250 × 49 mm | Check the height, width, and depth against the finished frame |
| Body material | Beech or oak | Match the material with the future finish |
| Surface preparation | "Standard" or "Prestige" | Choose the volume of subsequent manual preparation |
| Finish | The case is supplied unpainted | Pre-approve the enamel, tint, or other design finish |
| Mechanism | Quartz, with smooth sweep | Provide access for maintenance |
| Mounting | Mounting bar is included in the set | Check the position of the bar and how to remove the clock |
| Power supply | AA battery is purchased separately | Add battery to installation preparation |
The table is important not just for listing specifications. It shows that the order consists of several decisions: material, preparation quality, finish, mounting position, and compatibility with the existing wall. Request "buy wooden wall clock" leads to the product card, but the final decision is made only after checking the entire composition.
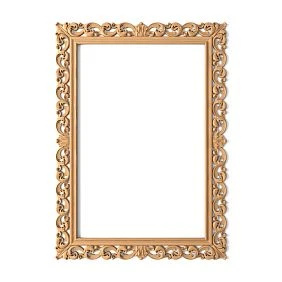
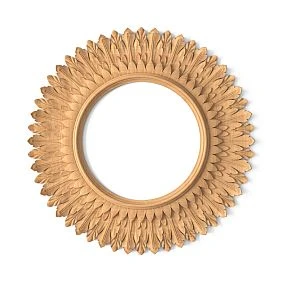
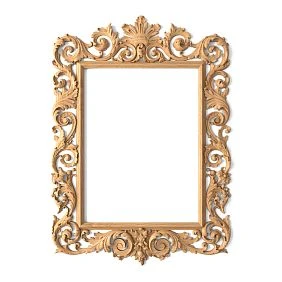
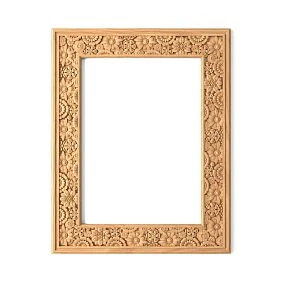
Our factory also produces:
Why the dial deceives the scale
In the product photo, a person first sees the white dial and brass bezel. The brain remembers the familiar round shape and unconsciously evaluates the watch based on it. The carved leaves around it seem like a background, although they form the outer points of the dimensions.
On the wall, the situation changes. The molding frame forms a strict rectangle, and each protrusion of the ornament begins to be compared with the straight line of the profile. If the edge of an acanthus leaf approaches the molding, the gap is read instantly. If the watch is slightly shifted, the asymmetry becomes more noticeable than on a free wall. Therefore, the size of the round capsule is not suitable for calculating the opening.
There is another trap. The buyer measures the free field with a tape measure in the center, but does not check the frame at the top, bottom, and corners. The molding may be installed with a slight deviation, the internal dimensions may differ, and a protruding decorative element may take up part of the space. Before you find out the price of the Versailles CH-001 watch and place an order, it is useful to record at least six values: width at the top, center, and bottom, as well as height on the left, center, and right.
Get Consultation
How to measure an already finished molding frame
Do not trust a single measurement in the center
One size shows only the distance between two points. It does not tell whether the opposite sides of the frame are parallel and whether the internal corners are the same. For a finished composition, measure:
-
internal width along the top line;
-
internal width through the assumed center of the clock;
-
internal width along the bottom line;
-
internal height on the left;
-
internal height along the clock axis;
-
internal height on the right.
The calculation takes the smallest value for each axis. If the top width is 390 mm, the center is 394 mm, and the bottom is 388 mm, the real constraint becomes 388 mm. You cannot rely on the convenient 394 mm and hope that the case will "move" into the wider part: centering and the carved contour do not allow you to freely ignore the narrow zone.
Fix the width and protrusion of the profile
The width of the molding affects the visual weight of the frame, and the depth affects the side view. Two profiles with the same frontal width can protrude from the wall differently. A flat profile leaves the clock open from the side. A voluminous profile creates a deep shadow line and, with a small gap, seems to hover over the carving.
Place a ruler or a small square perpendicular to the wall and measure the maximum protrusion of the molding. Then compare it with the depth of CH-001 — 49 mm. This does not mean that the molding must necessarily be shallower than the clock. What matters is different: the side silhouette of the frame should not cover the carved case from the main viewing points and interfere with movement when removing the clock.
Find the real center of the composition
The geometric center of the frame is not always equal to the visual center of the wall. There may be a console nearby, a doorway, a sconce, or an adjacent frame. First, determine what the clock should be centered relative to: the inner rectangle, the furniture below it, the entire wall, or a group of panels.
If a console is installed under the frame, the viewer most often associates the clock with it. The offset of the clock relative to the furniture will be more noticeable than a slight deviation from the center of the wall. If the frame is part of a boiserie system, the panel axis takes priority. In projects where a full architectural layout is required rather than a separate frame, it is useful to look at wall panels with moldings and compare how central objects work within several connected fields.
Opening formula: simple arithmetic without false precision
For a preliminary calculation, it is convenient to use two formulas:
Inner width of the frame = 250 mm + left offset + right offset.
Inner height of the frame = 453 mm + top offset + bottom offset.
The formula does not specify what the offsets must be. It only translates the visual decision into measurable values. For example, if a trial layout showed that 50 mm on each side looks calm, the inner width will be 350 mm. If 70 mm is required at the top and 60 mm at the bottom, the inner height will be 583 mm.
This is an example calculation, not a standard for CH-001. On a wide wall, 350 mm may look cramped, while inside a narrow panel it may seem quite spacious. What needs to be checked is not the number itself, but its relation to the width of the molding, the scale of the wall, neighboring frames, and furniture.
Three trial options instead of one random indent
Make three paper rectangles or use painter's tape to mark three options for the inner margin:
| Option | Character of composition | When to check especially carefully |
| Dense | The clock takes up most of the frame | Narrow panel, thin molding, close viewing |
| Medium | The carving reads separately from the profile | Most living rooms and standalone frames |
| Spacious | Around the clock, a noticeable field of wall | High ceiling, large wall, wide boiserie |
Do not assign fixed millimeters to options in advance. First, apply the clock template, then move the frame boundaries or simulate them with tape. Take photos from one, three, and five meters. In photos, tightness is often more noticeable than during direct inspection, because the image flattens the composition and intensifies the comparison of contours.
The CH-001 template at 1:1 scale solves more than visualization
How to make an accurate working mock-up
Take thick paper, cardboard, or several glued sheets. First, construct the outer rectangle 453 × 250 mm. Mark the vertical axis and center. If a product drawing is available, transfer the outer contour from it. If a photo is used, do not pass off an approximate drawing as precise geometry: for checking fit, the full dimension is sufficient, and for assessing the free field, you can cut out a conditional silhouette inside the confirmed rectangle.
On the back of the template, mark the intended hanging-strip area. The exact position needs to be verified against the drawing or with the manager before installation. The template should help determine not only the clock's location but also the free space for upward movement when hanging and removing.
Checking from three distances
From one meter, joints, side shadows, and the proximity of the carving to the molding are visible. From three meters, the overall proportion of the clock and frame becomes clear. From five meters, the entire wall is assessed: adjacent panels, furniture, cornice, baseboard, and doorways.
If the clock looks good only up close but gets lost from the far end of the room, the frame may be too loose or the profile itself too active. If the composition is expressive from a distance but the carving almost touches the molding up close, you should enlarge the opening or choose a flatter profile. The template allows you to see this before purchase and not risk the finished finish.
A side angle cannot be replaced by a frontal photo
Attach a 49 mm wide cardboard strip to the template to simulate the depth of the case. This is a simple three-dimensional mockup. Look at the frame at an angle from the places where people enter the room, sit at the table, or walk along the corridor.
If the molding covers part of the cardboard strip, the real case will also appear visually recessed. Sometimes this effect is intentionally used for a niche, but a regular decorative frame should keep the object readable. If in doubt, it is better to order a wall design project, attaching photos, frame dimensions, and a floor plan.
Depth 49 mm: why the clock should be tried on not only by the facade
A finished molding frame has its own relief. The profile can protrude from the wall by a few millimeters or form a noticeable architectural molding. When CH-001 is placed inside, two three-dimensional shapes begin to compete for the foreground.
If the inner gap is small, the molding casts a shadow on the edge of the carving. In daylight, this shadow moves, and one side of the clock may appear heavier than the other. In evening lighting from a sconce or ceiling chandelier, the contrast becomes even stronger. Therefore, after the frontal fitting, turn on the main lighting scenarios and evaluate the wall from the side.
Check the ability to remove the clock from the mounting plate
The mounting plate is included with CH-001. For installation, the case is lifted, aligned with the mount, and lowered into the working position. The reverse movement is required for removal. If the top edge of the clock almost touches the molding, there may not be enough space to lift it, even if the case fits in a static position.
On the template, mark not only the final position, but also the upward movement path. The minimum amount of this movement cannot be invented without a mounting drawing. It must be checked against the product, official diagram, or clarified with a manager. In the finished frame, it is better to provide a free mounting zone than to hope to install the clock "diagonally" and damage the painted profile.
Access to the battery is also included in the calculation
The AA battery is purchased separately. When the battery needs to be replaced, the clock will need servicing. If the mechanism design allows access without full removal, this still needs to be checked on site. If the case is removed, the issue of top clearance and hand comfort arises again.
The frame around the clock should not turn a simple battery replacement into dismantling the decorative profile. Before ordering, imagine not only the installation day, but also regular use a few months later.
Carved case and rectangular frame: how to find visual balance
CH-001 has a complex silhouette. In the upper and lower parts, the ornament is perceived differently than on the sides. Therefore, identical margins in all directions do not always look the same. The top edge may seem closer due to active decor, and the side margins may seem wider due to the narrower case in the middle part.
This is not a geometry error. This is a feature of visual perception of a shaped object inside a strict rectangle. First, center the confirmed dimension of 453 × 250 mm, then evaluate the silhouette. Do not mechanically shift the clock just because one carved branch seems heavier. Any shift must be checked with a photo of the entire wall.
Geometric center and optical center
The geometric center is found by the intersection of the diagonals of the internal opening. The optical center may be perceived slightly differently due to the ornament, furniture, and light. The working order is as follows:
-
place the template strictly at the geometric center;
-
take a frontal photo;
-
check alignment with furniture and adjacent frames;
-
if necessary, shift the template by a small amount;
-
compare the two shots without relying on memory.
If the change is barely noticeable, it is better to keep the geometric axis: it simplifies layout and reduces the risk of error. If the composition is clearly tilting, the decision is agreed upon before drilling the wall.
The frame does not have to match the proportions of the clock
The CH-001 proportion is vertically elongated. The molding frame can be even more elongated, almost square, or fit into a large vertical panel. It is important that the empty space looks intentional.
A too narrow vertical frame emphasizes the height of the clock but reduces side breathing room. A wide frame makes the clock a standalone central piece, but requires a connection with furniture below. A tall panel suits a wall with a cornice and baseboard, where the clock becomes part of the overall architecture.
When a wooden frame supports CH-001
A wooden molding is appropriate when the clock case and frame should be perceived as related items. This can be the same opaque enamel, coordinated staining, repetition of furniture material, or a unified wood tone.
In the catalog you can Buy wooden wall moldings and select a profile by width, relief, material, and length. However, matching the word "wood" does not guarantee integrity. Beech, oak, MDF, dense enamel, and translucent finishes produce different visual results.
The same material is not always needed
Oak clocks can be placed in a frame painted along with the wall. Beech clocks under enamel can pair with oak furniture if the color and composition are coordinated. The material is chosen not for formal matching, but for the future finish and the item's role.
If you want to preserve the oak texture on CH-001, the molding can be made neutral and painted in the wall color. Then the frame works as architecture, and the clock as a wooden object. If the entire composition should be monochrome, beech under enamel provides a clear route to dense painting, but the specific preparation should be selected in the card.
Order the profile after checking the template
When the frame is not yet mounted, first hold the clock template against the wall and only then order the wooden molding for the frame. This order allows you to change the inner opening without fitting the clock to a randomly chosen rectangle.
If the frame is already ready, the task is reversed: measure the existing field and check whether it requires a thinner profile or partial rework. Sometimes it is enough to increase the top gap by raising only one horizontal. Sometimes the proportions are so off that it is wiser to reassemble the frame entirely.
When polyurethane molding is more convenient than wood
A polyurethane frame more often becomes part of a painted wall. It does not have to echo the wood of the clock. Its task is to set a contour, linking CH-001 with the cornice, baseboard, and neighboring frames.
You can buy polyurethane moldings for a monochrome wall scheme, where the profile is painted in the color of the base or highlighted with contrast. Before purchasing, compare not only the width but also the depth of the relief: a voluminous profile has a stronger effect on the side view of the clock.
A simple profile gives more air to intricate carving
CH-001 already contains rich baroque ornamentation. If the frame repeats complex florals, two decorative layers may conflict. A calmer profile often helps the carved clock read more clearly. This is not a ban on ornament, but a question of hierarchy: one element should be primary, the second—supporting.
For walls where corner overlays, rosettes, or additional fields are used around the central frame, you can Buy polyurethane wall decor and assemble a system. But the center with the clock should first be checked separately so that the overall composition does not become cramped.
Painting completes but does not fix proportions
The same color can tie together different materials, but it does not increase the physical gap. If the molding almost touches the carved case, painting in one tone can even enhance the effect of a stuck-together detail. First, size and depth are decided, then color.
Beech or oak: choosing the case for a finished wall
CH-001 is available in beech and oak. The choice of material is related to the finish and surroundings. Beech has a calmer grain and is often chosen for dense opaque painting. Oak has a pronounced porous texture that makes sense to preserve with a translucent finish.
This does not mean that beech cannot be tinted or oak cannot be painted. It's about visual logic. If a white, cream, deep green, or other dense enamel is planned, a pronounced texture may become secondary. If the clock is meant to match an oak console, countertop, or doors, the natural oak grain becomes part of the design.
"Standard" and "Prestige" are not a color or a coating
Both options indicate the quality of surface preparation. "Standard" includes machine processing and allows for a larger amount of subsequent manual finishing. "Prestige" provides for more detailed sanding, especially noticeable on complex carvings. Before choosing, it is useful to look at the quality of preparation of wooden products and correlate it with the painter's requirements.
You cannot write only "CH-001 white" in the order. The case is supplied without final painting, and the future color is a separate stage of the project. The specification records the material, sanding quality, and preparation option, then finishing materials and application technology are agreed upon.
Under enamel and under tinting — different tasks
In the card of a specific configuration, you need to check the veneer option. For enamel, a blank is chosen when the surface will be covered with a dense opaque layer. For tinting, wood that is more consistent in color and texture is needed, since a semi-transparent finish preserves the grain.
If the frame is already painted, take a sample of its color and hold it against a photo or wood sample. A monitor does not replace physical comparison: warm white, cool white, and gray-beige next to a brass rim are perceived differently.
How to tie a clock to the interior without overloading the wall
Living room with console
In the living room, CH-001 often becomes the vertical center above the console. The frame should connect the items but not constrain them. Check three axes: the center of the clock, the center of the tabletop, and the center of the inner opening. If the console is wider than the frame, the composition can be stable. If the frame is wider than the furniture, an additional base will be needed—for example, adjacent panels or symmetrical sconces.
Do not place the bottom edge of the clock too close to items on the tabletop. A vase, lamp, or tall sculpture may overlap the lower carving. The template allows you to arrange accessories before ordering the clock.
Dining room
In the dining room, the clock is visible from different angles. Here, the 49 mm depth and the molding protrusion are especially important. Check the view from the entrance, from the end of the table, and from the main seating positions. If the frame looks good only from the front, wide side shadows may be annoying during daily use.
Office or Library
In the study, CH-001 can be paired with wooden cabinets, panels, and the desk. An oak case with a translucent finish will support the natural texture; painted beech can become a light accent on a dark wall. In a rich environment, it is better to leave free space around the clock, otherwise the fine carving will blend with the book facades and decorative frames.
Hall and staircase area
In a passage space, the clock is viewed on the move. The detailed composition should be readable from a distance, and the molding should not create sharp visual boundaries near doors. Consider the opening of the door panels, the direction of movement, and reflections in mirrors.
Bedroom
In the bedroom, the smooth movement of the mechanism is especially appropriate, but the installation location should be chosen not only for beauty. Check whether the case falls into the direct beam of a sconce and whether glare appears on the glass lens. A free frame with soft contrast is usually perceived as calmer than a dense baroque outline.
CH-001 and CHPU-001: do not confuse the wooden case with the ready-made white version
Similar names create a risk of error. CH-001 is a wooden carved clock, available in beech and oak, with a choice of surface preparation and subsequent finishing. CHPU-001 is a separate model made of a different material and with a different purchasing scenario.
| Criterion | CH-001 | CHPU-001 |
| Basis of selection | Wood, material, and future finishing | Ready-made interior version made of another material |
| Working with color | The body is supplied without final painting | The specific version of the card is checked |
| Connection with furniture | Can be coordinated with beech, oak, and wooden decor | Convenient to combine with painted molding |
| Frame check | Dimensions and depth of 49 mm are mandatory | Dimensions are checked separately on their own card |
| When to choose | Natural wood or individual finish is required | Need a ready-made white decorative option |
Do not transfer dimensions from CH-001 to CHPU-001 or vice versa. If a ready-made white finish is required, open the card and buy ready-made white CHPU-001 clocks after checking its own parameters.
The frame is ready, but CH-001 does not fit: four reasonable solutions
Increase the internal opening
If the molding can be carefully removed without damaging the wall, horizontal or vertical elements are moved. First, determine the new size using a template, then mark the lines. Do not start dismantling until all four boundaries are approved.
Replace a profile that is too wide
Sometimes the outer size of the frame cannot be changed, but the internal opening can be increased by using a narrower molding. This is especially useful if the frame fits into the grid of adjacent panels. The new profile must match the style and depth of the rest of the system.
Abandon the inner frame only for the central field
In complex boiserie, the clock can be placed in the central panel without an additional small rectangle. The architectural function is performed by the boundaries of the panel itself. This solution preserves air around the carving and does not require reducing CH-001.
Choose a different clock model
If the frame is part of a completed historical interior and remodeling is unacceptable, it is more honest to choose a clock with a smaller overall size. Do not buy CH-001 and then cut, cover, or hide part of the case. First, review wall clocks and wooden items and compare the sizes of available items.
What to order together with CH-001 to make the wall look complete
Clocks rarely exist on the wall completely alone. Even if the frame is already made, moldings for adjustment, wall decor, finishing materials, or design assistance may be needed nearby. But the set does not need to be assembled on the principle of "the more, the richer." Each additional element should solve a specific task: enlarge the opening, connect the clock with furniture, repeat the ornament, or complete the overall wall system.
| What to add to the order | Why is this needed | When it is especially appropriate | What to check |
| Wooden molding | Assemble or adjust the frame in the same material logic as the clock | The clock and frame should share the same enamel or tint | Width, depth, material, length of slats |
| Polyurethane molding | Match the clock with the painted wall composition | The frame is part of the molding system | Profile depth and inner opening |
| Wall decor | Emphasize corners or the center of the composition | A large wall looks empty around a single frame | Does the decor conflict with the CH-001 carving |
| Finishing materials | Prepare wood and profile for a unified finish | Enamel, tinting, or patina is planned | Material and substrate compatibility |
| Design project | Check the proportions of the entire wall | There are several frames, furniture, sconces, and a cornice | Provide exact dimensions and photographs |
| Delivery service | Receive the hours and long-length profile without splitting the order | The set includes several categories | Package dimensions and delivery address |
If the frame needs to be reassembled, you can choose and order a wooden molding together with the clock. When the profile should become part of a painted wall, it is more rational to choose a molding for a decorative frame. For a complex composition with several panels, corners, and central accents, it is useful to order a wall composition with a clock even before installation.
Do not add corner decor automatically
Corner overlays can make the frame more expressive, but near CH-001 they increase the density of the ornament. First, evaluate the clean rectangle with the clock template. Then add paper silhouettes of the corners one by one. If attention starts jumping between the clock case and the corners, it is better to keep the frame calm.
Check the proximity to the console and mirror
If there is a console under the clock, its width and decorative richness affect the size of the frame. Too ornate furniture plus a complex CH-001 case plus an ornamented molding can create visual noise. One of the elements should be calmer than the others.
A mirror in a neighboring frame enhances light and doubles part of the decor through reflection. Check whether the clock is visible in the mirror at a random angle. Sometimes the reflected silhouette makes the wall more interesting; sometimes it creates a feeling of two competing centers.
Mounting logic: from painted wall to clock without damage
CH-001 cannot be mounted by only aligning with the center of the dial. Layout is based on the mounting plate and the confirmed external dimensions. The preparation sequence should be discussed before drilling.
First mark the dimensions, then the mounting point
Place the 453 × 250 mm template in the approved position and outline the reference points with painter's tape. Mark the top, bottom, left, and right edges. Only after this, transfer the mounting position. This method allows you to see where the entire case will be after hanging.
If you start with one hole and then discover that the carved edge approaches the molding, moving the fastener will leave marks on the finished wall. Inside a light frame, even minor repairs can be visible under side lighting.
Check the wall base
The type of fastener depends on the wall: concrete, brick, drywall, wooden panel, or other structures require different solutions. The mounting plate is included with the clock, but the fasteners for the base must be selected based on the actual wall and load. A universal dowel cannot be assumed without checking the base.
If the molding frame is assembled on a wall panel, clarify the thickness of the cladding, the presence of voids, and the location of embedded supports. The mounting must hold the clock, not just the decorative layer.
Finish painting before installing the mechanism
Dust from sanding, primer, and paint must not get on the clock capsule and mechanism. The case is finished separately if the project technology does not require otherwise. After the coating is fully dry, install the mechanism and hang the clock.
Do not attempt to paint the case while it is already inside the tight frame. It is difficult to paint the side areas, control drips, and keep the wall clean. The finish must be completed before final installation.
Prepare the battery in advance
The AA battery is not included. This small detail is often remembered after installation. Add the battery to the mounting kit along with the level, tape measure, template, and fasteners. Then the clock can be started immediately after hanging and the smooth operation of the mechanism can be checked.
Case finishing: how not to lose the relief and the connection with the frame
The CH-001 case is supplied without a final finish. This is an advantage for a custom project, but also a responsibility: too thick a layer can smooth out fine details, unsuccessful tinting can emphasize unevenness, and an accidental color can break the connection with the frame.
Dense enamel
Enamel is suitable when the clock should match the color of the wall, molding, furniture, or door. A light tone lightens a complex ornament. A dark tone makes the silhouette graphic and enhances shadows. A rich color turns the clock into an independent accent.
Before painting, do a test on a separate wood sample with similar preparation. The color on the screen and on the real carving differs: recesses look darker, protrusions catch highlights. The more complex the relief, the more important a physical test coat is.
Translucent finish
Tinting preserves the wood grain. For oak, this is especially expressive, but the color must harmonize with the furniture and the frame. Exact matching of shades of different wooden elements is not always possible due to natural variability. It is better to build the composition on a related palette than to try to achieve an artificially identical pattern.
Patina and relief highlighting
Patina can highlight acanthus leaves and rocaille curves, but its excess makes the case heavier. If the frame already has a patinated profile, repeating the effect on the clock should be tested with a sample. Two heavily aged elements within a small opening may blend together.
To select compositions, you can to select materials for installation and finishing, but the specific technological system must match the wood, primer, and chosen finish.
How not to confuse CH-001 with similar tasks
Clocks for a free wall and clocks inside a frame are different scenarios
On a free wall, CH-001 can have a large field around them, and a small positioning error is less critical. Inside a rectangle, every millimeter is compared to the boundaries. Therefore, photos of clocks without a frame do not provide a ready answer for your composition.
A picture frame is not equal to a frame for a three-dimensional clock
A painting usually lies almost in the plane of the wall. CH-001 have a depth of 49 mm. A profile that perfectly surrounds a flat image may overlap the side contour of the clock. When choosing a molding, be sure to evaluate the depth.
Product size is not equal to mounting opening size
453 × 250 mm is the dimension of CH-001, not a ready recommendation for the frame. The internal opening should include the chosen visual and mounting clearances. This difference must be recorded in the task for the installers.
"Prestige" does not mean painted clocks
"Prestige" — quality of polishing. The finish does not appear automatically. If the customer expects a white finished body, you need either to arrange painting separately, or consider a different version, after checking the CHPU-001 card first.
Mistakes that cause the finished frame to be redone
Mistake 1. Measuring only the dial
The dial is smaller than the full carved body. Calculating based on the round capsule leads to a frame that is too narrow. Always use the external dimension of 453 × 250 mm.
Mistake 2. Leaving a gap only "so it fits"
The technical gap does not replace the visual field. The clock may fit but look cramped. Check the template from the actual viewing distance.
Mistake 3. Not accounting for the molding depth
The front dimensions may match, but the side profile may overlap the thread. Measure the protrusion size and make a three-dimensional cardboard mockup with a depth of 49 mm.
Mistake 4. Forgetting to remove from the mounting plate
A tight top clearance prevents lifting the body. Check the movement path before drilling.
Error 5. Ordering the clock before choosing the material and finish
The phrase «later we'll paint
Who CH-001 inside the frame really suits
The solution suits the owner of a classic or eclectic interior, where the clock should become the central decorative item. It is appropriate in the living room above a console, in a study with wooden furniture, in a hall with boiserie, in a dining room, and in a representative commercial space.
CH-001 is especially useful when a case made of beech or oak with a custom finish is needed. The ability to choose the preparation allows the clock to be linked to existing furniture, doors, moldings, and the overall palette.
When it is better to choose another option
If the inner frame is noticeably smaller than the required field and cannot be reworked, it is worth considering more compact clocks. If the client needs a fully finished white case without separate painting work, CHPU-001 should be compared. If the interior is minimalist and does not imply active carving, the baroque ornament of CH-001 may be too rich.
An honest refusal of an unsuitable model is better than trying to force it into a ready-made opening. Size, style, and maintenance must work together.
How to place an order without losing parameters
Step 1. Save the frame measurements
Record the minimum width, minimum height, molding depth, distance to furniture, and center position. Add front and side photos.
Step 2. Confirm the template
Place the 453 × 250 mm dimension inside the frame. Check the tight, medium, and loose margin options. Record the chosen position with a photo and dimensions.
Step 3. Select the CH-001 version
The specification line must include:
-
article CH-001;
-
size 453 × 250 × 49 mm;
-
beech or oak;
-
"Standard" or "Prestige";
-
surface preparation option;
-
quantity;
-
agreed method of further finishing.
Step 4. Check the set
The mounting bar is included in the set. Element AA is purchased separately. Wall fasteners are selected based on the base. Finishing materials and moldings are ordered as separate items.
Step 5. Coordinate logistics
If long-length profiles are ordered together with the clock, calculate in advance the delivery of the clock and moldings. Packaging and transportation of the item and linear materials differ, so it is better to fix the address and order composition at the same time.
Step 6. Proceed to purchase
After checking the template, you can buy CH-001 with the selected configuration. If the wall requires a wider classic configuration, additionally select classic decor for the interior, keeping the clock as the main center of the composition.
Technical specification for the installer: which dimensions cannot be left verbally
The phrase "hang the clock centered" is insufficient. A technician can honestly perform geometric centering and still get a composition that looks offset relative to the console or adjacent frames. Before starting work, prepare a short sheet with dimensions and a photo of the approved template.
The task specifies the internal width and height of the frame, the clock axis from the floor or ceiling, the distance from the center to the nearest corner, the position of furniture below, the maximum size of 453 × 250 mm, and a depth of 49 mm. A separate line states: "check the possibility of removing the housing upward after installation." Such a note prevents a situation where the technician leaves only a static gap.
Control points are more convenient than a long description
Place four painter's marks on the wall at the extreme points of the future housing and one at the center. For a complex frame, add a mark for the upper mounting zone. Photograph the layout together with a tape measure. After drilling, this data will allow checking the position before hanging the clock.
If the wall will be painted after marking, transfer the coordinates to the plan. Do not leave a paper template taped under tight tape for a long time: traces may remain on fresh paint.
How to check the frame in daylight and evening lighting
The same opening looks spacious during the day but cramped in the evening. The reason is shadows. Diffuse daylight softens the depth of the molding. Directional wall sconces emphasize protrusions and create a dark band around the clock.
Check the template in at least three modes: in daylight, under main ceiling lighting, and with local lights on. If sconces are located on the sides of the frame, ensure the shadows are symmetrical. Different lamp wattages or unequal distances to the profile can visually shift the center.
Glare on the glass changes the viewing point
The glass lens of the clock capsule reflects light. If a window or bright chandelier is directly opposite, the dial may be poorly visible from the main area of the room. Before ordering, stick a circle of glossy paper or a small mirror in the center of the template. This simple test will show the direction of the glare.
If the reflection interferes, sometimes it is enough to raise or lower the clock within the frame. But changing the position must preserve free space around the thread. Therefore, light is checked before final approval of the opening.
Practical scenarios: one clock size, different walls
Narrow wall space between doors
Here, the main constraint becomes width. CH-001 takes up 250 mm, but the frame requires additional space and its own profile. First, measure the clear distance between the casings, then subtract the width of the molding on both sides, and only then evaluate the internal opening.
If after calculation only a few millimeters remain around the clock, it is better to abandon a separate frame. A freely placed case on a painted wall can look more convincing than a cramped rectangle.
Tall boiserie panel
In a tall panel, the constraint more often arises not in height, but in connection with the lower paneled field and the cornice. The clock cannot be automatically placed in the middle of the entire height: it may end up too high for reading the dial. First, determine a comfortable visual axis, then distribute the free space above and below.
If complex finishing is planned, you can order a boiserie project with a central clock and provide the exact size of CH-001. The project page should not replace measurements, but rather serve as a way to coordinate all elements of one wall.
Frame above a low console
Low furniture leaves a large vertical field. There is a temptation to lower the clock to connect it with the countertop. But the lower carved part should not collide with vases, lamps, and seasonal decor. Arrange the tallest items on the console, then check the pattern.
Frame within a group of three fields
In a three-part composition, the central frame is usually wider than the side ones. CH-001 should support this hierarchy. If all fields are the same, the clock may make the center feel tighter than the neighboring frames. Sometimes it is enough to enlarge only the central field, keeping the overall height and profile.
Commercial space
In a living room, restaurant, or hotel, the clock is viewed from a large distance. Small gaps are not readable, but the overall silhouette and contrast matter more. The free field can be wider, and the finish more contrasting. At the same time, access to the battery and mounting should remain simple for staff.
Acceptance of CH-001 before painting and installation
After receiving, do not rush to hand over the body to the painting workshop. First, verify the article number, size, material, preparation quality, and completeness. Measure the external dimension and again apply the product or its packaging outline to the frame.
Wood is a natural material, so visual surface features are assessed considering the chosen preparation and future finish. An unpainted blank cannot be compared to the final visualization as a finished color. The task of acceptance is to confirm the shape, size, execution, and absence of damage that affects the finish.
Check the mounting bar separately
Make sure the included mounting bar is present. Before installation, apply it to the wall and check the length, position, and accessibility of fastening zones. Do not drill the base through the decorative body.
Document the product with photographs
Take frontal photos, side views, and close-ups of the carving before sending it for finishing. This helps control the result and avoid confusing the original wood features with damage that appears later.
Care after installation: the frame should not interfere with everyday life
A carved case collects more dust than flat clocks. If the molding is too close, it will be difficult to reach the side areas with a soft brush. A free gap is needed not only for aesthetics and removing the case, but also for maintenance.
Use a dry soft brush or a suitable method agreed with the finish coating. Do not use compounds that could damage the paint, tint, or patina. Maintenance specifics depend on the chosen finish, so the painter's recommendations should be kept with the specification.
When replacing the battery, place a soft clean surface under the clock. Remove the case in the intended direction, without resting the carving on the molding. After servicing, check that the clock has returned to the marked axis and has not shifted inside the frame.
Additional commercial check before payment
Before finalizing the order, open the CH-001 card and check the current configuration. Do not transfer the price, availability, or lead time from the old estimate into the order: these data may change. The order line must match the selected material and preparation.
Then compare the list of related purchases. Are new moldings needed? Is wall decor required? Has the battery been ordered? Is there suitable wall mounting hardware? Is delivery of long profiles needed? The commercial route is considered complete only when the set can be installed and maintained, not just received at the warehouse.
If the frame and clock belong to different renovation stages, keep a single project file: dimensions, product links, paint sample photos, axis positions, and contractor contacts. This discipline protects against accidental replacement of the profile or material after several weeks.
Quick decision matrix before ordering CH-001
Sometimes a long check seems complicated, although the solution can be reduced to a few branches. Use this matrix after measurements and the template, not instead of them.
| Situation | Solution | Next action |
| The opening is noticeably larger than the template, the profile does not overlap the frame | CH-001 fit the scale | Approve the center, material, and finish |
| There is enough space on the sides, the frame cannot be lifted from the top | Insufficient mounting zone | Increase the top clearance or change the frame |
| Frontally everything is free, on the side the molding covers the thread | The profile is too deep or the gap is small | Choose a flatter molding or enlarge the opening |
| The clock fits, but gets lost within the large field | The frame is too loose for the current composition | Add furniture support, adjacent fields, or reconsider the frame size |
| The clock ornament conflicts with the corner decor | The decorative hierarchy is disrupted | Simplify the frame and keep CH-001 as the main accent |
| A ready-made white body is needed without separate finishing | The wooden CH-001 may not match the scenario | Compare the parameters of CHPU-001 |
| The frame cannot be redone, and the template looks cramped | The model does not fit the finished opening | Choose other clocks by full dimensions |
After the matrix, return to the product card and re-check the execution. Even the correct size does not compensate for an error in material or surface preparation. For wooden clocks in a finished interior, four coordinated parameters remain decisive: the full contour, the mounting zone, the future finish, and the connection with the surrounding decor.
Do not make a decision based only on one successful photo of the template. The photo must be confirmed by an actual inspection under the main lighting. If two options seem equally convincing, choose the one that leaves more freedom for installation and maintenance: visual emptiness can be supported by furniture or additional architecture, while a too-tight opening can only be fixed by redoing it.
FAQ: questions about CH-001 and the molding frame
Can the internal opening be made exactly 453 × 250 mm?
No, such an opening matches the full dimensions of the clocks and leaves no free margin. It does not compensate for frame tolerances, complicates centering, and may interfere with removing the case.
What indentation from the clocks to the molding is considered correct?
There is no single mandatory value. The indentation is chosen according to the template, taking into account the width and depth of the molding, the wall size, neighboring frames, furniture, and viewing distance.
How to quickly check if CH-001 will fit into a ready-made frame?
Measure the minimum internal dimensions of the frame and compare them with the overall size of 453 × 250 mm. Then make a 1:1 template and check the actual free space.
Why consider the depth of 49 mm?
The depth determines the side profile. A voluminous molding with a small gap can visually cover the edge of the case and create a heavy shadow.
Can I rely on the dial size?
No. For the frame, the full carved case is important, not just the round clock capsule.
Is the mounting included in the kit?
The hanging bar is included with CH-001. Wall mounting hardware is selected separately based on the base material.
Is the battery included?
No. The AA battery is purchased separately.
Can the clock be removed if there is a small gap at the top?
This depends on the actual movement on the canopy bar. The upper mounting zone needs to be checked against the template, drawing, or clarified with the manager before drilling.
What to choose for CH-001 — beech or oak?
Beech is convenient for projects with dense enamel and a calm surface. Oak is chosen when planning to preserve a pronounced wood texture. The decision is linked to the finish and surrounding furniture.
How does 'Standard' differ from 'Prestige'?
These are surface preparation levels. "Prestige" includes more detailed manual sanding of complex relief, while "Standard" may require more finishing work before the final coat.
Are CH-001 units supplied painted?
The body is supplied without final painting. Color, tinting, patina, and protective coating need to be planned separately.
Can the clock and molding be painted in one color?
Yes, if the materials and preparation are compatible with the chosen finishing system. First, do a physical color sample, because the clock relief and molding profile reflect light differently.
Will a polyurethane frame suit a wooden clock?
Yes. The frame can be part of a painted wall, and the wooden body can be the central piece. Materials do not have to match if color, scale, and depth are coordinated.
When is it better to choose a wooden frame?
When you need to match the wood, general enamel, or tinting of furniture and clocks. Before ordering, check the width and profile projection.
Can CH-001 be installed inside a boiserie?
Yes, if the panel has sufficient internal size, a free mounting area, and a suitable base for fastening. The center of the clock should be aligned with the axis of the entire panel.
What to do if the frame is already too small?
You can enlarge the opening, replace the profile with a narrower one, abandon the additional inner frame, or choose a different clock model. The solution is first checked with a paper layout.
Do I need to order the clock before installing the molding?
It is safer to first approve the CH-001 dimensions with a template, then determine the frame. If the molding is already installed, the clock is ordered only after checking the finished opening.
How to understand if the wall is overloaded with decor?
Remove corner overlays and additional accessories from the layout, leaving the clock and frame. Then return elements one by one. If attention stops being held on CH-001, there is too much decor.
Where can I see other carved clocks and home goods?
You can choose carved clocks and wooden goods in the profile section, comparing the full size of each item.
Can I order a project for an entire wall?
Yes. For a complex composition with boiserie, frames, clocks, sconces, and furniture, you can to order a wall design project and provide the specialist with exact room dimensions and selected items.
Final decision: clocks are chosen by the full outline, not by the dial
Before ordering CH-001, check four things: the minimum inner frame size, free visual space around the 453 × 250 mm dimension, side compatibility with the 49 mm case depth, and the ability to remove the clock from the mounting rail. Then choose beech or oak, preparation quality, and future finish.
If the frame is already ready, don't try to convince yourself that the case will 'somehow fit.' Make a 1:1 template, look at it from the main points of the room, and compare several offsets. Such a fitting takes less time than redoing a painted molding after clock delivery.
At STAVROS, you can order CH-001 with a wooden or polyurethane profile, wall decor, and composition design. The main result of a comprehensive selection is not the number of details, but a coordinated wall where the carved clock is freely readable, serviced without dismantling, and looks like part of a pre-planned interior.