Article Contents:
- What to buy for a furniture base: a complete list of materials
- Wooden elements
- Polyurethane Elements
- Consumables
- How a furniture base differs from a floor skirting board
- Floor skirting board: wall and floor
- Furniture base: architecture of the lower base
- Why it's important not to confuse these two elements
- Where a furniture base is needed
- Built-in wardrobe and dressing room
- Kitchen set
- Buffet and display case
- Library
- Chest of drawers and wall unit
- Where to use wood in furniture base
- Baseboard strip: direct contact with the floor
- Side corner strips and return fragments
- Decorative overlays along the base length
- Kitchen and hallway zones: material requirements
- Where to use polyurethane in the furniture base system
- Molding divider above the base
- Decorative lines on side panels
- Connection with wall moldings
- Transition to the room's floor baseboard
- Ready-made kits for different types of furniture
- Built-in wardrobe: wooden base + molding above the base
- Classic kitchen: baseboard + decorative molding + fasteners
- Sideboard: lower base + trim + polyurethane overlays
- Library: wooden trim + lower belt + moldings on the sides
- Dressing room: base + plinth line + calm polyurethane decor
- Proportions of furniture base: how to choose height and overhang
- Wardrobe up to 220 cm high
- Wardrobe from 220 to 260 cm
- Wardrobe up to the ceiling (250–320 cm)
- Sideboard and chest of drawers
- Installation technology: what is important to know before starting work
- Mistakes when creating a furniture plinth
- About the Company STAVROS
- FAQ: Answers to Popular Questions
- What is a furniture plinth?
- How is a furniture plinth different from a baseboard?
- Can polyurethane molding be used on a furniture plinth?
- What to buy for a classic furniture plinth?
- How to connect a furniture plinth with a floor baseboard?
- How not to overload the lower part of furniture with decor?
- What height to choose for a cabinet plinth?
Look at any truly expensive furniture — a handmade cabinet, an English sideboard, a classic kitchen set. What makes it expensive? Not just the facades, not just the hardware, and not just the body material. First of all — the base. The lower base, the plinth, the place where the furniture 'stands' on the floor and 'communicates' with it. It is the furniture plinth that decides the issue of visual stability, architectural completeness, and stylistic belonging of the entire structure.
Cheap furniture simply "stands" on the floor — on metal adjustable legs covered with a thin plastic strip. Classic furniture — a wardrobe, sideboard, bookcase, built-in set — has a plinth as an independent architectural element. This is the lower tier, separated from the main body by a decorative line, protruding forward relative to the facades and connecting the furniture with the floor, walls, and the entire horizontal system of the interior. How to make it correctly, from what, with what decor — is the subject of this article.


What to buy for a furniture plinth: a complete list of materials
Anyone who thinks that for a plinth it is enough to buy just one strip is mistaken. A classic furniture plinth is a system of several elements, and saving on any of them affects the final result.


Wooden elements
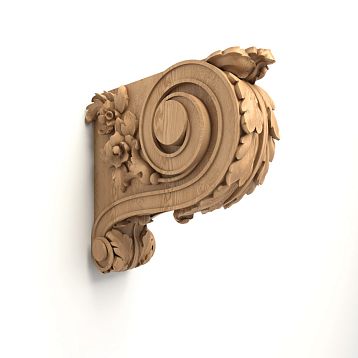
A wooden plinth is the load-bearing and visible base. This is a profiled or straight strip made of solid wood, which is attached along the entire perimeter of the lower part of the furniture, protrudes forward relative to the facades by 10–30 mm, and forms the lower horizontal line of the entire structure. Pogonazh iz massiva — the main material for the furniture plinth: from it, a plinth profile with the required cross-section, side corner strips, transition elements, and decorative horizontal rods are selected. Molding made of beech or oak withstands regular mechanical contact — kicks, wet cleaning, load when opening lower drawers.
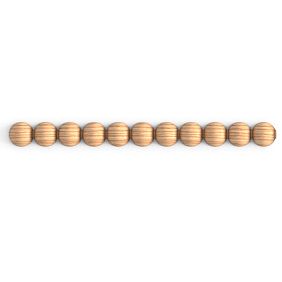
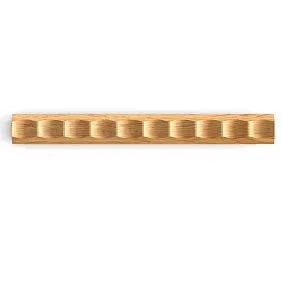
decor for furniture — overlay milled elements made of solid wood to enrich the visible surfaces of the plinth. These can be diamond-shaped or rectangular inserts, relief strips along the plinth base, corner overlays at the plinth joints. It is decorative elements for furniture made of wood that turn a flat plinth strip into an architecturally rich lower tier.
Our factory also produces:


Polyurethane elements
Moldings made of polyurethane — a thin decorative line mounted on the furniture facade directly above the plinth. This is a "separating cornice" between the lower base and the main volume of the body: it creates a horizontal accent, emphasizes the transition from the plinth to the body, and simultaneously adds relief. For furniture, moldings of moderate height are chosen: 20–35 mm with a relief of 8–15 mm. A large active profile on a small facade creates overload.
Polyurethane trim — lightweight profiles for decorative horizontal and vertical lines on the sides of the cabinet, connecting elements between the furniture plinth and wall moldings. Polyurethane molding in the plinth area is mounted only where there is no direct mechanical contact: on the facade line above the plinth, on the side plane of the cabinet, on transitions to the wall.
Polyurethane appliqués — decorative corner elements for the external corners of the plinth, rosettes, and relief inserts on the facade planes above the plinth. Decor for Molding — corner and lock elements at the intersection points of molding lines.
Get Consultation
Consumables
Liquid nails or acrylic glue for polyurethane profiles (read about the right choice in the article what to glue polyurethane molding with). Finishing nails, screws with caps and dowels for wooden parts. Acrylic sealant — for final sealing of all joints. Acrylic primer — a mandatory layer before painting both materials. Enamel or oil — the finishing coat. Reserve for profiles — 10–15%.
How a furniture base differs from a floor skirting board
This distinction is not terminological, but fundamental. Confusion between these two concepts leads to people buying the wrong thing and getting the wrong result.
Floor skirting board: wall and floor
The floor skirting board belongs to the room. It covers the joint between the vertical plane of the wall and the horizontal plane of the floor. Its task is purely technical and partly decorative: to hide the gap, protect the lower edge of wallpaper or plaster from contact with the floor, create a horizontal line around the perimeter of the room. The skirting board is an interior detail, not a furniture detail.
Furniture base: architecture of the lower base
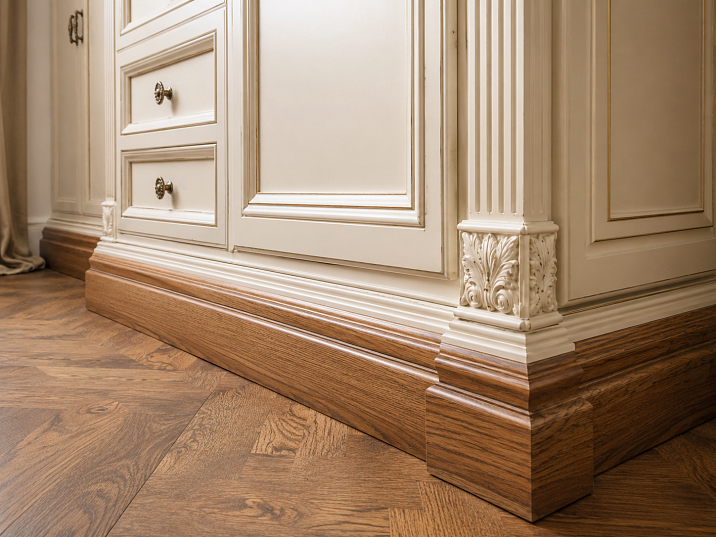
The furniture base is a furniture detail. It forms the lower architectural zone of the body: separates it from the floor, creates the effect of a "pedestal" on which the furniture stands, and at the same time hides the adjustable legs, the gap between the bottom of the body and the floor, cables and communications that may run under the lower edge of the cabinet.
In a classic interior, the furniture base is not just a closed lower gap, but an independent architectural tier. The entire Classic Furniture built on the principle of an order system: plinth (base) — main body — cornice (finial). This is a three-part vertical structure, where each tier has its own proportions, relief, and decorative logic.
Why it's important not to confuse these two elements
If you replace a furniture plinth with a regular floor skirting board, the furniture will lose visual stability. The skirting board belongs to the wall; its profile is designed for a different context and different proportions. The furniture plinth profile is wider, fits more tightly to the facade, has a forward protrusion, and is often decorated with relief coordinated with the facade moldings.
Conversely, if you bypass the furniture with the room's floor skirting board without installing a separate furniture plinth, it creates the impression that the cabinet is 'cut' into the wall roughly and carelessly. Real built-in classic furniture has its own plinth, which is then joined with the room's floor skirting board in one horizontal line.
Where a furniture plinth is needed
The question seems obvious, but no: not all furniture requires a separately designed plinth. Here is a typology of objects where this solution is mandatory.
Встроенный шкаф и гардеробная
A built-in wardrobe that occupies an entire wall or niche is one of the main objects for a furniture plinth. Without it, the lower edge of the body either rests on metal legs with plastic caps or simply 'hangs' in the air above the floor. A wooden plinth across the entire width of the built-in wardrobe creates the feeling of a monolithic built-in structure — not a 'wardrobe in a niche,' but an 'architectural niche with doors.'
For a dressing room, where maximum capacity is important, the plinth is often made functional: inside it, lower pull-out sections are placed, or a zone for shoe storage is left. On the outside — a wooden profile from solid wood millwork with relief coordinated with the door facades.
Kitchen set
The kitchen plinth is a high-load area. Water is spilled here, objects fall, and feet work when opening lower drawers. A wooden kitchen plinth made of solid beech with a moisture-resistant coating withstands these loads significantly better than a plastic counterpart. At the same time, it allows painting the entire lower zone of the unit in the color of the facades, creating unity.
A kitchen furniture plinth with a height of 100–150 mm is standard: it hides the leveling legs and creates a convenient gap from the floor for cleaning. A wooden millwork profile along the entire front of the unit with a molding finish above is the boundary between the kitchen block and the interior, made as an architectural element, not a technical one.
Sideboard and display cabinet
A sideboard is by definition a piece with a rich lower base. In a classic sideboard, the lower cabinet (under the display case) has its own plinth-pedestal: it protrudes forward, is equipped with a profiled plinth strip, and is often decorated with decorative overlays. It is this element that creates the "heaviness" in the lower part of the sideboard—the visual stability that distinguishes an antique sideboard from a modern cabinet on legs.
decor for furniture made of solid wood in the plinth area of the sideboard is one of the key tools: relief strips along the lower base, corner overlays, fronton elements. It is here that the wooden decor works most expressively: the lower tier is readable from a distance and forms the first impression of the furniture.
Library
In a floor-to-ceiling library, the plinth is the lower architectural tier of the entire structure. Its height sets the proportions: with a ceiling of 2.7 m, a plinth height of 100–130 mm is the optimal proportion. With a ceiling of 3 m, it is 150–180 mm. The library plinth forms the "base" on which the entire vertical of shelf sections and the finishing cornice stands.
Wooden moldings for the lower base of the library are made of oak or beech, with a coordinated profile. Thin Polyurethane molding directly above the plinth is a decorative "break line" between the base and the main volume. This is a classic technique dating back to academic order architecture.
Chest of drawers and wall unit
For a chest of drawers, the plinth is the pedestal on which the entire front architecture rests. For wall units that combine several sections across the width of the room, the plinth is especially important: it visually unites all sections into a single structure. Even if the sections are of different heights, a single plinth profile across the entire width "stitches" them into one architectural front.
Where to use wood in a furniture plinth
Wooden parts occupy the zones of strength and visible base in the furniture plinth.
Baseboard: direct contact with the floor
Main baseboard made of solid wood trim — this is what is visible from below: a profiled or straight strip forming a horizontal line under the facades. Its cross-section must account for the forward protrusion relative to the doors (usually 10–20 mm), the height of the base (80–180 mm depending on the furniture), and the shape of the lower profile (flat shelf, cove, straight bevel, or stepped relief).
For the kitchen and hallway, the baseboard is made from dense wood — beech or oak. For a library and living room, pine is acceptable if the surface is well coated with enamel or oil. The ends of the baseboard at corner joints are cut at 45° — this is a mandatory rule: a butt joint without a miter cut always looks like unprofessional work.
Side corner strips and return fragments
On the sides of the cabinet, the baseboard goes 'around the corner' — this is the so-called 'return'. The wooden baseboard on the side face of the furniture is a short segment of the same profile, fixed at a right angle to the main front strip. Without it, the side end of the baseboard is exposed and unsightly. The size of the return is usually 50–80 mm, i.e., enough to hide the end at a normal viewing angle.
Decorative overlays along the length of the baseboard
Wooden decoration — milled overlays from solid wood — mounted directly onto the surface of the baseboard. These can be diamond-shaped or rectangular flat overlays, evenly spaced along the length of the front baseboard. There can be thin horizontal rods creating a stepped relief. There can be corner relief elements at the joints of sections. All of this is wood, because precision of shape and resistance to mechanical contact are needed here.
Kitchen and hallway zones: material requirements
In the kitchen and hallway, the wooden baseboard takes the maximum load. Only dense wood is appropriate here: beech with a moisture-resistant coating or oak. Softwood species are not recommended in these areas: pine and spruce are soft, easily dented from impacts, and swell from moisture. The finishing for a kitchen baseboard is alkyd or polyurethane enamel, which creates a hard, water-resistant film. Oil and varnish are less durable here.
Where to use polyurethane in the furniture base system
polyurethane decor occupies a clearly defined zone in the furniture base system: everything above the wooden baseboard that is not subject to direct mechanical contact.
Molding-separator above the base
Thin Polyurethane molding is mounted directly above the wooden base — at the transition point from the base to the main facade. This is the "lower tier cornice": it creates a shadow, emphasizes the horizontal line, and visually separates the base from the body. It is this detail that transforms a flat lower block into a full architectural tier. Choose a molding with a relief height of 10–20 mm: enough to be expressive, but not so active as to compete with the facade decor.
Decorative lines on side panels
Polyurethane trim — a light vertical or horizontal profile — is used on the side planes of the cabinet where the furniture is visible from the side. A vertical polyurethane profile strip on the side panel creates the impression of a pilaster structure, even if the cabinet side is completely flat. A horizontal strip at the level of the separator molding continues this line onto the side surface — creating the effect of the base wrapping around the structure.
Connection with wall moldings
One of the most effective techniques in a classic interior is to connect the furniture base with wall moldings using a single horizontal line. Polyurethane moldings on the walls on both sides of the cabinet, it is installed at the same height as the molding above the furniture base. Then the line separating the base and the body transitions from the cabinet to the wall and "wraps around" the entire room with a horizontal belt. This is a complex but very convincing technique, characteristic of historical interiors with paneling systems.
Transition to the room's floor plinth
The junction of a wooden furniture baseboard with a floor skirting board is a delicate point. If the baseboard and skirting board have different heights, a step or gap occurs. Polyurethane trim used here as a transition element: a short piece of polyurethane profile of the same height as the skirting board is installed at the junction point of the furniture and the wall, organically linking the two elements into a single horizontal line.
Ready-made kits for different types of furniture
Built-in wardrobe: wooden baseboard + molding above the base
Pogonazh iz massiva — front and side baseboard planks. Wooden overlays along the length of the front baseboard for relief. Polyurethane molding — a thin decorative line above the baseboard. Sealant — on all joints. Acrylic primer + enamel — a single color.
This is a basic kit that works for any built-in wardrobe in a classic or transitional interior.
Classic kitchen: baseboard plank + decorative molding + fasteners
Wooden kitchen baseboard made of beech — height 100–120 mm, protrusion 15 mm forward relative to the fronts. Alkyd enamel, resistant to moisture. Polyurethane molding 20 mm high — a thin line above the baseboard. Fasteners: self-tapping screws with decorative caps matching the coating color. Acrylic sealant along the joining lines.
This option is restrained and practical. The kitchen baseboard must be durable and easy to clean — rich relief is not needed here. The decorative function is taken on by the facades and cornice of the set.
Sideboard: lower base + trim + polyurethane overlays
A wooden base pedestal 120–160 mm high with pronounced relief — for the sideboard, these are the "legs" on which the entire structure stands. Pogonazh iz massiva with a shaped profile — the base profile of the lower cabinet. decorative elements for furniture made of wood — relief overlays along the entire length of the base. Polyurethane appliqués — corner elements at joints and relief inserts on the facade above the base. The molding above the base is made of polyurethane, with moderate relief.
Library: wooden trim + lower belt + moldings on the sides
Wooden library base pedestal 120–180 mm high — made of oak or beech. Horizontal belt molding made of polyurethane — "lower tier cornice" above the base. Polyurethane trim — vertical rods on the sides of the library. Decor for Molding — corner trims at the transition point of the horizontal molding to the side panel.
Walk-in closet: baseboard + plinth line + calm polyurethane decor
In a walk-in closet, practicality and ease of cleaning are important. The wooden baseboard is of minimal height (80–100 mm), smooth, without complex relief, coated with hard-film enamel. Polyurethane trim — a thin horizontal profile above the baseboard and around the perimeter of the cabinets. No active relief: a walk-in closet is a workspace, not a formal interior.
Proportions of furniture baseboard: how to choose height and overhang
The height of the baseboard is not an arbitrary number, but a function of the total furniture height and room height.
Cabinet up to 220 cm high
Baseboard 80–100 mm. This is the standard format for most household cabinets. Overhang forward relative to the fronts is 10–15 mm.
Cabinet from 220 to 260 cm
Baseboard 100–130 mm. The proportion starts to 'heavier' — this is good for classic style. Overhang 15–20 mm.
Cabinet up to the ceiling (250–320 cm)
Base 130–180 mm. A high base creates the effect of a monumental pedestal. Overhang 20–30 mm. It is with this ratio that the structure acquires the proportions of historical furniture — massive, stable, architectural.
Sideboard and chest of drawers
Base 120–160 mm. For a sideboard, the base should look like "legs" — so sometimes it is not made solid, but is designed with a figured cutout along the lower edge (a sweep), creating the silhouette of support legs. This requires more complex milling, but gives a very convincing classic look.
Installation technology: what is important to know before starting work
Installation of a wooden base begins with checking the floor levelness. Even a slight horizontal difference (2–3 mm per meter) causes the baseboard to "float" and form a gap between it and the floor. Solutions: either adjust the lower edge of the board to the floor relief (cutting with a jigsaw), or fill the gap with acrylic sealant after installation. The second option is simpler, but aesthetically less precise.
Fastening of the wooden base — finishing nails 40–50 mm long or self-tapping screws through hidden holes with plugs. Fastening step — 250–300 mm. Corner cuts at 45° are made with a miter saw or miter box.
Polyurethane profiles are mounted with glue after installing the wooden base. A detailed installation guide for polyurethane profiles — the order of applying glue, methods of fixation during drying, techniques for sealing joints — is provided in the article about installing polyurethane moldings.
After installing all wooden and polyurethane parts — acrylic sealant along all junction lines. Then — primer, interlayer drying, finishing enamel in 2 coats.
Mistakes when creating a furniture base
The collected practice of mistakes is what saves time and money.
Confusing furniture baseboard with floor skirting board. Different tasks, different profiles, different installation logic. The floor skirting board covers the joint between the wall and the floor. The furniture baseboard finishes the lower base of the cabinet body.
Not considering the height of the facades when choosing the baseboard height. A baseboard 80 mm high for a cabinet 300 cm high will visually "disappear." The proportion of "baseboard height / furniture height" should be in the range of 1/20 to 1/15.
Not leaving space for opening lower drawers. If the baseboard protrudes forward more than the drawer design allows, the lower pull-out drawers will hit its top edge. Check before installation.
Not checking the profile thickness. The baseboard profile must fit tightly against the front plane of the cabinet. If the profile thickness at the back is greater than the gap between the floor and the bottom edge of the cabinet body, the strip will not fit into place.
Using fragile decor in the kick zone. Polyurethane profiles should not be installed in the lower area of the baseboard — where the foot periodically hits when walking. This area should only be wood.
Forgetting about moisture and cleaning near the floor. The bottom edge of a wooden baseboard is in an area that is regularly washed. Moisture-resistant coating is mandatory. For the kitchen — alkyd enamel. For the living room and study — acrylic enamel or oil with wax.
Not connecting the baseboard with the room's skirting board. The furniture baseboard and floor skirting board should either align in one horizontal line or be joined via a transition element. A "gap" between them creates a feeling of incompleteness.
Choosing too active a relief for small furniture. A baseboard with a strong relief for a chest of drawers 80 cm wide is an overload. The scale of the decor should match the scale of the furniture.
Not allowing for trimming waste. Corner cuts require additional material. A 10–15% allowance is mandatory.
About the company STAVROS
Good furniture starts with the right details. STAVROS is a production company that specializes in exactly that: wooden moldings from solid oak and beech, wooden furniture decor, and polyurethane stucco for interiors. STAVROS's history began in St. Petersburg in 2002: a workshop of carved products, work on the reconstruction of the Konstantinovsky Palace, and then on the interiors of the Hermitage, the Alexander Palace, and the Sheremetev Mansion. These are not marketing words — these are specific projects with specific quality requirements that STAVROS has fulfilled and maintains as a standard in every product.
Today STAVROS is a full line of solid wood linear products, furniture decor, cornices, moldings, baseboards, and polyurethane stucco. Production is in St. Petersburg, showrooms are in St. Petersburg and Moscow, delivery is throughout Russia. For those planning a furniture plinth or a full set of decor for a cabinet, kitchen, or library, consultation on material selection with quantity calculation is available upon request.
FAQ: Answers to popular questions
What is a furniture plinth?
This is the lower architectural base of furniture — a cabinet, kitchen set, sideboard, library, or built-in unit. It covers the bottom gap between the body and the floor, hides the leveling legs, and forms a visual "pedestal" on which the entire furniture structure stands. In a classic interior, the furniture plinth is a full architectural tier, not just a closed gap.
How is a furniture plinth different from a baseboard?
A floor baseboard is a room detail: it covers the joint between the wall and the floor. Furniture plinth is a furniture detail: it forms the lower architectural tier of the body. They have different proportions, different profiles, and different installation logic. Confusing these two elements means getting the wrong result.
Can polyurethane stucco be used on a furniture plinth?
Polyurethane moldings is appropriate in the furniture plinth area — but not in the very bottom part that takes impacts, but higher: as a molding divider above the wooden plinth, as decorative strips on the sides, as overlays on the facade above the plinth. The lower wooden tier should be made of solid wood — a durable and long-lasting material.
What to buy for a classic furniture plinth?
Pogonazh iz massiva — for the baseboard and side returns. decorative elements for furniture — for relief overlays. Polyurethane molding — for the line above the baseboard. Glue, fasteners, acrylic sealant, primer, enamel or oil. Profile allowance — 10–15%.
How to connect the furniture baseboard with the floor plinth?
Optimal options: choose the height of the wooden baseboard equal to the height of the plinth and join them in one horizontal line, or use a transition element from polyurethane molding — a short profile segment in the junction area of the cabinet and wall, organically connecting two horizontal elements.
How not to overload the lower part of the furniture with decor?
Make the baseboard sturdy and functional, and shift the decorative load to the molding above it. One decorative accent — a divider molding — is sufficient. Active relief in the lower zone of furniture is appropriate for large objects (sideboard, library, display case). For compact cabinets and nightstands — a restrained profile.
What height to choose for the cabinet baseboard?
Focus on the proportion: the height of the baseboard should be approximately 1/20 – 1/15 of the total furniture height. For a 220 cm cabinet — a baseboard of 100–120 mm. For a 280 cm cabinet — 140–160 mm. For furniture up to a 300 cm ceiling — 160–180 mm. These proportions provide visual stability and architectural logic to the entire structure.