Article Contents:
- Why furniture decor should be chosen before furniture production
- What changes if the decor is chosen in advance
- Decor as part of furniture architecture
- Decorative appliqués
- Moldings
- Cornices
- Pilasters
- Brackets and Consoles
- Carved elements
- Why you shouldn't start with the overlay
- Free space around the decor
- Wide wardrobe
- Narrow cabinet
- Drawers
- Commode
- Beech and oak
- Sanding
- Toning
- Carving
- Recessed Outlets
- Brackets
- Capitals
- Pilasters
- Moldings
- Moulding on a furniture facade
- Polyurethane decor matching the facade color
- Combining with moldings
- Wood is chosen when these matter
- Polyurethane is chosen when these matter
- Mixed system
- Step 1. Determine the facade field
- Step 2. Set the outer margin
- Step 3. Choose a profile
- Step 4. Check the center overlay
- Step 5. Check the handle
- Step 6. Check the repeat
- One facade
- Two facades
- Four identical doors
- Fronts of different widths
- Floor-to-ceiling wardrobe
- Wardrobe in a niche
- Built-in library
- Furniture as part of architecture
- Frame size
- Handle zone
- Upper facades
- Island
- Painting
- Commode
- Cabinet
- Console
- Rule of Scale
- One profile
- One rhythm
- One material
- A unified molding system
- Decor matching the facade color
- Contrasting decor
- Patination
- Wood under a clear finish
- Combined finish
- What is especially important for wooden decor
- What is especially important for polyurethane
- Why testing saves time
- Do not scale arbitrarily
- Check for repetition
- Check side lighting
- Coordinates
- Repetition
- Left and right elements
- Facade drawing
- Why the project code does not replace the SKU
- Status
- Molding
- Central overlays
- Paired overlays
- Cornice
- Brackets
- Scale verification check
- Handle verification check
- Edge control check
- Wooden Panels
- Polyurethane decor
- Moldings
- Commercial reconciliation
- Mistake 1. Choosing decor after manufacturing the fronts
- Mistake 2. Scaling a ready-made SKU in 3D
- Mistake 3. Not accounting for the protrusion
- Mistake 4. Not separating left and right elements
- Mistake 5. Not accounting for the frame
- Mistake 6. Too many decor levels
- Error 7. Using the same scale on the wardrobe and the cabinet
- Error 8. Not matching the color on the sample
- Error 9. Not passing the coordinates to the designer
- Error 10. Changing the SKU after approval without a revision
- Minimalist architecture
- Small facade
- Active wood texture
- Complex milling
- High operational load
- SKU card
- Application tags
- Scale tags
- Single item
- Furniture series
- When custom decor is needed
- Room code
- Furniture code
- Decor code
- What should change synchronously
- Why a fragment is better than a small sample
- Which fragment to make
- When to choose furniture decor — before or after the drawings?
- Which is better for furniture: wood or polyurethane?
- Can wall molding be used on a furniture facade?
- How to calculate molding for four identical facades?
- Do I need to make a test facade?
- Where can I find 3D and DWG files?
- Where can I view all categories of furniture and interior decor?
- How can I hand over the decor to furniture production?
- Can the decor be repeated on several pieces of furniture?
- Where should I start professional work with STAVROS?

Furniture decor is best chosen before the furniture goes into production. If a wardrobe, kitchen, or custom console has already been manufactured, the designer is forced to select overlays, moldings, and carved elements to fit the finished geometry. The professional process works the other way around: first the facade grid is formed, then real serial decor is selected for it, after which its dimensions and product codes go into the visualization, working drawing, and specification.
That's exactly how furniture decor for a design project becomes part of the furniture construction, rather than an ornament added at the last moment.
Workflow:
furniture concept → facade grid → decor type → material → real product code → visualization → working drawing → specification → quantity calculation → purchase → furniture production.
This approach is especially important for built-in wardrobes, walk-in closets, kitchens, libraries, chests of drawers, and custom furniture, where the decorative geometry must align with the actual axes of the fronts, handles, panel mouldings, plinth, and top cornice.


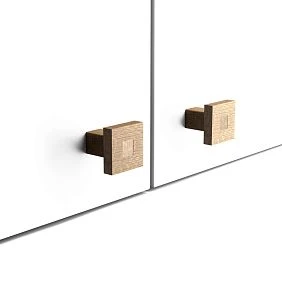
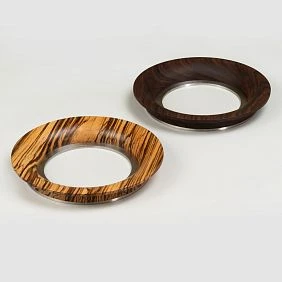
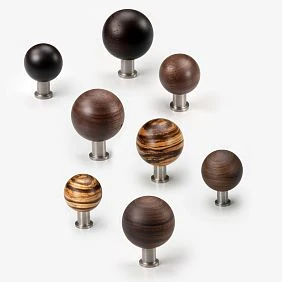
Why furniture decor should be chosen before furniture production
The main mistake is treating decor as the final stage.
The wrong scenario:
the furniture has already been produced → the fronts have been painted → the designer is looking for something to decorate them with.
At this point, some options are already unavailable. An applique may not fit between the frame and the handle, a moulding may turn out to be too wide, a cornice may conflict with the ceiling, and a pilaster may block the door's operating clearance.
The right scenario:
concept → front grid → decor → actual dimensions → drawing → test → furniture production.




What changes if decor is chosen in advance
The designer can:
- set the correct frame size;
- leave a free field around the overlay;
- determine the position of the handle;
- calculate the symmetry;
- align the top cornice;
- link the decor to the furniture sections;
- allow for the thickness and protrusion of the element in advance;
- provide the furniture maker with the specific SKU.
Our factory also produces:
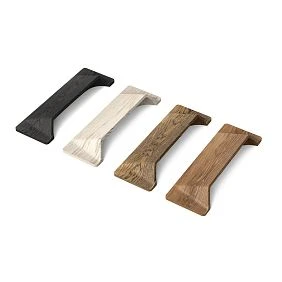
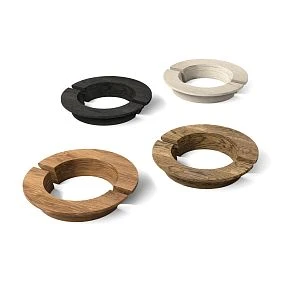

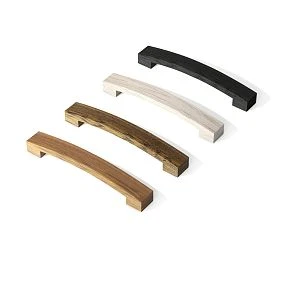
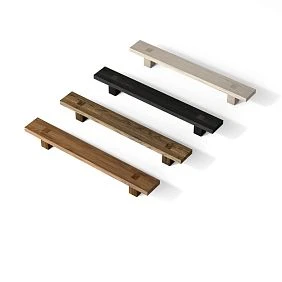

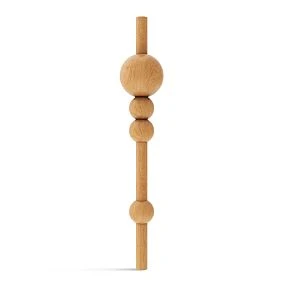
Decor as part of the furniture architecture
The cabinet facade can be viewed as a small architectural plane.
It has:
- plinth;
- verticals;
- frames;
- central fields;
- top finish;
- the axes;
- rhythm.
Therefore, the decorative element must follow the same compositional logic as the architectural decor of the room.
Get Consultation
Which elements belong to furniture decor
Decorative inlays
Covers can be:
- central;
- corner;
- paired;
- left and right;
- horizontal;
- vertical.
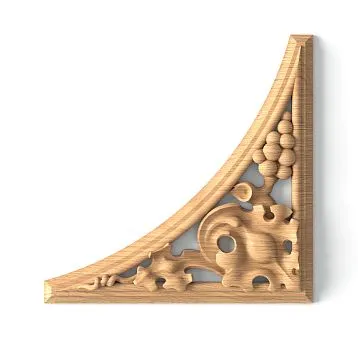
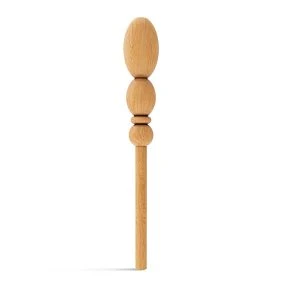
to buy, which will allow you to transform your furniture using carved wooden elements. You can use the C-003-3 decor set to decorate furniture, walls, doors, or any other surface. The C-003-3 decor set is made of oak or beech, known for their strength, durability, and beauty. You can buy the C-003-3 decor set at the Stavros decor store, which specializes in producing and selling decorative elements and hardware for furniture and interiors. At the Stavros decor store, you will find a wide selection of decor sets of various shapes, sizes, and styles. You can choose especially useful for facades, chests of drawers, nightstands, cabinets, doors, and furniture panels.
Moldings
Molding forms the facade frame.
It defines:
- field width;
- rhythm;
- position of the overlay;
- the border of the panel;
- the visual thickness of the facade.
Crown Mouldings
The cornice completes the cabinet or built-in furniture from above and connects the furniture with the ceiling architecture.
Pilasters
Pilasters and vertical decorative elements set the axis and help structure a wide furniture composition.
Brackets and corbels
Used in open sections, console tables, shelves, and custom furniture.
Carved Elements
Carved wooden decoration applicable where complex shaping, natural texture, and joinery logic are needed.
First the facade grid — then the decorative element
Before choosing the decor, you need to build the facade.
At minimum, you need to know:
- width;
- height;
- number of doors;
- the number of drawers;
- the axes;
- frame grid;
- position of handles;
- hinge zones;
- plinth;
- top cornice.
Why you shouldn't start with the overlay
Let's say the designer chose a central overlay 300 mm wide.
On a 900 mm facade, it may look proportional.
On a 400 mm facade, the same element will take up most of the field and leave almost no breathing room.
It's the same product, but two different compositions.
Free space around the decor
It's useful to calculate not only the size of the overlay itself, but also the remainder.
If the facade is 600 mm and the overlay is 300 mm:
600 − 300 = 300 mm.
With symmetrical placement:
300 / 2 = 150 mm
of free space in width on each side.
If the frame takes another 45 mm on each side, the usable space is reduced:
600 − 2 × 45 = 510 mm.
Then around the overlay:
510 − 300 = 210 mm, that is, by 105 мм on each side.
It is this size that the designer should evaluate visually.
How to match the scale of decor to a furniture facade
Scale is the relationship of a decorative element to the facade and adjacent details.
Need to check:
facade width → free field → frame → central element → handle.
Wide wardrobe
On a tall facade 800–900 mm wide, larger decor is acceptable.
Narrow cabinet
On a facade 350–450 mm wide, a large overlay can interfere with the handle and look heavy.
Drawers
Decor on a drawer should take into account:
- the height of the drawer rail;
- the handle;
- neighboring drawer;
- vertical repetition.
Chest of drawers
If three drawers have the same height, the decor can repeat.
If the top drawer is different, mechanically repeating a single pattern sometimes disrupts the proportion.
Wooden furniture decor
Buy wooden furniture decor makes sense when the project has already defined a specific geometry and material.
Wooden decor is especially appropriate for:
- solid wood furniture;
- painted furniture;
- classic cabinets;
- libraries;
- display cases;
- dressers;
- designer consoles;
- door and furniture portals.
Beech and oak
With wooden decor, not only the carving pattern matters, but also the material.
Beech and oak differ in texture and finishing behavior. If the product is coated with opaque enamel, the texture may be less important. If a clear or semi-transparent finish is used, the choice of wood species becomes part of the design.
Sanding
The carved element must be consistent with the surface quality of the furniture facade.
On painted furniture, preparation defects are especially noticeable after finishing.
Staining
If the wooden overlay remains visible, the finish sample must be compared with the facade.
Carving
Fine carving on a large wardrobe can get lost.
Large carving can overwhelm a small item.
Therefore, wood should be chosen not only from a photo, but also by real scale.
Decorative wooden elements for furniture
Buy decorative wooden elements for furniture — it's not just the central overlays.
The project may use:
- Outlets;
- Brackets;
- capitals;
- pilasters;
- corner elements;
- frame elements;
- friezes;
- finials.
Outlets
They work as a compact center of the composition.
Well suited for:
- doors;
- furniture frames;
- edges;
- central panels.
Brackets
Can support:
- a shelf;
- cornice;
- a console;
- an open section.
But even if the bracket serves a mainly decorative function, its scale must match the thickness of the furniture structure.
Capitals
Used in furniture with pronounced vertical architecture.
A capital without a pilaster or vertical usually looks accidental.
Pilasters
They separate sections and turn a wardrobe into an architectural object.
Plates
The most flexible category: central, corner, and symmetrical compositions.
Furniture decor made of polyurethane
Polyurethane furniture decor suitable for furniture intended for painting and for projects where complex relief and repeatability matter.
Design advantages:
- relatively low weight;
- repeatable geometry;
- paintability;
- complex ornament;
- ease of use in serial compositions;
- use on MDF fronts.
Moulding on a furniture front
Moldings for Furniture should be considered not as wall decor transferred to a cabinet, but as an element of the furniture grid.
Need to check:
- size;
- the depth;
- edge;
- the position of the handle;
- adjacent doors;
- opening.
Polyurethane decor in the front colour
This is one of the most architectural scenarios.
If the decor is painted the same color as the facade, the relief works through shadow rather than through color contrast.
Combination with moldings
decoration for polyurethane furniture can be used together with frames, but the profile and the overlay must be consistent in scale.
Wood or polyurethane: how to choose for a project
There is no need to look for a universally best material.
Wood is chosen when the following are important
- natural texture;
- matching with solid wood;
- joinery logic;
- carved molding;
- transparent finish;
- patination on wood.
Polyurethane is chosen when important
- light weight;
- painting to match the facade;
- repeatability;
- complex relief;
- serial production;
- combination with polyurethane molding.
Mixed system
In one cabinet, you can use wooden and polyurethane elements, but only if they do not conflict in thickness, relief, and finish.
How to design a furniture frame from moldings
The frame is built not around a random free space, but as part of the facade grid.
Step 1. Determine the facade field
For example, 600 × 900 mm.
Step 2. Set the outer margin
Let's say, 60 mm.
Outer frame size:
600 − 2 × 60 = 480 mm
by width.
Step 3. Choose a profile
If the molding is 35 mm, the inner frame field:
480 − 2 × 35 = 410 mm.
Step 4. Check the central overlay
If the overlay is 260 mm:
410 − 260 = 150 mm.
That is, 75 mm remains on each side.
Step 5. Check the handle
If the handle is in the center, the overlay and the handle may conflict.
Step 6. Check the repetition
If the four fronts are identical, the frame should repeat systematically.
For frame systems, you can use Moldings made of polyurethane and a separate Decor for Molding.
Central overlay: how not to overload the front
The central overlay should be connected not only to the size of the door, but also to its internal logic.
Checked:
- central axis;
- frame position;
- handle;
- adjacent fronts;
- distance to the edge;
- repetition of the composition.
Single front
On a single door, the overlay can work as a standalone centerpiece.
Two fronts
You need to decide: does each door have its own center, or is the pair read as a single composition?
Four identical doors
If the decor is repeated, the spacing and height must be the same.
Fronts of different widths
The same overlay can look too large on a narrow front.
In this case, you need different sizes or a different composition.
How to design a built-in wardrobe
Built-in furniture is especially interesting for a designer because it can continue the architecture of the room.
Useful links:
wall baseboard → cabinet plinth
wall molding → facade frame
ceiling cornice → built-in wardrobe cornice
Cabinet up to the ceiling
The top finish must be coordinated with the room's cornice.
If the ceiling cornice runs along the wall and suddenly breaks off at the wardrobe, the junction must be planned in advance.
Wardrobe in a niche
Important to check:
- side fillers;
- depth of overlays;
- door opening;
- adjacent walls;
- position of the plinth.
Built-in library
Vertical pilasters, cornices, and carved decor can be used, but their scale must correspond to the sections.
Furniture as part of architecture
When the facade grid continues the lines of the wall frames, the cabinet stops looking like a separate object.
How to design kitchen facades
The kitchen requires especially strict discipline, because decorative elements are located next to handles, the countertop, appliances, and work zones.
Frame size
The proportions on upper and lower facades may differ.
If the same molding is used on a 720 mm door and a 180 mm drawer, the visual weight will be different.
Handle zone
The decor should not interfere with the grip.
Need to check:
- handle size;
- position of holes;
- overlay protrusion;
- distance to the frame.
Upper fronts
Tall cabinets require a larger scale than small drawers.
Island
The island can be designed as a separate furniture architecture: frames, pilasters, decorative panels, brackets.
Painting
If the decor is painted together with the front, a test sample is especially useful for checking the relief and sanding.
Chests of drawers and cabinets: a different scale of decor
On small items, you cannot automatically use the same scale as on cabinets.
Chest of drawers
If the drawer front width is 700 mm, a 300 mm overlay can still work.
If the width is 350 mm, the same element will take up almost the entire panel.
Cabinet
More often suitable:
- a thinner molding;
- a small overlay;
- a single relief level;
- a understated handle.
Console
Here, the decor can be concentrated in the central area or on the supports.
Scale rule
The smaller the item, the more important the free space around the decor.
How to tie furniture decor to the room's architecture
Furniture should not speak a different decorative language.
It is useful to tie together:
- wall molding;
- ceiling cornice;
- plinth;
- the furniture frame;
- carved element.
One profile
Sometimes wall and furniture moulding can be similar in character, but not necessarily the same in size.
One rhythm
If the wall has large, calm frames, overly fine ornament on the cabinet may look accidental.
One material
A wooden portal can support wooden furniture elements.
Unified moulding system
Wooden trim helps connect long furniture lines with carved details.
For more specific frame profiles, useful are Wooden moldings.
How to work with color
Decor matching the facade color
The most architectural option.
The relief is read through shadow, not through contrast.
Contrast decor
Used when the element should become a standalone accent.
Patination
Patina emphasizes the recesses and makes the relief more noticeable.
But it needs to be approved on a sample, because the degree of contrast strongly affects perception.
Wood with a clear finish
The texture remains visible.
In this case, the wood species and grain direction become part of the composition.
Combined finish
Sometimes the frame is painted to match the facade color, while the central wooden overlay remains natural.
Such a composition requires checking the material board.
Why a sample is needed before starting furniture production
A test facade or physical sample is useful if:
- the decor is large-scale;
- the facade is complex;
- solid wood is used;
- patina is planned;
- an exact color is needed;
- there are several materials.
The test sample is used to check:
- scale;
- relief;
- painting;
- joint;
- Glue;
- the position of the handle;
- real lighting.
What is especially important for wooden decor
wooden decorative elements it must be coordinated taking into account the actual texture and finish.
What is especially important for polyurethane
Check how the decorative relief looks after painting in the facade color.
Why testing saves time
If 20 facades are produced in series, the mistake will be repeated 20 times.
A single test facade allows you to correct the composition earlier.
How to use a 3D model of furniture decor
The correct workflow:
SKU → 3D → furniture model → interior visualization.
3D models of furniture decor are useful for checking:
- real scale;
- a protrusion;
- light and shadow;
- repetitions;
- proximity to the handle;
- the overall look of the wardrobe.
Do not scale arbitrarily
If a real element is 180 mm wide, you cannot make it 230 mm just because it looks better in the scene.
The project must retain the real SKU.
Check for repetition
An ornament may look good on one facade, but on four adjacent ones it can feel too overpowering.
Therefore, you need to look at the entire furniture unit.
Check side lighting
The relief depends heavily on the direction of the light.
What to hand over to the furniture designer
A render is not enough.
The furniture designer needs:
- SKU;
- actual dimensions;
- facade diagram;
- coordinates;
- indents;
- quantity;
- the material;
- finish;
- direction;
- installation note.
If available DWG of furniture decor, it must be attached to the working documentation.
Coordinates
For the central overlay, you can set:
- X axis;
- Y axis;
- distance to the top edge;
- distance to the frame.
Repetition
If there are several identical facades, this must be explicitly indicated.
Left and right elements
L/R cannot be combined into one line without a quantity.
Facade drawing
The designer must see not only the decorative element, but also:
- the handle;
- hinges;
- the frame;
- panel;
- technological clearances.
How to document furniture decor in a specification
Example:
| Code | SKU | Element | Furniture | Material | Quantity |
|---|---|---|---|---|---|
| FD-01 | ... | Molding | Cabinet | PU | ... m |
| FD-02 | ... | Overlay | Cabinet | Wood | 4 pcs. |
| FD-03 | ... | bracket | Console | Wood | 2 pcs. |
Additionally store:
- URL;
- finish;
- room;
- status;
- revision.
Why a project code does not replace a SKU
FD-02 helps within the project.
But procurement requires a real item number.
Therefore:
FD-02 → SKU → URL.
Status
It is useful to use:
- SHORTLIST;
- APPROVED;
- SPECIFIED;
- ORDERED.
Only APPROVED/SPECIFIED items should go into furniture production.
How to calculate the quantity of decor
Molding
If one frame has dimensions of 500 × 800 mm:
2 × (0.5 + 0.8) = 2.6 m.
On four fronts:
4 × 2.6 = 10.4 m.
This is the geometric length. Next, cutting to the actual length of the supplied profile is required.
Center overlays
One overlay for each of the four fronts:
4 × 1 = 4 pcs.
Paired overlays
Left and right for each front:
4 × 2 = 8 pcs.
In the specification, it is better to separate:
- 4 L;
- 4 R.
Cornice
If the cabinet is 3200 mm long:
base length — 3.2 m.
If there are side returns of 300 mm:
3.2 + 0.3 + 0.3 = 3.8 m.
After that, the cutting layout is checked.
Brackets
They are calculated based on specific installation locations.
Not by the total length of the furniture.
What to check before launching furniture into production
Checklist:
- facade grid approved;
- actual SKUs selected;
- actual dimensions verified;
- decor fits between handles and edges;
- the moulding does not conflict with the panel;
- the pilasters do not interfere with opening;
- quantity is calculated;
- material is defined;
- the finish is agreed upon;
- the test sample is approved;
- 3D and drawing of the same version;
- the specification matches the drawing.
Scale check
Before launching, it is useful to print the facade at 1:1 or at least output a key element at actual size.
This quickly reveals problems that get lost on screen.
Handle check
The handle and the overlay should be checked together, not in separate files.
Edge control check
If the overlay protrudes, the adjacent front and opening direction must be taken into account.
How to buy furniture decor for a design project
The commercial stage should begin after the facade grid, material, and specific SKUs have been approved.
The correct sequence is:
facade design → SKU → test → specification → quantity → order → furniture production.
Wooden Panels
If the designer plans wooden facade accents, the specific size and material are fixed first, and only then is the purchase made.
You cannot choose an overlay based on a single attractive preview: you need to check whether it fits within the actual facade field.
Polyurethane decor
For painted furniture, it is important to confirm:
- actual size;
- relief;
- element type;
- repeatability;
- compatibility with the frame.
Moldings
If the molding forms a frame, the purchase quantity is calculated based on actual perimeters, not the approximate facade area.
Commercial reconciliation
Before payment, you need to check:
- SKU;
- quantity;
- the material;
- current price;
- availability;
- the deadline;
- the final revision of the project.
For a general overview of product categories, you can use the STAVROS catalog, while professional work with files and project materials should be done via STAVROS for designers and architects.
Mistakes in furniture decor design
Mistake 1. Choosing decor after manufacturing the facades
Why it happens: decor is perceived as a final embellishment.
Consequence: a suitable element does not fit or conflicts with the handle.
How to avoid: include the decor in the facade grid before production.
Mistake 2. Scaling a finished SKU in 3D
Why it happens: in the render, the element appears too small.
Consequence: a nonexistent size appears in the project.
How to avoid: choose a different real product code instead of deforming the model.
Mistake 3. Not accounting for the protrusion
Why it happens: the designer looks only from the front.
Consequence: the adjacent door catches on the decor, or the handle ends up too close.
How to avoid: check depth and opening in 3D/section view.
Mistake 4. Not separating left and right elements
Why it happens: in the visualization, they look like mirror copies.
Consequence: the order arrives with the wrong quantity of L/R.
How to avoid: separate specification lines.
Mistake 5. Not accounting for the frame
Why it happens: the overlay is selected separately.
Consequence: the actual free space is smaller than expected.
How to avoid: count the overlay inside the frame's inner field.
Mistake 6. Too many levels of decor
Why it happens: you want to use several elements you like.
Consequence: the facade becomes overloaded.
How to avoid: highlight the main motif and the secondary relief.
Mistake 7. Using the same scale on the wardrobe and the nightstand
Why it happens: there is a desire to unify SKUs.
Consequence: on small furniture, large decor looks heavy.
How to avoid: create a family of solutions at different scales.
Mistake 8. Not approving the color on a sample
Why it happens: the shader in the visualization seems sufficient.
Consequence: after painting, the texture or patina looks different.
How to avoid: a test front or a physical sample.
Mistake 9. Not passing coordinates to the constructor
Why it happens: the position of the element seems obvious from the render.
Consequence: in production, the overlay is installed "approximately."
How to avoid: dimensions and axes in the drawing.
Error 10. Changing SKU after approval without revision
Why it happens: a more affordable alternative was found.
Consequence: 3D, drawing, and specification diverge.
How to avoid: record OLD SKU → NEW SKU and update all documents.
When furniture decor is not needed
Not every piece of furniture needs to be filled with overlays and moldings.
Minimalist architecture
If the facade should be as calm as possible, decorative relief can ruin the concept.
Small facade
On very narrow doors, a complex overlay often becomes disproportionate.
Active wood texture
If the surface of the material itself is expressive, additional carving may be unnecessary.
Complex milling
If the facade already has developed geometry, additional applied decor may compete with it.
High operational load
In places where protruding decor will be constantly bumped, it is better to choose a flatter solution.
An expert choice is not the maximum amount of decor, but a sufficient one.
How to create a furniture decor library in a design studio
If a studio regularly designs furniture, it is useful to store proven SKUs separately.
Structure:
STAVROS / Furniture Decor / Wood
STAVROS / Furniture Decor / PU
STAVROS / Moldings
STAVROS / Profiles
SKU card
Store:
- article number;
- the material;
- size;
- preview;
- 3D;
- DWG;
- URL;
- sample;
- completed project;
- comment.
Application tags
For example:
- wardrobe;
- kitchen;
- dresser;
- console;
- library;
- portal.
Scale tags
- small;
- medium;
- large.
This speeds up selection for a new facade.
How to reuse successful furniture decor
After the project is completed, the item can return to the master library.
It is useful to save:
- installation photo;
- actual color;
- furniture maker's comment;
- Quality of joints;
- actual consumption;
- Ease of installation.
Then the next studio project begins not with the search for a "beautiful overlay," but with an already proven base.
How to work with custom furniture
In custom furniture, decor can be part of the project's unique language.
A single piece
For example, a console or a sideboard.
Here you can allow a more complex composition, because repetition is limited.
A furniture series
If one motif is repeated in cabinets, chests of drawers, and doors, you need to create a system.
For example:
- one base molding;
- one central overlay;
- one type of bracket;
- two socket scales.
When custom decor is needed
If the standard range does not cover it:
- size;
- a custom ornament;
- profile;
- a historical motif.
Then an individual element can be designed from a sketch, but that is already a different production scenario.
How to link furniture decor with the overall interior specification
Furniture elements should not live in a separate “closed” table if they affect the interior.
For example, a built-in wardrobe in the living room is linked to:
- wall molding;
- the baseboard;
- ceiling cornice;
- a door;
- wall color.
Therefore, it is useful to have links between the following in the general specification:
FINISH-01 → furniture
MLD-01 → wall
FD-01 → cabinet
Room code
Each furniture decor item must have a room.
Furniture code
For example:
CAB-01
KIT-02
DRS-01
Decor code
FD-01
This way, the assembler understands which item a specific overlay belongs to.
How to control versions
This is especially important for furniture because production may start before the interior is fully completed.
Example:
CAB-01_FACADE_v03_APPROVED
Decor specification:
FD-SPEC_v03
If the furniture drawing is v03 and the specification is v02, production is prohibited until reconciliation.
What must change synchronously
When the decor is replaced, the following are updated:
- facade;
- 3D;
- working drawing;
- specification;
- quantity;
- commercial calculation.
How to check furniture decor on a real mockup
For complex furniture, a 1:1 facade fragment is useful.
With it, you can check:
- molding;
- angle;
- overlay;
- the handle;
- color;
- patina;
- thickness;
- the joint.
Why a fragment is better than a small sample
A separate overlay shows the quality of the product.
The facade fragment shows the composition.
Which fragment to make
Not the entire wardrobe is necessary.
A section with the maximum number of interactions is sufficient:
frame + overlay + handle + facade edge.
How to work with multiple identical items
If a project has ten identical wardrobes, one correct prototype is especially valuable.
After approval, the following are fixed:
- SKU;
- coordinates;
- installation template;
- finishing;
- quantity per wardrobe.
For example:
4 overlays per wardrobe × 10 wardrobes = 40 pcs.
2 brackets per cabinet × 10 = 20 pcs.
Molding length per cabinet 8.6 m × 10 = 86 м before cutting allowance.
This is how serial production becomes a manageable calculation.
Final designer checklist
Before launching furniture:
- Facade grid approved.
- All decorative elements have real SKUs.
- Dimensions match the project.
- Center axes defined.
- Handles verified.
- Hinges and opening do not conflict.
- Moldings are built to the actual profile.
- L/R elements are separated.
- Material confirmed.
- Finish is coordinated.
- Test sample is ready if needed.
- 3D and DWG match the SKU.
- Quantity calculated.
- Linear trim cutting is verified.
- Specification is the same revision as the drawing.
- A commercial order is created only after final verification.
FAQ
When should furniture decor be chosen — before or after the drawings?
Before the final working drawings. First, the facade grid is formed and the actual decor is selected, then its dimensions go into the drawing.
What is better for furniture: wood or polyurethane?
It depends on the project. Wood is chosen when natural texture and joinery logic matter. Polyurethane — when a lightweight, paintable relief and repeatability are needed.
Can wall molding be used on a furniture facade?
Only after checking the actual profile, scale, depth, and installation method. You cannot automatically assume any molding is suitable for furniture.
How do you calculate molding for four identical facades?
Calculate the perimeter of one frame, multiply by the number of facades, then separately cut according to the actual profile length.
Is it necessary to make a test facade?
For complex, expensive, or serial furniture — it is advisable. Especially if patina, solid wood, large relief, or several types of decor are used.
Where can I find 3D and DWG files?
STAVROS professional materials include 3D models and DWG files for products; the specific file must be linked to the selected SKU.
Where can I view all categories of furniture and interior decor?
Through the STAVROS catalog you can go to wooden, polyurethane, and other product lines.
How do I hand over decor to a furniture manufacturer?
Not as a render, but as a complete package: SKU, dimensions, facade drawing, coordinates, quantity, material, finish, and working file.
Can the same decor be repeated on multiple pieces of furniture?
Yes, if the scale of each piece is checked separately. The same SKU may be suitable on a wardrobe and too large on a nightstand.
Where should I start professional work with STAVROS?
Page STAVROS for designers and architects contains professional materials and tools for project work.
Final workflow
1. Design the furniture.
Define the sections and the facade grid.
2. Choose the decor type.
Overlay, molding, cornice, pilaster, bracket.
3. Choose the material.
Wood or polyurethane.
4. Record the SKU.
Do not use a temporary description.
5. Check the scale.
On the facade, not separately.
6. Check the handles and opening.
7. Use 3D.
At real scale.
8. Send DWG/dimensions to the designer.
9. Make a test sample.
If the project is complex.
10. Generate a specification.
11. Calculate the quantity.
12. Check the cutting layout.
13. Verify revisions.
14. Place the order.
So STAVROS becomes not a source of random decorative details, but part of a controlled project chain from the facade grid to the finished furniture.