Article Contents:
- What task does a bracket perform in furniture
- First the mounting point, then the thread pattern
- Dimensions A, B, and C: why three numbers matter more than a photo
- Height A: will the part fit between the shelf and the cornice
- Width B: does the part match the upright
- Depth C: the most common source of wrong choices
- Additional dimensions and the working surface
- When one bracket is enough
- When two identical parts are needed
- When the pair should be mirrored
- System of pilaster, capital, bracket, and cornice
- What to check on the drawing and the sample
- Can a wooden bracket be installed in an already finished cabinet?
- Is a solid wood bracket suitable for an MDF shelf?
- Why does the relief look different on two identical brackets after painting?
- Can I order a pair of the same item code and flip one piece to get a mirrored look?
- What should I do if the chosen bracket is slightly deeper than the available space?
- Should I get a stock of brackets for the entire furniture series?
- How can I tell whether heavy books can be placed on the brackets?
- How do I coordinate decorative brackets with a cornice if they are made of different wood species?
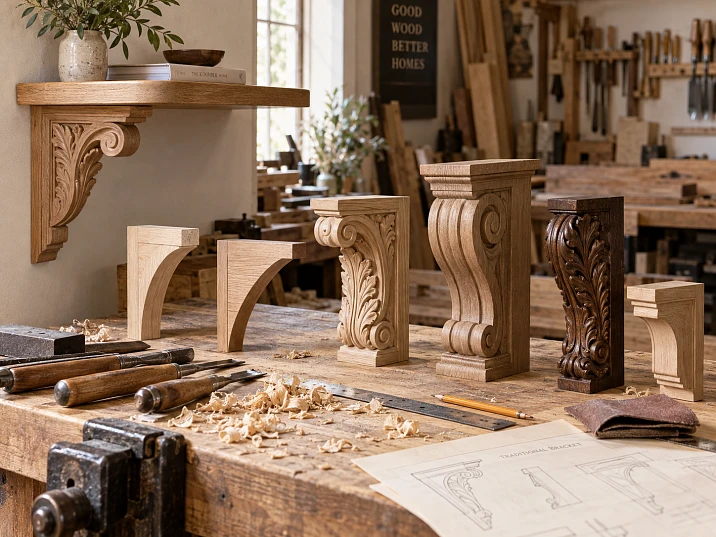
A furniture maker already has a drawing of a bookcase: the width of the open section is 1100 mm, a cornice runs above it, and vertical uprights stand on the sides. All that is left is to choose two wooden brackets. The catalog has some that match the design, but one protrudes 43 mm from the back plane, while the other protrudes 200 mm. Both are called brackets. For the same joint, they solve completely different tasks.
That is why wooden furniture brackets are chosen starting with their function and mounting location, not with the ornament. First, determine whether the piece will only decorate the transition between the shelf and the upright or actually participate in load transfer. Then check the height, width, depth, mounting surface, and whether it can be installed as a pair. After that, choose the material and finish. If the order is reversed, a beautiful carved piece often has to be fitted to already-made furniture — sometimes this is not possible at all without changing the structure.
Wooden brackets for shelves deserve special attention. In a photo, a carved console looks like a support, but visual similarity to a load-bearing bracket does not confirm its load capacity. For heavy books, dishes, or a countertop, a proven fastening and force-transfer scheme is needed. A decorative model can be used over an independent load-bearing assembly — then the appearance does not depend on what load the cabinet or shelf must withstand.

What task does a bracket perform in furniture
The word "bracket" in a furniture project can refer to various parts. Picture a tall cabinet with an open central niche. Beneath its top shelf sit a pair of small carved elements. They form the termination of the vertical posts and echo the pattern of the cornice. The shelf itself is held by its own joints with the side panels. In this case, the wooden bracket is a decorative part of the furniture assembly.
A different situation is a wall-mounted shelf without side panels. If the structure is designed to rest specifically on brackets, the load must be transferred through them to the fasteners and then to a suitable base. Here, not only the dimensions and wood species matter: the product's design, the quality of the joints, the placement of fasteners, the wall or furniture frame base, and the allowable load for the entire assembly are all checked. The name "wooden shelf bracket" alone is not enough.
There is also a third scenario: a bracket under the wide top of a console. The upper edge of the part adjoins the top, and the rear edge adjoins the vertical panel, but its actual role may remain decorative. If the top is supported by the side panels and the internal frame, they bear the load. If the support is meant to bear part of the load, the structure is calculated and tested in that specific configuration.
Finally, on a furniture portal, a bracket often serves as a compositional transition. Beneath the upper projecting band, two parts stand on the right and left, each linking a pilaster to the cornice. What matters most in such an assembly is the precision of dimensions, symmetry, and the matching of the carving with the neighboring wooden elements. Buying a massive structural corbel here just for its strength makes no sense if what is needed is a shallow decorative accent.
| Installation location | What the bracket must do | What is checked first |
|---|---|---|
| Under a decorative cabinet shelf | Finish the joint between the horizontal and the post | Height, depth, visible contour, mounting point |
| Under an open wall-mounted shelf | Possibly transfer the load to the base | Confirmed load-bearing structure, fastening, base, overhang |
| Under the console tabletop | Support the composition or structure | Function, dimensions, adjacent units, furniture stability |
| On the sides of the furniture portal | Create a symmetrical finish | Pairing, pattern direction, axis alignment |
| Under the library cornice | Continue the rhythm of the pilasters and upper band | Ornament scale, repeat spacing, clearance to doors |
The key question before selection: what happens if the bracket is removed from the assembled furniture? If the appearance changes but the structure remains functional, it is a matter of decor. If a shelf or countertop loses its necessary support, such a part cannot be selected without an engineering check.
For preliminary selection, it is convenient to use the STAVROS wooden bracket catalog. However, even within a single category there are different shapes, sizes, materials, and finishes: the final decision is made based on the drawing of the specific product.




First the mounting location, then the carving pattern
In a finished cabinet, what usually remains is not an abstract "space for decoration," but a strictly limited area. A cornice protrudes above, a post runs behind, and a door opens to the side. A decorative console must retain its own volume, taking into account the movement of the door leaf and the fastening tool.
On a sketch or working drawing, four boundaries are marked: the upper horizontal line, the vertical contact surface, the nearest side edge, and the farthest point of possible protrusion into the room. Handles, hinges, sliding mechanisms, and already selected moldings are additionally marked. Only then are several models selected from the catalog that fit within this space.
For example, 180 mm in height is provided above a niche for a decorative finish. A wooden bracket 210 mm high is not suitable, even if its pattern fully matches the cornice. Trimming 30 mm off a carved part is not the same as shortening a straight strip: you can destroy the upper end of the ornament, disrupt the proportions, or damage the contact surface. It is better to immediately choose a smaller size of the same model or change the furniture drawing before manufacturing the parts.
A small node map is sufficient for selection:
- Purpose — decorative or load-bearing bracket.
- Permissible part height and distance to the lower edge of the shelf.
- Width of the vertical post or prepared mounting area.
- Maximum protrusion depth.
- Orientation of the visible side and the need for a mirrored pair.
- Material, finish, and fastening restrictions.
This order is especially useful when making built-in bookcases. There, even a difference of a few centimeters can be significant: the bracket will begin to block the opening of the facade or will catch on the cornice profile. Fixing after installing built-in furniture often costs more than the decorative piece itself.
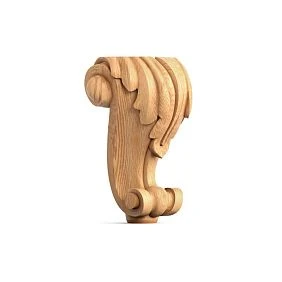
Our factory also produces:
Dimensions A, B, and C: why three numbers matter more than a photo
In the STAVROS catalog, wooden brackets use the designations A — height, B — width, C — depth. This allows you to filter models, but it does not remove the need to study the drawing. More complex items have additional dimensions D and E; their meaning should be read from the diagram for the specific item, not guessed from a general table.
Get Consultation
Height A: will the piece fit between the shelf and the cornice
Height determines the bracket's position on the vertical and its visual weight. If the shelf is mounted close to the upper rail of the furniture, a tall bracket can destroy the free space beneath it. And vice versa: too small a piece on a tall pilaster will look like a random dot.
An example of a simple check. Suppose 230 mm is left under the upper rail, and the craftsman wants to keep 15 mm of free space above and below. That leaves 230 − 15 − 15 = 200 mm for the bracket. A model with height A = 210 mm does not pass for the chosen scheme, even if it could physically be squeezed in flush. The 15 mm clearances here are a condition of the specific project, not a universal standard.
Width B: does the part match the upright
Width is checked primarily relative to the surface on which the element should look natural. If the upright has a visible width of 90 mm and the bracket is 67 mm, centering leaves 11.5 mm on each side. This ratio can work for a neat assembly. With a 50 mm upright, the same 67 mm wide bracket will protrude beyond its outline by 8.5 mm on each side, unless a different arrangement is provided.
But width B does not automatically equal the width of the flat mounting part. A relief part may have protrusions and narrowings. Installation requires a separate inspection of the rear pad and the fastening method. That is why small carved brackets require no less checking than large ones.
Depth C: the most common source of a wrong choice
Depth shows how much space the bracket occupies from the rear plane. In a furniture project, it determines the strength of the silhouette, the distance to the door, compatibility with the shelf, and the visibility of the carving from the side.
Let us imagine two models of almost the same height. The first has A = 156 mm, B = 50 mm, C = 43 mm. The second has A = 200 mm, B = 44 mm, C = 200 mm. Vertically they are comparable, but in depth they differ by more than four times. The first may be perceived as a narrow carved applied console. The second forms a noticeable protrusion and requires a completely different space.
One must not draw a conclusion about the permissible load from a comparison of C: the volume of the product and its load-bearing capacity are different characteristics. Even more so, one must not assume that a bracket with a depth of 200 mm is automatically suitable for any shelf with a depth of 200 mm. What matters are the design of the product itself and the fastening.
Additional dimensions and the working surface
For some carved models, the product page lists not three but four or five letter dimensions. For example, KR-026 includes D and E in addition to A, B, and C. When purchasing a specific version, all values must be checked against the drawing: an additional dimension may define a critical section of the profile rather than the overall height or width.
It is convenient to record the overall dimensions separately from the dimensions of the mounting area. The furniture maker's specification must answer two questions: does the bracket fit into the allocated space, and can it be reliably fastened in the intended place. A positive answer to the first question guarantees nothing regarding the second.
Real STAVROS models: comparison by shape, not by a single name
The difference between a decorative carved console and a structural bracket is clearly visible in specific products. The table shows individual versions from the catalog; for models with multiple variants, exactly one of them is listed.
| Product and version | Dimensions A × B × C, mm | Material | What the example shows |
|---|---|---|---|
| KR-026, size 156 × 50 × 43 | 156 × 50 × 43 | Beech or oak depending on the order | Compact in depth carved model; the product also has sizes D and E |
| KR-070, size 200 × 44 × 200 | 200 × 44 × 200 | Spruce | Pronounced overhang; the manufacturer describes a structural version with hanging strips |
| KR-023, variant 150 × 55 × 114 | 150 × 55 × 114 | Beech or oak depending on the order | At a similar height, the depth is noticeably greater than that of the compact KR-026 |
In the KR-070 product page, the manufacturer specifies a mortise-and-tenon joint, gluing, and a set of two steel mounting plates. The model is described as a product that can perform a load-bearing function. This is a significant difference from the situation where a craftsman buys a carved decorative element without a confirmed load-bearing purpose. At the same time, the KR-070 description itself does not give the right to assign an arbitrary weight of books or a countertop: the permissible load and the correct mounting base must be coordinated for the specific assembly.
For KR-026, a single SKU covers several sizes. For example, the product page lists versions with A × B × C = 156 × 50 × 43 and 210 × 67 × 58 mm. This is convenient for furniture compositions of different scales, but the specification cannot leave a single entry of “KR-026, two pieces.” The full version, material, and finish quality must be specified. Otherwise, on a repeat order, the workshop may receive the same carving pattern but a different size.
The KR-023 model is useful as an additional point of comparison: in the version with a height of 150 mm, the depth is 114 mm. It demonstrates that a similar height does not yet mean a similar assembly geometry. Even without changing the facade pattern, a new depth can require moving the handle or adjusting the protruding cornice.
These examples are not a ready-made recommendation for model interchangeability. They should be selected according to the specific purpose, and strength properties and fastenings should be considered separately from decorative dimensions.
Under the shelf: how to choose the placement and proportions of a pair
A shelf has at least two widths that a furniture maker sometimes confuses: the size of the shelf itself and the distance between its visible supports. For the composition, the offset of each bracket from the edge also matters. The geometric center of the shelf alone will not tell you where to place the part if there are doors, side walls, or vertical posts nearby.
Let's take an open shelf 1100 mm long. For symmetrical decorative finishing, the craftsman marks the axes of two brackets at a distance of 140 mm from each end. Between the axes, this gives 1100 − 140 − 140 = 820 mm. If the visible width of each bracket is 67 mm, the free distance between their inner edges will be approximately 820 − 67 = 753 mm. On the outside, there will be 106.5 mm from the end of the shelf to the nearest edge of the bracket.
Such a calculation describes only the placement of decorative elements, not the permissible span of a load-bearing shelf. For actual supports, the distance between them is chosen based on the shelf's strength, its material, thickness, expected load, and mounting method. The fact that a pair is beautifully placed on the drawing does not mean it can be loaded.
For a shelf with decorative brackets, it is useful to make front and side sketches. The front view shows the axes, the distance between parts, and the interaction with the vertical lines of the cabinet. The side view is used to check depth C and the profile shape. If you rely only on the front view, a bracket that is too deep will only be discovered during assembly.
When one bracket is enough
A single central element may be justified under a narrow decorative projection, in the middle of a furniture gable, or as a compositional finishing touch to an upper niche. But a single bracket under a wide loaded shelf is a completely different engineering task. Without a separately calculated structure, a central decorative element cannot be regarded as a replacement for a pair of load-bearing supports.
When two identical parts are needed
Two identical consoles usually create a clear rhythm along the edges of an open section. For a short niche, the decorative option may look calmer if the brackets are set back from the edges and align with the vertical posts. For a long section, an additional structural fastening in the middle is sometimes required — it can be hidden without adding a third carved accent.
When the pair must be mirrored
A complex ornament is often oriented in one direction: a leaf, scroll, or branch has a distinct beginning and end. Two identical pieces placed along the edges of a portal can create the impression that the pattern on both sides “faces” the same direction. This is not always a mistake: some compositions are deliberately built on a parallel rhythm. But if mirrored symmetry is intended, you need to check whether left- and right-hand versions exist, rather than simply ordering two pieces of the same article number.
A specific model may not have a mirrored version at all. Flipping the part does not always help: the upper and lower parts of the ornament differ, and when reversed, the mounting surface ends up where it is not needed. If the supplier offers separate left and right parts, they are recorded in the order and bill of materials as separate lines with the quantity for each side.
Furniture console and tabletop: where decor ends and support begins
A console table with a thin tabletop and two carved brackets beneath it can look convincing even without visible legs. This is exactly where a dangerous substitution of concepts arises: if the tabletop appears to be supported by wood, the buyer assumes that the wood is what holds it up. But stability depends on the internal frame, the wall attachment, the geometry of the tabletop, and the entire load path.
For decorative use, the console itself is designed first: it is determined what bears the weight of the countertop and objects, and what loads the wall, frame, and fasteners experience. Carved wooden brackets are installed after this, fitting them into the already calculated structure. If actual support on wooden parts is intended, only a suitable structural design is selected, and its permissible performance is verified together with the installation method.
Suppose the countertop protrudes 300 mm from the wall panel. The selected decorative console has a depth of C = 200 mm. That leaves a 100 mm difference in overhang. This is useful for evaluating the silhouette, but it says nothing about whether a load can be applied to the front edge of the countertop. The forces on the fasteners will depend on the weight, the point of load application, the distance from the wall, and the stiffness of the other elements.
There is another feature of furniture consoles. A reinforcing rail, a hidden metal bracket, or a mounting plate may run under the lower surface of the countertop. The wooden part must either go around them or cover them without obstructing access to the fasteners. Therefore, a beautiful profile that tightly fills the entire space under the countertop is far from always convenient for manufacturing.
For a wall-mounted console, it is useful to assemble a trial unit from a countertop offcut, a section of vertical panel, and one bracket. The craftsman immediately sees whether the fasteners are covered, where the top point of the thread goes, whether the wooden element interferes with the countertop fitting, and whether access for assembly remains.
When decorative wooden brackets should not be chosen: if without them there is no proven support for a heavy countertop, and the selected product is not intended or confirmed for such a mode of operation. In this case, the furniture design must first be changed, rather than choosing a deeper relief.
Brackets for a furniture portal, library, and built-in wardrobe
In a portal, a bracket rarely exists on its own. Below it meets a pilaster or vertical post, above it a cornice, and sometimes a capital is located nearby. An error in choosing one part leads to a shift in the entire vertical composition.
Let us imagine a library with a built-in niche. At its edges stand two pilasters 100 mm wide. Above the niche runs a wide cornice, under which one would like to place carved brackets. If an element with width B = 120 mm is chosen, it will extend beyond both sides of the pilaster by 10 mm when centered. Such a protrusion may be a meaningful part of a classical composition, but it cannot be hidden behind the word “fits.” It must be decided in advance: is the protrusion planned, or will it ruin the overall vertical line?
Another question is depth. A pilaster may protrude only 25 mm from the facade, while a bracket protrudes 80 mm. A step arises between these parts that is visible from the side. Sometimes it is precisely this that creates an expressive shadow under the cornice. However, in a narrow hallway or next to a door, such a protrusion may interfere with use. Built-in furniture must be checked not only in the front drawing but also in side views.
System of pilaster, capital, bracket, and cornice
To ensure the parts are perceived as a single whole, check their compatibility by the following criteria:
- Vertical axis. The center of the bracket must be aligned with the axis of the post or pilaster, or have an obvious compositional offset.
- Dimensional transition. The upper end of the bracket should not unexpectedly protrude beyond the cornice in a way that appears to be an assembly error.
- Nature of the carving. If the pilaster has a large acanthus leaf and the bracket has a fine geometric notch, the connection between the elements requires separate justification.
- Depth of the relief. Very deep carving next to a smooth wide band makes the bracket the main accent; when repeated every half meter, the facade can become overloaded.
- Material and finish. Different species under a transparent finish produce noticeable heterogeneity even when the stain color is similar.
The STAVROS catalog has separate groups wooden capitals и pilasters and columns. It is more convenient to consider them together with the brackets when a single furniture composition is formed from these parts. When choosing decorative overlays for adjacent facades, the category is also useful — this is the decoration of cabinet fronts, chests, tables, and doors. Carved inlays allow creating a unique furniture design, adding individuality and expressiveness. The inlay N.VRS-014L gives furniture an elegant look, making it a true work of art. Using carved decoration on furniture adds luxury to the interior and highlights the owner’s taste..
Sometimes the best result comes from omitting part of the carving. For example, a bookcase already has a massive profiled cornice and capitals on every vertical pier. Large carved brackets beneath them can create three competing decorative rows. In that case, a calmer model or the absence of brackets on certain sections is more appropriate.
Carved or geometric bracket: criteria for the furniture maker
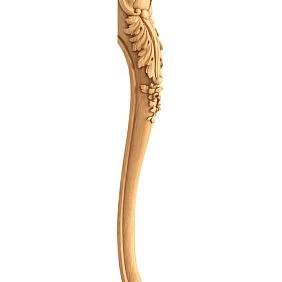
On a carved corbel, the relief reads through light and shadow. In a deep niche, it can become the main signature of classic furniture, especially if it repeats leaves, scrolls, or other plant-like forms. A geometric corbel relies on a simpler shape and flat planes; it is easier to pair with straight-lined fronts and a calm cornice.
This does not mean that all classic cabinets must be carved, while modern furniture allows only straight lines. For example, a narrow geometric corbel can nicely finish a strict bookcase with paneled fronts. And a single carved element on a minimalist console will become a deliberate accent if the rest of the decor is almost absent.
| The workshop's task | What to focus on | When the solution looks unconvincing |
|---|---|---|
| Cabinet in a classic composition | Carving tied to pilasters and cornice | The corbel's pattern does not match the scale of the rest of the decor |
| Restrained bookcase | Moderately carved or geometric model | The relief overlaps the lines of shelves and door frames |
| Modern console | Simple shape with a readable outline | The bracket imitates a load-bearing structure, although it lacks the necessary fastening |
| Furniture portal with a large cornice | A pair linked to vertical axes | The ornament and projection conflict with the capitals |
| A series of identical cabinets | Repeated size and calm rhythm | Each module gets a different pattern without an overall system |
Catalog selections are suitable for the initial screening brackets from the "Classic" collection и brackets from the modern collection. If you specifically need a carved element for a classic system, the assortment can be narrowed down to carved brackets in the classic collection.
When choosing, it is useful to compare two sizes of the same design on a single sheet at a 1:1 scale. People often confidently choose a large model from a photograph because the image shows only the item itself. On a real cabinet, next to handles, door panels, and pilasters, the same relief looks considerably more massive.
How the material affects the design and finish: beech, oak, pine
For a finished wooden bracket, the species matters not on its own, but together with the finishing method and the surroundings. The decision is made taking into account whether the natural wood grain will be visible or the entire furniture will receive an opaque paint finish.
Beech is often chosen for parts under enamel. Its surface allows for a smooth painted system in which the main role is played by the carved relief rather than the wood texture. But this does not eliminate the need to check sanding, primer, and end-grain areas. If open fibers or glue transitions remain on the end grain, the finish may reveal them more strongly than on the face.
Oak is appropriate where the wood should remain visible. Oil, clear lacquer, and tinting reveal the fibrous pattern and porous structure. On complex carved ornamentation, this creates expressive color variations. When matching an oak bracket to an oak cornice, it is important to coordinate not only the shade of the finish but also the character of the surface itself: two parts made of the same species may differ in grain pattern.
Pine is found in specific models, for example in KR-070. This property cannot be applied to the entire range of brackets. For a pine part under a clear finish, it is worth making a test patch to assess uneven absorption of the coating and the possible appearance of resinous areas. Under enamel, suitable substrate preparation and a compatible primer system are required.
Wood species does not replace the strength calculation of a furniture assembly. Harder wood by itself does not turn a decorative corbel into a verified load-bearing support: geometry, glued joints, and fasteners remain decisive.
The manufacturer distinguishes both surface preparation options and sanding quality. If several carved items are used in one project, the specification must state the selected quality and finish rather than merely the name "beech." For more on how finishing options differ, see the STAVROS section on materials and product quality.
Mounting plane and fastening: checks before ordering
A narrow carved bracket may have an impressive outer contour but a very small contact area with the furniture. If the craftsman relies only on the maximum width B, problems will appear once the part is in hand. The surface may be uneven due to the profile, and the spot that seemed suitable for a screw is too close to the edge or to a thin section of the carving.
For decorative installation, it is important to determine exactly what the element will be attached to: a solid post, a furniture panel, a cabinet side, an applied pilaster, or an auxiliary blocking piece. Each substrate has its own limitations on fasteners and their placement. A thin cabinet back panel, for example, should generally not be considered an independent substrate for a heavy loaded corbel without an appropriate structure.
Checking the direction of force is also necessary. Weight applied to a shelf away from the wall creates a tendency to rotate the bracket around the fastening. Even strong wood does not compensate for unreliable fastening or an unsuitable substrate. Installation into a solid post and hanging on a facing panel are not equivalent schemes.
What to check on the drawing and sample
- Whether there is a sufficient flat area for contact with the vertical and horizontal parts.
- Whether the manufacturer provides a method of mechanical fastening and whether the fastening elements are included in the kit.
- Where a hole can be made without damaging threads, thin webs, or glued joints.
- Whether the fasteners can be reached with a tool after the countertop or cornice is installed.
- Whether the bracket interferes with the movement of the door, drawer, folding front, and the operation of the hinge.
- Whether the fastener will be visible on the front side after finishing.
- If the bracket is to be load-bearing, whether there is confirmed data for the entire scheme of its operation.
Adhesive can be part of the method for installing a decorative element, but a single glued joint should not be considered confirmation of load-bearing capacity. For loaded assemblies, fasteners and the base are selected based on calculations or manufacturer data. Do not determine drilling depth and screw diameter on your own from a photo of the product.
For model KR-070, for example, the description specifies metal hanging rails. This is a specific design feature of this product. But the presence of rails does not mean that a wall made of any material or any furniture side panel will withstand the same load. Data on permissible weight, type of fastener, and base must be verified before use as a support.
Finishing: paint the bracket separately or together with the furniture
Ready-made wooden brackets can be included in the overall furniture finish or highlighted in a different color. The decision affects more than just appearance. It determines the installation sequence, access to carved recesses, and whether the connection to the cabinet body will remain visible.
If the cabinet is coated with opaque enamel and a uniform color is desired, a trial fitting is performed first. Then it is determined whether the carving can be primed and painted to a high quality after installation. Deep undercuts and narrow areas behind the bracket may be inaccessible for sanding and even spraying. In such cases, it is technologically more convenient to finish the part separately, but the joint area will have to be planned in advance.
If the bracket is to remain oak under oil or lacquer while the furniture body is painted, a finished surface on the separate part is often preferable. The craftsman can see the color and texture before final assembly. However, care must be taken in advance to prevent the finish from getting onto the designated glue surfaces: finished wood may behave differently in a glued joint than a prepared clean surface.
Patination requires one more check. The pigment collects in the recesses of the carving and changes its visual depth. On a single sample the effect may be pleasing, but on a long bookcase with dozens of repeating brackets it turns into a solid dark rhythm. It is better to evaluate a test finish next to the finished cornice and facade rather than separately on the workbench.
The practical order for painted furniture is as follows: fitting without glue → checking the fastening → test finishing → color approval → preparation of the remaining parts → final installation. The exact sequence of installation and application of the finish depends on the specific item and the workshop's technology; this is especially true of joints that can no longer be treated after assembly.
One test part before making the entire bookcase
The catalog size answers the question of overall dimensions, but does not show the real sense of scale. A carved bracket has thickness, the shadow from its projections, and the pattern on its side. If it stands in a deep niche, the adjacent panels may hide half of the ornament. If it is brought out to the front edge, the same pattern will become significantly more noticeable.
For a single cabinet with two decorative brackets, a full-size paper template is sometimes sufficient at the sketch stage. For a furniture series or an expensive built-in bookcase, it is wiser to obtain a real test part.
The check is carried out on a small assembly mock-up of the unit. It is not necessary to make the entire cabinet: you will need a section of the upright, a sample shelf or cornice, and a bracket in the chosen finish. This allows you to evaluate not only the beauty but also the assembly.
- Verify the item code and the full set of dimensions against the drawing and the packing slip.
- Measure the height, width, depth, and the actual mounting area.
- Place the bracket against the assembled corner in the correct orientation.
- Check whether access to the intended mounting points remains.
- For a pair, place both parts at the same distance from the central axis.
- Place the adjacent cornice or capital next to it: a mismatch in scale is better identified before finishing.
- Make a test coat with the selected coating system.
- Record the approved parameters and a photo of the assembly in the documentation.
The result of such a check is not a general note of "suitable," but a precise decision: which item code, which size, in which material, at which height, and by which method to install. If necessary, you can first study STAVROS product samples and clarify which sample or test piece is more reasonable to order for a specific piece of furniture.
The trial fitting itself does not replace testing the load-bearing mounting if the shelf is to bear significant weight. For this, the entire structure with the selected base and its design loads is checked; a decorative check addresses other matters.
How to avoid typical mistakes when selecting wooden brackets
Mistake one — buying from a photo. An image without adjacent furniture has no scale. A bracket seems compact until it is placed next to a handle or a door panel. The fix is simple: open the drawing, write down A, B, and C, make a template, and look at both views — front and side.
The second mistake is equating the maximum width with the mounting area. A carved element 80 mm wide may have a narrower back surface. If you place a post of exactly the same width under it, there may be no room left for fasteners. Mounting geometry is measured separately.
The third mistake is choosing symmetry by quantity rather than by ornament direction. Two identical brackets do not yet form a mirrored pair. Check the front-side pattern and whether different versions exist before placing the order.
The fourth mistake is transferring the properties of a structural bracket to a decorative one. One model may have joints and hanging elements designed to participate in the support's load-bearing function; another has no such information. The first design does not turn the entire catalog of carved decor into a set of load-bearing parts. Load capacity and base must be confirmed separately.
The fifth mistake is changing the bracket after the posts have been manufactured. A new item number may differ in depth or height by tens of millimeters. Reworking finished panels, cornice, or opening scheme costs significantly more than an early drawing correction.
The sixth mistake is forgetting about coating thickness. After priming and enamel, parts installed with virtually no gap may fit poorly or damage painted edges during installation. Where tight fit is critical, check dimensions and the finishing process sequence rather than trying to solve the problem by force.
The seventh mistake is assembling an overly complex decorative band. A carved pilaster, deep capital, large bracket, and wide patterned cornice may each look good on their own. On a narrow furniture portal, their motifs begin to compete. Simplifying one of the components can be more useful than adding a new one.
Finally, there are situations where a bracket is not needed at all. If the shelf is reliably supported by the side panels and a clean line of decorative molding already runs beneath it, an additional console will only clutter the niche. The absence of a bracket can also be the result of competent design.
Quantity calculation for a small batch: don't mix up pairs and reserve
A small workshop manufactures eight identical cabinets. Each cabinet has two open sections, and under the top of each section a pair of decorative brackets is provided. The requirement without reserve is:
8 cabinets × 2 sections × 2 brackets = 32 pieces.
If the composition is symmetrical and the catalog contains separate left and right versions, procurement turns into 16 left and 16 right. You cannot replace this with an entry of “32 brackets” without orientation. Leftover parts from production for one side do not compensate for a shortage on the other.
Suppose the workshop has approved only three cabinets and will manufacture the next five later. The first part of the series requires 3 × 2 × 2 = 12 brackets, and the second requires 20. In the documentation, it is better to keep the overall norm per item and separately indicate the volume of the current order. That way you won't have to recalculate the project from memory again.
The technological reserve is not assigned as the same percentage for all items, but according to the actual risk of damage, resupply lead time, finishing complexity, and series volume. If production already has one approved trial part, it cannot be automatically included in the set of a serial item: it may have received holes or coatings that do not correspond to the final version.
Cost must also be calculated based on the full order variant: SKU, size, material, processing quality, quantity, delivery, and in-house work. For example, the price of two brackets of the same version does not equal the total cost of a finished console: fasteners, base preparation, finishing, and the furniture maker's work will be required.
Example based on catalog prices as of October 10, 2026. KR-070 in pine, size 200 × 44 × 200 mm, “Prestige” sanding quality, was listed at 3,080 ₽ per piece; a pair was 6,160 ₽. KR-026, size 156 × 50 × 43 mm, in beech, “Standard” sanding, prepared for enamel, was 3,150 ₽ per piece, or 6,300 ₽ per pair. The comparison shows that a similar cost does not at all mean the same purpose: the items differ in depth, material, manufacturing method, and mounting type. Before purchasing, the current price and selected version are checked on the product page.
For batches with multiple sizes, it is advisable to calculate by separate lines rather than derive an average price for “one bracket.”
Specification: how to save the selected model for reordering
After a few months, a new batch of cabinets must repeat an already approved composition. An entry like “classic wooden bracket, large” is not enough for this. Even the same SKU may have different sizes and processing options, and visually similar models differ in depth and relief.
It is better to keep the bill of components separately for each version:
| Specification field | Example entry | Why it's needed |
|---|---|---|
| Furniture assembly | Library, upper right niche | Avoid confusion of installation locations |
| Article number | KR-026 | Identify the specific model |
| Full size | A = 210, B = 67, C = 58, D = 47, E = 61 mm | Do not receive a different size version |
| Material | Beech | Maintain the agreed finish |
| Surface Quality | According to the approved sample and order | Approve the subsequent painting |
| Orientation | Standard / left / right — only if provided by the product | Do not mix up the sides |
| Quantity | 2 pieces per section | Calculate the batch correctly |
| Finishing | Primer and enamel according to the approved sample | Replicate the appearance |
| Installation method | According to the furniture assembly drawing | Avoid installation "by eye" |
| Link | URL of the selected product card | Quickly restore data when ordering |
For KR-026 with the height of 210 mm specified in the example, the dimensions D = 47 mm and E = 61 mm apply specifically to this version. For other variants, they must be re-checked against the drawing: the values of one dimensional version cannot be transferred to another. Likewise, when changing from beech to oak, it will require not correcting a single word in the invoice, but re-evaluating the finish and external compatibility.
Also useful for project documentation are catalogs with STAVROS product drawings. However, a saved copy of the drawing should not replace checking the current assortment and finish before a new purchase.
Where to buy wooden brackets for furniture production
Once the function, permissible dimensions, and installation method are defined, the search becomes much more precise. Instead of the general wish to "buy wooden brackets," the furniture maker can now choose a specific category, compare carved and geometric designs, select a pair by orientation, and agree on the wood species.
STAVROS offers for this Wooden brackets made from solid wood, as well as the general catalog wooden carved decoration, if the bracket is being selected together with overlays and other decorative elements. When selecting specific products, you should check the available sizes and materials in the product card, without assuming that every finish is produced in all wood species.
The queries "buy wooden brackets for shelves" and "order carved wooden brackets" look similar, but they may imply different purchases. In the first case, the buyer often needs a functional support. In the second, a decorative ornament for a specific furniture component. When placing an order, it is better to state the purpose directly: for decorative finishing of a shelf or for a structural support requiring coordination of fastening and load.
For a small workshop, it is useful STAVROS manufacturer terms pageThe manufacturer indicates the possibility of shipping from a single unit and special cooperation terms. This allows considering a trial order before the main batch, but specific prices, lead times, and availability should be confirmed for the selected item codes.
Before purchasing, finally verify the furniture working drawing against the bracket dimensions. Review the mounting surfaces, evaluate the pair as a whole, approve the finish on a sample, and specify the complete product variant in the order. Then the bracket will become a predictable part of the furniture, not a component that will need to find its place after assembly.
Frequently asked questions from furniture makers
Can a wooden bracket be installed in an already finished cabinet?
Yes, if there is suitable free space and an acceptable mounting method that does not interfere with the furniture's operation. Check the opening of doors and drawers, access to the fasteners, and the actual width of the mounting area. If the bracket is to bear load, the finished structure must be tested separately: adding a decorative component does not automatically reinforce the cabinet.
Is a solid wood bracket suitable for an MDF shelf?
Materials can be combined in a single product, especially with opaque painting. What matters is not the proximity of solid wood and MDF itself, but the fastening, thickness and construction of the panel, the finish, and the purpose of the assembly. Decorative gluing to a thin panel cannot be considered a suitable load-bearing scheme for a heavy shelf.
Why does the relief appear differently on two identical brackets after painting?
The reason may be the coating thickness, differences in surface preparation, the method of applying the enamel, or the lighting. Complex ornamentation produces a noticeable shadow under side light, while under even frontal lighting it looks calmer. For a series, compare parts after identical finishing under the same lighting.
Can I order a pair of the same item code and rotate one part for a mirrored look?
Only if the design and pattern of the model allow such a reversal. On many carved brackets, the top, bottom, and rear mounting surface are not symmetrical. First check the drawing and whether a separate left or right version is available. If it is not, a different item code or a change to the composition may be required.
What should you do if the selected bracket is slightly deeper than the available space?
You need to consider a different model size or modify the furniture assembly before production. Trimming a deep carved part can alter the pattern, compromise the mounting surface, or damage the joint. You should not treat any bracket as a blank that can be shortened arbitrarily.
Should you order spare brackets for the entire furniture series?
The reserve depends on the likelihood of damage, the complexity of the finish, the size of the series, and the availability of reordering. For mirrored items, the requirement and reserve are calculated separately for each side. There is no universal percentage that suits all projects equally.
How can you tell whether heavy books can be placed on the brackets?
Look at the confirmed data for the specific model, mounting scheme, and base. Even if the manufacturer describes the bracket as structural, you need to know the permissible loads for the entire system and take the shelf depth into account. If such data is unavailable, design a separate load-bearing fixing and use the wood only in a decorative role.
How do you coordinate decorative brackets with a cornice if they are made of different species?
First determine the type of finish. Under enamel, differences in species may be visually hidden with suitable preparation, but the surface and the behavior of the coating should still be tested on a sample. With a clear finish, compare the texture, color after tinting, and the overall wood pattern before making the main purchase.