
























































Article Contents:
- Turned furniture leg MN‑149: what exactly the workshop buys
- Why a separate brass insert MN‑149 is convenient for separate finishing
- What needs to be marked on the leg before handing it to the painter
- Brass needs to be kept unpainted: how to protect inserts before assembly
- Why degreasing is a separate operation, not a formality
- What to do with excess glue
- Beech or oak for MN-149: material is chosen before approving the final finish
- How to accept wood before painting: four identical legs must be checked before irreversible treatment
- How to avoid getting four different shades on the turned profile MN-149
- Why an error of 10-20 mm is sensitive
- When 700 mm is a good candidate
- Straight installation
- Angled installation
- FUR-017 at a 10° angle: which confirmed parameters to consider
- Furniture fittings for MN-149: what should be in a separate list
- Adjustable support foot FUR-019: what it solves and what it doesn't
- Four or five MN-149: does the workshop need a spare leg
- Why a spare leg is especially useful with complex tinting
- How to calculate the full budget of an MN-149 set, not just the cost of the legs
- Acceptance of brass inserts before gluing: why irreversible operations are postponed until the end of inspection
- Dry fitting of a brass insert: what can be checked without glue
- Finish boundary near metal: how to avoid painting the glue zone
- If the finish is opaque
- If the finish is transparent or tinted
- Why the masking width cannot be assigned from an article
- What to do if the painter has already painted the entire leg, including the seat for the insert
- If the brass band must match the handles and light fixtures
- When a slight difference is acceptable
- Four legs and four inserts: why it is useful to number them in pairs
- Approval map: who must confirm each MN-149 node
- When direct mounting is more convenient than inclined for MN-149
- When a 10° incline is useful but requires a drawing
- How to check the final height with inclined installation
- Tabletop and MN-149: what dimensions the constructor needs before choosing the plate
- If MN-149 is installed on a console rather than a dining table
- If MN-149 is placed on a desk
- MN-149 price by height: why the cost of 700 mm cannot be transferred to other sizes
- Brass or stainless steel: the insert color changes not only the appearance
- Can different metals be ordered for one table
- If the brass insert should remain without varnish
- What to do if after staining the wood turned out too dark next to brass
- Why the spare leg should not be the first to go into an irreversible experiment
- How to store the spare MN-149 after project completion
- Assembly of four legs: why one control template is needed
- Height control of four assembled MN-149
- If the table wobbles after assembly: what diagnostic order to follow
- Working table of final height: what to fill in before ordering four MN-149
- If one brass insert differs in shade: when to stop the entire assembly
- If one wooden leg looks darker than the others after staining
- How to calculate the financial sense of a fifth MN-149
- Delivery MN-149: what to accept before handing over the kit to the painter
- How to store the kit between the painting and assembly stages
- After gluing the insert: what to check before installing the leg on the table
- When separate finishing of MN-149 saves time, and when it adds operations
- Final visual inspection: wood, brass, and tabletop must be checked together
- What to save in the finished table's passport after installing MN-149
- Mistake 1. Choosing the height based on a photo of a finished table
- Mistake 2. Approving the shade on beech, but ordering oak
- Mistake 3. Painting the glue joint
- Mistake 4. Choosing glue without instructions
- Mistake 5. Degreasing brass with an aggressive compound
- Mistake 6. Not doing a dry fit
- Mistake 7. Mixing up brass and stainless steel in the cart
- Mistake 8. Assembling the insert before the finish is fully dry
- Mistake 9. Choosing FUR-017 after marking the countertop
- Mistake 10. Using a foot to fix an incorrect length
- Mistake 11. Assigning an allowable load "because it's oak"
- Mistake 12. Counting only 14,680 ₽ and calling it the cost of the set
- Mistake 13. Not accepting inserts before gluing
- Error 14. Cannot save the staining formula
- Error 15. Order the fifth leg automatically
- What wood is MN-149 made from?
- What metal options are available?
- Does the brass insert come already glued?
- What heights are available for MN-149?
- Can you paint the wood before installing the metal insert?
- What glue should be used for the brass insert?
- Can brass be degreased with acetone or another solvent?
- Will the MN-149 700 mm work for a dining table?
- Can the MN-149 be installed at an angle?
- What angle does the FUR-017 provide?
- What does the adjustable FUR-019 offer?
- What is the allowable load on one MN-149?
- Do I need to order a fifth leg?
- How much do four beech MN-149 700 mm with brass cost?
- How much do five such legs cost?
- Is the mounting hardware included in these 14,680 ₽?
- Can we make three brass legs and one with a steel insert?
- What should be checked before gluing?
- Where can I buy MN‑149?
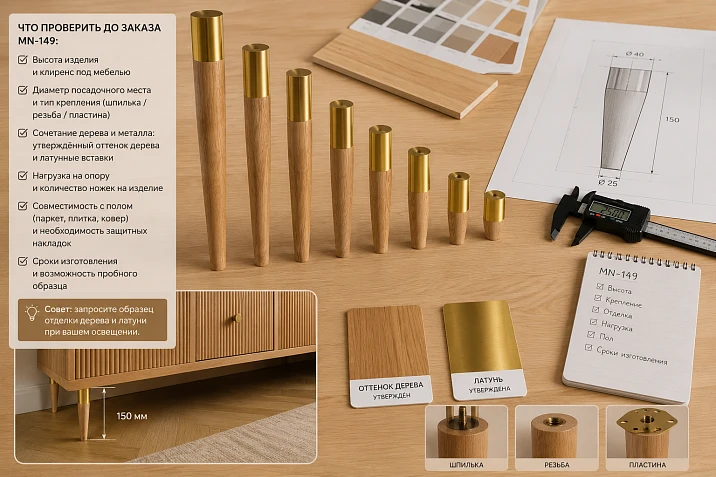
In the workshop, a color sample has already been made, the wood shade is approved, the tabletop is agreed upon, and the metal accent was decided to remain brass. For the project, MN‑149 was chosen — a turned furniture leg made of beech or oak with a separate metal insert. At this stage, it seems that all that remains is to order four identical parts, paint the wood, and glue in the brass element. But this is exactly where mistakes most often appear: the glue area accidentally gets covered with varnish or enamel, inserts get scratched during degreasing, mounting hardware is selected after painting, and the final table height turns out different due to the mounting plate and floor glide.
A proper MN‑149 order starts not with the quantity, but with the assembly specification. Before payment, you need to fix the wood species, height, metal option, straight or angled mounting scheme, floor glide, final furniture height, wood finishing method, and gluing requirements. The product card confirms that the metal decorative insert is supplied separately, without gluing to the wooden part. This is convenient for the painter, but at the same time means that the workshop must receive the joining technology before irreversible finishing.
The product card does not publish the specific brand of adhesive for wood and metal, the application scheme, the method of degreasing the brass surface, the allowable load per leg, or the exact height increase from the adjustable floor glide. These values cannot be invented. In the article, they are turned into a list of questions for the manufacturer and the designer.
If form MN‑149 is not yet finally approved, you can first Buy wooden furniture legs after comparing the entire category. But further, the article proceeds from a more specific situation: MN‑149 has already been selected, the wood part is finished separately, the metal band remains brass, and the task is to obtain four identical finished legs without rework.
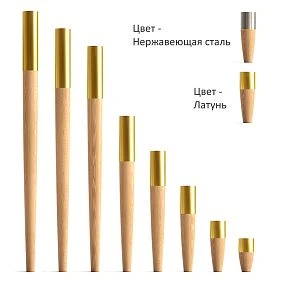
Turned furniture leg MN‑149: what exactly the workshop buys
MN‑149 combines a turned wooden part and a metal decorative insert. The product card offers the wooden part in oak or beech, and the metal option as "stainless steel" or "brass."
Size range:
| Height A | B | C | Wood | Metal insert |
|---|---|---|---|---|
| 100 мм | 45 мм | 24 мм | Oak / beech | Stainless steel / brass |
| 150 мм | 45 мм | 24 мм | Oak / beech | Stainless steel / brass |
| 250 мм | 45 мм | 24 мм | Oak / beech | Stainless steel / brass |
| 350 мм | 45 мм | 24 мм | Oak / beech | Stainless steel / brass |
| 450 мм | 45 мм | 24 мм | Oak / beech | Stainless steel / brass |
| 650 мм | 45 мм | 24 мм | Oak / beech | Stainless steel / brass |
| 700 мм | 45 мм | 24 мм | Oak / beech | Stainless steel / brass |
| 750 мм | 45 мм | 24 мм | Oak / beech | Stainless steel / brass |
The product card associates MN‑149 with undermount dining and writing tables, as well as consoles. This does not mean that any tabletop can simply be placed on four legs of the chosen height. The construction depends on the thickness of the base, the mounting scheme, the arrangement of the supports, the weight of the tabletop, and the operational load.
If the project has already been approved, you can buy the turned furniture leg MN-149 in the required combination. But the order line must include not only the article number and quantity, but also the height, wood species, and metal.




Why the separate brass insert MN‑149 is convenient for separate finishing
An unglued delivery gives the painter an obvious advantage: the wooden part can be sanded, primed, tinted, stained, lacquered, or painted without masking the metal band. The brass does not get paint overspray, no accidental painter's tape line forms at the boundary, and the insert is installed after the main finishing cycle is complete.
But this advantage only works with a pre-designed glue zone. If the seating surface of the wood is covered with varnish or enamel, the future adhesive may bond not with the wood but with the paint layer. The strength of such a scheme is not confirmed by a card.
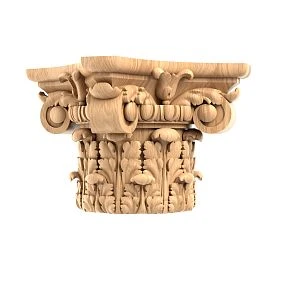
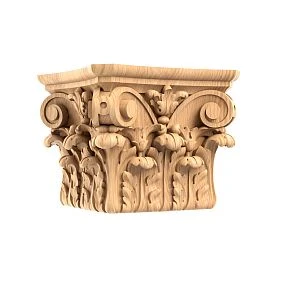
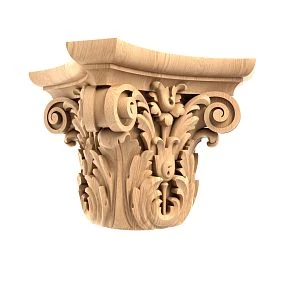
Our factory also produces:
What needs to be marked on the leg before handing it to the painter
On the technical drawing or photo, the following should be shown:
- the visible paintable area;
- the seating of the metal insert;
- the part of the wood that must remain in the state required by the adhesive system;
- places where a thick layer of primer or varnish is not allowed;
- the installation direction of the insert, if it matters.
This scheme should not be drawn "by eye" from a product photo. If the seating width and tolerance are not published, the workshop requests them from the manufacturer.
Get Consultation
Metal insert MN-149: what questions to ask about bonding before ordering
The card says the insert is supplied separately, but does not specify the adhesive system. Therefore, you cannot replace the technology with advice like "use universal glue."
Before starting work, request:
- recommended type of adhesive composition;
- requirements for moisture content and preparation of wood;
- whether the back side of the metal insert needs sanding;
- whether the metal can be degreased and with what compound;
- whether a primer for metal or wood is needed;
- whether the adhesive is applied to one or both surfaces;
- allowable thickness of the adhesive layer;
- open assembly time;
- fixation time;
- full polymerization time;
- temperature and humidity during assembly;
- method of removing excess without damaging brass;
- how long after gluing can the leg be mounted on the furniture.
If this information is not obtained, it is better not to start gluing. Wood, paint coating, and metal insert are three different materials, and the compatibility of the adhesive joint cannot be determined by the color of the composition's packaging.
Unpainted brass insert: surface protection and finish boundary
Brass must be kept unpainted: how to protect inserts before assembly
The brass accent is visible on the finished leg, so a scratch, solvent stain, or adhesive mark becomes more noticeable than a minor defect on hidden hardware.
Before assembly, inserts should be stored separately from abrasives and parts to be painted. Upon receipt, each is checked on a soft, clean surface. Unknown tapes should not be applied to the front side, and chemical compounds should not be applied without compatibility testing.
Why degreasing is a separate operation, not a formality
Adhesive technology may require a clean surface, but "degreasing" does not mean using any solvent. Some products can alter the decorative surface, leave streaks, or dull the metal. Until the manufacturer confirms the preparation method, it is better not to experiment on the visible part.
What to do with adhesive excess
You need to know in advance what to remove them with and at what moment. If you try to mechanically scrape off a fully hardened compound from brass, you can scratch the insert. If you wipe fresh glue with an unsuitable solvent, you can damage the finish. The answer should be part of the adhesive instructions.
Wood and finish sample: how to get four identical MN-149
Beech or oak for MN-149: the material is chosen before approving the final finish sample
If the workshop has already approved the color on beech, transferring the same recipe to oak without a new sample is not allowed. The wood differs in structure, absorption, and grain.
For opaque enamel, the natural texture is hidden more. For stain, oil, varnish, or a semi-transparent finish, the wood species becomes part of the design. Therefore, the sample must be made on the exact wood that will be used in the order.
If the project requires self-finishing, you can choose unfinished oak and beech legs and compare the shape, height, material, and mounting scheme. But the MN-149 technology cannot be automatically transferred to another model.
How to accept a table before painting: four identical legs must be checked before irreversible treatment
After tinting or enamel, some of the original features become harder to assess. Therefore, acceptance is done before sanding, primer, and glue.
Check:
- article MN-149;
- quantity;
- the height of each leg;
- uniformity of the turned profile;
- wood species per order and marking;
- dents, chips, cracks, and deep scratches;
- the seating area for metal;
- all brass inserts;
- the sameness of the selected metal option;
- completeness of the accompanying fittings.
Before finishing, it is useful check the quality of the wood before finishing and record the condition of the set with photos. If there is a discrepancy, it is resolved before painting or gluing.
How to avoid getting four different shades on the turned profile MN-149
The turned shape is more complex than a flat sample. On cylindrical and conical sections, light changes, shadows appear in grooves, and end and longitudinal zones of wood may accept the tint differently.
For a series of four parts, a single painting cycle is needed:
- number the legs;
- use one preparation system;
- mix a sufficient volume of dye or enamel for the entire set;
- maintain the same number of passes;
- keep the same time between layers;
- dry under the same conditions;
- compare the set under diffused and side light;
- preserve the formula and the control sample.
Before work, you can study tips for finishing furniture legs, but the specific paint system is still chosen according to the manufacturer's technical data sheets and an actual test coating.
Height MN-149: why 700 mm does not equal the height of the finished table
The leg height is only one part of the vertical chain. For the finished product, you need to add up all elements from the floor to the top surface of the tabletop.
In general form:
The height of the finished table = leg height + mounting assembly height + foot pad height + tabletop thickness.
If an MN-149 with a height of 700 mm and a tabletop thickness of 40 mm are selected, the simple sum gives:
700 + 40 = 740 mm.
But this is not the final height yet. The mounting plate and adjustable foot pad can add their own vertical dimension. The exact addition from FUR-019 for a specific assembly in the MN-149 card is not published, so it cannot be added "by eye." A section view of the assembly is needed.
Why an error of 10-20 mm is sensitive
For a console, a small difference may be acceptable, but for a dining or writing table, it affects seating, legroom, and compatibility with chairs. Therefore, the height is chosen after the tabletop, not the other way around.
When 700 mm is a good candidate
If the design height of the finished table is close to the standard dining area and the tabletop thickness, mounting assembly, and foot pad are already accounted for. Without this data, "700 mm fits" is only an assumption.
Direct or angled mounting of MN-149: the decision is made before painting
The card separates two scenarios. For direct installation, FUR-001 and FUR-012 are named. For angled installation, FUR-017 and FUR-020 are named. The mounting scheme affects the position of the leg relative to the tabletop edge, the floor footprint, and overall stability.
Direct mounting
The support is positioned perpendicular to the plane of the base. This option is simpler in terms of geometry, but still requires checking the thickness of the tabletop, the type of fastener, and the distance from the edge.
Angled mounting
For FUR‑017, a fixed angle of 10° is confirmed. This plate changes the position of the lower point of the leg relative to the upper one. For four legs, you need to check in advance whether they extend too far beyond the edge and whether the free space for the seated person is reduced.
If the project requires exactly a 10° angle, you can order the FUR-017 mounting plate at a 10° angle. But first, you need to compare it with the material and thickness of the tabletop, the location of the embedded inserts, and the future load.
FUR‑017 at a 10° angle: which confirmed parameters to consider
Current STAVROS materials describe FUR‑017 as a wooden mounting plate measuring 112×70×26 mm with a built-in metal M8 insert and a fixed 10° angle. This provides useful geometry, but does not define the entire fastening assembly.
Before ordering, check:
- whether the base area of the tabletop is sufficient for the plate;
- is the fastener too close to the edge;
- does the plate intersect with the embedded part or cable duct;
- which screw/fastener is needed for the specific tabletop material;
- does the corner conflict with the adjacent leg;
- is there enough space for tightening.
The leg card does not publish the allowable load of the finished assembly. The tilt should not be designed only for aesthetics.
Mounting plates and foot pads: what to add to the legs
Furniture hardware for MN‑149: what should be in a separate list
The price of four legs is not the price of a finished underframe. The kit may include mounting plates, studs, foot pads, adhesive compound, consumables, and fasteners for the tabletop.
It is useful to divide the specification into four groups:
| Group | What applies | Who confirms |
|---|---|---|
| Supports | MN‑149, wood species, height, metal | Designer / customer |
| Mounting | FUR‑001 / FUR‑012 / FUR‑017 / FUR‑020 | Constructor / assembler |
| Contact with the floor | Foot cap or other bottom hardware | Construction set |
| Insert assembly | Glue and seat preparation | Manufacturer / technologist |
The general catalog allows buy furniture hardware for legs, but you need to select items according to the drawing, not by the principle “usually these legs take this”.
Adjustable foot FUR-019: what it solves and what it doesn't
The current FUR-019 card confirms dimensions 23×23×27 mm, ball joint, "brass" color, and metric insert M6. The foot is designed for installation in furniture supports and helps compensate for local floor unevenness.
Before buy the adjustable foot FUR-019, it is necessary to clarify:
- seating compatibility with the selected MN-149;
- working adjustment range;
- minimum and maximum height addition;
- allowable load on the assembled unit;
- visibility of the foot in finished furniture;
- compatibility of the contact surface with the floor.
The foot should not be used as a way to "make up" a large height error. If a 650 mm leg was purchased instead of the required 700 mm, adjustment does not replace the correct size.
Load on MN-149: why oak, beech, and price do not yield an acceptable figure
The card indicates the purpose for tables and consoles but does not publish the maximum load per leg or per set of four. This figure cannot be derived from the wood species, diameter, or price.
The calculation includes:
- tabletop weight;
- its length and width;
- operational load;
- leg placement;
- straight or angled installation;
- tabletop material and thickness;
- plates and fasteners;
- torsional and lateral forces;
- presence of additional reinforcement.
For heavy stone, glass, or solid bases, it is especially important to obtain engineering confirmation before purchase. A beautiful turned profile does not replace furniture calculation.
Quantity and total budget: four working legs or five with a spare
Four or five MN-149: does the workshop need a spare leg
For a regular table with four supports, the design usually requires four identical MN-149 legs. But the workshop may deliberately order a fifth.
A spare makes sense if:
- a new tinting scheme is used;
- a full-size process sample is needed;
- the object is far away and a late reorder is inconvenient;
- a service replacement needs to be kept for the future;
- it is important to preserve one batch of wood and metal.
But a fifth leg is not a universal recommendation. If the finishing system has long been proven, supply is available, and the budget is limited, four pieces may be sufficient.
Order calculation: four beech MN‑149 700 mm with brass inserts
As of 29.08.2026, one beech MN‑149 700 mm high with a brass insert costs 3,670 RUB. For four supports:
4 × 3 670 = 14 680 ₽.
If one spare is taken:
5 × 3 670 = 18 350 ₽.
The difference:
18 350 − 14 680 = 3 670 ₽.
These amounts do not include mounting plates, floor glides, glue, painting materials, painting, assembly, packaging, and delivery. Therefore, 14,680 RUB cannot be called the price of a finished table base.
Why a spare leg is especially useful with complex tinting
If the color is built with several layers of stain, patina, or a complex varnish, a full-size spare allows repeating the entire process without the risk of ruining one of the four working pieces. With simple opaque enamel, such a spare may be less necessary.
How to calculate the full budget for the MN‑149 set, not just the cost of the legs
The full estimate should be assembled line by line:
legs + metal inserts in the selected configuration + fasteners + mounting plates + floor glides + adhesive system + painting materials + labor + assembly + delivery.
If part of the hardware is included in a specific product item, this is recorded separately. If it is not included, one should not assume otherwise based on a photo.
It is convenient to make a table:
| Position | Quantity | Price | Status |
|---|---|---|---|
| MN-149 beech 700 + brass | 4 | 14,680 ₽ total | Confirmed as of the verification date |
| Mounting plates | By scheme | Check | Separately |
| Floor protectors | By scheme | Check | Separately |
| Glue inserts | According to technology | Clarify | Not published in the MN-149 card |
| Finishing | 4 legs | Painter's estimate | Separately |
| Assembly | 1 set | Workshop estimate | Separately |
Acceptance and dry fitting before irreversible gluing
Acceptance of brass inserts before gluing: why irreversible operations are postponed until the end of the check
While the insert is not glued, the defect can be recorded separately and the issue of completeness can be resolved. After degreasing, sanding the back side, or contact with glue, the original condition of the product changes. Therefore, all four inserts are accepted before technological processing.
Checked:
- compliance with the ordered "brass" option;
- identical appearance of the set;
- absence of scratches and dents on the front side;
- edge geometry;
- fit on the corresponding wooden part without applying glue;
- absence of deformation;
- completeness of all four or five inserts.
Before irreversible processing, it is worth checking the warranty before gluing parts MN-149If a discrepancy is found, first record the packaging, labeling, and defect, and only then contact the seller.
Dry fitting of the brass insert: what can be checked without glue
Before final assembly, the insert can be carefully placed or installed into the seat without force, if the design allows. The purpose of dry fitting is not to "seat it all the way," but to ensure that the components match each other and that no unexpected conflict arises after painting.
Check:
- whether primer or varnish got into the seating area;
- whether the geometry changed after sanding;
- whether a coating buildup is in the way;
- whether the metal band sits evenly;
- whether the insert's position looks the same on all four legs.
If seating requires force, do not hammer the metal part or remove wood "in place" without understanding the tolerance. You need to determine what exactly is in the way: the coating, the geometry, or the initial fit.
Finish boundary near metal: how to avoid painting the glue zone
The most practical mistake in such a project is to finish the leg perfectly, and then discover that the joint with the metal is covered with several layers of primer and varnish. Therefore, the boundary is set before the first painting pass.
If the finish is opaque
The thickness of the layers can be more noticeable, so it is especially important not to create a coating bead in the seating area. The painter must understand where the decorative zone ends and the adhesive zone begins.
If the finish is transparent or tinted
The task is more complex visually: the boundary must remain invisible after installing the brass insert, and the uncovered wood must not peek out. A precise masking line along the actual part is needed.
Why the masking width cannot be assigned from an article
Card MN‑149 does not publish the adhesive seating size and the required tolerance. Therefore, one cannot advise "leave 5 mm of wood without varnish." This size must come from the drawing and the adhesive technology.
What to do if the painter has already painted the entire leg, including the seating for the insert
Do not automatically strip the coating down to the wood. First, find out the requirements for the adhesive joint. Perhaps the chosen system allows bonding over a specific prepared coating; perhaps it requires bare wood. Without instructions, any removal of a layer can change the seating size.
Correct sequence:
- stop assembly;
- record the actual state;
- request requirements for the adhesive zone;
- determine the acceptable method of coating removal, if needed;
- test on a spare part or hidden sample;
- only then fix the working set.
If the brass trim must match the handles and light fixtures
The word "brass" does not guarantee visual matching of all metal items in a room. Brass can be polished, satin, aged, with different shades and lacquer. MN-149 needs to be physically compared with a handle or a sample of another metal.
It is especially important to view parts under the same lighting. Warm light can make brass more saturated, while cool light can mute the yellowness. If the designer wants an exact match, photos from an online store are not enough.
When a slight difference is acceptable
If the metals are far apart and repeat a common warm accent, a full shade match may not be necessary. If a brass leg is next to a brass console handle, the difference is more noticeable.
Four legs and four inserts: why it's useful to number them in pairs
After receiving each wooden part and each metal insert, you can assign a number: 1–1, 2–2, 3–3, 4–4. If during a dry fit one insert matches a specific seat better, that pair is kept until final assembly.
Marking is applied so as not to damage the front surface and not to get into the glue zone. This is especially useful for a workshop when parts go through different sections — carpentry, painting, and assembly.
Work order with MN‑149: from incoming inspection to the finished underframe
For a series of four legs, a fixed route is useful:
- Inspection of wood and metal.
- Photo documentation.
- Dry fitting of inserts.
- Confirmation of wood species, metal color, and height.
- Confirmation of straight or angled mounting.
- Cross-section of the finished table with plate and foot support.
- Request for gluing technology.
- Masking the glue zone.
- Trial full color sample.
- Acceptance of color sample by designer/customer.
- Finishing all legs.
- Checking color consistency.
- Preparing the glue zone.
- Gluing inserts.
- Full polymerization.
- Hardware installation.
- Furniture assembly.
- Stability and geometry check.
This sequence reduces the risk that the decision about glue or fasteners will have to be made after a beautiful but already irreversible finish.
Approval map: designer, painter, engineer, and assembler
Approval map: who must confirm each MN‑149 joint
| Question | Who confirms | What secures it |
|---|---|---|
| Shape, height, wood species | Designer / customer | Specification |
| Wood color and sheen | Painter / designer / client | Signed sample |
| Metal — brass | Designer / customer | Sample / batch photo |
| Paint coating boundary | Painter / bonding technologist | Seating diagram |
| Glue and preparation | Manufacturer / technologist | Written instructions |
| Mounting | Constructor / assembler | Assembly drawing |
| Thrust bearing | Construction set | Section and list |
| Load | Furniture designer | Calculation / approval |
Such a sheet is especially useful if the table is made by several contractors. Each sees their own area of responsibility and does not assume that "the assembler will choose the glue later" or "the furniture maker will account for the height increase himself."
Geometry of finished furniture: straight and inclined supports in a real project
When straight mounting is more convenient than inclined for MN-149
The straight option is simpler if the tabletop is compact, the designer does not need an expressive splay of legs, and it is important to keep the minimal furniture footprint on the floor. An inclined leg looks more dynamic, but the bottom point shifts outward.
When choosing, check:
- tabletop overhang;
- distance to the corner;
- legroom;
- distance between legs on the floor;
- ability to place the table close to the wall;
- intersection of legs with drawers or mechanisms.
If the console stands in a narrow passage, the incline can increase the actual base width and become undesirable.
When a 10° tilt is useful, but requires a drawing
Tilted installation can give a more expressive silhouette and increase the base of support on the floor. But the phrase "10° is more stable" without calculating specific furniture is too general. Stability depends on the position of the center of mass, the dimensions of the tabletop, the attachment point, and the distance between the legs.
The drawing needs to show the top attachment point and the bottom contact point with the floor. Then it is clear how far the leg extends outward and whether it conflicts with the space around the table.
How to check the final height with tilted installation
The angle changes the vertical projection of the part. You cannot automatically assume that a leg 700 mm long gives exactly 700 mm of vertical height when tilted. For an accurate project, you need the installation geometry and data from the mounting assembly.
In the simplest geometry, the vertical projection of a tilted part of length L at an angle α relative to the vertical is described as:
H = L × cos α.
But applying this formula to MN‑149 as the final height is only possible if it is confirmed that dimension A corresponds to the length of the part's axis and the angle is set specifically relative to the vertical. Without a drawing, this is an example of a geometric principle, not a ready-made dimensional instruction.
Therefore, for 10°, you do not need to independently subtract a few millimeters and consider the table finished. Use the actual drawing of the assembly.
Tabletop and MN‑149: what dimensions the designer needs before choosing the plate
Minimum set:
- length and width of the tabletop;
- thickness;
- the material;
- presence of an underframe or reinforcement;
- overhang;
- position of each leg from the edges;
- tabletop weight;
- planned operational load;
- location of the mounting plate;
- allowable fastener depth.
Without this, it cannot be confirmed that the same plate fits both a massive wooden tabletop and a thin slab.
If MN‑149 is installed on a console rather than a dining table
A console is usually narrower and may stand close to a wall. The tilt of the rear legs can conflict with the baseboard or wall, while the front legs may protrude further into the walkway. Therefore, the four-leg layout needs to be checked in plan view.
If the console is additionally fastened to the wall, that is a separate structural assembly. It cannot be assumed that wall mounting automatically removes the requirements for furniture legs and their hardware.
If MN‑149 is installed on a writing desk
For a desk, in addition to the overall height, the knee space, drawer placement, and cable management are especially important. The mounting plate must not intersect with the internal box, and the angled legs should not take up more useful width under the desk than the project allows.
Before ordering, it is useful to make a bottom plan of the tabletop with four mounting zones and all built-in elements.
Heights, prices, and metal option: what changes in the cart
Price of MN‑149 by height: why the cost of 700 mm cannot be transferred to other sizes
The card has a separate price for each height and wood/metal combination. As of 29.08.2026, the following values were recorded for beech:
| Height | Beech + stainless steel | Beech + brass |
|---|---|---|
| 100 мм | 1 470 ₽ | 2 010 ₽ |
| 150 мм | 1 680 ₽ | 2 210 ₽ |
| 250 мм | 2 000 ₽ | 2 610 ₽ |
| 350 мм | 2 250 ₽ | 2 810 ₽ |
| 450 мм | 2 560 ₽ | 3 150 ₽ |
| 650 мм | 2 990 ₽ | 3 490 ₽ |
| 700 мм | 3 220 ₽ | 3 670 ₽ |
| 750 мм | 3 340 ₽ | 3 930 ₽ |
These are dynamic values. Their purpose in the article is to show the budget range, not to fix the price forever. Before payment, the specific combination of height, wood species, and metal is checked.
Brass or stainless steel: the insert color changes not only the appearance
In the current scenario, brass is already approved because it ties the legs to the handles and lights. But the card also has stainless steel. If the project is not yet finalized, you should compare physical metal samples, not just the price difference.
Stainless steel is usually perceived as colder and more technological, while brass is warmer. But the specific shade depends on the actual surface of the product and lighting. It is impossible to promise an exact match with hardware from another brand based on the word "brass."
Can I order different metals for one table
Technically, the product page allows selecting metal per item, but a mixed set of three brass legs and one steel leg will almost always be a configuration error if the design does not include asymmetry. Before payment, you need to check all lines in the cart.
If the brass insert should remain without varnish
You should not automatically coat a metal part with the same varnish as wood. The product page does not require such coating and does not describe its compatibility. If the designer wants to change the gloss or protect the metal with an additional compound, that is a separate finishing operation that needs to be coordinated with the metal and coating manufacturer.
For the current scenario, it is safer to preserve the factory decorative appearance of the insert and not perform chemical or abrasive treatment on the front surface without confirmation.
What to do if after staining the wood turned out too dark next to brass
The color of the wood and the metal should be evaluated together. Dark beech can enhance the contrast with brass, while very warm tinting can, on the contrary, visually blend both materials. If a separate flat stain sample was approved without the metal, before serial finishing it is worth assembling a temporary composition of one leg and the insert.
You need to look at:
- in daylight;
- under the main evening lighting;
- next to the real tabletop;
- at a normal viewing distance;
- along with the handles and lamps that the brass must support.
If the combination doesn't work, it's cheaper to adjust the stain formula before finishing the four legs.
Spare MN-149: when a fifth leg truly justifies the risk
Why the spare leg shouldn't be the first to go into an irreversible experiment
If a fifth MN-149 is purchased, it's convenient to use it as a technical sample, but ruining it completely with experimental glue or aggressive solvents is not rational. It's better to separate tests: color staining on an acceptable wood sample, glue testing on materials provided or approved by the manufacturer.
A fifth full leg is especially valuable as a service replacement. If it remains untouched, after a few years you can repeat the finish using the saved formula.
How to store the spare MN-149 after project completion
The spare should be labeled with the article number, wood species, height, and metal option. Along with it, keep:
- the tinting/enamel formula;
- the name of the primer and varnish;
- finishing date;
- control sample;
- photo of the finished set;
- data on the mounting plate and thrust pad.
The brass insert is best stored protected from scratches and household chemicals, and the wooden part in conditions that meet the manufacturer's recommendations.
Final assembly and inspection of the four supports
Assembling four legs: why one control template is needed
If the metal insert has an axial or decorative orientation, all four legs must be assembled identically. A slight rotation of the decorative band may go unnoticed on one part, but in a set it will give a sense of inconsistency.
A simple assembly template or mark allows you to repeat:
- insert position;
- seating depth;
- orientation of the visible side of the tree;
- direction of the leg during angled installation.
But the template does not specify the press-fit force or glue thickness if these parameters are not obtained from the manufacturer.
Height control of four assembled MN‑149
After gluing the inserts and installing the bottom hardware, all four supports are compared on one flat surface before installing the tabletop. The measurement allows detecting a difference that may have appeared due to the foot pads, thread depth, or another assembly reason.
If the heights differ, the error cannot be compensated by randomly adjusting only one leg until the cause is understood. The adjustable foot pad should compensate for the floor, not hide incorrect assembly.
If the table wobbles after assembly: diagnostic order
- Check the floor flatness.
- Place the table in another location on a verified flat surface.
- Compare the height and position of the legs.
- Check the tightening and seating of the mounting plates.
- Check the symmetry of the marking.
- Only after this use the standard adjustment of the foot plate.
Thus, FUR‑019 remains a means of fine adaptation to the floor, not a way to mask a skewed underframe.
When MN‑149 is especially well suited for a project
This model is logical if the project simultaneously needs:
- turned wooden shape;
- visible metal accent;
- independent painting of the wood;
- choice between beech and oak;
- several heights in one style;
- Direct or inclined installation after structural verification.
An unglued insert in such a project becomes an advantage: metal does not interfere with the painting cycle, and assembly is performed after finishing.
Final height worksheet: what to fill in before ordering four MN-149 units.
To avoid arguing about height verbally, create one vertical section.
| Element | Size | Source |
|---|---|---|
| MN‑149 | 700 мм | Product card |
| Mounting plate | ___ mm vertically | Assembly drawing |
| Thrust bearing | ___ mm in working position | Hardware card/drawing |
| Tabletop | 40 mm, for example | Furniture project |
| TOTAL | ___ mm | Calculation |
This makes it immediately clear which figures are confirmed and which still need to be requested. While two rows have dashes, the final height cannot be declared as definitive.
If one brass insert differs in shade: when to stop the entire assembly
Metal inserts sit side by side in the same product, so a difference in one part can be noticeable. If during acceptance one insert clearly differs, do not glue three "good" ones first and discuss the fourth later. Before irreversible assembly, it is better to stop the set and determine whether the difference is a normal material characteristic or a nonconformity.
This is especially important when four legs will be visible simultaneously. After gluing, replacing a metal part may require intervention in already painted wood.
If one wooden leg looks darker than the others after finishing
First, the cause is established: natural wood variation, different amounts of stain, uneven preparation, or lighting. Do not "boost" the shade with an extra coat on only one part without testing — you may get an even greater difference in saturation and gloss.
If the workshop ordered a fifth leg, it provides an additional opportunity to replace the problematic part after agreeing on the shade. This is one of the clearest scenarios where a spare truly has value.
How to calculate the financial sense of the fifth MN‑149
In the current scenario, the spare costs 3,670 RUB. This amount should be compared with the consequences of a possible reorder:
- new production lead time;
- repeat delivery;
- new painting operation;
- risk of wood batch difference;
- risk of brass insert difference;
- table assembly delay.
If the object is nearby, the product is consistently available, and the finish is simple, 3,670 ₽ can be left unfrozen in reserve. If the furniture must be delivered by a specific date and re-manufacturing takes 5–10 business days, the spare support gains not only material but also calendar value.
Delivery, storage, and passport of the finished set
Delivery MN‑149: what to accept before handing the set to the painter
The card reports Contact us to confirm shipping to your destination. and an average production time of 5–10 days for missing items. After receipt, do not send the box to the painting shop unopened. First, check the entire set.
Photograph:
- packaging before opening;
- product labeling;
- each wooden leg;
- each metal insert;
- set of hardware, if ordered together;
- defects, if any are found.
After that, wooden and metal parts are separated into technological zones. Brass should not be stored near abrasives, and adhesive joints should not receive random overspray from the painting booth.
How to store the set between the painting and assembly stages
After painting, the legs are especially vulnerable: the coating may feel dry to the touch but not yet have reached full durability. The time before assembly is determined by the paint system, not by the convenience of the production schedule.
Before gluing and installation:
- do not place the legs flush against each other with their face surfaces;
- do not wrap the fresh finish in an unknown film;
- do not place brass inserts on painted wood without a soft pad;
- keep the paired marking of parts;
- do not install fasteners until the coating is confirmed ready.
After gluing the insert: what to check before installing the leg on the table
When the adhesive has fully polymerized according to the instructions, perform a check:
- the insert sits evenly;
- there is no visible glue bead;
- the brass surface is not scratched;
- the tree cover edge is not damaged;
- all four legs look the same;
- the glue seam does not interfere with mounting hardware.
There is no need to check strength by hitting, using a lever, or trying to rotate the decorative insert if such a method is not specified by the technology. Acceptance must be safe for the finished part.
When separate finishing MN-149 saves time, and when it adds operations
Separate delivery is convenient if the wood requires complex tinting and the metal must remain clean. The painter does not waste time masking the insert and does not risk getting overspray on the brass.
But an additional assembly operation appears: metal acceptance, protection of the glue zone, surface preparation, bonding, and curing. Therefore, MN-149 is especially beneficial not for those who want "fewer actions at any cost," but for a project where separating the finish and the metal improves the quality of the result.
Final visual inspection: the wood, brass, and tabletop must be checked together
Before final installation, it is better to assemble the table in a test form and look at all four legs at once. A separate MN-149 may look perfect, but in the set, differences in tone, orientation, and position of the brass insert become apparent.
The check is performed from at least three points: frontally, diagonally, and from the height of a seated person. It is important to see whether the brass belt reads the same on all supports and whether one leg visually appears darker due to tinting or light direction.
If the tabletop has a pronounced wood texture, its shade is also included in the comparison. The legs do not have to fully match the top in color if the design provides for contrast, but the difference should be intentional, not the result of a separate sample without a general fitting.
What to keep in the passport of the finished table after installing MN‑149
After delivering the furniture, it is useful to leave a short set of data for future repairs:
- article MN-149;
- wood species and height;
- metal option;
- wood finishing formula;
- adhesive system name;
- assembly date;
- article numbers of mounting plates and support feet;
- photos of the finished assembly;
- Reserve leg data, if it remains.
So in a few years you won't have to re-figure out which shade was used and how the decorative belt was assembled. For custom furniture, such a small technical card significantly simplifies service.
Mistakes when ordering turned furniture legs MN-149
Mistake 1. Choosing the height based on a photo of a finished table
The tabletop, plate, and foot pad are not taken into account. The final furniture turns out higher or lower than the project.
Mistake 2. Approving the shade on beech, but ordering oak
The finish looks different. Each wood species requires its own control sample.
Mistake 3. Painting the glue joint
The glue bonds with the coating instead of the intended base. The boundary of the finish is agreed upon in advance.
Mistake 4. Choosing glue without instructions
Compatibility of wood, coating, and metal is not confirmed.
Error 5. Degrease brass with an aggressive compound.
The face surface may change appearance. The preparation method is confirmed first.
Error 6. Not doing a dry fit.
Fit issues are detected only after the adhesive is applied.
Error 7. Mixing up brass and stainless steel in the cart.
The set is visually inconsistent. Each order line must be checked.
Error 8. Assembling the insert before the finish is fully dry.
The coating and adhesive bond may be damaged.
Error 9. Choosing FUR-017 after marking the countertop.
The tilt changes the bottom geometry of the legs. The plate is selected before the final drawing.
Mistake 10. Use a foot pad to fix an incorrect length
Adjustment is intended for local unevenness, not for a major design error.
Mistake 11. Assign an allowable load "because it's oak"
The load depends on the entire structure, and the card does not publish a ready-made figure.
Mistake 12. Count only 14,680 ₽ and call it the cost of the set
Fasteners, foot pads, glue, finishing, assembly, and delivery are not included.
Mistake 13. Not accepting inserts before gluing
After irreversible processing, it is harder to prove the original defect.
Mistake 14. Not saving the cutout formula
A spare leg or repair section is later difficult to match to the same color.
Error 15. Order a fifth leg automatically
A spare only makes sense with a specific risk, otherwise it's an unnecessary purchase.
Decision tree: is project MN-149 ready for ordering
| Question | If yes | If no |
|---|---|---|
| Are the wood species and height approved? | Check metal | Do not order |
| Is brass physically matched to the interior? | Check wood finish | Make a sample |
| Is the paint sample done on the required wood species? | Check the glue zone | Repeat the paint sample |
| Is there an instruction for gluing? | Check the fastening | Request from the manufacturer |
| Is the straight/angled installation determined? | Check the countertop and hardware | Make a drawing |
| Is the final height calculated? | Check the load | Assemble a vertical chain |
| Is the load agreed upon? | Form the cart | Pass to the constructor |
What to send to the manager and workshop before processing MN-149
To ensure the order does not consist of scattered verbal agreements, compile a single specification.
- Item MN-149.
- Quantity — 4 or 5 pieces.
- Wood type — beech or oak.
- Height — for example, 700 mm.
- Insert option — brass.
- Photo or code of the approved tree finish.
- Degree of gloss.
- Glue zone boundary.
- Request for recommended adhesive.
- Request for metal preparation.
- Straight or angled installation.
- Mounting plate part number.
- Support foot, if needed.
- Countertop drawing.
- Countertop material and thickness.
- Calculated final height.
- Agreed load.
- Production time and availability.
This is how the seller, painter, designer, and assembler work with the same combination.
Before finally sending the order to production, it is useful to print one page with all decisions and give it simultaneously to the manager, painter, and assembler. It should contain four identical lines: MN‑149 700 mm, beech, brass, the selected mounting scheme, the agreed support plate, the paint code, and a note about the adhesive zone. This way, the order does not fall apart into separate verbal agreements: the manager sees the completeness, the painter knows the coating boundary, and the assembler understands which elements cannot be swapped. If later at least one parameter changes — for example, direct mounting becomes angled — the specification is recalculated entirely, because the geometry, fasteners, and final height change.
Final specification for four beech MN‑149 700 mm with brass
| Parameter | What to fix |
|---|---|
| Article number | MN‑149 |
| Quantity | 4 pcs. + reserve only if necessary |
| Wood | Beech |
| Height | 700 мм |
| B × C | 45 × 24 mm |
| Metal | Brass |
| Price for 4 pcs. as of 29.08.2026 | 14 680 ₽ |
| Wood finish | Approved sample |
| Adhesive zone | According to confirmed technology |
| Glue | Request from the manufacturer |
| Installation | Straight / inclined per drawing |
| Plate | Per selected scheme |
| Thrust bearing | As needed and compatible |
| Final height | Per full furniture cut |
| Load | Confirm for finished construction |
Checklist before payment
- height selected after calculation of countertop and mounting;
- wood species matches approved sample;
- all inserts are brass;
- four legs accepted before finishing;
- Brass is checked before degreasing and gluing;
- Glue area is marked;
- Glue brand/type and preparation are requested;
- Straight or angled mounting is recorded;
- Plate is compatible with the countertop;
- Foot is selected based on the actual task;
- Final height is recalculated;
- Load is not invented, but verified;
- Fifth leg has a specific role if ordered;
- Price, availability, and delivery time are re-checked.
FAQ about the turned furniture leg MN-149
What wood is MN-149 made from?
The card includes beech and oak.
What metal options are available?
Stainless steel and brass.
Does the brass insert come pre-glued?
No. The card clearly states that the metal insert is supplied separately, without being glued to the wooden part.
What heights are available for MN-149?
100, 150, 250, 350, 450, 650, 700, and 750 mm with other dimensions of 45×24 mm.
Can the wood be painted before installing the metal insert?
Separate supply allows the painting cycle to be carried out independently, but the glue area must be prepared according to the requirements of the future joint.
What glue should be used for the brass insert?
On the verified card, the specific brand and technology are not published. They need to be requested from the manufacturer and coordinated with the coating.
Can brass be degreased with acetone or another solvent?
A universal recommendation cannot be given without confirmation of compatibility. The method of metal preparation should be obtained together with the adhesive technology.
Will MN‑149 700 mm be suitable for a dining table?
This depends on the tabletop thickness, mounting assembly, foot, and required final height. The leg size alone does not provide a definitive answer.
Can MN‑149 be installed at an angle?
Yes. The card links angled installation with FUR‑017 and FUR‑020. The specific scheme needs to be checked against the drawing.
What angle does FUR‑017 provide?
The confirmed angle is 10°.
What does the adjustable FUR-019 provide?
It has a ball joint and is designed to adjust the contact of the furniture support with the floor. The exact range and height increment for the project need to be clarified.
What is the permissible load on one MN-149?
The card does not publish the exact value. The load should be assessed for the entire assembled structure.
Do I need to order a fifth leg?
Only if a technical sample, a reserve on site, or a service replacement is needed. For a regular table, this is not a mandatory rule.
How much do four beech MN-149 700 mm with brass cost?
As of 29.08.2026 — 14,680 ₽ at a price of 3,670 ₽ per one. Before payment, the price needs to be checked again.
How much do five such legs cost?
18,350 ₽ on the same date.
Does the price of 14,680 ₽ include fasteners?
No. This is the price of four legs in the specified combination. Hardware, floor glides, glue, finishing, assembly, and delivery are calculated separately.
Can we make three brass legs and one with a steel insert?
Technically, the card has both options, but for a regular symmetrical table, such a discrepancy is most likely a configuration error. Check each order line.
What to check before gluing?
Completeness, condition of the brass, dry fit, coating boundary, adhesive technology, and the match of each insert to its leg.
Where to buy MN‑149?
In the product card after fixing the height, wood species, metal, mounting, and full budget.
Final commercial step: check the order terms before sending parts to the paint shop.
Once the specification is assembled, it remains to check dynamic conditions — price, availability, production time, and delivery. Before payment, it is useful to check the payment and delivery of the leg set and save the confirmed order configuration.
After receiving the set, it is accepted before sanding, painting, and gluing. This is especially important for brass inserts: while they are not processed and not glued, the condition of the product can be assessed objectively.
Result: unglued brass insert MN‑149 is an advantage only with a pre-designed technology
MN‑149 fits well the scenario where the wooden leg needs to be painted separately, and the metal belt left brass. The card specifically provides separate delivery of wooden and metal parts, so the painter can work without complex masking of the metal.
But the separation transfers part of the responsibility to the project. Before ordering, you need to know which area of the wood cannot be coated, how and with what to join the materials, how to prepare the metal, how long to hold the glue, which fastener to use, and what the glider adds to the final height. If this data is not available, it must be requested — not replaced with assumptions.
For the scenario of four beech legs 700 mm with brass, the product cost as of 29.08.2026 is 14,680 ₽; the fifth spare increases it to 18,350 ₽. But the final budget is formed only after adding hardware, gliders, finishing, gluing, assembly, and delivery.
The correct sequence: height and tabletop → wood species → physical color sample → brass insert → dry fitting → adhesive technology → straight/angled mounting → glider → load calculation → full estimate → order → acceptance → finishing → gluing → assembly.