
























































Article Contents:
- Wooden frame RM-056: what the product card confirms
- Large mirror frame 1873 × 1273 mm: external size or glass size
- Carved frame with 240 mm profile: how much space remains for reflection
- How to check doorways before buying a wooden frame
- Will the large mirror frame fit in a passenger elevator
- Four elevator check scenarios at a real site
- Coordinate marking: how to check the wall without a full-size template
- Scenario 1. First receive and finish the frame, then order the mirror
- Scenario 2. Order the frame and mirror in parallel based on a confirmed drawing
- Scenario 3. Assemble the frame and mirror directly on site
- Minimum set of data without which it is better not to confirm the order
- Mistake 1. Measure only the wall
- Mistake 2. Consider the door size by its label
- Mistake 3. Rely only on the elevator cabin
- Mistake 4. Order a mirror sized 1873 × 1273 mm
- Mistake 5. Order a mirror based on the calculation 1393 × 793 mm
- Mistake 6. Not accounting for packaging
- Mistake 7. Design a switch under the profile
- Mistake 8. Buy fasteners first, then study the wall
- Mistake 9. Paint the frame before a complex delivery without protection
- Error 10. Counting on dismantling common building obstacles
- Error 11. Checking the route before repair, but delivering after repair
- Error 12. Assuming that RM-056 can be placed on the floor without fastening
- Can you simply turn RM-056 sideways and carry it through any door?
- Is knowing the frame diagonal enough?
- Do you need to measure the elevator if the building has a freight one?
- Can you remove the packaging before the elevator if the frame doesn't fit with it?
- Can I order a mirror together with the frame?
- Is the mirror included in the RM‑056 set?
- What does the 240 mm profile mean?
- Can I use the approximate internal size of 1393 × 793 mm to order the mirror?
- Do I need to leave a gap between the frame and the door casing?
- Can I hang RM‑056 on drywall?
- Is RM‑056 suitable for horizontal placement?
- What should I do if the frame fits in the elevator without packaging but does not fit with packaging?
- Can I store RM‑056 for several weeks before installation?
- How can I tell if the frame will look too large on the wall?
- Where to order a mirror frame if RM-056 doesn't fit the route?
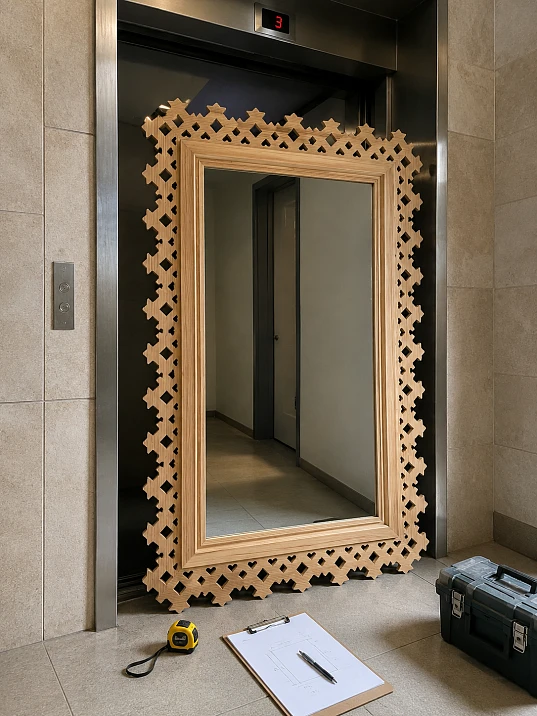
A large mirror frame is easier to choose than to bring in. The RM-056 has an external dimension of 1873 × 1273 mm, a depth of 44 mm, and a decorative profile width of 240 mm. For an interior, this is an expressive scale; for logistics, it's an item that cannot be ordered on the principle of "it should probably fit through the doorway." Before placing an order, you need to check not just one dimension, but the entire chain: packaging, entrance door, vestibule, elevator, stair landing, apartment doorway, hallway, turning space, and the prepared wall area.
The main practical conclusion is simple: if at least one narrow section of the route hasn't been measured, the purchase decision hasn't been made yet. It's especially dangerous to rely only on the width of the elevator cab or only on the doorway. A large rigid frame doesn't pass obstacles like a roll or soft furniture: it can't be arbitrarily bent, and the carved profile needs protection from impacts. Additional clearance will also be needed for the shipping packaging, which may be larger than the product itself.
The RM-056 model should be considered specifically as a frame. The product card confirms the article number, material, and dimensions, but doesn't give grounds to automatically assume that the mirror glass, backing, and a specific mounting system are included. Therefore, the mirror specialist shouldn't be given an "eyeballed" calculation based on external dimensions, and the installer shouldn't buy fasteners in advance without understanding the wall construction, the actual weight of the assembled unit, and the fixing scheme.
If the delivery route and installation location have already been checked, you can open the product card: wooden frame RM-056. Then the order is placed specifically: with ready measurements of openings, photos of difficult sections, niche or partition parameters, and questions about the mirror glass and mounting.
Wooden frame RM-056: what the product card confirms
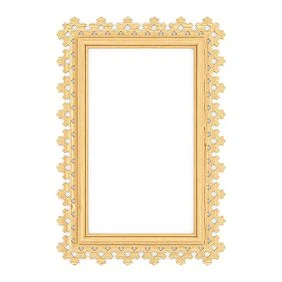
RM-056 is a large-format mirror frame made of pine. The confirmed external size is 1873 × 1273 mm, depth is 44 mm, and decorative profile width is 240 mm. The product is specified with "Prestige" sanding quality. The frame is designed for subsequent finishing; the phrase "under enamel" should be understood as preparation of the product for an opaque final coating, not as a promise of already applied enamel of a specific color.
For the buyer before ordering, it's more useful to perceive these characteristics not as a catalog line, but as a set of design constraints.
| Parameter RM-056 | What it means in practice |
|---|---|
| 1873 mm along the long side | need to check the height of doorways, elevator, vestibules, and the possibility of tilting the product |
| 1273 mm along the short side | critical for the width of passages, doors, and turning on landings |
| 44 mm depth | the frame has volume; during carrying and packaging, the actual thickness of the transport package will be greater |
| profile 240 mm | the frame occupies a significant wall area and reduces the visible field inside the outer contour |
| Spruce | Natural wood requires careful storage, handling, and finishing. |
| Prestige sanding | The surface is prepared to a high standard, so impacts and contamination before finishing are especially undesirable. |
The card should not replace technical coordination. Before paying for a large product, you need to separately clarify at least four things: the exact delivery configuration, packaging dimensions, the actual mounting size for the mirror panel, and the recommended mounting scheme. If the mirror is planned to be ordered from another company, ask STAVROS for data that the mirror maker can use without guesswork: the rabbet size, seating depth, allowable technological gap, and glass fixation requirements.
Separately check the current product status immediately before purchase. For a large frame, the delivery plan is often tied to the finishing work date, the mirror order, and the presence of installers. Availability and timelines may change, so it is wiser to confirm them at the time of ordering rather than fixing them in the design project several weeks before the actual purchase.
If the RM‑056 is not suitable in scale or access route, the assortment can be compared through the section buy mirror frame. The point of such a link is not to search for an "almost the same" frame, but to be able to change one of the key parameters — the outer size, profile width, or structural design — before the problem is discovered at the apartment door.




Large frame for a mirror 1873 × 1273 mm: outer size or glass size
The most expensive mistake when preparing a mirror for the RM‑056 is taking 1873 × 1273 mm as the size of the mirror panel. These are the outer dimensions of the frame. The glass is physically located inside the structure and must correspond not to the outer contour, but to a specific seating zone.
The profile width of 240 mm allows for a useful preliminary calculation, but only to estimate the scale. If you conditionally subtract twice the profile width from the outer size, you get:
-
in height: 1873 − 240 − 240 = 1393 mm;
-
Width: 1273 − 240 − 240 = 793 mm.
That is, the conditional inner field is about 1393 × 793 mm. Its area is approximately 1.10 m², while the area of the outer rectangle of the frame is about 2.38 m². This clearly shows how visually significant the 240 mm wide profile is: it forms not a thin edging, but a large decorative frame.
But the value of 1393 × 793 mm cannot be used as the order size for the mirror. The reason is structural: the width of the visible part of the profile and the geometry of the seating groove for the glass are different parameters. The mirror may extend under the inner edge of the frame, have a technological gap, rest on individual elements, or be fixed according to a different scheme. Even a few millimeters of error for a glass panel can turn a finished mirror into an unsuitable part.
The correct sequence is as follows:
-
determine whether only the frame is purchased or the frame together with additional elements;
-
obtain the exact seating size from the seller;
-
clarify the glass seating depth;
-
find out the required technological gap;
-
provide this data to the mirror manufacturer;
-
only after this confirm the cutting and edge processing of the mirror panel.
If the mirror specialist suggests measuring the frame after it is received, this is a conservative but often reliable scenario. It increases the number of stages, but removes the risk of ordering glass based on assumptions. It is especially reasonable to do this if the frame must undergo painting after delivery: the finish coating, protective materials, and assembly method can affect the sequence of work.
There is also a second practical issue: the external dimensions of 1873 × 1273 mm must be fully accounted for on the wall, even if the reflective surface is significantly smaller. The buyer sometimes evaluates a mirror by the desired reflection area, perceiving the decorative part as a "frame." For RM‑056, the 240 mm wide profile is so prominent that the design must be based on the external rectangle of the product.
Our factory also produces:
Carved frame with a 240 mm profile: how much space remains for the reflection
The wide profile changes both aesthetics and ergonomics. If the goal is to achieve the largest possible mirror surface on a limited wall, RM‑056 may not be the most rational option. If the goal is to make the mirror an architectural accent, the large profile, on the contrary, becomes an advantage.
Let's imagine a wall segment 1500 mm wide. The external width of RM‑056 is 1273 mm. With ideal centering, the following will remain:
(1500 − 1273) / 2 = 113.5 mm of free space on each side.
Formally, the frame fits. Practically, 113.5 mm may be insufficient if there is a switch, door casing, vertical furniture facade, protruding wall lamp, or curtain slope nearby. Even when the adjacent object does not fall under the frame itself, it can visually conflict with the wide carved profile or interfere with the hand when using the switch.
On a wall segment of 1800 mm, the situation is different:
(1800 − 1273) / 2 = 263.5 mm on each side.
Such a margin is easier to distribute between the frame and adjacent elements, but it still cannot be considered automatically sufficient. For example, a wall lamp with a shade 180–220 mm wide may protrude into the space in front of the frame, and the door handle of a nearby door may enter the frame area when the door is fully opened.
For marking, it is useful to work not from the edge of the wall, but from the center of the future composition. Half of the external width of RM‑056 is 636.5 mm, half of the height is 936.5 mm. If you have marked the center of the mirror on the wall, the external boundaries of the frame should be approximately 636.5 mm to the right and left, and 936.5 mm up and down from that point.
The conditional inner boundary when subtracting the 240 mm profile is located approximately 396.5 mm to the right/left and 696.5 mm up/down from the center. Let me repeat: this is a visual reference, not a mounting drawing for the glass.
This marking method is useful even before purchase. Apply painter's tape along the outer contour of 1873 × 1273 mm, then mark the approximate inner field. From a distance of 2–4 meters, it will become clear whether the frame is perceived as a proportional accent or takes up too much wall. At the same time, conflicts that are not visible in the plan will be revealed: thermostat, intercom, sconce, furniture cornice, high baseboard, decorative panel, or door casing.
If the goal is specifically a large format, it is useful to look at the assortment buy a frame for a large mirror and compare not only the external size, but also the ratio of the profile width to the useful mirror field. Two frames of the same height can give completely different reflection areas.
Get Consultation
How to check door openings before buying a wooden frame
The nominal door width is not equal to the free passage. The door leaf, hinges, casings, frame quarter, door closer, and protruding handle reduce the actual space. Therefore, the phrase "we have a 90 cm door" says almost nothing for RM‑056.
You need to measure the clear opening — the minimum actual width and height through which the packaged product will pass. Width is measured between the most protruding elements of the open box, height — from the finished floor to the lowest point of the upper part of the opening or door closer. If there is a threshold, it is also part of the route and affects the lifting angle.
For each door, record four values:
-
clear width;
-
clear height;
-
free space in front of the door;
-
free space after the door.
The last two parameters are often more important than the first ones. The frame can be carried through a relatively narrow opening at an angle only when there is somewhere to extend the long side before and after the door. If the door is in a short vestibule, a corridor with a turn, or opposite a wall, the mathematically possible tilt may turn out to be physically impossible.
The diagonal of the outer rectangle of RM-056 is approximately 2265 mm. This number is useful for understanding the scale, but it does not mean that any opening with a diagonal greater than 2265 mm is guaranteed to let the frame through. Passage depends on three-dimensional geometry, packaging thickness, rotation angle, and free space near the opening. Moreover, carrying a carved wooden frame at a "critical angle" is riskier than a simple sheet of material.
A practical way to check is to make a lightweight mock-up of the outer contour. Assemble a rectangle of 1873 × 1273 mm from slats, packing cardboard, or rigid strips. If the seller provides packaging dimensions, it is better to make the mock-up based on those rather than the bare product. Walk the entire route with the mock-up from the building entrance to the installation wall. It does not simulate weight and fragility, but it immediately reveals geometric dead ends.
Be sure to check the house entrance door and the apartment door in the fully open position. Sometimes the door leaf does not open 180° but only 90–110°, and it itself becomes an obstacle for diagonal carrying. Similarly, electromagnetic locks, door closers, protruding handles, intercom panels, and thresholds can get in the way.
If there are protective grilles, second doors, or a narrow vestibule on the route, each step must be measured. A passage sufficient for a person with a box may turn out to be unsuitable for a rigid frame almost 1.9 m long.
Will the frame for a large mirror fit into a passenger elevator
Checking the elevator starts not with the cabin but with the door. In a typical passenger elevator, the interior space may seem large, but the clear door opening remains the narrowest section. Then a second question arises: after passing through the door, can the RM-056 be turned inside the cabin so that the doors close and the frame does not hit the ceiling, handrail, or control panel.
Record for the elevator:
| What to measure | Why this is needed |
| clear door width | determines the primary frame pass |
| clear door height | limits the tilt of the long side |
| cabin width | needed for turning inside |
| cabin depth | determines whether the frame can be placed diagonally |
| cabin height | important when tilting vertically |
| distance from the elevator door to the opposite corridor wall | needed to bring the frame into the cabin |
| protrusions inside the cabin | handrails and panels reduce the usable volume |
The most common mistake is measuring only the cabin floor. For example, the floor diagonal may allow placing a rectangle, but the frame won't be able to enter the cabin because there isn't enough space in front of the elevator for the required angle. Or vice versa: the door is wide enough, but inside, the frame's top corner will hit the ceiling before the bottom corner goes deeper.
Check the elevator with open doors and a tape measure in the exact building where the order will be delivered. The elevator model reference or building passport is useful, but actual finishing, panels, and handrails can reduce space. For new buildings, separately account for the protective cabin lining that the management company sometimes installs during renovation periods.
If the building has a freight-passenger elevator, compare not the name but the dimensions. A larger cabin is almost always more convenient, but it may also have a limited door opening. For RM-056, the decisive factor may not be the total cabin volume, but the combination of door width, depth, and free space on the floor.
Before ordering, it's useful to do a "dry rehearsal" with a mock-up. One person controls the top corner, the second controls the bottom, the third opens doors and watches for obstacles. If passing the mock-up requires scratching walls, removing the door closer, pressing on the ceiling panel, or turning the structure literally millimeter by millimeter, then a real carved frame shouldn't be moved that way. Packaging will increase the dimensions, and the weight and the need to hold the product by safe areas will reduce maneuverability.
If the elevator isn't suitable, switch to the staircase or professional lifting scenario in advance. Discovering this after the transport vehicle arrives means getting a logistical, financial, and installation problem all at once.
Four scenarios for checking the elevator at a real site
To avoid the decision depending on the general impression of "the elevator is big," it's useful to classify the check result.
Scenario A: the frame passes with a confident margin. The doorway allows the transport package to be brought in without contact with the box, there is space in front of the elevator for turning, and inside the cabin the corners of the product do not hit the ceiling or walls. This is the best option. Even here, you need to wait for packaging data: the bare dimension of 1873 × 1273 × 44 mm is not yet equal to the transport dimension.
Scenario B: the bare frame passes, but the packaging is questionable. This result cannot be considered positive. If removing the protection is required for passage, ask the supplier whether partial unpacking on site is allowed, where exactly to do it, and how to then protect the carved profile. Packaging exists for a reason; a passage "with centimeter precision" may become unacceptable after adding corners, cardboard, and protective pads.
Scenario C: the elevator door fits, but the cabin does not allow turning around. This is a typical situation with narrow depth. The frame enters with the first corner, then the long side hits the wall or ceiling, and the second corner remains in the doorway. The solution is not forced rotation, but a different route. If the building has two elevators, check both; if there is a staircase, model it separately.
Scenario D: the cabin fits, but there is no space in front of the elevator for feeding. For example, the elevator door is in a narrow hallway, with a wall opposite at a distance less than the length of the required trajectory. In this case, the internal dimensions of the cabin cease to matter. The frame physically cannot take the angle from which it needs to be inserted.
For each scenario, it is useful to make a short video of a trial pass with a mock-up. It will give the delivery team much more information than a set of numbers without understanding the layout. If the mock-up has to be tilted significantly, also measure the ceiling height in the area of movement of the top corner.
Another detail is door hold time. Do not plan a complex maneuver as if the automatic doors will stay open indefinitely. During an actual delivery, one person should control the doors and safety, while the others handle the product. Do not insert random objects into the doors and do not block the elevator in a way that could damage the equipment. If a service mode is required for bringing the item in, this needs to be arranged with the maintenance organization or management company in advance.
Staircase, vestibule, and landing turn: how to plan the delivery route for RM‑056
A staircase is more complex than an elevator because the product moves both vertically and horizontally. On a straight flight, width matters; on a landing, the ability to turn; at the ceiling, clearance for the long side. Railings and handrails create additional constraints that are not present on the apartment floor plan.
Start the route from the farthest point: from the wall where the mirror will stand, and work backward to the street. This approach helps not to forget the "last five meters" — the room door, the turn in the hallway, and furniture already installed after renovation.
For each staircase landing, measure:
-
width of the flight between actual protrusions;
-
height from a step or landing to the ceiling/lower part of the next flight;
-
length and width of the platform;
-
distance between the inner corner of the turn and the railing;
-
width of doors on the landing;
-
protruding radiators, cabinets, fire boxes, and mail blocks.
A 90° or 180° turn is especially dangerous. A frame 1873 mm long may pass through the flight itself but fail to turn on the intermediate landing. In this case, you need to simulate not only a 1873 × 1273 mm rectangle but also the trajectory of its corners.
Do not consider railings as 'conditionally removable' if dismantling has not been agreed in advance. The same applies to door closers, light fixtures, fire equipment, and building-wide structures. The delivery plan must work with the actual state of the building, not on the assumption that someone will allow removing an obstacle on the day of delivery.
A vestibule between two doors is another typical trap. The first door may let the frame through, and the second one too, but there is not enough depth between them to close the first door and open the second or change the angle of the item. If the doors open toward each other, the usable volume of the vestibule becomes even smaller.
For a complex staircase, prepare a diagram on a single sheet: floor, dimensions of flights, dimensions of landings, door openings, heights, and photographs. It is useful to show such a document to delivery personnel or the installation crew in advance. The phrase 'there is a wide staircase' does not allow assessing the risk, but a diagram with numbers does.
If the route remains doubtful, it is safer to avoid improvisation on the day of delivery and choose another method: a freight elevator, specialized lifting, a different delivery time, a temporarily clear route, or a smaller-format frame. A large wooden part must be preserved, not 'dragged through at any cost'.
Unloading at the house: why the route starts not from the apartment door
Even a perfectly measured elevator does not solve the issue if the frame cannot be safely removed from the vehicle and brought to the entrance group. A large product has intermediate logistics: the transport stopping point, curb, porch steps, ramp, turnstile, or narrow lobby.
Before delivery, check where the vehicle can actually stop. If there are dozens of meters from the unloading point to the entrance, a path without construction debris, snow banks, low branches, and narrow gates is needed. For a country house, the gate, turn on the property, and width of the entrance group are additionally important.
Do not expect to carry the RM-056 vertically like a regular box by one person. A large rectangular contour requires multiple control points: one person cannot see both the top and bottom corners simultaneously. The number of workers and the gripping method should be determined by the delivery provider, but the buyer can clear obstacles and free the route in advance.
If the entrance is equipped with a turnstile or access control system, find out in advance whether there is a wide gate or a separate cargo passage. Carrying the frame over a standard turnstile is dangerous: the top edge may hit the ceiling, and the bottom may hit the post. The same applies to revolving doors: a large rigid item usually requires an alternative entrance.
A separate risk is temporary obstacles. On delivery day, a construction container may be near the entrance, neighbors' furniture in the lobby, or repair crew materials on the stairs. Therefore, a day before arrival, it is useful to walk the route again and ensure it has not changed.
At facilities with access control, arrange access for movers in advance and clarify the hours when loading and unloading work is allowed. If delivery arrives when the freight elevator is unavailable, even correct geometry will not help.
A practical rule: the route is considered prepared only if the product can sequentially pass from the vehicle side to the final temporary placement point in the room. The calculation cannot be completed with the phrase "they will deliver to the entrance, we will figure it out there."
Pine frame 44 mm deep: how to prepare the wall space
After checking the route, the second half of the task begins: the RM-056 must not only get into the room but also take its place without conflicts. For this, a free external rectangle of at least 1873 × 1273 mm plus a reasonable installation margin around the perimeter is needed on the wall.
First, determine the finished plane of the wall. If a tall baseboard, wall panel, decorative molding, or furniture has not yet been installed, dimensions based on the "bare" wall cannot be considered final. The frame, with a depth of 44 mm, protrudes from the plane, and adjacent elements may protrude even further and visually or physically intersect.
The most reliable method is full-scale marking with painter's tape. Mark the outer contour of 1873 × 1273 mm and check all elements inside and near it:
-
sockets and switches;
-
thermostats;
-
intercom;
-
wall sconce;
-
cable outlets;
-
furniture fronts in the open position;
-
door handles;
-
cornices and moldings;
-
baseboard;
-
floor convectors and radiators;
-
the edge of the curtain.
If the center of the frame is already specified by the project, use half dimensions: 636.5 mm horizontally and 936.5 mm vertically. This is more convenient than recalculating the edges from adjacent walls multiple times.
Example. You want the bottom edge of the frame to start at a height of 250 mm from the finished floor. The top point will be at the mark:
250 + 1873 = 2123 mm.
If a sconce, cornice, or decorative molding is located above the mirror at a height of 2100 mm, the conflict is detected before purchase. If the lower edge is raised to 350 mm, the top of the frame will already be at 2223 mm — this may be undesirable with a ceiling of 2400–2500 mm.
Another example: in the hallway, the wall is 1600 mm wide. After centering, the following remains:
(1600 − 1273) / 2 = 163.5 mm on each side.
If a door trim 100 mm wide runs along one side and an additional visual gap is needed, centering ceases to be optimal. The frame may have to be shifted, which already changes the position of the internal mirror field relative to the console or light fixture.
Additionally, consider the wall as the base. Drywall partition, brick, concrete, aerated concrete, and wooden frame walls require different mounting solutions. The frame card does not replace the installer's calculation. Before choosing fasteners, you need to know the frame weight, mirror weight, their connection method, and the base structure.
Coordinate marking: how to check the wall without a full-size template
If it is inconvenient to glue a large rectangle entirely, use the coordinate method. First, select the center of the future frame and mark it with a cross. From the center, measure 636.5 mm horizontally and 936.5 mm vertically. This gives the four outer boundaries of RM‑056. Then connect the points with a laser level or painter's tape.
This method is especially convenient when the mirror is centered above a console. Suppose a console 1200 mm wide is positioned along the wall axis. RM‑056 is 73 mm wider than it, so with a common center, the frame will protrude approximately 36.5 mm on each side relative to the console. This is already a specific composition that can be assessed before purchase. If the console is 1400 mm, on the contrary, it will be wider than the frame by approximately 63.5 mm on each side.
Next, mark the contours of opening items on the same wall. For a door, draw an arc of the extreme point of the handle or panel. For a cabinet, mark the line of the open facade. For a sconce, mark not only the mounting cup but also the maximum reach of the lampshade. This allows you to see the conflict in three dimensions: the frame has a depth of 44 mm, and the adjacent item may protrude even further.
If the electrical points can still be moved, make the decision based on the outer contour, not the conditional mirror field. A socket that ends up "inside the mirror" on the designer's sketch may actually fall under the wide wooden part. With a 240 mm profile, such an error is more likely than with a thin baguette.
After marking, photograph the wall strictly frontally and from two diagonal points. The frontal shot shows proportions, the diagonal ones show protrusions and proximity to furniture. These photos are useful when coordinating with the designer and installer.
How to order a mirror panel for the wooden frame RM‑056
The mirror is a separate technical task. The outer frame dimension and an approximately calculated inner field are insufficient for manufacturing the glass. A correct order starts with the seating geometry.
Ask the seller or measure the following parameters after receiving the frame:
-
actual width and height of the seating groove;
-
sampling depth;
-
width of the support shelf;
-
required clearance around the perimeter;
-
allowable mirror thickness;
-
mirror panel retention scheme;
-
the need for a backing or back panel;
-
location of frame-to-wall mounting elements.
Why can't you order a mirror exactly to the size of the cutout? Glass should not be installed into a wooden part with force wedging. Wood reacts to changes in humidity and temperature, and installation has its own tolerances. The specific gap should be determined by the design and manufacturer's recommendations, so it's better not to invent a universal number here.
Separately agree on edge treatment. If the edge is completely hidden by the frame, the requirements for its decorative quality differ from a situation where part of the glass is visible from the side. The mirror maker also needs to know whether the mirror will be glued to the base, held mechanically, or combined with a backing. These decisions affect the total weight and the subsequent selection of wall fasteners.
The sequence of work is very important. Three scenarios are possible.
Scenario 1. First get and finish the frame, then order the mirror
This is the most cautious path. After final finishing, you can take a control measurement of the seat and give the mirror maker the actual dimensions. The downside is that the project's calendar timeline increases.
Scenario 2. Order the frame and mirror in parallel based on a confirmed drawing
Suitable if you have accurate technical documentation from the manufacturer and the contractors have agreed on tolerances. The plus is time savings. The risk is that any misunderstanding in dimensions becomes an expensive mistake.
Scenario 3. Assemble the frame and mirror directly on site
Suitable for large formats, when transporting an already assembled mirror unit is more difficult and dangerous than transporting the wooden frame and glass separately. But this scenario requires a prepared site, experienced installers, and a clear fixation system.
Do not conclude that the request "buy a large mirror in a wooden frame" describes RM-056 as a ready-made set. For this model, it is more accurate to talk about purchasing the frame and separately clarifying the delivery contents. This maintains commercial accuracy and protects the buyer from incorrect expectations.
Carved wooden frame for enamel finish: when to perform the finishing
RM-056 made of pine with preparation for enamel should logically be included in the overall finishing schedule, rather than painted "whenever possible." For a large carved piece, the order of operations affects both the quality of the coating and the risk of damage during handling.
There are two basic approaches: finish the frame before delivery to the site, or perform the final finish after bringing it in. The first option reduces the amount of dusty work on site, but the finished coating becomes vulnerable during complex transportation through an elevator and stairs. The second option allows bringing in an unpainted piece, but requires a clean area, dust control, and the ability to properly treat a large item indoors.
Before choosing a scenario, answer the following questions:
-
are there tight turns along the route;
-
will the frame need to be moved multiple times;
-
are wet and dusty works completed;
-
is it possible to safely place the item for painting;
-
is a complex color, patina, or multi-layer finish required;
-
will the mirror be mounted before or after finishing.
The phrase "under enamel" does not mean that the product can be coated with any paint available on site without preparation. The finishing system must be compatible with the wood, primer, and planned finish. For carved profiles, the application technique is especially important: an excessively thick layer can visually "blur" fine relief, while insufficient interlayer preparation can emphasize defects.
From a logistics standpoint, RM-056 has another nuance. A profile 240 mm wide creates a large decorative surface around the perimeter. When carrying, you cannot rely on movers holding the frame by any convenient spot. It is better to pre-determine safe grip zones and protect protruding carved decor with soft pads that leave no marks on the prepared surface.
If finishing is done on site, do not place the unfinished wooden frame directly on a wet floor or lean it with the decorative side against a wall. Clean pads and a stable position are needed. Specific storage and finishing recommendations should be clarified with the manufacturer based on the particular coating.
What to check in the mounting of a large frame and mirror
Mounting cannot be chosen only by external size. A large frame itself has mass, the mirror adds load, and the way they are joined determines how this load is transferred to the wall.
Before installation, four groups of data must be known:
First is the assembly composition. A frame alone, a frame with a mirror, a frame with a mirror and backing are structures of different mass and rigidity.
Second is the wall substrate. Concrete, solid brick, hollow block, aerated concrete, drywall, and framed partitions require different fastening solutions. Even within one wall, it is important to know where studs, embedded elements, wiring, and pipes run.
Third — the mounting scheme of the RM-056 itself. You cannot automatically drill the frame or hang it on universal furniture hangers if the manufacturer does not provide for this. You need to obtain the recommended fixing points and understand whether the frame allows installation in the chosen orientation.
Fourth — operational risk. In the hallway, the mirror may be bumped by outerwear and bags; in the bedroom, by furniture during rearrangement; in a public space, by visitors. The higher the likelihood of accidental contact, the more important the anti-tip and retention scheme.
If you are considering the RM-056 as a frame for a floor mirror, do not consider this an automatically permitted option. The search query "buy a frame for a floor mirror" describes a need, but does not confirm the structural suitability of a specific model for free-standing floor placement. This scenario requires a separate support, stability, protection against tipping, and confirmation from the manufacturer or designer.
It is useful to divide the work among specialists. The frame seller confirms the structural features of the product. The mirror specialist handles the glass and the method of its fixation. The installer evaluates the wall and the fasteners. The designer or architect sets the position. When one contractor starts making decisions "by eye" on behalf of everyone else, the risk of error increases.
Before drilling, do a control marking and check the hidden utilities again. A large frame can cover a large area of the wall, so a mounting point that is geometrically convenient is not always technically acceptable.
When it is better to buy a wooden baguette instead of a ready-made RM-056
A ready-made large frame is convenient when its external size, profile, and style already fit the project. But there are situations where manufacturing the framing from moulding material is more rational.
The first situation is a strictly specified mirror size. For example, the niche is already made, the mirror must have a certain width, and the external contour cannot be increased due to sconces or trim. Then the ready-made RM-056 may not match the geometry, while a baguette allows designing the framing around the given panel.
The second — the impossibility of bringing in a one-piece frame. If the route has an insurmountable turn, theoretically you can consider manufacturing or assembling the framing on site from individual elements. But this is no longer "cutting the RM-056": disassembling a ready-made frame without the manufacturer's permission is not allowed. The alternative must be designed from the start for on-site installation.
The third — a different balance between decor and the reflective surface. The RM-056 has a 240 mm profile. If the external size of about 1273 mm is important on the wall, but significantly more mirror area is required, a narrower profile is needed.
The fourth is a complex non-standard shape or attachment to an architectural niche. Molding allows you to build your own perimeter provided that corner joints, finishing, and installation are handled professionally.
In such cases, you can Buy wooden picture frame molding and design the frame for a specific mirror. But this path is not always cheaper and not always simpler. Additional operations arise: calculating length, cutting at an angle, matching the pattern at joints, assembly, reinforcing corners, sanding, and final finishing.
The finished RM-056 wins where the project needs exactly its scale and pattern, and logistics allow bringing in a one-piece product. The baguette wins where
How to accept a large frame after delivery
A large decorative element should be accepted differently than a small box of hardware. Even if the outer packaging looks intact, after transportation it makes sense to check the geometry and the most vulnerable areas.
Prepare a place for inspection in advance. You need a clean, dry surface large enough to remove the packaging without the frame coming into contact with a dirty floor, stairs, or tools. Do not start unpacking in a narrow hallway where the item cannot be safely laid down or held.
Acceptance sequence:
-
inspect the packaging from all sides before opening;
-
photograph dents, punctures, signs of wetness, and deformations;
-
open the packaging carefully, without running the knife deeply along the decorative surface;
-
check the four corners and joints;
-
inspect the carved profile around the perimeter;
-
check the front surface under side light;
-
make sure the geometry has no obvious skew;
-
match the product with the ordered article and size;
-
do not discard the packaging until the inspection is complete.
For RM-056, control of edges and protruding decor is especially important. On a large format, minor damage may be unnoticeable from afar, but may appear after enameling when the surface becomes uniform.
If the frame arrives before the site is ready, storage must be addressed. Do not leave it in a walkway where tools and materials will be carried over it. Do not use the frame as a support for sheets, countertops, or doors. Storage conditions must be dry and stable; the specific orientation method—vertical or horizontal—should be coordinated with the manufacturer, especially for long-term storage.
Documenting the acceptance is useful not only for potential claims. Photos before painting help distinguish a transport defect from damage that occurred later on site.
What to specify to the manager when ordering RM-056
A good order for a large frame starts not with the phrase "I want this one." The more precise the initial data, the lower the chance that an important constraint will surface after payment.
In your request, please specify:
-
article RM‑056;
-
external dimensions 1873 × 1273 × 44 × 240 mm;
-
material: pine;
-
sanding quality "Prestige";
-
the intended finishing method;
-
city and delivery method;
-
floor;
-
availability of a passenger or freight elevator;
-
minimum dimensions of doorways along the route;
-
whether lifting to the premises is needed;
-
whether a separate order for the mirror panel is planned;
-
Is technical information required for mirror installation?
-
Is consultation needed regarding mounting?
If the route is complex, attach photos of the elevator, entrance door, and stair landing with a tape measure in the frame. Numbers without context can be misunderstood: for example, "door 900 mm" may mean the size of the door leaf, not the clear passage.
Separately ask questions about packaging: what is its approximate external size, can part of the transport packaging be removed before a narrow section of the route, and who is responsible for further carrying in that state. Do not unpack the product yourself at the entrance just because it does not fit in the packaging: the decorative frame will become vulnerable to impacts and dirt.
If the mirror glass is ordered separately, request the data in writing to pass it to the glazier without retelling from memory. The question wording can be simple: "What exact seating size of glass is required for RM-056, what gap should be left, and how is its mounting intended?"
Current methods of ordering and receiving your order are best checked on the page payment and delivery STAVROS. For a large product, it is especially important to distinguish in advance between delivery to the address, delivery to a pickup point, and lifting directly to the premises.
Minimum set of data without which it is better not to confirm the order
Before finalizing, consolidate the information into one sheet. At the top — product data, below — logistics, then mirror and installation. Such a sheet disciplines the project and prevents a situation where each participant knows only their own fragment.
For the product: RM‑056, 1873 × 1273 × 44 × 240 mm, pine, «Prestige», selected finishing scheme.
For logistics: transport packaging dimensions, minimum route opening, door and elevator cabin sizes, problematic turns, backup path, temporary storage location.
For the mirror: mounting size, depth, gap, glass thickness per agreed scheme, edge treatment, fixation method, presence or absence of backing.
For installation: wall material, embedded elements, proposed fixation points, final weight of the assembled unit, access to fasteners after mirror installation.
If at least one of these blocks is empty, ask whether the issue can be resolved before payment or whether a control measurement is required after receipt. This is the difference between a regular «order a frame for a mirror» and a prepared order for a large-format product.
It is especially useful to record in writing exactly what is being supplied. In commercial correspondence, do not use the vague «mirror kit» if you are buying a frame. Write: «Please confirm whether the mirror panel, backing, and fasteners are included in the RM‑056 kit; if not, please provide parameters for their separate order.» Such a question eliminates different interpretations.
If you need to order a wooden mirror frame with delivery to a specific city, it is better to discuss the logistics part simultaneously with the product part. Large dimensions can affect the available receipt method and delivery requirements, so first confirm the route, then choose the delivery method.
Mistakes when buying a large wooden mirror frame
Mistake 1. Measuring only the wall
Why it occurs: the buyer thinks about the interior, not about logistics.
Consequence: the frame fits in the installation location, but does not fit into the elevator or door.
How to prevent: measure the full route from the unloading point to the wall.
Mistake 2. Assuming the door size based on its label
Why it happens: the phrase "80/90 cm door" is used without actual measurement.
Consequence: the clear passage turns out to be narrower due to the frame, leaf, and hardware.
How to prevent: measure the minimum clear opening with the door fully open.
Mistake 3. Relying only on the elevator cabin
Why it happens: it seems that if the frame fits inside, it can be brought in.
Consequence: the product cannot be brought through the elevator door or turned in front of the cabin.
How to prevent: check the door, cabin, and landing area as a single geometry.
Error 4. Ordering a mirror sized 1873 × 1273 mm
Why it occurs: the external frame size is mistaken for the glass size.
Consequence: the mirror physically does not fit the mounting area.
How to prevent: obtain the exact mounting size from the frame manufacturer.
Error 5. Ordering a mirror based on the calculation 1393 × 793 mm
Why it occurs: the buyer correctly subtracts the 240 mm profile, but treats the result as a technical drawing.
Consequence: the visible inner field and the mounting recess may not match.
How to prevent: use 1393 × 793 mm only as a reference for assessing proportions.
Error 6. Not accounting for packaging
Why it occurs: the route is checked based on the product's clean dimensions.
Consequence: the protected frame does not pass where an unpackaged contour would pass with minimal clearance.
How to prevent: request transport dimensions before delivery.
Error 7. Designing a switch under the profile
Why it occurs: the plan only accounts for the conditional mirror, not the external frame contour.
Consequence: the carved profile covers the electrical point or makes it inconvenient.
How to prevent: do full-size layout 1873 × 1273 mm before electrical work or before ordering the frame.
Error 8. Buying fasteners first, then studying the wall
Why it occurs: a large frame is perceived as an ordinary picture.
Consequence: the selected dowels or hangers do not match the base and the full weight of the assembly.
How to prevent: determine the mounting after understanding the wall, mirror, and manufacturer's scheme.
Error 9. Painting the frame before a complex delivery without protection
Why it occurs: you want to finish the finishing work ahead of time.
Consequence: the fresh finish gets chips and scuffs on the staircase.
How to prevent: coordinate the sequence of finishing and logistics before starting work.
Error 10. Counting on dismantling common building obstacles
Why it occurs: it seems that a railing, door closer, or light fixture can be removed "for five minutes."
Consequence: on delivery day, dismantling is not allowed, and the route turns out to be blocked.
How to prevent: build a working plan without unauthorized interference with common building structures.
Error 11. Checking the route before renovation, but delivering after renovation
Why it occurs: measurements were taken on an empty site.
Consequence: after installing cabinets, lights, doors, and baseboards, the passage becomes narrower.
How to prevent: repeat the control measurement immediately before delivery.
Mistake 12. Assuming that RM-056 can be placed on the floor without fastening
Why it happens: a large vertical frame visually resembles a floor mirror.
Consequence: there is a risk of tipping over or damage.
How to prevent: do not use the floor scenario without a specially provided support and a confirmed fastening scheme.
When it is better not to buy a large RM-056 frame
RM-056 does not have to suit every interior just because its design is appealing. Refusing to buy can be the right decision if the limitations of the space contradict its scale.
You should not order RM-056 if the delivery route is not confirmed. Hoping that the movers will "somehow turn it" is not a logistics plan.
You should not choose it for too narrow a wall section. Even if 1273 mm formally fits, the profile needs visual breathing room and free interaction with neighboring elements.
It is not worth buying it if the main goal is maximum mirror area with a limited external size. The 240 mm profile is deliberately decorative and takes up a large share of the composition.
It is not worth ordering the mirror first and then trying to match the RM‑056 to it. The finished frame has its own mounting geometry that needs to be checked before cutting the glass.
It is not worth planning free-standing floor use without a structural solution. A large size does not automatically make the frame floor-standing.
It is not worth buying a ready-made frame if the project requires an individual size down to the millimeter. In this case, it is more logical to consider a frame solution from moldings or custom manufacturing, rather than trying to "fit" the interior to a ready-made external dimension.
Such a block is needed not to reduce the commercial value of the product, but for the right choice. A buyer who has excluded an unsuitable scenario in advance is less likely to face a return, mirror rework, or expensive non-standard lifting.
Practical measurement map before ordering RM‑056
To avoid keeping dozens of sizes in your head, create a table and fill it in along the route. Example structure:
| Section | Width, mm | Height, mm | Depth/length, mm | Is turning possible? | Note |
| building entrance | |||||
| external vestibule | |||||
| internal door | |||||
| area in front of the elevator | |||||
| elevator door | — | ||||
| elevator car | handrails/panel | ||||
| floor landing | |||||
| apartment door | |||||
| Corridor | furniture/lighting | ||||
| room door | |||||
| area in front of the wall |
In a separate line, record the packaging dimensions when you receive them from the seller. This will become the actual shipping size that needs to be compared with the route.
Next, use the principle of the "weakest link." If ten sections are spacious, but one turn is questionable, the entire route is considered questionable. Do not average out dimensions and do not think that a large elevator "compensates" for a narrow vestibule.
For objects with completed renovation, it is useful to add photos of each critical section. In the photos, you can mark the direction of movement and the intended turn with arrows. Such a visual map is especially helpful if delivery and installation are performed by different organizations.
Another useful technique is two route scenarios. The main one: via the elevator. The backup one: via the stairs or another entrance. The backup is needed not because the main one will definitely fail, but because on the delivery day the elevator may be temporarily disabled, occupied, or closed for maintenance.
But the backup route must also be measured in advance. "If anything, we'll carry it up the stairs" without checking the landings is not a backup, but a new assumption.
Frequently asked questions about ordering, delivery, and installation of RM-056
Can RM-056 simply be turned on its side and carried through any door?
No. Turning helps only if there is sufficient height and free space on both sides of the opening. Packaging increases dimensions, and a rigid wooden frame cannot be deformed to pass through.
Is it enough to know the diagonal of the frame?
No. The diagonal of about 2265 mm is useful for assessing scale, but it is not a universal criterion for passability. A three-dimensional check of the door, the space in front of it, and the area after the opening is needed.
Do I need to measure the elevator if there is a freight elevator in the building?
Yes. The name "freight" or "freight-passenger" does not replace the actual dimensions of the doors, cabin, and landing area. The specific elevator must be checked.
Can I remove the packaging in front of the elevator if the frame does not fit with it?
Only after agreeing with the seller or delivery company and understanding responsibility for further carrying. Packaging protects the carved profile. Removing it for a few millimeters without a plan is risky.
Can I order the mirror at the same time as the frame?
Only if the confirmed mounting size and agreed tolerances are available. If such data is not available, it is safer to receive the frame or technical drawing, then order the glass.
Is the mirror included in the RM‑056 set?
Based on product information, such a conclusion cannot be made automatically. Before ordering, you need to separately confirm the configuration: frame, mirror, back panel, mounting, and other elements.
What does the 240 mm profile mean?
This is the width of the decorative part of the frame. It shows the scale of the framing, but it is not automatically equal to the width of the seating groove for the glass.
Can the approximate internal size of 1393 × 793 mm be used to order a mirror?
No. This is only a calculation obtained by subtracting twice the profile width from the external dimension. It helps to understand the proportions, but it does not replace the exact seating size.
Is it necessary to leave a gap between the frame and the door casing?
It is advisable to assess not only the physical absence of intersection, but also ease of use. A door handle, an opening leaf, or a visually heavy casing can conflict with the frame even with a formal gap of a few millimeters.
Can RM-056 be hung on drywall?
The answer depends on the partition design, embedded elements, mounting points, and the total weight of the assembly with the mirror. Without this data, a universal permission cannot be given. A mounting calculation based on the actual base is needed.
Is RM-056 suitable for horizontal placement?
Physical rotation of the rectangular frame is possible, but the decorative orientation and mounting scheme must be confirmed for the specific model. If the design has a distinct top and bottom, horizontal installation may be stylistically or structurally incorrect.
What to do if the frame fits in the elevator without packaging, but does not fit when packaged?
Before delivery, agree on an alternative: another elevator, stairs, specialized lifting, a different packaging scheme, or a different product format. The decision should not be left until the moment of unloading.
Can the RM-056 be stored for several weeks before installation?
Temporary storage can be planned only under suitable conditions and safe placement of the product. The orientation method and humidity requirements are best clarified with the manufacturer. The main thing is not to keep the frame in a passageway, in a damp area, or under the load of other materials.
How to understand if the frame will look too large on the wall?
Make a full-size marking of the outer contour 1873 × 1273 mm with painter's tape. Then mark the conditional inner field. Evaluate the composition from different points in the room and check the proximity to furniture, lighting fixtures, and doors.
Where to order a frame for a mirror if the RM-056 does not fit the route?
First, determine which parameter is the limitation: external width, height, depth, profile format, or the need for on-site assembly. Then compare solid wood frames or design a baguette frame. For material selection, you can buy a wooden mirror frame in the corresponding section of the catalog and choose a model with more suitable geometry.
Final check before placing the order
RM‑056 is a case where the right purchase starts with a tape measure. The external dimensions of 1873 × 1273 mm, a depth of 44 mm, and a profile of 240 mm make the frame a large architectural element rather than an ordinary decorative accessory. Before paying, you need to prove three things to yourself: the product fits along the route, it actually fits on the prepared wall, and the further mirror and mounting scheme is clear for it.
It is convenient to finish the check with a short checklist:
-
the external contour of 1873 × 1273 mm is marked on the wall;
-
sockets, switches, wall lamps, trims, furniture, and doors are checked;
-
the entrance door of the building is measured;
-
the vestibule is measured;
-
the elevator door is measured;
-
the elevator car and the space in front of the elevator are measured;
-
the staircase is checked as a backup route;
-
measured the apartment door and room doors;
-
specified the dimensions of the transport packaging;
-
specified the configuration of RM-056;
-
obtained or requested the exact mounting size of the mirror;
-
agreed on the sequence of finishing;
-
the wall structure is clear;
-
the mounting is selected based on the total weight and assembly scheme, not "as for a picture";
-
the delivery date is coordinated with the readiness of the site.
If at least one item remains unknown, it is better to resolve it before payment. For a large-format frame, one additional measurement is cheaper than repeat delivery, urgent stair lift, or reworking the mirror panel.
When the route, wall, and mirror mounting are confirmed, the request "buy a large mirror frame" turns from an abstract desire into a technically prepared order. It is at this moment that RM-056 can be chosen consciously: not only because the design fits, but also because the product can actually be delivered, finished, assembled, and safely installed in a specific interior.