


Article Contents:
- Can stucco molding be used with a stretch ceiling
- What goes where
- Why polyurethane is the right choice for this scenario
- Which stucco elements are suitable for a stretch ceiling
- Polyurethane cornice
- Ceiling Moldings
- Chandelier moldings
- Cornices for hidden lighting
- Decorative trim and overlay elements
- What is strictly forbidden to do with a stretch ceiling
- Do not glue any decor directly onto the canvas
- Do not drill without embedded elements
- Do not attach heavy elements with glue without mechanical fasteners
- Do not select a curtain rod blindly after ceiling installation
- Do not use random glue
- How to choose a curtain rod for a stretch ceiling
- Profile width and room height
- Profile with or without an overhanging shelf
- Smooth or ornamental profile
- Cornice for hidden lighting
- Curtain rod with lighting: when it is appropriate and how to choose
- When backlighting is justified
- What matters when choosing a cornice with backlighting
- Installation of a cornice with backlighting: work sequence
- Ceiling rosette and stretch ceiling: how it works
- Embedded part is a mandatory condition
- Thermal ring (platform)
- Installing the Rosette
- Diameter of the rosette and chandelier
- Moldings and decorative lines with stretch ceilings
- Molding around the perimeter as a hidden transition
- Molding as a decorative frame
- When molding is better than cornice
- Wall moldings below the stretch ceiling
- How to choose the style of stucco for a stretch ceiling
- Classic and neoclassic
- Modern classic and neoclassical with restrained decor
- Minimalism and Loft
- Scandinavian Style
- Interior with accent lighting
- Why polyurethane stucco is most convenient for stretch ceilings
- Light weight is the main argument
- Geometric precision
- Easy processing
- Perfect painting
- Step-by-step scheme of working with stucco during renovation with a stretch ceiling
- Stage 1. Design
- Stage 2. Preparation
- Stage 3. Stretch ceiling installation
- Stage 4. Final decor
- Stage 5. Chandelier connection
- Mistakes when buying stucco for a stretch ceiling
- Where to buy stucco for a stretch ceiling
- FAQ: Answers to Popular Questions
- About the manufacturer
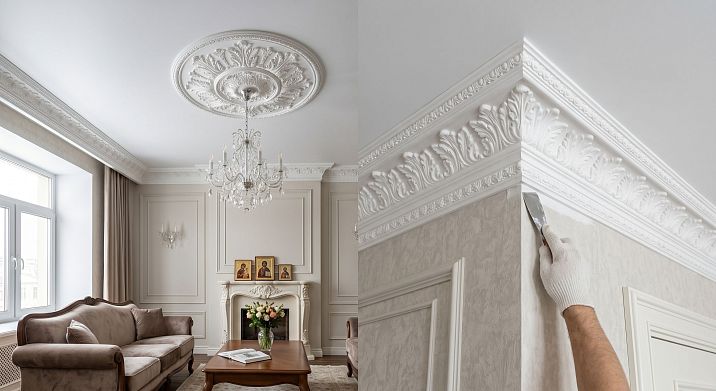
A stretch ceiling and stucco are not a contradiction. It's a matter of a competent approach. Tens of thousands of apartments across Russia are decorated exactly like this: a white or colored stretch ceiling fabric, a neat polyurethane cornice around the perimeter, a rosette under the chandelier, thin moldings. It turns out beautiful, modern, and — importantly — without a single installation error.
But people constantly have questions. Can stucco be glued directly to the fabric? Where to attach the cornice if the base ceiling is already covered? How to choose a rosette if the chandelier will be mounted through the stretch fabric? What to do with hidden lighting? These questions are not theoretical: the wrong answer means a torn fabric, a fallen cornice, or a ruined renovation.
This article is a comprehensive practical analysis. We will go through all the key scenarios: cornice, moldings, rosettes, hidden lighting, installation, mistakes. Read to the end — it will save you money and nerves.


Can stucco molding be used with a stretch ceiling
Answer: yes, it can. But it's important to understand the key principle: Polyurethane moldings with a stretch ceiling, it is attached not to the fabric, but to the base structures — to the wall or to the base ceiling via special embedded elements. The stretch fabric itself is not a load-bearing surface; it is a thin PVC film or fabric material not designed to hold decorative elements.
This is the main rule to keep in mind from the very first second of design.


What goes where
The division is simple:
To the wall — cornice, ceiling molding, linear elements, transition profile. Everything that goes along the perimeter of the room along the wall/ceiling line is mounted to the wall using dowels or glue plus mechanical fastening. In this case, the stretch fabric simply goes behind the cornice or is brought flush to it.
To the base ceiling — a rosette for a chandelier. But only if the base ceiling has an embedded element: a wooden beam, a steel plate, or another structure installed before the fabric is stretched. Through the fabric to the embedded element goes a special ring-platform, to which the rosette is then attached.
To the fabric — nothing. No glue, no screws, no decorative stickers weighing more than a few grams. The fabric is a decorative shell, not a construction surface.
Our factory also produces:


Why polyurethane is the right choice for this scenario
polyurethane moldings it wins here on one key parameter: low weight. Even a large polyurethane cornice weighs several times less than a plaster counterpart. This means less load on the adhesive, less load on the dowels, and a lower risk of detachment during vibration or temperature changes.
Polyurethane does not crack or crumble during processing, is easy to cut, and accepts paint well. This material is specifically designed to make decor both affordable and reliable.
Get Consultation
Which stucco elements are suitable for a stretch ceiling
Let's break down specific items that blend organically with a stretch ceiling.
Polyurethane cornice
A ceiling cornice is the main element when designing a stretch ceiling. It serves two functions simultaneously: decorative (creating an architectural transition between the wall and ceiling) and technical (hiding the edge of the stretch fabric and the fastening system).
a polyurethane cornice is attached to the wall — before or after installing the stretch ceiling. If before, the lower edge of the cornice serves as a guide for installers when tensioning the fabric. If after, the cornice is glued to the wall and covers the gap between the edge of the fabric and the wall. The second option requires precise selection of width and profile.
Ceiling moldings
Moldings made of polyurethane are used in two ways with a stretch ceiling:
First — around the perimeter, as a simplified cornice without an angular shelf. The molding is glued to the wall along the line of the stretch ceiling, hiding the technical transition.
Second — on the wall below the stretch ceiling as a decorative element for dividing wall planes. In a classic interior, moldings divide the wall into horizontal zones — this is not directly related to the stretch ceiling but creates a vertical ensemble.
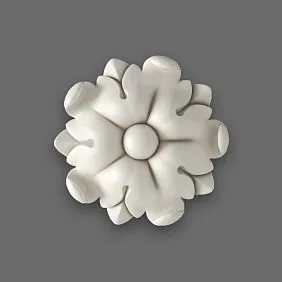
Rosettes for chandeliers
Polyurethane ceiling rosettes With a stretch ceiling, it's a special case. The socket is not glued to the fabric. It is mounted using a special thermal ring (platform) that is glued to the fabric from below, and through which a hole is drilled for the wire. The socket itself is glued to the ceiling ring and to the fabric around it — minimal glue, strictly along the perimeter, without load.
Important: the thermal ring is installed by stretch ceiling installers, not by yourself. Its position must be agreed upon in advance.
Cornices for hidden lighting
This is a separate scenario, very popular in modern interiors. A special profile-cornice with a niche for an LED strip is mounted around the perimeter of the room — behind it, the LED lighting is hidden, the light of which is reflected from the stretch ceiling fabric.
Such a cornice is attached to the wall or to a special wooden embedded element in the lower zone — strictly before the installation of the stretch ceiling. The fabric is stretched to the level of the lower edge of the cornice or slightly behind it, hiding the LED strip.
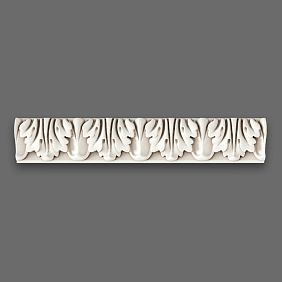
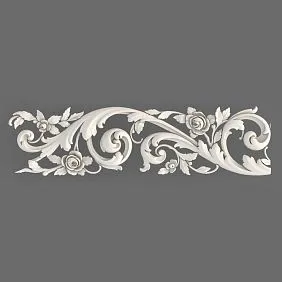
Decorative moldings and overlay elements
Polyurethane trim — baseboards, moldings, transition profiles — go perfectly with stretch ceilings. A polyurethane ceiling baseboard around the perimeter creates a clean transition line and can also hide the mounting strips of the stretch fabric.
decorative inlays — medallions, ornamental inserts — are mounted on the walls, not on the fabric. This is safe and does not create any risks.
What is strictly forbidden to do with a stretch ceiling
This block is the most important. Mistakes here are costly: torn fabric, dismantling, rework. Remember these rules once and for all.
Do not glue any decor directly onto the fabric
A stretch ceiling fabric is a PVC film or fabric stretched under tension. It is not a load-bearing surface. Glue applied directly to the fabric can deform it, leave whitish spots, or peel off along with a piece of decor. No moldings, overlays, or tiles on the fabric — only through special thermal rings in specific places.
Do not drill without embedded elements
Drilling through the fabric without an embedded element in the base ceiling results in a hole in the fabric and nothing to securely attach to. Any fastening through the fabric requires a pre-installed embedded element — a metal plate, wooden beam, or special dowel installed in the base ceiling before stretching.
Do not install heavy elements with glue without mechanical fasteners
A lightweight polyurethane cornice on the perimeter — enough glue plus small dowels into the wall. Heavy decor (though rare for polyurethane) requires mandatory mechanical fastening.
Do not choose a cornice blindly after ceiling installation
Wall height, cornice width, gap to the fabric — all this needs to be planned before work begins. If the cornice is not planned in advance, installers may stretch the fabric so that there is no room for the cornice: the gap may be too small, or the edge of the fabric may be attached in the wrong place.
Do not use random glue
For polyurethane moldings — only special acrylic or polyurethane construction adhesive. Silicone sealants are not suitable for this purpose: they do not provide a rigid bond. Epoxy adhesives are too rigid and can damage the surface. The correct adhesive is specified in the manufacturer's instructions for the molding.
How to choose a cornice for a stretch ceiling
Choosing a cornice is a key moment of the entire decor. It is the cornice that sets the ceiling line, hides the mounting profile, and creates the first visual impression of the interior.
Profile width and room height
The rule is the same as for any ceiling cornice: the room height determines the allowable profile width.
| Ceiling Height | Recommended cornice width |
|---|---|
| Up to 2.5 m | 40–70 mm |
| 2.5–2.8 m | 60–90 mm |
| 2.8–3.2 m | 80–120 mm |
| Above 3.2 m | 120 mm and more |
With a stretch ceiling, there is another important parameter: there must be a gap of at least 5–10 mm from the lower edge of the stretch fabric to the top of the cornice. Otherwise, the cornice will push the fabric from below and deform it. This gap is taken into account during installation — the cornice is placed below the fabric line by the required amount.
Profile with or without an overhanging shelf
A classic ceiling cornice has an overhanging "shelf" — a horizontal plane that runs at an angle along the wall and partially covers the transition line. With a stretch ceiling, such a shelf is an excellent way to hide the mounting profile: the fabric is tucked behind the shelf, and the transition is invisible.
A cornice without an overhanging shelf (flat or slightly convex molding) is more suitable for interiors where the stretch ceiling descends close to the wall and there is no need to hide a wide gap.
Smooth or ornamental profile
A smooth cornice with clean lines is for neoclassical and modern interiors. An ornamental one with leaves, meander, pearls is for classic and formal rooms. The logic is the same as for any other ceiling cornice.
Cornice for hidden lighting
A separate profile type — with a niche for LED. In the lower part of the cornice, there is a groove or niche where the LED strip is placed. The light goes upward, reflects off the stretch ceiling fabric, and creates a diffused "glowing ceiling."
Such a cornice must be installed strictly before the ceiling fabric is stretched: the LED niche must be accessible for placing the strip from below or behind. After the ceiling is installed, access to the niche is limited.
Cornice with lighting: when it is appropriate and how to choose
A cornice with a niche for hidden LED lighting is one of the most sought-after elements of modern interior design. And at the same time — one of those where the most mistakes are made during selection and installation.
When lighting is justified
In the living room — almost always, if the interior aims for ambiance. Soft diffused light around the perimeter of the ceiling creates a sense of height and volume, advantageously highlighting the stretch ceiling fabric.
In the bedroom — to create a night lighting mode: the main light is off, the perimeter lighting glows dimly — intimate, calm.
In the hallway — to increase space: a narrow hallway with a lit stretch ceiling visually becomes wider.
In the bathroom (if it is large enough) — a cornice with lighting under the stretch ceiling creates a spa atmosphere.
What is important when choosing a cornice with lighting
Recess depth. The LED strip has a width of 8–12 mm. The recess in the cornice must be at least 15 mm wide — for free placement of the strip without overheating.
Light output angle. The recess should be directed so that the light from the strip goes upward, not forward. If the recess faces forward — the light will shine into the eyes, rather than reflecting off the ceiling.
Material and painting. Polyurethane cornice The recess for backlighting is painted before installation in white or the wall color. The inner surface of the recess — in white: this ensures maximum light reflection.
Installation of a cornice with backlighting: work order
-
Mark the height of the cornice on the wall, taking into account the gap to the stretch ceiling
-
Mount the cornice on the wall (glue + dowels)
-
Place the LED strip in the recess
-
Connect the LED to the power supply
-
Call the stretch ceiling installers — they stretch the fabric to the level of the lower edge of the cornice
The order is not broken: first the cornice and all electrical work, then the ceiling.
Ceiling rosette and stretch ceiling: how it works
A ceiling rosette with a stretch ceiling is an element that requires the most careful approach. Several tasks intersect here: electrical work, chandelier installation, rosette fastening, and decor.
Embedded part is a mandatory condition
Before stretching the fabric, an embedded part is installed in the base ceiling at the chandelier suspension point. This could be:
-
a wooden beam 50×100 mm, fixed between the floor slabs
-
a steel plate welded to the metal structure
-
a special ceiling hook with a wide plate
The embedded part bears the weight of the chandelier. Without it, the chandelier would only be supported by the fabric — which is absolutely unacceptable.
Thermal ring (platform)
After stretching the fabric at the embedded point, installers mount a thermal ring. This is a plastic ring with double-sided tape that is glued to the fabric from below. Then the fabric is cut inside the ring — an opening for the chandelier wire. The thermal ring prevents the fabric from spreading along the cut.
The diameter of the thermal ring is selected considering the diameter of the rosette: the rosette must completely cover the ring, and the central opening of the rosette must be no smaller than the ring's diameter.
Mounting the medallion
ceiling rose made of polyurethane It is glued with mounting adhesive to the fabric around the thermal ring. The adhesive is applied along the perimeter of the back side of the rosette — carefully, avoiding adhesive seeping beyond the edges. The rosette is pressed down, the central opening is aligned with the opening of the thermal ring, and the wire is pulled through.
The weight of a polyurethane rosette is 200–500 g depending on the diameter. This is a perfectly acceptable load for the fabric in combination with adhesive mounting along the entire perimeter.
Rosette diameter and chandelier
The rosette must completely cover the mounting ring and the decorative 'cup' of the chandelier. If the chandelier has a wide ceiling cup with a diameter of 150 mm — the rosette must be at least 250–300 mm. Otherwise, the cup will cover part of the ornament, and the purpose of the rosette is lost.
Moldings and decorative lines with a stretch ceiling
Moldings in combination with a stretch ceiling work differently than with a regular plastered ceiling.
Molding along the perimeter as a hidden transition
The most practical scenario. Thin Polyurethane molding It is glued to the wall along the line of the stretch ceiling — it covers the mounting profile and creates a clean horizontal line. This molding takes on the function of a ceiling plinth in the classical sense.
The height of such a molding is 30–60 mm. The relief is minimal. It is a "quiet" transitional element that creates completeness without drawing attention to itself.
Molding as a decorative frame
A more artistic technique: a frame of moldings is formed on the wall, the top crossbar of which runs along the stretch ceiling. This is an architectural technique that turns the wall into a system of decorative panels. With high ceilings, it is very impressive.
When molding is better than a cornice
If the stretch ceiling is installed very close to the wall (a gap of up to 2–3 cm), a wide cornice simply will not fit there. In this case, a thin molding is the right replacement. It takes up minimal space, hides the transition, and looks neat.
Wall moldings below the stretch ceiling
decorative molding on the walls is not technically connected to the stretch ceiling — it is attached to the wall and does not touch the fabric at all. This gives complete freedom: use moldings and linear elements on the walls without regard to the type of ceiling.
How to choose the style of stucco for a stretch ceiling
A stretch ceiling itself is a neutral element. It accepts any style. The stucco sets this style.
Classicism and neoclassicism
Rich ornamental cornice with leaves, meander, and pearls. Ceiling rosette with elaborate ornamentation for a large classic chandelier. Possible moldings along the perimeter and decorative frames on the walls. Stretch ceiling fabric — matte white or ivory.
This is a full-fledged classic interior where the stretch ceiling serves as a clean backdrop for polyurethane architectural decor.
Modern classic and neoclassical with restrained decor
Cornice with geometric rods — no ornament, but with an expressive profile. Rosette with several concentric bands without carved filling. Thin, rectangular moldings. Stretch ceiling fabric — matte white or light gray.
This is the balance that is in maximum demand: modern renovation with classic touches.
Minimalism and loft
Thin transition profile — almost no relief, just a line. No ornaments, no rosettes. If there is a chandelier — only a thermal ring without decor. Stretch ceiling fabric — strict, matte or even dark.
In a minimalist space, decor is minimal — but it exists. Even a thin transition line creates completeness.
Scandinavian style
Small neat cornice with smooth lines, white paint. Simple small rosette with light relief. Everything in white. Stretch ceiling fabric snow-white. Minimum decor — maximum cleanliness and order.
Interior with accent lighting
Cornice with a niche for LED — this is an independent design technique that does not require rich ornamentation. Clean profile, simple lines, the task is to hide the lighting and ensure a beautiful light output. Everything else — the light will do itself.
Why polyurethane stucco is most convenient for stretch ceilings
Choosing the material for stucco with stretch ceilings is crucial. Let's examine why polyurethane wins.
Light weight is the main argument
The stretch fabric and mounting profile are not designed for significant loads. A 3 m long polyurethane cornice weighs 200–400 g. A gypsum equivalent weighs 3–5 kg. The difference is multiple. When mounted on a wall, this is not critical, but when working in close proximity to the stretch fabric, a lightweight material is safer in every respect: an accidental impact on the fabric or careless pressing of a heavy element can deform or tear the fabric.
Geometric accuracy
Factory-made Polyurethane moldings is manufactured using molds with precision down to fractions of a millimeter. With stretch ceilings, where the cornice runs close to the fabric, precise geometry is crucial: a crooked or deformed cornice creates an uneven gap.
Easy processing
Polyurethane is cut with a regular knife or jigsaw. Trimming corners, adjusting length is done on-site without dust and without risk of damaging the fabric. Gypsum requires a saw and creates a significant amount of fine dust that settles on the fabric.
Perfect painting
All products made of polyurethane are designed for painting. Water-based paint, enamel, tinted paint — everything applies evenly. The color can be matched exactly to the ceiling, to the wall, or create contrast.
Important: painting the cornice before installation is much more convenient than after. Especially with a stretch ceiling — paint easily gets onto the fabric after installation.
Step-by-step workflow with stucco during renovation with a stretch ceiling
This is a practical scheme that helps avoid mistakes during the planning and implementation stages.
Stage 1. Design
Before starting the renovation, determine: whether a cornice, rosette, hidden lighting, or moldings are needed. Choose the style and specific item numbers. Mark chandelier suspension points on the project.
Stage 2. Preparation
Install embedded supports for chandeliers in the base ceiling. Run electrical wiring. Install the cornice (if before the stretch ceiling — this is a common option for cornices with lighting). Place the LED strip in the cornice niche.
Stage 3. Stretch ceiling installation
Installers stretch the fabric. The fabric goes behind the cornice or is brought up to it. Thermal rings are installed at chandelier points.
Stage 4. Final decor
After ceiling installation, the cornice is glued (if installed after the fabric), rosettes are mounted through thermal rings, and moldings are installed on the walls. Joints are puttied and painted.
Stage 5. Connecting chandeliers
Wiring is pulled through thermal rings and sockets, and chandeliers are connected.
The order of stages is strict. Any violation of the sequence creates problems.
Mistakes when buying stucco for a stretch ceiling
Let's move on to analyzing typical mistakes — some of them cannot be fixed without dismantling the fabric.
Buying decor before understanding the installation scheme. The most expensive mistake. The purchased cornice may not fit the actual gap between the wall and the ceiling in width. First — the plan, then — the purchase.
Choosing a socket that is too heavy. Polyurethane is initially light, but massive multi-level sockets with a diameter of 700–800 mm can weigh 700–900 g. This is the borderline weight for installation on the fabric without additional fastening.
Not taking into account the room height. A wide cornice in a low room visually lowers the ceiling — the already low space becomes cramped.
Installing a wide cornice in a low room. Specific limit: with a ceiling up to 2.5 m, the cornice width should not exceed 60–70 mm. A polyurethane profile with a shelf overhang of 100 mm with a ceiling of 2.4 m is excessive.
Forgetting about the embedded element for the chandelier. After the fabric is stretched, the embedded element cannot be installed. This must be done before — or accept that the chandelier will only hang on the thermal ring without proper support.
Do not coordinate the decor with the ceiling installers. The installers must know where the cornice will be, its height, and where the sockets are. Otherwise, the fabric may be stretched incorrectly, thermal rings may not be installed, or gaps may not be maintained.
Do not count corners, joints, and spare material. A cornice around the perimeter means four corners. Each corner requires cutting. Purchase with a 10–15% margin.
Do not buy elements of different styles. A classic ornamental cornice and a rosette with a geometric minimalist ornament are from different eras in one ceiling. Buy from a single catalog — then the style is guaranteed.
Where to buy stucco for a stretch ceiling
When choosing a supplier, it is critical to have a unified range of cornices, moldings, rosettes, and linear elements made from the same material in a consistent style. This allows you to buy all the decor in one place with guaranteed compatibility.
In the STAVROS catalog Polyurethane moldings is presented with a full range for decorating a stretch ceiling: cornices and moldings for the wall/ceiling transition, ceiling rosettes for a chandelier, decorative molding for hiding transitions, decorative inlays for walls.
All the STAVROS catalog is a unified system of polyurethane decor where styles, profiles, and ornaments are coordinated with each other.
FAQ: Answers to popular questions
Can stucco molding be glued to a stretch ceiling?
Not onto the fabric itself. Cornices and moldings are attached to the wall. The rosette is mounted through a thermal ring onto the fabric only using the special technology of stretch ceiling installers.
Which cornice is suitable for a stretch ceiling?
A polyurethane cornice with an overhanging shelf that hides the mounting profile. Width — according to the ceiling height. Installation — to the wall before or after the fabric is stretched.
Can a ceiling rosette be used with a stretch ceiling?
Yes, through a special thermal ring. It is installed by stretch ceiling installers. The polyurethane rosette is attached on top of the ring with glue.
Where is stucco molding attached with a stretch ceiling?
Cornice, moldings, linear elements — to the wall. Rosette — through a thermal ring onto the fabric. Any embedded elements for chandeliers — into the base ceiling before stretching.
Is polyurethane stucco molding suitable for hidden lighting?
Yes. Special cornices with a niche for an LED strip are installed before the fabric is stretched. The light reflects off the fabric and creates soft diffused illumination across the entire ceiling.
Can you paint stucco after ceiling installation?
You can, but it's inconvenient: paint may get on the fabric. It is recommended to paint the cornice and rosette before installation, and only touch up the seams afterwards.
What to choose: cornice, molding, or rosette?
It all depends on the task. A cornice is for framing the transition and hiding the mounting profile. A molding is for a delicate transition and wall frames. A rosette is for decorating the chandelier suspension point.
How not to damage the stretch ceiling?
Do not glue anything directly to the fabric, do not drill without embedded parts, do not use heavy elements without reliable fastening, do not work with sharp tools near the fabric without protection.
Is an embedded part needed for the chandelier and rosette?
Absolutely. The embedded part is installed before the stretch ceiling is mounted. Without it, the chandelier will not be securely fastened, and the rosette installation will be incomplete.
Where to buy stucco for a stretch ceiling?
In the STAVROS catalog: polyurethane moldings — cornices, moldings, rosettes, linear elements — with delivery across Russia.
About the manufacturer
STAVROS — Russian manufacturer polyurethane products for interior decoration. The company's range includes Ceiling cornices and moldings, ceiling rosettes, decorative molding, overlay elements a complete system for designing a stretch ceiling in a unified style. If you are looking for stucco molding for a stretch ceiling — a cornice, rosette, or molding — in the catalog STAVROS you will find the required element with a guarantee of the right choice.


