Article Contents:
- What is moulding for a design interior
- How a design interior differs from decorating a single room
- First, divide the property into zones
- Do not use a new profile in every room
- How to choose the main moulding for a project
- How to choose the main ceiling cornice
- Skirting as the lower line of the entire system
- Ceiling medallions: where standardisation is needed and where it is not
- Typical decorative unit
- Collection or custom project system
- Why SKU should be locked early
- Samples before approving large quantities
- Sample approval as a separate status
- 3D model in the project interior
- DWG for typical units
- How to link 3D, DWG, and the specification
- Master spec for the entire project
- A typical room should be counted once
- How to work with non-standard spaces
- Moulding cannot be ordered by linear metres alone
- Ornamental plaster moulding and pattern repeat
- Reserve must be calculated by category
- Trim
- Recessed Outlets
- Moldings
- Custom decor
- Too many unique profiles
- Conditional profile remains until purchase
- No standard detail
- Linear footage is counted only in meters
- One reserve for all categories
- Batches are not linked to SKU
- A new SKU is changed only in the specification
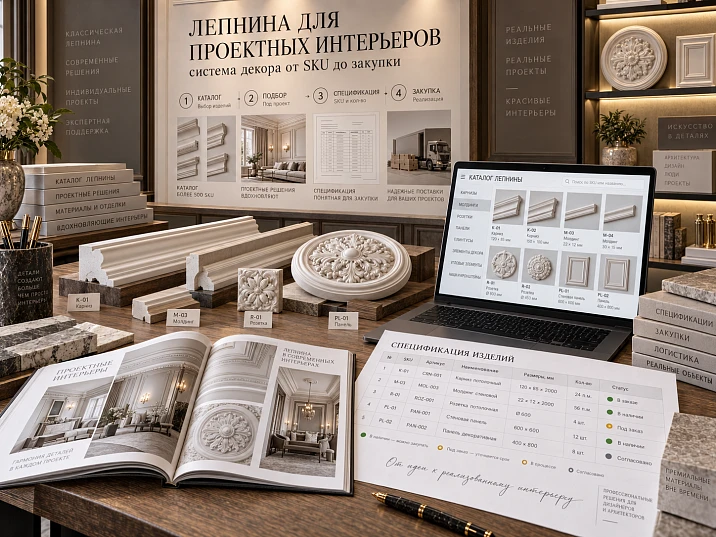
In a single living room, you can afford an almost handcrafted approach: choose one molding, select a cornice separately, then replace a rosette because another one looks better in the visualization. On a large project, such freedom quickly turns into a problem. If thirty rooms have different profiles, the corridors use yet another cornice, and the lobby gets its own separate system, then within a few months no one understands which items should be considered primary, which are incidental, and which were replaced after approval.
A project interior requires a different logic.
Here, stucco should not be a set of beautiful elements, but a reproducible system that can be repeated, calculated, linked to DWG and 3D, included in the master spec, divided into batches, and if necessary reordered six months later without a new search.
The working chain looks like this:
project zones → element system → real SKUs → samples → 3D/DWG → typical units → master spec → quantity → cutting → batches → order.
That is why professional work with stucco begins not with the question “which profile is more beautiful,” but with the question “which elements should become the standard for the entire project.”


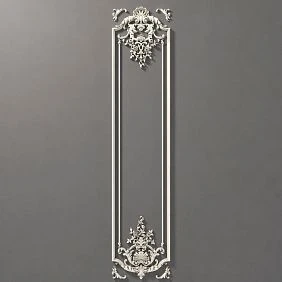
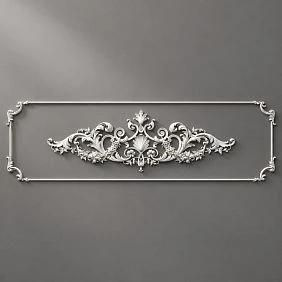
What stucco means for a project interior
Stucco for project interiors differs from an ordinary purchase of decor not in material and not in style.
The difference lies in the scale of management.
In a single room, a decision can be made locally. If a molding doesn't fit, it is replaced and one wall is adjusted.
On a project with dozens of rooms, the same replacement affects typical rooms, elevations, 3D, DWG, the specification, quantity, procurement, warehouse reserve, and repeat deliveries.
Therefore, the main criterion of a project system is not how good an individual element looks on its own, but how easily it can be repeated and controlled.
Plaster molding must have a project code, a real SKU, a fixed size, a clear status, a technical file, and a place in the master spec.
If any of these levels exists separately, the system is already beginning to fall apart.




How a project interior differs from decorating a single room
A single living room allows for an almost individual composition.
A large project creates repeatability.
Identical walls, typical rooms, groups of identical doors, repeating ceilings, floors, public areas, and several procurement stages appear.
In a hotel, the same molding may be repeated in 40 rooms. In a private house — in corridors, bedrooms, and walk-in closets. In a restaurant — in the main hall, private dining rooms, and passage spaces.
An error in one room is local.
An error in a typical detail is replicated.
That is why, on a large project, the solution is first standardized and only then replicated.
Our factory also produces:

First, divide the project into zones
Trying to design plasterwork for the entire project at once is inconvenient.
It is much easier to first divide the space into functional zones.
For example:
PUBLIC
PRIVATE
LOBBY
ROOM-TYPE-A
ROOM-TYPE-B
CORRIDOR
SUITE
Each zone has its own system.
This does not mean that each zone must have a unique set of profiles. On the contrary, the goal is to find the maximum number of common elements and the minimum number of justified exceptions.
For example:
ML-01used in rooms and corridors;CR-01— the main cornice for standard rooms;CR-02— a larger cornice for the lobby only;ROS-01— a standard ceiling rose;ROS-02— a ceiling rose for luxury units.
This keeps the system varied yet manageable.
Get Consultation
Do not use a new profile in every room
This is one of the most expensive mistakes in interior design.
At the visualization stage, each new profile seems like a small decision.
In the master spec, each new profile creates a new line item, a new calculation, a new cut plan, a separate reserve, an additional risk of error, and a separate reorder.
Therefore, it is better to form a limited set of design codes in advance.
For example:
ML-01 — primary molding
ML-02 — accent molding
CR-01 — primary cornice
CR-02 — formal cornice
PL-01 — primary baseboard
ROS-01 — standard ceiling rose
ROS-02 — ceiling rose for special zones
This not only simplifies purchasing.
A limited pool of profiles makes the interior visually more cohesive. The same line is repeated in different rooms and forms a common architectural language.
How to choose the primary molding for a project
The main molding should suit not just one beautiful wall, but the majority of typical situations.
Before approval, you need to check the width, depth, profile, performance within frames, interaction with doors, adjacency to furniture, repeatability across different zones, and the actual SKU.
For a project system, especially useful are Moldings made of polyurethane, because from a single category you can select a profile for wall frames, horizontal divisions, and transitions.
But you shouldn't choose based on a catalog preview.
A 50 mm wide molding can be almost flat or have a deep stepped profile. On a plan, both occupy the same strip. In side light, they perform completely differently.
For a project interior, it is the cross-section that must be taken into account.
How to choose the main ceiling cornice
A cornice in a large project must withstand different conditions.
It may run through standard rooms, corridors, public areas, next to built-in furniture, near curtain niches, and beside full-height doors.
If you choose a profile based only on the main hall, it may turn out to be too heavy for a guest room.
If you choose based only on the guest room, it may be too weak for the lobby.
Therefore, it is often reasonable to have two levels:
CR-01 — primary
CR-02 — formal
At the same time, both should belong to the same visual system and not look like a random set.
Skirting board as the lower line of the entire system
Skirting board is often perceived as a separate technical item, but in a designed interior it forms the lower architectural boundary of the wall.
It needs to be checked alongside door casings, panels, furniture, moldings, and vertical elements.
If five different skirting boards are used in standard rooms without necessity, the project loses coherence, and procurement becomes more complicated.
It is better to define the base profile once and use it as the standard, creating exceptions only where the design truly requires a different solution.
Ceiling sockets: where standardization is needed and where it is not
Sockets clearly show that standardization does not mean uniformity across the entire project.
Not every room requires its own model.
For example:
ROOM-TYPE-A → ROS-01
SUITE → ROS-02
MAIN-HALL → ROS-03
This is already sufficient variability.
If you choose a separate socket for each room, the effect will be almost imperceptible to the user, but the master spec will gain dozens of additional lines.
The project value here comes not from the maximum number of different elements, but from a properly organized hierarchy.
For selection, you can use ceiling rosettes and immediately verify the actual dimensions of the selected SKUs.
Typical decorative assembly
A strong design system is built not only from individual elements, but also from repeatable assemblies.
For example:
PL-01 → ML-01 → CR-01
This is a basic wall system.
Or:
BASE-01 → PIL-01 → CAP-01 → CR-02
This is a vertical architectural portal.
A standard unit is assembled once in 3D, checked against dimensions, approved, fixed in DWG, linked to an SKU, and included in the master spec.
After that, it is not redesigned in every room.
This is exactly how the number of random discrepancies between rooms is reduced.
Collection or custom project system
It is not necessary to use only one catalog collection.
A project can combine elements from different series.
But they must be coordinated in scale, profile, depth, ornament, material, and character of light and shadow.
The goal is not to “assemble a collection from a catalog,” but to create a custom system for the object.
If two elements formally belong to different series but work together in scale and pattern, this can be a good solution.
If they belong to the same collection but conflict in proportions in a specific room, the collection name won't save the composition.
Why SKU needs to be locked in early
One of the typical mistakes is working with a placeholder profile for too long.
In early visualization, this is convenient.
The problem appears when a placeholder molding is part of the project for several months, and the real SKU only starts being searched for before purchase.
It may turn out that the selected product is narrower, deeper, has a different cross-section, is supplied in a different length, or works differently at corners.
Then the frames, light and shadow, quantity, and cutting layout change.
Therefore, the project chain should be as follows:
concept → specific SKU → further development.
It is not necessary to lock in the item on the first day. But after the architectural direction is approved, the placeholder asset should be replaced with a real item.
Samples before approval of a large quantity
If a single profile is repeated dozens or hundreds of times, it is worth checking it physically before placing a mass order.
On a sample, you can assess the actual width, depth, relief, surface, quality of light and shadow, and color.
Scale is especially important.
On a screen, a profile can easily be enlarged or reduced with the camera. On a wall, a 70-millimeter molding remains 70 millimeters.
For verification, you can use samples of stucco and decor.
Sample approval as a separate status
A phrase in the correspondence:
the client liked the first white profile
is not a normal project status.
Better:
ML-01 / SAMPLE APPROVED
Then it is clear which profile was reviewed, which SKU was approved, which sample was accepted, and which item to purchase.
For a large project, this is especially useful.
A few months later, the decision should be recoverable from documents, not from the participants' memory.
3D model in a project interior
3D is needed not only for visualization.
On a large project, it becomes a standardization tool.
The same one ML-01 must be used in ROOM-TYPE-A, ROOM-TYPE-B, the corridor, if provided, and in other repeatable zones.
If visualizers use different approximate models, the project gradually falls apart.
Official 3D models of stucco molding are useful precisely because they allow working with the real geometry of the selected product.
DWG for standard assemblies
DWG captures what 3D does not always show clearly: section, dimension, projection, fit, anchoring, and mating.
For each key item, a useful link is:
SKU → DWG → design code.
For example:
ML-01 → SKU → DWG
Then on the layout you can write ML-01, and in the master spec quickly find the actual product.
The following are also suitable for this section DWG and STAVROS 3D models.
How to link 3D, DWG, and the specification
Key principle:
SKU = 3D = DWG = SPEC
That is, all representations must describe one item.
If 3D shows one profile, DWG shows another, and Excel lists a third SKU, the project already contains a contradiction.
On a small project, such an error can be noticed manually.
Across 40 typical rooms, it multiplies.
Therefore, the project code should not exist separately from the SKU.
Master-spec for the entire project
For a large interior, it is better not to create an independent specification for each room.
It is more convenient to have one master-spec.
For example:
| Code | SKU | Element | Zone | Material | Quantity | Batch |
|---|---|---|---|---|---|---|
| ML-01 | selected SKU | Molding | TYPE-A | PU | Calculation | B01 |
| CR-01 | selected SKU | Cornice | TYPE-A | PU | Calculation | B01 |
| ROS-01 | selected SKU | Rosette | TYPE-A | PU | Calculation | B01 |
| ML-02 | selected SKU | Molding | LOBBY | PU | Calculation | B02 |
Additionally, you can store the revision, status, URL, DWG number, 3D link, reserve, and note.
The master-spec becomes the central point of control.
A typical room should be counted once
If a project has 30 identical rooms, there is no point in recalculating each one independently.
More correctly:
- fully verify TYPE-A;
- approve all SKUs;
- calculate one room;
- verify the cutting layout;
- record the quantity;
- multiply by the number of repetitions;
- account for exceptions separately.
Suppose one standard room requires 18 m ML-01, 14 m CR-01 and 1 pc. ROS-01.
For 30 identical rooms, the base requirement will be 540 m ML-01, 420 m CR-01 and 30 pcs. ROS-01.
But this is not yet the order quantity.
For linear trim, you then need to move on to the commercial length, cutting plan, and whole planks.
How to work with non-standard spaces
A lobby, restaurant, main hall, suite, or meeting room often are not fully included in the standard system.
But this does not mean they should be treated as a separate world.
First, check which elements they can inherit from the overall system.
For example, the main baseboard remains PL-01, the main molding — ML-01, only the cornice changes to CR-02 and a separate socket is added.
This way the exception remains limited.
A non-standard zone gets its own code and a separate block within the master-spec, but does not break the entire system.
Moulding cannot be ordered by linear metres alone
For mouldings, cornices and skirting boards, the calculation goes through four stages:
linear metres → product length → cutting → whole planks.
This is fundamental.
For example, the drawing requires 104 m of moulding.
If one plank has a fixed product length, you cannot simply order “104 metres”.
You need to understand:
- how many planks are required;
- which sections can be cut from a single plank;
- how many offcuts remain;
- where long continuous pieces are needed;
- whether there is an ornamental repeat.
Therefore, the specification must store not only the total linear footage, but also the actual ordered quantity.
Ornamental moulding and repeat
On a large project, a mistake in one node becomes a serial mistake.
If an ornamental moulding is joined incorrectly in TYPE-A, and then the solution is repeated in 40 units, the entire project will have to be corrected.
Therefore, the repeat is checked before replication.
It is necessary to understand in advance:
- repeat length;
- allowable cut locations;
- start and end of the pattern;
- behavior at the inner corner;
- behavior at the outer corner.
For a smooth profile, cutting is simpler.
For an ornamental one, it is already part of the architectural project.
The reserve should be calculated by category
Rule:
+10% on everything
convenient, but too rough.
Different groups need different approaches.
Linear trim
The reserve depends on the plank length, cutting layout, number of corners, and leftovers.
Outlets
The reserve can be calculated in pieces.
Plates
If the elements are left and right, the reserve must also account for orientation.
Individual decor
The reserve depends on the complexity of re-production and lead times.
Therefore, it is better to store the reserve as a separate master-spec field for each category.
Splitting an order into batches
A large project is rarely purchased in a single delivery.
It is convenient to split the order:
B01
B02
B03
For example:
B01 — standard rooms
B02 — common areas
B03 — reserve and extras
This simplifies acceptance, labeling, warehousing, floor distribution, and stock control.
The key is not to break the link between the batch and the project code.
Why SKU and batch must be linked
If ML-01 arrives in three batches, the master spec must show:
- how much is ordered in B01;
- how much is in B02;
- how much was received;
- how much has been handed over for installation;
- how much remains;
- where the reserve is stored.
Without this link, identical boxes quickly lose context.
Especially if there are similar moldings on the site.
The marking must match the project code.
For example:
ML-01 / B02 / FLOOR-03
This way, even in the warehouse it is clear what this item is and where it is intended to go.
Revisions of project plaster moldings
If the profile changes, a new revision is created.
For example:
REV01 → REV02
After the change, you need to update:
- typical rooms;
- nodes;
- 3D;
- DWG;
- quantity;
- Cutting;
- master-spec;
- batches, if the order has not yet been sent.
A replacement cannot be considered complete just because the new SKU has been entered into Excel.
Do not change the SKU only in Excel
This is especially dangerous on a large project.
The new profile may have a different:
- width;
- the depth;
- commercial length;
- repeat;
- joining method.
In the table, the difference takes up one row.
On the project, it can change hundreds of meters of decor.
Therefore, replacing the article number is a design change.
First, the geometry is checked.
Then the visualization.
Then DWG.
Then the quantity.
And only then master-spec.
Custom stucco in a design interior
A custom item is justified if it is truly needed by the architectural system.
For example, an element:
- is repeated;
- shapes the character of the object;
- is not replaced by a ready-made SKU;
- makes sense to produce as a series.
But first you need to check the standard catalog.
For this, you can use STAVROS stucco catalog, molded decoration made of polyurethane и Decor for Molding.
If a ready-made item solves the problem, it is usually easier to reorder.
When a custom item is risky for a large project
The riskiest option is an element that:
- exists only in the render;
- has not yet been approved;
- has no production file;
- and at the same time must be repeated dozens of times.
Such an object cannot be replicated right away.
First:
- production file;
- prototype;
- check;
- sample approval;
- REV fixation;
- only then the series.
A prototype mistake is cheap compared to a batch mistake.
Repeat order after a few months
A project system is considered sustainable if, after a few months, you can understand without a new search exactly what needs to be reordered.
The master spec must store:
- manufacturer;
- SKU;
- project code;
- the material;
- finish;
- source URL;
- the batch;
- revision.
The description "white molding from item 204" is almost useless for a repeat order.
ML-01 / SKU / REV02 — that is already proper identification.
That is why the item code is more important than a general description.
Final audit before commercial calculation
Before requesting the final commercial proposal, check:
- all main SKUs have the status
APPROVED; - samples of key profiles are approved;
- 3D matches the SKU;
- DWG matches SKU;
- standard rooms are frozen;
- non-standard zones are identified;
- master spec is up to date;
- quantity is recalculated;
- cutting has been completed;
- reserve is calculated by category;
- batches are determined;
- revision is up to date.
If at least one base profile remains conditional, the final calculation is still too early to be considered final.
How to buy moulding for a design interior
The commercial stage becomes logical only after standardization.
First, the object knows:
- which elements are used;
- where they are repeated;
- which SKU is approved;
- how much is needed;
- which batch the item belongs to.
After that, it makes sense to proceed to purchasing.
For the main system, you can use polyurethane molding, Moldings made of polyurethane, molded decoration made of polyurethane, Wall Decor и ceiling rosettes.
Available for design work 3D models and DWG, and for professional configuration — the section STAVROS for designers and architects.
Working algorithm for a large project
Before starting detailed development:
- break the project into zones;
- identify typical rooms;
- define the basic categories of stucco;
- reduce the number of profiles to a manageable set;
- assign project codes;
- select real SKUs.
After selection:
- download 3D and DWG;
- assemble standard units;
- check samples;
- confirm
SAMPLE APPROVED; - add items to the master-spec.
Before purchasing:
- fully calculate TYPE-A;
- multiply the standard quantity by the number of repetitions;
- calculate exceptions separately;
- create a linear cutting plan;
- determine the reserve;
- split the order into batches;
- lock in the revision;
- prepare a commercial estimate.
After delivery:
- label the batches;
- monitor stock levels;
- do not mix the reserve with current installation;
- keep the SKU and original URLs for reordering.
Mistakes that scale expensively
Too many unique profiles
Every room looks interesting, but the master spec keeps growing.
Consequence: a complex order and a high risk of confusion.
Solution: limit the SKU pool.
The conditional profile remains until purchase
The visualization is approved on one geometry, while the product is selected later.
Consequence: frames and quantities change.
Solution: lock the SKU after concept approval.
No standard detail
Each visualizer and drafter assembles a similar wall in their own way.
Consequence: the same code is used across different geometries.
Solution: declare the node once.
Linear footage is counted only in meters
The total footage matches, but there are not enough actual strips.
Solution: calculate the cutting layout.
One reserve for all categories
Sockets and moldings receive the same percentage.
Consequence: in some places the reserve is excessive, in others insufficient.
Solution: calculate by category.
Batches are not linked to SKUs
There is material in the warehouse, but no one understands which zone it is intended for.
Solution: linking code → SKU → batch → zone.
A new SKU is changed only in the specification
3D and DWG remain outdated.
Consequence: the project contains several versions of the solution.
Solution: a full revision.
Final check of the stucco molding system
Before launching mass procurement, ask not the question “has all the stucco molding been selected,” but a more precise one:
can any standard detail of the project be reproduced from the documentation without additional verbal explanations?
If the answer is “yes,” the system works.
It should be clear:
- which project code to use;
- which SKU it corresponds to;
- which 3D file to apply;
- which DWG to consider current;
- which sample is approved;
- how much is needed for a typical room;
- how cutting is calculated;
- which batch the item belongs to;
- what reserve to leave;
- how to place a repeat order.
Mouldings for project interiors become manageable only when they cease to be a set of separate decorative solutions.
A different logic applies on site:
limited SKU pool → standard zones → approved samples → 3D/DWG → master-spec → cutting → batches → revisions → repeat purchase.